Welcome to RennTech.org Community, Guest
There are many great features available to you once you register at RennTech.org
You are free to view posts here, but you must log in to reply to existing posts, or to start your own new topic. Like most online communities, there are costs involved to maintain a site like this - so we encourage our members to donate. All donations go to the costs operating and maintaining this site. We prefer that guests take part in our community and we offer a lot in return to those willing to join our corner of the Porsche world. This site is 99 percent member supported (less than 1 percent comes from advertising) - so please consider an annual donation to keep this site running.
Here are some of the features available - once you register at RennTech.org
- View Classified Ads
- DIY Tutorials
- Porsche TSB Listings (limited)
- VIN Decoder
- Special Offers
-
OBD II P-Codes - Paint Codes
- Registry
- Videos System
- View Reviews
- and get rid of this welcome message
It takes just a few minutes to register, and it's FREE
Contributing Members also get these additional benefits:
(you become a Contributing Member by donating money to the operation of this site)
- No ads - advertisements are removed
- Access the Contributors Only Forum
- Contributing Members Only Downloads
- Send attachments with PMs
- All image/file storage limits are substantially increased for all Contributing Members
- Option Codes Lookup
- VIN Option Lookups (limited)
Leaderboard
Popular Content
Showing content with the highest reputation since 03/19/2024 in Tutorials
-
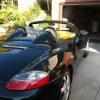
If your battery is dead and you need to get into the front trunk, it may be necessary to locate the manual pull wire to open the front trunk and get to the battery. This might be more difficult to locate the first time. You may not be in a good location to wrestle the right front tire splash guard to find it. It might be night time or you may not be dressed in the correct clothes to be down by the tires trying to locate it. I would recommend that you take the time to locate it in good weather and in the comfort of your garage or better yet re-route the wire to the front bumper behind the plastic plug the hides the location for the tow fish eye bolt. To get started I removed the carpet liner in the front trunk. The front trunk liner is made up of 2 sections and I only had to remove the front section. There was one thumbscrew clip on the passenger side and one thumbscrew clip opposite on the driver's side. Also on the driver's side there was one snapin clip and 2 additional snapin clips located in the front of the trunk. All five clips are very easy to find and remove. I then removed the plastic trim directly on top of the front trunk latch and microswitch. There are 4 screw plugs and you simply turn the plastic plugs 1/4 to 1/2 of a turn: I then removed the passenger side head lamp by using the tool in the Boxster tool kit. The kit is usually located near the spare tire in the front trunk. Turn the wrentch about 1/2 turn counter clockwise to unlock the headlamp. Slide the head lamp out. You may have to jiggle it a little but it should slide out with very little effort. Once the light is out you will be able to locate the pull wire. It is clamped into a lasso at the end. In the photo below you can see it at the end of the red arrow. The red oval in the top of the photo is the plastic wheel splash guard. The passenger front tire is directly behind that. Some recommend to access the pull wire from the tire side but that is a little more difficult and you still have the problem of trying to re-rout the wire up to the front bumber. Doing it from the head lamp side makes it easy. Here is another photo with my finger pointing at the pull wire. Remove the front bumper plastic cover that hides the tow plug. I used a plastic upholstery tool and the plastic cap popped right out. The plug has a fishline wire connected to it to prevent you from losing it. Use the light from a flashlight to guide you (from the front bumber side) and re-route the pull wire from the headlight to the tow plug. Having the top plastic guard off makes this very easy. Tuck the pull wire back in and re-insert the pastic bumber plug. Reassembly is just the reverse. Slide the headlamp back into the guides and push it home, use the wrentch and turn clock wise. you will hear a loud pop when the headlamp is secured. You know have easy access to the emergency pull wire.1 point