Welcome to RennTech.org Community, Guest
There are many great features available to you once you register at RennTech.org
You are free to view posts here, but you must log in to reply to existing posts, or to start your own new topic. Like most online communities, there are costs involved to maintain a site like this - so we encourage our members to donate. All donations go to the costs operating and maintaining this site. We prefer that guests take part in our community and we offer a lot in return to those willing to join our corner of the Porsche world. This site is 99 percent member supported (less than 1 percent comes from advertising) - so please consider an annual donation to keep this site running.
Here are some of the features available - once you register at RennTech.org
- View Classified Ads
- DIY Tutorials
- Porsche TSB Listings (limited)
- VIN Decoder
- Special Offers
-
OBD II P-Codes - Paint Codes
- Registry
- Videos System
- View Reviews
- and get rid of this welcome message
It takes just a few minutes to register, and it's FREE
Contributing Members also get these additional benefits:
(you become a Contributing Member by donating money to the operation of this site)
- No ads - advertisements are removed
- Access the Contributors Only Forum
- Contributing Members Only Downloads
- Send attachments with PMs
- All image/file storage limits are substantially increased for all Contributing Members
- Option Codes Lookup
- VIN Option Lookups (limited)


my996
-
Posts
261 -
Joined
-
Last visited
Recent Profile Visitors


my996's Achievements
Member (1/1)
3
Reputation
-
Bonnet and engine lid won't open.
my996 replied to my996's topic in 996 Series (Carrera, Carrera 4, Carrera 4S, Targa)
This lid can be opened manually by a cable that goes under the driver side rear brake lights. Check under this area. Thanks for the responses. Is this cable accessable from the outside and underneath the car? Do I need to take the rear bumper off? Or does the rear tail light have to come off? I'm not sure how I'll get the light off, if it needs to be taken off, without having access to the engine bay area first or am I missing something here? -
My remote unlocks the car just fine but I can't get the bonnet or the engine lid to open. They won't open from inside the car either when I try to use the levers at the drivers side door. The levers stay in the locked position. Any way to open them? BTW, my air bag light is on and I think that will likely have to be reset by the dealer. Is that right?
-
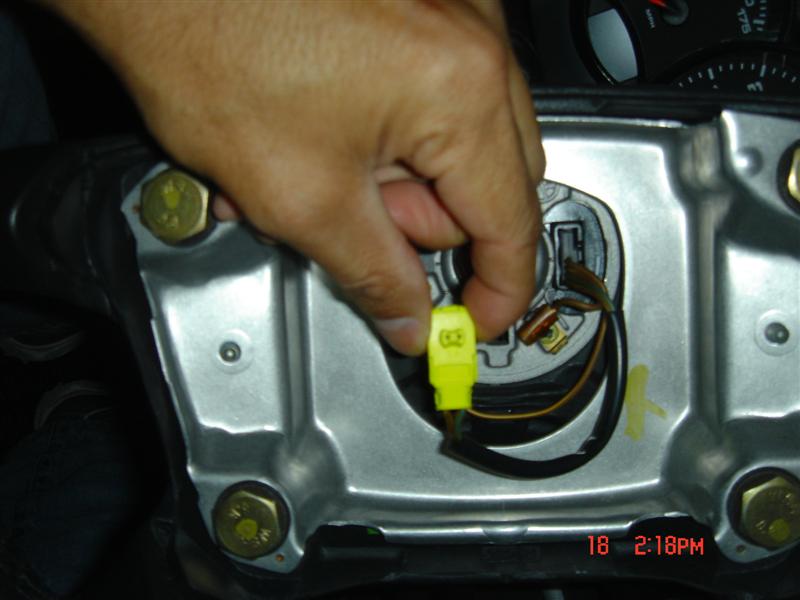
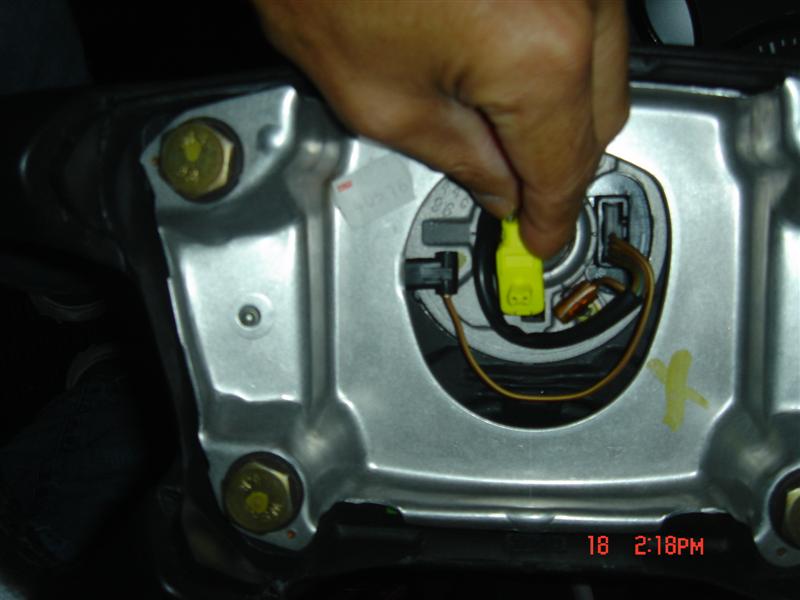
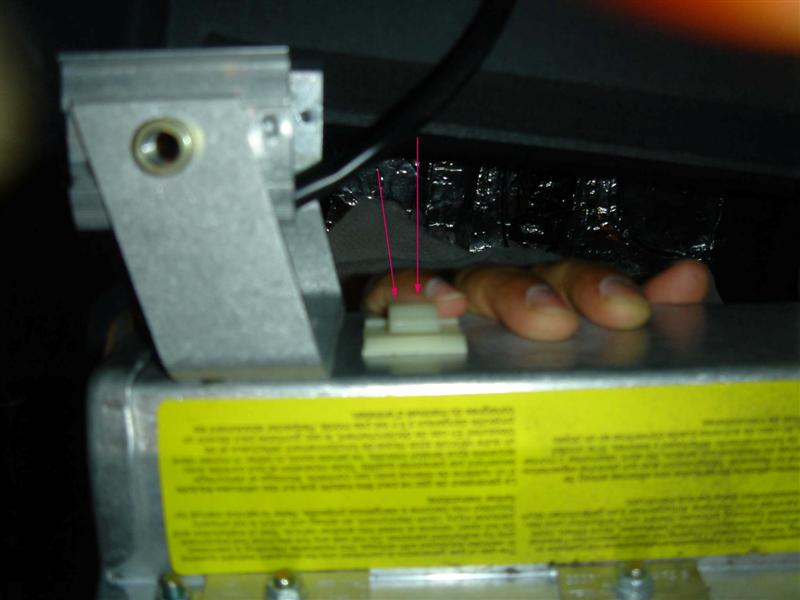
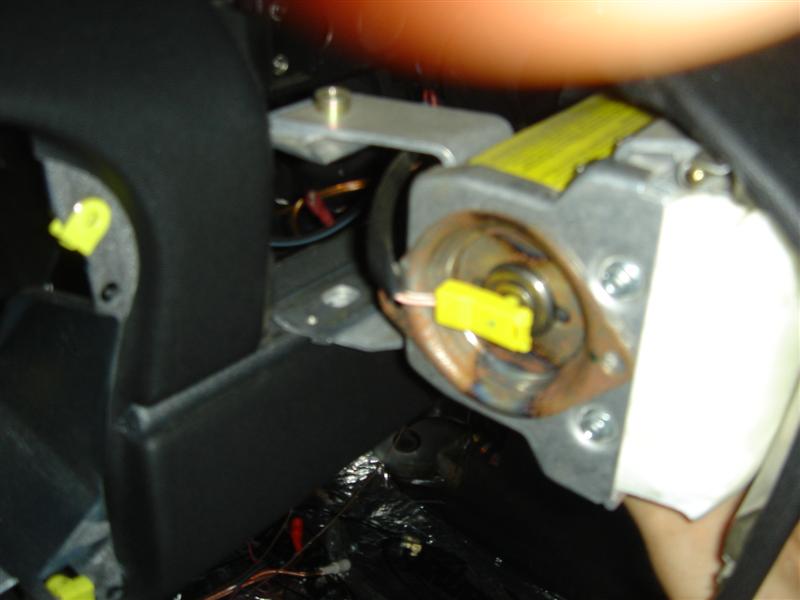
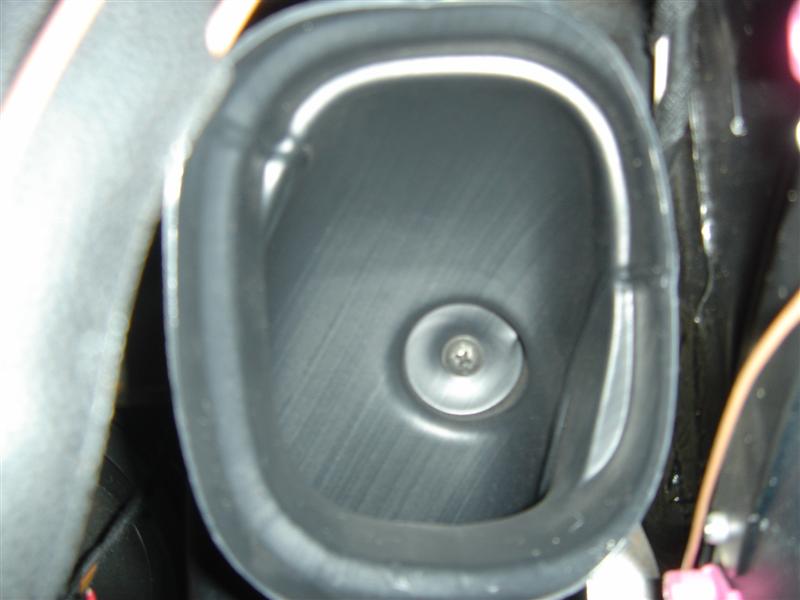
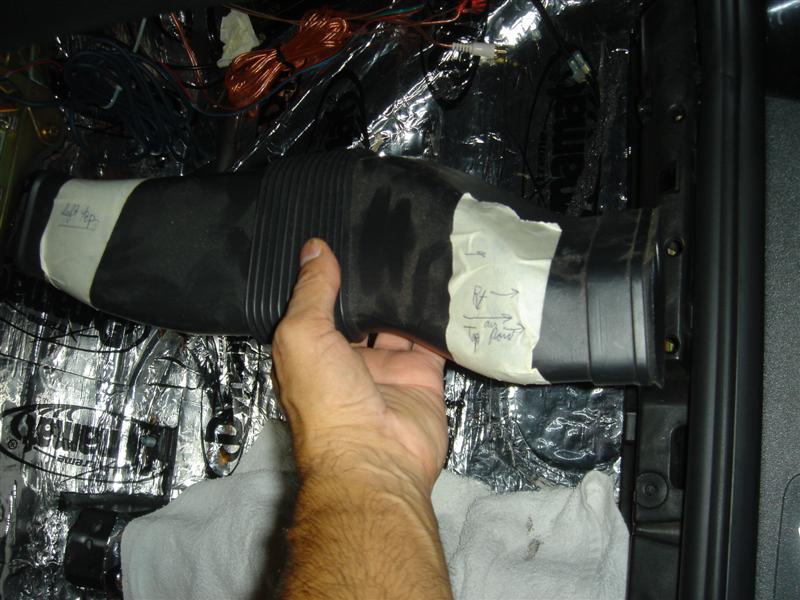
Anyone know which way the yellow air bag electrical connector fits back onto the back of the air bag housing? The connector fits both ways, as shown in the two photos with the lead in wire coming in from the top and from the bottom, but which way is correct?

-
Definitive Dash Removal Guide
my996 replied to my996's topic in 996 Series (Carrera, Carrera 4, Carrera 4S, Targa)
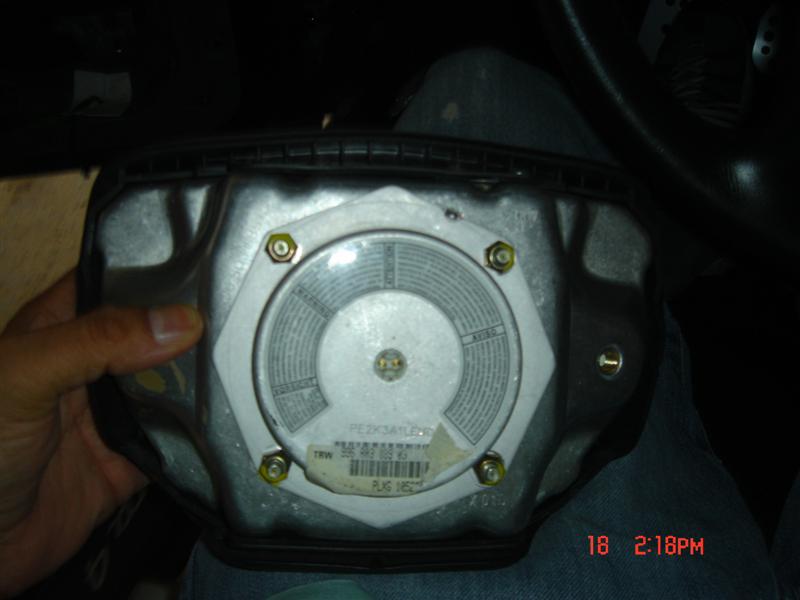
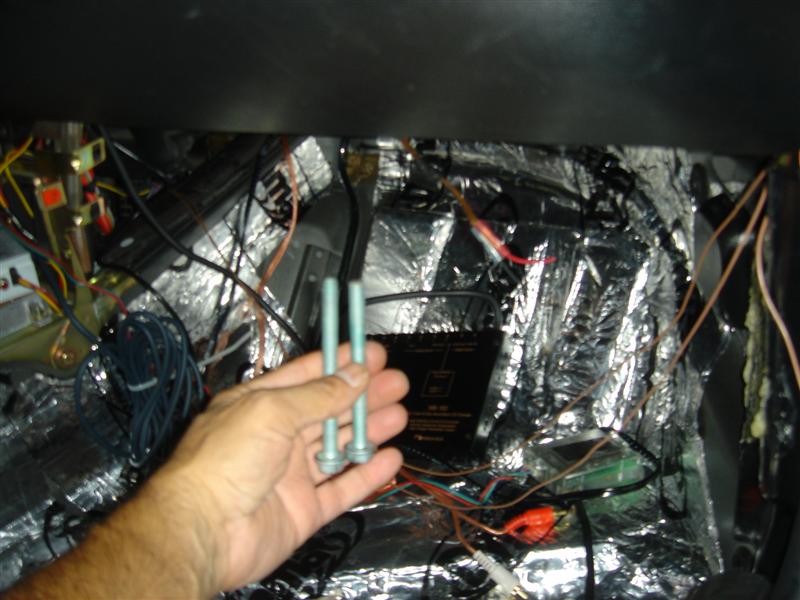
Read the intro at the top and there is your answer. But, briefly, remove the right side air vent, unscrew the air duct which then loosens the black pipe underneath the dash. Remove this pipe; lay on your back in the passenger footwell and with a 13 mm socket, take out the air bag bolts. - About 30 minutes or so. -
Definitive Dash Removal Guide
my996 replied to my996's topic in 996 Series (Carrera, Carrera 4, Carrera 4S, Targa)
Continued 1
-
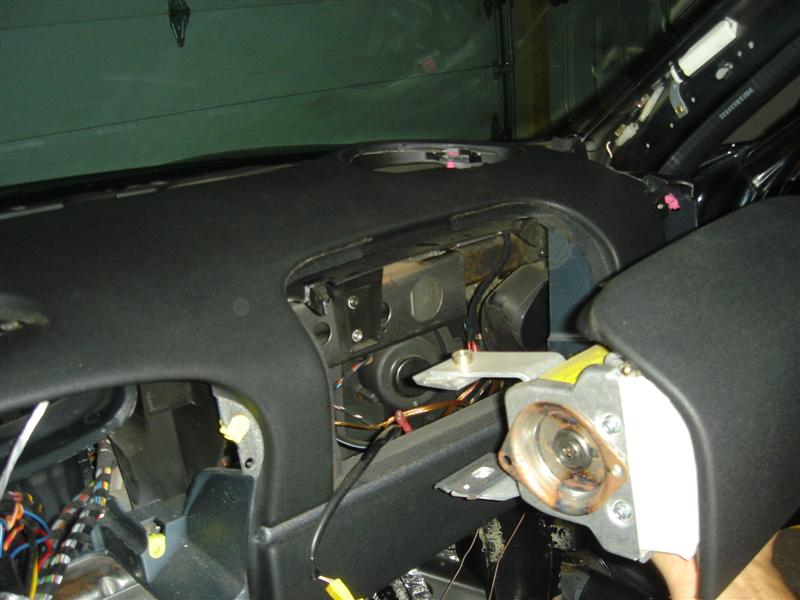
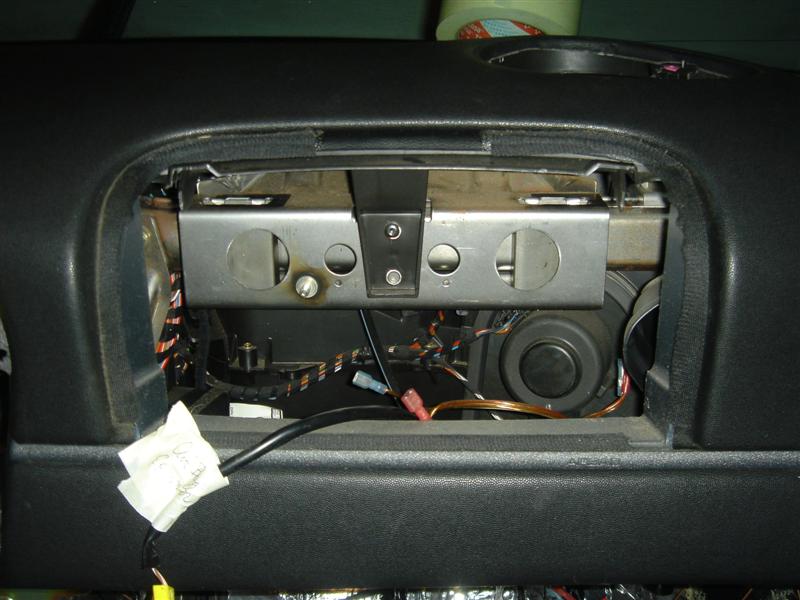
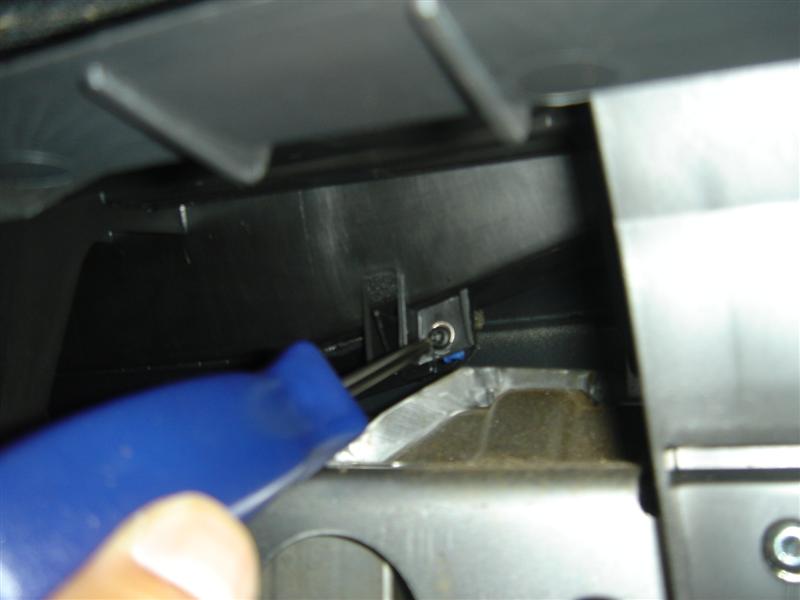
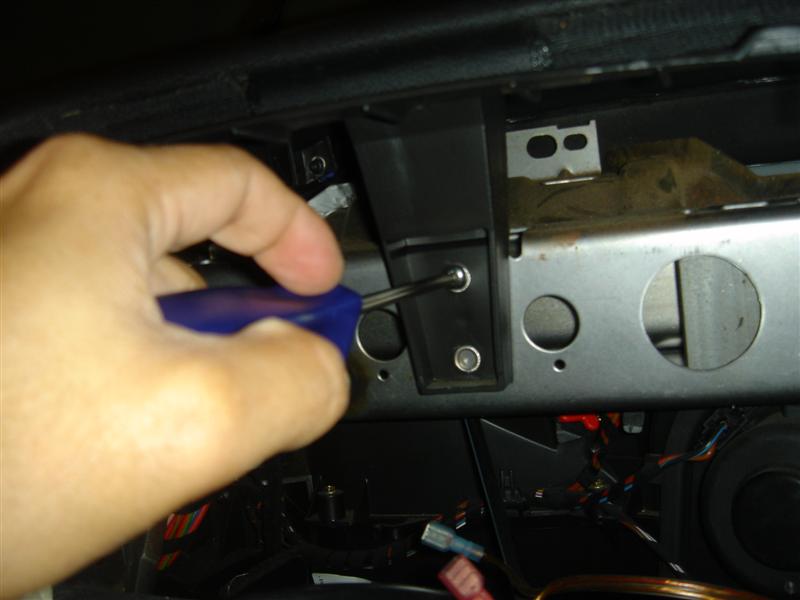
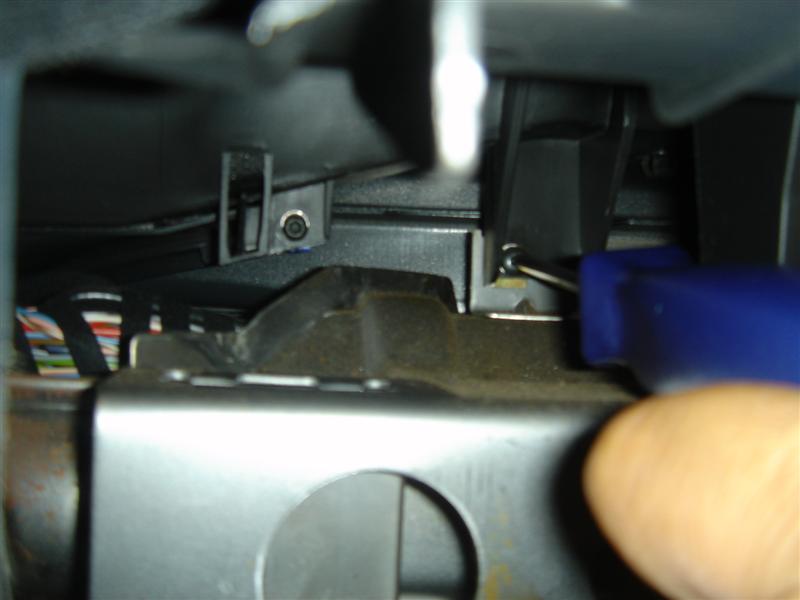
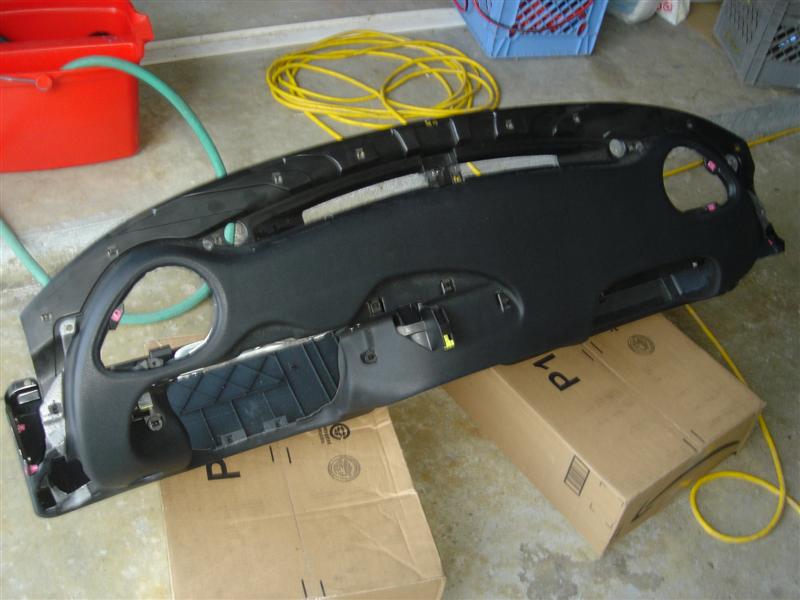
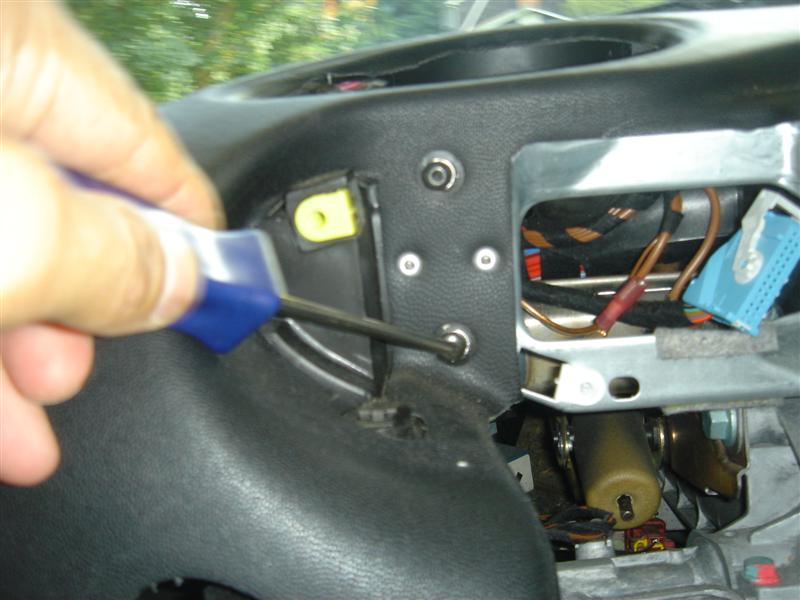
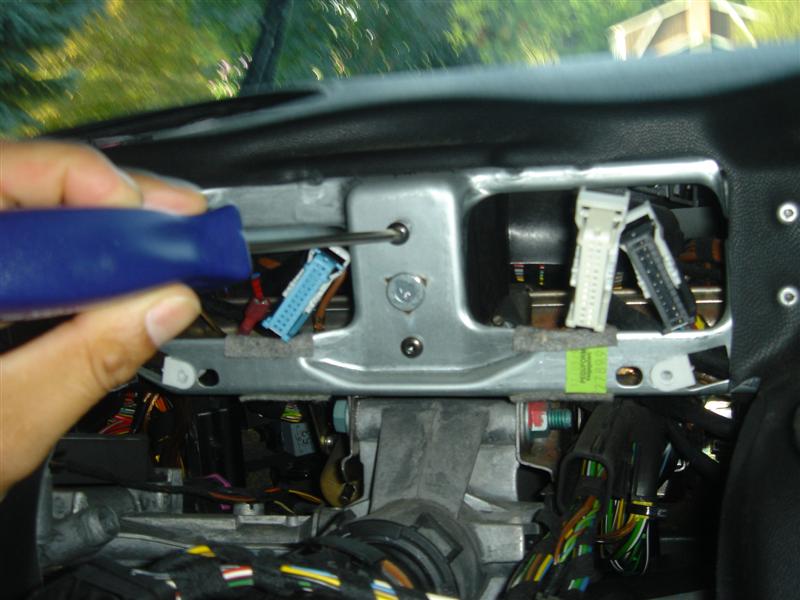
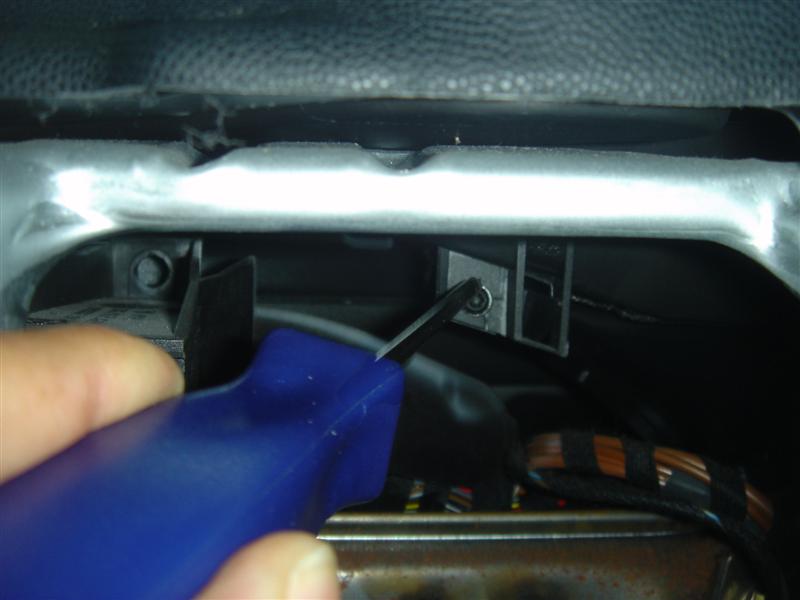
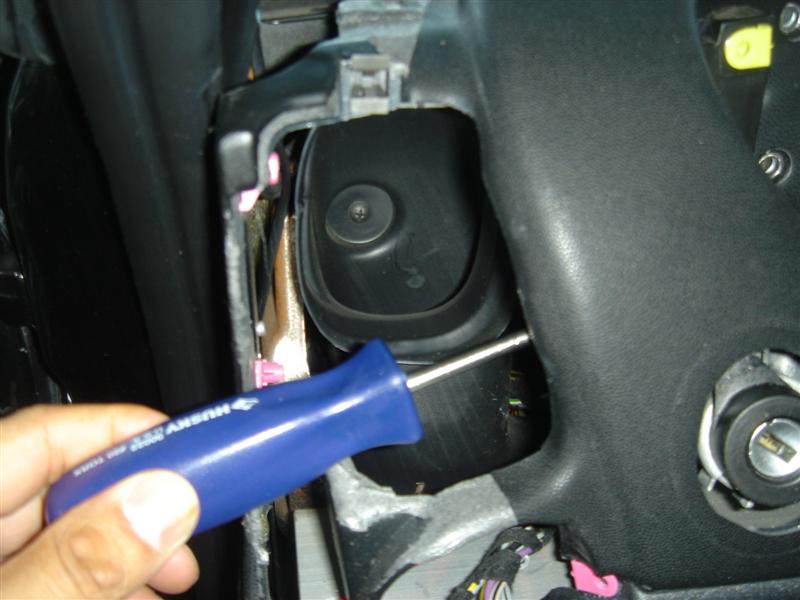
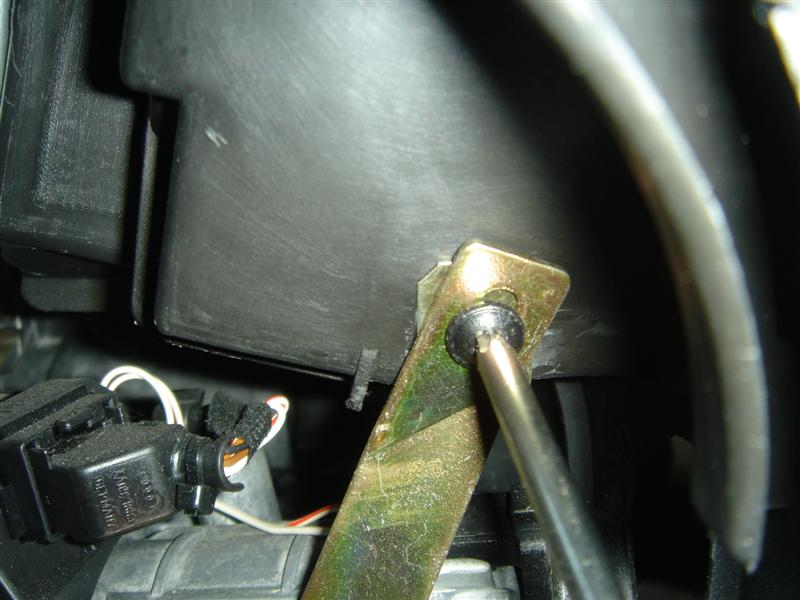
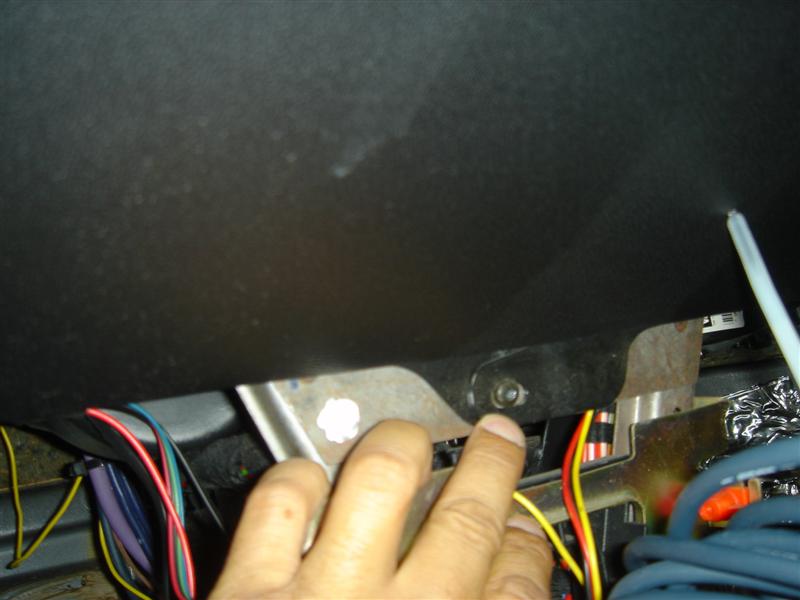
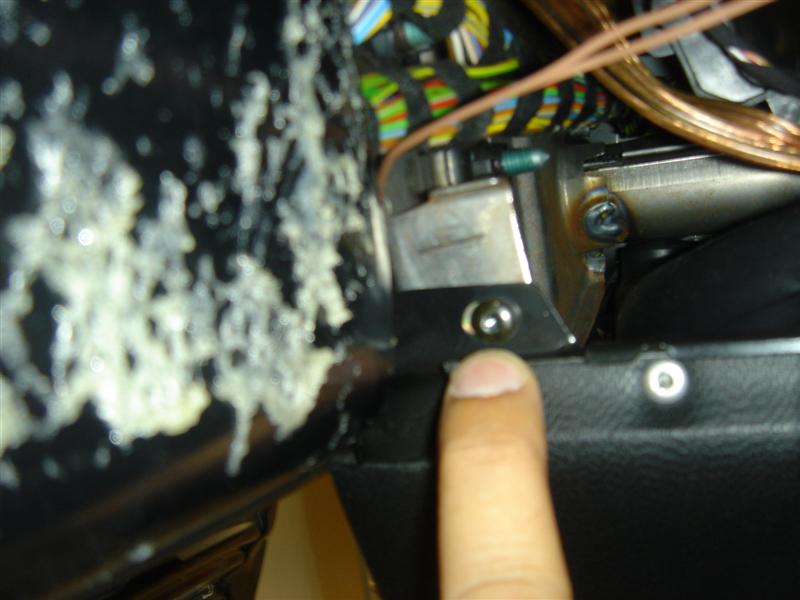
Thanks for all who answered questions and otherwise supported my efforts in removing my 1999 996 dash so I could reskin it. What follows is a picture by picture account of how I removed my dash. Once you have removed both left and right side air vents, the headlight switch dial, the ignition key cover, the instrument console, the steering wheel and all its trim, the radio and all its trim, the alarm receiving unit and its trim, and both left and right side speakers, you can start removing the dash. The Pictures show every screw I removed but one – this one is located under the alarm receiving unit in the center if the dash right next to the windshield. I also removed the right side air vent Phillips screw so I could remove the black air pipe it connects to under the dash. The 2 13mm bolts that hold the air bag in place can be accessed when this black air pipe is removed. I laid on my back in the passenger foot well and looked directly up and found and removed the bolts. Once all the screws were removed, I pushed all the wires through their respect openings, grabbed the bottom right side of the dash with one hand and the steering wheel area with the other and pulled the bottom out first as I carefully rotated up and out. The install is just backwards. Good Luck.
-
Dash and air bag removal help
my996 replied to my996's topic in 996 Series (Carrera, Carrera 4, Carrera 4S, Targa)
Yes, but where are they? And, it doesn't seem like I'm that far as all of the bottom is already loose and now its only the top. I just need to locate the rest of the screws and then its out. -
I have all the stereo parts, speakers, air control unit, air ducts, and steering wheel off of my 99 996. While I have removed 4 screws on the bottom so te dash is loose at the bottom, 2 screws at the stereo housing and one by the center of the windshield, the dash is still on the car rock solid at the top. Where are all the screws and other clips or fasteners located? And, how do I remove the passenger side air bag?
-
Instrument panel bulbs
my996 replied to my996's topic in 996 Series (Carrera, Carrera 4, Carrera 4S, Targa)
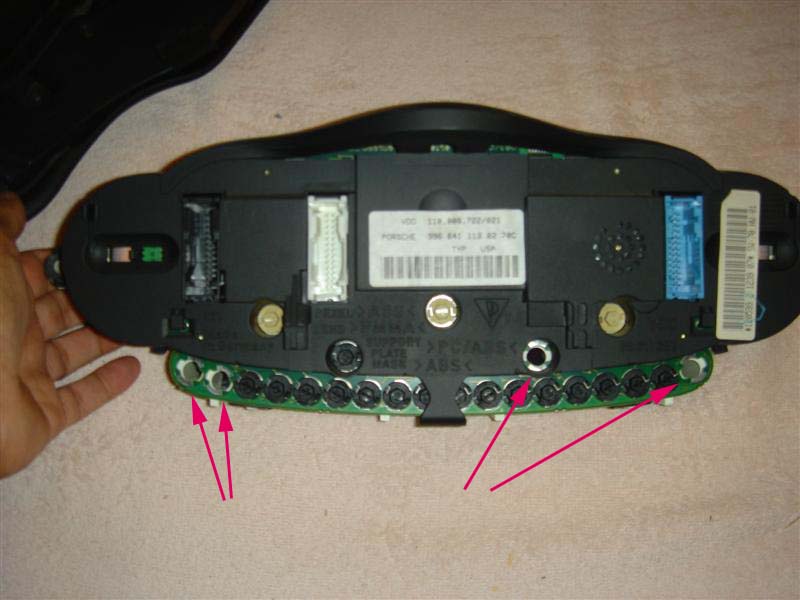
What's a DME? The second arrow from the right. -
Instrument panel bulbs
my996 replied to my996's topic in 996 Series (Carrera, Carrera 4, Carrera 4S, Targa)
Thanks Loren. I have a cab and these are missing. Should I replace them so they are in there? And I have traction control (PSM actually) so should I install this bulb too? Also, the other hole is a Fuel Cap indicator. Should I put a bulb in there too? -
I took my instrument panel off today and noticed some bulbs were missing. What indicators are these for and what bulbs go into them?
-
Steering Wheel removal
my996 replied to my996's topic in 996 Series (Carrera, Carrera 4, Carrera 4S, Targa)
Got it. Thanks -
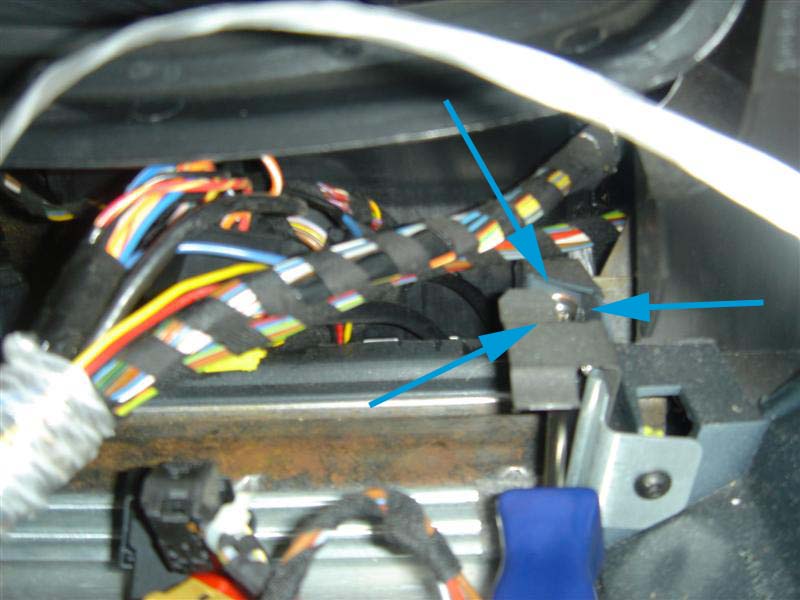
Trying to remove the steering wheel and I’ve gotten as far as loosening the nut indicated with the arrows. After giving the nut a few turns so there is some space in the threads, the next step is to pull the steering wheel out a bit. But it won’t budge. What am I missing? Anyone know why it won’t come out?
-
996 C2 Cab Leaking Condesate Water
my996 replied to g2saint's topic in 996 Series (Carrera, Carrera 4, Carrera 4S, Targa)
Is this the AC drain tube?
-
Water route in Cab
my996 replied to my996's topic in 996 Series (Carrera, Carrera 4, Carrera 4S, Targa)
Thanks Loren, however what I meant to say was does anyone have actual pics of the tubes connections? I can't seem to see any tube connections in the diagrams on the other post. Thanks.