Welcome to RennTech.org Community, Guest
There are many great features available to you once you register at RennTech.org
You are free to view posts here, but you must log in to reply to existing posts, or to start your own new topic. Like most online communities, there are costs involved to maintain a site like this - so we encourage our members to donate. All donations go to the costs operating and maintaining this site. We prefer that guests take part in our community and we offer a lot in return to those willing to join our corner of the Porsche world. This site is 99 percent member supported (less than 1 percent comes from advertising) - so please consider an annual donation to keep this site running.
Here are some of the features available - once you register at RennTech.org
- View Classified Ads
- DIY Tutorials
- Porsche TSB Listings (limited)
- VIN Decoder
- Special Offers
-
OBD II P-Codes - Paint Codes
- Registry
- Videos System
- View Reviews
- and get rid of this welcome message
It takes just a few minutes to register, and it's FREE
Contributing Members also get these additional benefits:
(you become a Contributing Member by donating money to the operation of this site)
- No ads - advertisements are removed
- Access the Contributors Only Forum
- Contributing Members Only Downloads
- Send attachments with PMs
- All image/file storage limits are substantially increased for all Contributing Members
- Option Codes Lookup
- VIN Option Lookups (limited)


TNT79Bronco
-
Posts
54 -
Joined
-
Last visited
Content Type
Profiles
Events
Forums
External Paint Colors
Downloads
Tutorials
Links Directory
Collections
Store
Posts posted by TNT79Bronco
-
-
Could use some help with my radio code.
Becker 1
Serial # 15001317
Type 4352
Thank you very much.
-
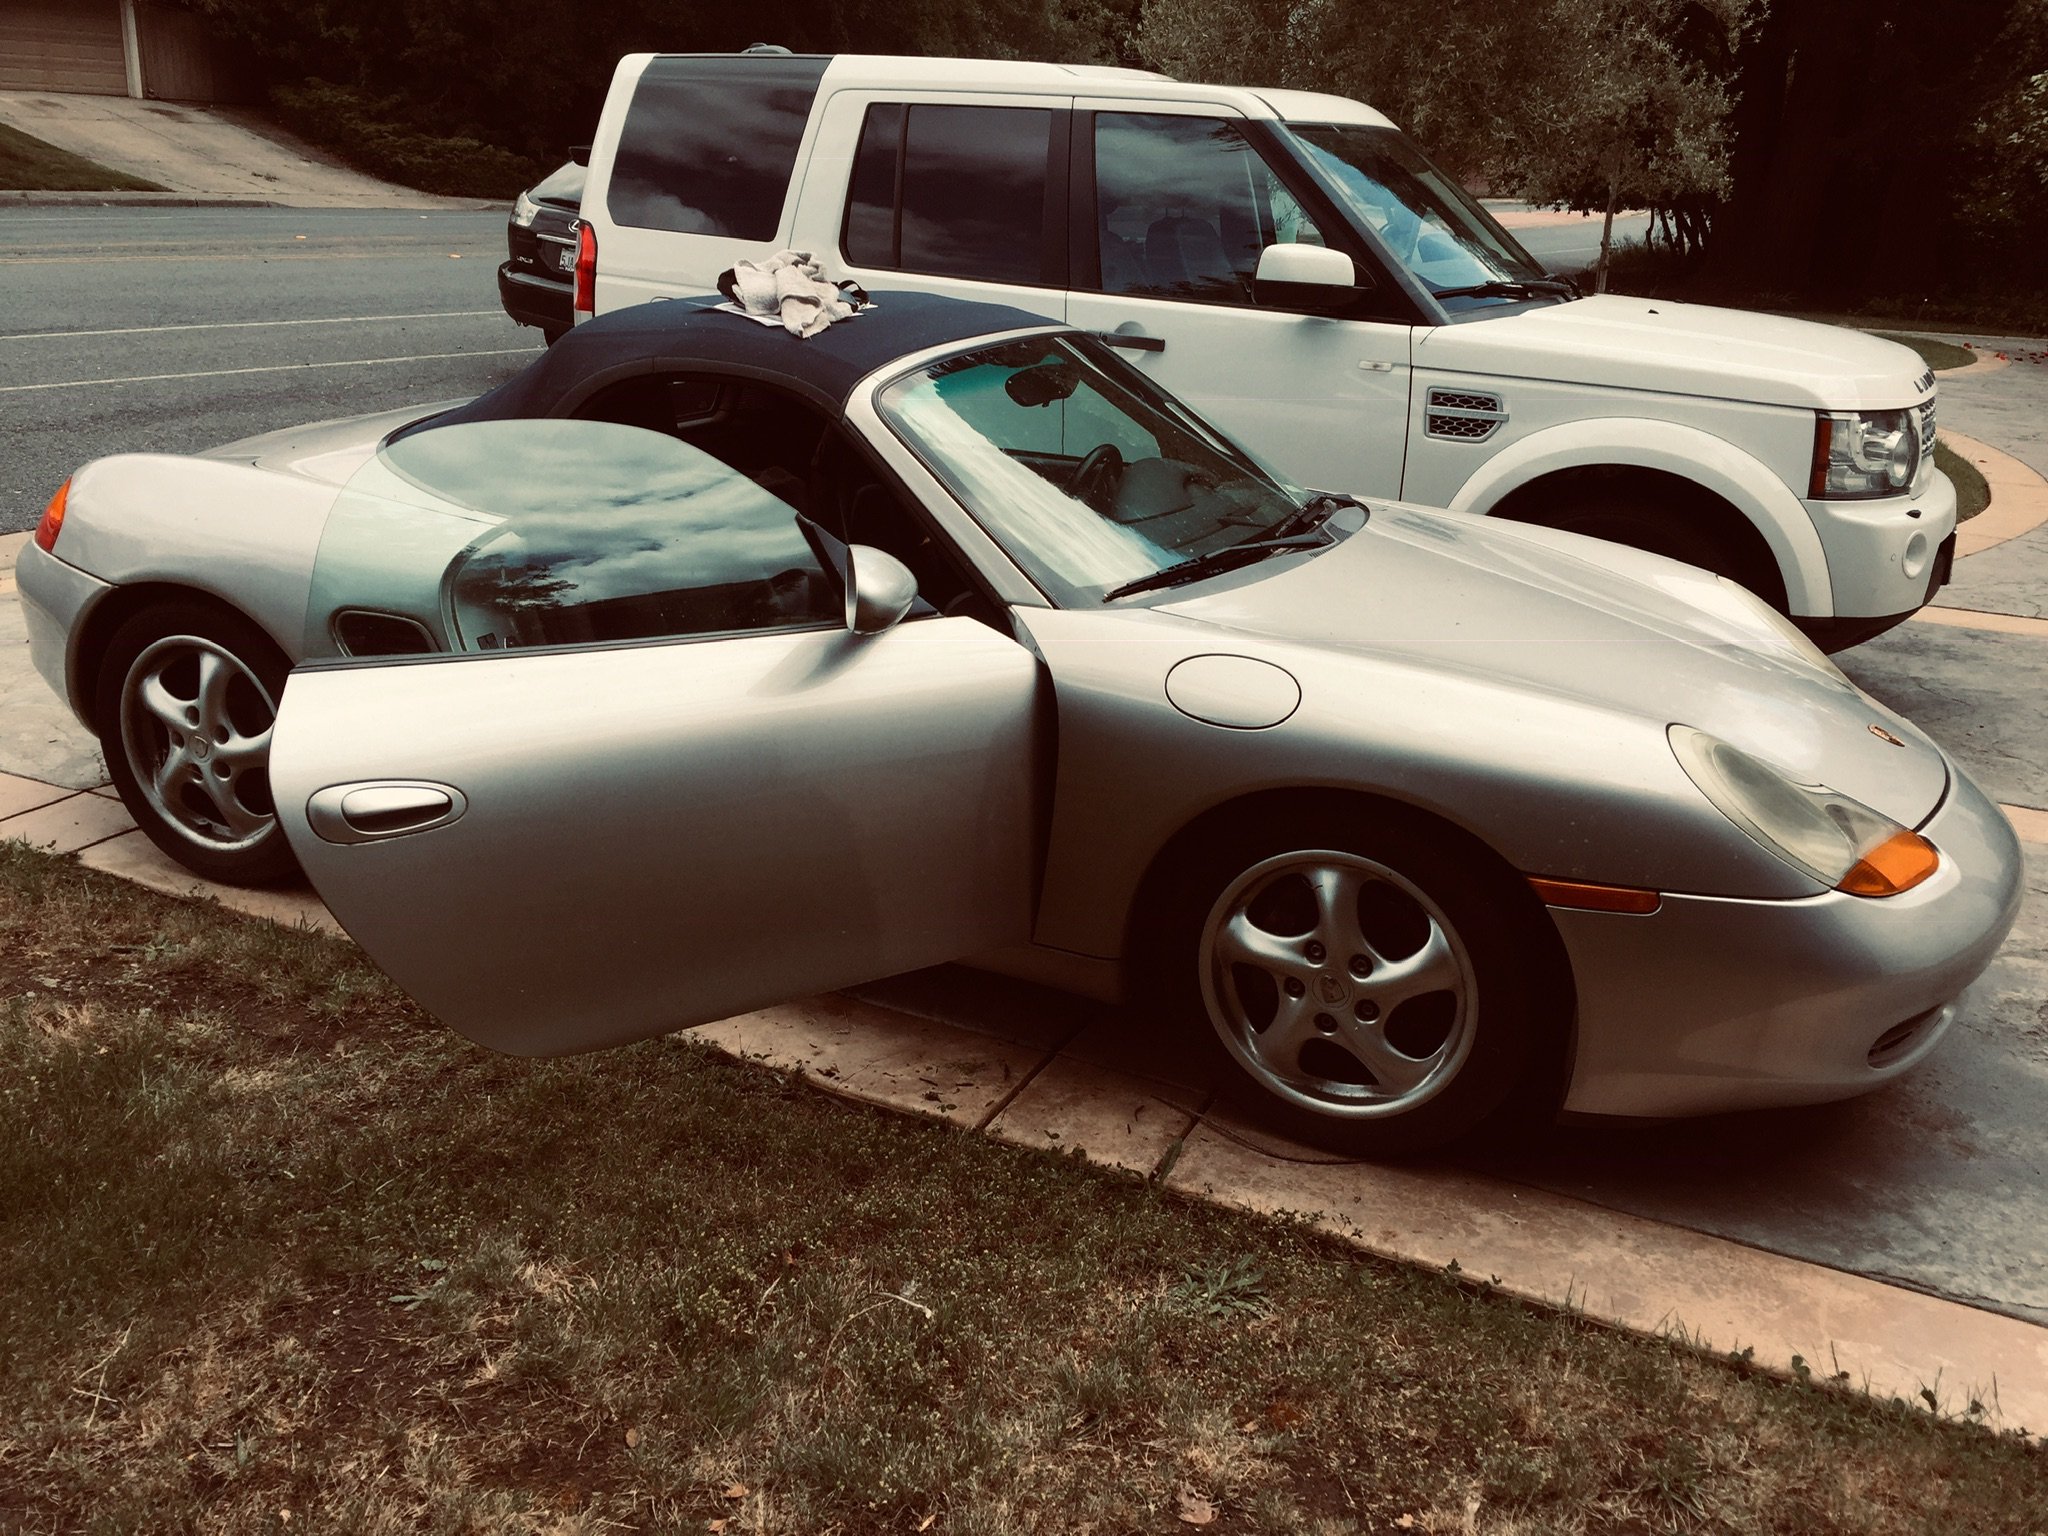
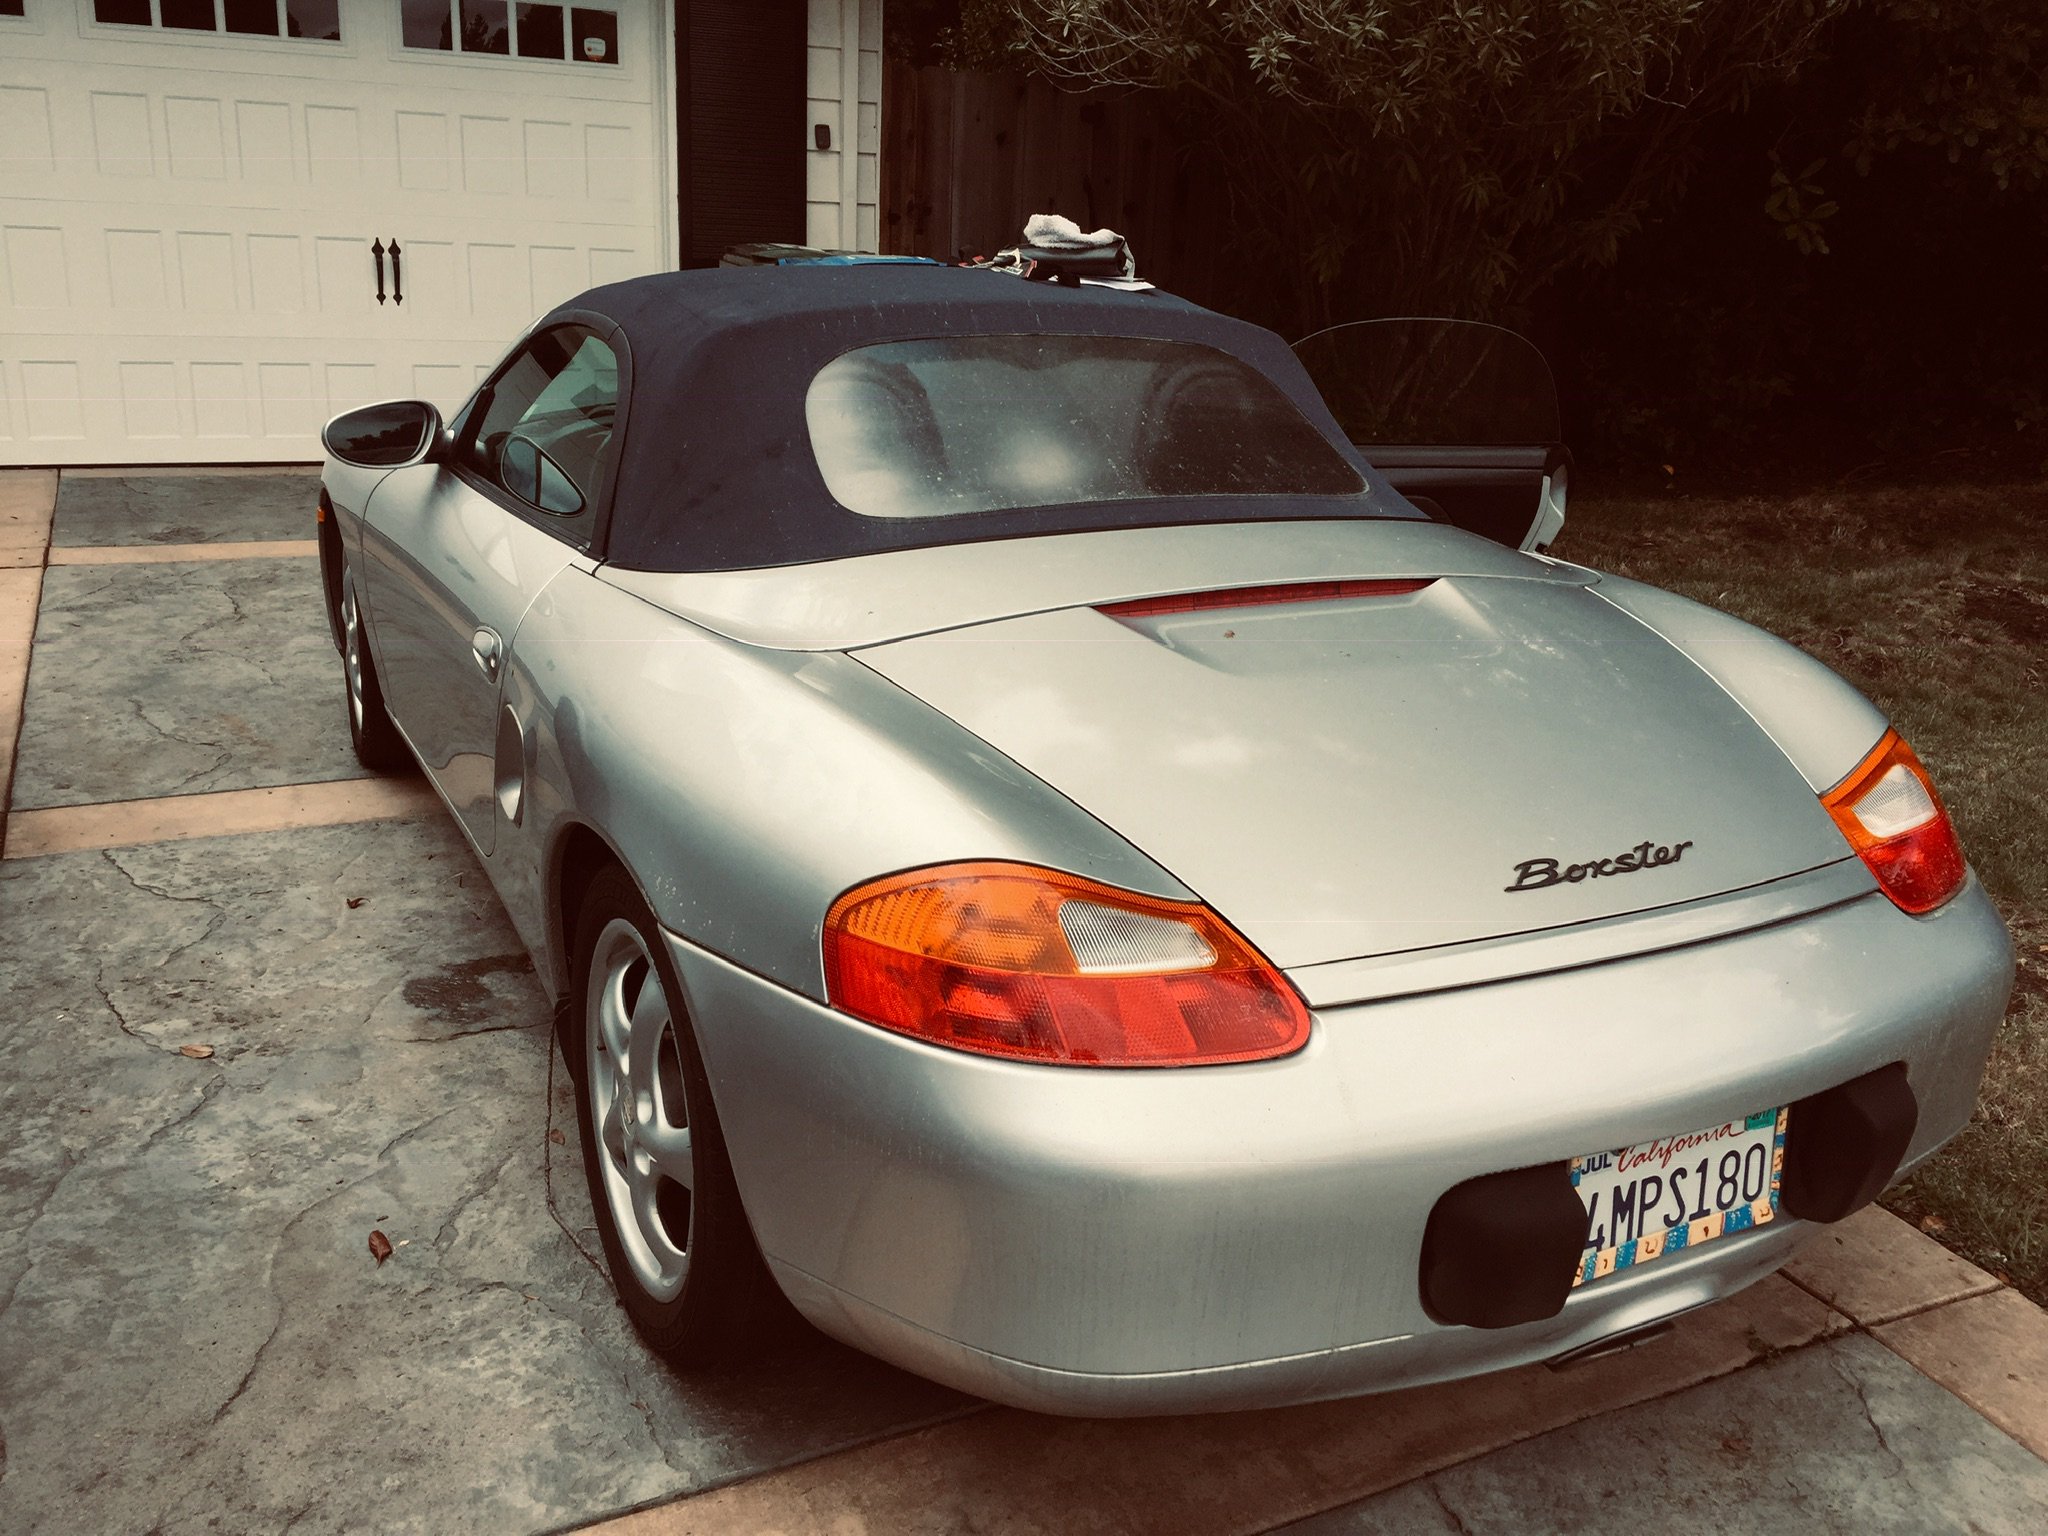
2000 Boxster Base- Manual 8/10 body
Non runner - “Engine just stopped”
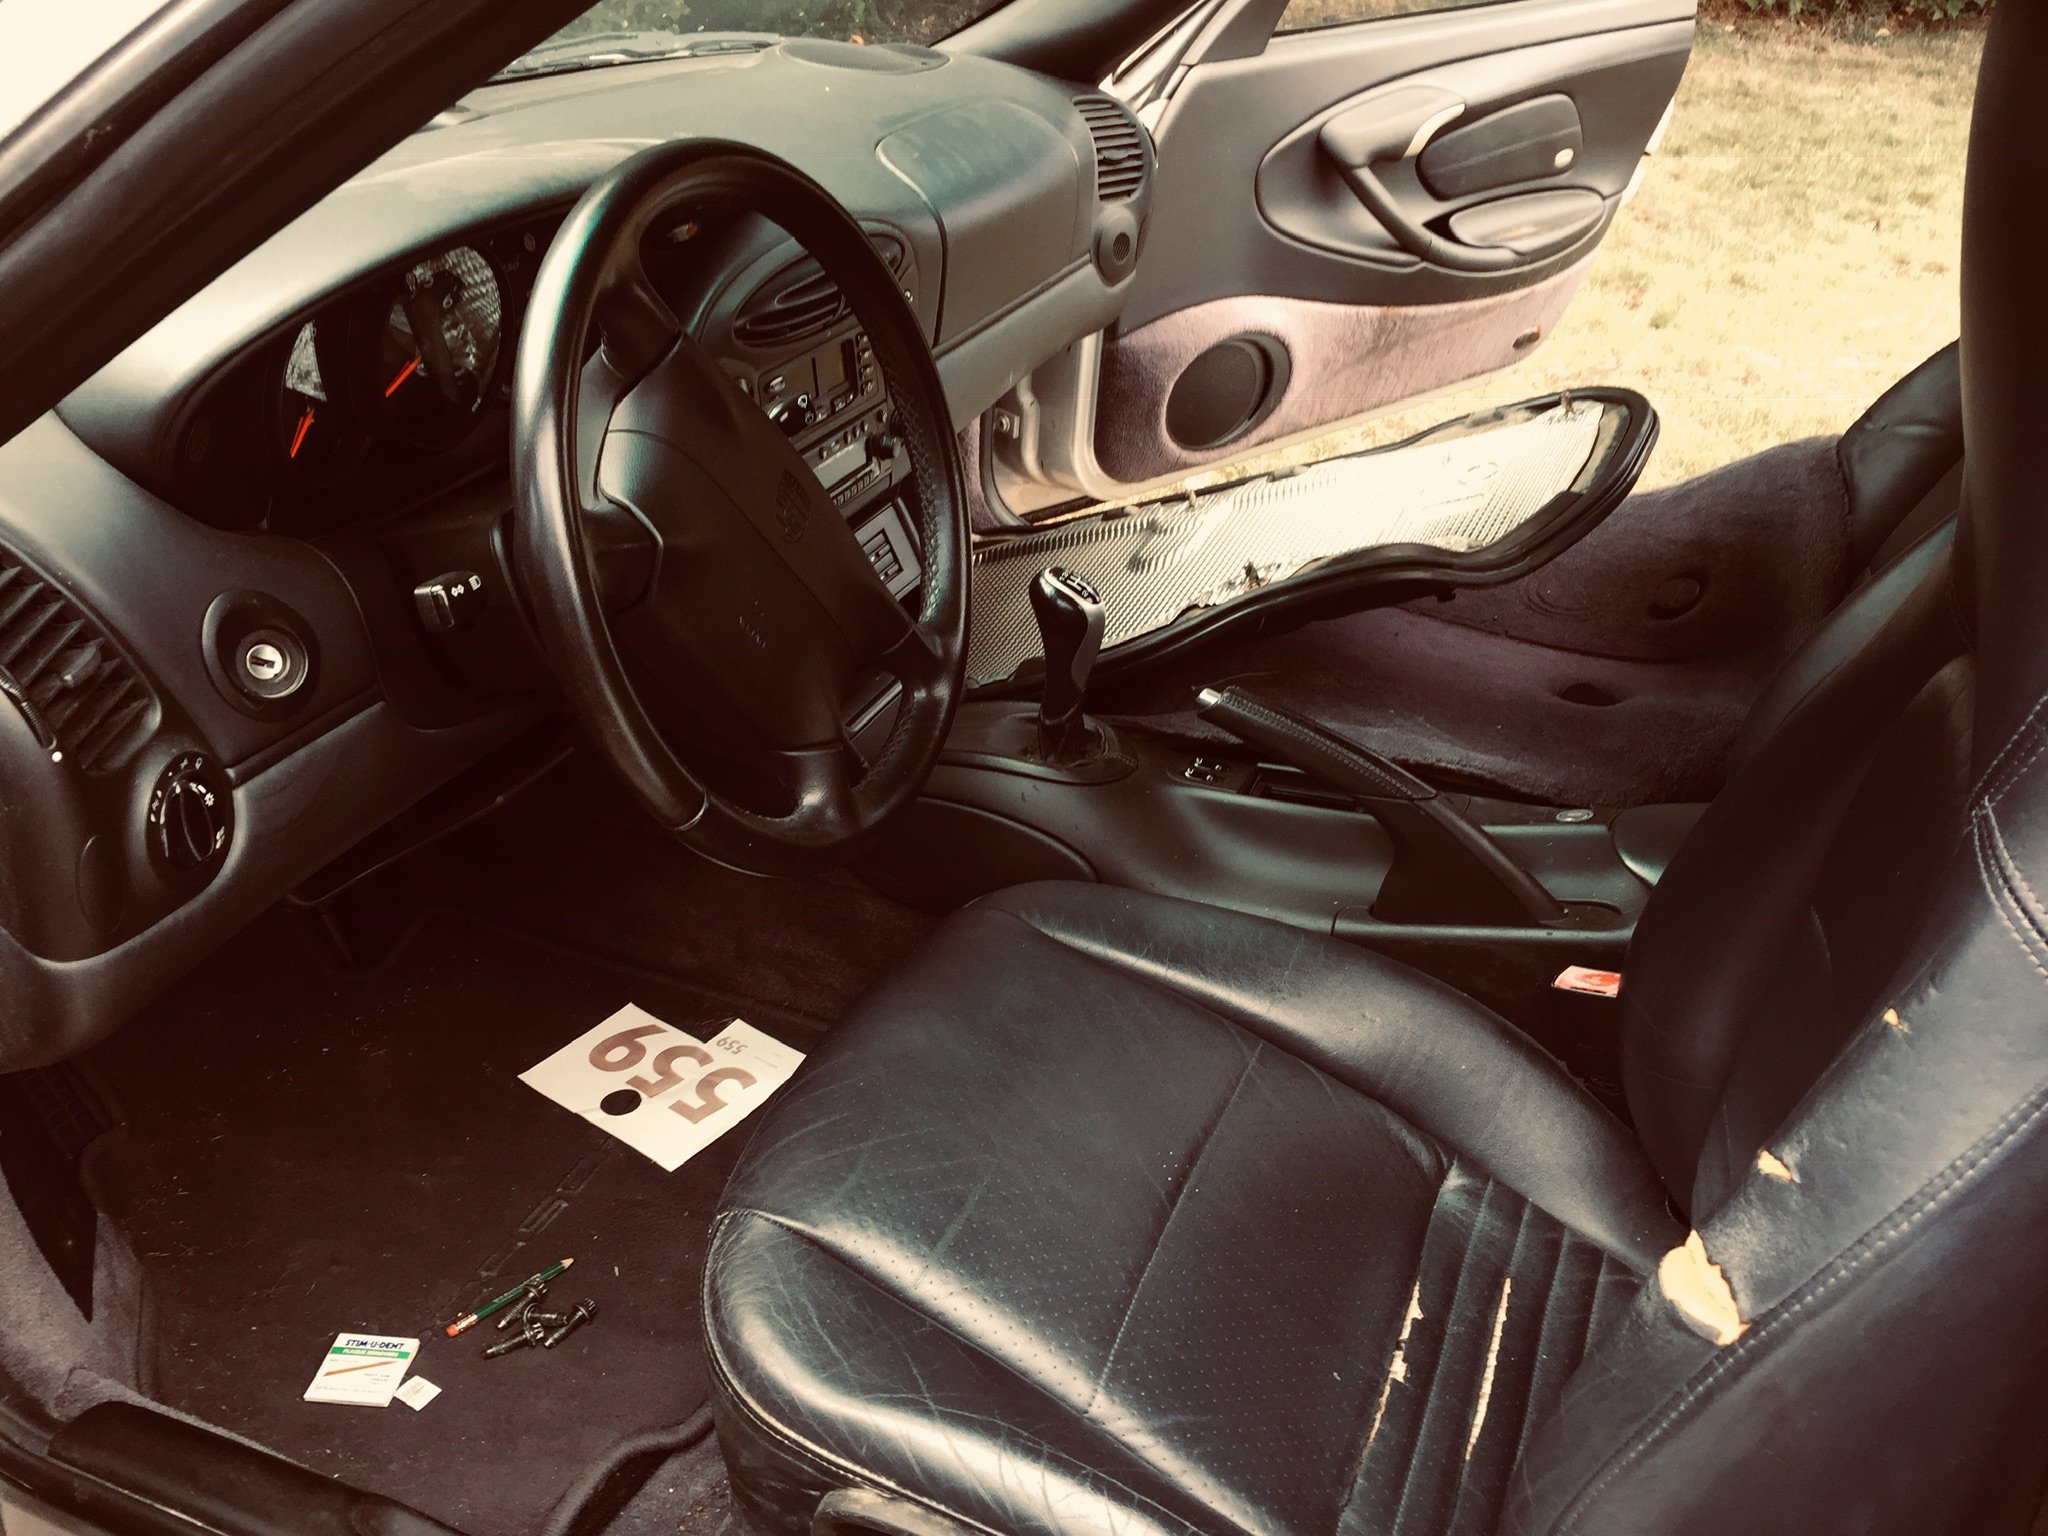
So, a few weeks ago, I decided I needed another $700 project. Owner had no idea why it stopped running. Sat for several years.

When I got it home and after completely detailing it, I decided to check and see what was in the oil sump. Nothing, but some very fine plastic bits. Nothing big and nothing metallic. Nothing suspicious in the oil filter. There is hope!!!!
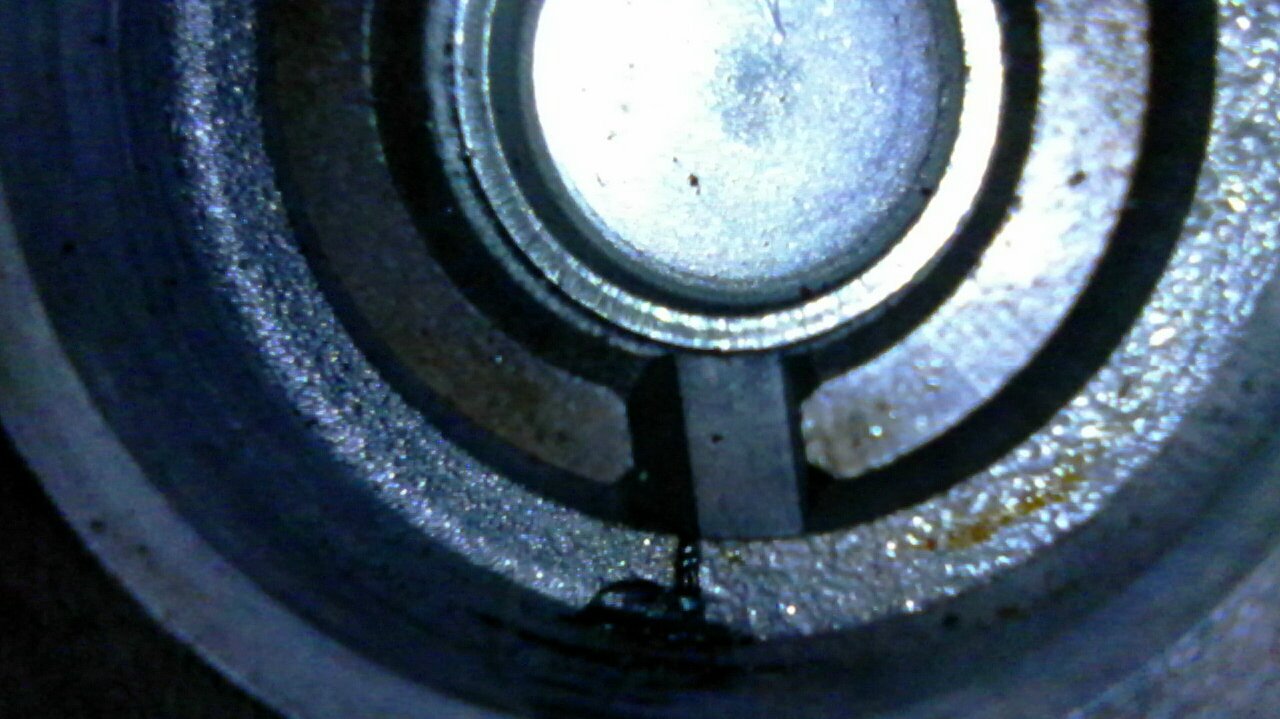
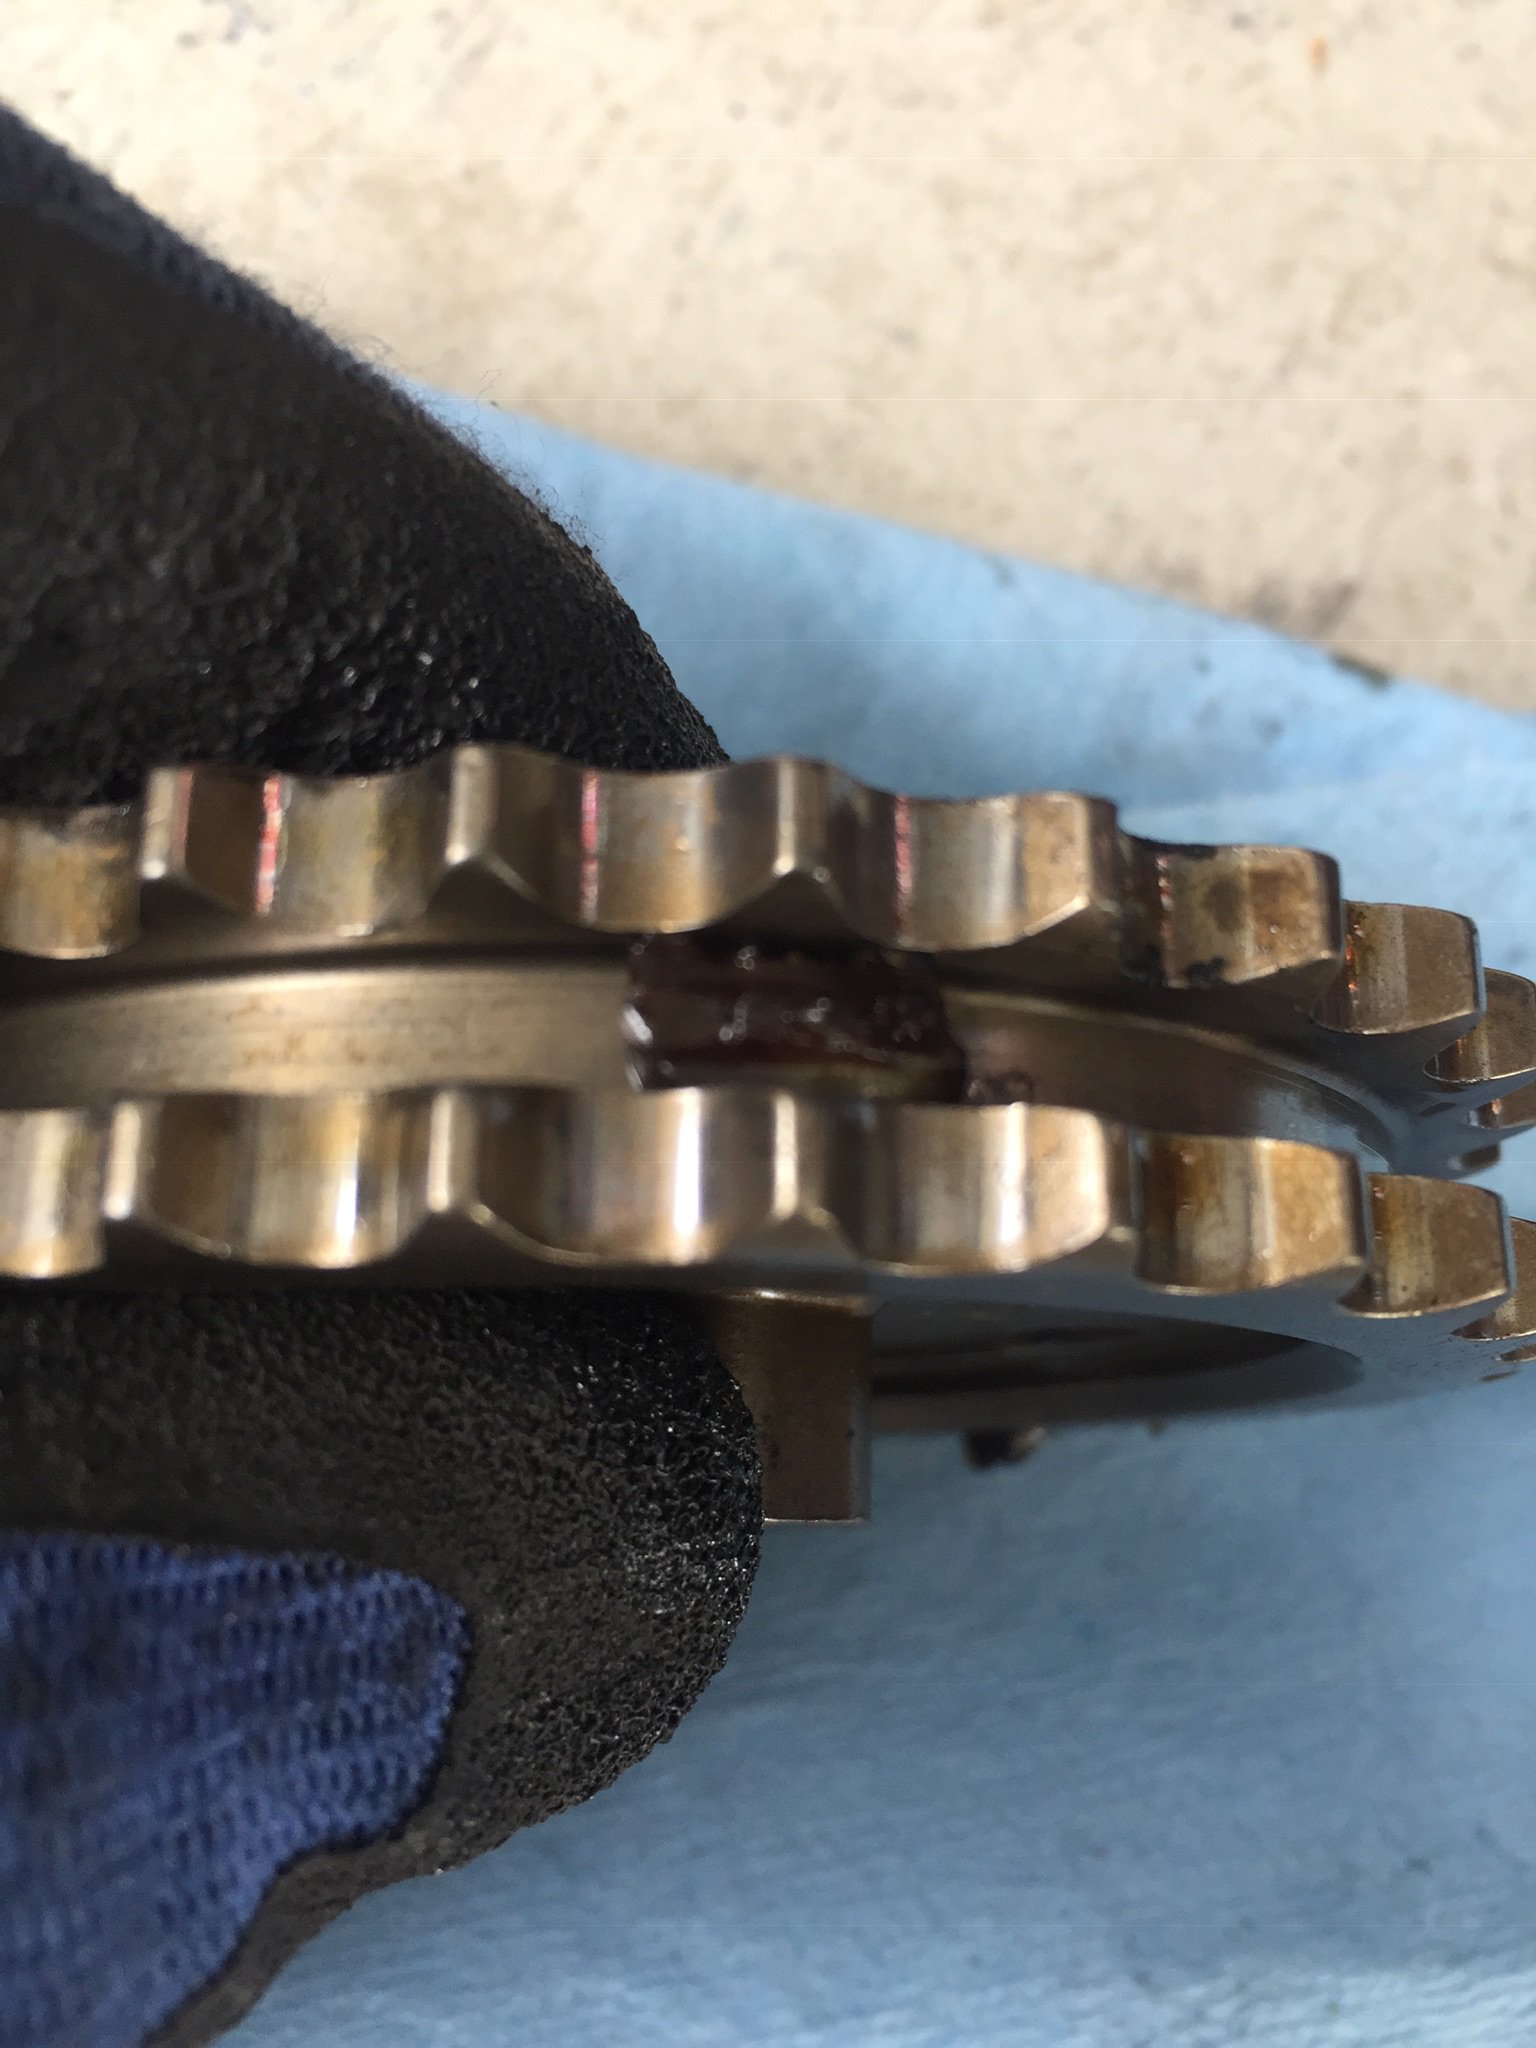
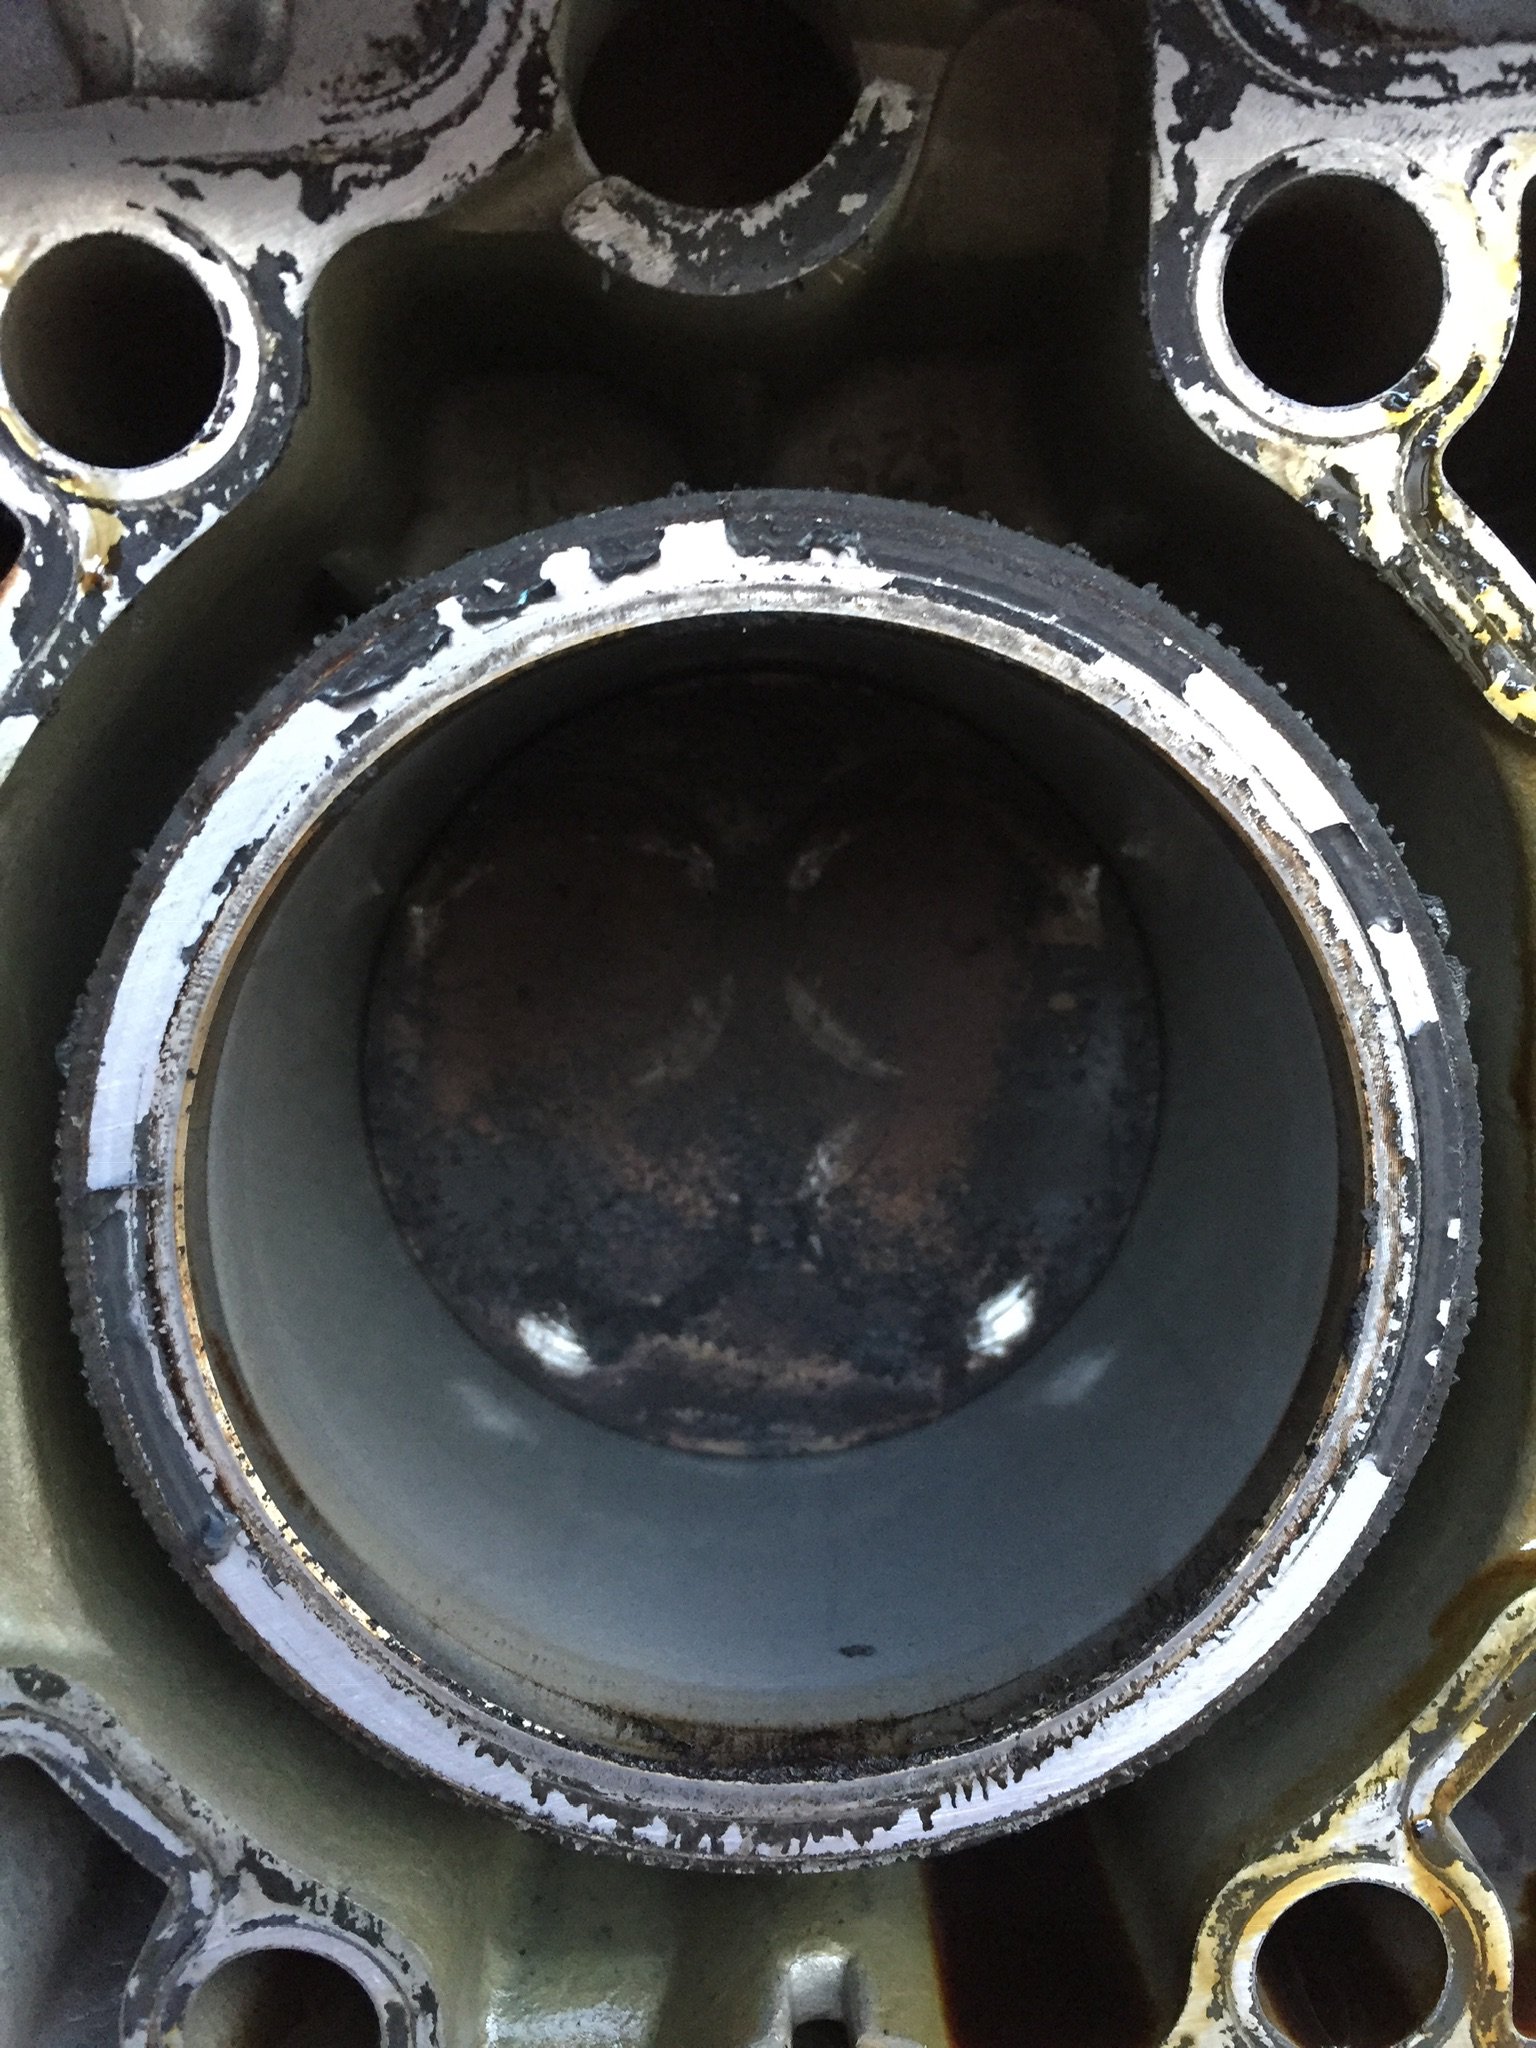
Next stop, check the timing. Here is what I found on bank 1.....
It does appear that the engine jumped timing. I checked that “three letter” thing that everyone is paranoid about. All looked great!
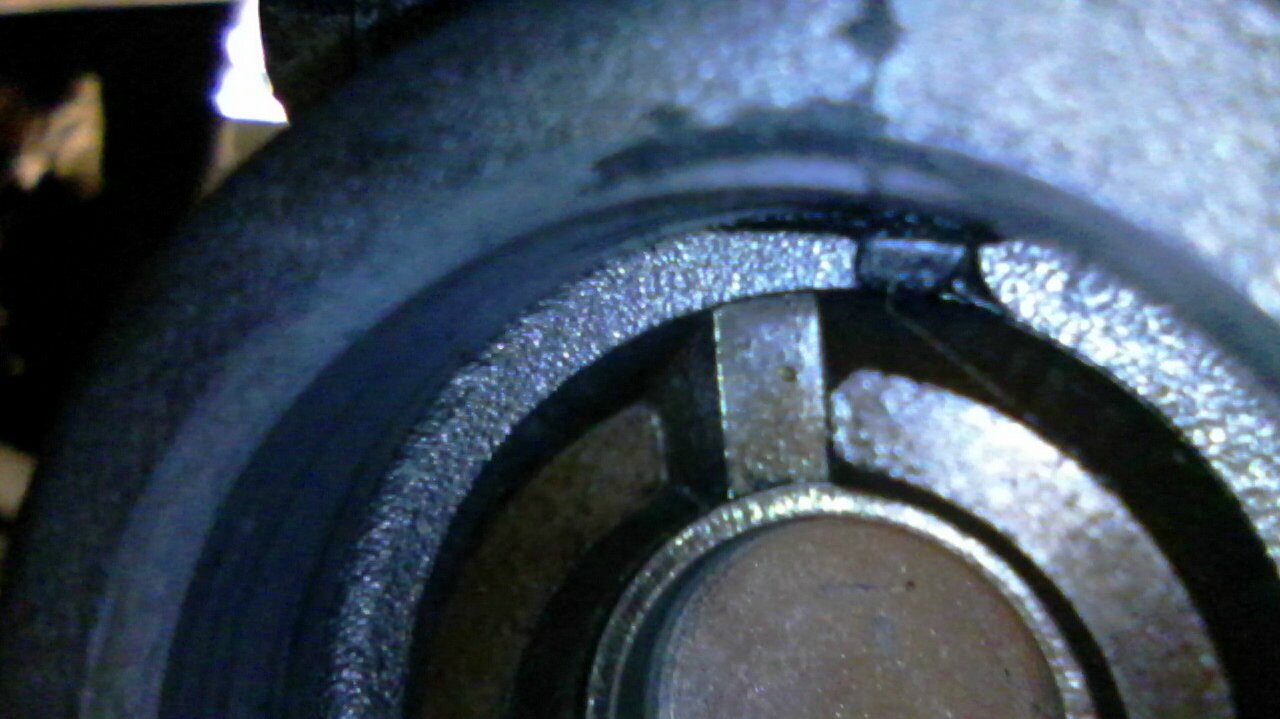
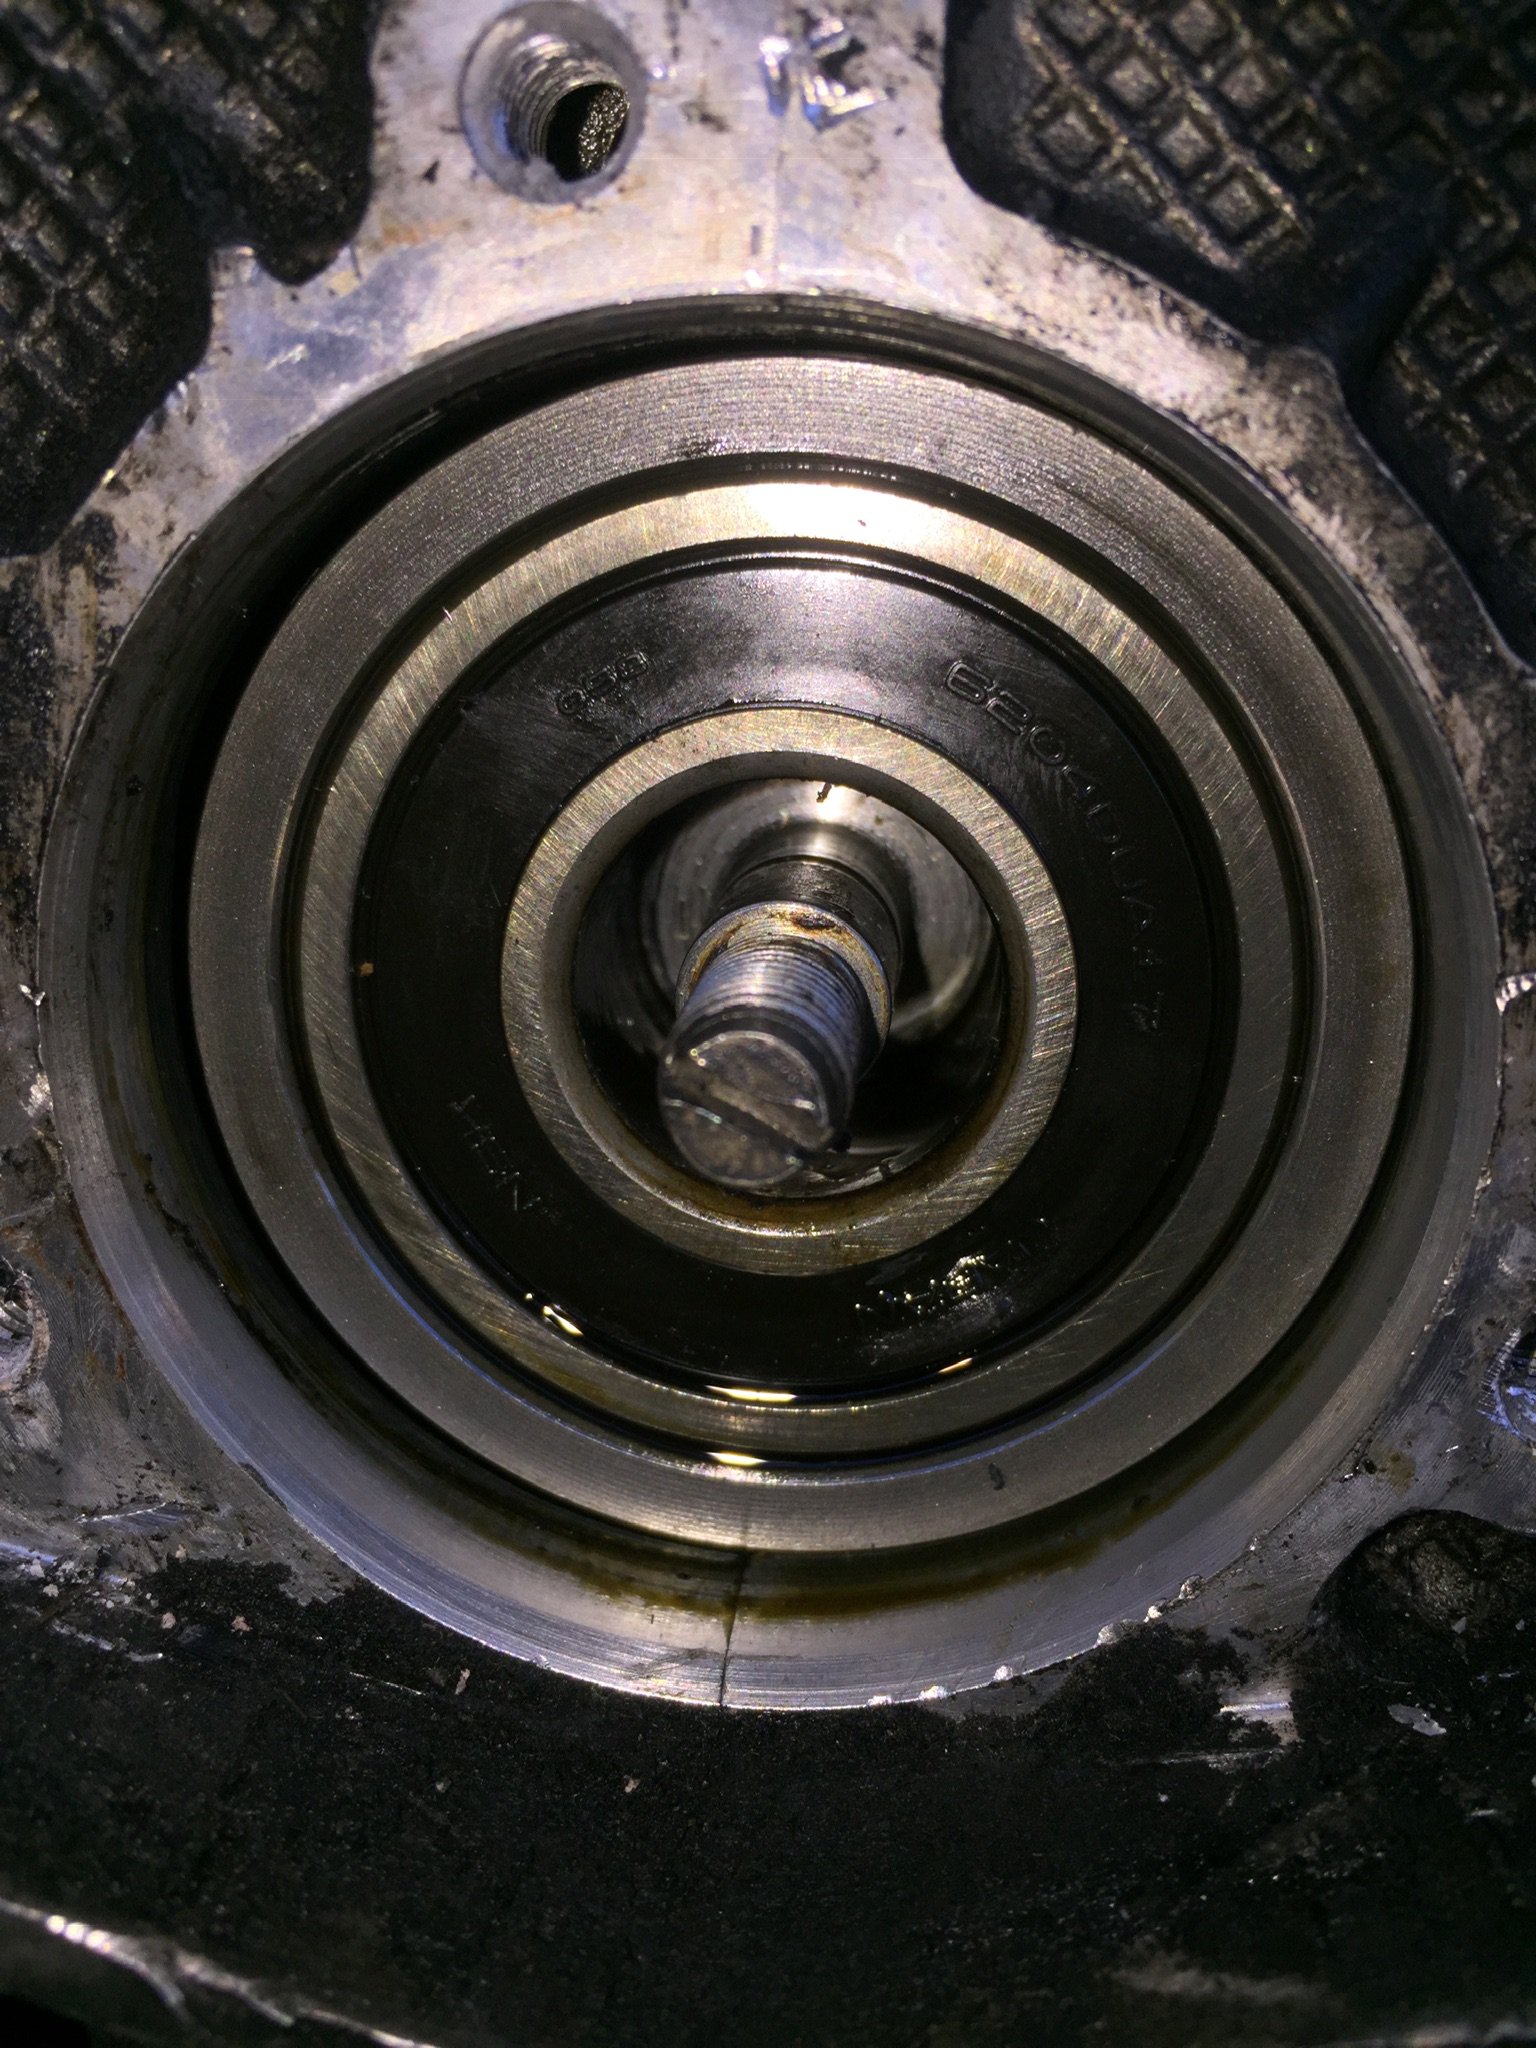
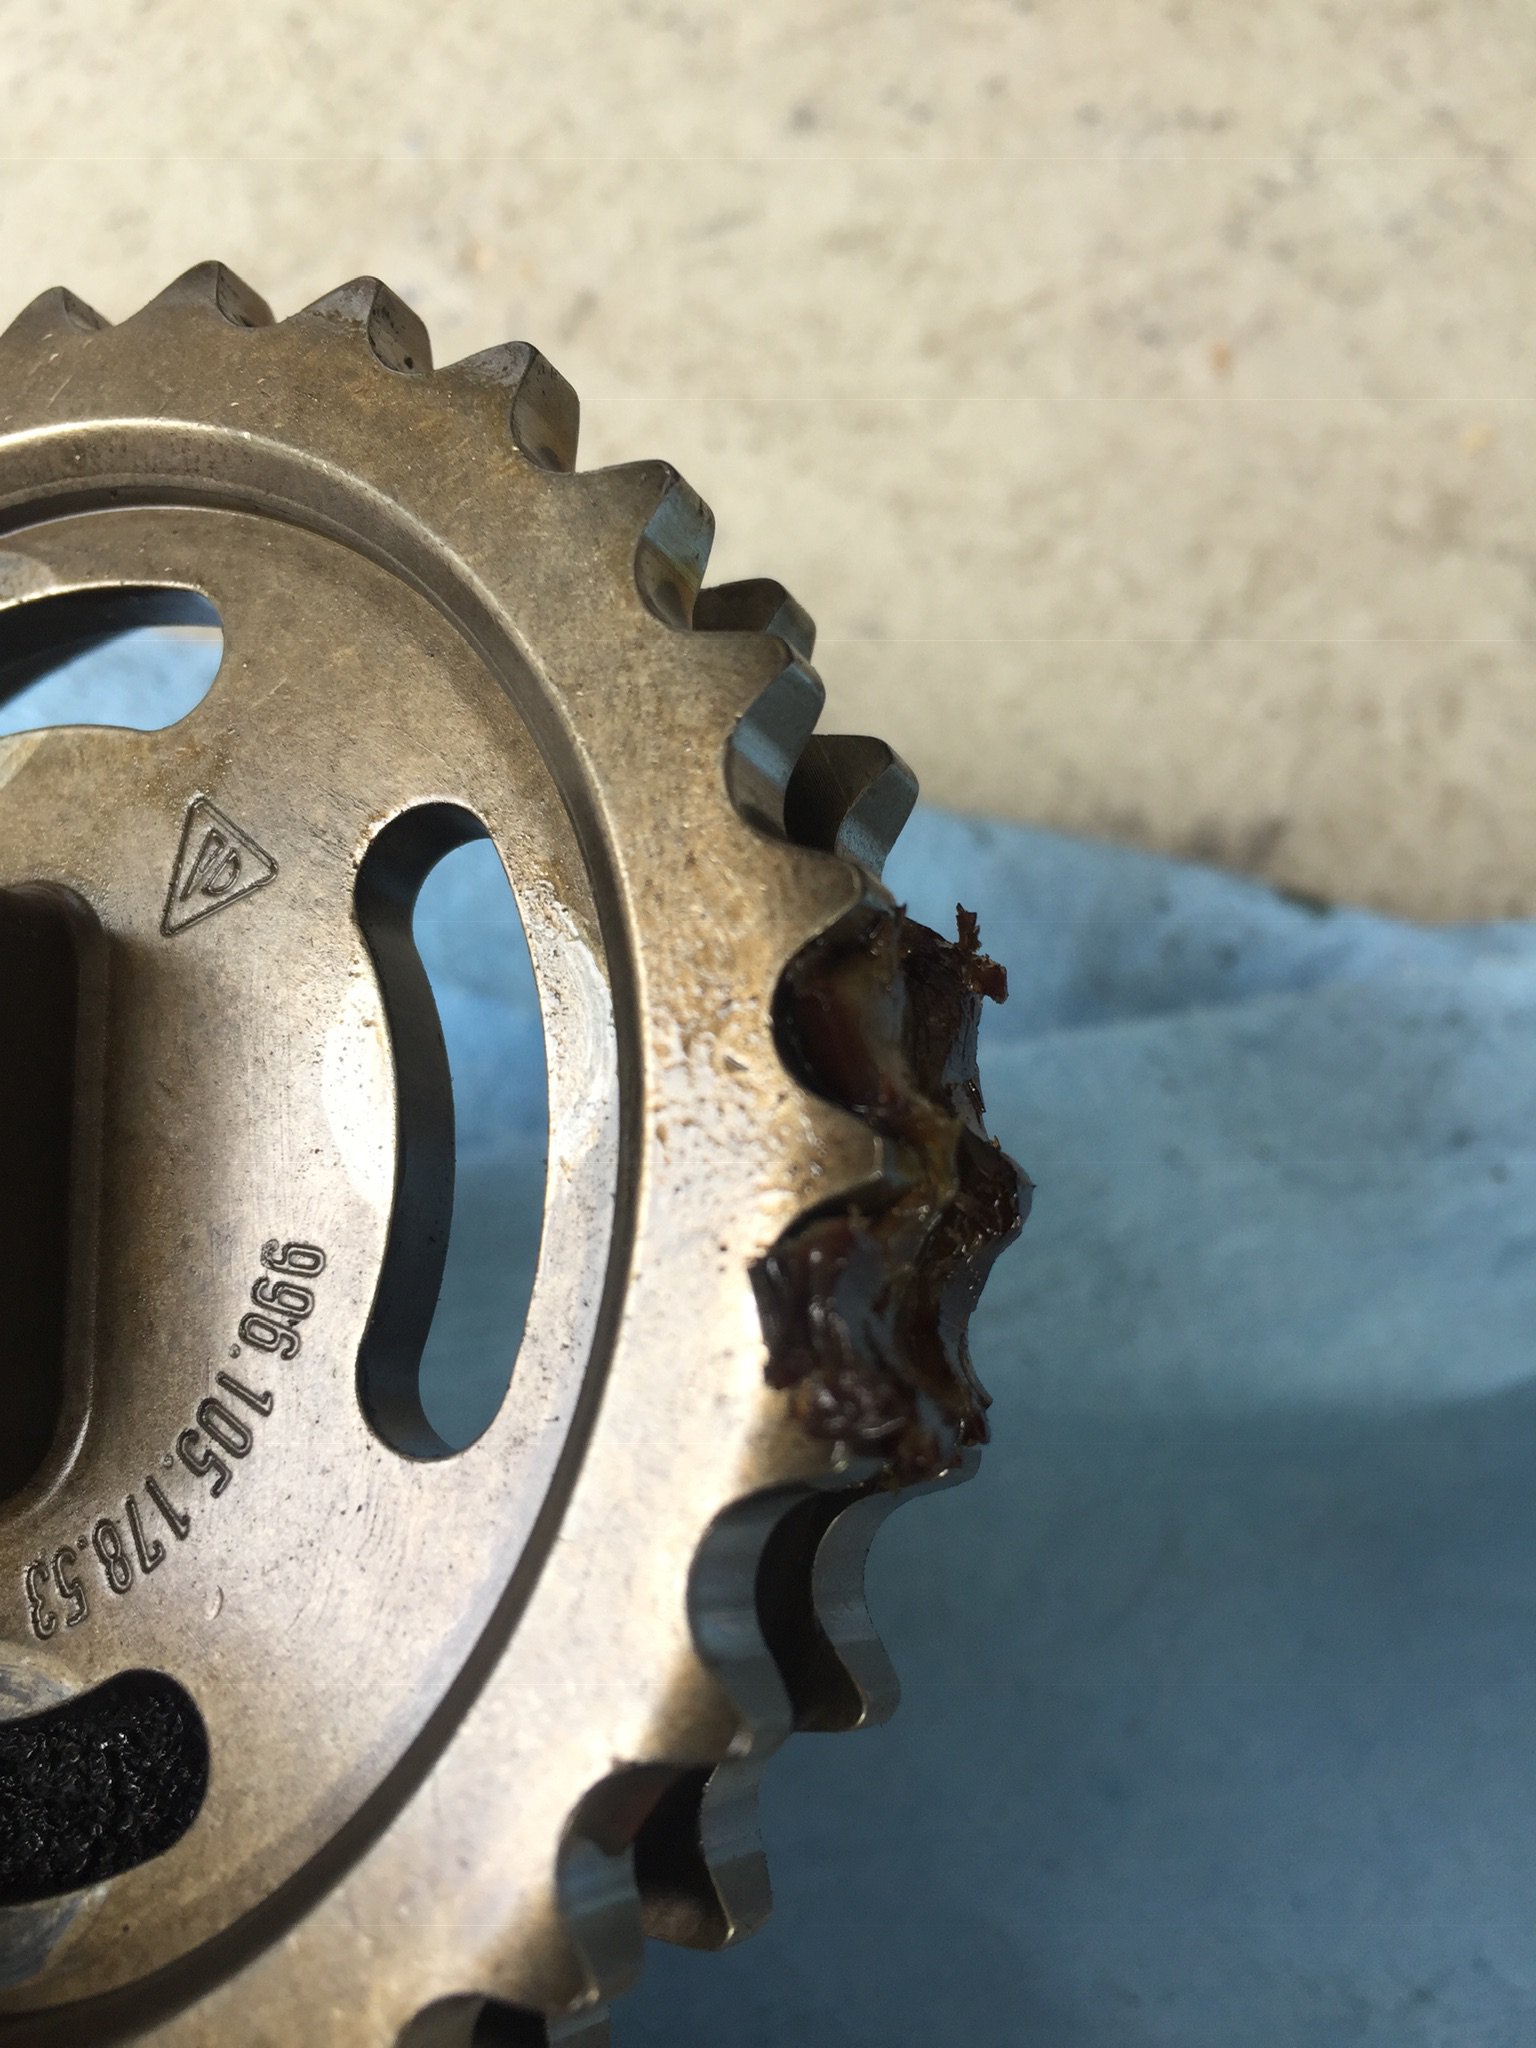
I next pulled the scavenger pump cover off, to take a look at the chain/sprocket. Ah.....this could be a clue....
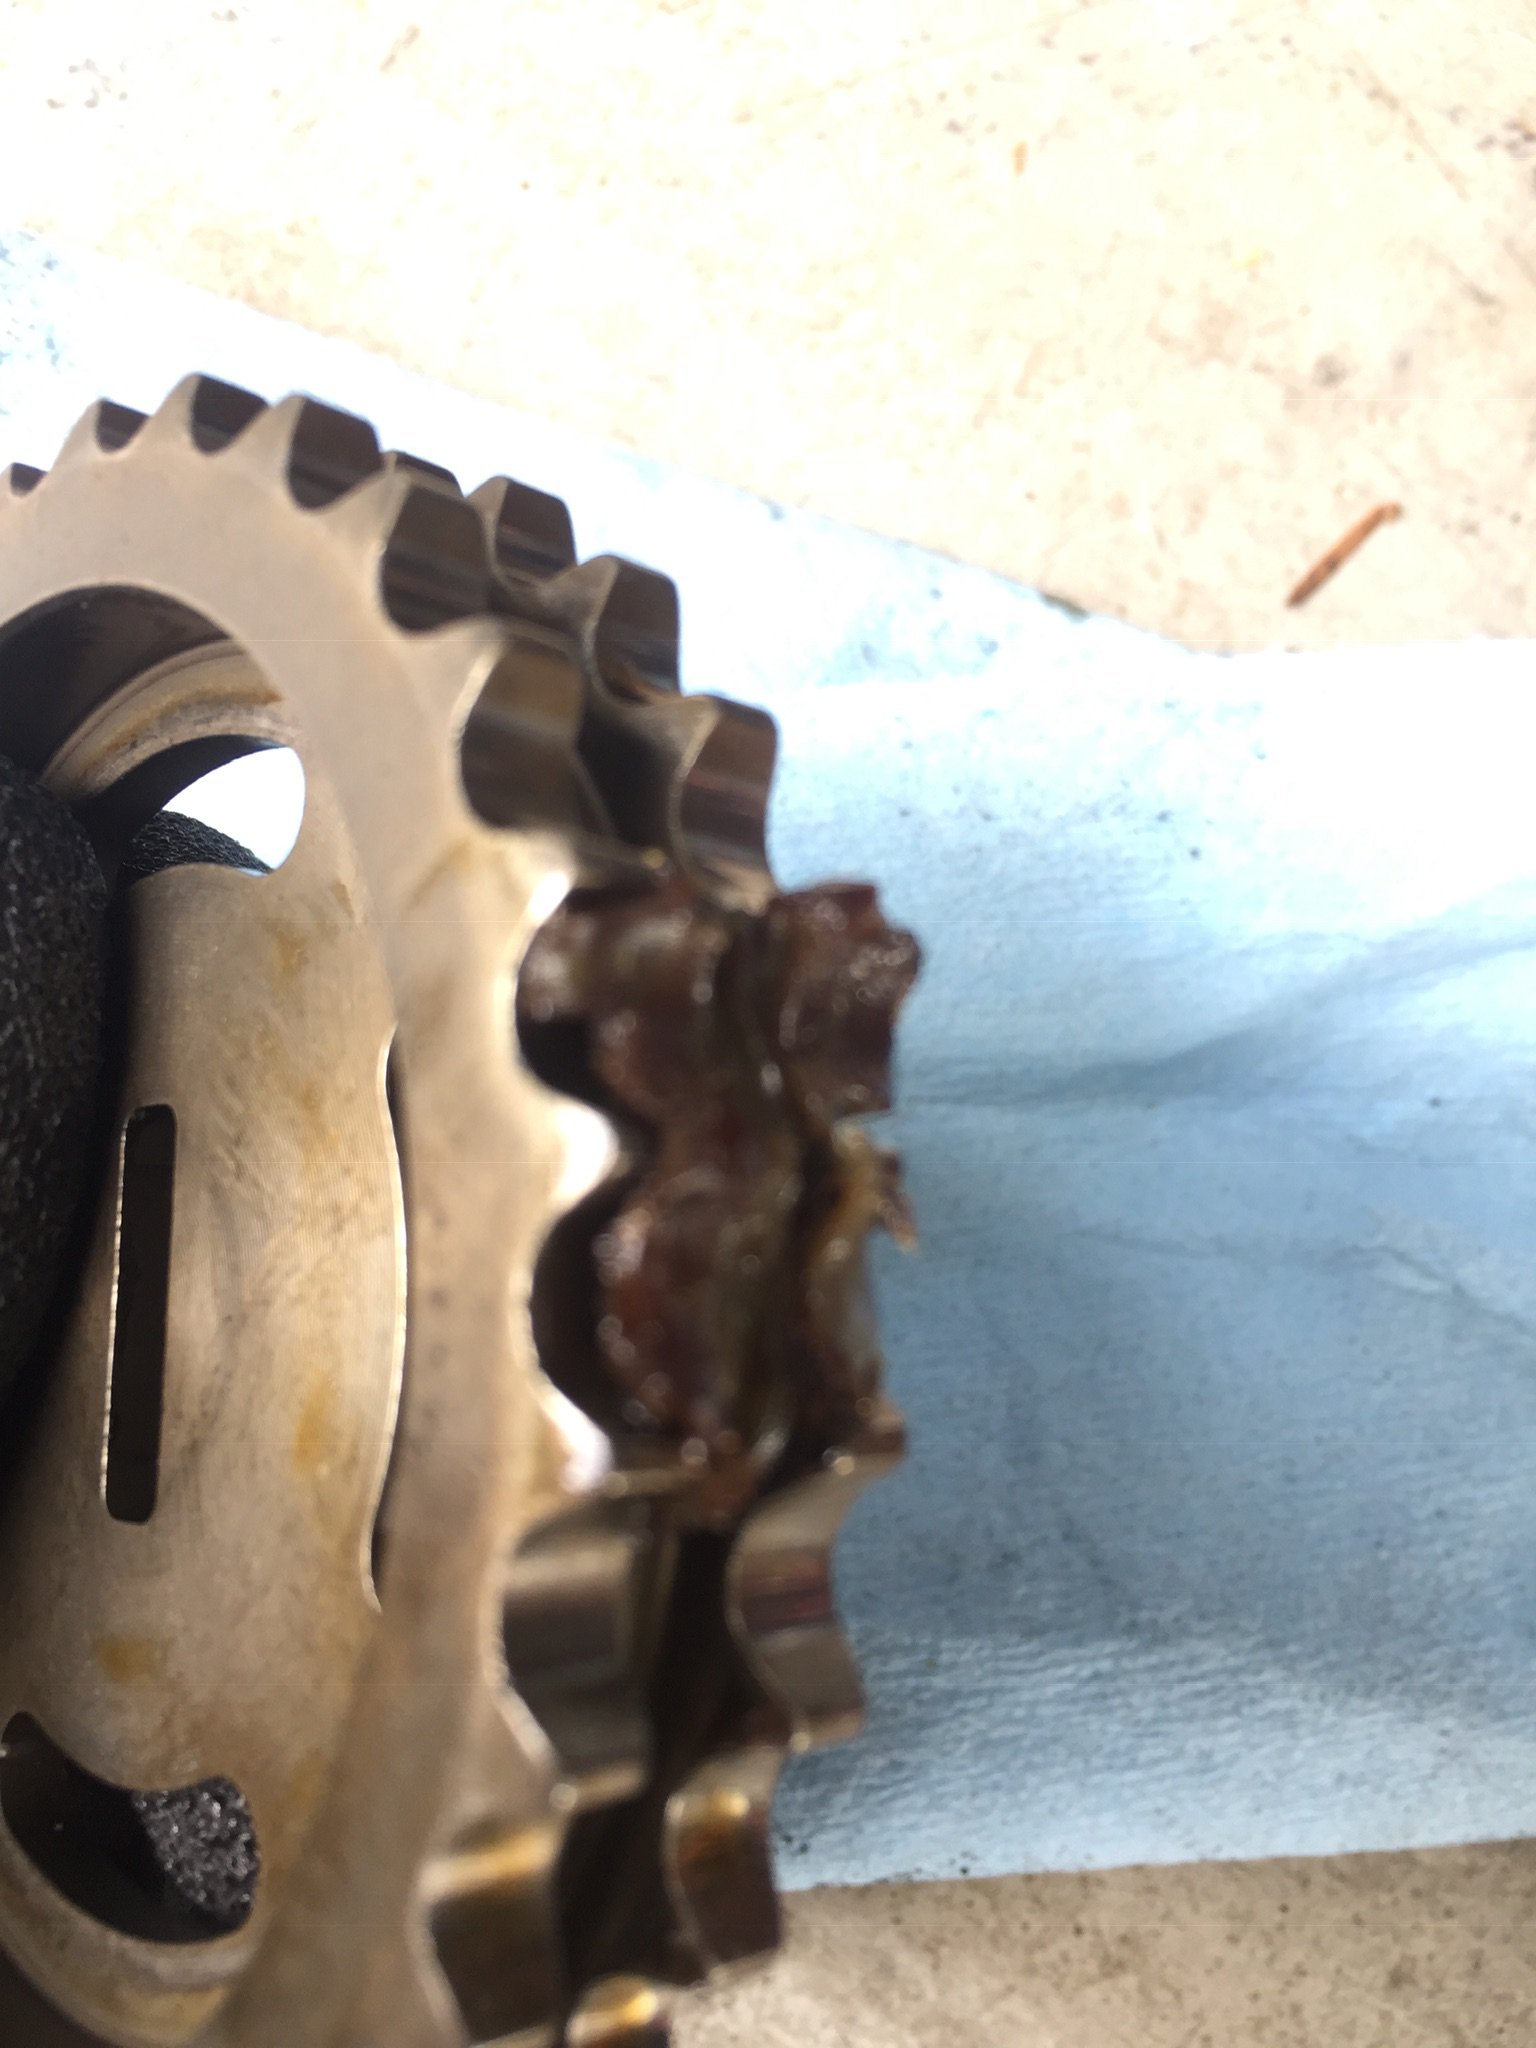
i think I found out why the timing is off. My guess is that someone was in there before to replace the chain rails and guides, but neglected to do a thorough check and left some bits in there. A piece got caught in the sprockets.
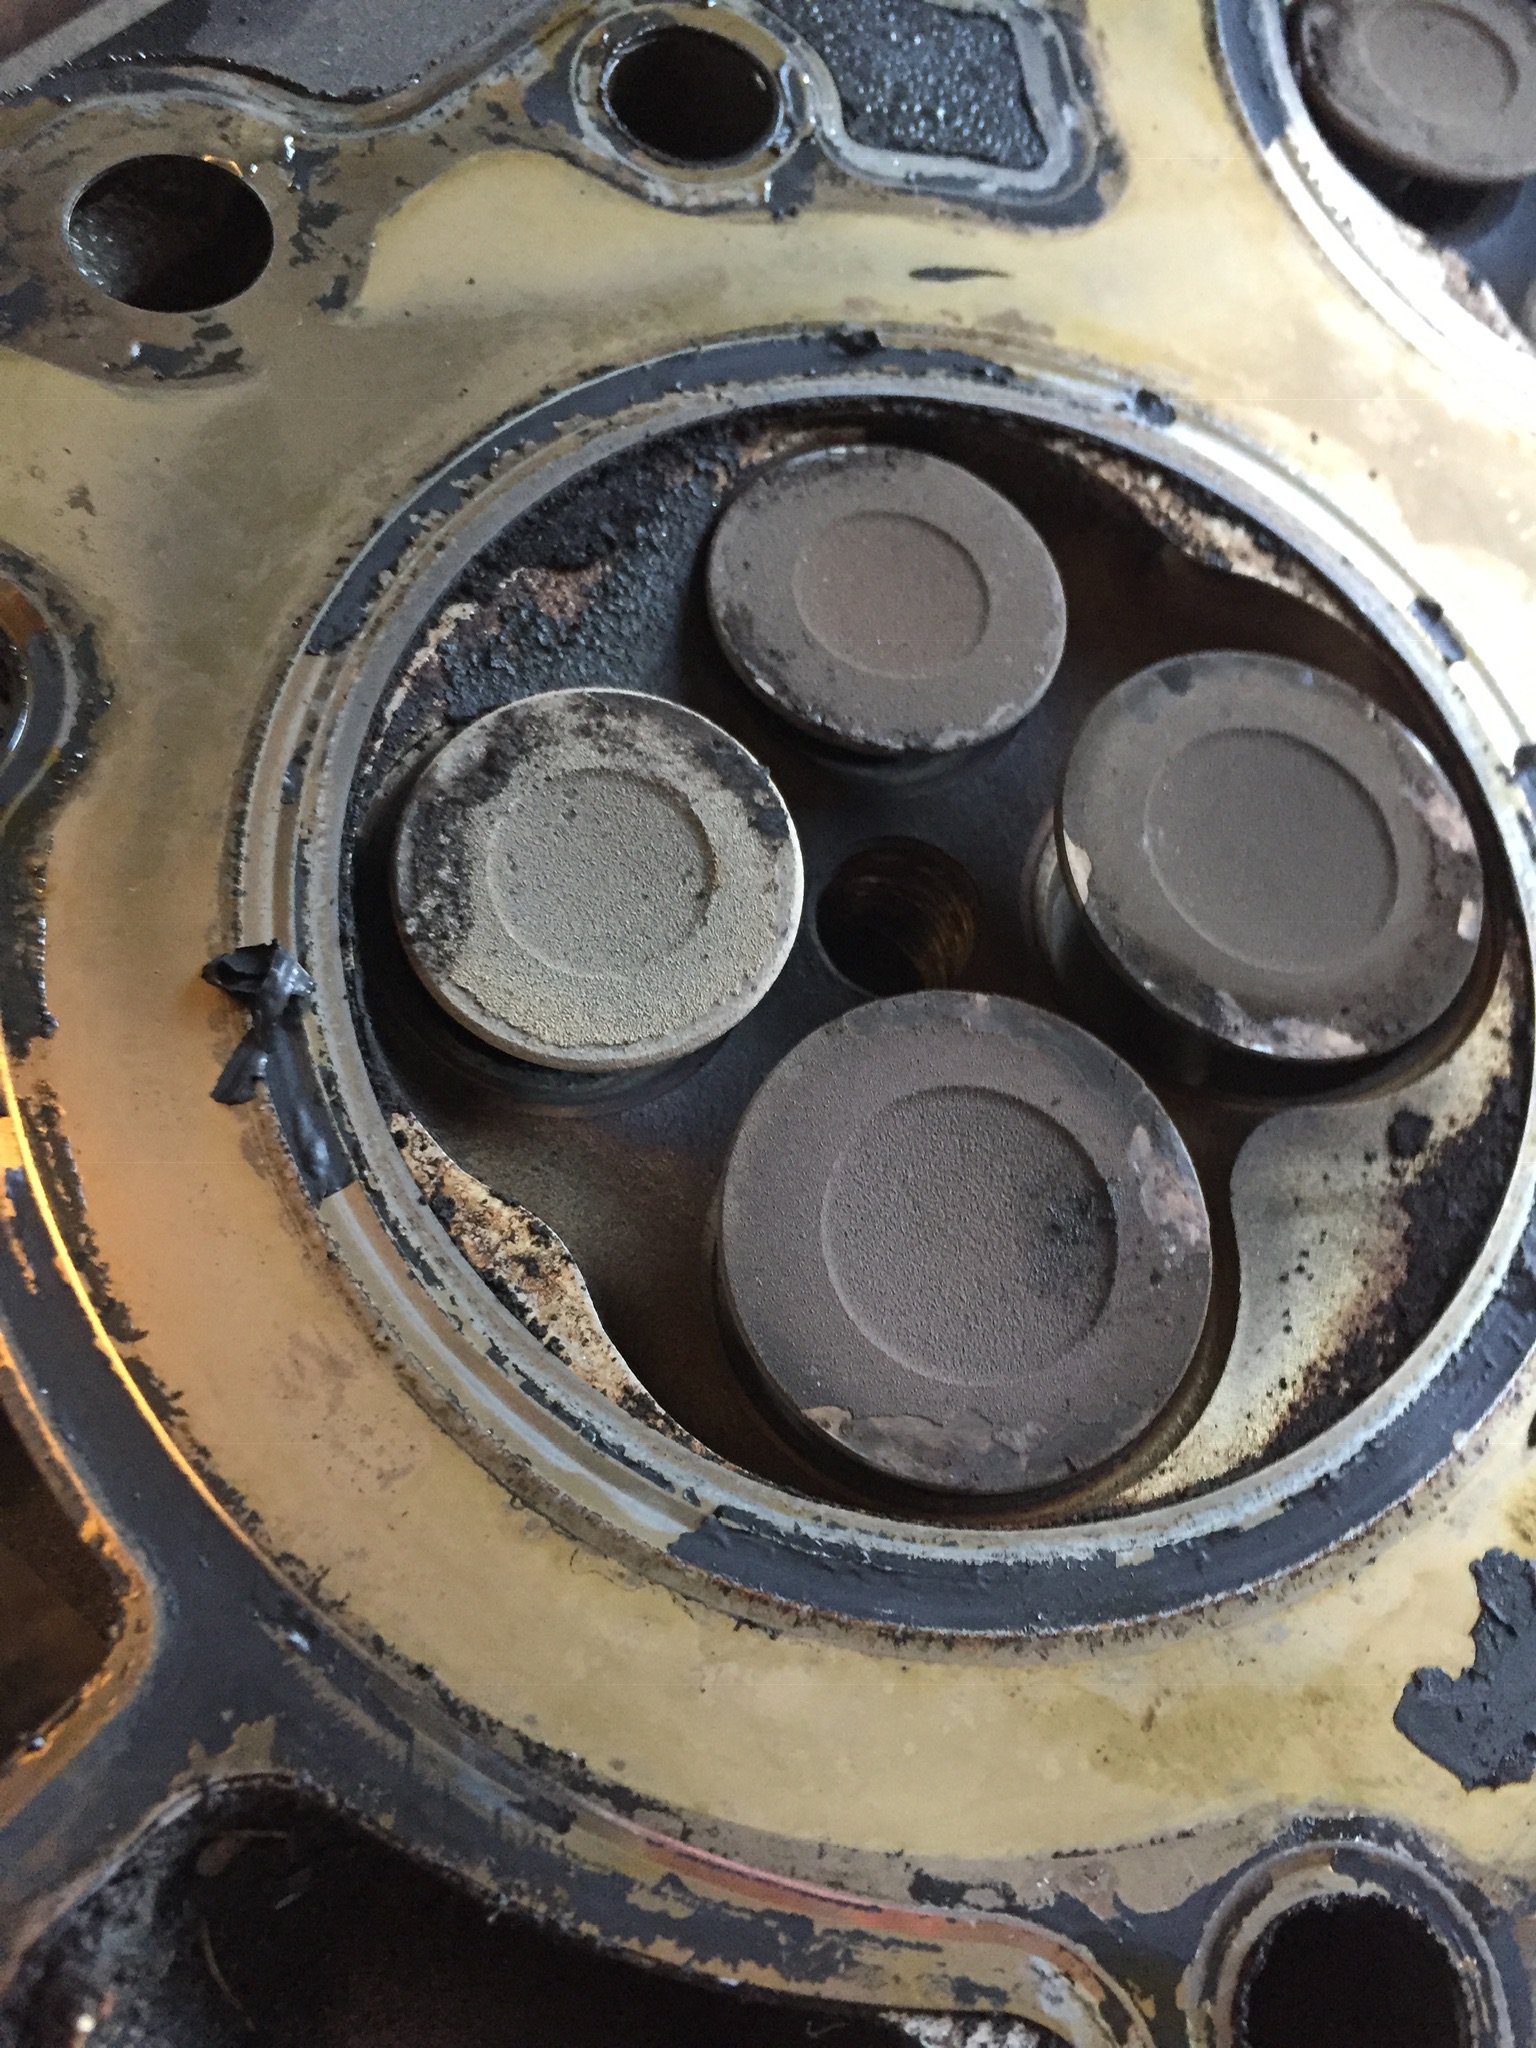
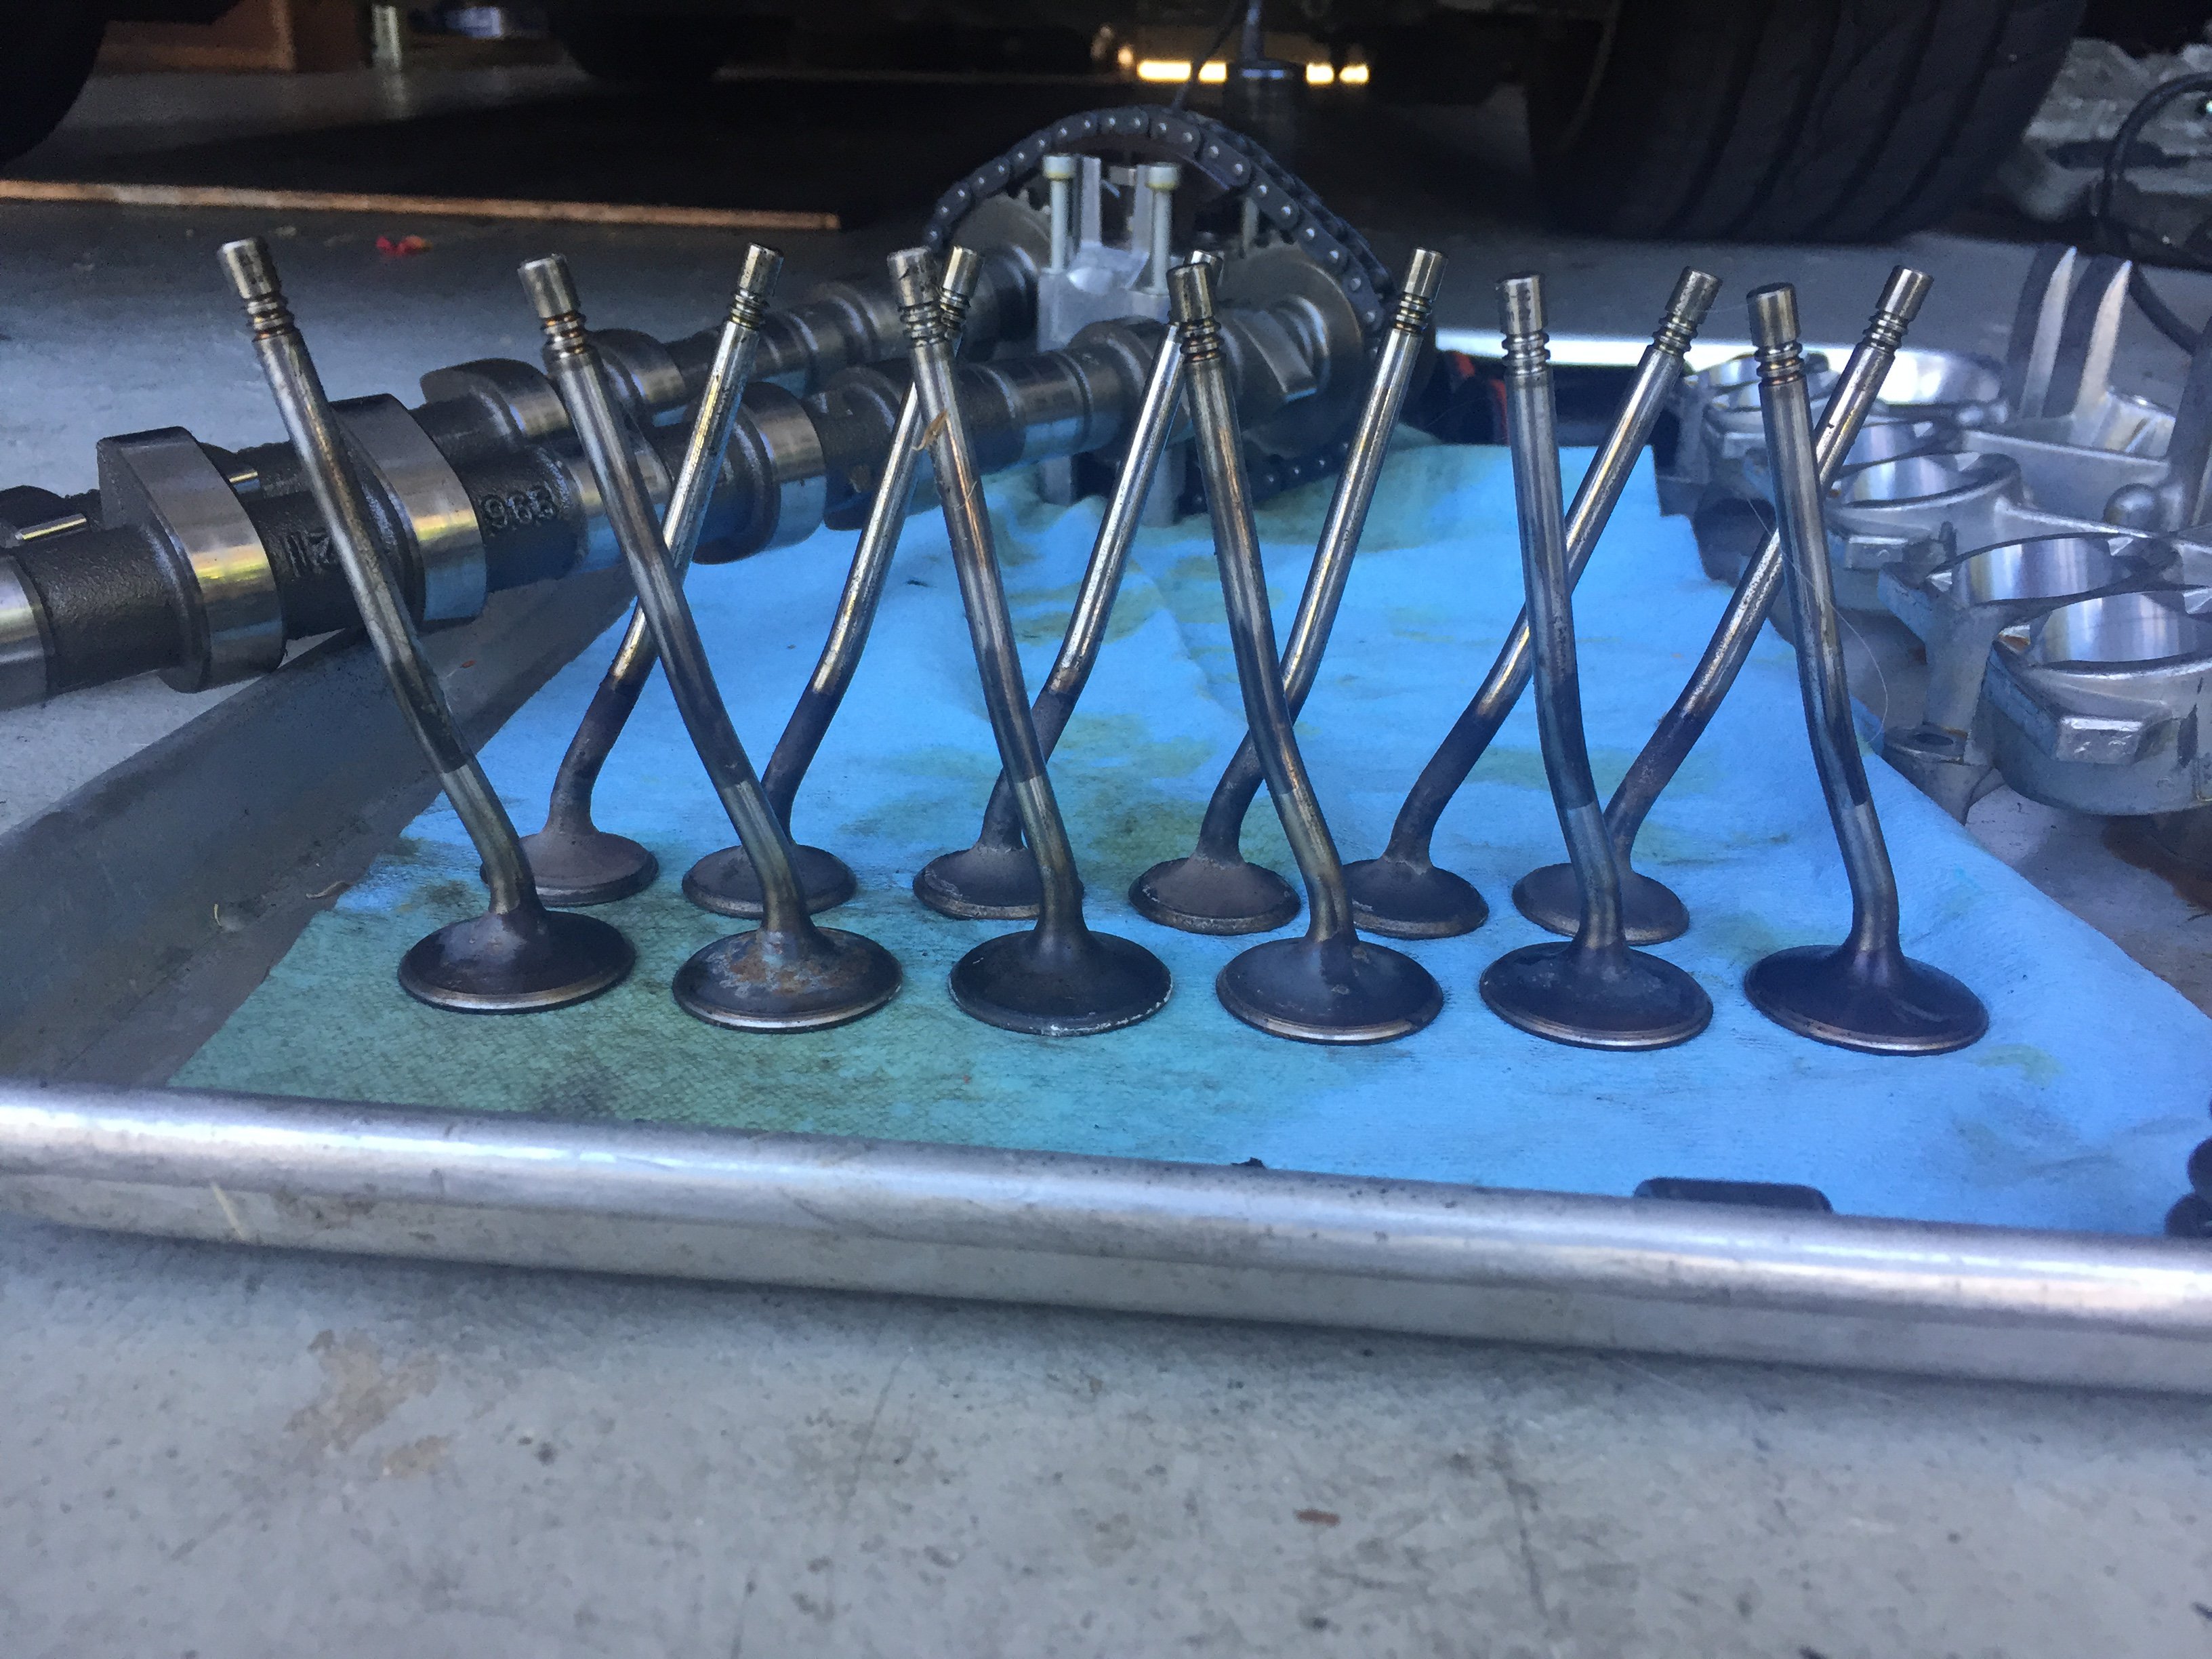
This is is the result of that little bit of plastic:
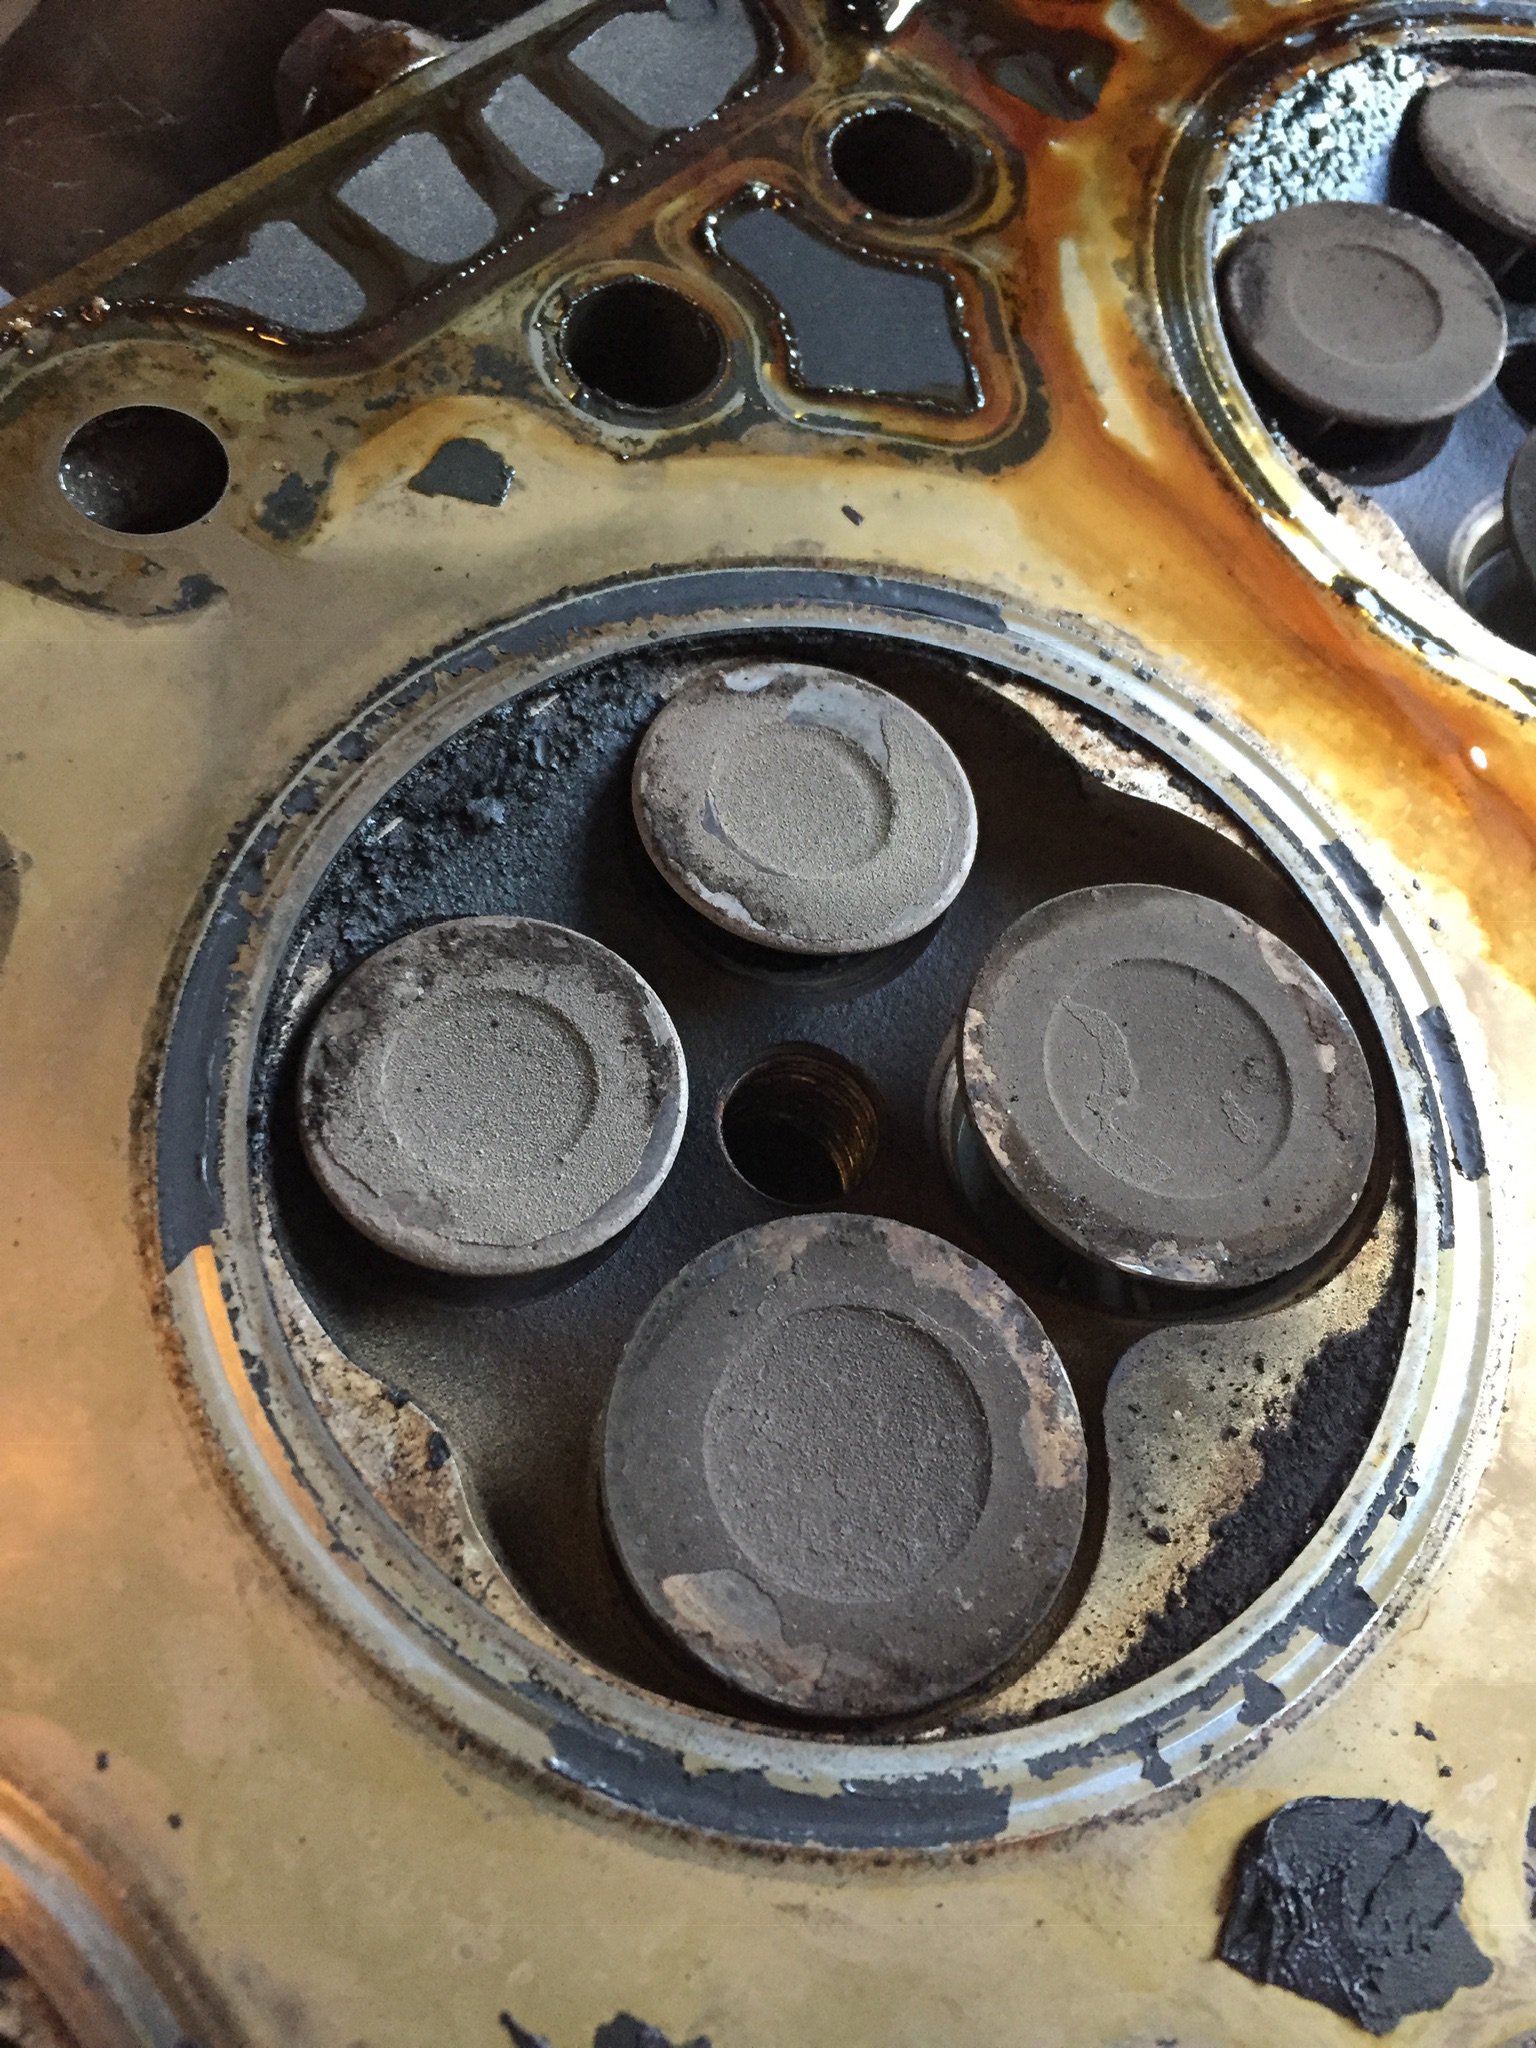
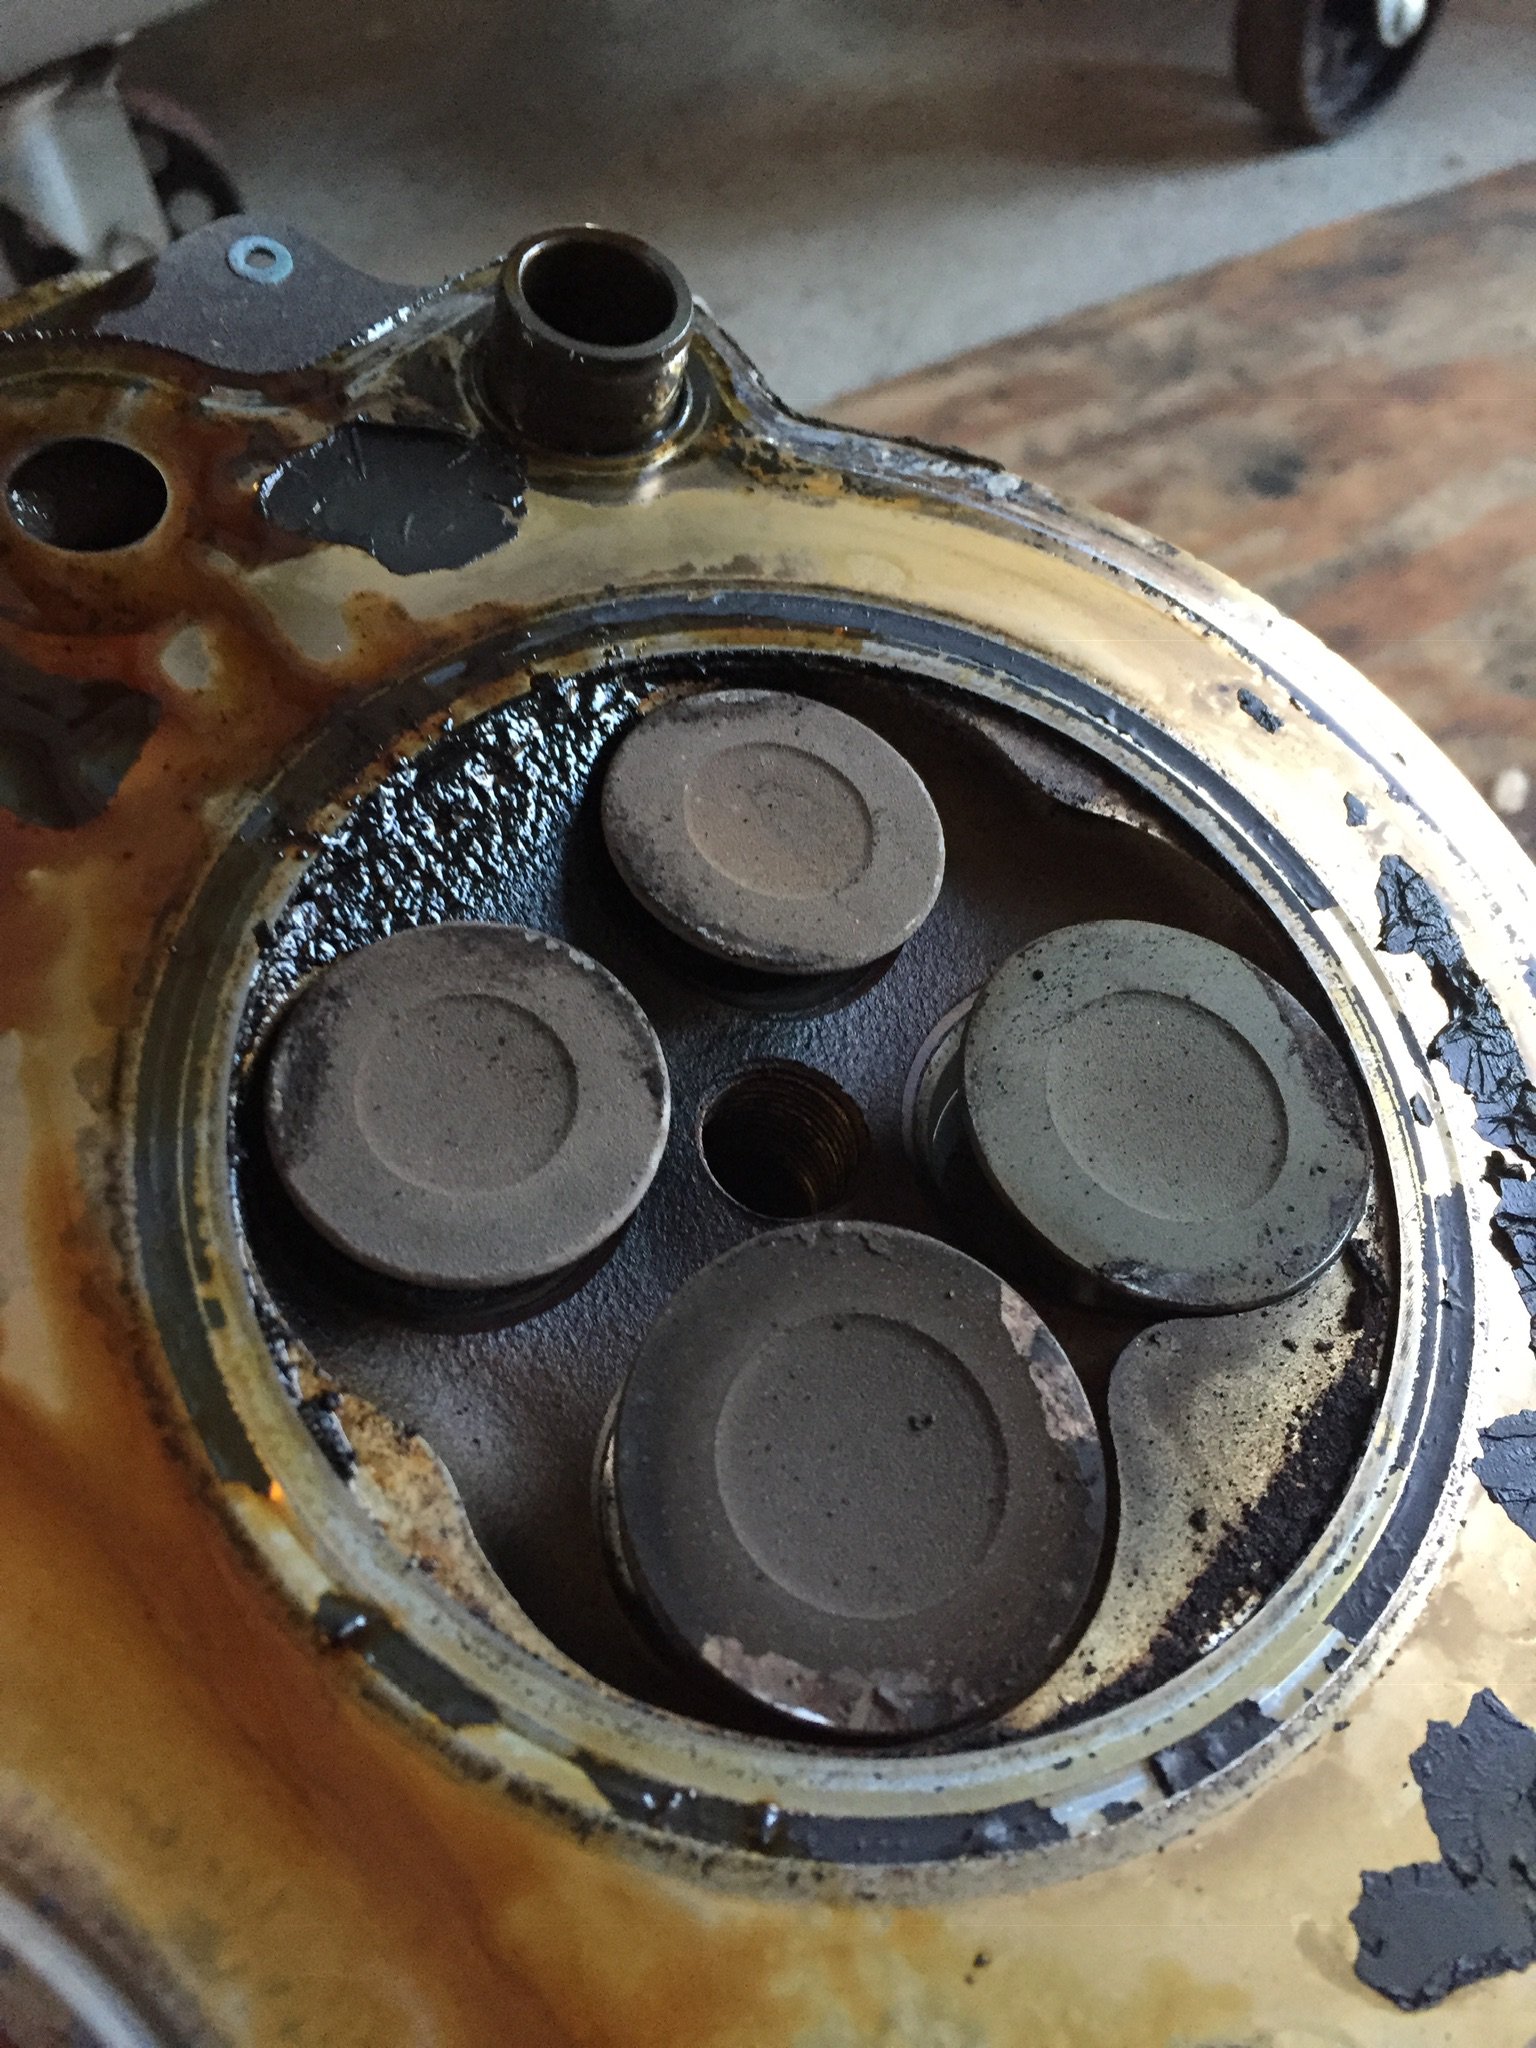
Here is is what the valves looked like:
Now I gotta figure out what I’m going to do next.
For those that have experience with this kind of stuff, what advice would ya give?

-
A few things to help you figure out your problem. Make sure your gears in the spoiler mechanism are good. They are known to wear and not allow the spoiler to retract properly. Also, check the relays in the trunk for proper operation. Physically pull them out and test with a battery and voltmeter. You should hear a click. Read the wiring diagram to determine how to jump the pins on the motor, to make the spoiler go up and down. Not real difficult, and will confirm that mechanically all is good.
Next, check the switch on the kickpanel. Same as the relay. Make sure it is working properly.
Last, realize it is the dash cluster that controls the spoiler extending and retracting at speed. I’ve had to replace a bad cluster before, that prevented the spoiler from operating properly at speed and the dash light was on.
Good luck.
Oh...you’ll be taking the trunk apart.....sorry.
-
His videos are like potato chips......ya can’t watch just one!!!! Thoroughly enjoy all his videos, because he does a top notch job and always willing to share his information.
-
Vacuum fill. Too much is at stake. It works like a champ and isn’t rocket science. Also, make sure other radiator is clean of debris.
-
On 10/7/2018 at 10:43 AM, wizard said:
Well, Ahsai and JFP are far more experienced and knowledgeable than I am but could it be something as simple as the electrical component of the ignition switch, I wonder?
That is a common problem and I had to replace mine years ago (2003 Boxster) but I can't remember the symptoms.
This is indeed a common problem, and an easy one to troubleshoot. Not overly expensive.
-
I agree about the cluster, although I have an extra one I can put in there. That is why I was trying to figure out whether the switch by the fuses is switching the ground or the power. From what the schematic looks like, it must be switching the ground. If that is the case, then the instrument cluster must be sending out voltage to activate the control side of the relays.
I have pretty much everything figured out from there.
Anybody's input would help.
-
Hi Loren, thanks for responding. I figured out how to apply current to the motor leads to retract and extend, by swapping power/ground on the Yellow/Green and Blue/Green wires. Motor works fine.
Also tested the relays and the switch by the fuse panel, all good. I can trace power from the fuse on D7 to the relays and to the spoiler motor.
I see the switch is wired through the instrument cluster.
is the switch and instrument panel switching the ground?
I think it might be a bad insturment cluster.
-
I guess nobody has any knowledge of how our rear spoiler works.......
I should of said something about the IMS bearing, that would have gotten a response. Lol.
-
-
Spoiler doesn’t extend at speed, nor does it work with the switch. The spoiler light comes on in the dash at speed. Swapped in another spoiler mechanism, thinking it might be a bad mechanism, and no luck there. All fuses and relays have been replaced.
HOWEVER, with the manual switch (by fuse box) unplugged, and I connect the rear wiring harness to the spoiler unit, I can hear the relay clock, and it will raise the spoiler about 1/2” and stop. If I unplug and plug back in, it will go up another 1/2”. I kept doing this (duh!!!)
Now I have a fully extended spoiler, with no way to retract. I have the wiring diagram from Bentley manual.
Any troublemshooting advice? What wires should I apply 12v power to, to retract? Any and all advice is helpful.
Also, I tried to make heads or tails of the wiring diagram. I’m more mechanical oriented than automotive electronics. I just got a headache!!
-
Thanks for letting us know how it turned out! Did you figure it out, or the desler??
-
Just a thought. Check the Parking break and see if that allows it to continue. I am trying to think of things that would cause it to stop, while in operation. Fob has nothing to do with it, IMHO....
-
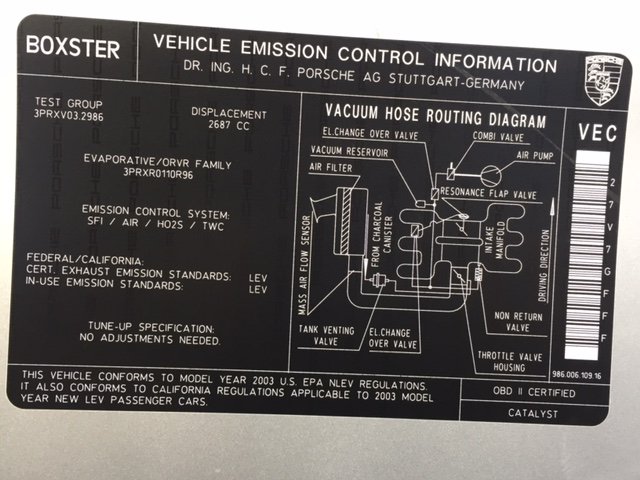
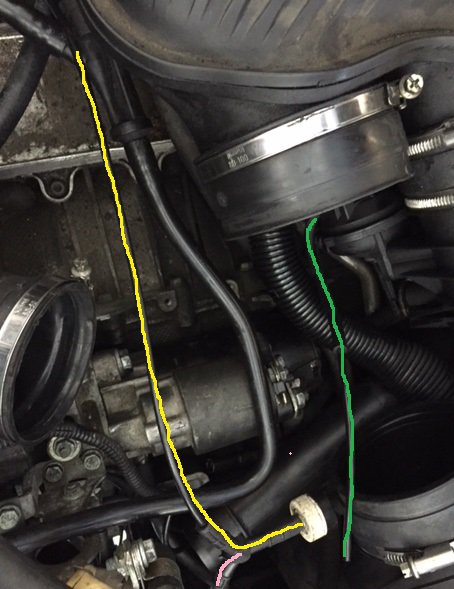
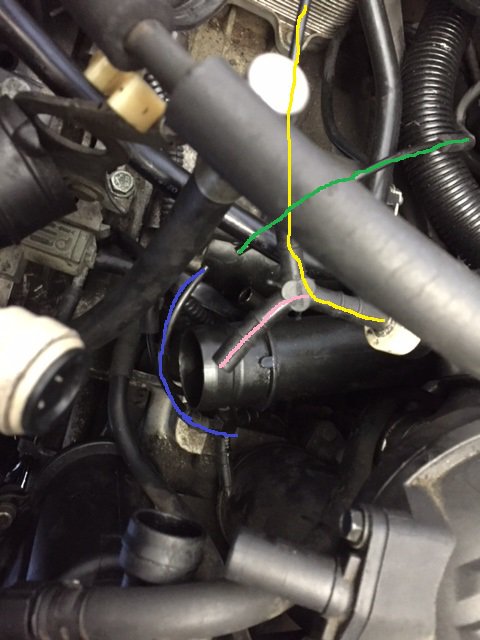
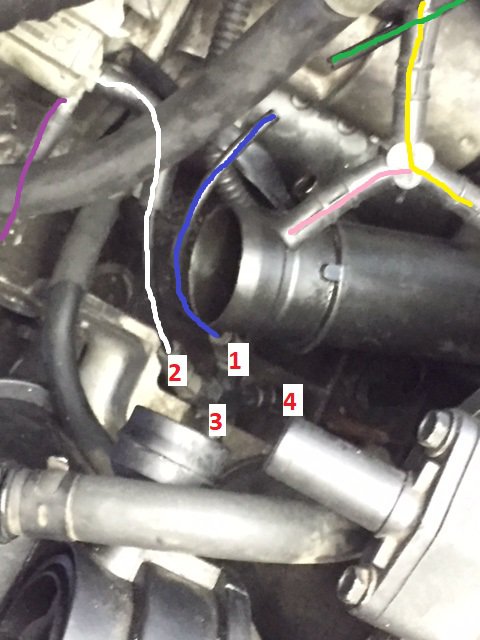
I need some help reconnecting the vacuum hoses on my '03. Had to remove tiptronic to repair it, and either have a broken vacuum hose, and/or am as lost as I can be. I can't figure it out. Here is the vacuum diagram from the trunk. Part of the problem is, that I can't identify all the parts.
The "white" connector goes into the intake. Off of that is a "Y". The "Yellow" line (vacuum hose) goes nowhere that I can tell. I am sure it connects somewhere, I just can't tell where. It is long.
The "Pink" end of the "Y" is open. I am sure something sticks in there, just not too sure what.
The "Green" line (vacuum hose) connects to what I believe is the Resonance Flap Valve. However, it is either broken (and connects with the "Blue" line (vacuum hose)), or inserts into the "Pink" end of the "Y". Not too sure which.
The other end of the "Blue" line (vacuum hose) connects to a 4 way "Cross fitting", that connects to the vacuum reservoir. Shown as connection #1 below.
I guess the upper end of the "Blue line" (vacuum hose) could connect to the "Pink" arm of the "Y". Again, not too sure.
It is entirely possible, that the "Blue" and "Green" line is a broken line. If this is the case, not too sure what would plug into the "Pink" on the "Y".
#2 "White" line (vacuum line) attaches to a switch, that I believe is associated with the tiptronic transmission. The lower end of the hose connects to the "Cross" fitting that is by the vacuum reservoir.
The "Purple" line (vacuum line) is attached to a valve that controls coolant that goes to the tiptronic.
#3 Line disappears somewhere deep into the engine somewhere.
Can anyone help?
Thanks!
-
I think I found my issue.......
When I reinstalled the valve body, I neglected to make sure the selector tab was inserted into the piston. I hate removing things and reinstalling because I was stupid!
-
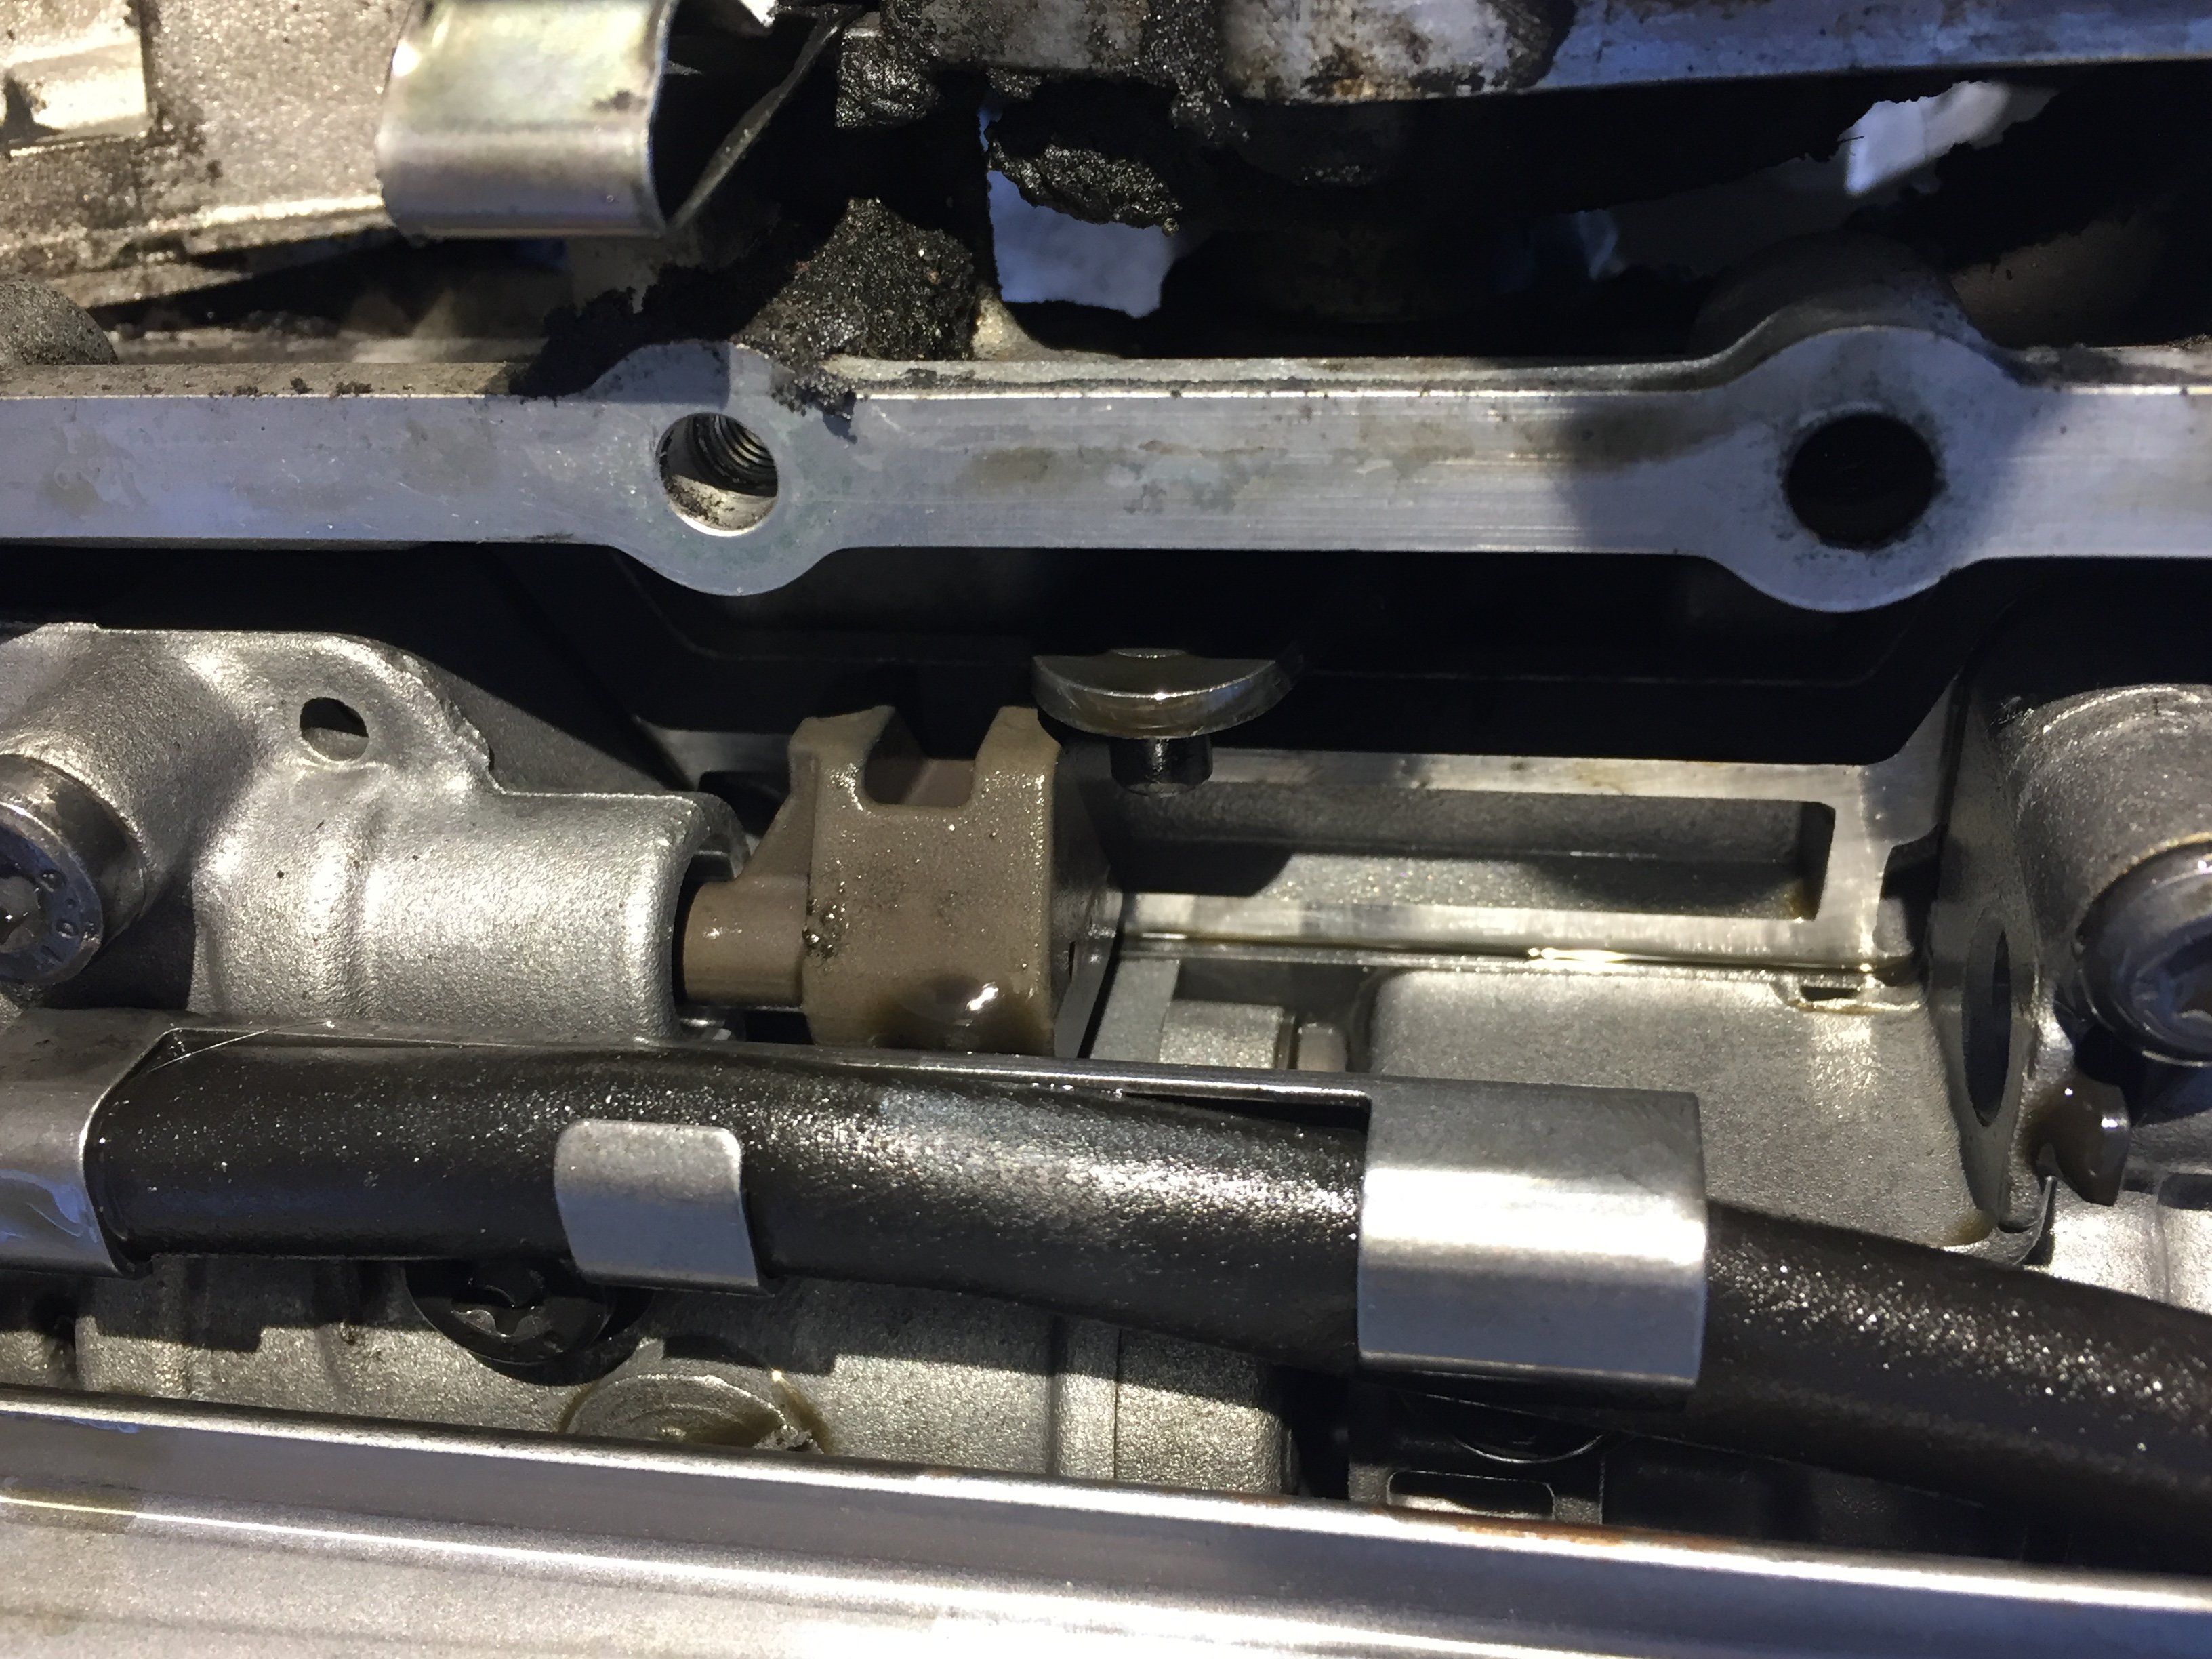
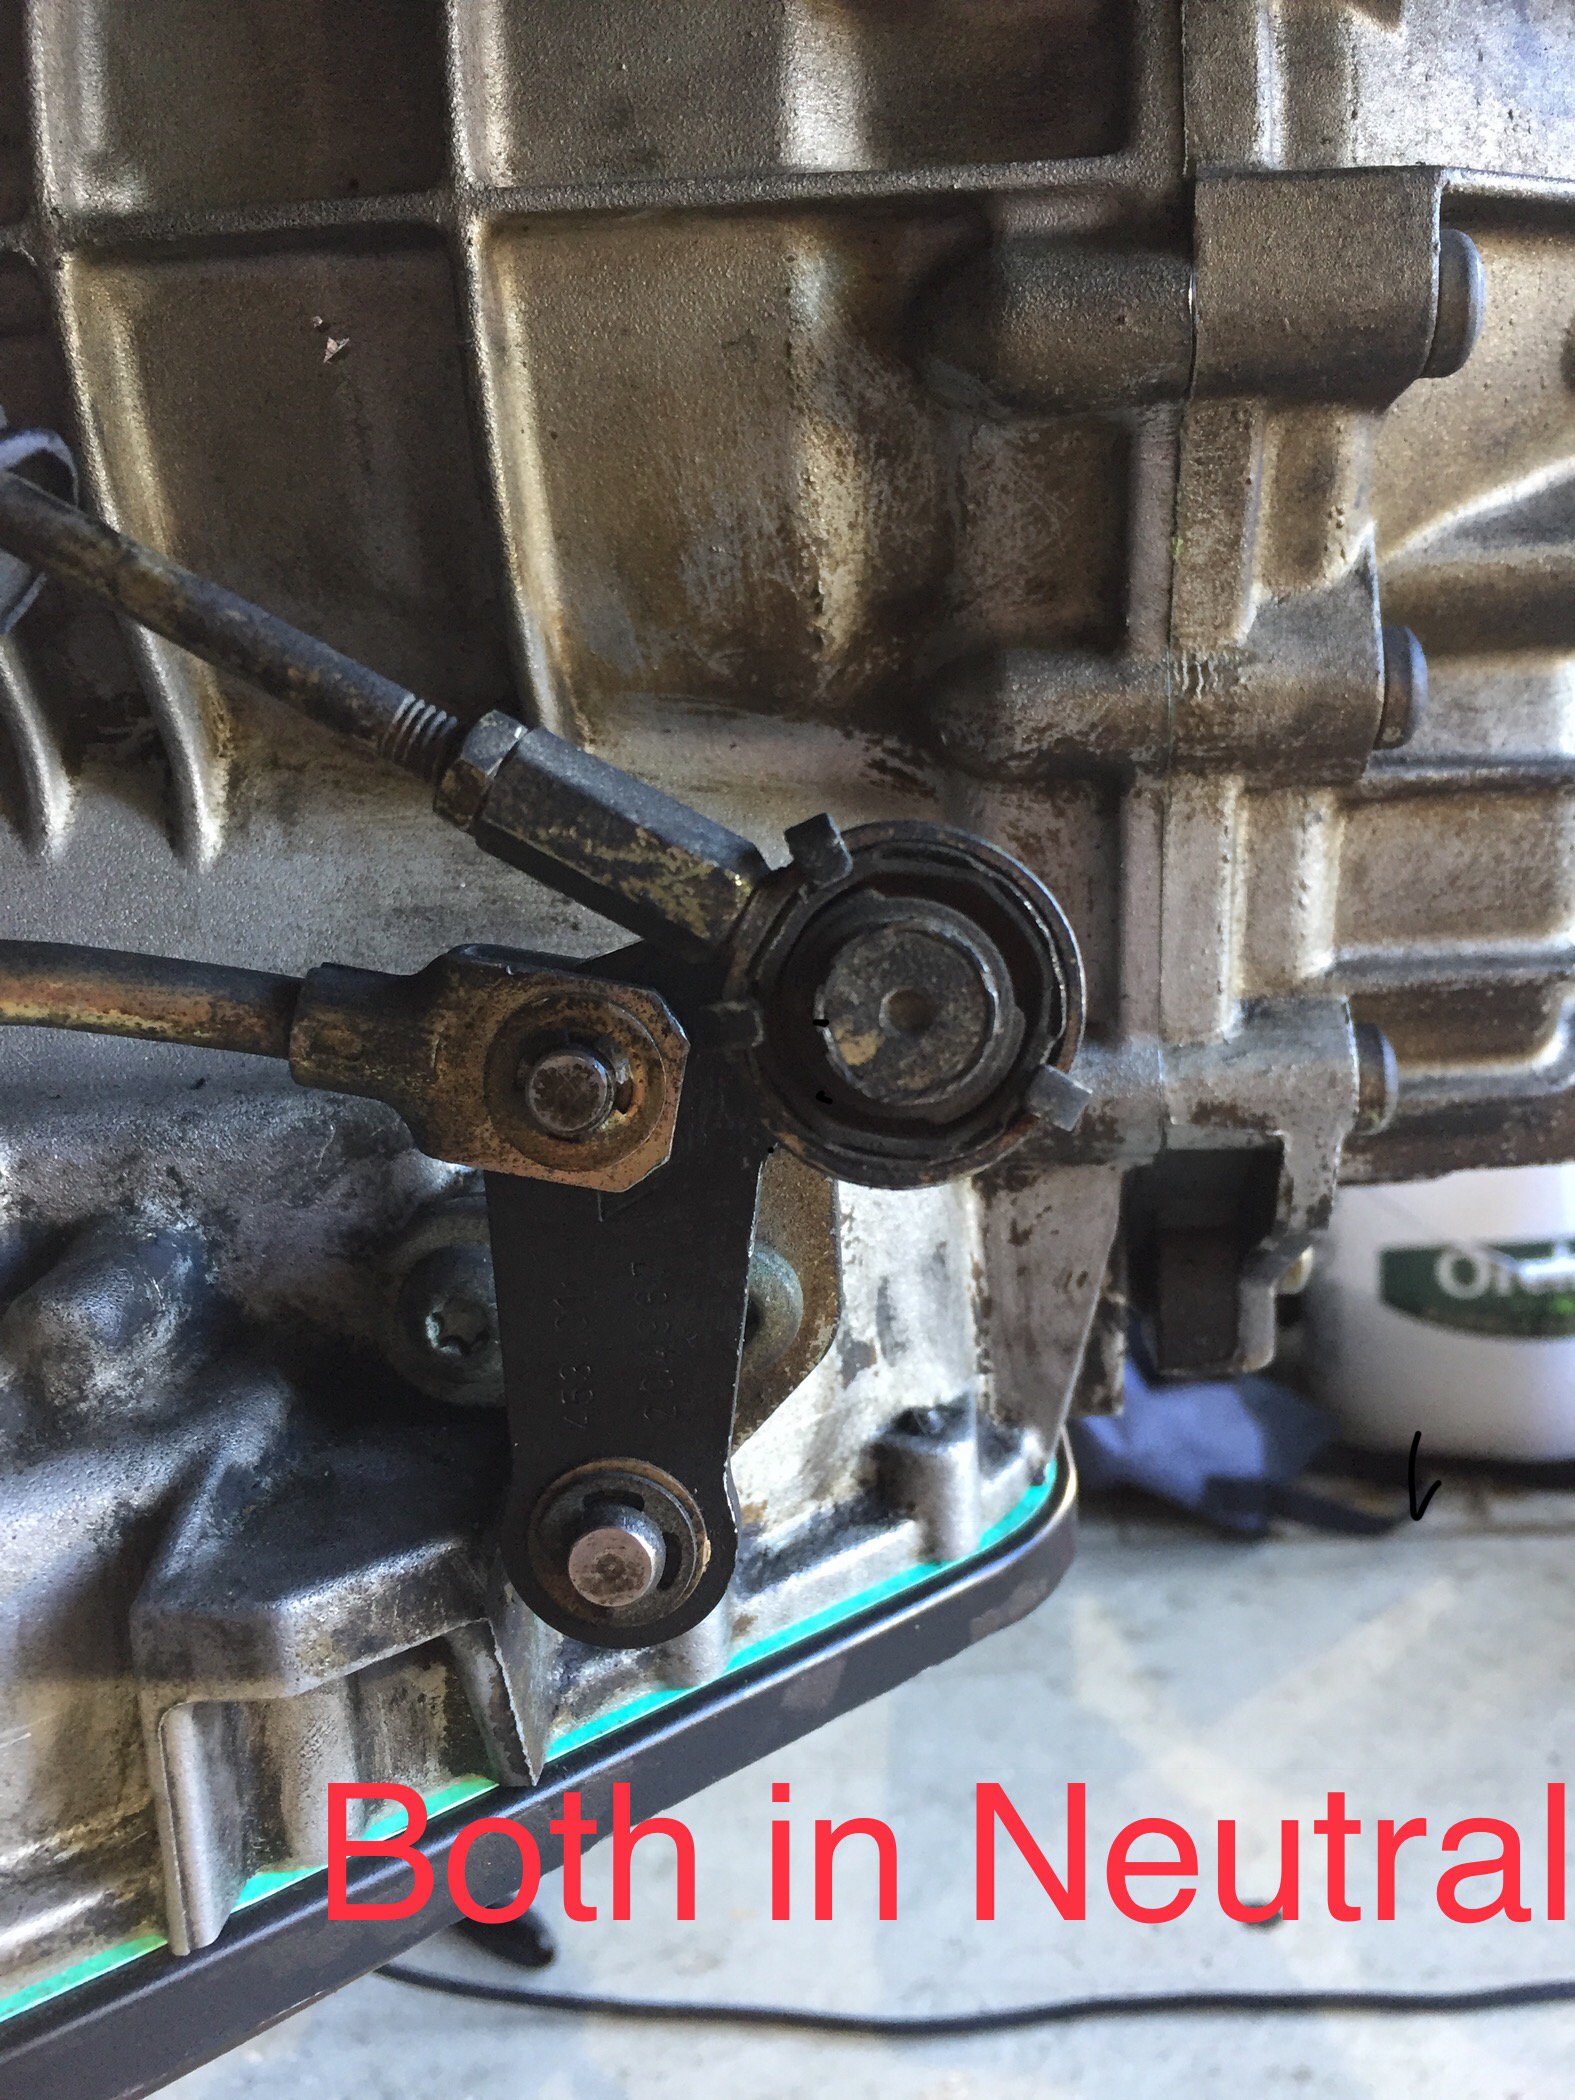
Had to remove the tiptronic to replace the trans oil pump and torque converter. Naturally, this involved removing a lot of the guts of the transmission. All seemed to go back into place with ease. The transmission is back in the car and electronic connectors back in place. However, when I tried to put the cable back on the shift knob ON THE TRANSMISSION, with the gear selector in PARK, the end of the cable was off, because the transmission shift selector would not move into the PARK position. The furthest back it would go is REVERSE.
The position of the transmission was verified by the indicator on the dash readout. In Reverse, the two ends lines up perfectly and they did in neutral. If I connect the cable to the transmission mounting point, the gear selector will not go into park, because the shifting mechanism on the transmission is preventing it.
I did did not remove the shifting mechanism on the transmission, nor did I mess with the shift cable or gear shift in the car.
What would prevent the gear shifting mechanism (on the transmission) from being manually into the park position?
-
-
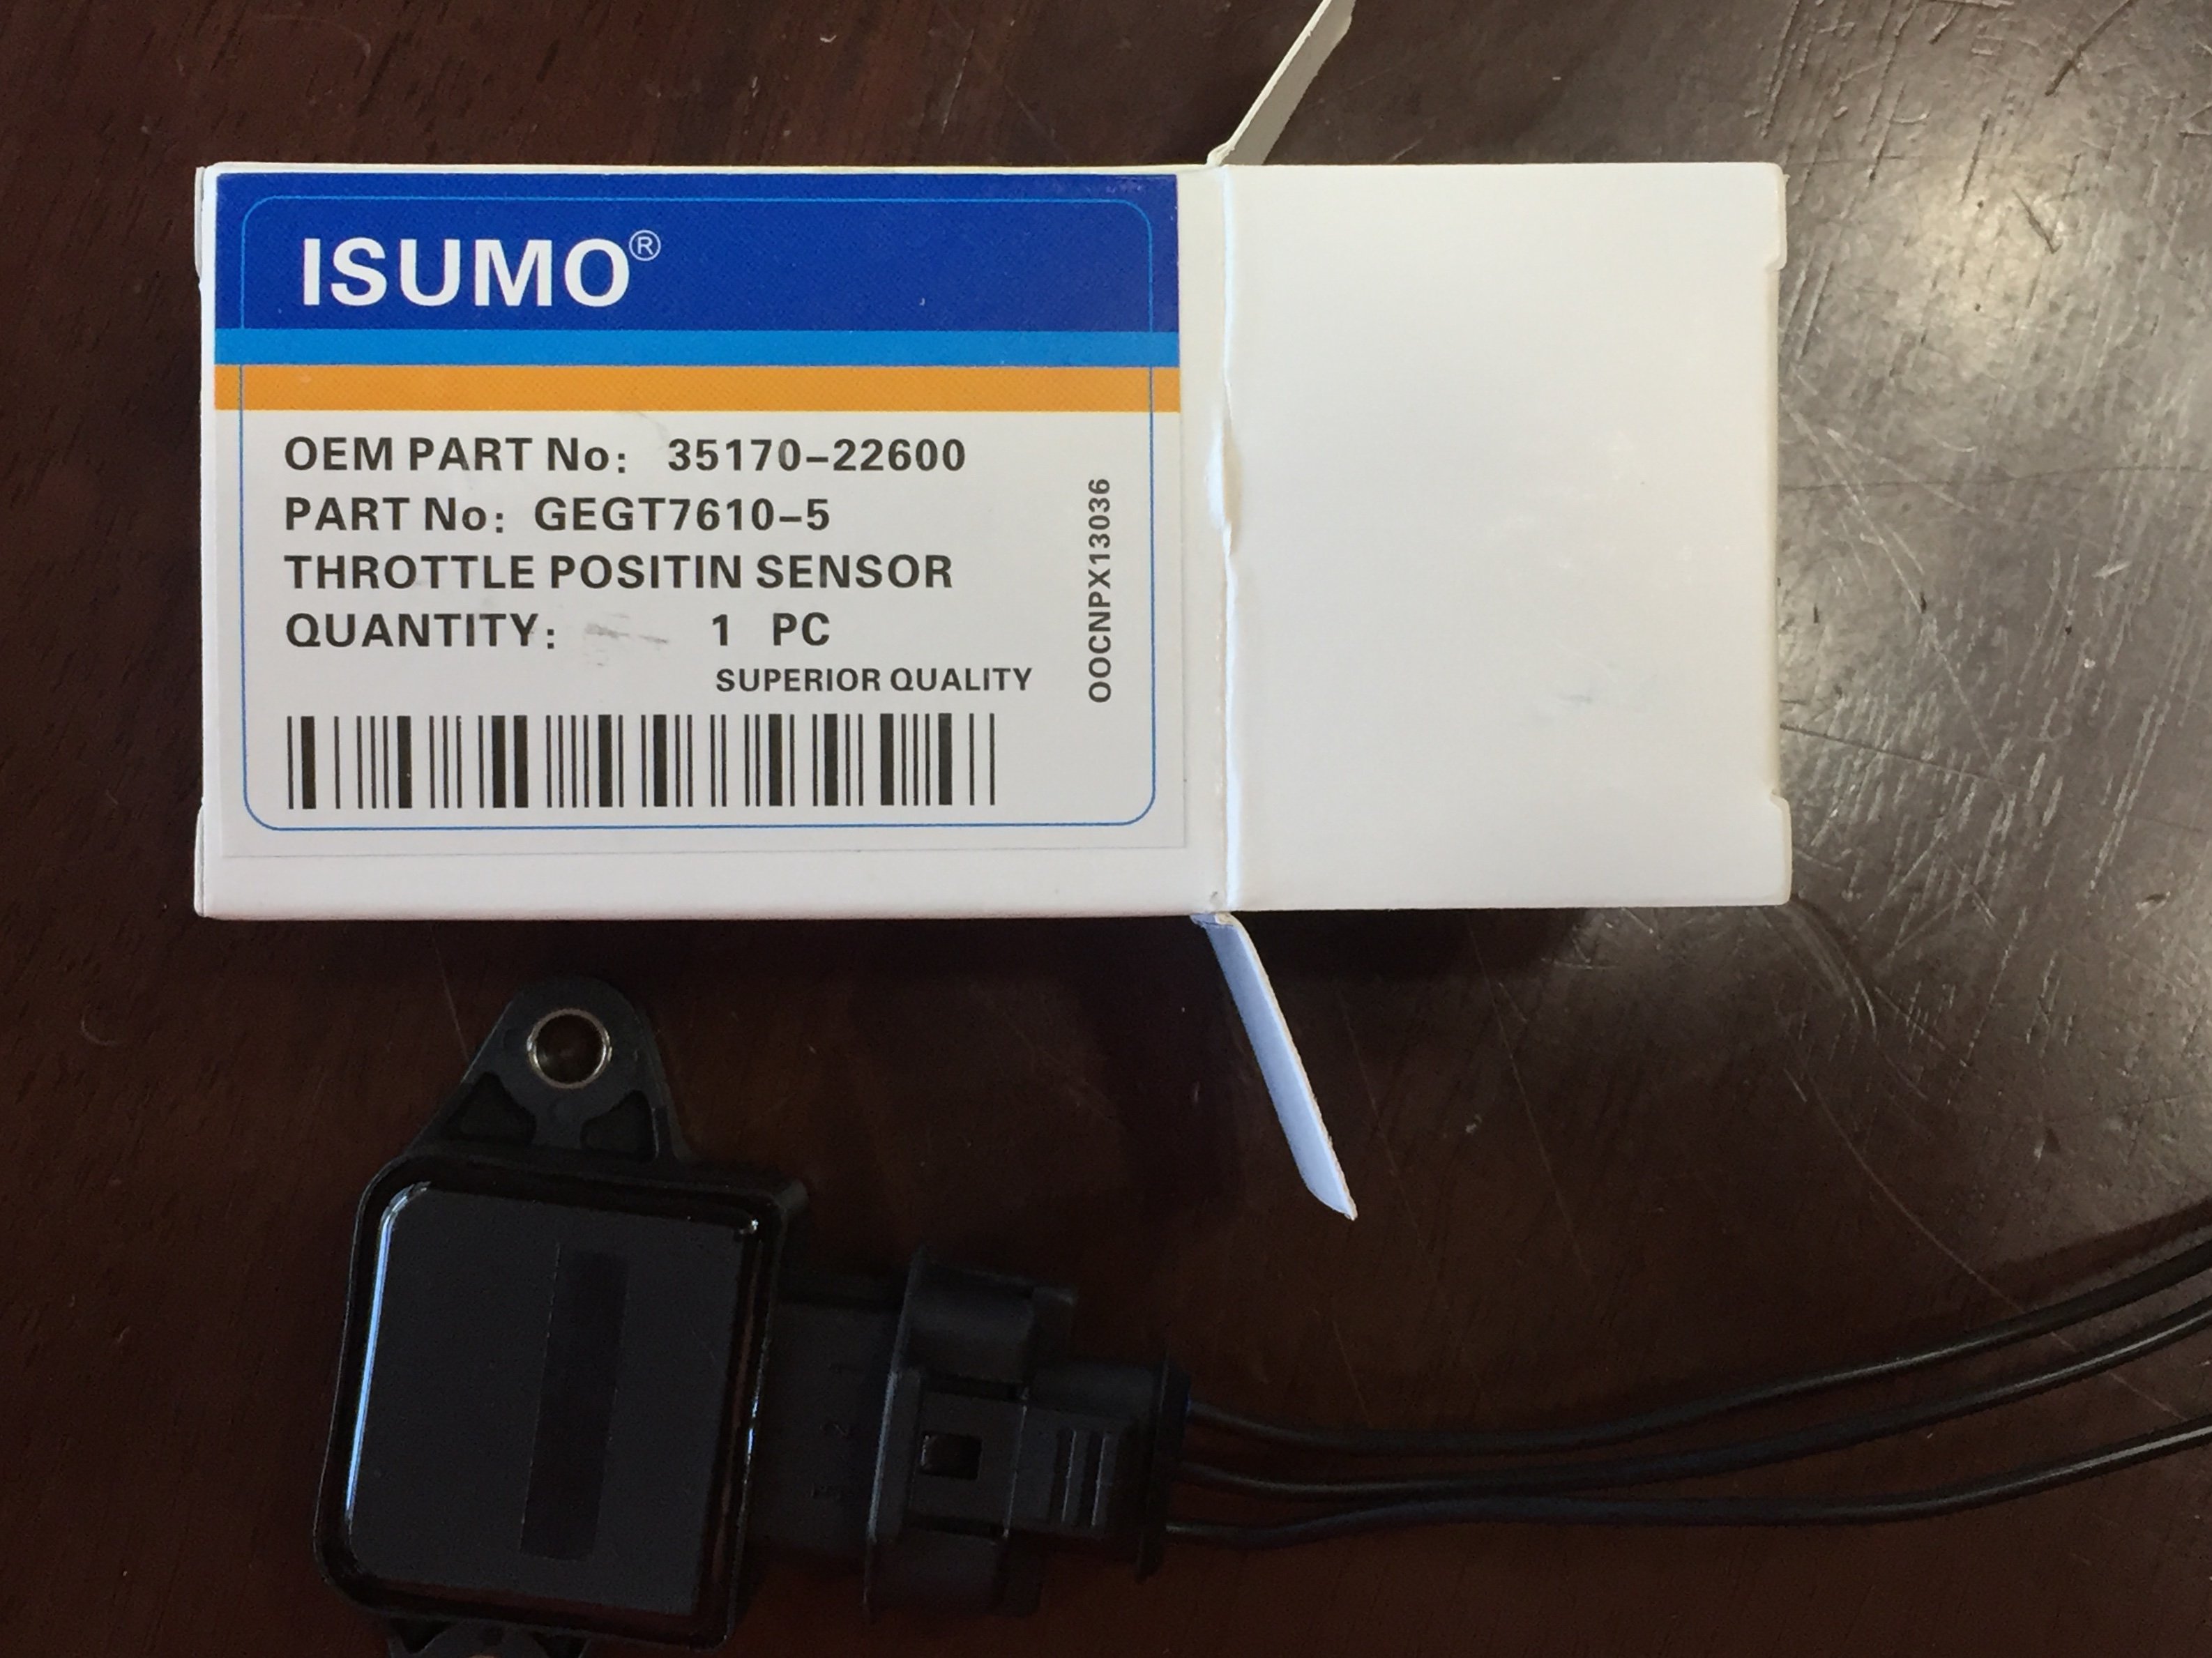
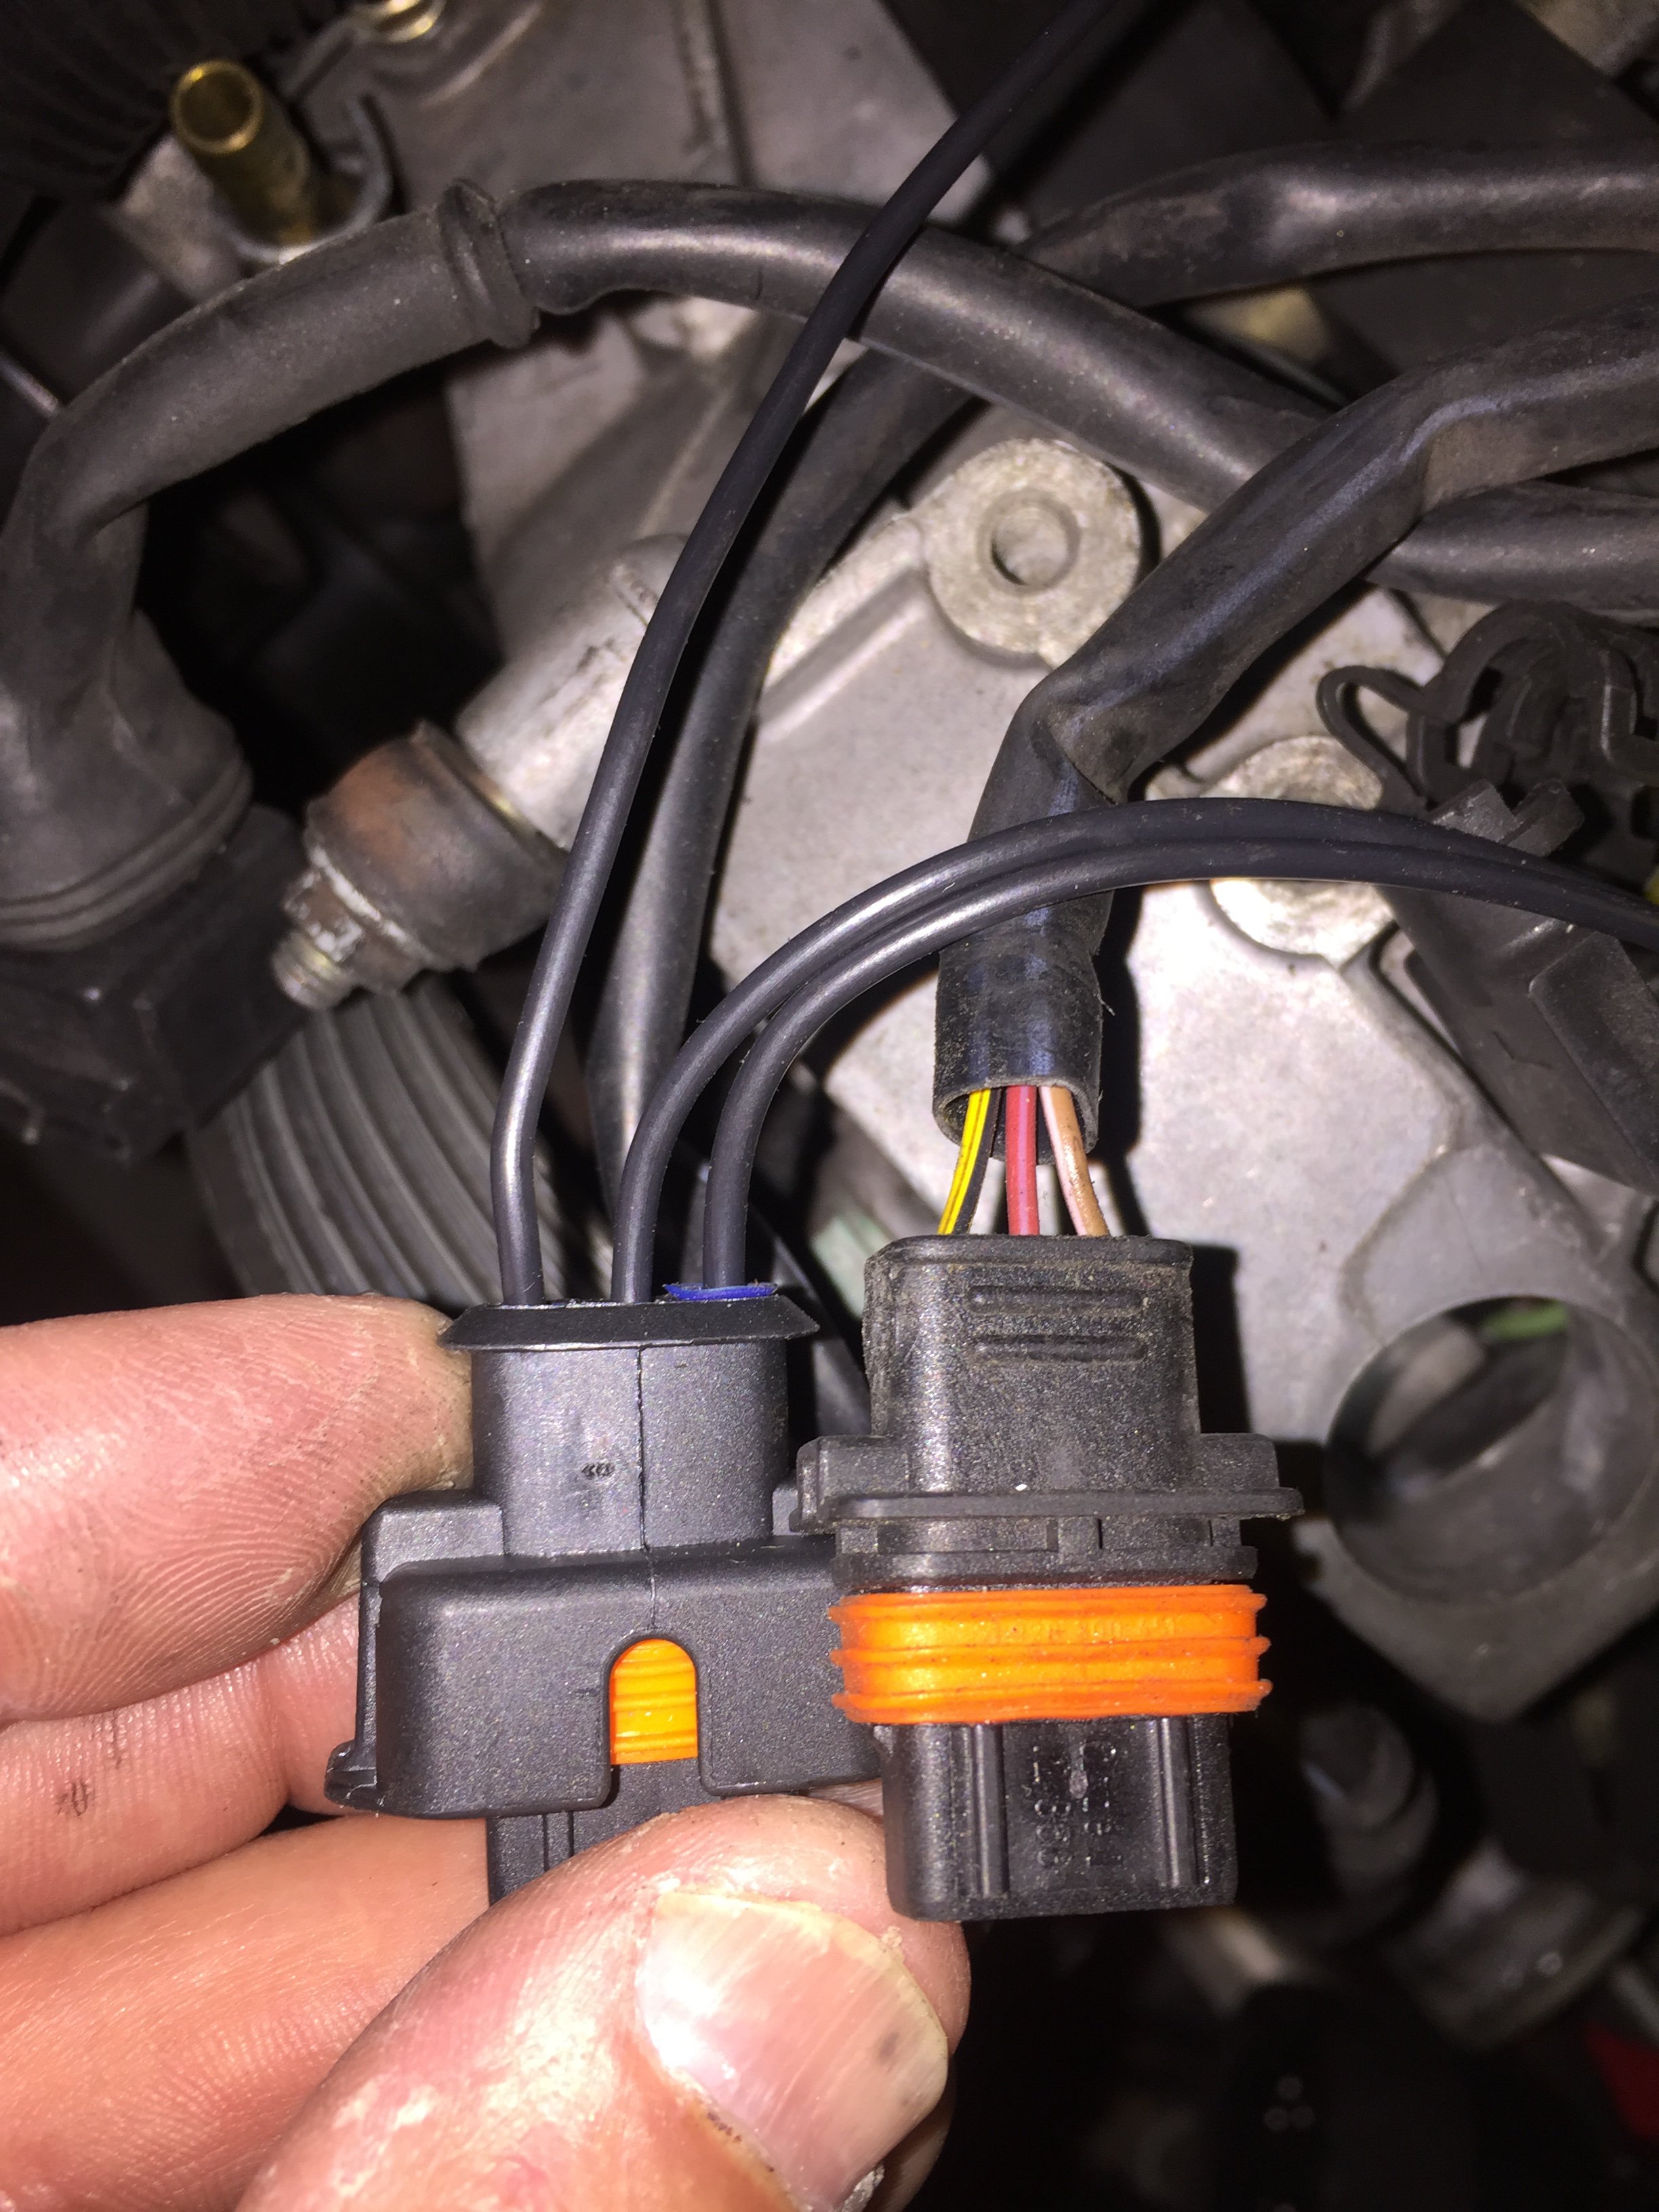
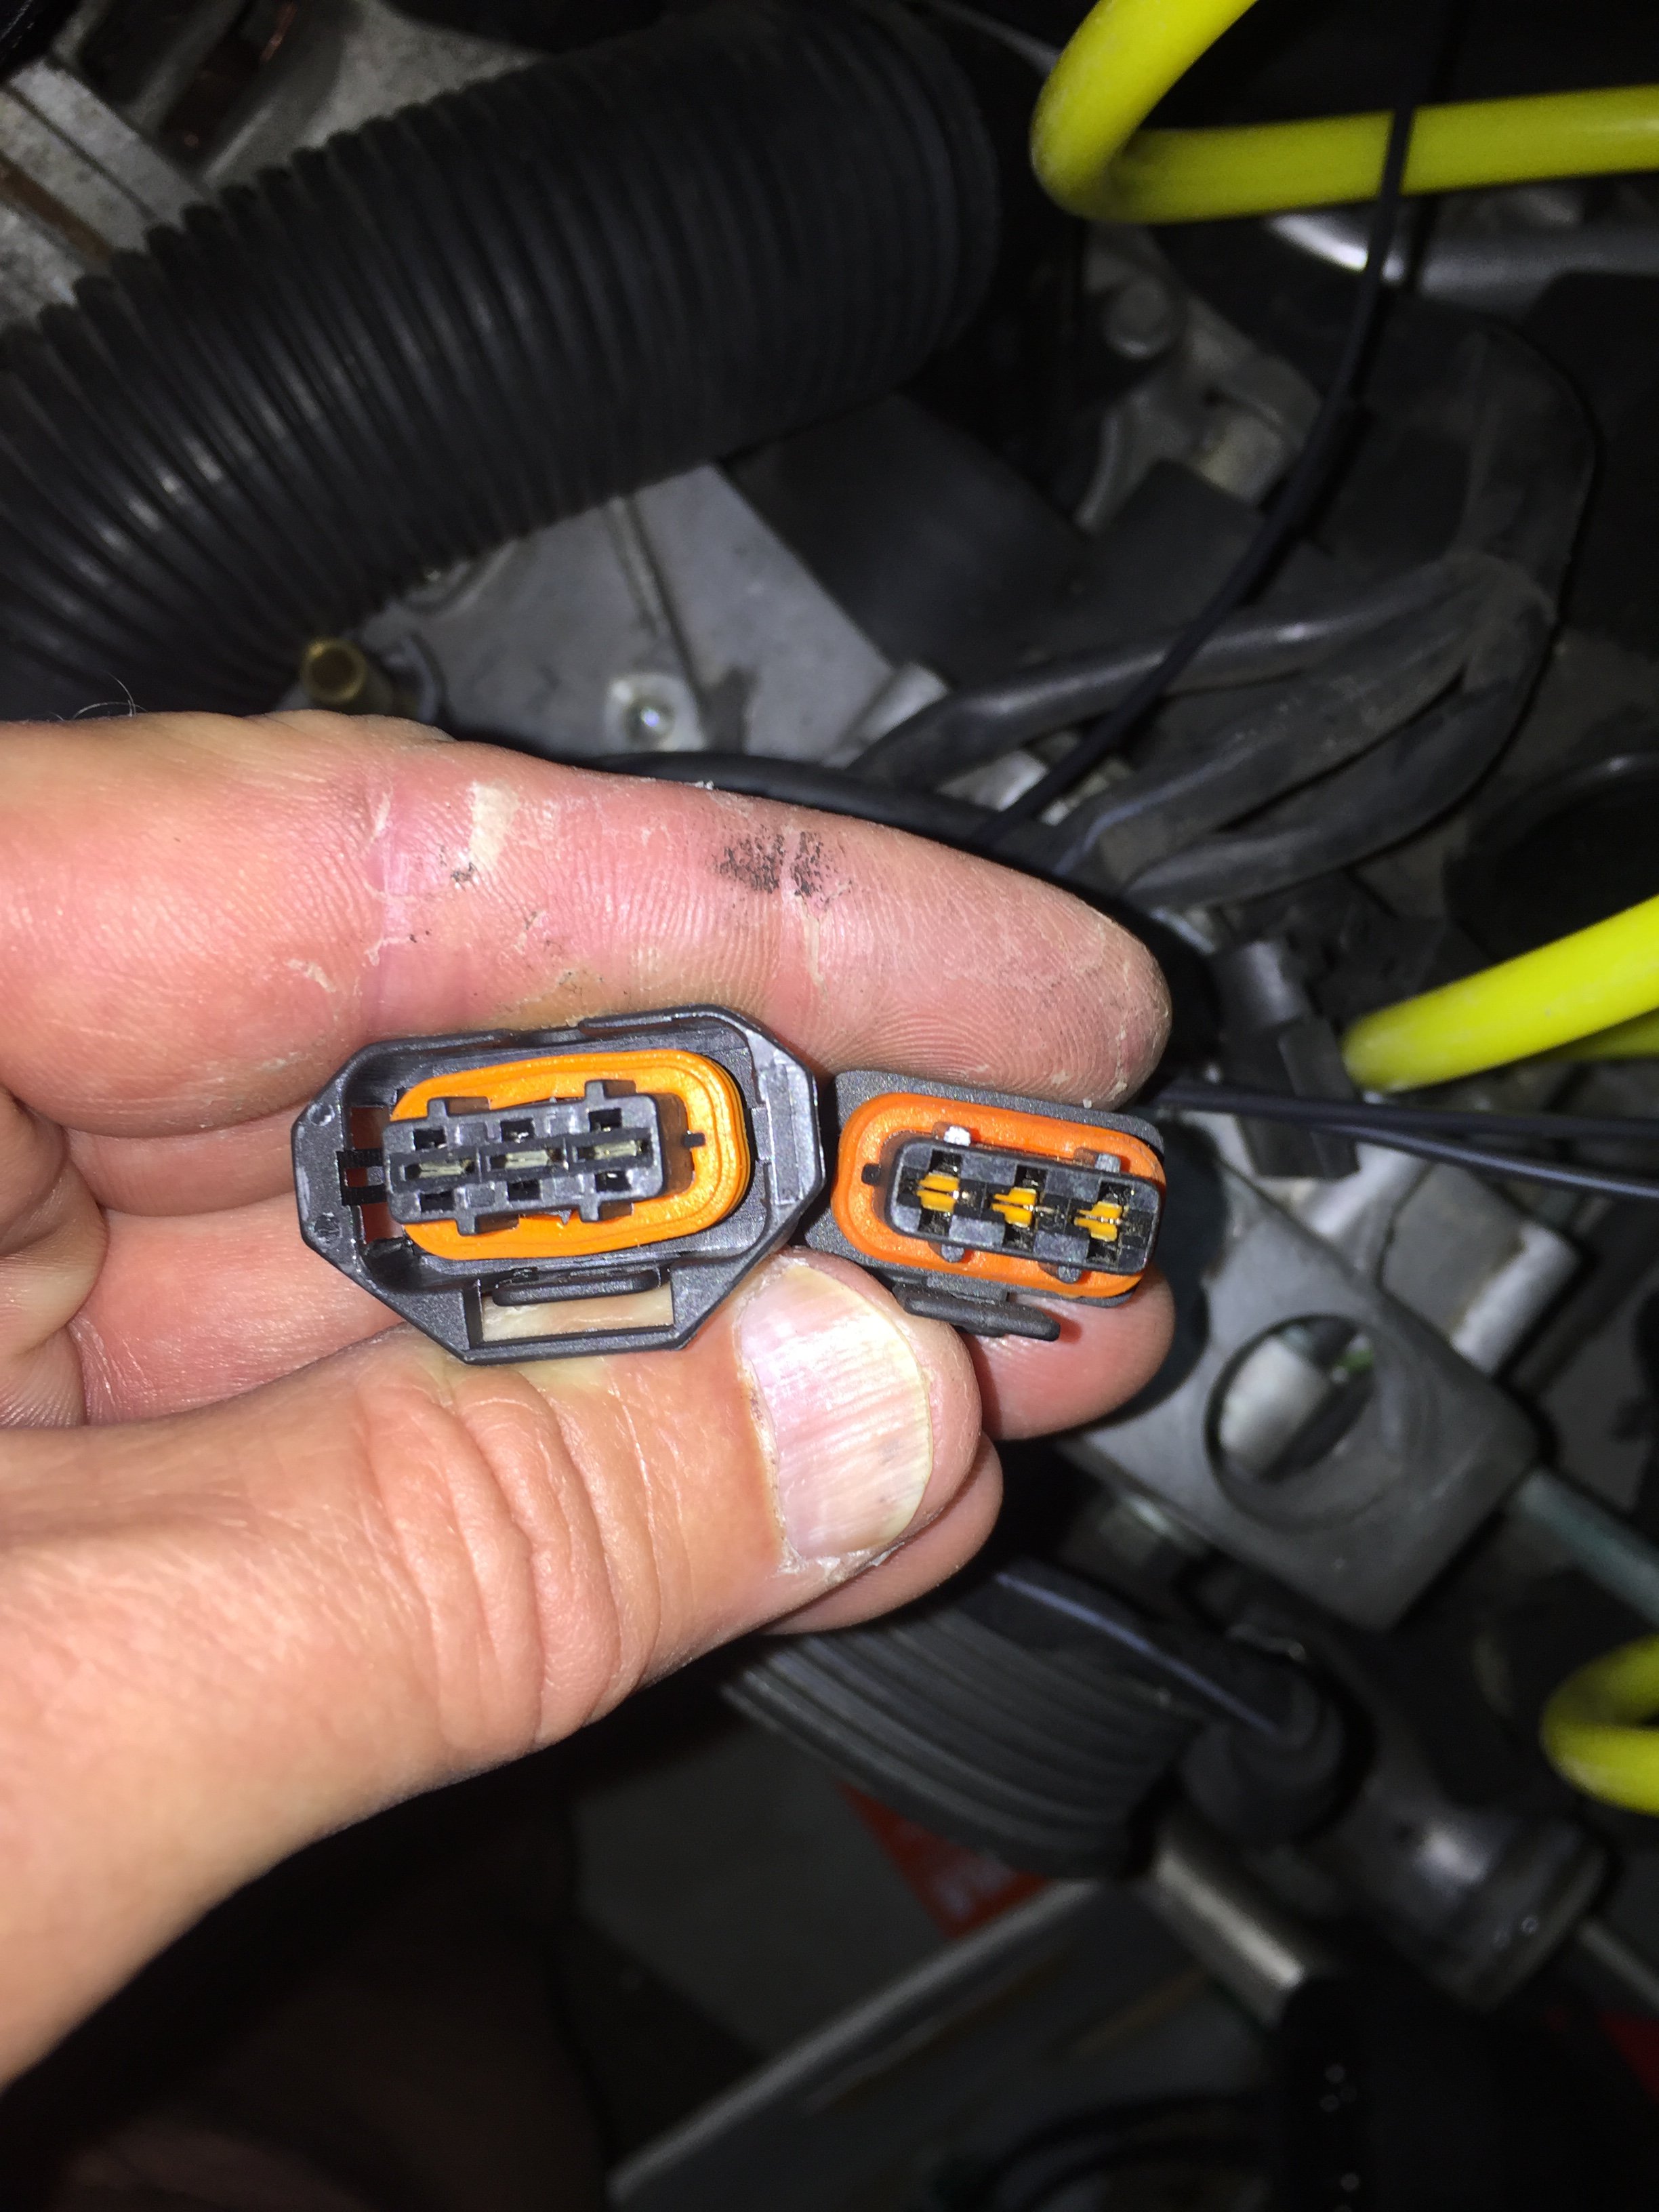
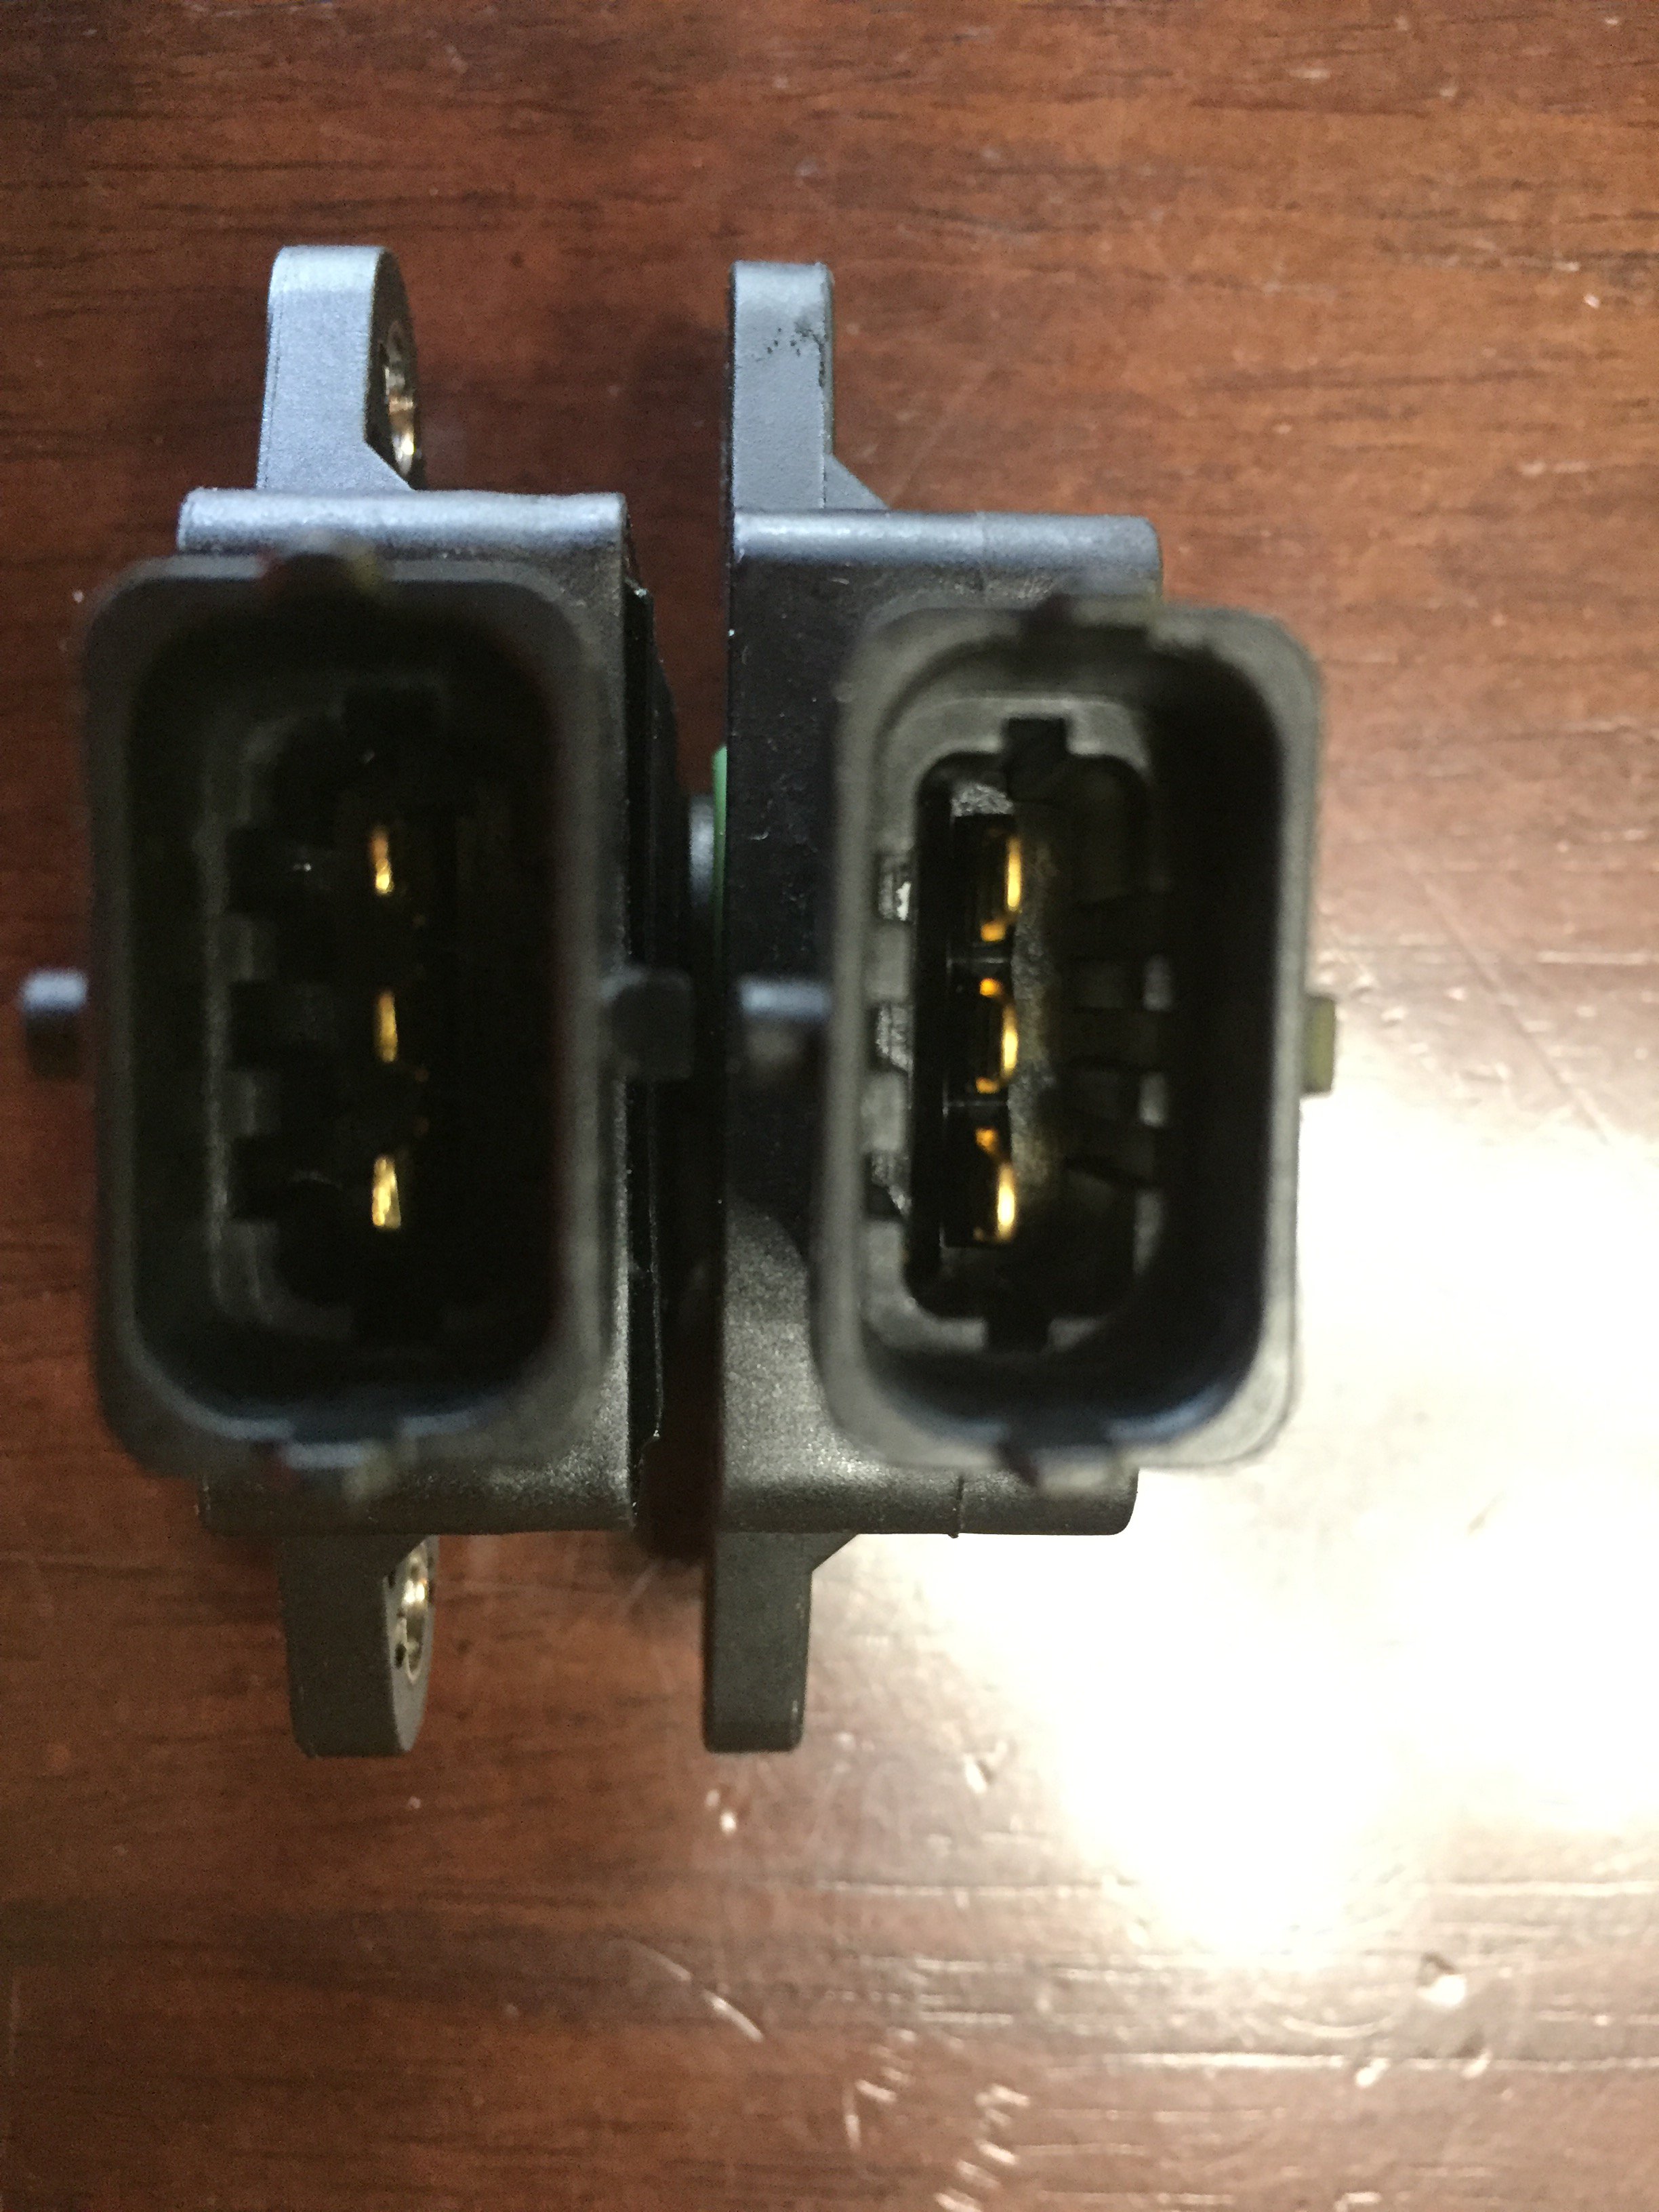
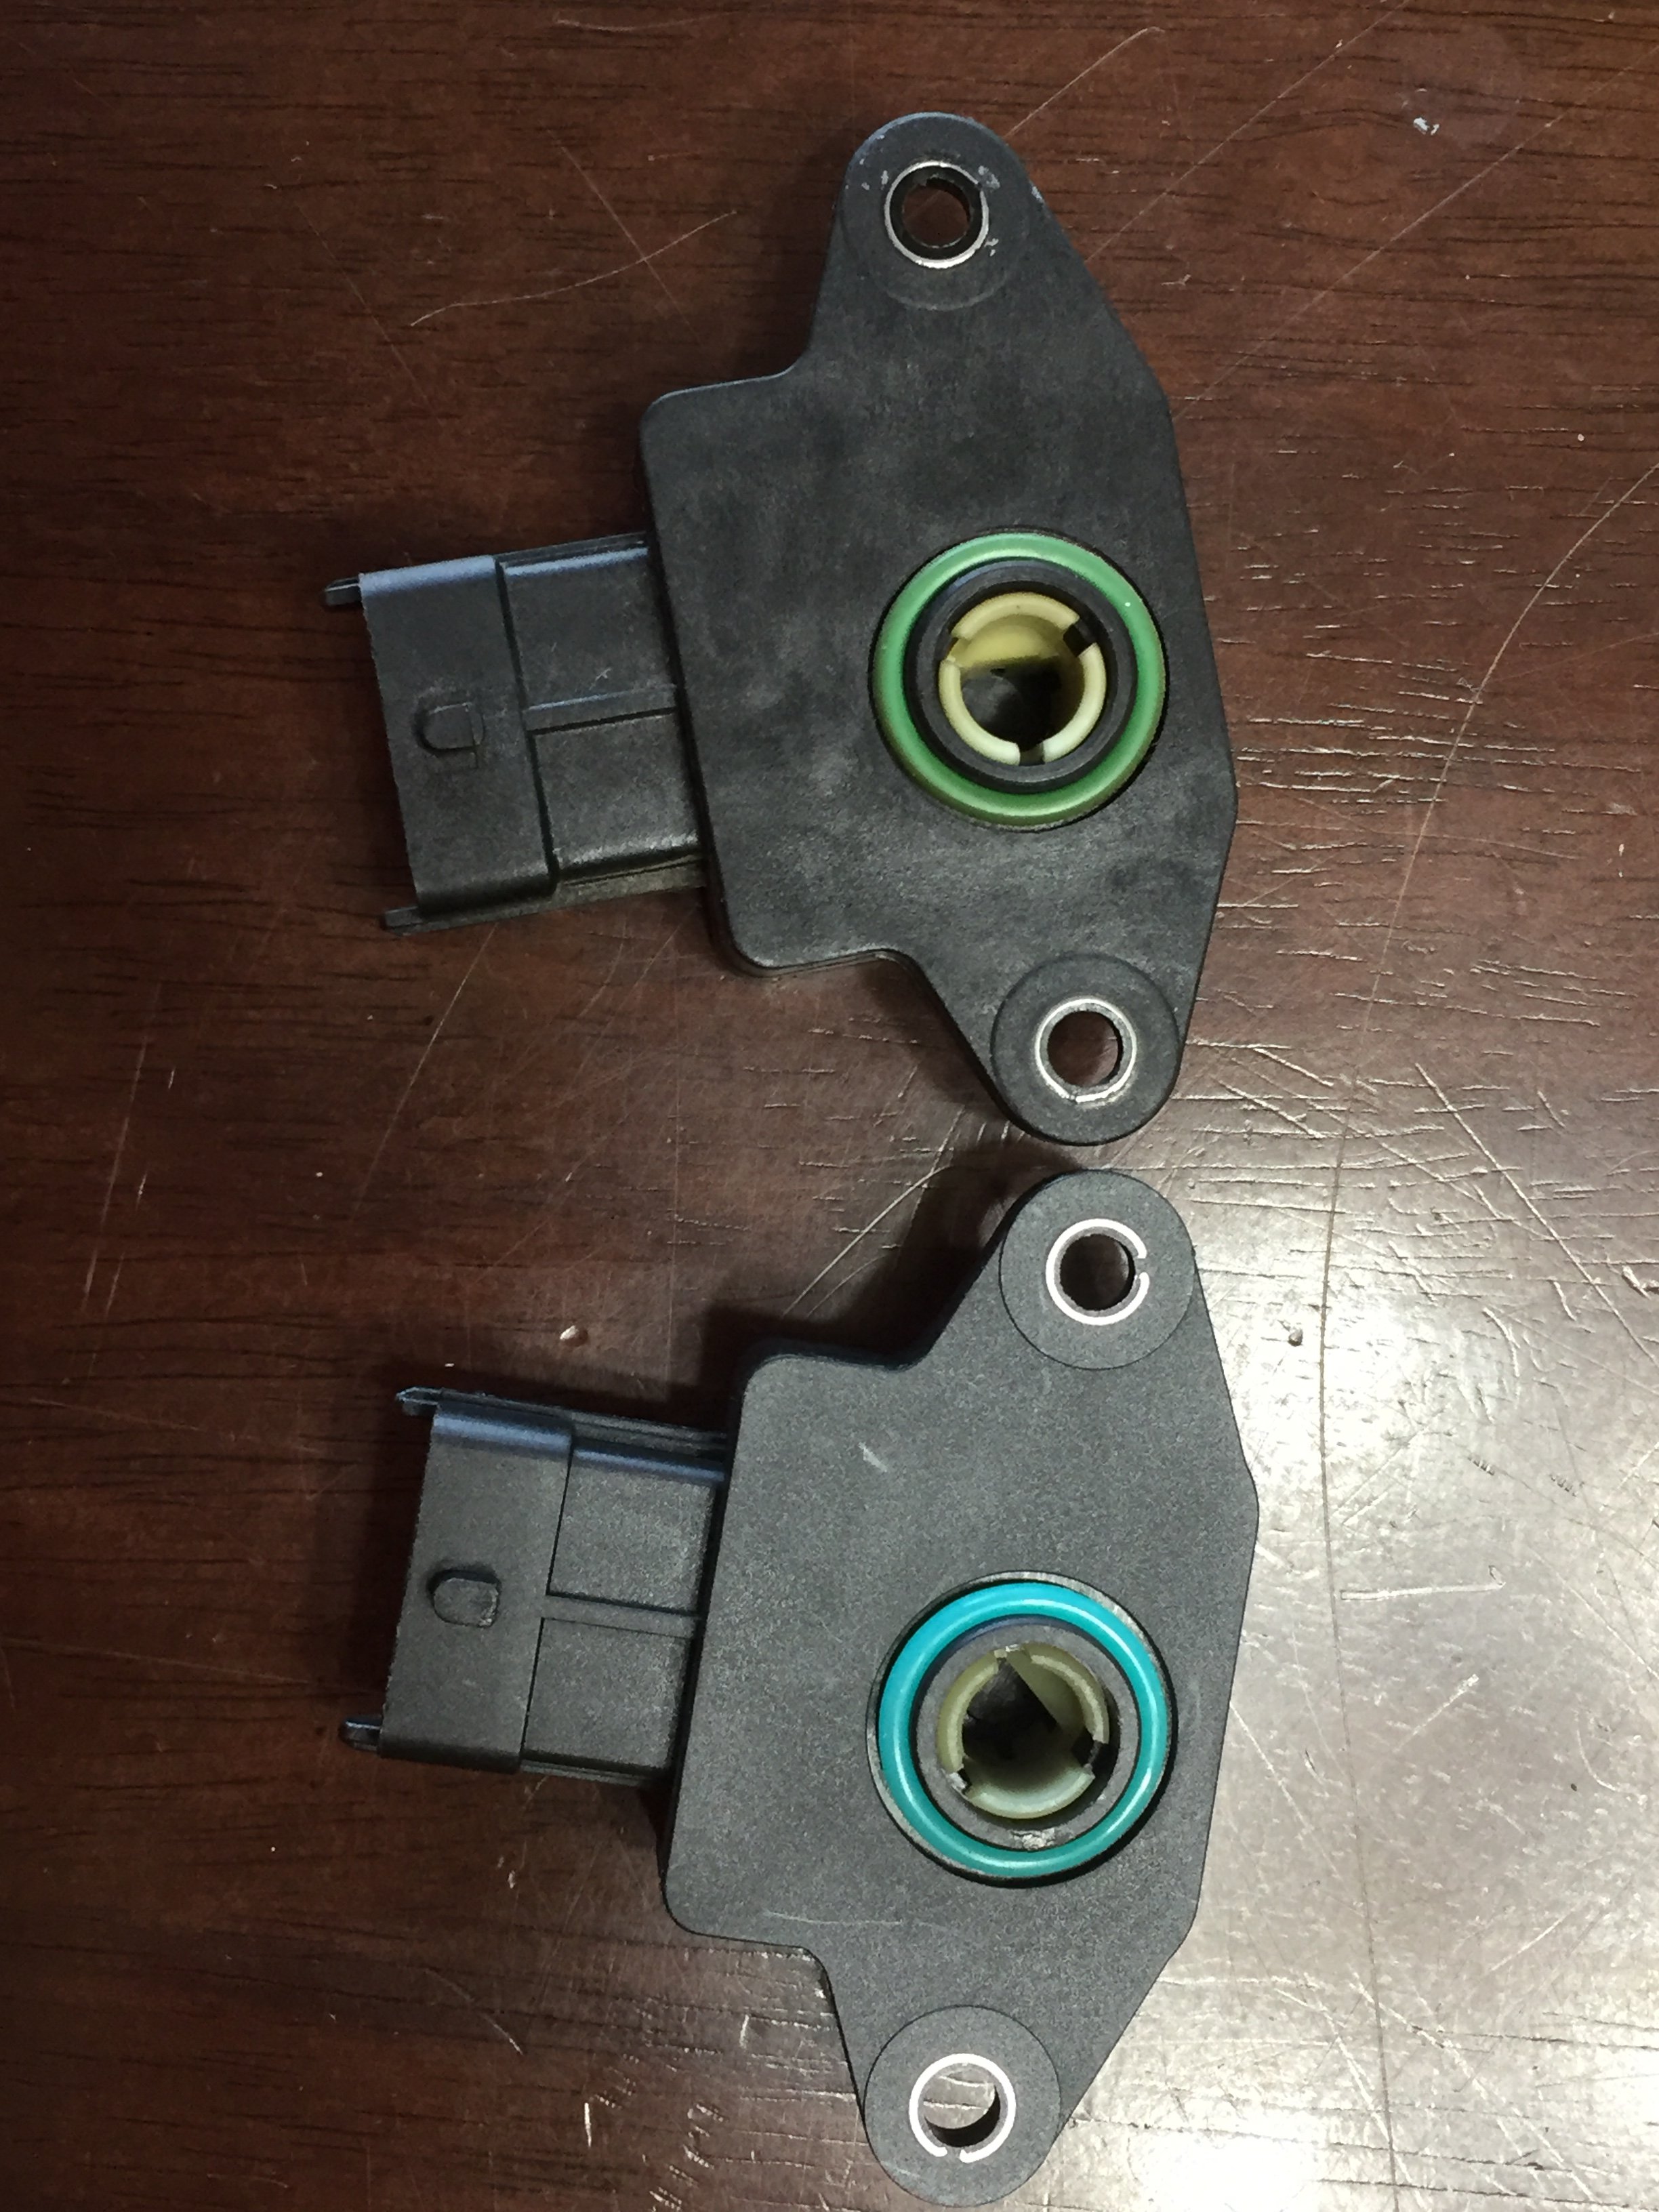
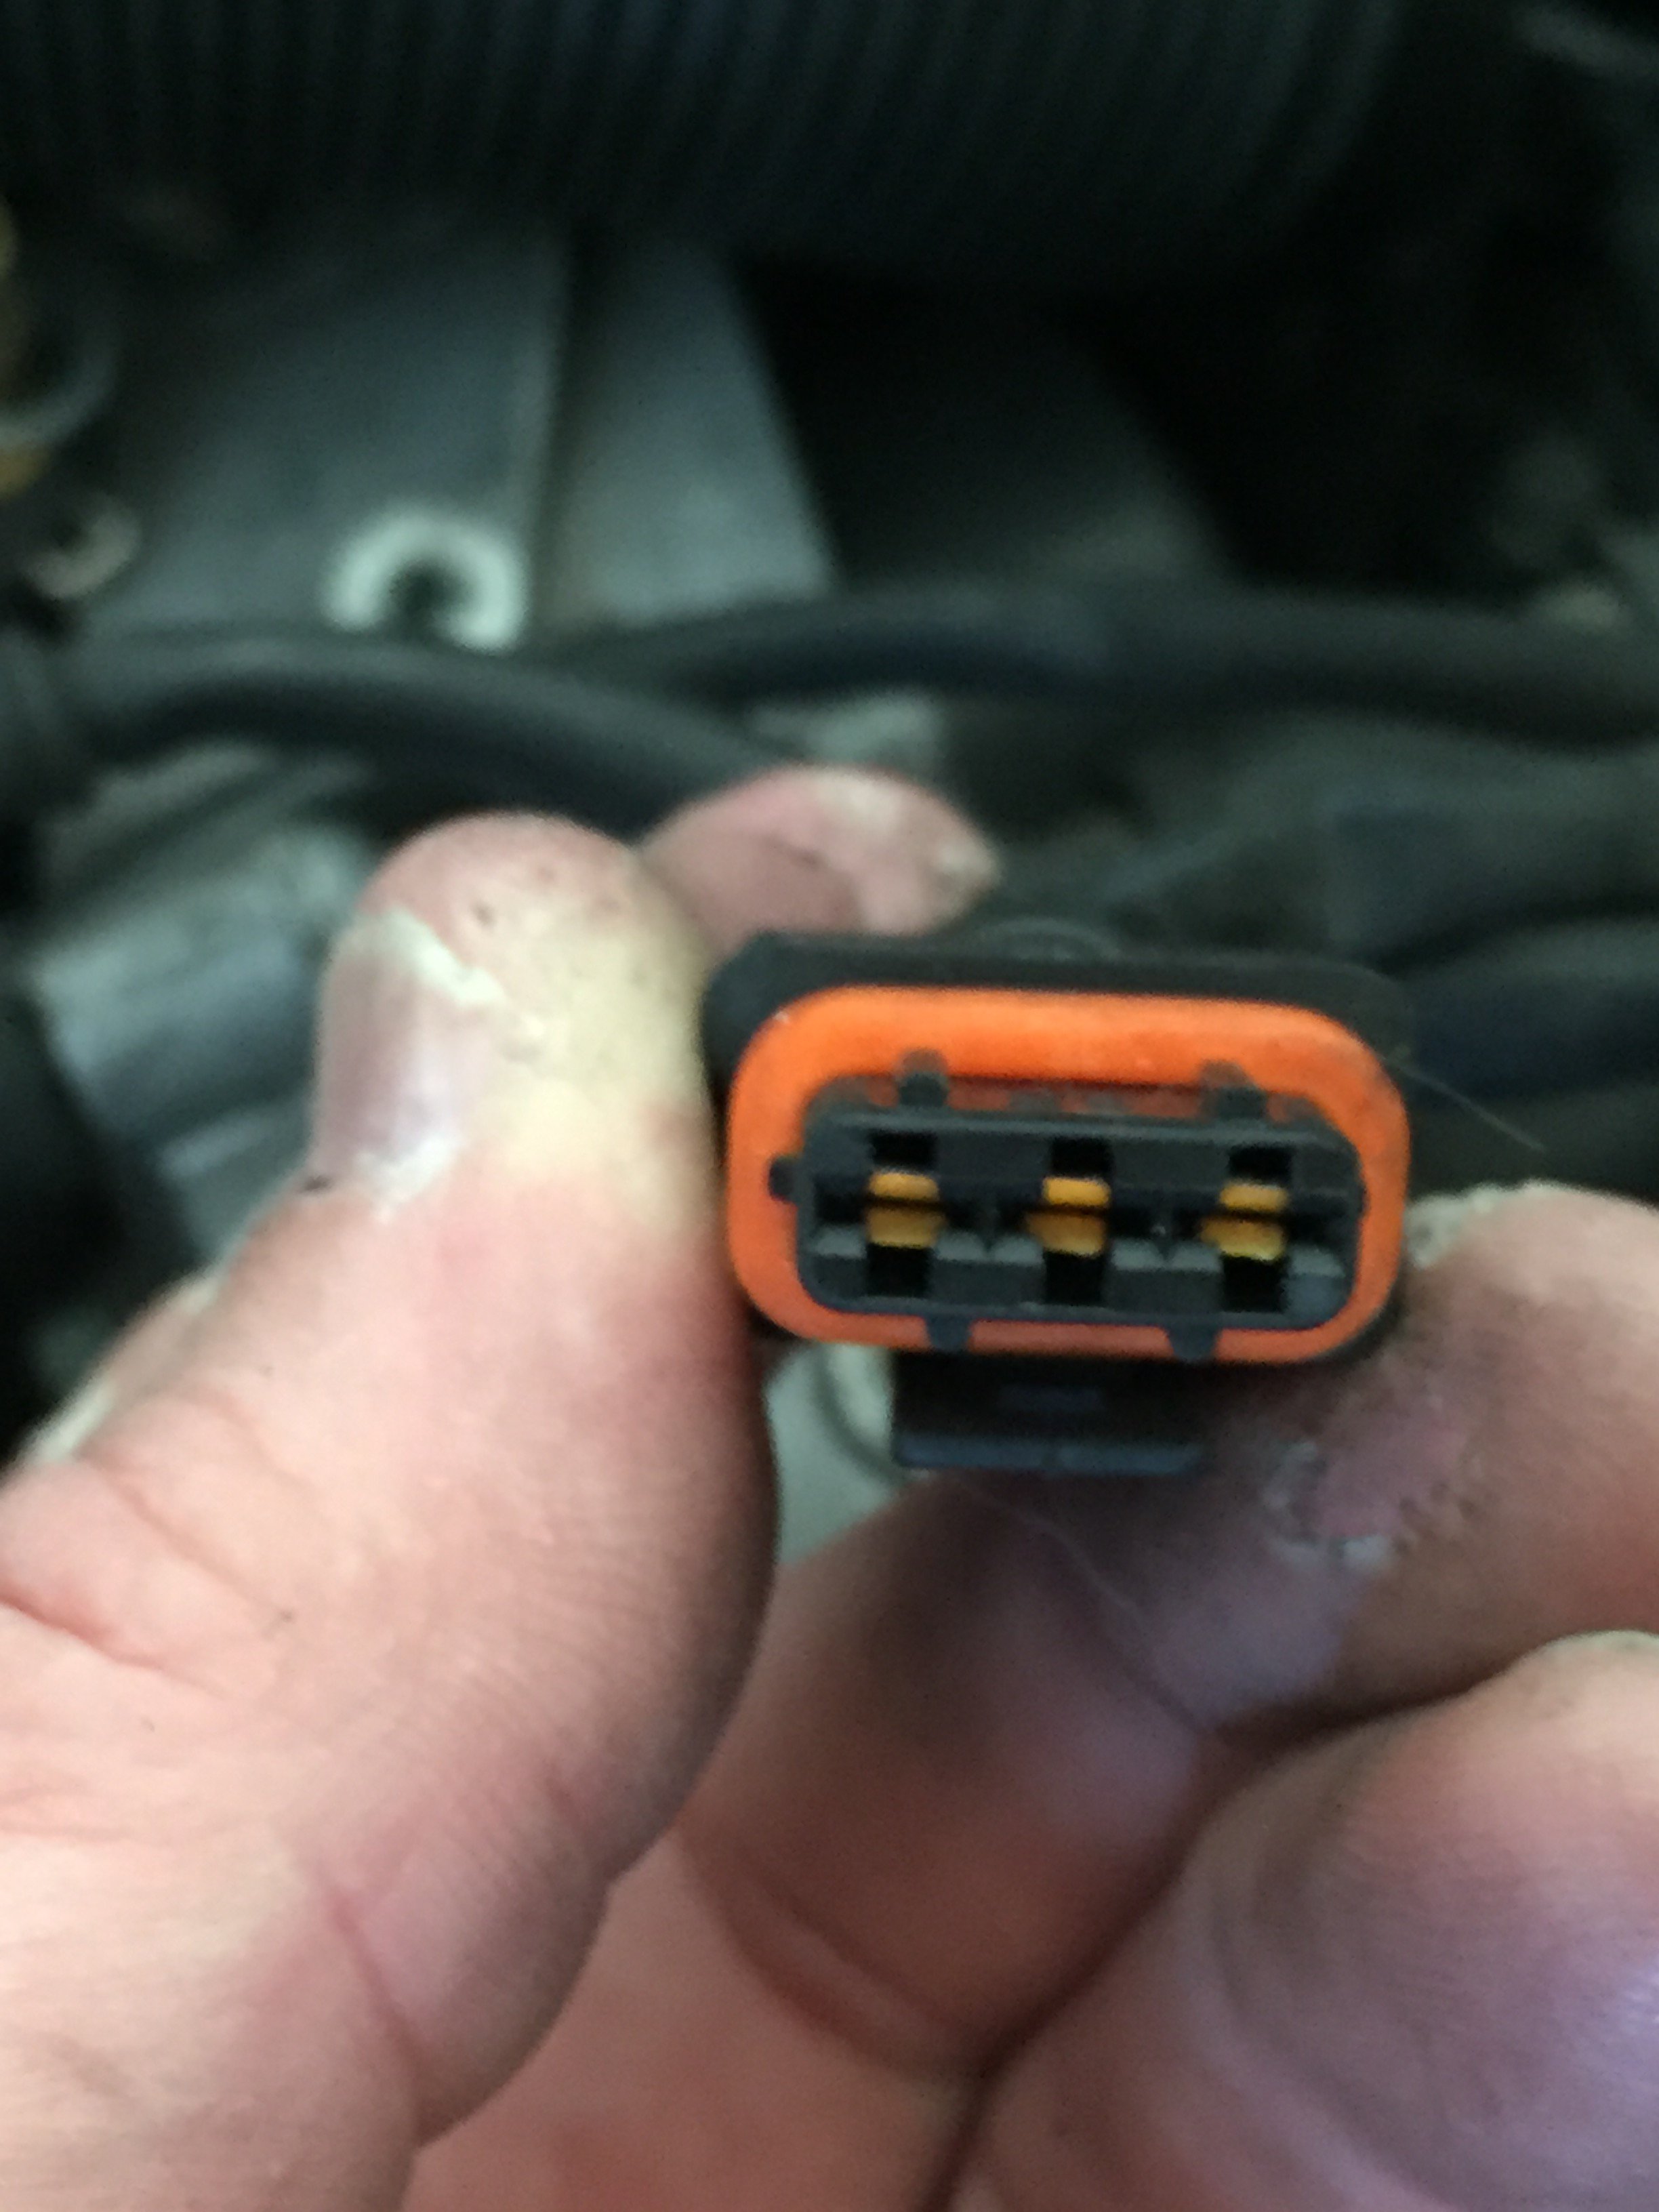
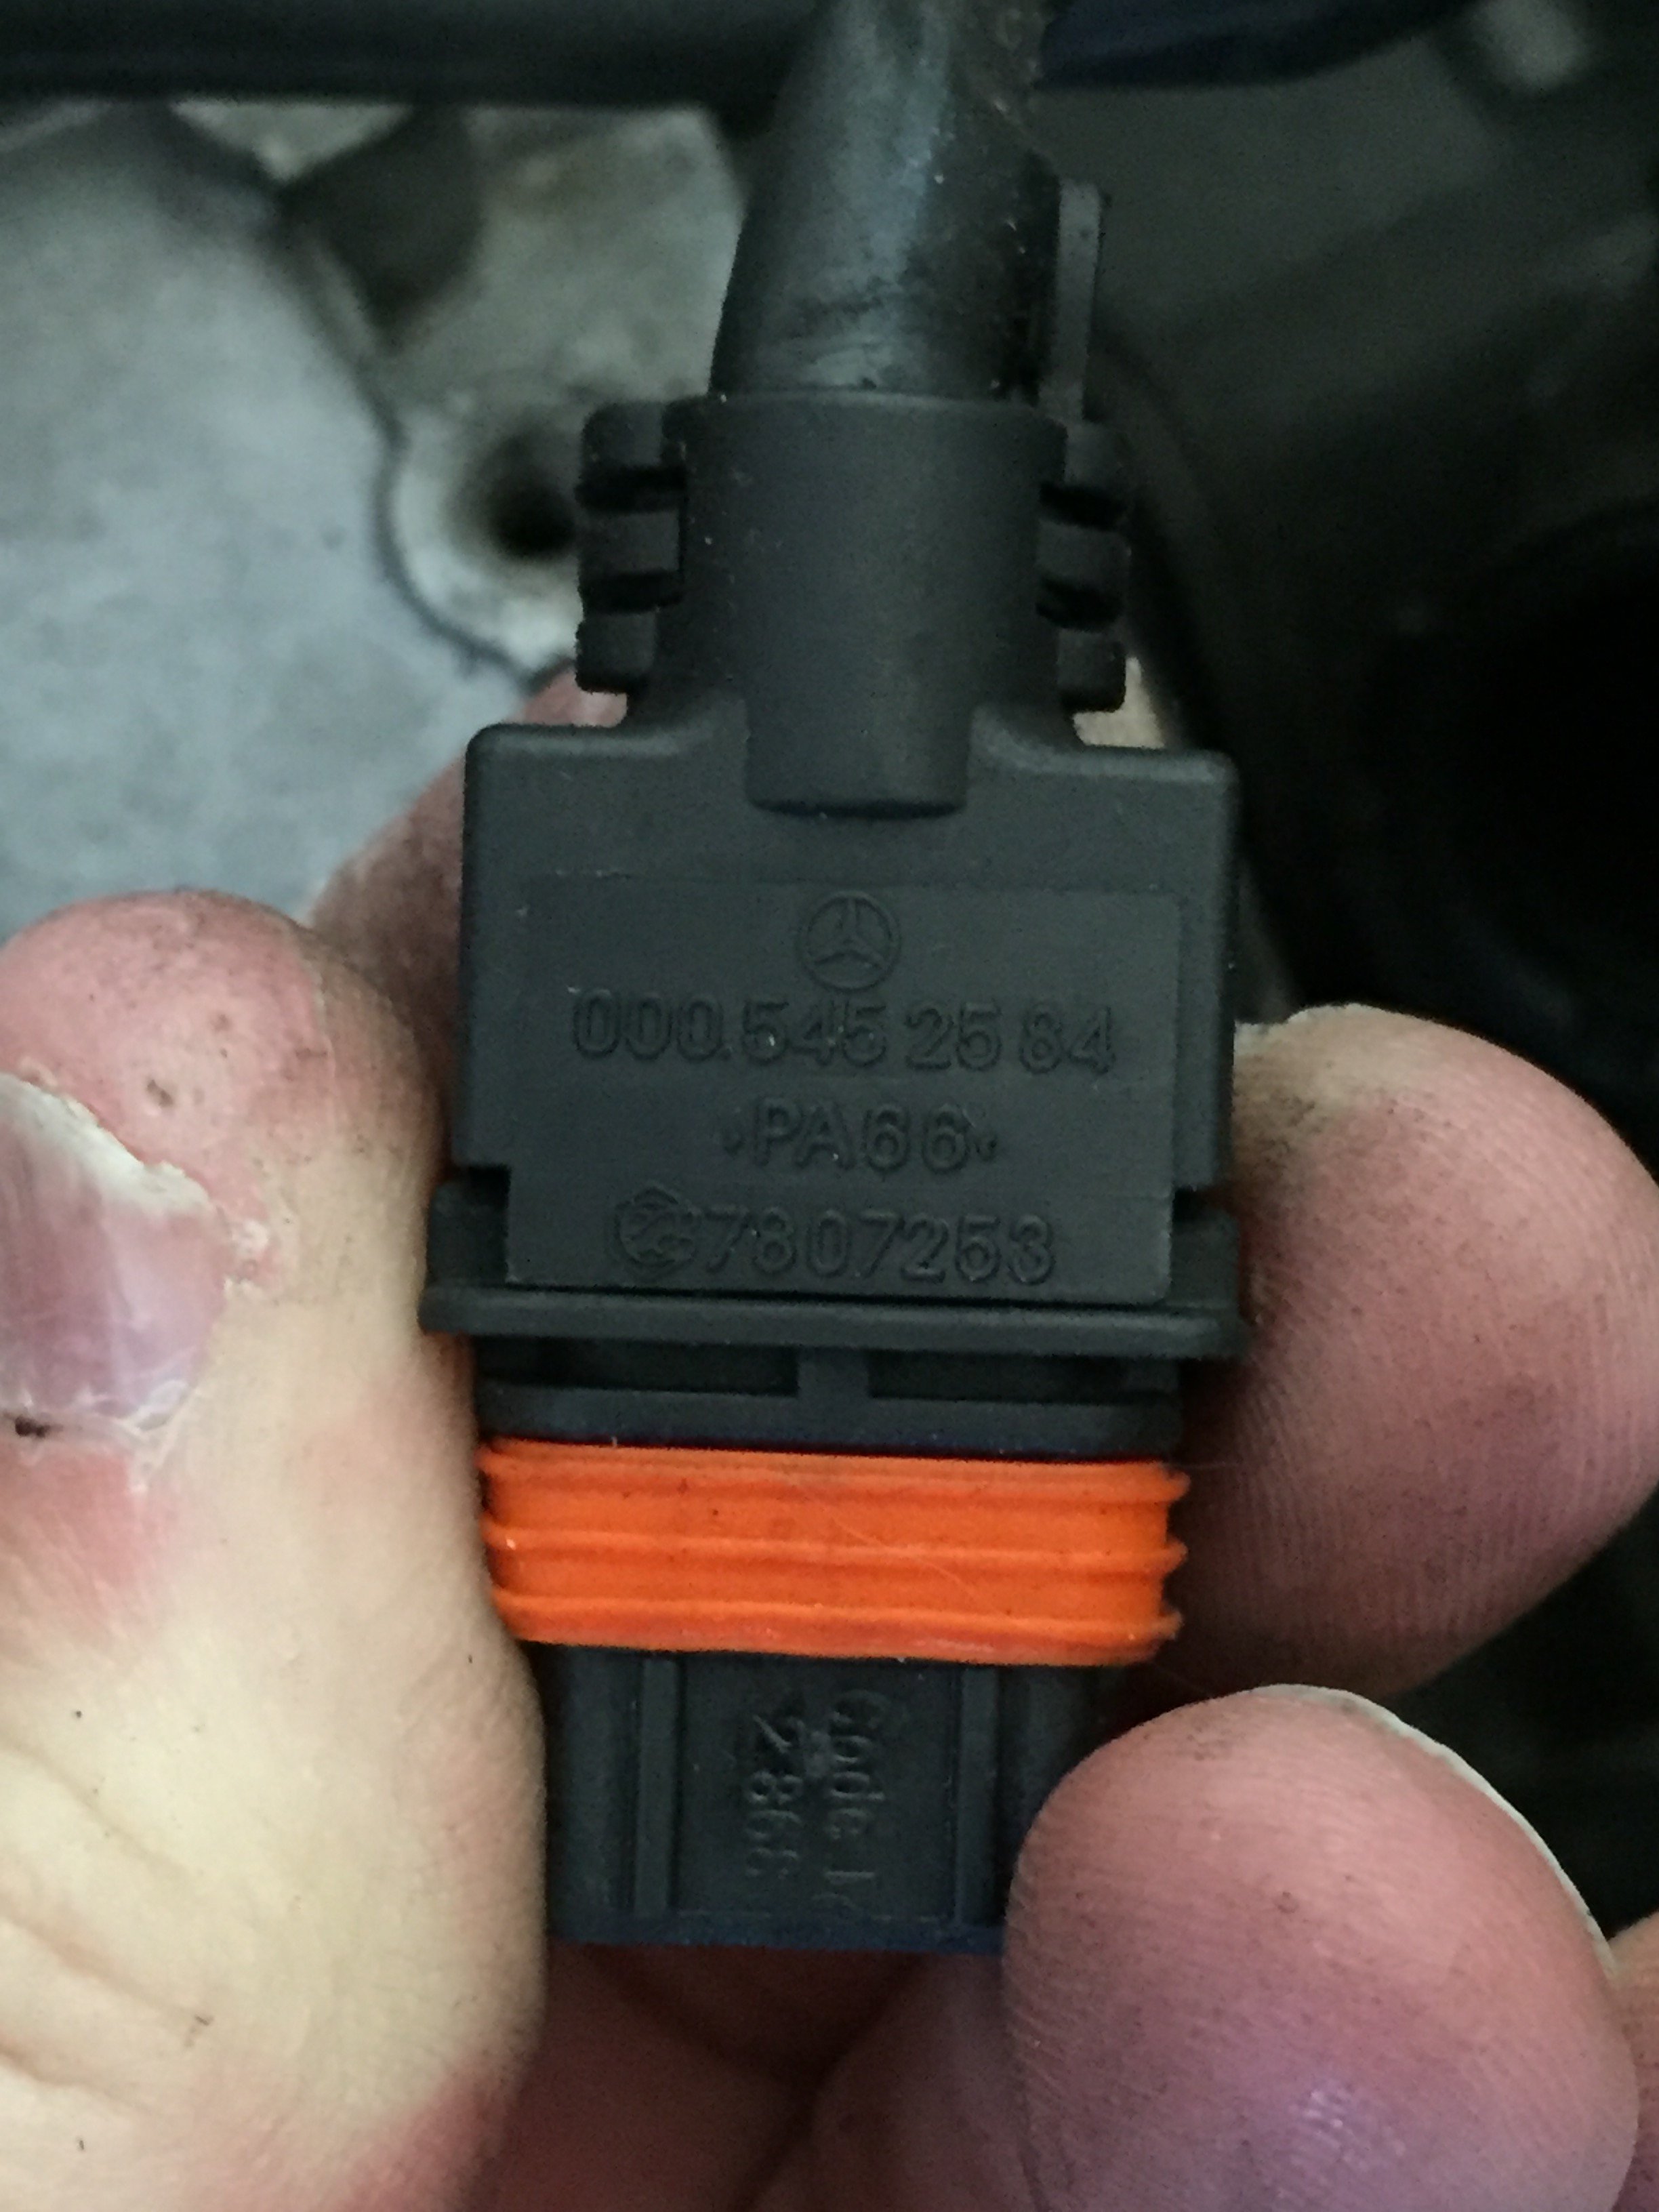
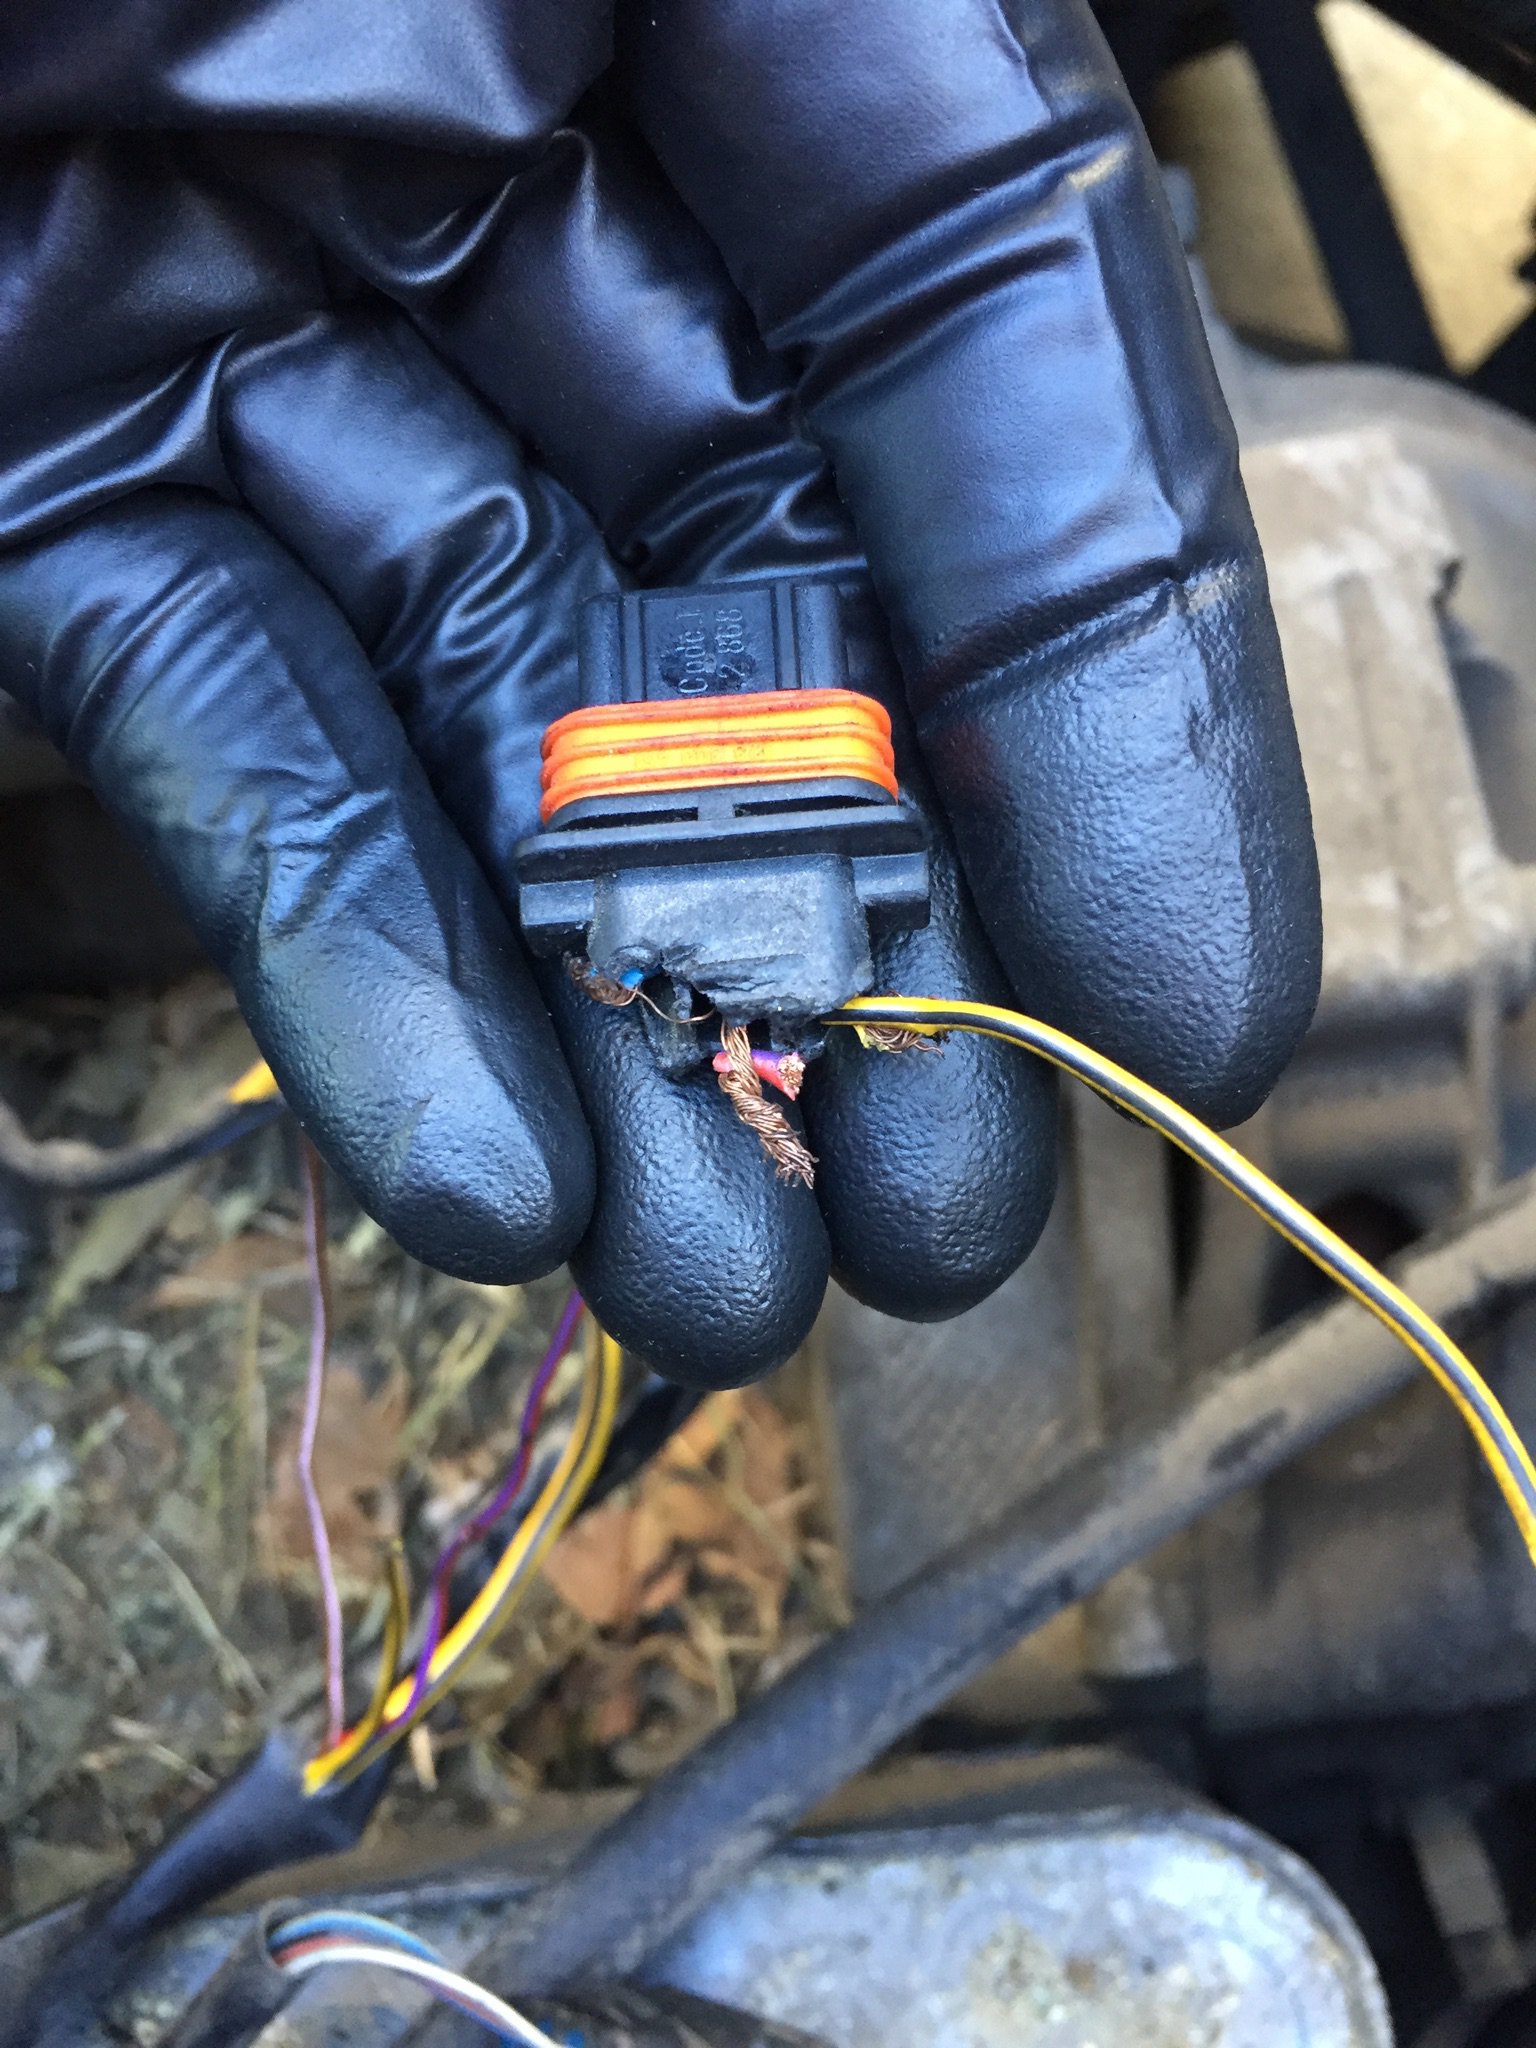
In an attempt to find a “plug and play” solution, I found what looks to be an EXACT match for the TPS and connector. I ordered one and it came in today. Both the TPS and connector was about $11.
I figured worst case scenario, I would replace the TPS and then becassured of a connector that fit.
The outside look a little different.
End view of connectors looks to be exact match
And the two TPS sockets look exactly alike.
Even the part that connects to the Throttle Body looks the same.
-
3 wires/3pins
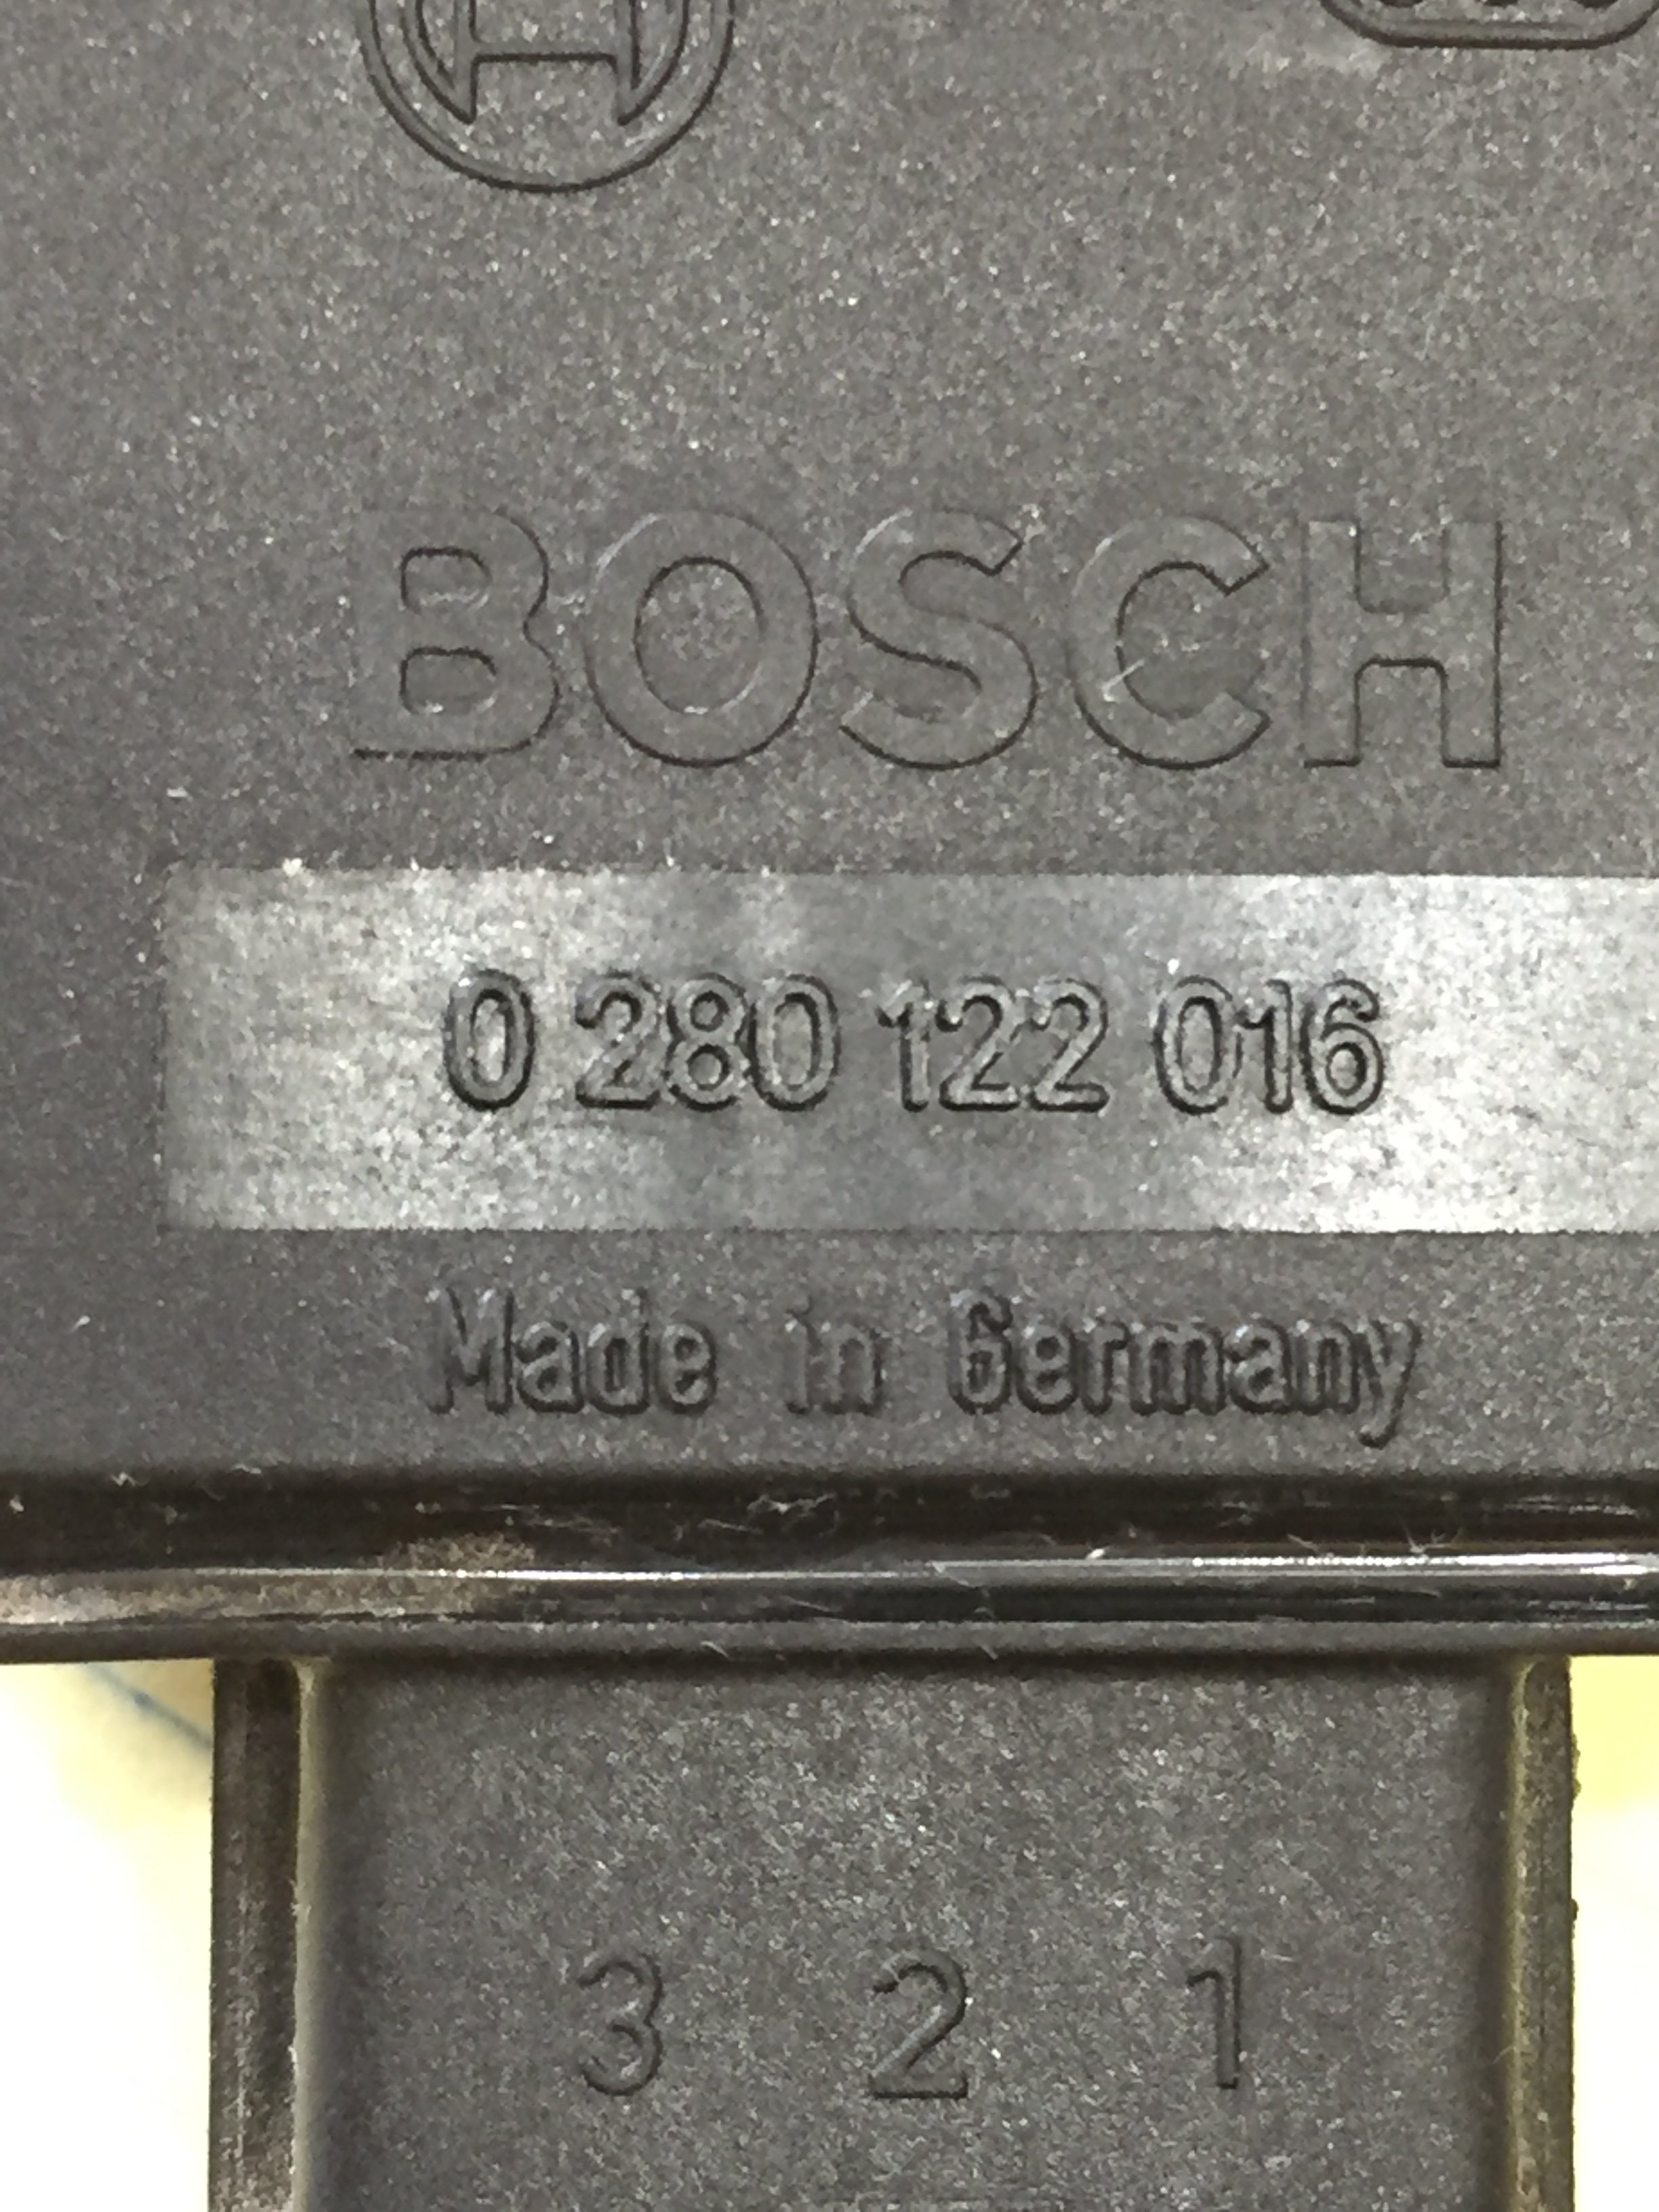
The BOSCH part number on the outside of the TPS doesn’t come with a connector anywhere that I can find. Amazon showed one, but it wrong. It isn’t for the right TPS connector that I need.
0 280 122 016 - TPS
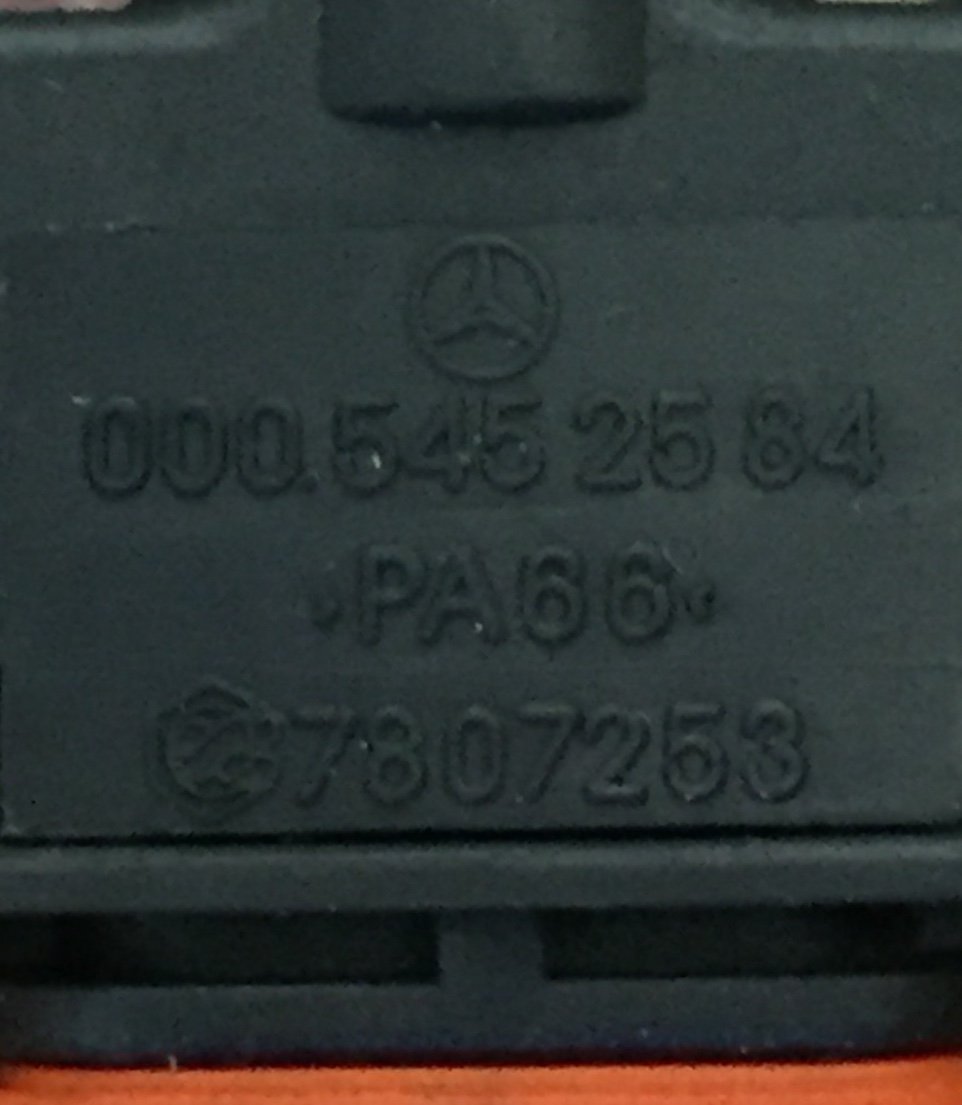
000 545 25 84 - number on correct connector (no luck)
-
Nobody???????
-
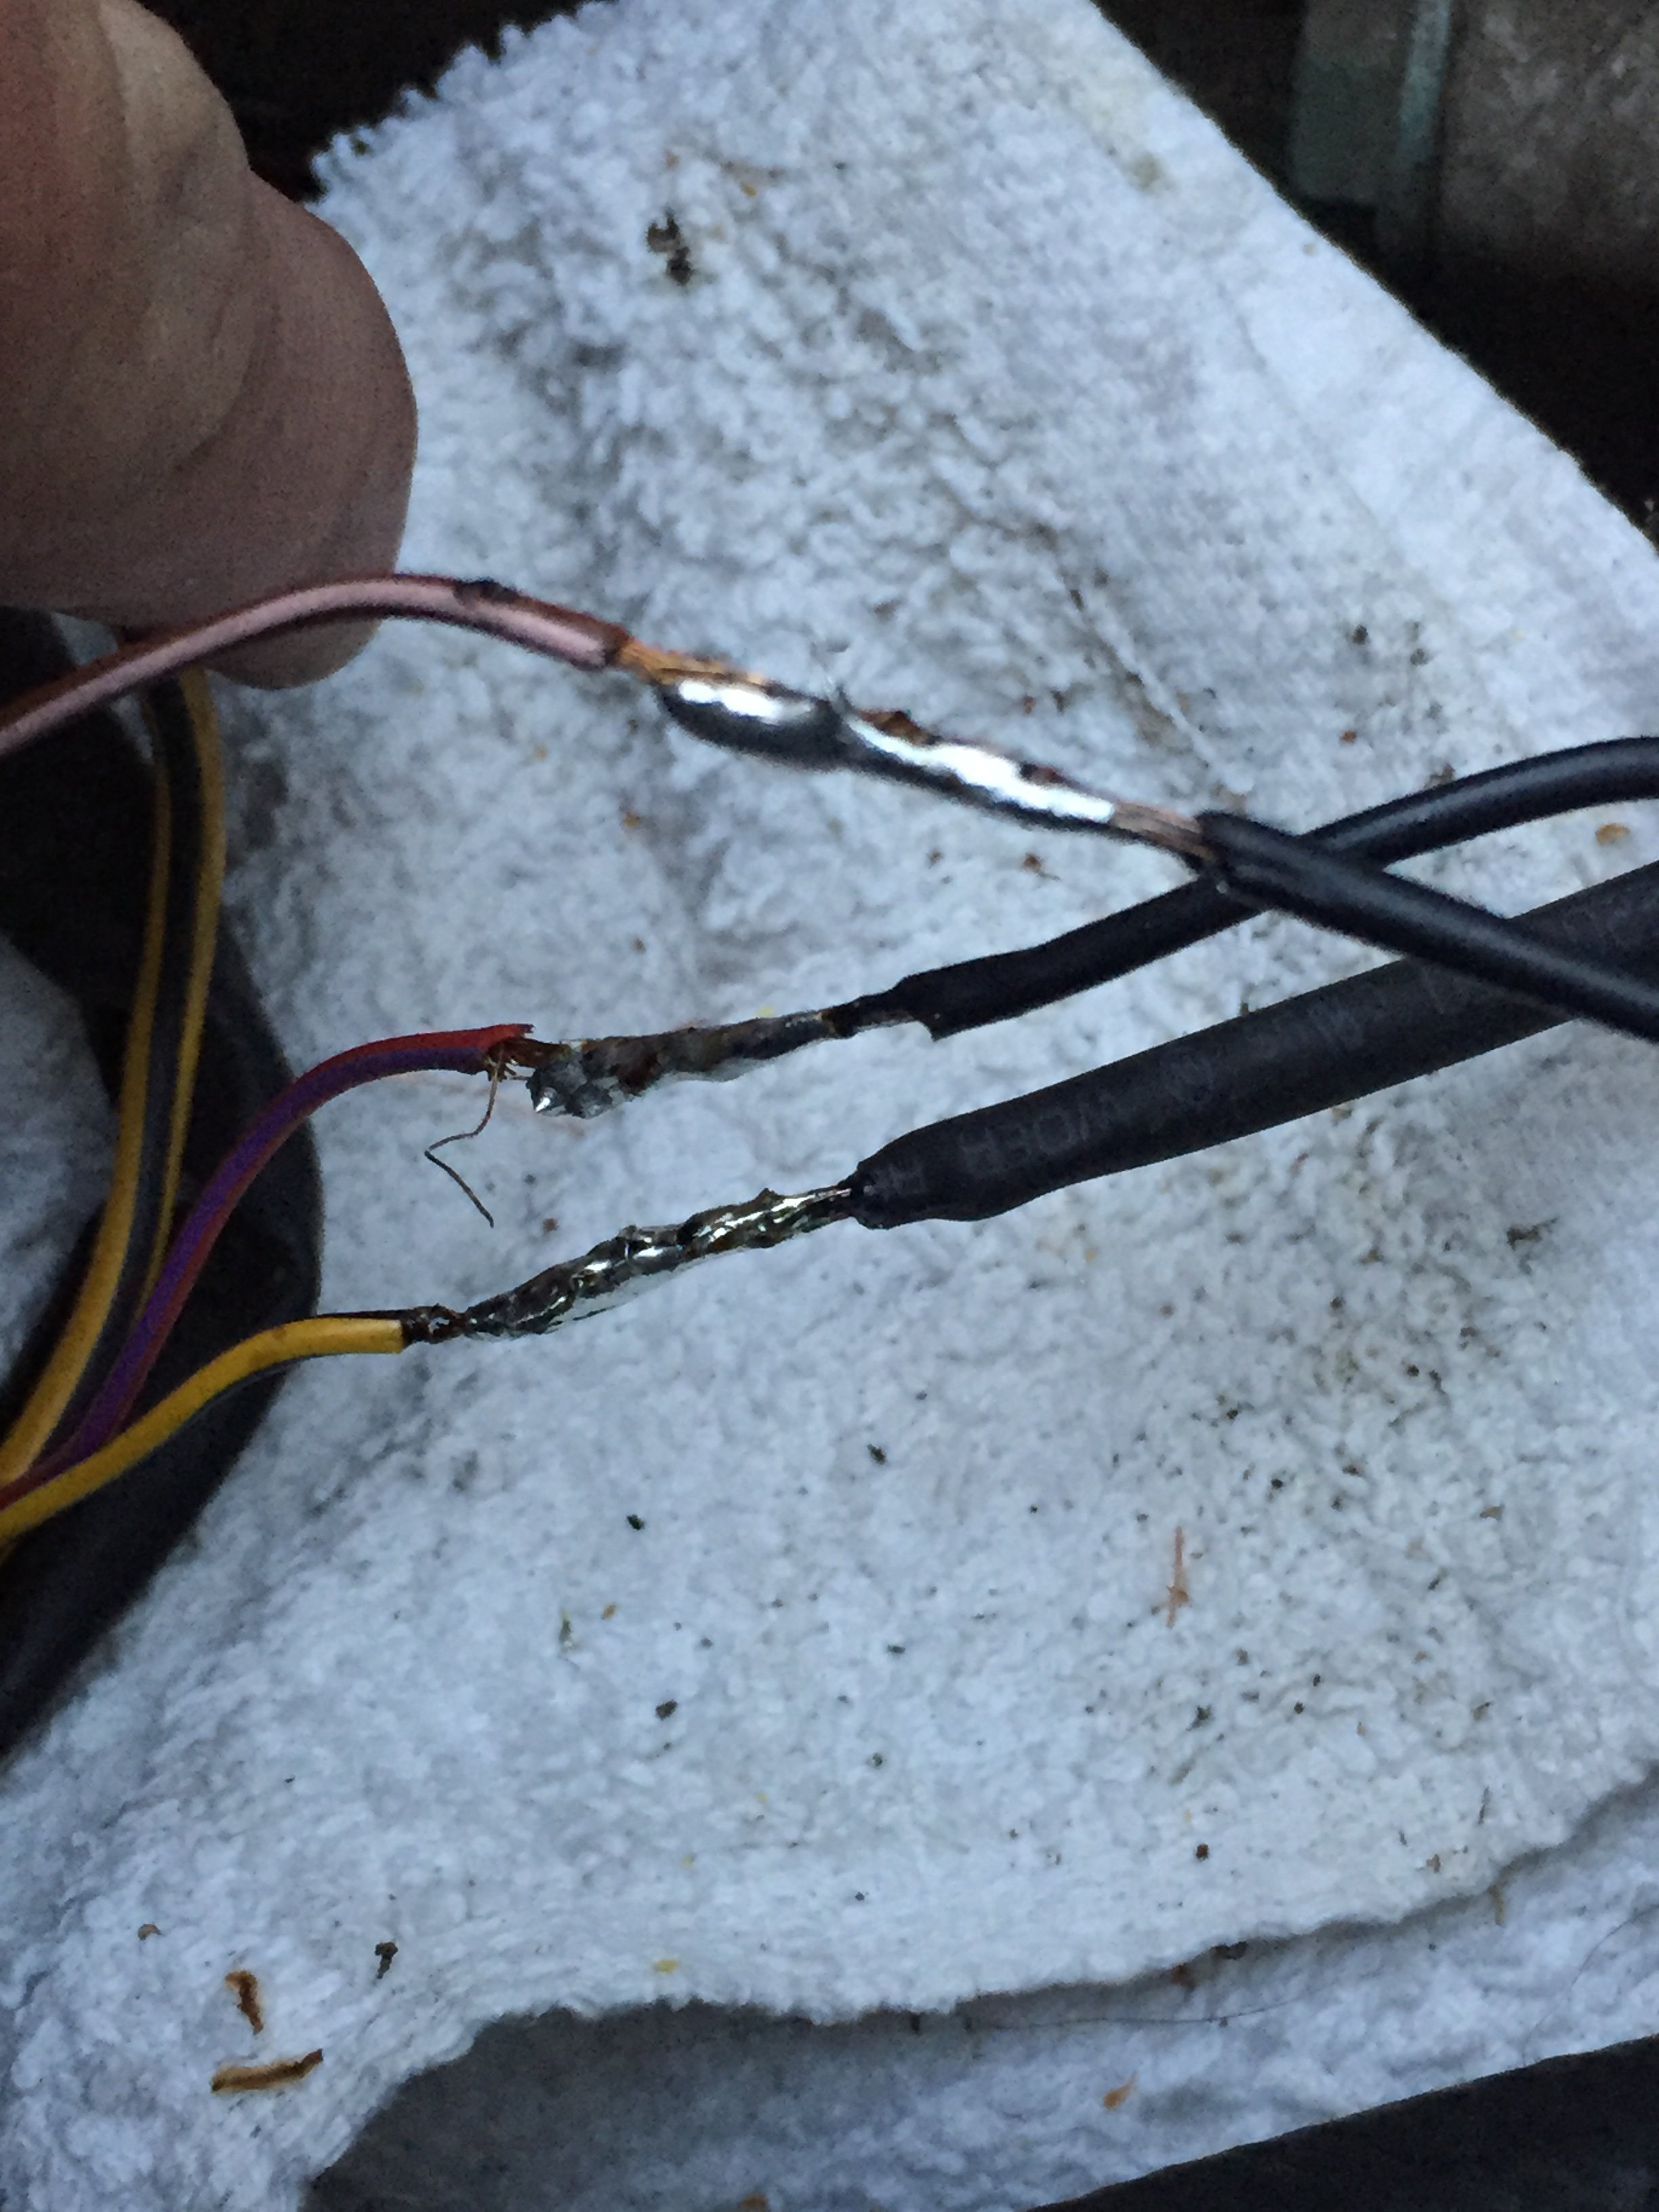
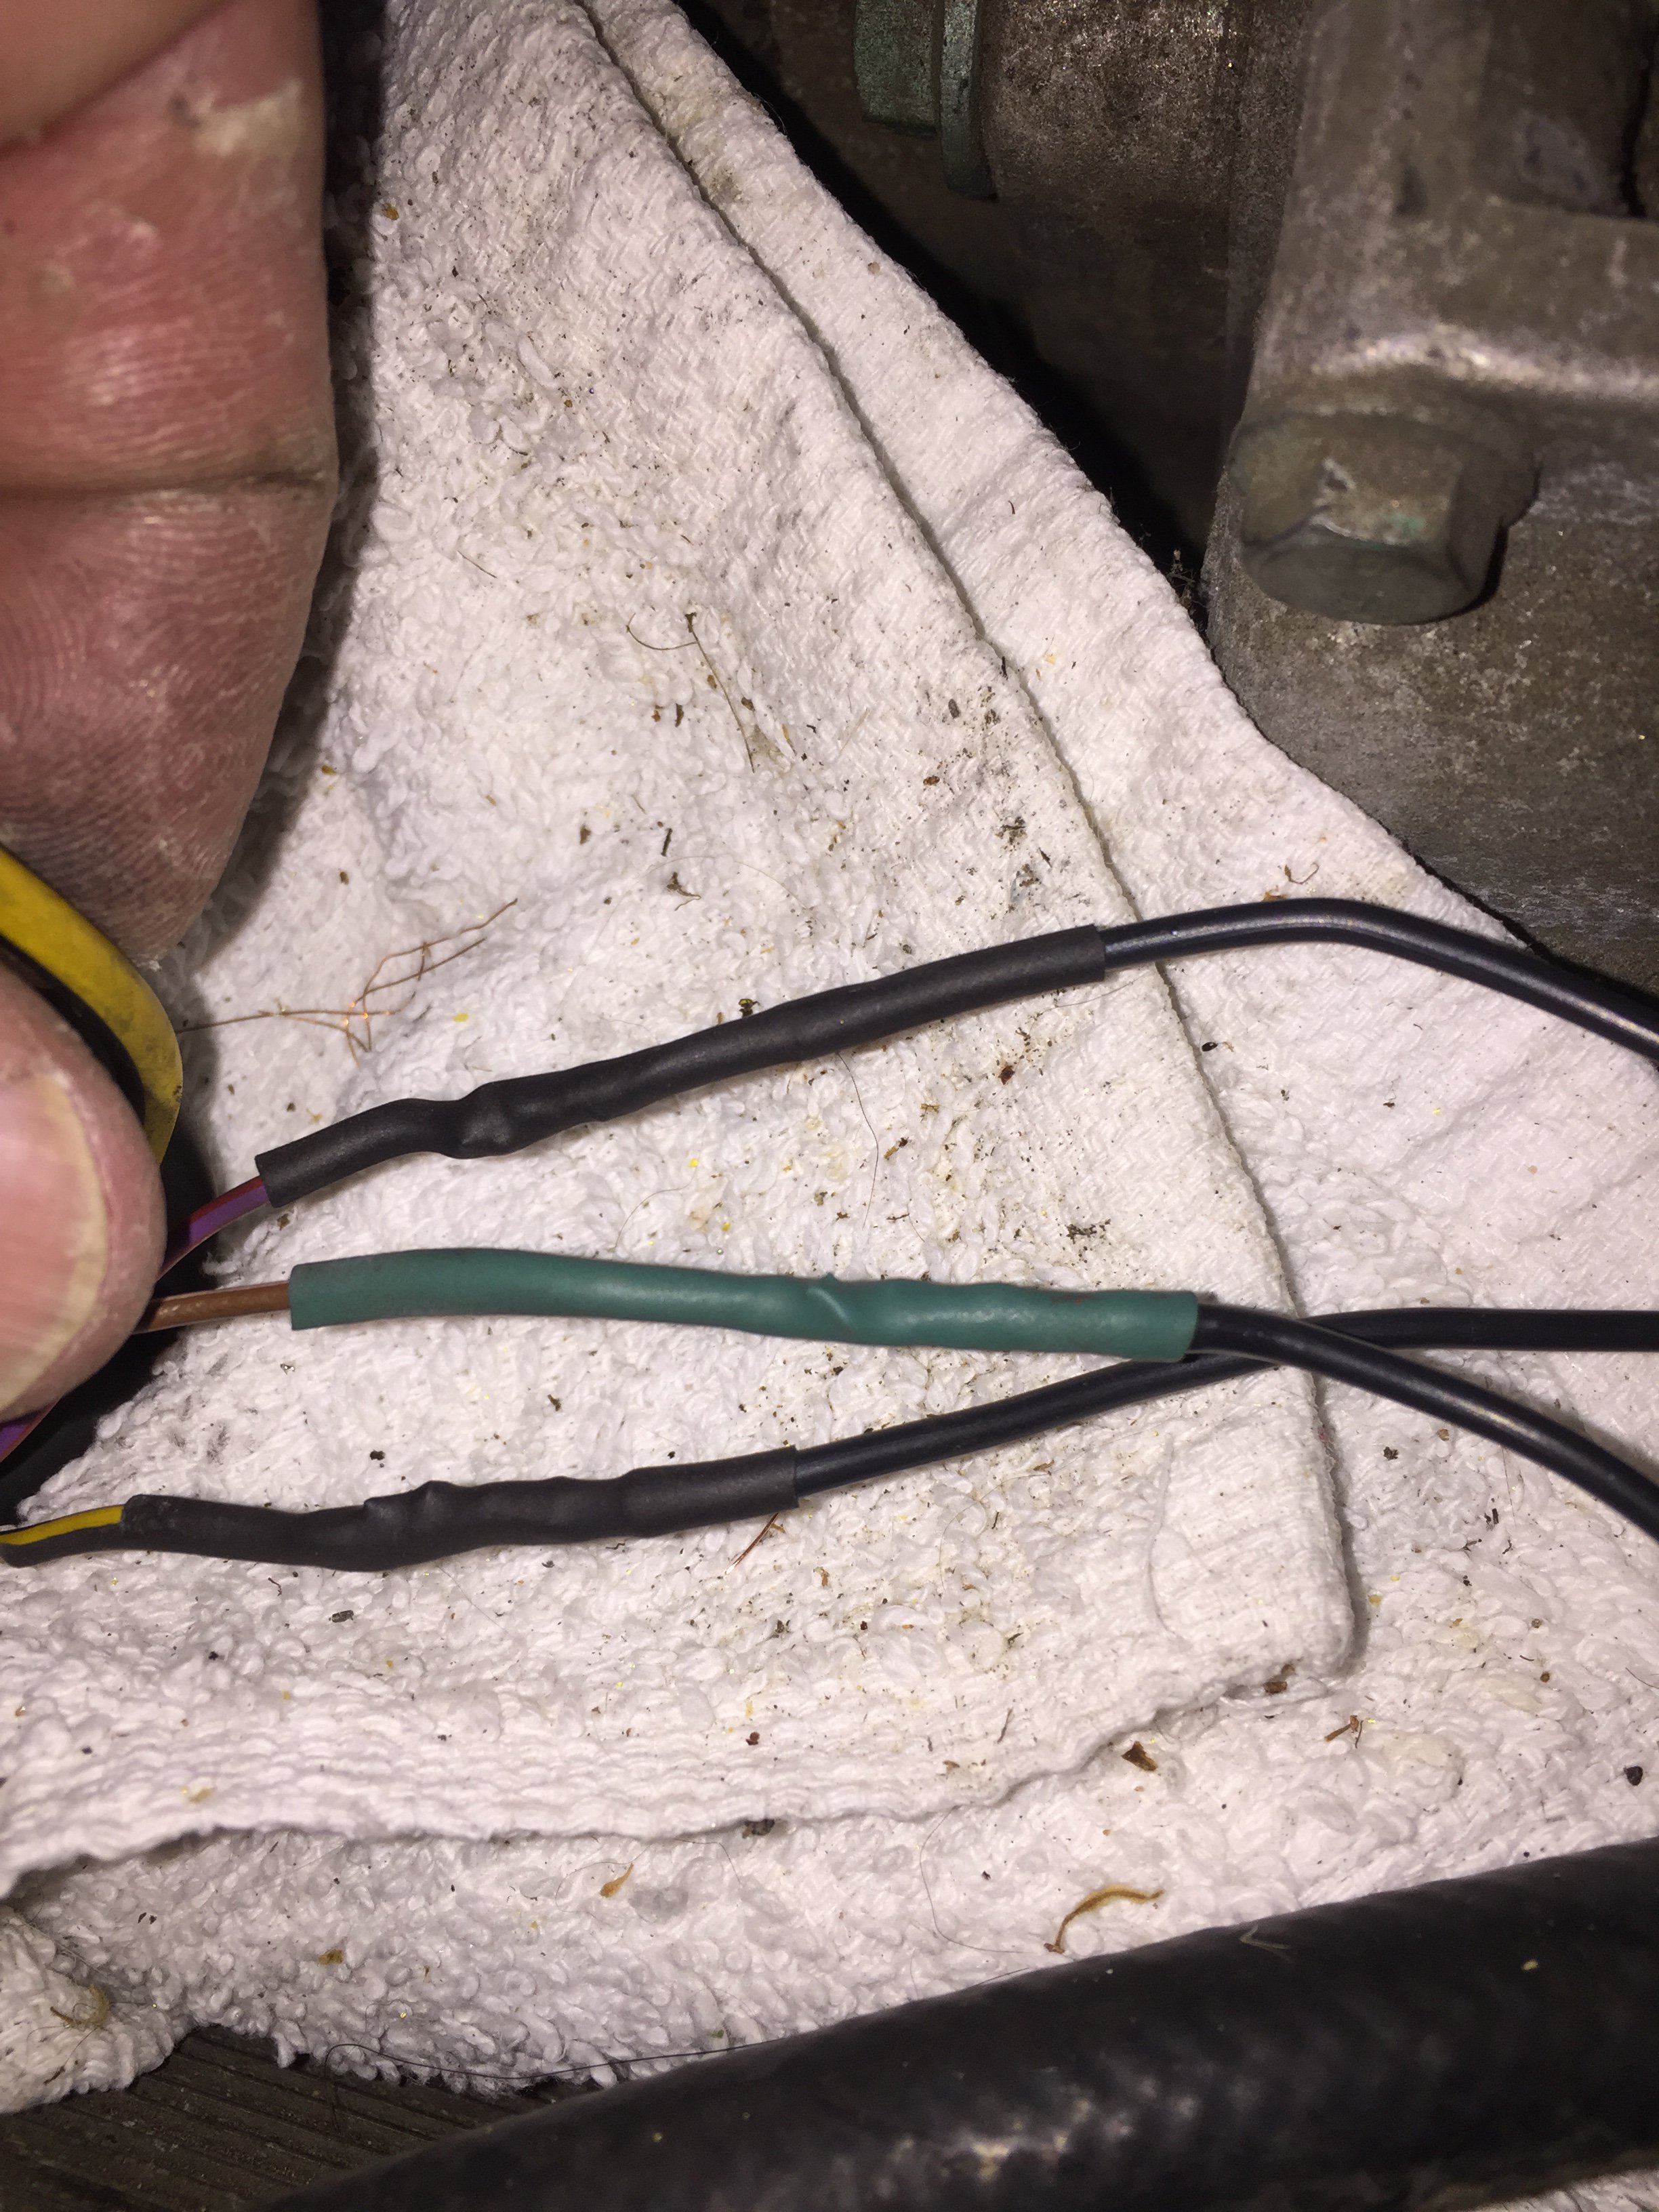
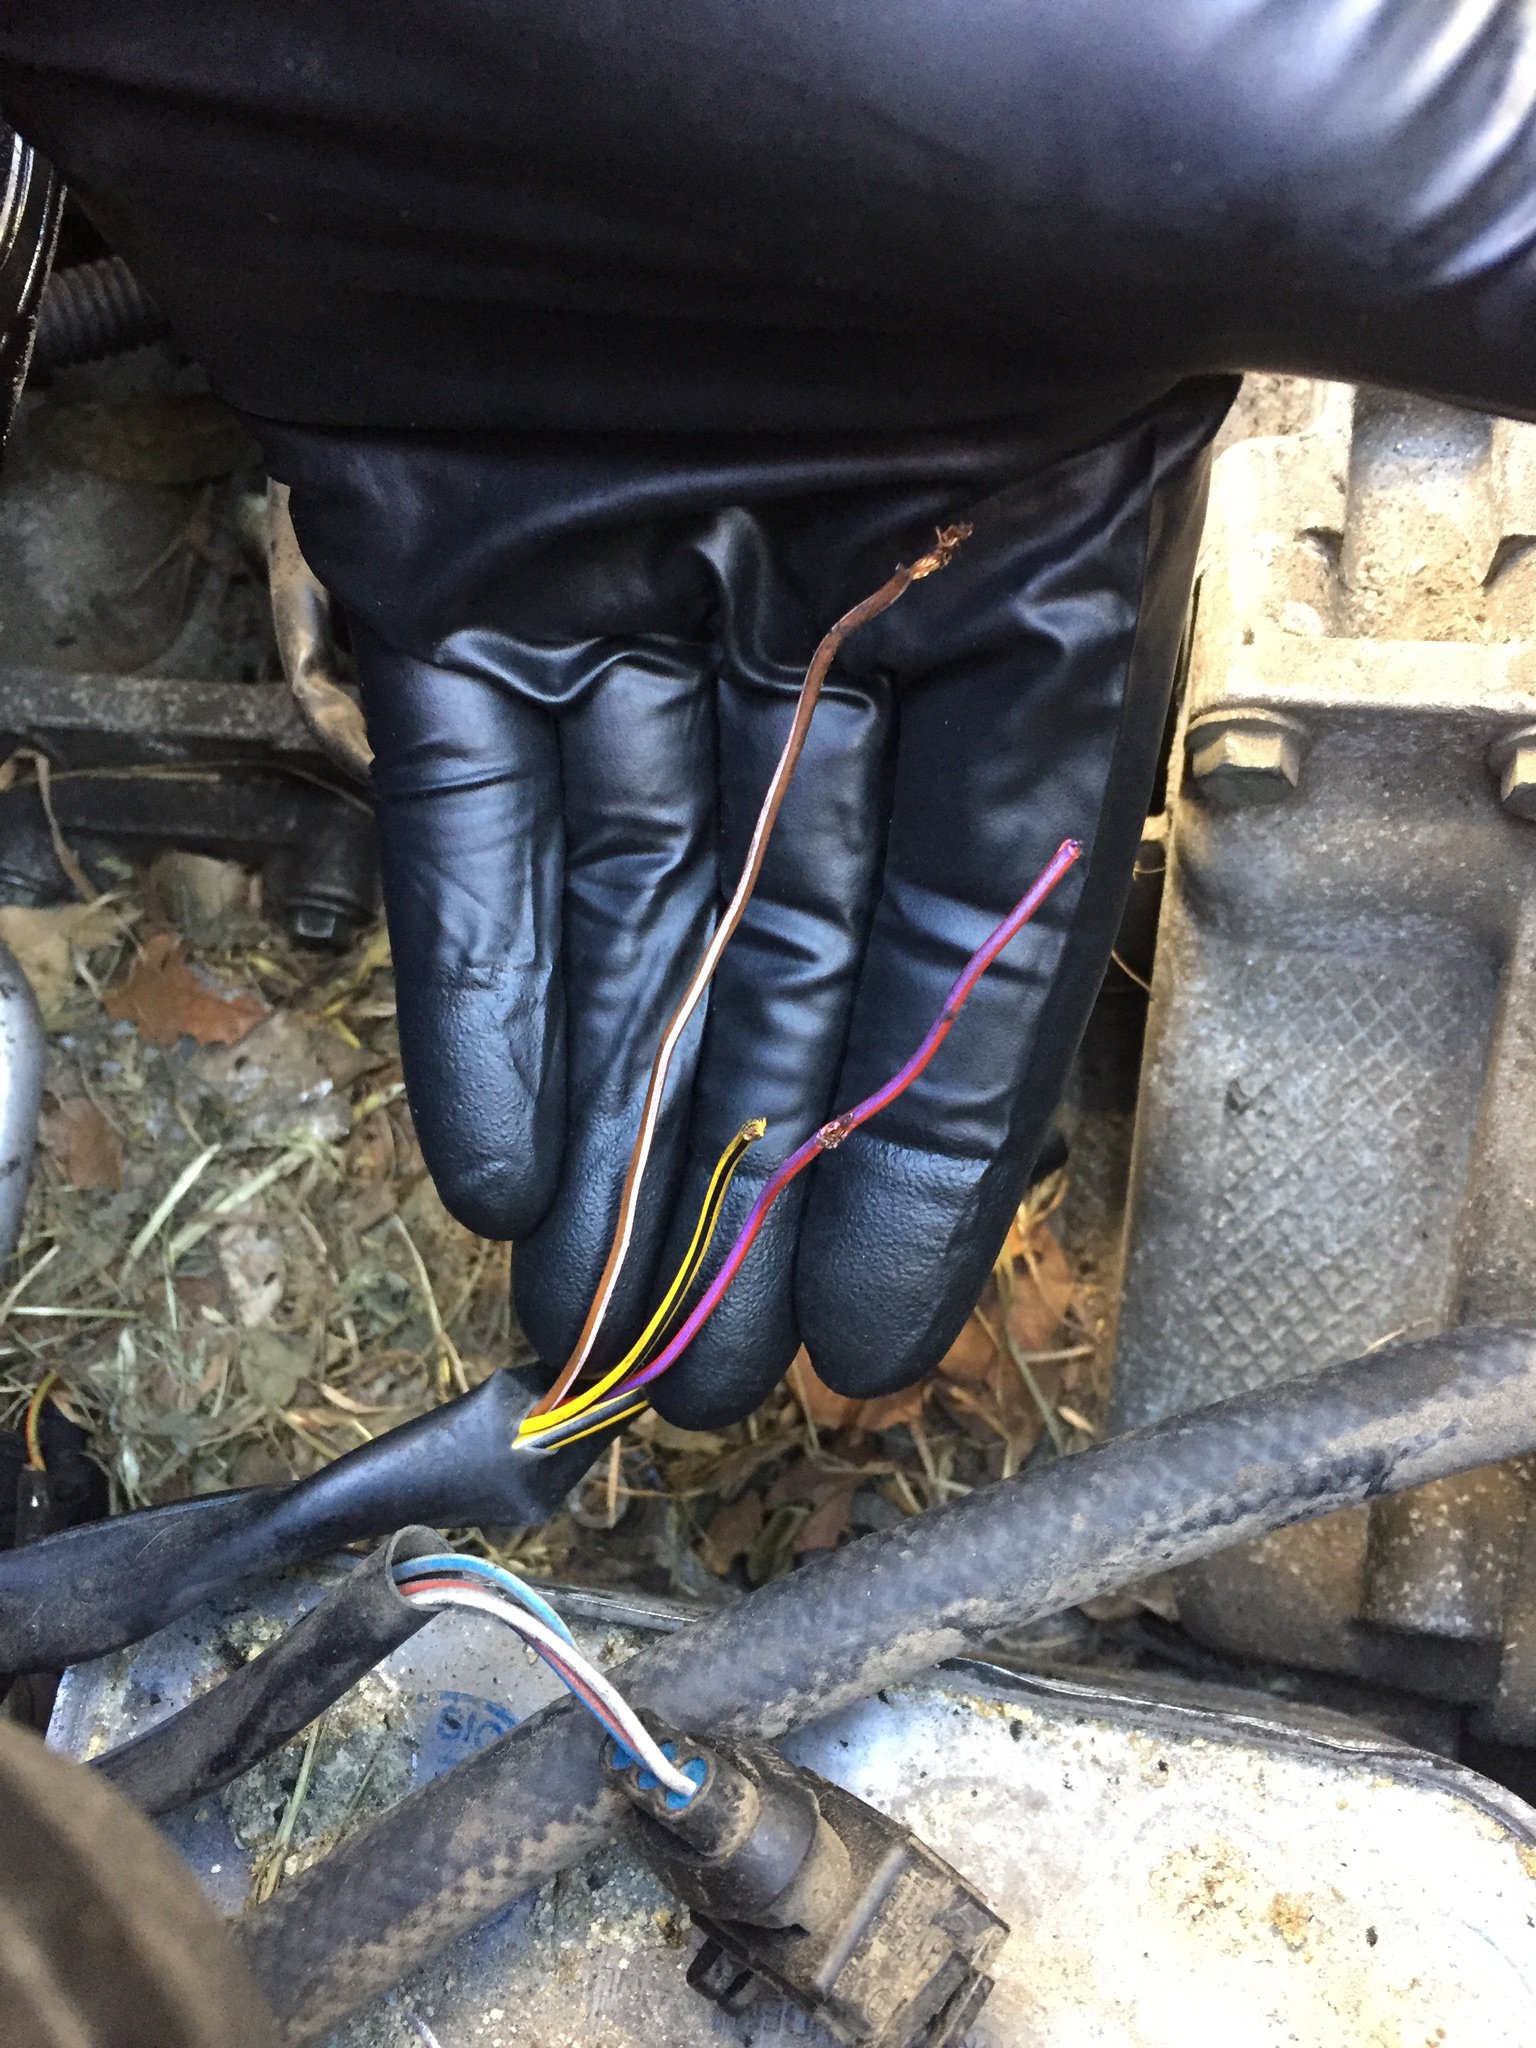
Looks like on my project Boxster, a CEL (code P0123) is caused by a rodent chewing through some wires. The project car is a ‘97 Manual.
Does anyone have a part number for the connector that plugs into the TPS, or know where I can find one to splice in? The Bosch part # for the TPS is 0280122016
Thanks,
-
Quick update. Driven the car for a month now. All issues with the misfire seem to be gone. Running beautifully now.
-
My transmission refurb continues. My old TC has grooves worn in it from a failed oil pump bearing and seal. All the fluid puked out. I have been trying to source a reman TC (at a reasonable price) but have been unsuccessful. Thinking of using a redi-sleeve to “repair” the TC.
1. Anybody done this before?
2. Source for reman TC’s?
-
Awesome!!!! I just gave them a call. Talked to John, and he was real helpful. Part of the problem, was that I was looking at other companies websites, and they weren't using the ZF part numbers. I guess they were using their own internal part numbers. Anyway, they have complete part breakdowns and they have the ZF part numbers on those diagrams, and he had all that I needed in stock. Will be here In two days. Pricing and service were indeed excellent!


Lost Radio Code - post your request here
in Lost Radio Codes
Posted
Bingo!!! Thank you!