Welcome to RennTech.org Community, Guest
There are many great features available to you once you register at RennTech.org
You are free to view posts here, but you must log in to reply to existing posts, or to start your own new topic. Like most online communities, there are costs involved to maintain a site like this - so we encourage our members to donate. All donations go to the costs operating and maintaining this site. We prefer that guests take part in our community and we offer a lot in return to those willing to join our corner of the Porsche world. This site is 99 percent member supported (less than 1 percent comes from advertising) - so please consider an annual donation to keep this site running.
Here are some of the features available - once you register at RennTech.org
- View Classified Ads
- DIY Tutorials
- Porsche TSB Listings (limited)
- VIN Decoder
- Special Offers
-
OBD II P-Codes - Paint Codes
- Registry
- Videos System
- View Reviews
- and get rid of this welcome message
It takes just a few minutes to register, and it's FREE
Contributing Members also get these additional benefits:
(you become a Contributing Member by donating money to the operation of this site)
- No ads - advertisements are removed
- Access the Contributors Only Forum
- Contributing Members Only Downloads
- Send attachments with PMs
- All image/file storage limits are substantially increased for all Contributing Members
- Option Codes Lookup
- VIN Option Lookups (limited)


Davet18
-
Posts
66 -
Joined
-
Last visited
-
Days Won
2
Content Type
Profiles
Events
Forums
External Paint Colors
Downloads
Tutorials
Links Directory
Collections
Store
Everything posted by Davet18
-
I changed the two #6 seals but it didn't fix the seepage. It is an easy change if you want to do it. As I recall it is very tight to get the bolts out but doable. From my research it seems that the V8 engines seep oil from a few places which I could never track down. I just lived with it until I sold it. Unfortunately I loved the vehicle but at around 110K. it seem I was spending more on parts that it was worth.
-
After a 3 hour highway drive, stopped at a traffic light, vehicle jerked while stopping and ABS warning light came on. Pulled into a gas station and filled up. After filling the sequence is as follows: Started the vehicle ABS light came on immediately Speedometer floated up to 85 mph then slowly returned to 0 Put the vehicle in reverse then drive and it would not move Shut off vehicle and waited a minute Started the vehicle No ABS light Speedometer registered 0 Put vehicle in reverse backed out and drove away normally. Two days later drove 3 hours back home hoping it would make it. No problems and no ABS warning light. Analyzed with Durametric, Only Error Code 1324 Transfer Box Control Unit Recent repair: I had Error Code 2042 and no 4 wheel drive in November so I replaced the Transfer Case Controller and servo motor. Code Cleared and 4 wheel drive works fine. Only other issue is I occasionally have sluggish or hard steering. I’m thinking that I may have a failing wheel speed sensor because ABS is dependent on wheel speed sensor input, speedometer is driven off the ABS module, and variable steering is also based on vehicle speed, which I think is driven off either the vehicle speedometer or ABS. Seems that the issues are all tied back to vehicle speed and wheel speed sensors. Does anyone know if an intermittent wheel speed sensor fault would be stored in ABS memory and detectable by Durametrics? Any suggestions for analyzing the problem would be appreciated.
-
Thanks for the reply.
-
Loren, thanks for the quick reply. One other time I had an issue that I could not find information on a code, Durametric transposed the numbers. By chance can your list of codes be sorted by system? If so can you send or post the tiptronic shifter codes? If not I won't worry about it.
-
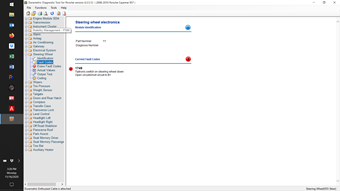
While checking another issue I checked all systems for error codes and found Error Code 1749- Tiptronic switch on steering wheel down under Steering Wheel Electronics using Durametric Software. Steering wheel shift switches are working fine. I've tried to erase the code to see if it comes back, but it doesn't erase. I have researched it and don’t seem to find anyone that has posted about this error code. Anyone seen this issue/error code before or have any recommendations? Thanks in advance for any recommendations.

-
I had the same problem on my 09 Cayenne S when the vehicle was still under warranty. It would randomly activate the alarm when I would lock the doors. According to the dealer they replace the alarm control module. It took two visits to the dealer for them to figure it out but once they changed the control module the problem went away.
-
I have been getting oil seepage around my Oil Cooler Heat Exchanger which is getting worse. From the manual I see there are two seals between the heat exchanger and the oil pan that could be causing the problem. I searched the forum and don't see any threads on the topic. Has anyone else had leakage around the oil cooler heat exchanger and if so what was the fix? Before I replaced the seals, I thought I would put it out there for input. Dave T
-
The intake socket does not need to be replaced unless you damage it taking it out. I am not sure of your numbers but the parts numbers for the parts I replaced were as follows; 948-106-125-01 Thermostat $72.14 List Price 948-106-533-00 Seal $6.78 List Price 948-106-124-02 Seal $6.12 List price 948-106-707-00 O ring Seal $11.12 List price Hope this helps
-
I removed the drain plug easily by tapping a triple square into the torx recess. No drilling. Since the aluminum is so soft a little gently tapping and the triple square sets itself securely. Not the best use of a triple square bit but it worked.
-
Thanks I will be working on it next week.
-
Does anyone have experience on how to remove a stripped drain plug? The T50 torx head is stripped not the treads. I assume drill and screw extractor is the way but I thought I would ask. I knew the torx head wasn't in good shape and should have changed it last time. Advice to all the aluminum strips easily!
-
Glad I could help. I know I have saved thousands of dollars with the help received from other on this site.
-
You code might actually be a 0346 fault. I had a 5504 code and couldn't find anything about it and emailed durametrics and they answered very quickly that it was actually 0455 fault. Seems that the durametric programing might be transposing the codes. 0346 has to do with the cam sensor positioners. "P0346 Camshaft Position Sensor, Bank 2 - Signal Implausible Possible cause of fault - Camshaft position sensor, bank 2 faulty" from a post by Lauren http://www.renntech.org/forums/topic/31110-2007-cayenne-turbo-erratic-idle-cel/?hl=p0346#entry191845 I don't know where the sensor positioner is but you might have bumped a wire or connector. If not a loose wire. You might be able to trade bank 1 and 2 sensors and see if the fault code moves. Then it would be the position sensor. Hope this helps
-
I don't know if it is the same for the 08 but the parts sound the same so I think it will be very similar. I did not drain the whole system. I drained about a gallon and a half into a clean bucket and reused it. I just used a water soluble lubricant. Nothing special but it was water soluable. I would stay away from anything that is petroleum based as some petroleum based lubricants can damage rubber type seals. The two biggest problems are getting the thermostat out and then putting the intake manifold back in and getting the vacuum hoses back in place expecially the one on the back of the left side of the manifold. Removing the thermostat takes some very hard prying. From your parts list you have an intake socket. If that is, what I call, the rubber tube between the water pump and the thermostate I did not replace mine. I resued the old one and have not had any problems. If you are not reusing the rubber tube then you may take a thin object and insert it arount the outside of the tube to separate if form the side walls. The post above this indicates that that is what he did because he could not get it out. Good luck
-
Glad the write up helped. The vacuum hoses are a challenge. I had a cracked vacuum hose which I took a while to diagnose. It has been two and a half months and no faults codes on my 09 cayenne so I think it is good to go. As you said this is a DIY. Strictly unbolting remove, replace and bolting back together. It can easily be done in 3hours the second time so I don't know how the dealer justifies around 7 hours to do the thermostat change out.
-
Apparently the thermostat is a common problem. I used the durametric software to determined the code P8121. I brought it into the local dealer because I have an extended warranty. Dealer said the thermostat needed to be replaced but wasn't covered so I changed the thermostat myself. I don't know if they did any other tests or because it is a common problem they just knew it was the thermostat. Thermostat cost around $50 from Sunset Porsche. The sensors are a little harder to get at. I think they are on the back of the thermostat housing and the fuel manifold needs to be removed. Sorry for the late response.
-
FYI I did the thermostat replacement last weekend and posted a DIY today. It is a straight forward project which takes between 4 and 5 hours. Cost for parts is around $70 from Sunset Porsche. Hope the DIY helps anyone who is going to do the thermostat replacement.
-
Thermostat Replacement on a 09 Cayenne S The following is a do it yourself procedure for replacing the thermostat on a 09 Cayenne S. The change out is straight forward and took me around 4-5 hours. One word of advice, the thermostat housing does not have to be removed to remove the thermostat. I thought it did and wasted a bunch of time removing other components to remove the housing before I realized it wasn’t necessary. The thermostat is removed easily after the water pump is removed. The parts were purchased from Sunset Porsche Author Davet18 Category Cayenne (9PA, 9PA1) - Common Fixes and Repairs Submitted 01/01/2014 01:04 PM
-
The following is a do it yourself procedure for replacing the thermostat on a 09 Cayenne S. The change out is straight forward and took me around 4-5 hours. One word of advice, the thermostat housing does not have to be removed to remove the thermostat. I thought it did and wasted a bunch of time removing other components to remove the housing before I realized it wasn’t necessary. The thermostat is removed easily after the water pump is removed. The parts were purchased from Sunset Porsche who were fantastic in getting the parts to me overnight. As always thanks to Loren for his advice. Tools Pliers to remove hose clips Torx sizes T-30, T-40 Strap wrench for holding pulley when removing screws E-10 Torx socket Large adjustable wrench for serpentine belt tensioner Normal other tools, pliers, screw drivers, ratchet, extensions etc. 5 Gal Bucket Parts List 948-106-125-01 (1) Thermostat 948-106-533-00 (1) Seal for Water Pump 948-106-707-00 (2) O rings for Intake Transfer Pipe (Note, the O rings are shaped different than the original O rings. Originals were square with grooves and these are true round O rings. Torque Setting Water Pump to casing 7.5 ft-lbs Water Pump Pulley 17 ft-lb Intake Manifold and Side Covers- Cross-tighten all manifold bolts to 7.5 ft-lb; then final torque to 12 ft-lb. I could not find the 09 torque spec but found the 07 specs which were reasonable. Procedure 1) I always disconnect the battery before doing any major work and recommend it. 2) Drain Coolant System A. Allow engine to cool B. Remove Coolant Reservoir Cap C. Remove the front two splash pans under the engine and radiator D. From underside of vehicle disconnect the hose (Figure 1) and drain cooling system into a container (clean 5 gal bucket works) 3) Remove plastic around engine compartment (2 screws and 9 plastic snap screws) (Figure 2) 4) Remove intake manifold and piping A. Remove decorative 4.8 V8 cover by lifting off B. Remove intake piping by removing hose clamps and removing pins (Figure 3). The pins rotate about a quarter turn and pull upward and out. Be gentle they break easily!!!! 5) Remove Intake Manifold Side Covers (similar for both sides) A. Removing two T-30 Torx screws (Figure 4) B. Remove vacuum hose connective both side covers (Figure 4) C. Remove vacuum hose on right side breather (Figure 4) D. Lift the Manifold Side Covers from the center of the engine up and outward and they will lift off. Right side has a vacuum hose attached under the cover which needs to be detached. 6) Remove Intake Manifold A) Remove (5) T-30- or T-40 (forgot size)Torx Screws on each side of intake manifold (Figure 5) B. Move the Intake Manifold forward and remove vacuum line and electrical connection on the back of the intake manifold. The vacuum line and electrical connection wire are very short. I disconnected the vacuum line Tee shown in Figure 6 to make it easier to disconnect and reconnect the vacuum line. 7) Remove the serpentine belt A. Relieve tension on the serpentine belt by rotating the tensioner (Figure 7) B. Remove the serpentine belt from the water pump 8) Remove Water Pump A. Remove 3 Torx Screw on water pump pulley (Figure 8) using a strap wrench to hold the pulley from turning. B. Remove (5) M6 X 25 Bolts on Water Pump using and E-10 Torx socket (Note Reinstallation tightening sequence is clockwise starting with the top middle bolt. C. If the pump is stuck gently tap it with a plastic hammer or a block of wood and it should come off. 9) Remove Thermostat A. Locate the spring on the Thermostat and tie a wire around the spring. (Figure 9 &10) B. Using a screw driver or pry bar inserted in the wire loop as shown in Figure 10 and pry out the Thermostat and the Transfer Pipe. Figure 11 shows the Transfer Pipe (3) and Thermostat (4). 10) Installation is in the reverse order of the above with the following advice/precautions. A. When reinstalling the Thermostat make sure the new thermostat is all the way into the housing before inserting the Transfer Pipe. The Transfer Pipe has two seals that should be changed when reinserting the Transfer Pipe. Use a water soluble lubricant when inserting the seals. I tried pushing in the transfer pipe in by hand but it kept popping back out because of the new O rings. I used a flat pry bar to gently press the Transfer Pipe back in (Figure 12). The Transfer Pipe should be flush with the housing and should not stick out. B. Check all vacuum hoses for cracks. They get brittle over time and crack. When finished, I got a 5504 Fault Code using Durametric Software. I contacted Durametric because I could not find any information on that code. It turns out that the software is transposing the code so it should have been a 0455 code which is a vacuum leak. I found a vacuum hose cracked from moving it around to get the Intake Manifold off. C. The vacuum and electrical connection wire are very short on the back of the Intake Manifold. I disconnected the vacuum line Tee shown in Figure 6 to make it easier to disconnect and reconnect the vacuum line. Make sure they are firmly plugged in before setting the Intake Manifold in final position. D. Make sure the Intake Manifold is seated properly and no wires are under the back corner of the manifold preventing it from seating properly. E. Porsche recommends a vacuum fill of the cooling system. Since I didn’t have the equipment, I filled the cooling system through the Coolant Reservoir. I used the fluid I removed from the system so I knew how much needed to be put back in the system. I ran the vehicle for a little while, let it cool, and then continued to top off the system over the next few days. F. If you disconnected the Battery you will get a PSM fault which will go away after driving for a little while. The system has to recalibrate itself after Battery Removal. I hope this helps the helps. I wrote it about a week after I did the repair so I hope I haven't forgot anything.
-
I traced all of the vacuum hoses that I removed/moved during the thermostat replacement and found one in the back that was cracked. I replaced it tonight. Thanks
-
FYI, I talked to Durametrics and the software is reversing the code. It should be a code 0455: Evaporative emission system leak detected. They will correct the software on the next update.
-
The check engine light came on again and durametrics showed fault code 5504 again, no signal/communications. Module identification is "Siemens Digital Motor Electronics SDI4". I drove the Cayenne for a week after I reset the fault code before the light came on. Can you provide any guidance where the hood latch switch is located? Maybe something got loose or moved when I leaned in working on the thermostat.
-
Yes it was 5504 but it showed up under the engine section on Durametrics. I reset it and will see. If it is a lid/trunk or door problem I am not worried about it. I was concerned because of the thermostat changeout. As always thanks for your help. :cheers:
-
I just did a thermostat change out on my 09 Cayenne s and I am getting an error code 5504 no signal/communications? I cannot find this code anywhere? Anyone have any ideas?
-
I have the same 2181 code and took my 2009 Cayenne S to the dealer for repair under aftermarket warranty. Found out warranty doesn't cover the repair. Dealer quoted $1300. Can you provide a description of how to get at the waterpump to change the thermostat? I do all my own work on my 911 and have changed water pumps on other vehicles but not on this one. Any advice on the repair and any other parts necessary to do the repair (i.e. gaskets etc) would be appreciated. Thanks in advance. Dave T