Welcome to RennTech.org Community, Guest
There are many great features available to you once you register at RennTech.org
You are free to view posts here, but you must log in to reply to existing posts, or to start your own new topic. Like most online communities, there are costs involved to maintain a site like this - so we encourage our members to donate. All donations go to the costs operating and maintaining this site. We prefer that guests take part in our community and we offer a lot in return to those willing to join our corner of the Porsche world. This site is 99 percent member supported (less than 1 percent comes from advertising) - so please consider an annual donation to keep this site running.
Here are some of the features available - once you register at RennTech.org
- View Classified Ads
- DIY Tutorials
- Porsche TSB Listings (limited)
- VIN Decoder
- Special Offers
-
OBD II P-Codes - Paint Codes
- Registry
- Videos System
- View Reviews
- and get rid of this welcome message
It takes just a few minutes to register, and it's FREE
Contributing Members also get these additional benefits:
(you become a Contributing Member by donating money to the operation of this site)
- No ads - advertisements are removed
- Access the Contributors Only Forum
- Contributing Members Only Downloads
- Send attachments with PMs
- All image/file storage limits are substantially increased for all Contributing Members
- Option Codes Lookup
- VIN Option Lookups (limited)


JFP in PA
-
Posts
8,585 -
Joined
-
Last visited
-
Days Won
190
Content Type
Profiles
Events
Forums
External Paint Colors
Downloads
Tutorials
Links Directory
Collections
Store
Posts posted by JFP in PA
-
-
Which "red dash alarm light"?
-
P0446 is the code thrown when the EVAP canister purge air line is blocked. Usually just needs a compressed air blow out of the purge air line. The same code can also be thrown if the EVAP canister itself becomes totally blocked, but that happens very rarely.
-
You could start by posting in the correct forum: Lost Radio Code - post your request here
-
He's got a 2003 JFP so the actuators just pull right out of the cam cover. No need to remove the engine or pull the cam cover off...
The solenoids/actuators themselves a few hundred bucks if I remember right and pretty simple unbolt bolt on procedure.
Must be time for new glasses; I misread the model year.................. :eek:
-
Hi Loren, Logray, and all,
I've searched but only found info for pre-2001 cars, which don't have VarioCam+. My CEL has NEVER been ON but Durametric retrieved P1341. Does this code mean the actuator or its connections are at fault? Mine is a 2003 Carrera 2 coupe manual.
Is this the actuator, which Porsche call Solenoid Hydraulic Valve?
or this one, which Porsche call Vane Cell Adjuster?
1_2002_911-vane-cell-adjuster.pdf
If the former and it's failing, is it just a simple remove and replace? Or I need to remove the cam cover, re-time, and such?
Many thanks,
Ahsai
Most probable is you have a VarioCam actuator on the way out, there was a recent poster with the exact same issue and it was tracked down to the actuator. On the down side, this can be a bit expensive if a dealer does it; I think his all in bill was around $6K. May be a good time to find a quality indy in your area.................

-
The combination of overheating and water in the oil can be devastating, but without physically being able to look at or test the car, it is impossible to say what damage has been done. You need to do two things, pronto: One, get the contaminated oil out of the engine ASAP, being sure to also change the filter. Two, do not start the car until the cooling system as been properly refilled, and this will mean the use of a vacuum system because you do not want to run the car until the cooling system is ready to function. Then you can start purging the water out of the engine oil system.
Put a fresh filter and a full load of oil in it before starting it, then let it run at idle until fully warm, then bring the RPM’s up to about 1,500-2,000 for about 30 seconds. Let it idle again, shut it off and drain the oil and change the filter again.
Repeat the oil refill and filter, repeat the warm up and low engine speed run. Shut the car off and pull your dipstick looking for the classic “hot chocolate” look in the oil. If you find it, repeat the oil change again until the oil stays looking like oil and not an emulsion with water. Once the oil stays clean, take the car for a long, but casual drive to get it hot and allow the crankcase evacuation system to remove any remaining moisture.
Only time will tell what else may have happened…………..
-
 1
1
-
-
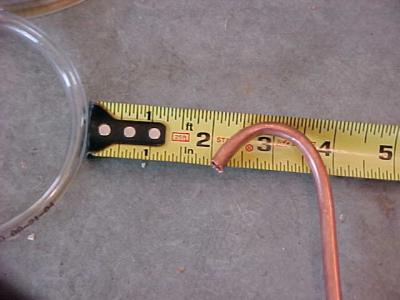
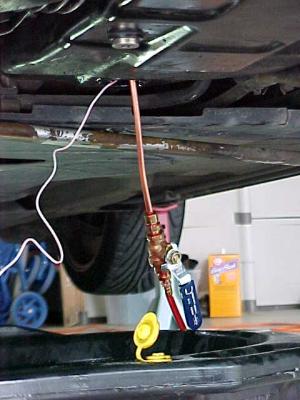
OK, the no end of confusion with the Tip refill stems from the fact that there are two apparent drain plugs on the bottom of the pan. One (usually slightly smaller in size)is acutually the drain, the other is the fill port. The fill port has a riser tube mounted in it that extends upwards into the trans a bit so that as your refill it, the fluid does not come back out until it reaches the top of the tube.
The factory refill setup has a flexible plastic end on it that is bent into an inverted "J" shape, so that the tool can be inserted up into the tube and then pops over the top edge so that the new fluid is flowing downwards towards the pan.
-
1
-
-
If the nut is over torqued, you run the risk of tensile failure just as you as described. When the stud breaks, the IMS is free to shuck back and forth in the case (that was the noise heard). Since the stud does nothing to support the bearing (just sets the running position) there was no reason to cause bearing damage. The stud's nut is a clinch lock type, and you hold the stud from turning with just a blade screwdriver after the nut is started. The little screw slot's anti-rotation role in tightening the nut should tell people "whoa, why is this here?" And,.....is one reason why the torque spec for the nut is so low. This is why we make a big, bid deal about procedures. I understand your concern, and take your comments seriously. Barring a defect in the original part (which is possible but not likely, and can occur regardless of size) the only scenario that can fail the stud is overtorque. You would think that the limit of holding the screw slot with a screwdriver would limit the installed torque. But in practice, once the nut starts an axial load on the stud, you don't need to hold the slot in position any more on many of these engines. Some turn, and some don't w/o the screwdriver in place. This is what makes the "tweaking" possible. Nobody likes tasks that are awkward or difficult. Learning the technique to hold the slot and tighten the nut takes practice, and I understand why you guys don't like it. But it was done for a reason.
The OEM stud actually has a couple advantages over a "beefed up" stud. 1) If things don't go together right, it limits the load you can put on the inner race. When you are
pulling on the inner race, it creates a load path thru the balls. Remember the discussion yesterday about bearing design for radial only loads. If you pull too hard, the races can get indented from the balls, and they are ruined. 2) The more material that goes into the stud dia., the less available to actually support the bearing ID. If the support flexes, it won't be long b4 other problems start.
While on the subject of odd ball failures............. When you guys come across strange failure modes, we would love to see the parts. Send them to us, or give us a call.
We can look at them in the lab, and tell a bunch of things not apparent to the naked eye.
BR
Casper Labs, Inc
You might be interested in the fact that the center bolt failure we saw was not the only one we are aware of, there have been at least two or three more, all were factory engines that had never been apart. Two of the bolt failures involved bearing failures as well the the center bolt, all of which failed at or very near the under cut area. I am not aware of any of the LN style center bolts failing, even on the very small number of bearings that have had problems.
-
We have actually seen a 986 that suddenly shut off while at a traffic light, was complaining of a large oil leak under the engine (it was huge) and some strange noises in the transmission area. What we found was part of the IMS center bolt had snapped off where it necks down for the oring, and was lying in the bottom of the bell housing. Prior this this happening, the car had been fine. While the engine was damaged due to valve to piston contact, the IMS bearing was rather loose, but otherwise seemed OK.
-
Actron makes an real fuel pressure test setup (CP 7838) that works perfectly and has adaptors so it can fit just about anything with throttle body or port fuel injection systems. List price is less than $60, but you can easily find one for about $35-40.
-
Two things to look at: (1) Look at your crank position sensor (mounted on bell housing). When the CPS starts to go bad, the DME does not see the engine turning over and does not turn on the fuel and ignition, so the car will not start. The car will also not thow any codes when this happens. (2) Check your fuel pressure and delivery volumes. The pressure test is quick (there is a metric shrader valve on the fuel rail that a test guage attaches to) and relatively inexpensive if you do not have the equipment to do it yourself. I the pressure is in range, check for delivery volume; the car needs both to run correctly. If either (or both) the pressure and volume are low, it could be the fuel filter on the early cars, or a bad fuel pump.
-
Glad to be of help.
-
For the most part, that is correct because the action of the dying bearing overloads it. But there have also been cases where the bolt let go and the bearing was still in reasonable shape.
-
" Correct me if I am wrong, but there are some savings by Casper using oem parts (support and center stud). This is great if there are no issues. Has anyone ever heard of any issues with the support and stud? Is this just a bearing problem and the support and stud are fine? If that is the case then Casper could be a good choice. "
LN increased the size of the center bolt to add strength, and removed the OEM under cut for the oring (LN relocated the oring to the flange) as the center bolt has been known to fail by breaking at that point:
-
1
-
-
The Pelican bearing has some other "interesting" elements as well: It is an all steel OEM style replacment with grease and seals. It also only comes in one size, but includes spacers to make up the difference of the larger bearing if the car was a dual row style. It supposedly will sell for $165.
-
Check your crank position sensors; it is in the bellhousing because it reads off the flywheel. When the CPS goes bad, the DME does not see the engine turning over, so it does not turn on the fuel and ignition and the car won't start; because DME sees nothing wrong, no codes.......
-
I also checked your data against 35 UoA's pulled at random from our data base, coming exclusively from Turbo's over a period of 3 years; while your VI, 40C, and 100C viscosities look like nearly fresh oil, and your TBN values looks equally good, the average of the reports I pulled at random are a mere fraction of those values after an average of less than 4,000 miles. I also see much higher fuel and water intrusion values as well, which I would expect from a Turbo car.
-
Was this the oil after 20,000km, with a new quart added every 3,000km?
Joel
Yes!
Mobil 1 must be using an entirely different formula in Europe.
-
No. If you look at a picture of the slave, its actuation arm/rod is inside the bell housing when it is installed, so you cannot see anything moving. It would be possible to pull the starter and insert a fiber optics cam to see it move, but I rather doubt you really want to get into that level of diagnostics.
You can pull the slave and operate it outside the bell housing on a bench using compressed air to see if moves correctly.
-
As I have stated before, I have no love for vacuum bleeding systems, they invite too many problems. Positive pressure, like from a Motive bleeder, it the best approach. The clutch needs to be bled with the pedal held fully depressed to the floor, after which you will need to manually pull it up, and then it will function normally.
The clutch master rarely is a problem, we see many more slave problems, ranging from leaking to simply not working, often stopping suddenly. Fortunately, the slave is not that bad a DIY project.
-
Have you contacted TRG and asked them? They are usually pretty helpful.........
-
By far, the best tool for this is a shorty double box wrench. I have one from Sears that is about 3 1/2 inches long and it gets right in there with room to spare. Put the wrench on first, then the drain tube, so the wrench stays in until you are done. There is more than enough room to swing the short wrench in the limited space.
The best way to get at the bleeder is from below; many like to remove the rear wheel so they can see better, and because they are going to do the brakes as well. As for how high, that is a matter of preference; I've done them on the lift or on jack stands, either takes about the same time. With the correct wrench, and doing it from below, bleeding the clutch adds about 2 min. to the total time for a brakes and clutch system flush, just don't "over think" the problem.
If you do not hold pedal to the floor while bleeding the clutch, you will not totally flush out all of the old fluid in the system, so it is a good idea to do so.
-
I find it interesting that people would be somewhat negative to a company trying to develop a potentially less expensive alternative and to the do it yourself-ers. Some choose to do their own maintenance instead of paying out lots of money to expensive mechanics and because they simply enjoy it.
No one is trying to specifically be negative towards either DIY'ers or entrepreneurs’ trying to develop alternative products. But there needs to be some level of appreciation, particularly in the case of the IMS retrofit, how this started out versus where it ended up.
When Charles and Jake set out to develop a realistic answer to a problem that Porsche said could not be done, I’m sure they had no idea how convoluted what was basically a good idea would become. Early on, both men went out of their way to try to support people attempting this retrofit, only to find out how all consuming it would become due to the demands it placed upon their time. To be simplistic, there a simply too many ways one of these installs can go wrong due to poor judgement, not product design; and then the phone starts to ring. Pretty soon, you find huge amounts of your time taken up trying to sort out what should not have happened in the first place. I can tell you from practical experience, even independent shops can spend can end up spending way more time talking on the phone about installs they have had nothing to do with, and that is simple not a good use of your time. There are a large number of DIY installs that have gone perfectly smoothly and without any problems; unfortunately, those get lost in the clutter of the smaller number of ones that didn’t.
Secondly, this latest alternative is either the fourth or fifth coming into the market to my knowledge. One or two have been pretty innovative in their approach compared to the OEM design; another took the “low cost provider” route. To date, the first of the “innovators”, while initially very interesting, seemed to quickly die due to unresolved technical problems that left installers and car owners on the hook with some big problems. The second of the “innovators” is still in the early stages, but again appears to be an overly complex design with a lot of things “still to be determined”. There is also a simpler lower cost alternative, but with somewhat of a caveat: Because of the materials of construction and the design of the retrofit unit, it now appears that the suggested replacement intervals for the retrofit bearing may be rather short, perhaps as short as every 36,000 miles, which somewhat puts a dent in the “low cost” concept.
So those of us that live in this space 10-12 hours a day, six days a week, tend to take a “show me” approach towards yet another new product offering, and recommend others take a “wait and see” attitude as well. That doesn’t mean that we believe there is anything intrinsically wrong with the new product, we are just being cautious due to experience……………
-
The keys for these cars are a reoccurring theme: Expen$ive. They require a special (read expensive) tool to cut, which many locksmiths do not have. I am not aware of any aftermarket source for the blanks. The coding is an issue because it requires proprietary software (PIWIS) to accomplish. Unfortunately, for the most part, only the dealer network has access to all three components, which limits your options.
You can try shopping around different dealers, they often vary widely on what they charge, but in the end you are probably going to have to pay more than you want to get it. Not that it will make you feel any better, but we went through a similar process to get a second key for a customer’s Nissan; the key was $150, the programming was another $95, and everything was “dealer only” for the same reason as Porsche: The market is too small for the aftermarket to tool up and do it for less.
-
3
-


red dash alarm light stays lit constantly
in 996 Series (Carrera, Carrera 4, Carrera 4S, Targa)
Posted · Edited by JFP in PA
I believe Loren is correct. It is common for the alarm system to go into fault mode when the battery is changed out.