Welcome to RennTech.org Community, Guest
There are many great features available to you once you register at RennTech.org
You are free to view posts here, but you must log in to reply to existing posts, or to start your own new topic. Like most online communities, there are costs involved to maintain a site like this - so we encourage our members to donate. All donations go to the costs operating and maintaining this site. We prefer that guests take part in our community and we offer a lot in return to those willing to join our corner of the Porsche world. This site is 99 percent member supported (less than 1 percent comes from advertising) - so please consider an annual donation to keep this site running.
Here are some of the features available - once you register at RennTech.org
- View Classified Ads
- DIY Tutorials
- Porsche TSB Listings (limited)
- VIN Decoder
- Special Offers
-
OBD II P-Codes - Paint Codes
- Registry
- Videos System
- View Reviews
- and get rid of this welcome message
It takes just a few minutes to register, and it's FREE
Contributing Members also get these additional benefits:
(you become a Contributing Member by donating money to the operation of this site)
- No ads - advertisements are removed
- Access the Contributors Only Forum
- Contributing Members Only Downloads
- Send attachments with PMs
- All image/file storage limits are substantially increased for all Contributing Members
- Option Codes Lookup
- VIN Option Lookups (limited)


ldfelix
-
Posts
3 -
Joined
-
Last visited
ldfelix's Achievements
Member (1/1)
0
Reputation
-
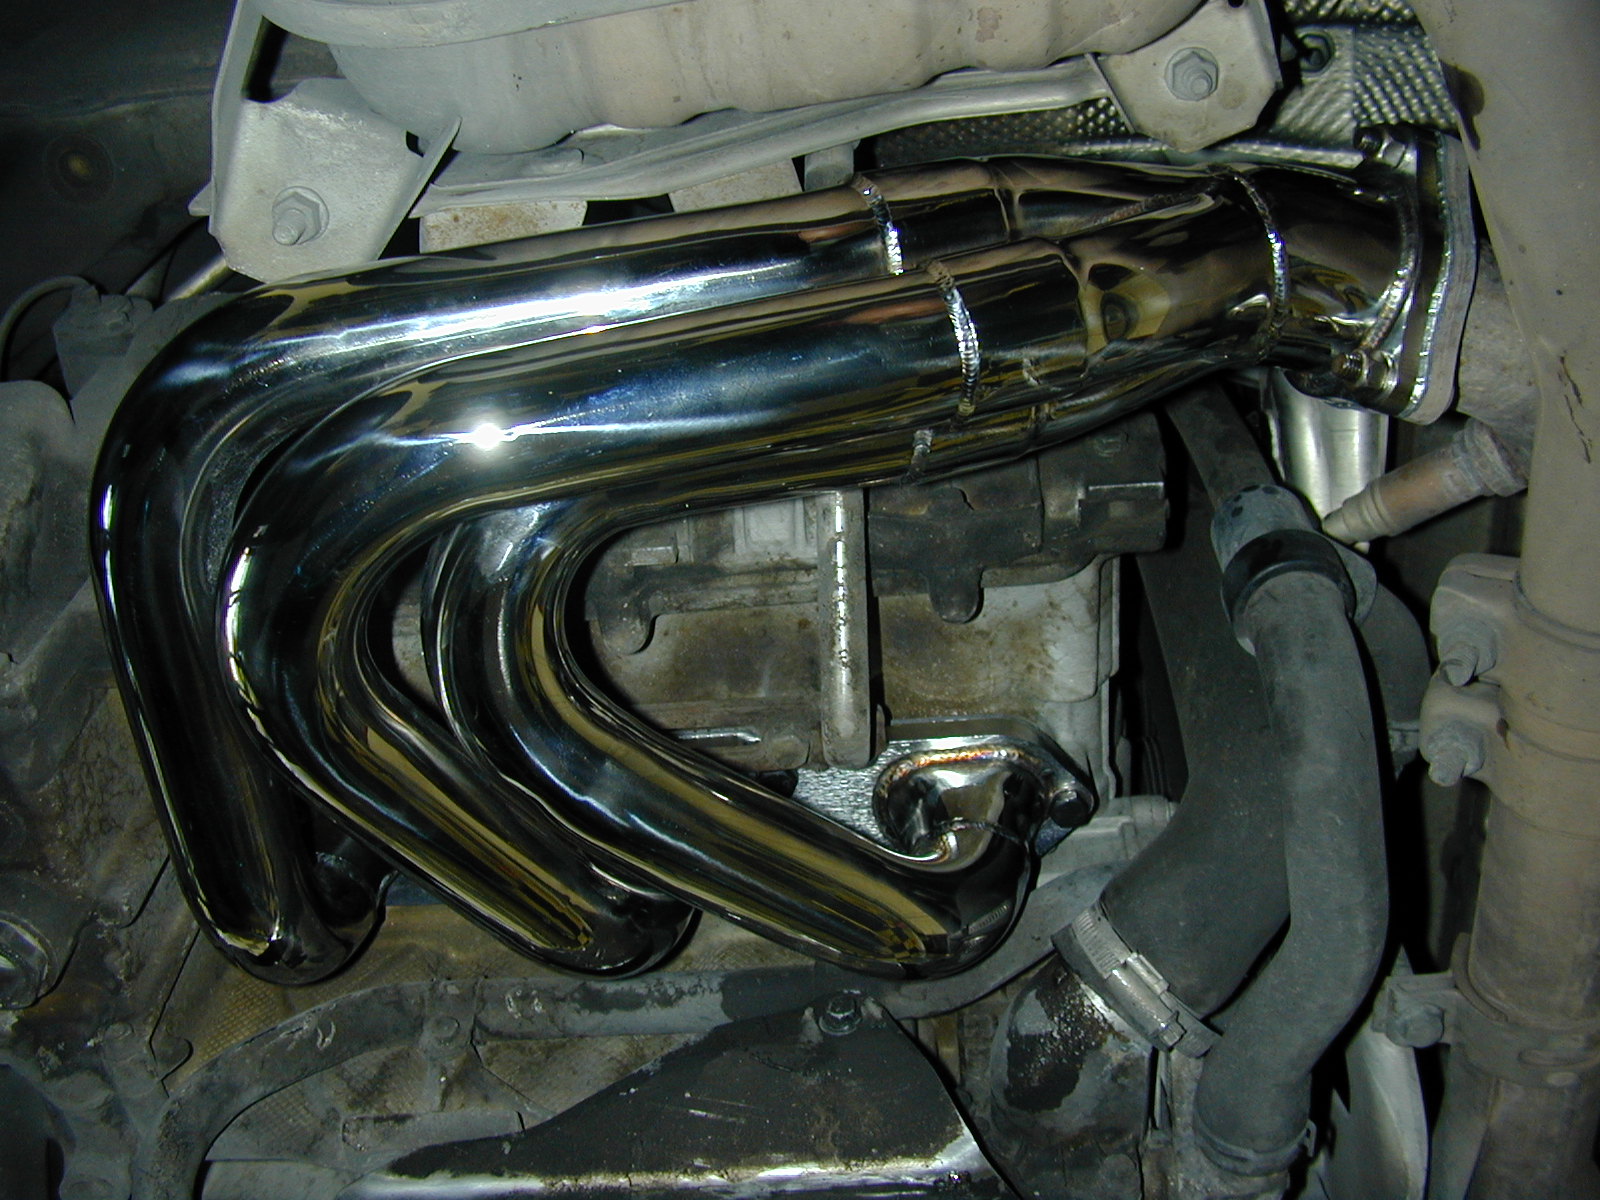
996 Header System
ldfelix replied to 1turb993s's topic in 996 Series (Carrera, Carrera 4, Carrera 4S, Targa)
The car is actually bone stock. No funny business. On the low end there a smaller HP gain but I do notice it and it's stronger off the line. As far as peak HP, I dont run my car at 6K+ RPM all day so where the HP matters to me, that 4000-5000 range where I tend to do a good part of my foot mashing, it's an obvious difference. The before and after dyno image is a little small but the header did make a real difference and considering the price point, I've seen people pay a lot more for a lot less gain. I know that chasing HP leads people to buy things they dont need and for people who make products to claim results that just dont add up but you have to admit, there are some upgrades which simply allow the engine to add more power. -
996 Header System
ldfelix replied to 1turb993s's topic in 996 Series (Carrera, Carrera 4, Carrera 4S, Targa)
I happen to be in the same PCA club with Marc Reviel who owns http://www.turbowerx.com/ . He tested out a set of his new headers on my 996 and did before and after dyno tests at the wheels (where it counts). I noticed a few benefits and would suggest the upgrade. I had a bit of a power dip in the 5600-6600rpm range and the headers knocked that right out. I felt (seat HP) the improvement and think that if you know your car, you'll be able to tell even subtle differences. In my case I noticed a bit of power along the whole range. I dont work for the company but I am a believer. And at $800, it's far cheaper than other headers. I can say without any doubt this is a worthwhile upgrade. All that and it's very shiny.
-
Relocate Climate Control
ldfelix replied to bjcarrera's topic in 996 Series (Carrera, Carrera 4, Carrera 4S, Targa)
I just finished installing the cup holder and moving the climate controls on my 2000 996 cabrio. A few things to note: 1. The harness (when the climate control box is located in the upper console "stock" position) for the climate controls originate from the passenger-side footwell and goes up a SMALL passage to the upper console. In order to move the controls to the lower console and have enough harness slack you have to pull the harness and it's 4 plugs back through the passage. I found this to be non-trivial and required one of my once-a-year use tools, the 16" tweezers and my daily tool, the Dewalt 18V flex-head light. Backing the harness down the passage requires a LIGHT touch. You would do well to start the process by working from both sides, guiding the plugs down from the top and jiggling the harness down from the bottom. If it snags, it's only doing so in a 5" space which you can either free up through gentle shaking or going in from the bottom with a tool that isnt sharp. I cant imagine the bill if you break off a head or break a connection up in there. I used the tweezers to grab and move over a few constricting cables and pull the heads through (sort of a simulated birthing process) one at a time. Oh, you'll need to remove the foam foot-well cover and it's 2 plastic SCREWS. Unlike some cars, these are actual screws and not push-ins. A body panel remover on these will provide a result that ends in tears. A simple flat-head will unscrew the 2 holders. 2. The 2 triangle brackets that come with the cup-holder kit are the most infuriating things to keep in place while you line-up the holder. I pulled out my trusty box of double-sided-foam tape and put a 2" strip on each triangle on the part that is recessed just to keep the parts in place while guiding in the cup holder unit. The trick here is the cup-holder unit has a small stick on each side that fits into the hole in the end of the triangle. You will likely have to remove the horseshoe surrounding the upper console so you have direct access to each side which helps align each side. This proces will not work the first time and may make you very angry. I suggest keeping a few car-washing sponges around so when you need something to throw in anger, it's soft. At some point after the car and the kit have sufficiently humiliated you, it will relent and slide in just enough to allow you get the set-screwn finger-tight and finish up. 3. The climate control can only go into the bottom hole of the lower console. It did not require and triangle rage-inducing extra parts, in fact, it just slides right in. Almost. At the last 1/2" it stops and binds in the slot. After a lot of cursing and nearly too much force it was clear that there are 4 small ridges, one at each corner that need to be razored off. Each ridge is about 1 or 2 mm tall 2mm wide and 2cm long. Razor them off. Almost like magic, it goes right in. You will want to plug the harness back up BEFORE installing the climate control. When setting the 2 holding screws for the climate control unit, DONT OVER TIGHTEN. If you tighten it too much the flanges deflect and encroach on the hole meant for the trim and the trim wont set right. Once finished you can marvel at your mad customization skillz and run into the house to show your significant other to show them how you saved so much money by not having the dealership so it. They will then tell you that it's silly for a car to not have a cup holder in the first place and dont understand why it took you so long to just plug something in. At that point I suggest a drive around the block followed my a margarita. Lionel 2000 996 Cab + cup holder.