Welcome to RennTech.org Community, Guest
There are many great features available to you once you register at RennTech.org
You are free to view posts here, but you must log in to reply to existing posts, or to start your own new topic. Like most online communities, there are costs involved to maintain a site like this - so we encourage our members to donate. All donations go to the costs operating and maintaining this site. We prefer that guests take part in our community and we offer a lot in return to those willing to join our corner of the Porsche world. This site is 99 percent member supported (less than 1 percent comes from advertising) - so please consider an annual donation to keep this site running.
Here are some of the features available - once you register at RennTech.org
- View Classified Ads
- DIY Tutorials
- Porsche TSB Listings (limited)
- VIN Decoder
- Special Offers
-
OBD II P-Codes - Paint Codes
- Registry
- Videos System
- View Reviews
- and get rid of this welcome message
It takes just a few minutes to register, and it's FREE
Contributing Members also get these additional benefits:
(you become a Contributing Member by donating money to the operation of this site)
- No ads - advertisements are removed
- Access the Contributors Only Forum
- Contributing Members Only Downloads
- Send attachments with PMs
- All image/file storage limits are substantially increased for all Contributing Members
- Option Codes Lookup
- VIN Option Lookups (limited)


kbrandsma
-
Posts
1,103 -
Joined
-
Last visited
-
Days Won
8
Content Type
Profiles
Events
Forums
External Paint Colors
Downloads
Tutorials
Links Directory
Collections
Store
Posts posted by kbrandsma
-
-
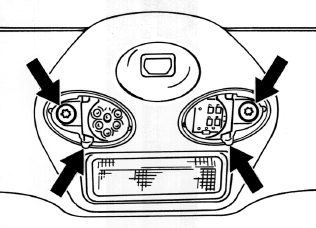
I had a similar issue, after checking the codes it turned out to be the interior infrared sensor fault above the rearview center mirror. It gets activated when you lock your car and the "Red Clip" is used when the top is down or the top is up and the micro switch is activated. I ended up replacing mine and the problem was solved. . Check your codes and see if you get a "Fault 34" Passenger compartment monitoring sensor. Simple DIY. The arrows point to a Torx T-30 fastening screw that holds the sensor in place, The sensors and screws are covered by two smoke or black covered oval lenses that just pry out. careful their plastic.
The part is about $80 or so.
Turn off the sensors and see if the problem goes away.

You can turn it off the interior sensor by....
(from the Porsche manual)
Deactivating the passenger compartment monitoring system for one locking
process
If a person or animal remains in the car while it is locked, the passenger compartment monitoring system must be switched off.
Quickly lock car twice.
The doors are locked but can be opened from the inside:
1. Pull inner door handle once to unlock door lock.
2. Pull inner door handle again to open door.
Note
Inform any person remaining in the car that the
alarm system will be triggered if the door isopened.
If you click your keyfob lock button twice in succession you will get the same results. Lights will flash twice and horn will sound once.
-
Thanks everyone, I did get them out with a ½" drive T30 bit from Harbor Freight. Once I got a little leverage they weren't that bad. New wheel is in and I really like it. It's the RAID wheel with paddles from Gert / Carnewal.
Congrats! Nice mod and upgrade! :drive:
-
I would not recommend turning the fastener clockwise as it will tighten and a possibility of shearing it off. If you use the proper tools you will not have any issues.
Yeah, sounds confusing but, if you turning the torx screw driver clockwise from the driver's seat, the torx bit is actually facing the driver and so you are turning the screw counter clockwise and loosening it.
If you are using a ratchet that makes it easier.
-
You can't go wrong with Lexol's products. Just replaced my front seats thru Leatherseats.com and they recommend Mother's Products.
Here is a link to Leatherseat's website: PRESS HERE
-
+ 1 for ignition switch. I've done about four replacements and prefer to also take off the driver's side vent. Some remove the driver's seat for better access as well and slide an ice chest next to the driver's side door sill to have a continued support area to lay on. Follow Flyingpenguin's link in post #3 above. Great DIY!
KBrandsma
-
I have used a pair of vice grips on a T30 Torx bit screw driver to get additional leverage. Turning it clockwise to break it loose. They are difficult to break free but eventually will.
-
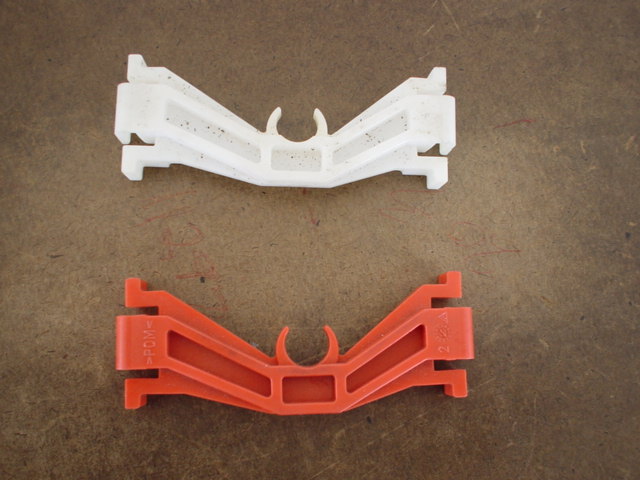
Just checked with Phil at Sunset.
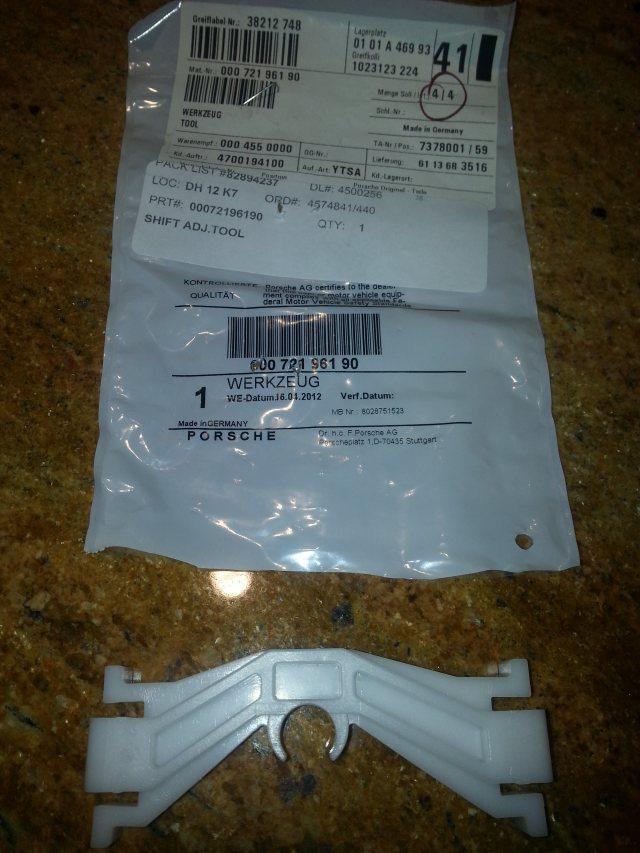
The green tool ending in 91 (00-721-961-91) is the tool for the short shifter.
The white or orange tool ending in 90 (000-721-961-90) is the tool for the standard shifter.
I ordered the green tool (00-721-961-91) - $3.13 plus shipping to check and will post once I can confirm.
KBrandsma
-
CA_BOXSTER
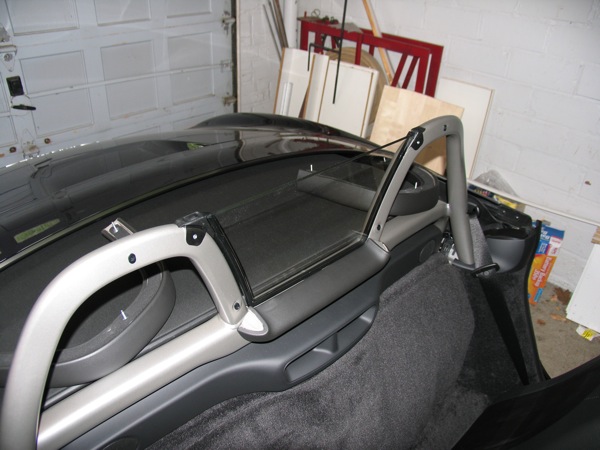
Check to see if you have the attachment clips attached to your roll bars and if so you just need the clear lexan center wind screen. If you don't have the clips you will also need to purchase that kit as well.
Very easy to do. Good DIY PRESS HERE
You can find a used clear center screen in excellent condition on Craigslist or eBay for less than $150.
Porsche Part No. 987-561-621-00
Check current eBay listings by PRESSING HERE
-
000-721-961-91 - $3.98 List
-
-
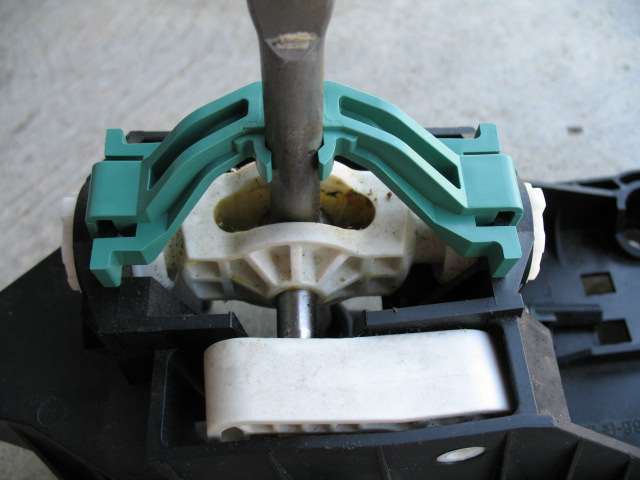
There is a Porsche Shift Adjustment Tool you can get off eBay for about $12 or so. It locks the shifter in place while you adjust the cables. Also here is a good DIY article on adjustment and/or replacement of the shift cables on a 997. PRESS HERE
And a not so recent post of adjusting the shifter but still good info: PRESS HERE
-
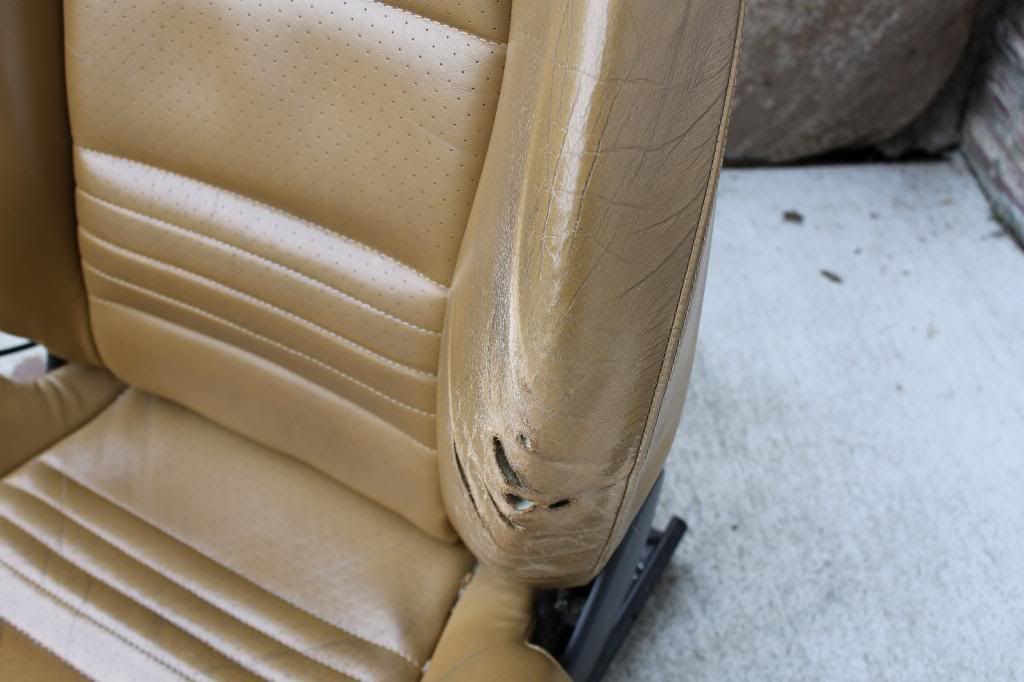
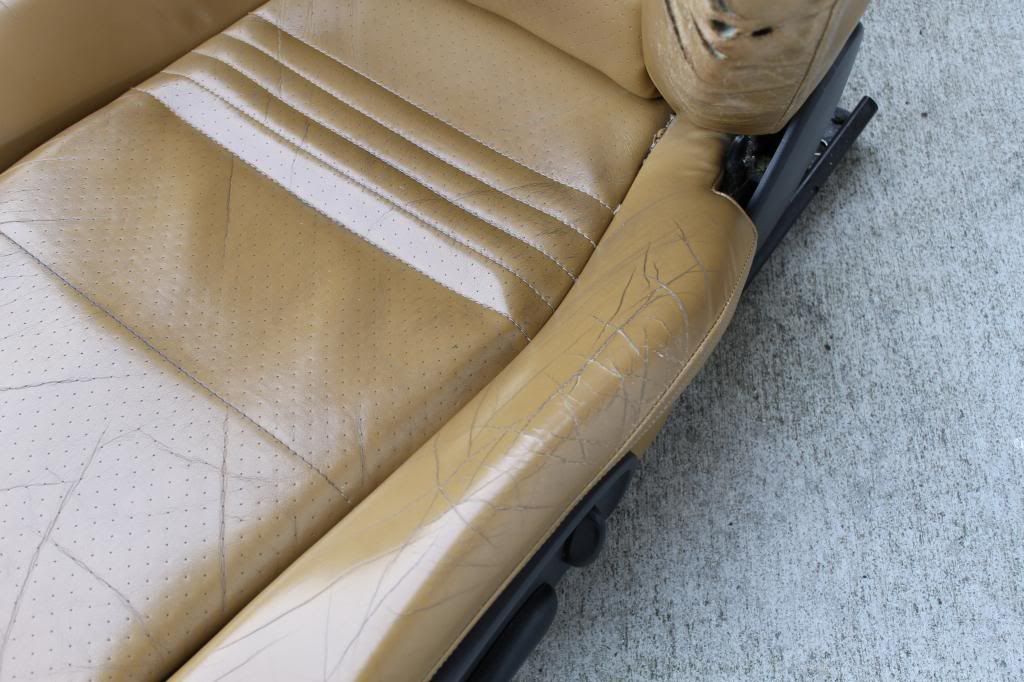
My old seats were literally starting to come apart. After a little research I bought replacement leathers from Leatherseats.com.
I wasn't comfortable trying to get an exact match with the Porsche Savanna Beige, so I went with two toned black and green which was a very good match with my black interior parts and the green exterior paint. The have several different grades of leather and other combinations in percentages of leather to vinyl. I went with 100% Premium Italian leather with perforated seats for about $1,250 plus shipping.
Leatherseats can be Found Here
-
I would definitely talk with the good folks at Sunset to get the exact part numbers and a the best price for original Porsche replacement parts!
-
The stock Porsche heated seat element/pad is attached to the foam underneath the leather. You can buy stock replacement foam with or without the heated pad. Because of the expense to replace OEM leather I went with an aftermarket replacement over original foam and heated pad. My original seats were 100% leather without any lining (except a thin headrest liner.) The OEM seat is basically leather on foam. My replacement seats had a sewn in liner. A substantial upgrade and I would definitely recommend.
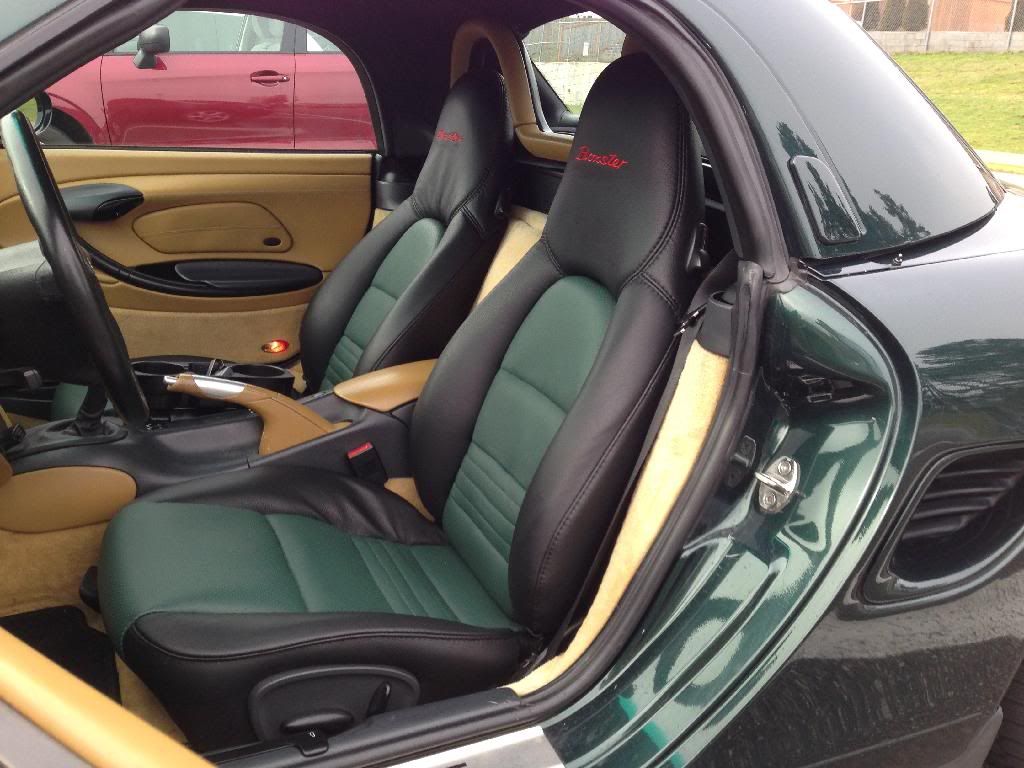
I also went with an embroidered "Boxster" logo in red.
-
M946 - 1997-2004 SEAT COVERS
Backrest Cover. - Graphite Grey - 996.521.141.05ESF
$1,375.65 List at Auto Atlanta
You may want to check Sunset for a better price.
KBrandsma
-
Yes, that is possible.
Here are the pieces for each seat. The top are the leathers (1, 4 and 5) and the bottom are the foam replacements (8-10).
I recently swapped out MY98 Boxster OEM Savannna Beige seats for a combo of Black/Green and Red Boxster logos. I went with a third party and replaced the stock leather. My OEM seats were all leather some may have vinyl in back of number 1 above.. Mine didn't.
Here is an after shot of the finished project.
-
Good Job!
:thumbup:
-
Here is the link to the front bumper removal DIY PRESS HERE
-
Update>my small compressor worked great set at 90psi. But i dont think i had any air when i pulled the vac it filled up to top and i couldnt add any. if i top it off it just leaks out the overflow anyway when the engine is warm it goes into the normal operating range.when cold its maybe allitle below the lower mark.
Sounds like you were able to get enough PSIG and maintain it long enough to get a good vacuum to refill. I would still open up the bleed valve and run a few drive cycles up to temperature. Keep topping off with coolant as needed or if needed.
Nice Job!!!
:thumbup:
KBrandsma
-
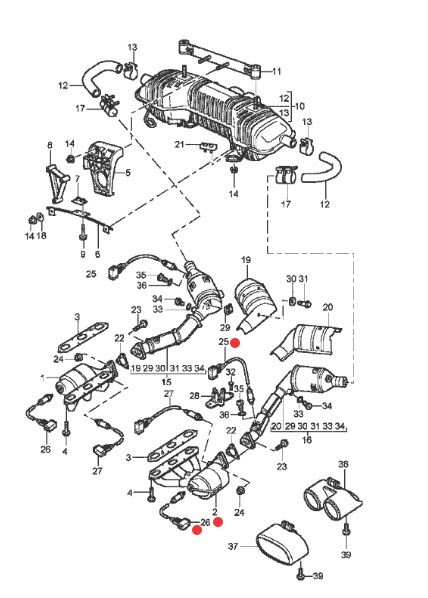
Here is a photo of your stock exhaust. On each bank there is a manifold that leads to the muffler.
The red dots identify the pre-cat(before) O2 Sensor (#26), the catalytic converter(#2) and post-cat (after) O2 Sensor (#25). The red dots are on the driver's side manifold.
Here is the best site I have found regarding O2 sensors for the Boxster. It is Mike Focke's site.
PRESS HERE -
Check Pedro's Boxster PSE DIY PRESS HERE
-
hi,
DME M3301 have 3 faults present:
Oxygen sensor behind catalytic converter, bank 1
Oxygen sensor ageing period, bank 1
Oxygen sensor ageing delay, bank 1
suggested part number: 98661866005
It is for 2001 Boxster S. However, I can't locate the listed part number to purchase. can anyone help me, please?
Hi Boxsterspharm,
I'm not seeing that part number?
Bank 1 is passenger side.
2000-2002 986 Boxster 2.7L or 3.2L
986-606-127-01 - 2000-2002 in front of the starter catalytic-converter - $303.18 retail
986-606-128-01 - 2000-2002 after the starter catalytic-converter - $303.18 retail
You can do better than dealer prices, check Sunset, Pelican or Autoparts Warehouse.
Might consider swapping sides, reset the codes and see what codes appear?
-
It is time to make a New Year's Resolution and become a New Contributing Member of Renntech or RENEW your existing membership. Your membership helps keep this site as the best place for maintenance and DIY tips and advice for your P-Car.
-
 1
1
-
-
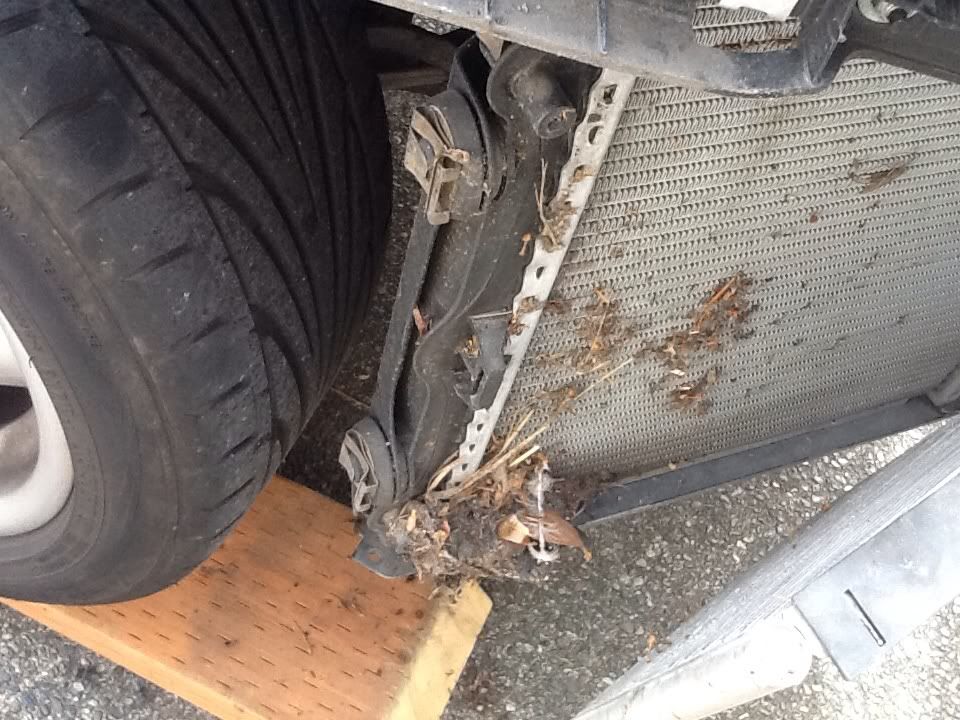
Sounds like you have a leak in your front passenger side radiator. I replaced MY98 passenger radiator at about 120K. Very common. May just me a bad hose or clamp as well, hard to say until you get it apart and take a look. Easy to do DIY project. Good to clean your radiators and condensers once a year anyway.
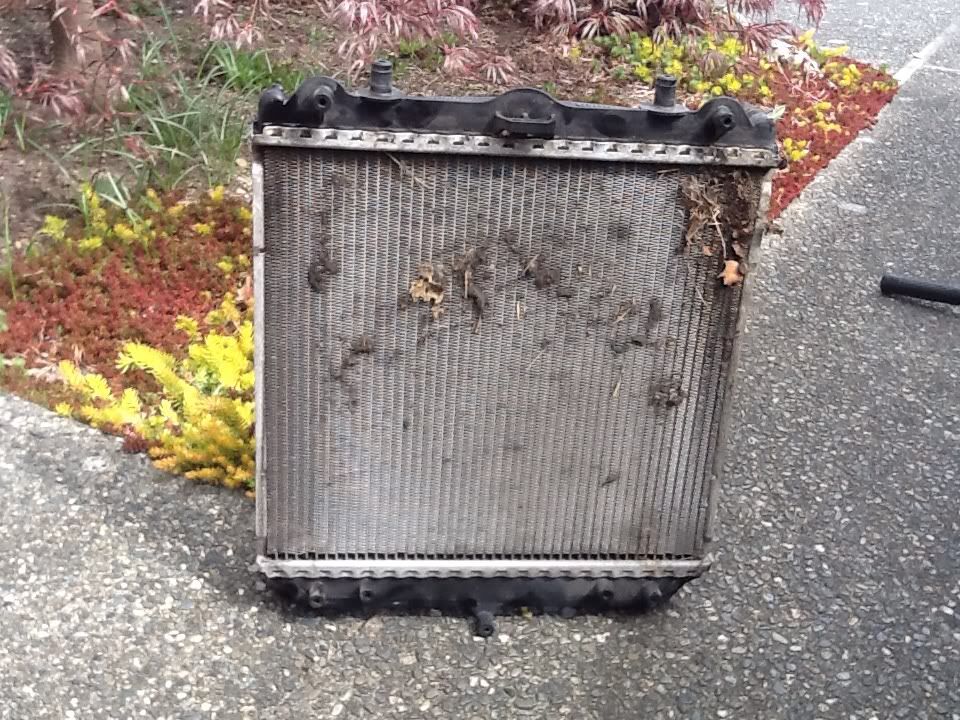
Here is a photo of my old radiator and the new replacement radiator.
And a shot of the radiator and condenser prior to cleaning. You'll be surprised what you'll find. The last time I had a small rodent in there.


Reliability of 996 Engines
in 996 Series (Carrera, Carrera 4, Carrera 4S, Targa)
Posted · Edited by kbrandsma
JFP also suggested a larger oil cooler!
Not sure if it would apply to a non-Boxster?