Welcome to RennTech.org Community, Guest
There are many great features available to you once you register at RennTech.org
You are free to view posts here, but you must log in to reply to existing posts, or to start your own new topic. Like most online communities, there are costs involved to maintain a site like this - so we encourage our members to donate. All donations go to the costs operating and maintaining this site. We prefer that guests take part in our community and we offer a lot in return to those willing to join our corner of the Porsche world. This site is 99 percent member supported (less than 1 percent comes from advertising) - so please consider an annual donation to keep this site running.
Here are some of the features available - once you register at RennTech.org
- View Classified Ads
- DIY Tutorials
- Porsche TSB Listings (limited)
- VIN Decoder
- Special Offers
-
OBD II P-Codes - Paint Codes
- Registry
- Videos System
- View Reviews
- and get rid of this welcome message
It takes just a few minutes to register, and it's FREE
Contributing Members also get these additional benefits:
(you become a Contributing Member by donating money to the operation of this site)
- No ads - advertisements are removed
- Access the Contributors Only Forum
- Contributing Members Only Downloads
- Send attachments with PMs
- All image/file storage limits are substantially increased for all Contributing Members
- Option Codes Lookup
- VIN Option Lookups (limited)


kbrandsma
-
Posts
1,103 -
Joined
-
Last visited
-
Days Won
8
Content Type
Profiles
Events
Forums
External Paint Colors
Downloads
Tutorials
Links Directory
Collections
Store
Posts posted by kbrandsma
-
-
For the trunk struts you can check this DYI at Pelican Parts by pressing HERE
I have had good success by checking prices at Sunset parts (Located under the Special Offers Menu tab above) or run the part number thru Amazon. If you have a prime account you get free next day shipping!
Don't forget to post some pictures and Welcome!
:welcome:
-
Thanks for the info.
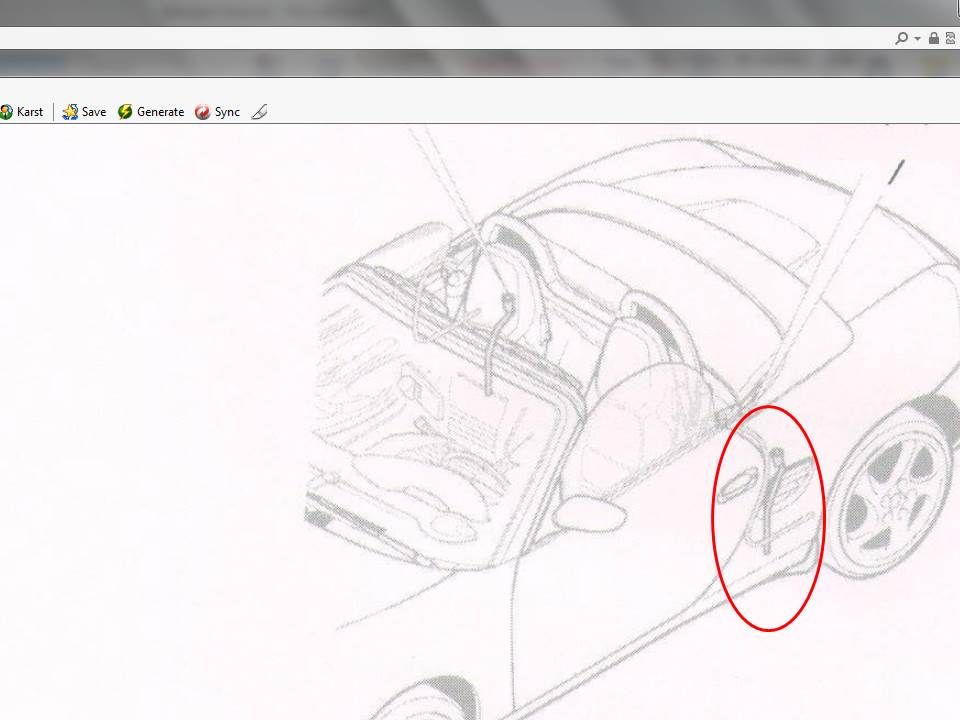
Once the camera is installed on the rear ( bumper or licence plate), how do you route the cables (power/video) from the camera install location to where the camera connects to the power and video cables?
I removed the liner in my rear trunk and ran the wire behind the license plate thru a hole already there and into the trunk. Don't let the wire dangle there as the exhaust is right below and it won't take long to melt the wire. (Ask me how I know)
With the lining removed you can run the wire thru a rubber grommet into the cabriolet bay, using cinch ties to keep things tidy, I ran it down the skinny carpeted pillar where the driver's seat belt retractor is located. There is an 8mm bolt to loosen (not remove) and one Philips head screw (in carpet pile) to remove and the carpeted pillar lifts up and then comes right out. The bolt head to loosen is right behind receptacle for the rear window defroster and under the driver's roll bar .
I then ran it behind the driver's seat, tucked into the lower back carpet. I removed the carpeted back wall and sound padding behind the seats (4 thumb screws). This is the back padding you would also remove if you needed to get into the front engine compartment access panel. (Like if you wanted to change the serpentine belt.) I tucked the wires in the lower carpet after the padding is removed and into the center console and ran it in the console and to the HU. Again always using cinch ties to keep things neat and tucked out of the way.
Some run it all the way under the door threshold and into the dash by the fuse panel, similar to what you would do on the passenger's side if you were installing speaker wires for a rear speaker kit. I chose not to.
-
I did the upgrade in 2007 with a double din AVIC D3 Pioneer. I routed two wires up to the HU from the rear camera/trunk. The two wires were the purple/white wire (25' supplied with HU) and the video wire with the yellow RCA plug. Both of these wires had connections in the HU
I also powered the rear camera from the driver's side backup tail light spliced in with the purple/white wire that goes to the HU and located a grounding source nearby. You'll also need to change your power source to battery in the HU setup screen.
-
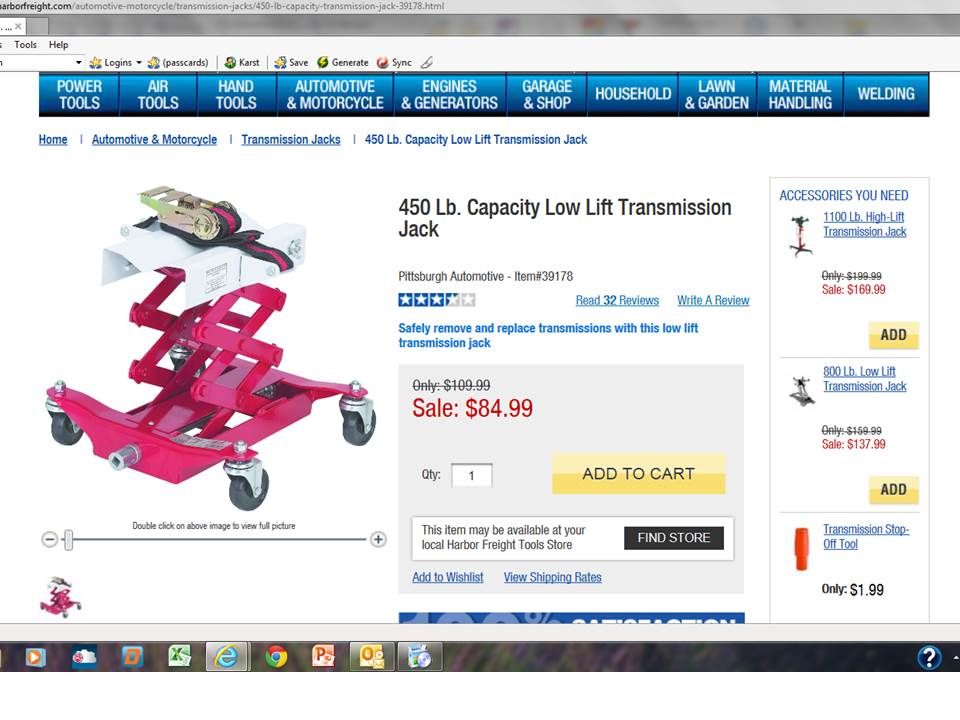
I also purchased a transmission jack from Harbor Freight.
This came in handy when I initiatlly lowered the transmission on removal and later when re-installing the transmission (to line up bolts). The transmission jack has also came in handy for other Boxster projects like when I replaced my front motor mount. I used it to drop the engine to change the mount.
To slide the transmission out from under the car to work on the clutch, I had to move the tranny off of the transmission jack stand and slide the tranny out under the car by itself, because my Sears jack stands weren't high enough to allow me to just roll the tranny out of the way attached to the transmission jack stand.

-
 1
1
-
-
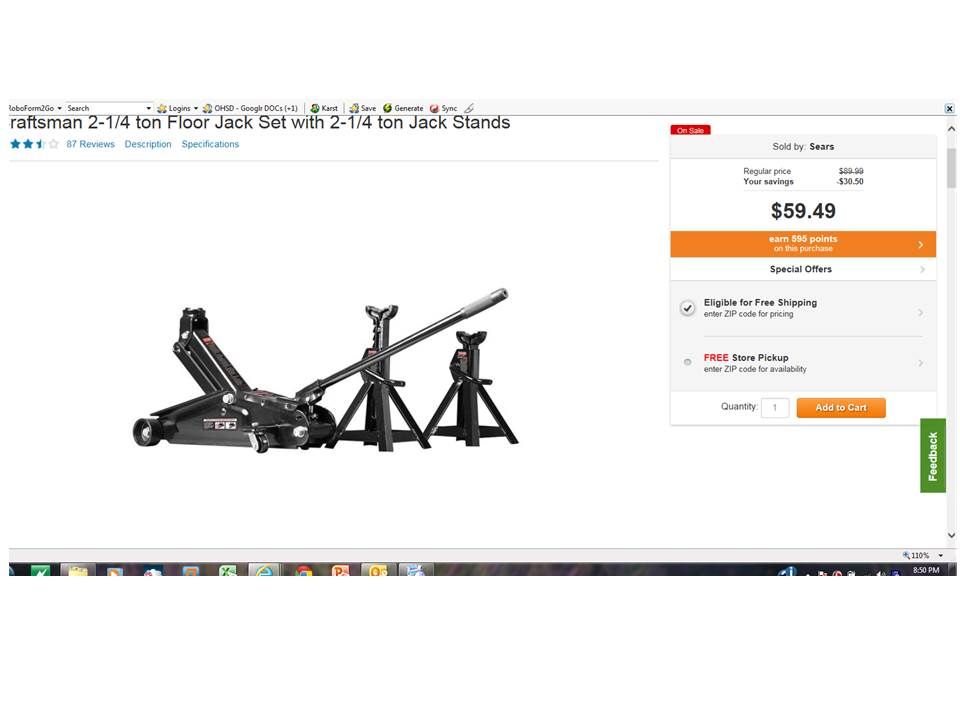
Here is the exact setup I used in 2007 with 60,000 US miles on my speedmeter when I replaced the clutch. The setup is on sale now at Sears. I also added custom cut hockey pucks for the jack stands.
For reviews from buyers press HERE!
I have since upgraded my setup with a low race type jack. I will replace my clutch again next April (140,000 miles). Again, the higher you can raise the car the better. If you can find a full vehicle lift, that would be preferred! (See transmission jack below.)
You can buy a more expensive jack for sure, my point being is that you don't need to spend a whole lot of money for a hydraulic jack and jack stands to do this project.
-
Very Nice! Thanks for sharing.
WELCOME!!
:welcome:
-
The short answer is, As high as you can get it. That said, I bought some two ton jack stands at SEARS and they worked great. I chose not to remove the back bumper, although it is very simple to remove it.
About 5 years ago, I replaced my RMS, upgraded my IMS, replaced the clutch, AOS and Oil fill tubes. Total bill was about $400 in parts from Sunset.
-
I added footwell lights on my 986 Boxster almost two years ago. It would be an identical installation for your 996 and it was a very worthwhile mod! I used super thin LED lights and connected them to the overhead light switch so that they have the same on/off properties as the rest of the interior lights.
Press HERE for the link.
-
Airbag Light
If you hear a lot of grinding noise when turning your steering wheel or you hear a grinding and/or squeaking noise from your steering wheel that gets worse over time or if you recently removed your steering wheel, you might get the infamous airbag light !!! AND when you take a Durametric tester and run the codes you get the following: Fault 21, Ignition circuit, driver is pretty common with these symptoms. Its probably time to remove the steering wheel and check your clockspring. The cloc
-
Author
-
Category
-
Submitted10/12/2013 09:56 PM
-
Updated10/14/2013 07:03 AM
-
-
-
Most likely your drain behind the driver's seat. Check out this helpful link on Mike Focke's site below:
Click HERE:
Scroll down and read entire page. Use the suggested method of pouring water down and catch it in the drain in front of rear tire to see if you catch it all.
Here is the drain that is most likely the problem:
-
Hi KevinH90,
I did the same service maintenance on MY98 Boxster several years back and did everything your considering minus the coolant tank. JFP gave some great advice and was very helpful. I also added a 160 TStat and the improved Boxster S oil cooler along with a new water pump. I think Sunset has their water pumps on sell for Renntech members, check the Special offers link on the main menu.
Here is the LINK to the project. I have a uView Airlift tool. I sent you a PM.
Good Luck!
-
Welcome! Post a few photos and let us know how your mods/updates go!
:welcome:
-
+1
I have the Durametric Professional kit.
Check differences in the Enthusiast Kits and Professional Kits by clicking HERE
-
I always place the palm of one hand on the top of the side I'm unclipping (pushing down) while using the other hand to pinch the clip and slide out. Then repeat on the other side.
-
Try pulling it off from the back.
-
If you haven't clean your radiators and AC condensors or re-routed your front hood latch emergency pull, perhaps you may want to drop your front bumper and do a couple of things as well as remove the license plate blocks.
-
Congratulations on your new 996 Cabriolet (looks great) and welcome to Renntech! :welcome:
Installing a double din unit is not hard at all, I've installed a few. I've had good success with Crutchfield installation components and also Euro-Motorspeed on US eBay. I think your better off finding adapters for stock Porsche radio harnesses. I've seen some wiring jobs that got ugly when they try and cut of the harnesses and hardwire to new radios. Keep it clean and simple and order a good installation kit and components. Also the installation faceplate is the key to a good and sharp looking installation.
Press HERE for link.
By becoming a contributing member you'll get full access to all that this site has to offer! Welcome again!
Regards,
KBrandsma
-
Sounds like you got a good deal and your almost home!
-
Porsche Raditator Cap 996-106-447-04 US MSP is $26.97
-
MY00 Boxster non S is 8E0-721-257-M. US MSRP is $106
-
I fixed mine on MY98 Boxster about 2 1/2 years ago and the the fix has held. Below is a link to the DIY write-up I did in the 986 forum but should be the same for you.PRESS HERE for DIY write-up.
-
I use the Zaino Product line and their detailing suggestions almost exclusively. I just clay barred my 986 yesterday and applied the first of three coats of wax. The first coat has an accelerant that provides a durable bottom base coat. I use Zaino's Z-5 wax for MY98. It is great for darker cars like mine and virtually eliminates swirl marks. I also use a california duster and Zaino's Gloss Enhancer Z-6 between washes. I use RaggTop to maintain the top.
PRESS HERE for Zaino product line and technical advice.
PRESS HERE for YouTube Video on RaggTop.
-
Thanks Loren, Tool Pants and doncapecod. You're dream and foresight was remarkable and very much appreciated! Here"s to the next ten!

I Need Advice on Good Tyres
in 996 TT, 996 TT S, 996 GT2
Posted
Tire Rack has some good deals on their 17" Performance Tires. The Sumitomo HTR Z III are under $400 for fronts and rears.
Tire Rack Press HERE