Welcome to RennTech.org Community, Guest
There are many great features available to you once you register at RennTech.org
You are free to view posts here, but you must log in to reply to existing posts, or to start your own new topic. Like most online communities, there are costs involved to maintain a site like this - so we encourage our members to donate. All donations go to the costs operating and maintaining this site. We prefer that guests take part in our community and we offer a lot in return to those willing to join our corner of the Porsche world. This site is 99 percent member supported (less than 1 percent comes from advertising) - so please consider an annual donation to keep this site running.
Here are some of the features available - once you register at RennTech.org
- View Classified Ads
- DIY Tutorials
- Porsche TSB Listings (limited)
- VIN Decoder
- Special Offers
-
OBD II P-Codes - Paint Codes
- Registry
- Videos System
- View Reviews
- and get rid of this welcome message
It takes just a few minutes to register, and it's FREE
Contributing Members also get these additional benefits:
(you become a Contributing Member by donating money to the operation of this site)
- No ads - advertisements are removed
- Access the Contributors Only Forum
- Contributing Members Only Downloads
- Send attachments with PMs
- All image/file storage limits are substantially increased for all Contributing Members
- Option Codes Lookup
- VIN Option Lookups (limited)


trieullionaire
-
Posts
161 -
Joined
-
Last visited
Content Type
Profiles
Events
Forums
External Paint Colors
Downloads
Tutorials
Links Directory
Collections
Store
Posts posted by trieullionaire
-
-
Out of curiosity, does your original factory radio still get reception when reinstalled? I would use that first to establish that there is a signal coming through the radio antenna to your original radio. Once you confirm this, I would reinstall the aftermarket radio...and check to make sure the antenna adapter is connected properly. If you still do not receive a signal, I would take a meter tester to see if there is a break in the antenna adapter...if so, you may need a replacement antenna adapter to replace the defective one.
Hi All
Sad to say I have hit a snag just as I was about to cross the finish line.
Everything is in and working great except the Radio. When I connected the antenna using the adapter from the kit I got no signal. So I went out to try another from my local Car Mart and the result was the same. I am not even able to receive strong channels. Next was to try a normal stick up antenna propped up on the back seat and Eureka! So at least I know the Radio works. Just seems that the antenna signal from the diversity antenna is not getting through somehow???
I have a 2003 996 C2 Cabrio with a diversity antenna and am now wondering if I need to connect both plugs as opposed to just the one or worse still need a 12 booster? If anyone can clarify I would be much obliged or if someone could point me in the right direction as I would hate to fail now having come this far.
Many thanks in advance.
-
trieullionaire I see that used to sell on ebay a kit that would work perfect for the AVIC D3, is that still available? I have a 1999 996 C2 and just purchased a AVIC D3 from a friend.
I would love to do this project myslef and I love the look you gave it.
Robert
Hi Robert,
Yes, the kit works for an AVIC D3. In fact, our kit works for the majority of head units out in the market.
-T.
-
Hello,
Is this Doubledin kit available for the 2000 Boxster S?
It will work for the 2000 Boxster S.
-
One question.
This kit is valid to a 986 of 1998 with pcm installed.
Because I see in the diy That there is to cut some pieces, but in models with pcm haven´t it
?¿?¿
Hi Demiano,
It will work for a 1998 986 w/ PCM set up as well.
Happy New Year!
-
No problem at all, looking forward to see some interior shots once you figure out a solution that works best for you. Thanks for the positive feedback as well.
Cheers!
-
Hi,
I bought the bezel for my car (Id already installed the unit when I saw this thread). The bezel looks great but my head unit's face is larger than the aperture in the bezel. Have you any tips for cutting it?
Thanks
Andrew
Hi Andrew,
I am assuming you had purchased one of our powder coated aluminum bezels. Just out of curiosity what brand and model head unit did you purchase, as we have rarely ever come across this issue it would be helpful to know. As for cutting the bezel, that will be a huge bear even for us to have it custom cut. You may be better off using the MDF material to fabricate a bezel to the specs of your head unit in this instance. You can just use the aluminum bezel as a template for the outer dimension to make life a bit easier.
If you go the MDF route, just email, call or PM us should you want to return the bezel you had purchased. We have a 30 day return policy for unused components, so that you're not stuck with an item you can't use.
Happy holidays!
-Trieullionaire
-
Greetings everyone! We hope everyone had a great weekend!!! Well, after a lot of reviews from our customers, we've been taking notes & decided 3 months ago to make a few enhancements to our 9X7 2-Din Kit. Our Version 2 kit was finally completed as of just late last week. We think some of modifications we've made will aid the efficiency of the overall installation of our kits. We posted images to illustrate the modifications and its function(s). Check out the link below and tell us what you think, we would love to get some feedback (good or bad :huh: ). Again, thank you to everyone who has contributed to this thread and many others on Renntech.
http://cgi.ebay.com/ws/eBayISAPI.dll?ViewI...#ht_2045wt_1167
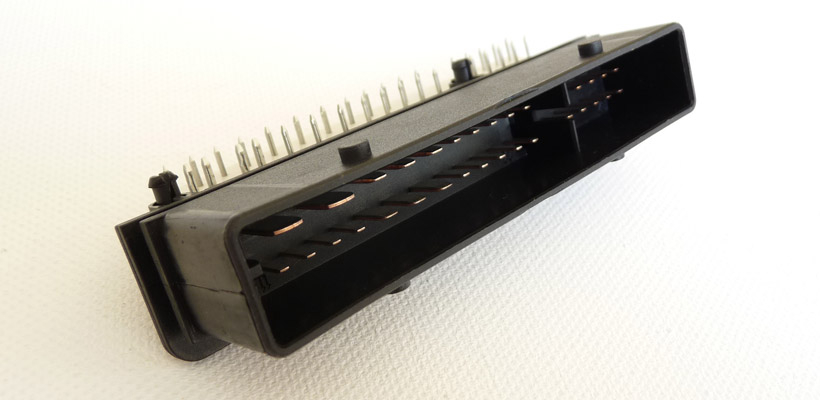
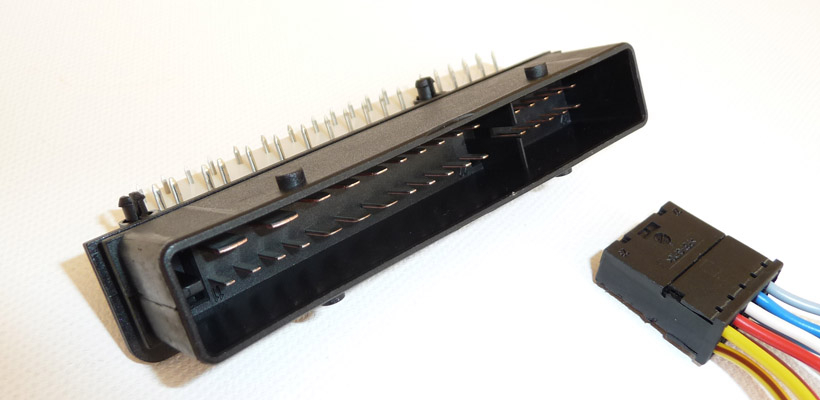
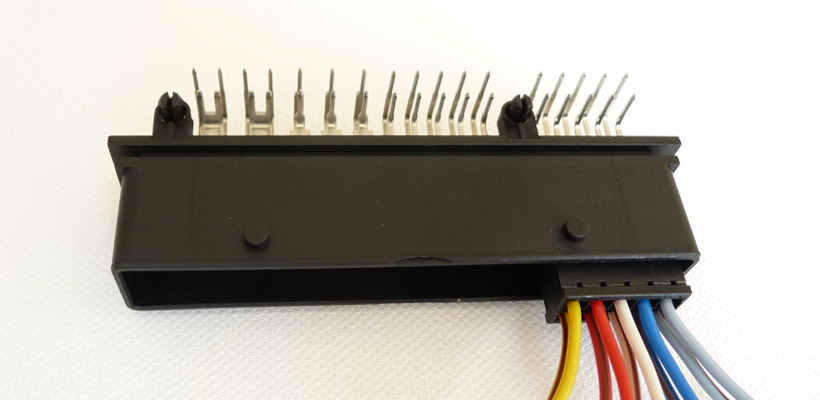
For those of you with the Bose set up, we will have an upgraded kit which includes an additional harness adapter for use with an aftermarket amp or other various set ups using resistors. The adapter will allow you to connect to the factory speaker wire harness without any need to cut, splice or wire tap these wires at all. Attached are a few pictures of the adapter and the vehicle's speaker wire harness that plugs into it. We'll have these adapters solddered with the appropriate factory matched wires in the near future but for the time being they will provided as shown.
Sincerely yours,
Trieullionaire
Euro MotorSpeed
:drive:

-
Hi Guys,
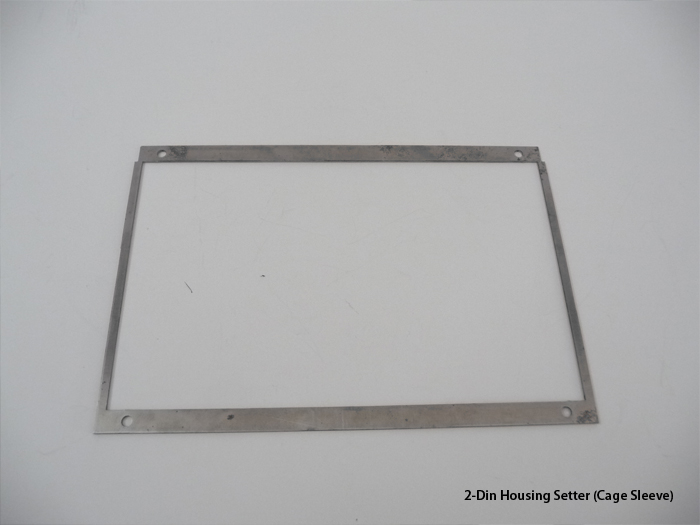
A couple things I wanted to clear up and hopefully will make life much easier for folks who install our kits in the future. We've included a cage sleeve for quite a while now with our kits, and it is usually already slid onto the cage for buyers. I guess it would help to understand how it works right...as it is not in our DIY which was based on the very first install we did on my '00 Boxster.
The purpose of the cage sleeve is to create a lip on all sides of the cage (the sides, top and bottom). This lip stops the cage from falling through the factory opening, and sits flush to the factory opening. This effortlessly allows you to set the depth and height of the cage, so that you don't need to do any measuring like in the original DIY.
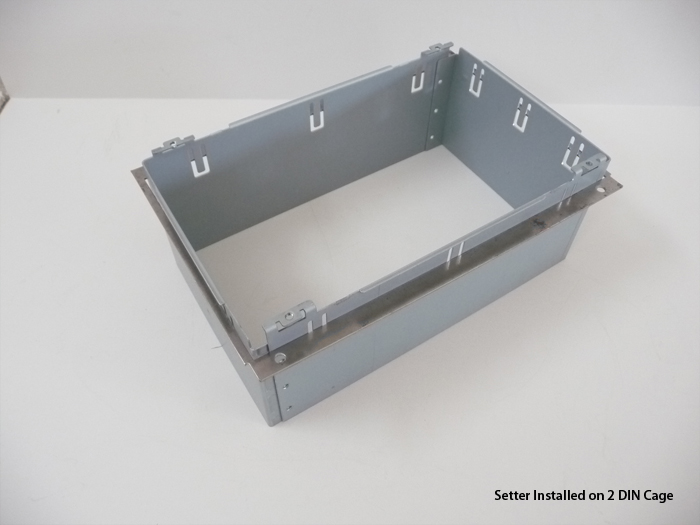
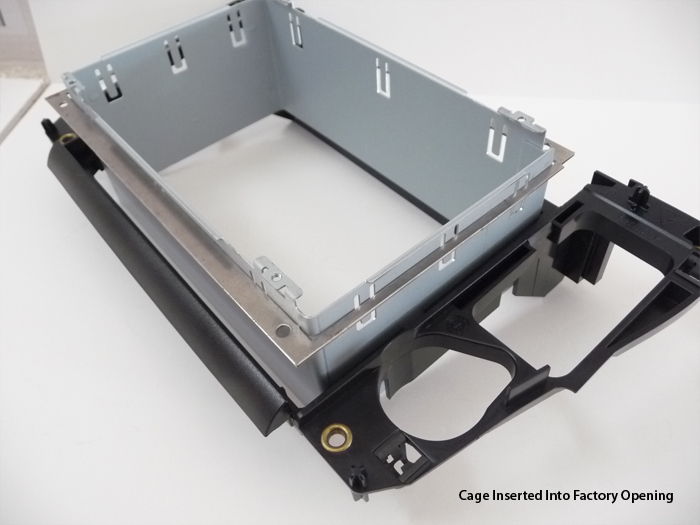
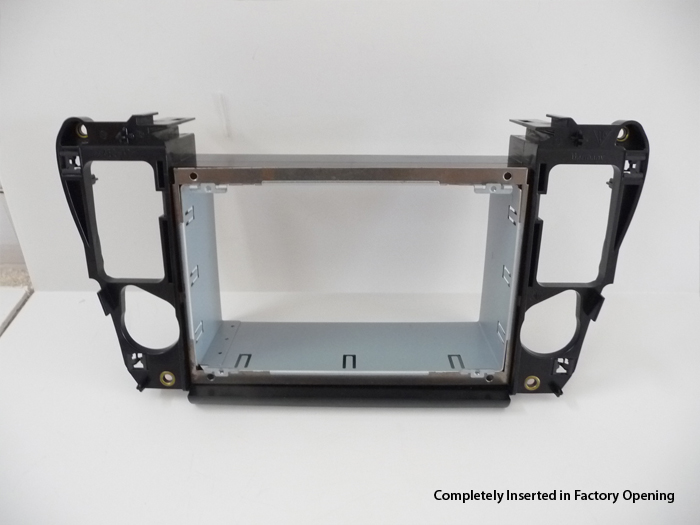
Anyhow, I have included some photos to show how everything comes together...in pictures of course! Just a little preface, this was my Saturday afternoon project converting the '00 Boxster radio surround area to the 03-04 version with the thin cup holder option. The install is complete and it looks awesome and I love my new cup holder, I just have to clean up my car and I'll have some pictures to show in the weeks to come.
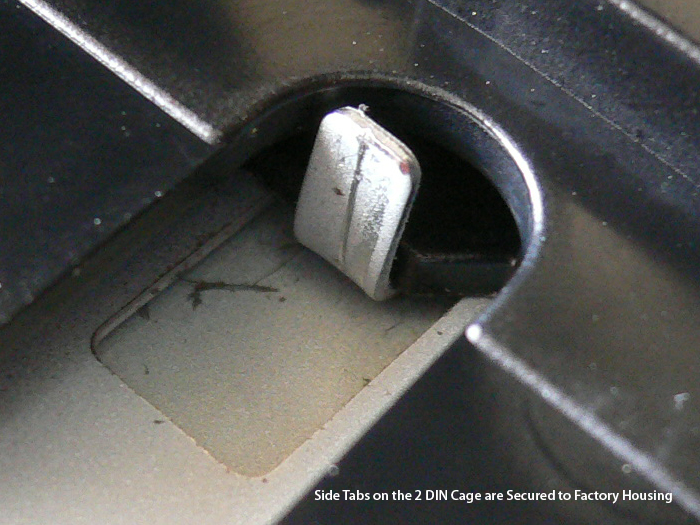
Just installed the Z110BT in my 2002 C4S with Bose. Since this seems to be the reference thread, I'll post comments here instead of on the 996 forum...dbnichols' and others' observation about there being no good way to securely mount the cage applies to the Euromotorspeed kit as well. There is a plastic ridge on the sides, but none on the top and bottom. After looking around for suitable spacing material, I found that the top and bottom bars of the CCU bezel are the right size and center the cage perfectly. The bars are also the right depth to bend the metal mounting tabs around for a tight and secure fit.
The gaps:
The plastic bars glued in place:
The final fit:
Thanks to dbnichols for the splash screen.
-
Hey guys,
Here are pics I took today from a Tampa customer who purchase the new kit with the factory textured bezel. The install was on a 2001 911 Turbo. I think it took his friend two days to complete the install, it looks pretty fabulous up close.
Cheers,
Trieullionaire
-
Ok, and, Is possible buy you this item too?¿
http://www.euromotorspeed.com/servlet/the-...-Molding/Detail
You can purchase these uphostery and trim tools from Harbor Frieght.
Unfortunately, we don't believe there's Harbor Freight over in Europe.
-
Hi,
I am in the process of adding a navigation system to a boxster and went to the link on ebay for the kit, it is not active anymore, are there any left?
RennTech Members:
1997-2002 Boxster & Carerra 2Din Custom Kit offered to Renntech Members: $169.00
2003-2004 Boxster & Carerra 2Din Custom Kit offered to Renntech Members: $169.00
U.S: FREE Shipping
Canada: $5.90 Shipping
International: $12.50 shipping
Price lowered for kits & shipping cost.
Please p.m. us for your new kit:) We will need the following information:
1. Year & Model
2. Country of Residence
3. Email Address or PayPal Email Address
Euro MotorSpeed
727.455.6580
-
You can connect to the head unit. Provided you used the RCA wires to connect to a front amp, you should have the speaker wires from your head unit still available for use. Use the speaker wire output designated for the rear speakers so that you have the fade function.
-
Ok, and, Is possible buy you this item too?¿
http://www.euromotorspeed.com/servlet/the-...-Molding/Detail
We discontinued that product, sorry.
-
I have just buy it.
I´m very happy with this matt version.
Thanks
Hi,
We just received your payment, we'll ship your item out today! Again, thank you, we know you will like the new bezel!
Trieullionaire
727-643-2207
Euro MotorSpeed
ww.euromotorspeed.com
-
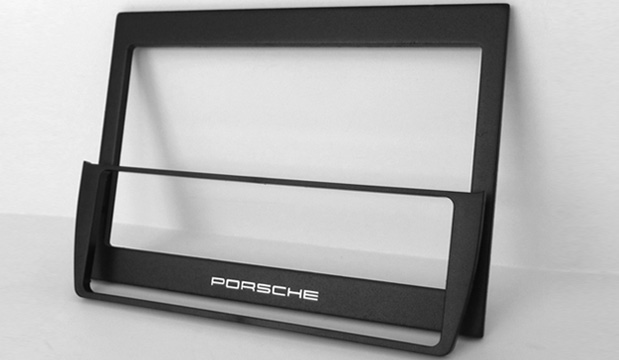
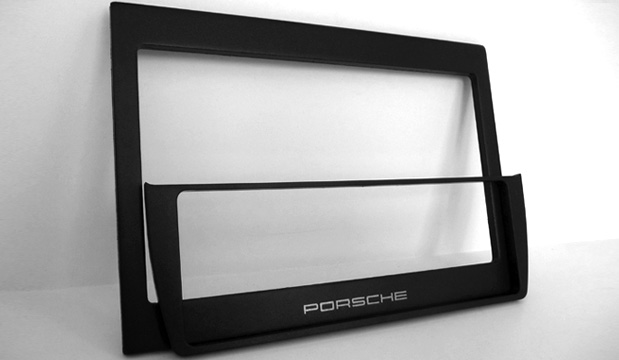
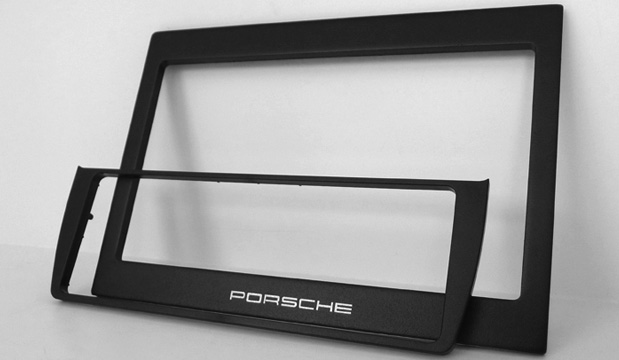
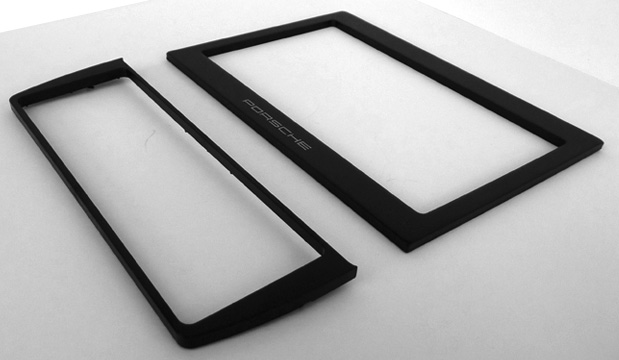
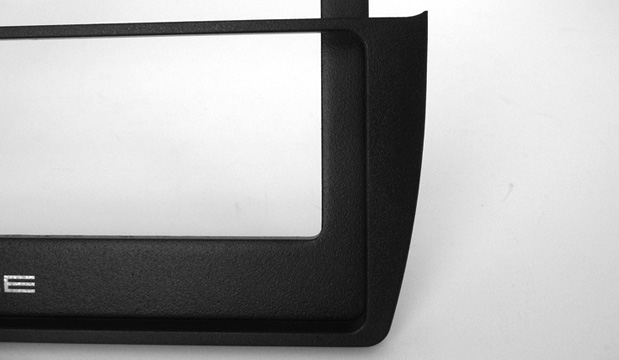
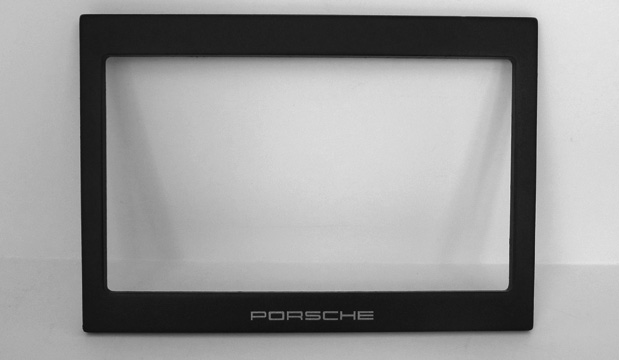
Hey Guys,
Hope everyone is doing great! We have some very good news to share. With the overwhelming request to have a matte black version of our 986/996 2 DIN bezel, we've went a couple notches above to come up with a bezel that I think many of you will be very pleased with.
Anyhow, I have attached a few photos for you guys to check out. In most of the pictures, you can see the factory climate control bezel (for the lower console) next to the new textured bezel.
-
Btw, it is possible to set up the harnesses from our kit to plug into the head unit using the line level RCA connectors. And then simply plug in the black and brown connectors to the double stack harness and yellow connectors to the red harness. We recently did it for a forum member's 02 Targa w/ Bose system successfully.
If you prefer to do it this way, please let me know.
-
This kit is not applicable to Bose 996s nor for PCM 996s. My TT had both. When I received these guy's kit I noticed that :(
I used only the antenna adapter and used only the top strip of the surround.
Hey guys,
I got Michael's email last night in regards to this issue and want to address the topic so everyone has the right information. The kit works for the 996 vehicles w/ either the Bose or the PCM set up - a minor modification is required to the wire harnesses that we include in our kit.
If you have a non MOST vehicle w/ Bose or PCM set up, essentially 4 additional speaker wires are required that plugs into the black double stack harness we provide.
It will make installing much simpler...
-Plug the vehicle's black and brown connector into the black double stack harness of the kit
-Plug the yellow connector (which is your amp remote turn on wire) to our red harness
-Connect the speaker wires of our double stack harness to the speaker wires of your new head unit
Anyhow, we will have some of these kits made available. Just give us a call or email us if you have this type of set up, so that we can include the additional wires for the harness.
Cheers,
Trieullionaire
-
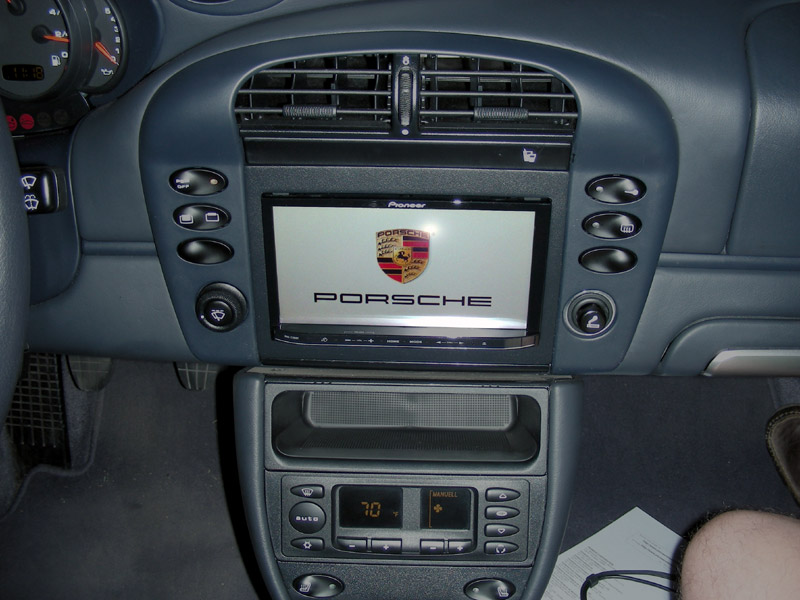
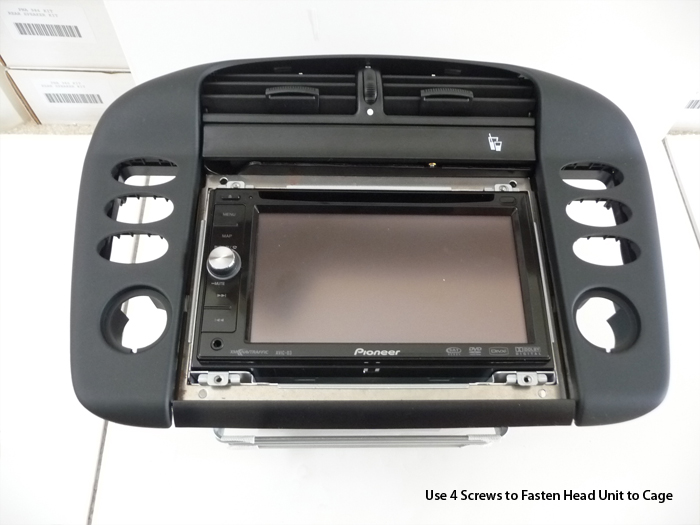
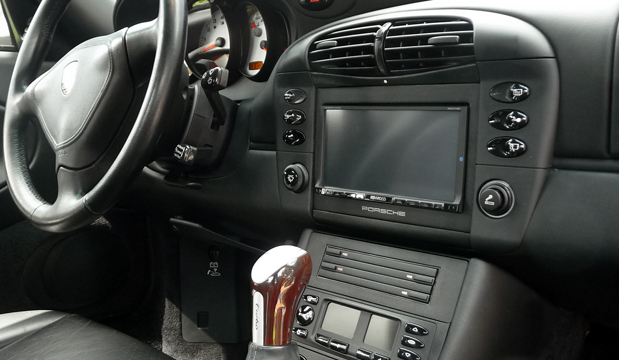
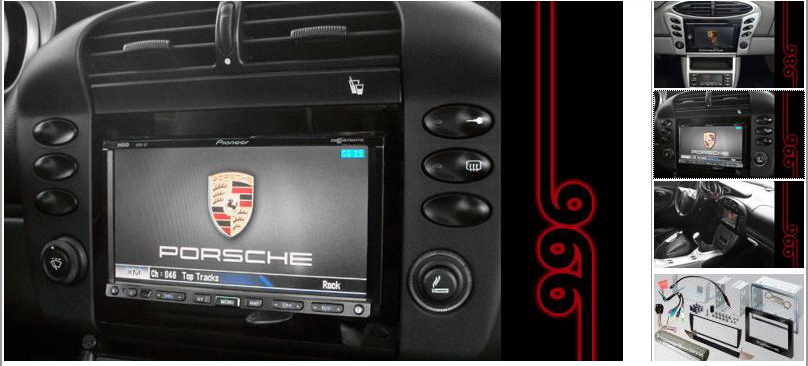
I recently installed the Avic D3 Navigation with rear view camera in my 2000 Boxster. Still have a few interior upgrades to do but the navigation system install was a success and really made the interior look phenomenal and updated.
What was needed for the job:
T20 Torx Screwdriver
Phillips Screwdriver
A dremel with cutting wheel
A file to sand down rough edges
Electrical tape & Wiring Caps
Wire Stripper
Double Din Kit Includes:
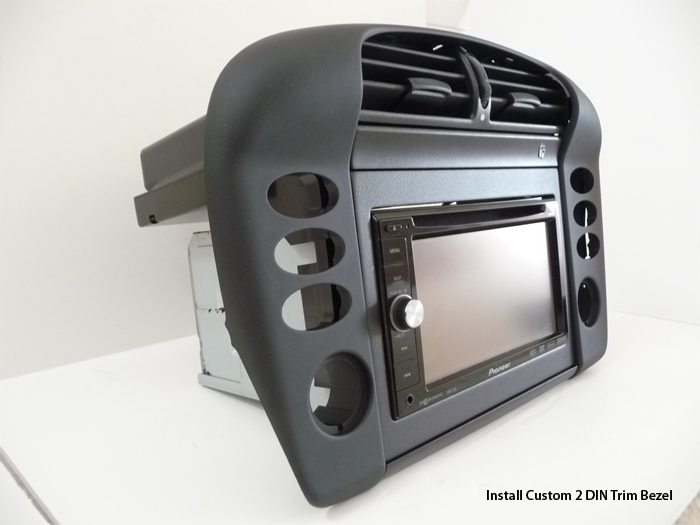
Precision cut fascia (trim) piece in Piano Finish to match Pioneer System
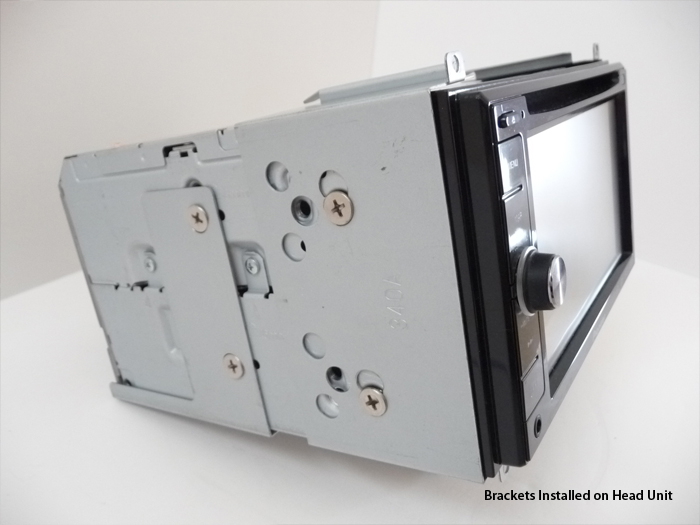
Double Din Housing & Brackets
Double Din Custom Support Bracket for Porsche
Heat Shield, Complete Wiring Harnesses, Antenna Adapter & Radio Removal Keys
Some of the things I really like about my new system is that I know that the install is solid. One of the challenges I noticed other folks had was the weight of the system, and so they elected to have it sit low as possible on the dash. Using the custom support bracket to support the back end of the navigation, and also choosing to mount the double din housing as high up as possible, I was able to keep most of the gap below the system as oppose to the top. And to make sure my stereo stays relatively unaffected by the heat from the climate duct system, I installed a heat shield between the duct and navigation.
The other challenge was that most standard double din navigation systems are a lot smaller than the size of my boxster's opening, so regardless of what I install it was going to make the system appear smaller. Didn't like that look too much, so instead of trying to match up the fascia piece to my car, I went with the piano black fascia piece instead to match it up to the Pioneer system. I think going this route made the fascia piece look like its part of the stereo which gives the illusion that the system is a bit bigger.
Anyways, I posted some of the pics below for everyone to check out!
OMG...This looks AWESOME. I have replaced everything in my 97 boxster, finally putting an Alpine double-din in after moving the instrument cluster....I've lived with the 1cm gap at the top for years, and now I feel so GHETTO. Hats off!
Where are you in regards to a universal mounting kit that would work for me, and how hard would it be for me to get some custom trim from you?
Thanks!
Bhavesh
Hi Bhavesh,
The kits we have available is compatible with your 97 Boxster and Alpine 2 Din headunit. Shoot us an email or PM us if you're interested in getting the kit (cvt929@yahoo.com).
Thx,
Trieullionaire
-
Back on topic please.
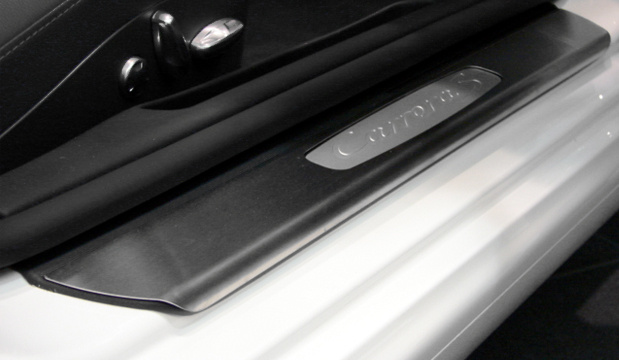
Heck no! We wanna know about the excellent bodywork :D
Here are a few pics of the stainless steel door sills for folks with the OEM upgrade.
-
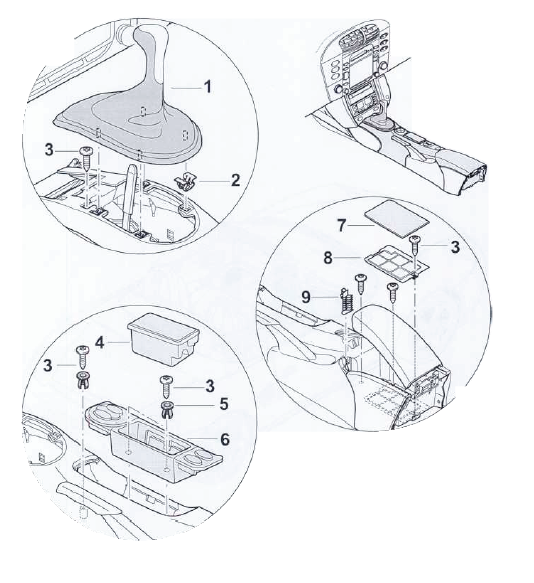
Replacing the center console isn't too complicated, see attachment
Does anyone have this picture in high res? Thank you in advance!
Trieullionaire
LOL - that is as "high res" as Porsche gets in their service manuals.
Thank you for the quick reply!
-
Replacing the center console isn't too complicated, see attachment
Does anyone have this picture in high res? Thank you in advance!
Trieullionaire
-
I just noticed my 2004 Boxster is the "facelift" with a slim cupholder and a horseshoe-shaped trim surrounding the original radio, climate control and air vents - how does this affect the installation instructions? (How do I remove the horseshoe shaped trim, as opposed to the trim style shown in the pictures in the DIY of this thread.) ....VERSUS....
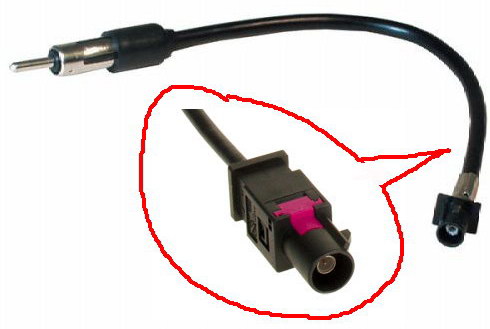
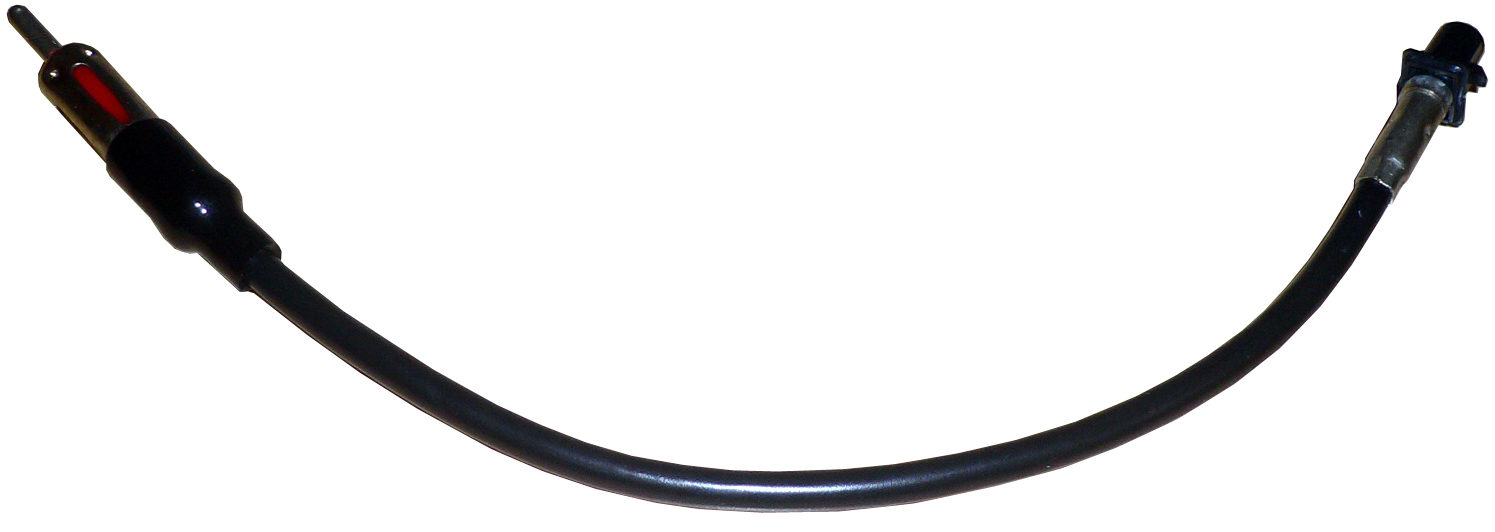
Also my radio antenna connector is a very small mini-"BMW"-type (not standard motorola, or even the standard larger "European" antenna connector.) Is this the same in the USA as well? So is this connector included in the kit? Thanks!
http://www.renntech.org/forums/index.php?s...dpost&p=719
The "horseshoe" you have is a 1 piece instead of 3 pieces shown in the DIY, detaching the 1 piece "horseshoe" & removing the wiring harnesses is similar. The kit for the 2003-04 uses a different antenna adapter vs the 97-02. Here is a picture of the antenna adapter we include for the 03-04 models:
-
We've been getting too many requests now to ignore what you guys want. We've been looking into making the bezel out of high grade metal & having it textured powder coated in a flat black. The powder coating application will make the bezel VERY scratch resistant and extremely durable! Unfortunately, our fabricator's lead time is always a couple of months but they do awesome work. Any thoughts on continuing the glossy black bezels?
Trieullionaire
EuroMotorSpeed.com
cvt929@euroMotorSpeed.com
727.643.2207
-
Hey Loren,
I just deleted the pics of the ads Fiberwerks sent me. I figure I do it to avoid causing you any more grief. :)


955 Cayenne w/ Bose Aftermarket Head Unit (Tampa Bay Area)
in 9PA, 9PA1 (Cayenne, Cayenne S, Cayenne Turbo, Cayenne Turbo S)
Posted
Cayenne Owners,
We are seeking one 03-09 Cayenne (w/ Bose) and one 03-09 (non Bose) in the Tampa Bay Area interested in replacing the original radio or PCM with an aftermarket head unit. If interested, please give us a call at 877.408.3876 for details.
Kind regards,
Loi T.
Owner - Euro Motorspeed