Welcome to RennTech.org Community, Guest
There are many great features available to you once you register at RennTech.org
You are free to view posts here, but you must log in to reply to existing posts, or to start your own new topic. Like most online communities, there are costs involved to maintain a site like this - so we encourage our members to donate. All donations go to the costs operating and maintaining this site. We prefer that guests take part in our community and we offer a lot in return to those willing to join our corner of the Porsche world. This site is 99 percent member supported (less than 1 percent comes from advertising) - so please consider an annual donation to keep this site running.
Here are some of the features available - once you register at RennTech.org
- View Classified Ads
- DIY Tutorials
- Porsche TSB Listings (limited)
- VIN Decoder
- Special Offers
-
OBD II P-Codes - Paint Codes
- Registry
- Videos System
- View Reviews
- and get rid of this welcome message
It takes just a few minutes to register, and it's FREE
Contributing Members also get these additional benefits:
(you become a Contributing Member by donating money to the operation of this site)
- No ads - advertisements are removed
- Access the Contributors Only Forum
- Contributing Members Only Downloads
- Send attachments with PMs
- All image/file storage limits are substantially increased for all Contributing Members
- Option Codes Lookup
- VIN Option Lookups (limited)


shonuff
-
Posts
16 -
Joined
-
Last visited
-
Days Won
6
Content Type
Profiles
Events
Forums
External Paint Colors
Downloads
Tutorials
Links Directory
Collections
Store
Posts posted by shonuff
-
-
Yeah the compromise of a direct injection engine is they don't have the washing effect from fuel being injected upstream.
-
Great write up, To remove the fuel pipe, I found it easier to use a 14mm brake wrench. Now attaching that fuel line back, is a pain in the you know what. Still working on it. I am even thinkin about removing the alternator for easier access... Any ideas?
The fuel line is a flare fitting. It can be separated from the manifold and aligned into the flare first before the manifold is lined back up.
I understand your frustration. The first time around is a royal PITA. If you had to do it again, I guarantee it would go much quicker.
Sent from my iPhone using Tapatalk -
So is that head of the t25 right on the arrow tip in your diagram, threads down?
The T25 screw is threads up as in you’re unscrewing it down towards the ground.
Sent from my iPhone using Tapatalk -
Mine is a 2009 3.6L V6.
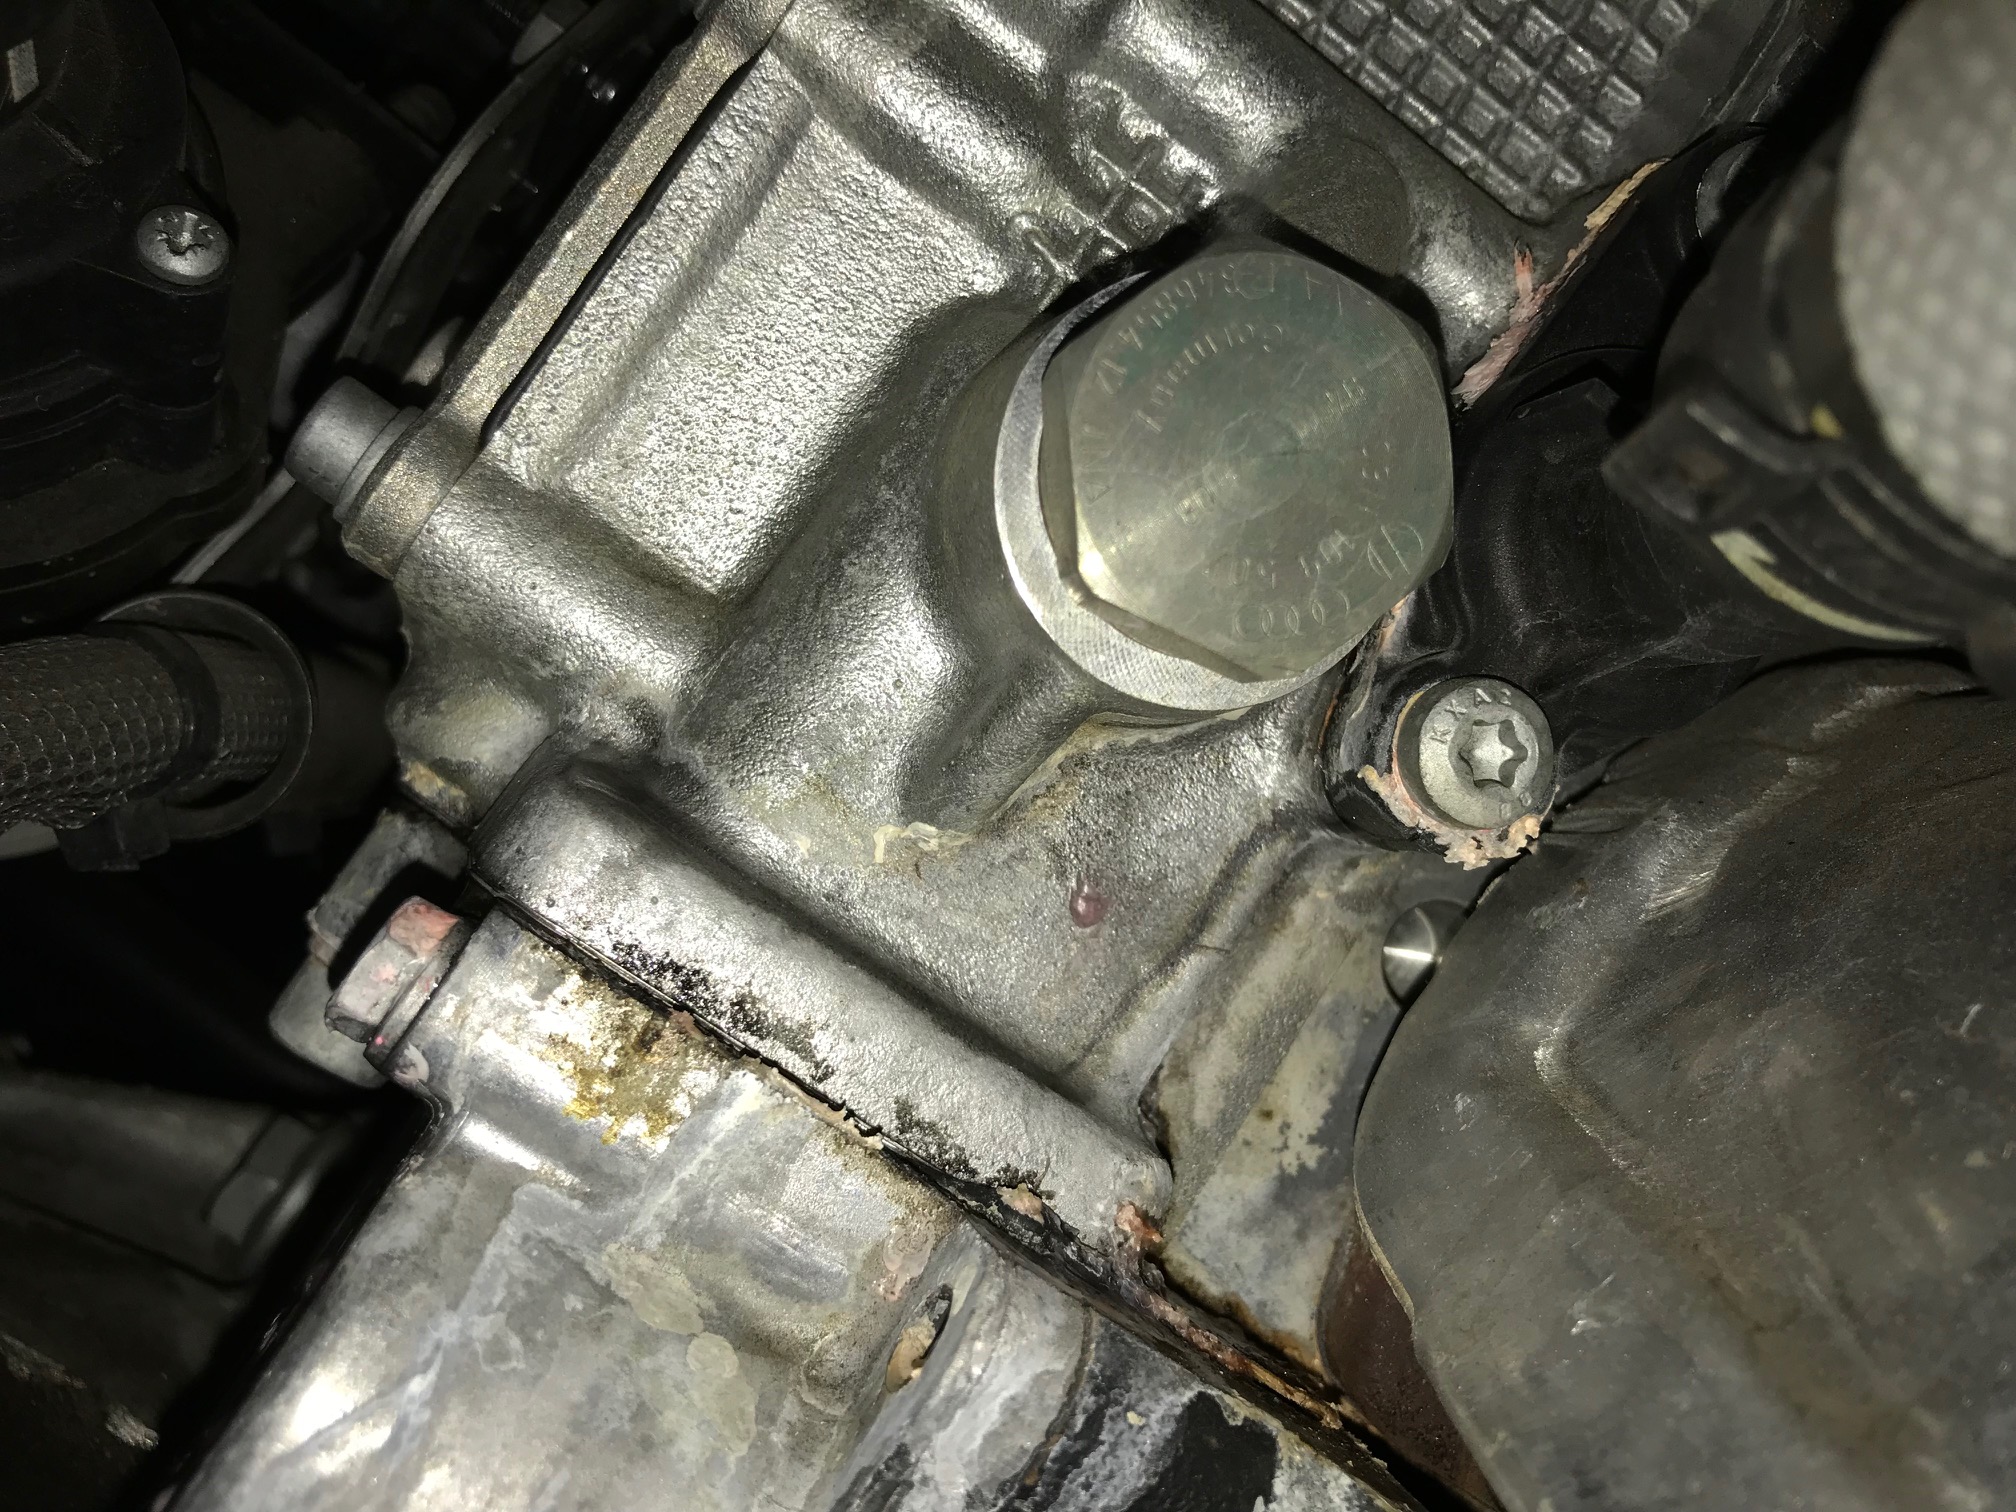
The black horizontal tube you're talking about sounds like the step where I said to remove the water hose bracket with a T25 torx bit. The bracket is a keyhole slot so once you remove the T25 screw you can slide the bracket towards the front of the car and release it. Once that is free the black tube moves out of the way giving you access to those triple square bolts.
-
Sorry I am a novice but your guide has led me every step of the way. I have uploaded I picture of the rail the i unscrewed. The nut I unscrewed from the top is circled at the bottom. When I pivot the manifold from the passanger side, the rail doesn’t move much. Why isn’t it wiggling loose? Am I wiggling the right thing?

You can kind of tilt the intake manifold towards the back firewall and free the fuel line after you’ve pivoted it up. It does take a little bit of wiggling/working it. It’s a flare fitting which looks like a cone that fits inside another cone. The fuel line flexes around a little which provides the resilience you need to pop it out.
You can pull the line down a little with your hand to free the cone from the upper fitting.
Sent from my iPhone using Tapatalk
-
1 hour ago, Sims5002 said:
I need help. I am at the part where you disconnect the lower fuel rail to remove the manifold. I have unscrewed the nut at the top. What is the right way to move the manifold without bending the fuel rail? I don’t want to damage anything.
If everything is unbolted, you should be able to pull the intake manifold up from the passenger side and pivot it up from the drivers side. Once its up a few inches you have a little bit of space to wiggle it free from the upper fuel rail nut.
-
 1
1
-
-
Great write-up and thanks for the contribution. This would of saved me a lot of time a few months ago. I attempted to change out a failed diaphragm valve in the intake on my 3.6, but couldn't finish the intake removal. I had everything on your write-up removed except for last M10 triple square on the drivers side closest to the firewall, I just couldn't get it. I ended up putting everything back together and bringing it to an indy shop. I went from $75 in parts for a DIY to a $1,480 bill from the shop, so frustrating. I'm sure this write-up will save many DIY techs big $. Again...well done!
Thanks, I get it. The first time I removed my intake manifold was for the same reason, failed PCV valve. I got a replacement diaphragm membrane for $20 and spent the whole night removing the intake manifold because there was no tutorial to follow. It was frustrating. I was slowly working my way around the engine trying to find all the mounting bolts and wiggling the intake manifold until it felt free.
When I put it all back together I had a slow gas leak due to the fuel injector seals. Coming from the BMW world where there is a tutorial for everything, I decided to document the process this time around to make a tutorial. Hopefully this helps others in the future who need to replace their PCV valve.
Sent from my iPhone using Tapatalk -
Cayenne 3.6 V6 Intake Manifold Removal DIY
This DIY tutorial covers how to remove the intake manifold on the 3.6L V6 Cayenne. Removing the intake manifold gives you access to several parts of the engine that you may need to service. Disclaimer: Perform at your own risk. This is for reference only, I am not responsible for any damage/injuries that may occur from this procedure. Please do not attempt if you are not comfortable with doing work on your car or working around the fuel system. Work in a well ventilated area as you w
-
Author
-
Category
-
Submitted03/09/2018 08:31 AM
-
Updated03/09/2018 10:00 AM
-
 1
1
-
-
2 minutes ago, Mr.Flip said:
I thought so too but when I pulled up the diagram it was listed under :
Porsche Cayenne M55.01 Water Pump Thermostat Housing
Sent from my iPhone using TapatalkInteresting. When I did the cooling system refresh I replaced the water pump (front of engine) and thermostat (side of engine) so that confuses the hell out of me why they would call that a water pump thermostat housing if neither of those components are back there.
Was it a fairly straight forward job? Doesn't look like I would have to remove much to get to it. I may take some pictures and make a DIY for the job.
-
1 hour ago, Mr.Flip said:
I've had the same problem in my 2008 v6. After removing the 2 bolts I saw it had a rubber gasket. Waiting for the dealership to call me when it comes in. (Was the cheapest there)
It's technically for the thermostat. It's called a flange socket and sealing ring. Here's the part #'s 95510623100 Flange Socket
95510643100 Sealing Ring
Sent from my iPhone using TapatalkThanks for the PN! Doesn't look very expensive, my local dealership has it for $26 and the o-ring is less than $2.
I think the thermostat is on the back of the 3.2 V6 but for the 3.6 V6 the thermostat is on the side of the engine (driver side). I know this because I replaced it during my cooling system refresh at 90k miles. However, there does seem to be a housing for something back there, I'm just not sure what it is..
-
1
-
-
The common coolant pipe issue seems to only affect the V8 Cayenne's. I'm wondering if my coolant leak is a common problem too. I've been losing coolant on my 3.6 V6 Cayenne at a fairly slow rate compared to the other more common issue. I'm having to top it off about once every month or two. Last weekend I was changing the oil and started investigating the leak. It looks to be coming from a black plastic coolant hose fitting on the back of the engine, passenger side.
Has anyone seen this problem before? I'm wondering if there is just a bad o-ring behind that fitting or if the whole part needs to be replaced. And if anyone knows the part number for this I would greatly appreciate that too!
Thanks -
Follow up post for anyone who has this problem in the future. I replaced the thermostat with a new one and fixed the issue. I confirmed it was a slow opening thermostat when I removed the old one and put it in a pot of boiling water with the new thermostat. The new thermostat opened as expected while the faulty one did not open until later. Both thermostats were bought from the Porsche dealership.
Side note, the replacing of the thermostat on the 3.6L V6 is a PITA. It is in a hard to reach area with hoses and wire harnesses running in front of it guaranteeing that you will walk away with bloody knuckles.
-
I recently replaced the thermostat on my '09 Cayenne 3.6L V6 with a genuine Porsche thermostat along with water pump, belt, etc. Ever since I replaced it I've noticed that on the first start of the day, when the engine is bone cold, the water temp creeps past 1/2 mark and to the 3/4 mark sometimes before it settles back to 1/2 mark. Once it settles at the 1/2 mark it stays rock solid, no issues whatsoever in 100F ambient days in stop and go traffic.
Did I get a bad thermostat? It feels like a slow opening thermostat to me. Sometimes I think its in my head and maybe it behaved this way before I replaced the thermostat but to be honest I never paid attention to it until I overhauled the cooling system. Has anyone else noticed this behavior or can confirm it is a lazy thermostat?
Thanks

.jpg.82cb3003a2dcdf94c5d3c2a30489cbb0.jpg)
Cayenne 3.6 V6 Intake Manifold Removal DIY
in DIY Articles - Cayenne - Common Fixes and Repairs
Posted
I only replaced the lower.