Welcome to RennTech.org Community, Guest
There are many great features available to you once you register at RennTech.org
You are free to view posts here, but you must log in to reply to existing posts, or to start your own new topic. Like most online communities, there are costs involved to maintain a site like this - so we encourage our members to donate. All donations go to the costs operating and maintaining this site. We prefer that guests take part in our community and we offer a lot in return to those willing to join our corner of the Porsche world. This site is 99 percent member supported (less than 1 percent comes from advertising) - so please consider an annual donation to keep this site running.
Here are some of the features available - once you register at RennTech.org
- View Classified Ads
- DIY Tutorials
- Porsche TSB Listings (limited)
- VIN Decoder
- Special Offers
-
OBD II P-Codes - Paint Codes
- Registry
- Videos System
- View Reviews
- and get rid of this welcome message
It takes just a few minutes to register, and it's FREE
Contributing Members also get these additional benefits:
(you become a Contributing Member by donating money to the operation of this site)
- No ads - advertisements are removed
- Access the Contributors Only Forum
- Contributing Members Only Downloads
- Send attachments with PMs
- All image/file storage limits are substantially increased for all Contributing Members
- Option Codes Lookup
- VIN Option Lookups (limited)


willga
-
Posts
6 -
Joined
-
Last visited
Content Type
Profiles
Events
Forums
External Paint Colors
Downloads
Tutorials
Links Directory
Collections
Store
Everything posted by willga
-
Wind Deflector Install
willga replied to jambajuice's topic in DIY Articles - Boxster (986) - Accessories
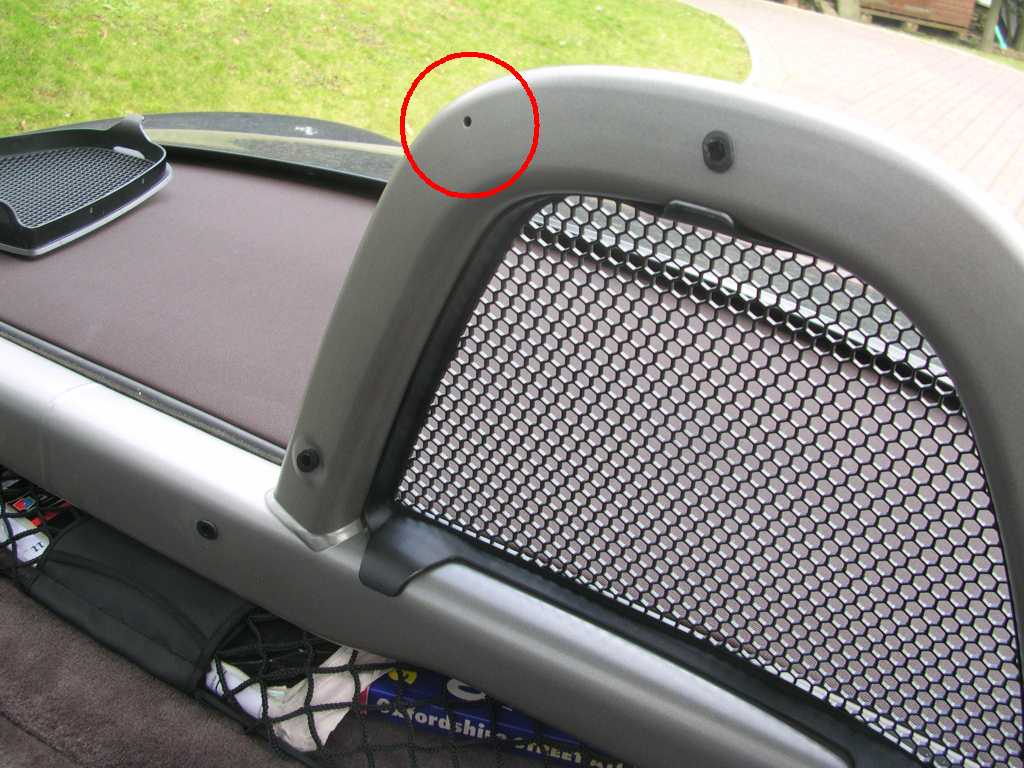
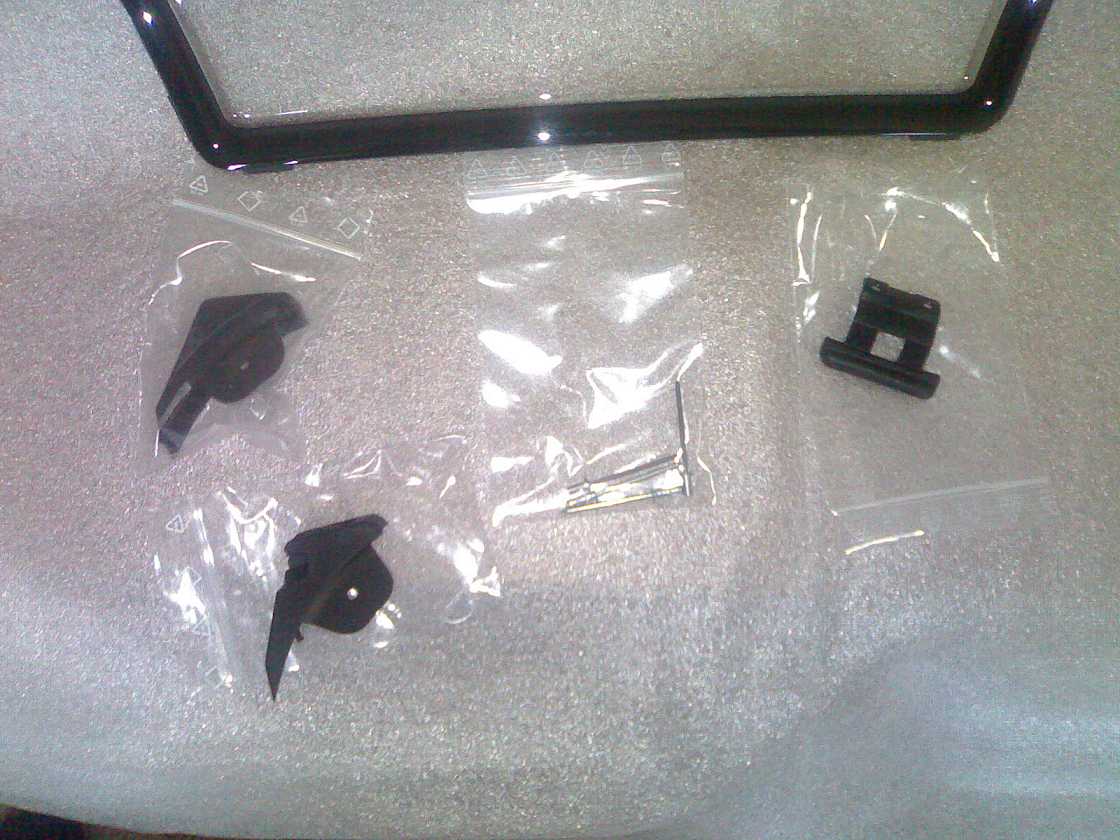
The long threaded section at the bottom left hand corner is an interference fit into some soft plastic bushes in the roll-bar ie yes, it holds the padding on and yes, you remove the padding by prying it off with a soft upholstery tool. That is how the pop-rivets look before they are 'popped'. Clip on, rivets in place, apply rivet gun, 'pop' - pulls out expander. -
Wind Deflector Install
willga replied to jambajuice's topic in DIY Articles - Boxster (986) - Accessories
Holes were pre-drilled in both the roll-hoops and the padding.
-
Wind Deflector Install
willga replied to jambajuice's topic in DIY Articles - Boxster (986) - Accessories
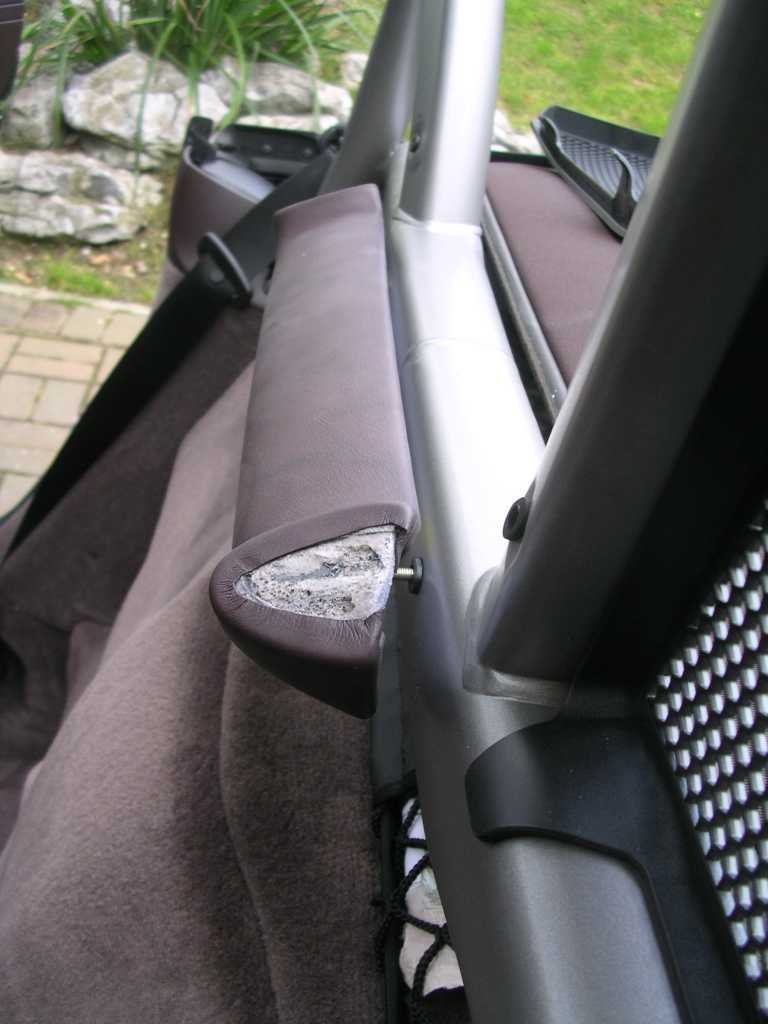
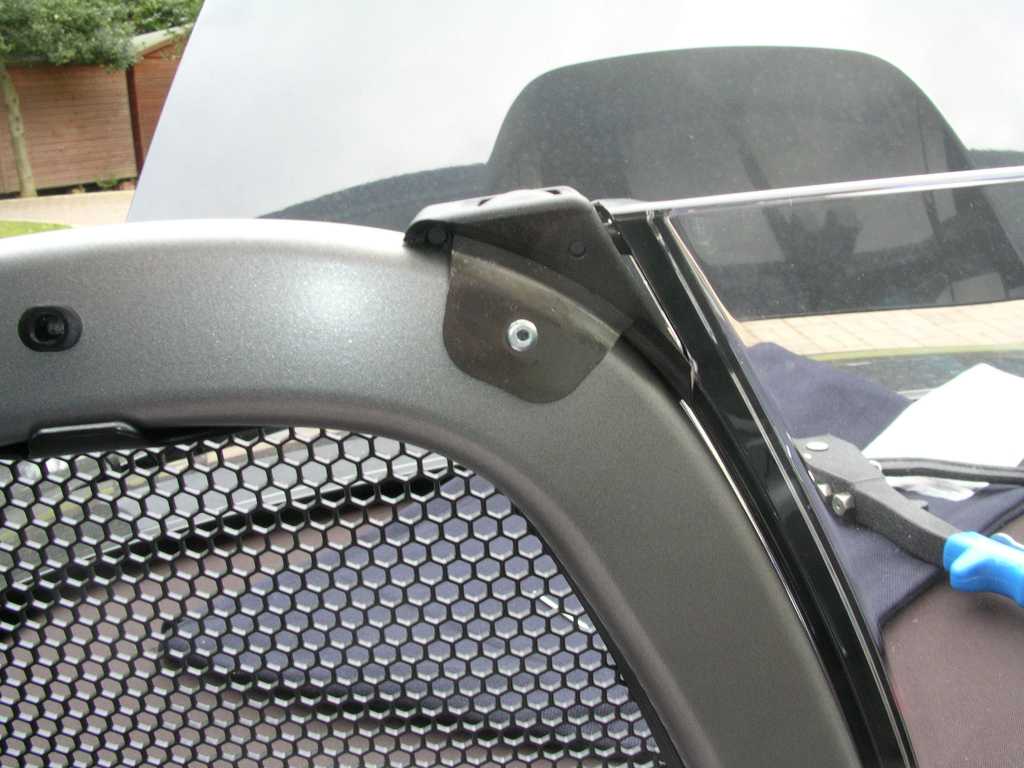
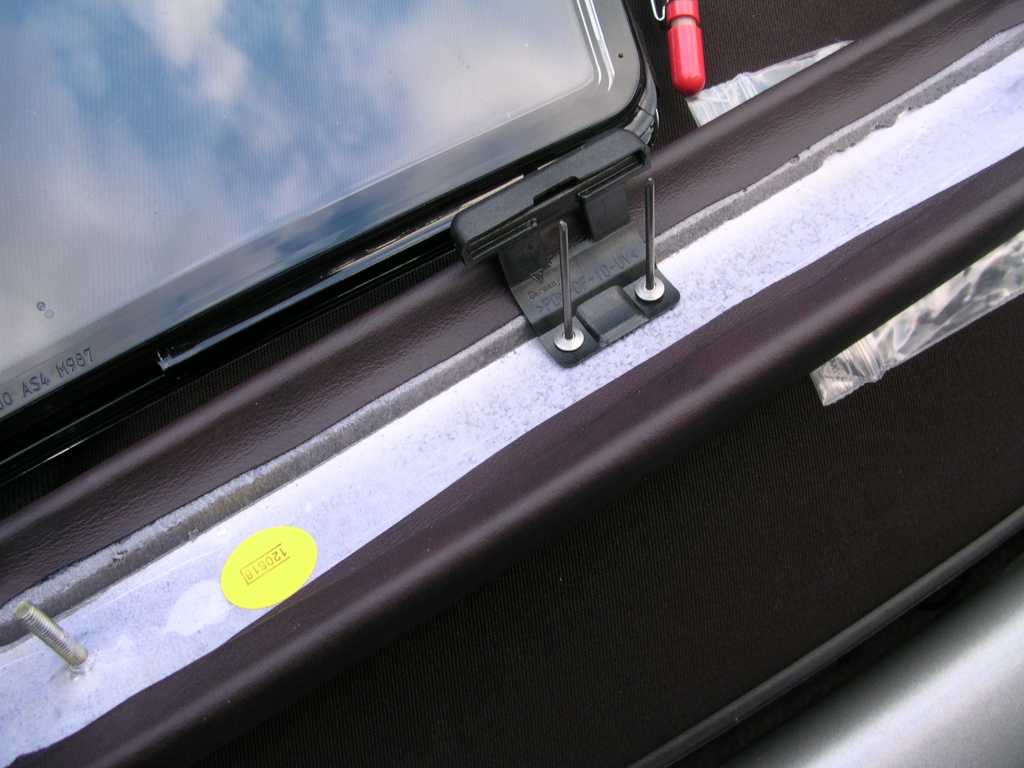
Finally found my rivet gun, so here's the installation: 1. Lever off the padding with a plastic lever to avoid scratching up the paint. There are M5 studs in the back of the padding which press into nylon inserts in the roll-hoops. They're pretty firm, but will budge with enough brute force. 2. Rivet the upper brackets in place, using the supplied rivets with the expander protruding from the end. It may be worth having the screen clipped into position, to make sure everything's lined up. 3. Rivet the centre bracket to the inside of the centre roll-bar padding, using the closed-off rivets. There should be holes pre-drilled into the padding. Don't spend hours trying to drill holes into the roll-bar like I did. 4. Press everything back into place and voila! All this ought to take less than half an hour: that's about £100 saved from the local Porsche dealership.
-
Wind Deflector Install
willga replied to jambajuice's topic in DIY Articles - Boxster (986) - Accessories
Thanks - I'll try and get it done later on during the week. -
Wind Deflector Install
willga replied to jambajuice's topic in DIY Articles - Boxster (986) - Accessories
I understand they're pretty much the same as for the 986, just a different profile to be difficult.
-
Wind Deflector Install
willga replied to jambajuice's topic in DIY Articles - Boxster (986) - Accessories
Have just gone out and bought a windstop kit to retrofit to my 987. Is there a quick and easy way to get the roll-bar padding off, or is it just a question of giving it a hard tug? I don't want to break anything...