Welcome to RennTech.org Community, Guest
There are many great features available to you once you register at RennTech.org
You are free to view posts here, but you must log in to reply to existing posts, or to start your own new topic. Like most online communities, there are costs involved to maintain a site like this - so we encourage our members to donate. All donations go to the costs operating and maintaining this site. We prefer that guests take part in our community and we offer a lot in return to those willing to join our corner of the Porsche world. This site is 99 percent member supported (less than 1 percent comes from advertising) - so please consider an annual donation to keep this site running.
Here are some of the features available - once you register at RennTech.org
- View Classified Ads
- DIY Tutorials
- Porsche TSB Listings (limited)
- VIN Decoder
- Special Offers
-
OBD II P-Codes - Paint Codes
- Registry
- Videos System
- View Reviews
- and get rid of this welcome message
It takes just a few minutes to register, and it's FREE
Contributing Members also get these additional benefits:
(you become a Contributing Member by donating money to the operation of this site)
- No ads - advertisements are removed
- Access the Contributors Only Forum
- Contributing Members Only Downloads
- Send attachments with PMs
- All image/file storage limits are substantially increased for all Contributing Members
- Option Codes Lookup
- VIN Option Lookups (limited)
Haiyan
-
Posts
39 -
Joined
-
Last visited
Content Type
Profiles
Events
Forums
External Paint Colors
Downloads
Tutorials
Links Directory
Collections
Store
Posts posted by Haiyan
-
-
I had a similar issue when I replaced the seat belt buckles the airbag light will stay on even if you cleared the codes with any diagnostic tool "Autel, Durametric...etc". However, I had to recode/reprogram the airbag unit with Porsche Tester and it solved my issue.
-
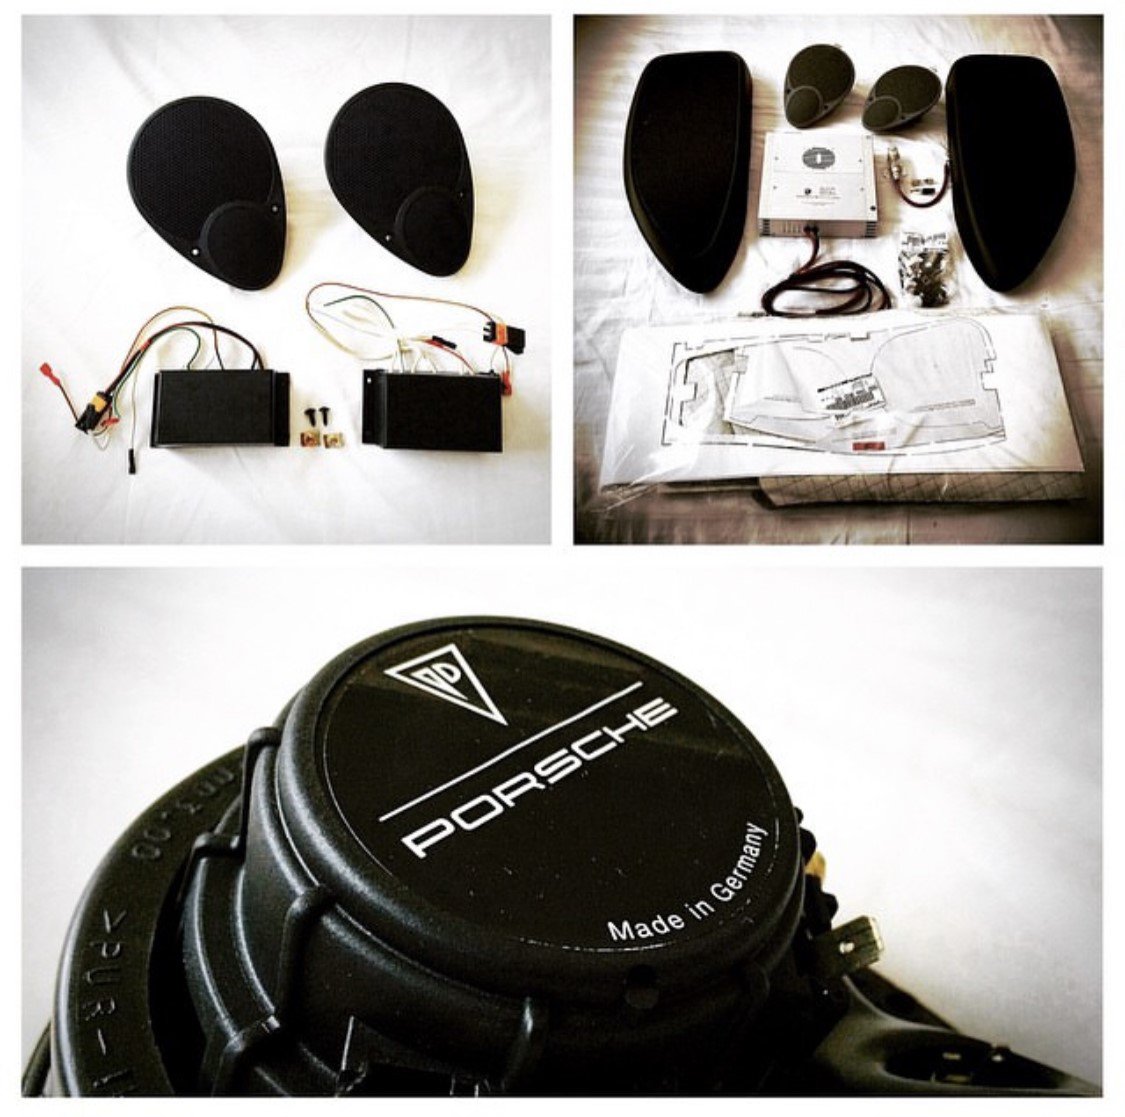
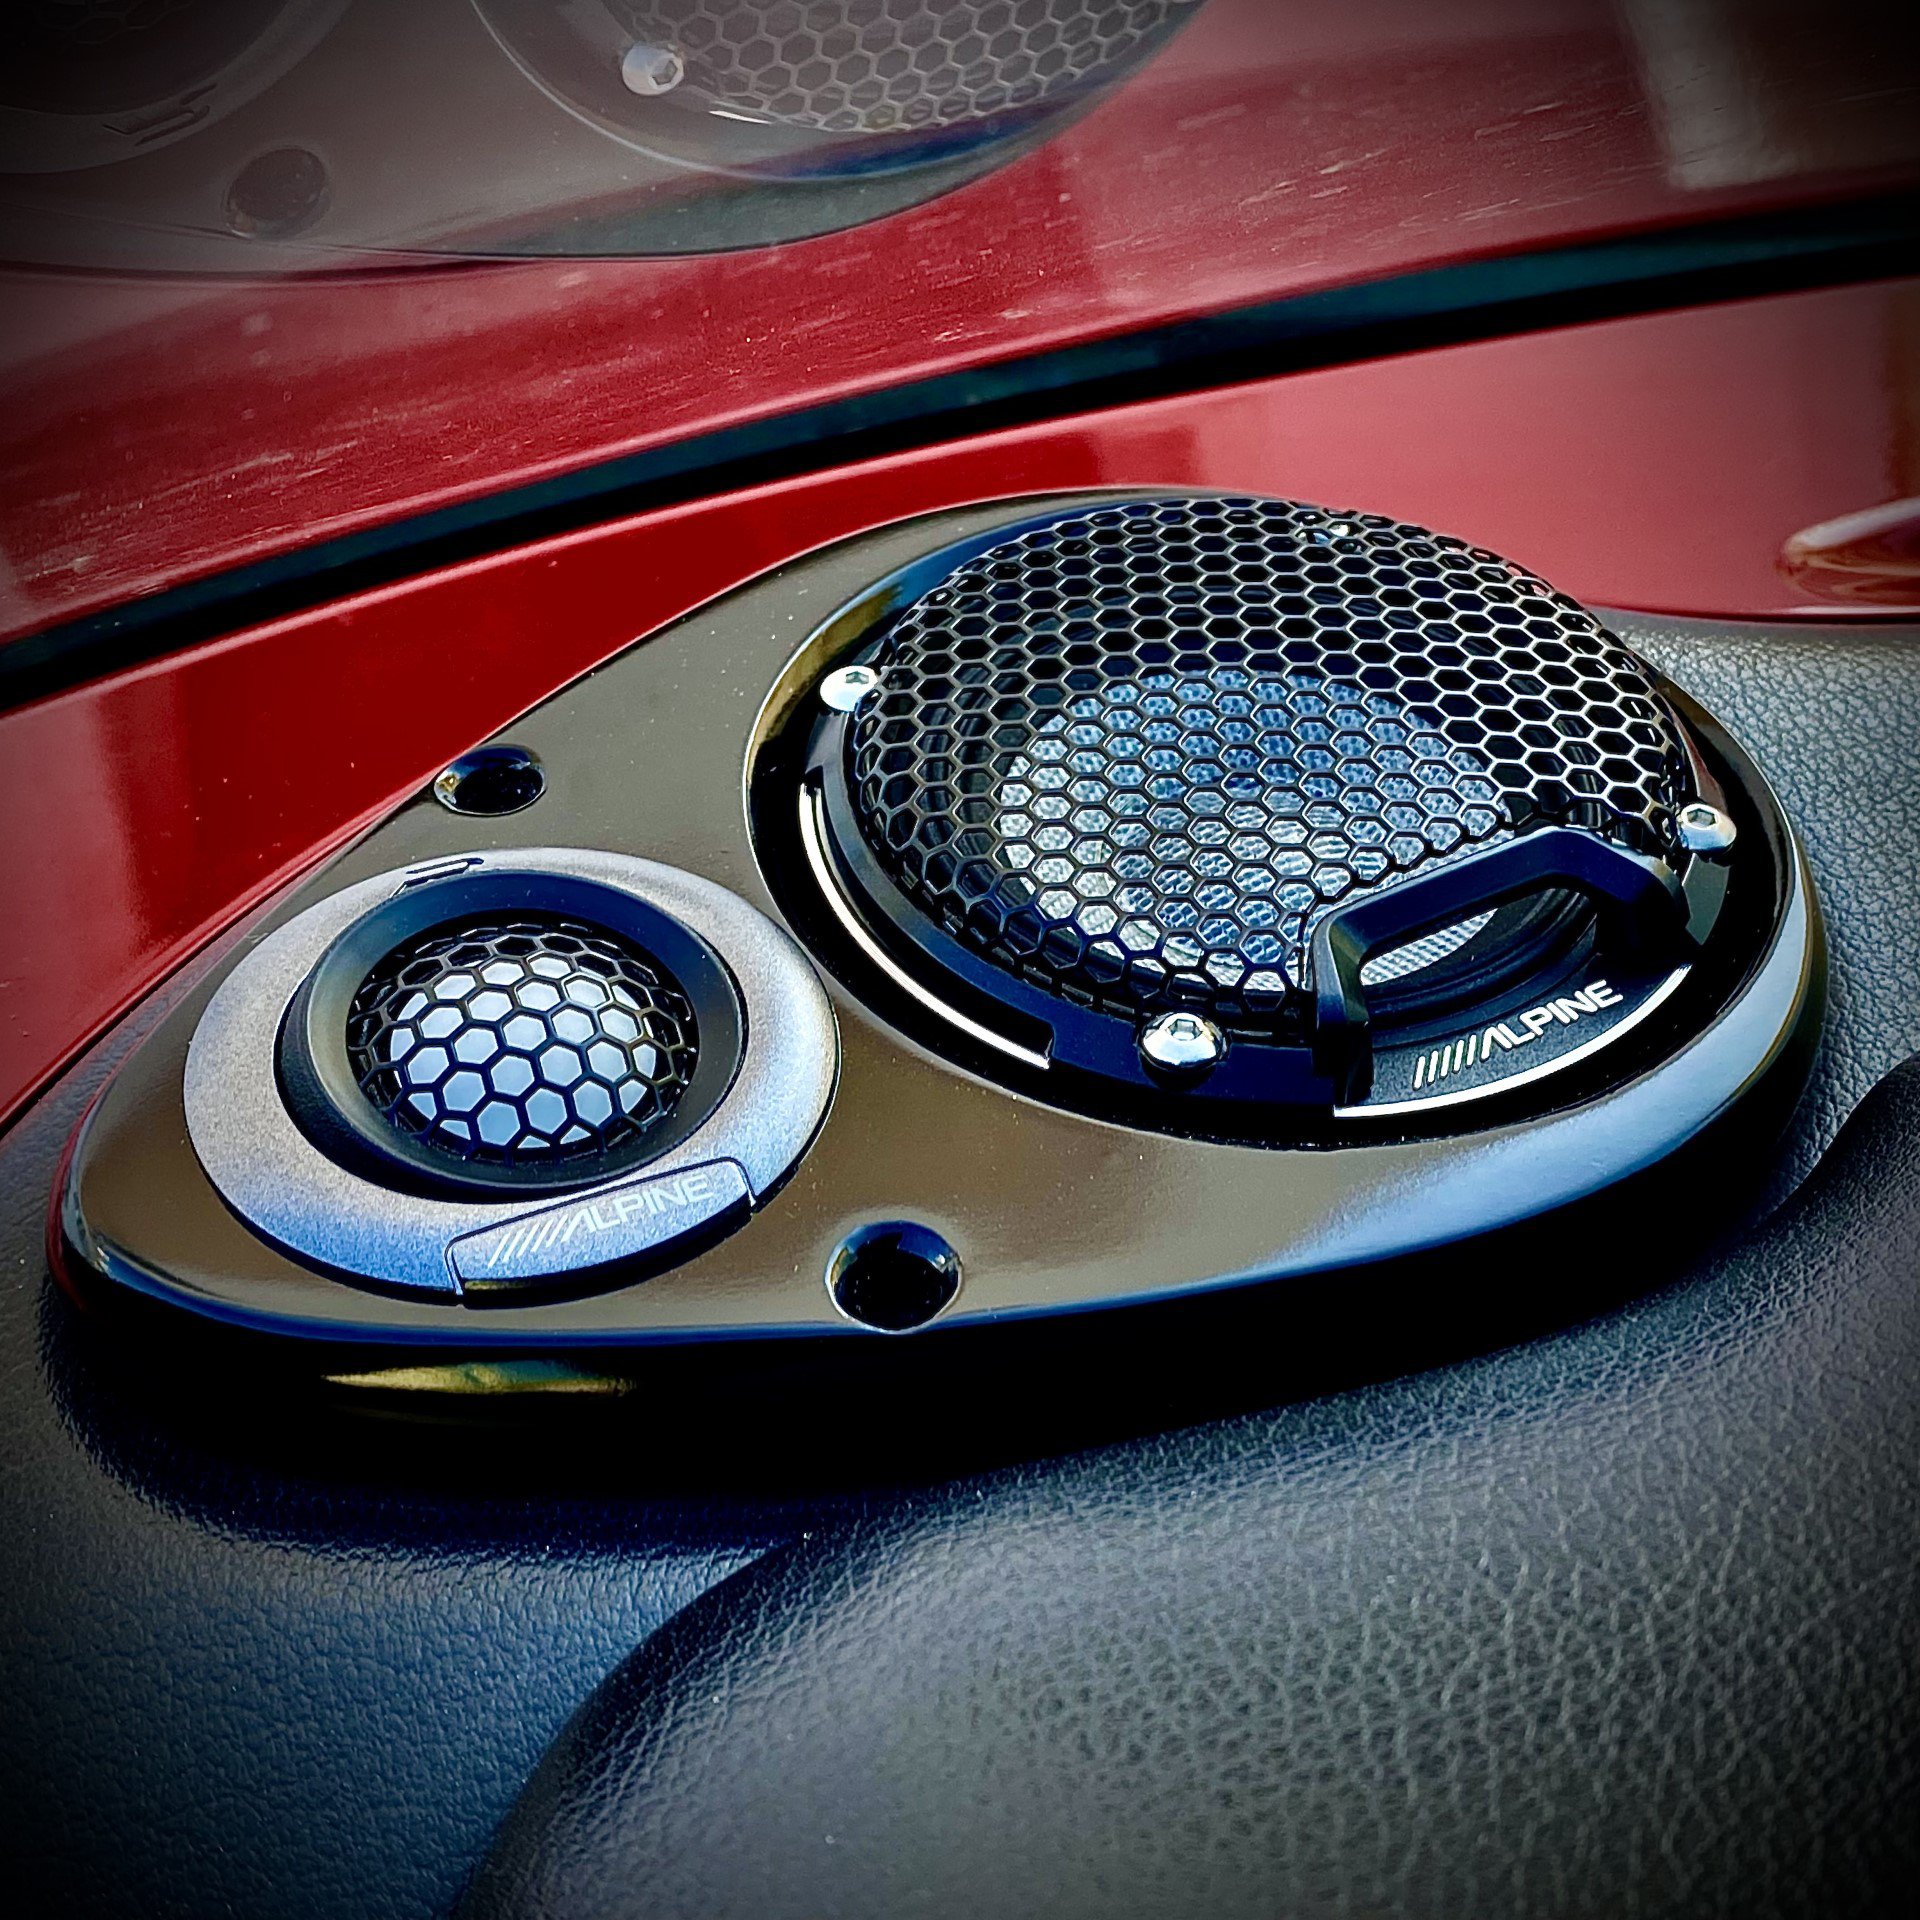
Just a quick look I had the Porsche High Performance Audio System "HPAS" upgrade fitted in my car and that is a Porsche tequipment accessory and it is intended for vehicles with M490 Sound Package and it could be installed on vehicles with M680 too, the kits includes amplifier, four 160mm woofers and two dash speakers with midrange and tweeter the rear speakers are optional and similar to the dash ones.

However, the sound system in the 996 was falling apart the speakers went out and followed by the amplifier so I had two options whether to stay OE or do a proper upgrade in which I had a limited choices due to the speaker layout and configuration in the 996 also not to mention the limited space.
I went with the following:
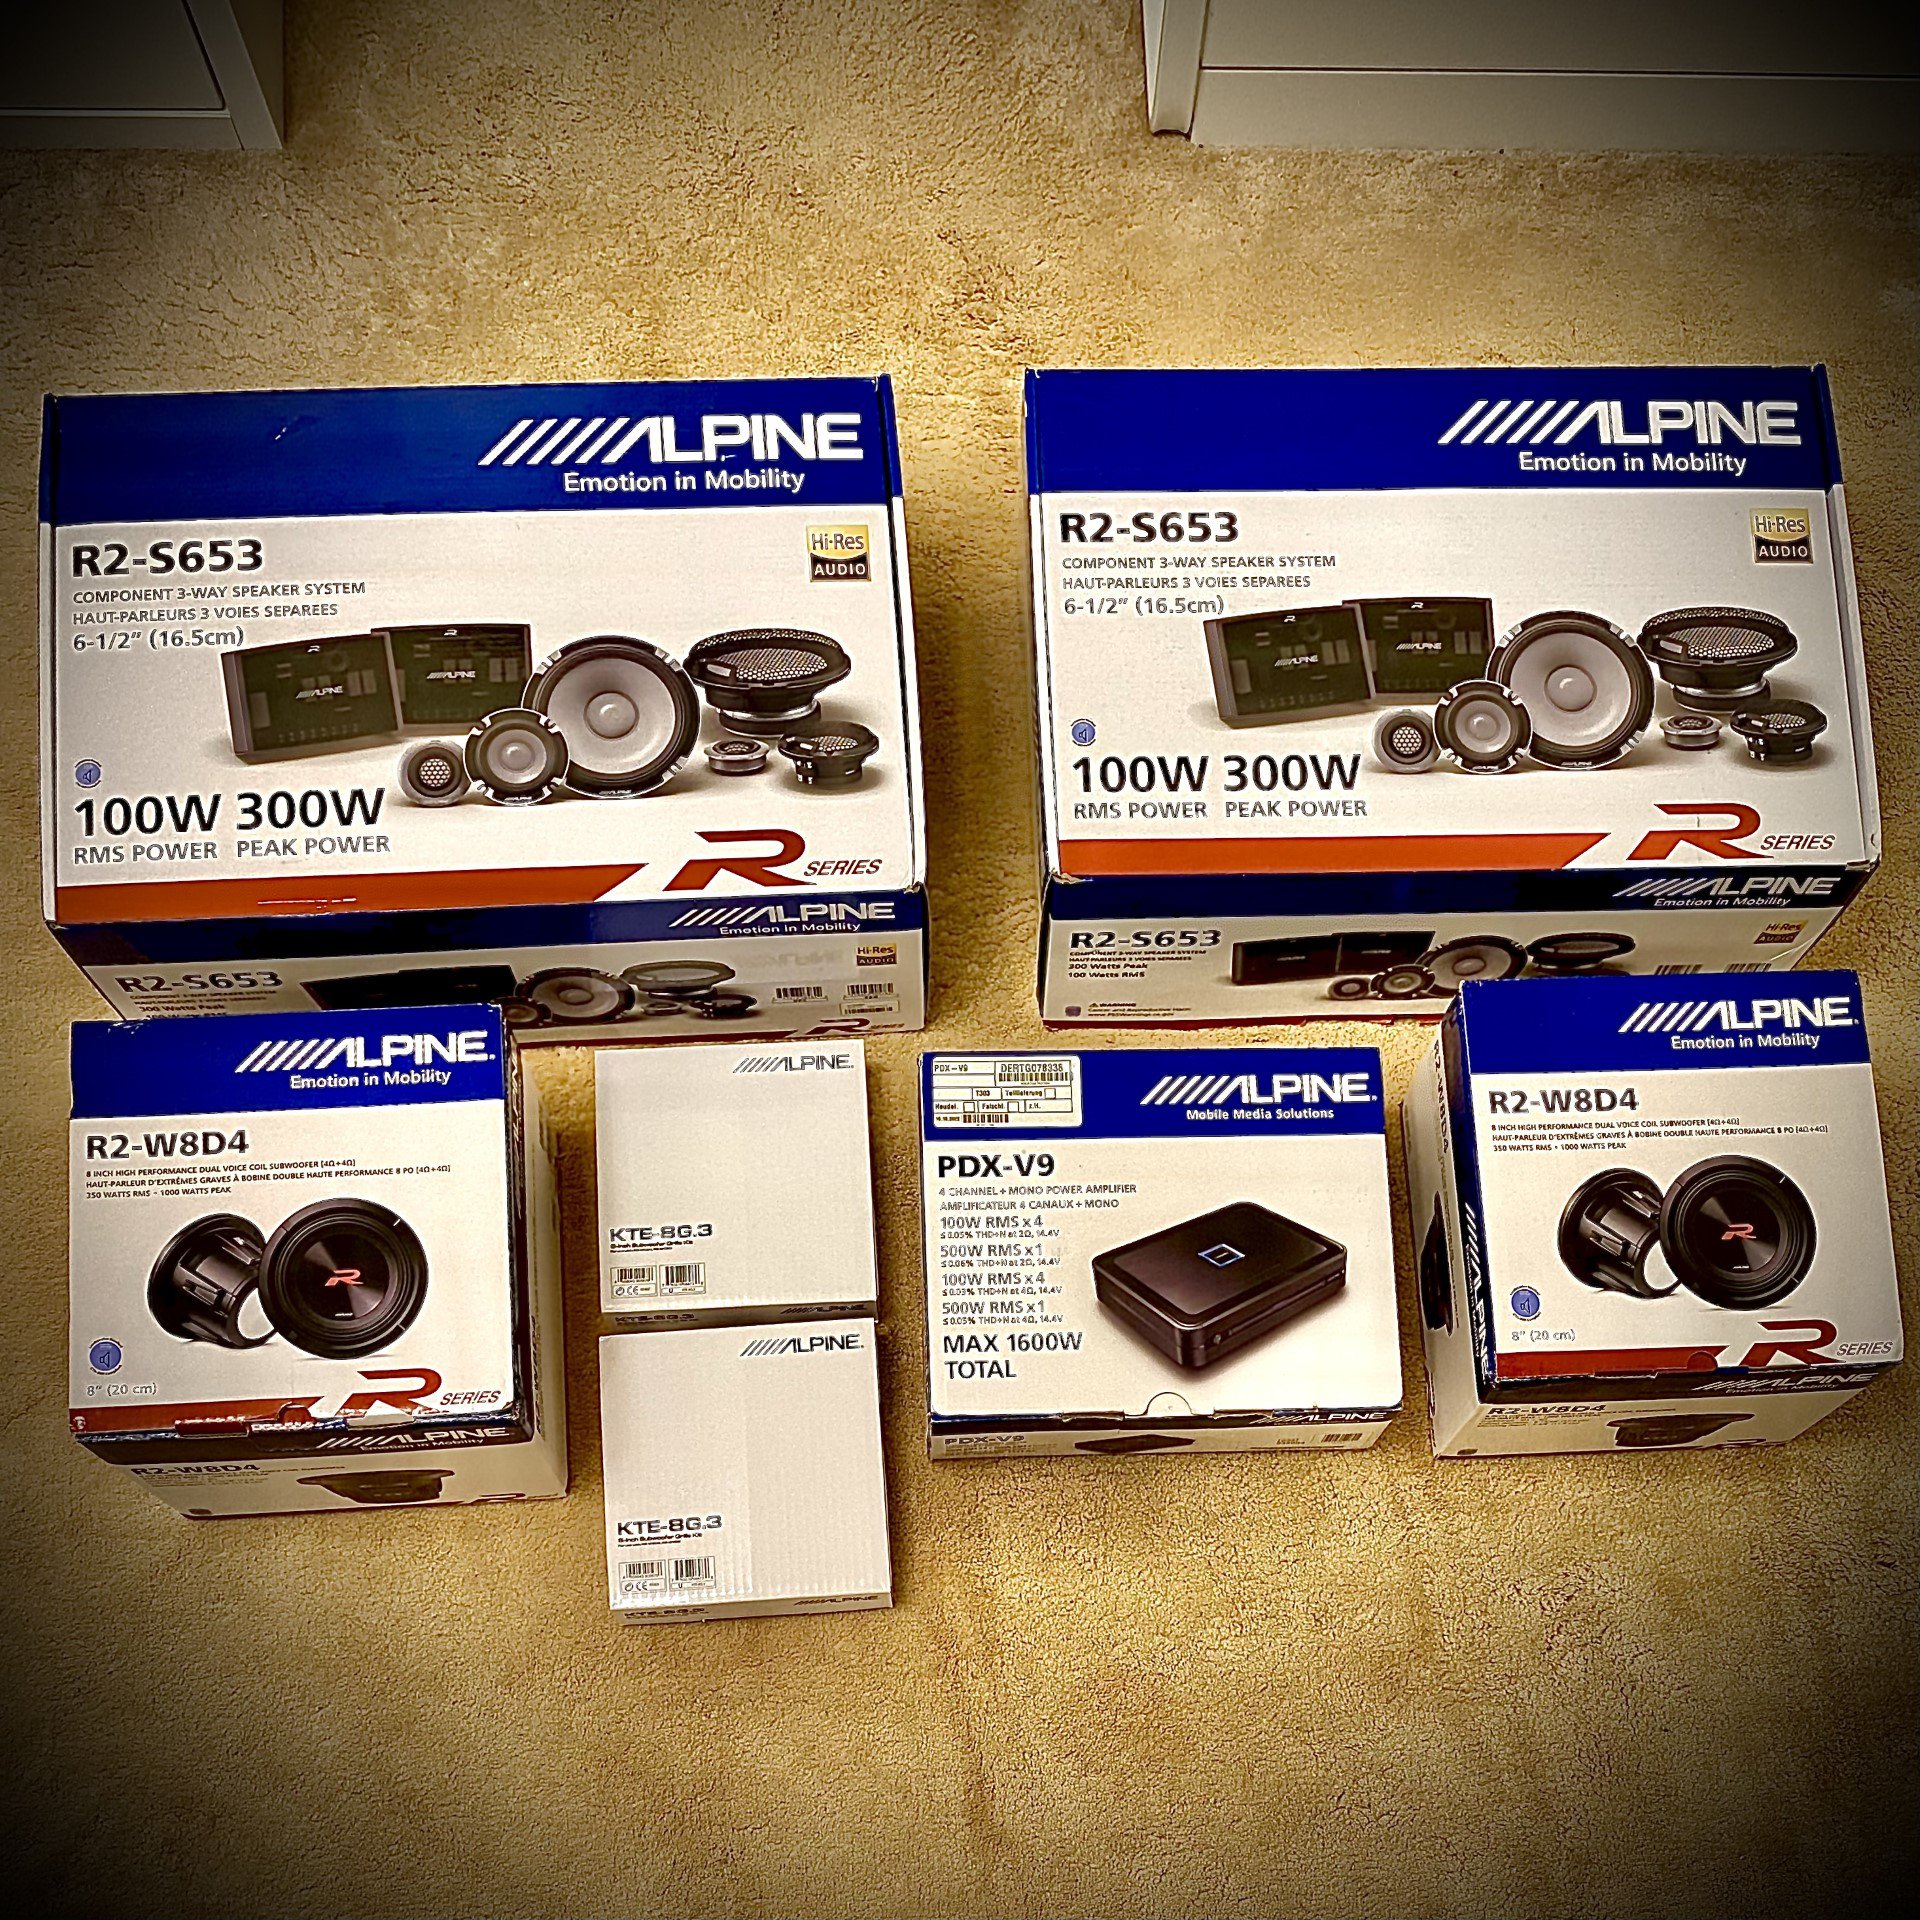
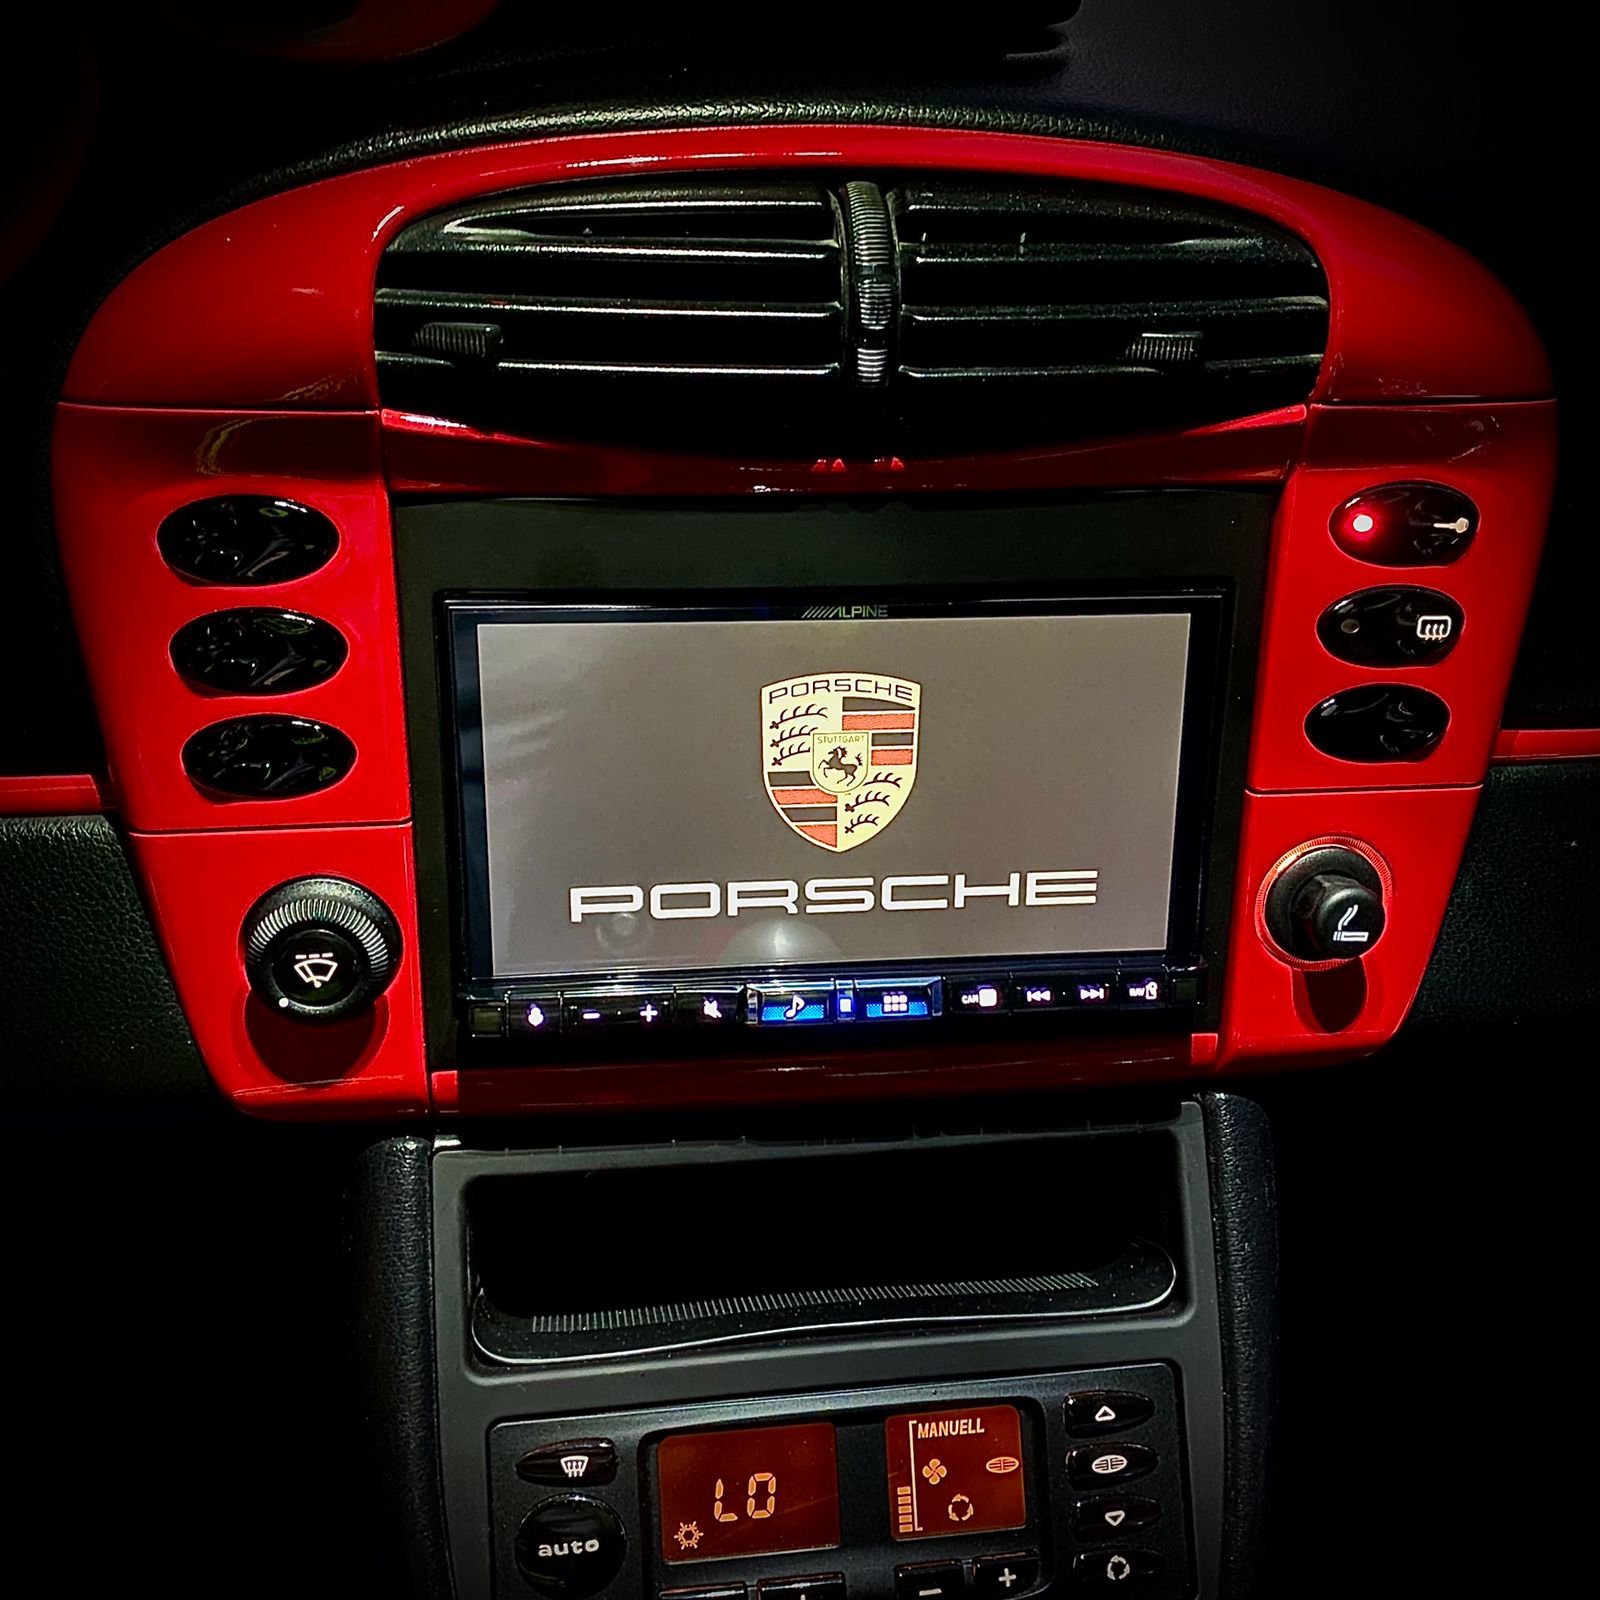
1- Alpine iLX-705D Head Unit.
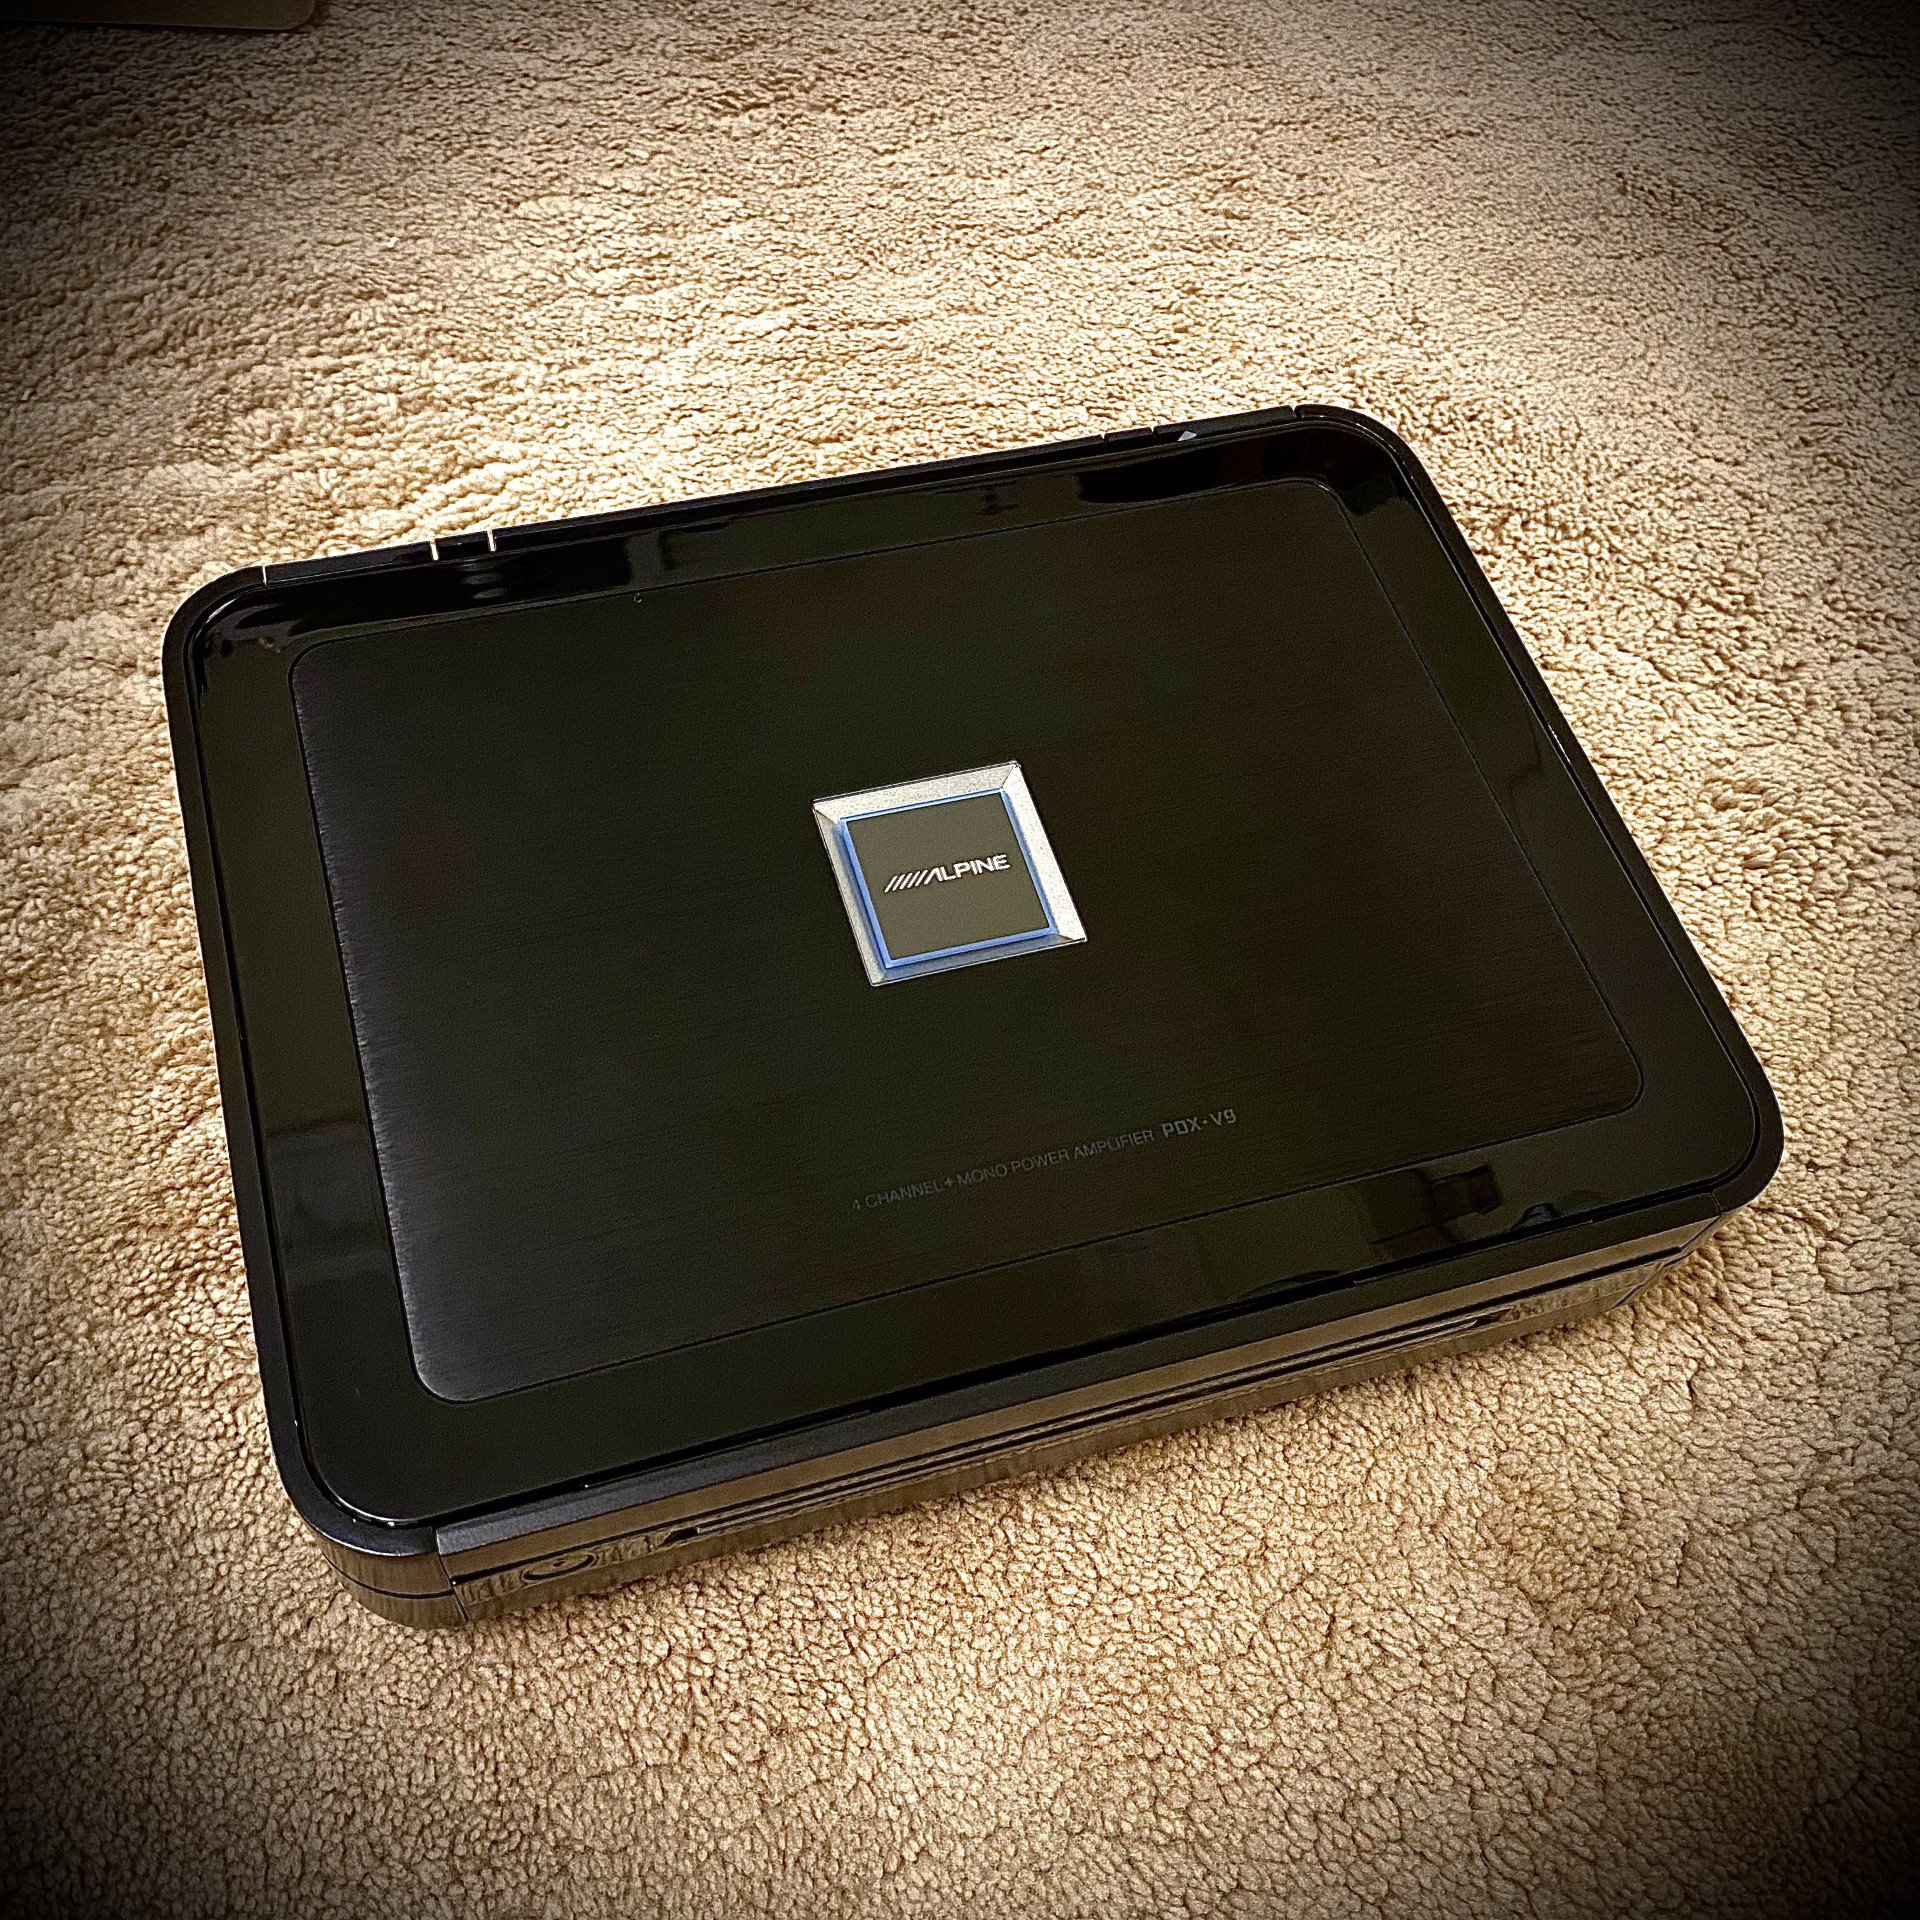
2- Alpine PDX-V9 5 channel amplifier.
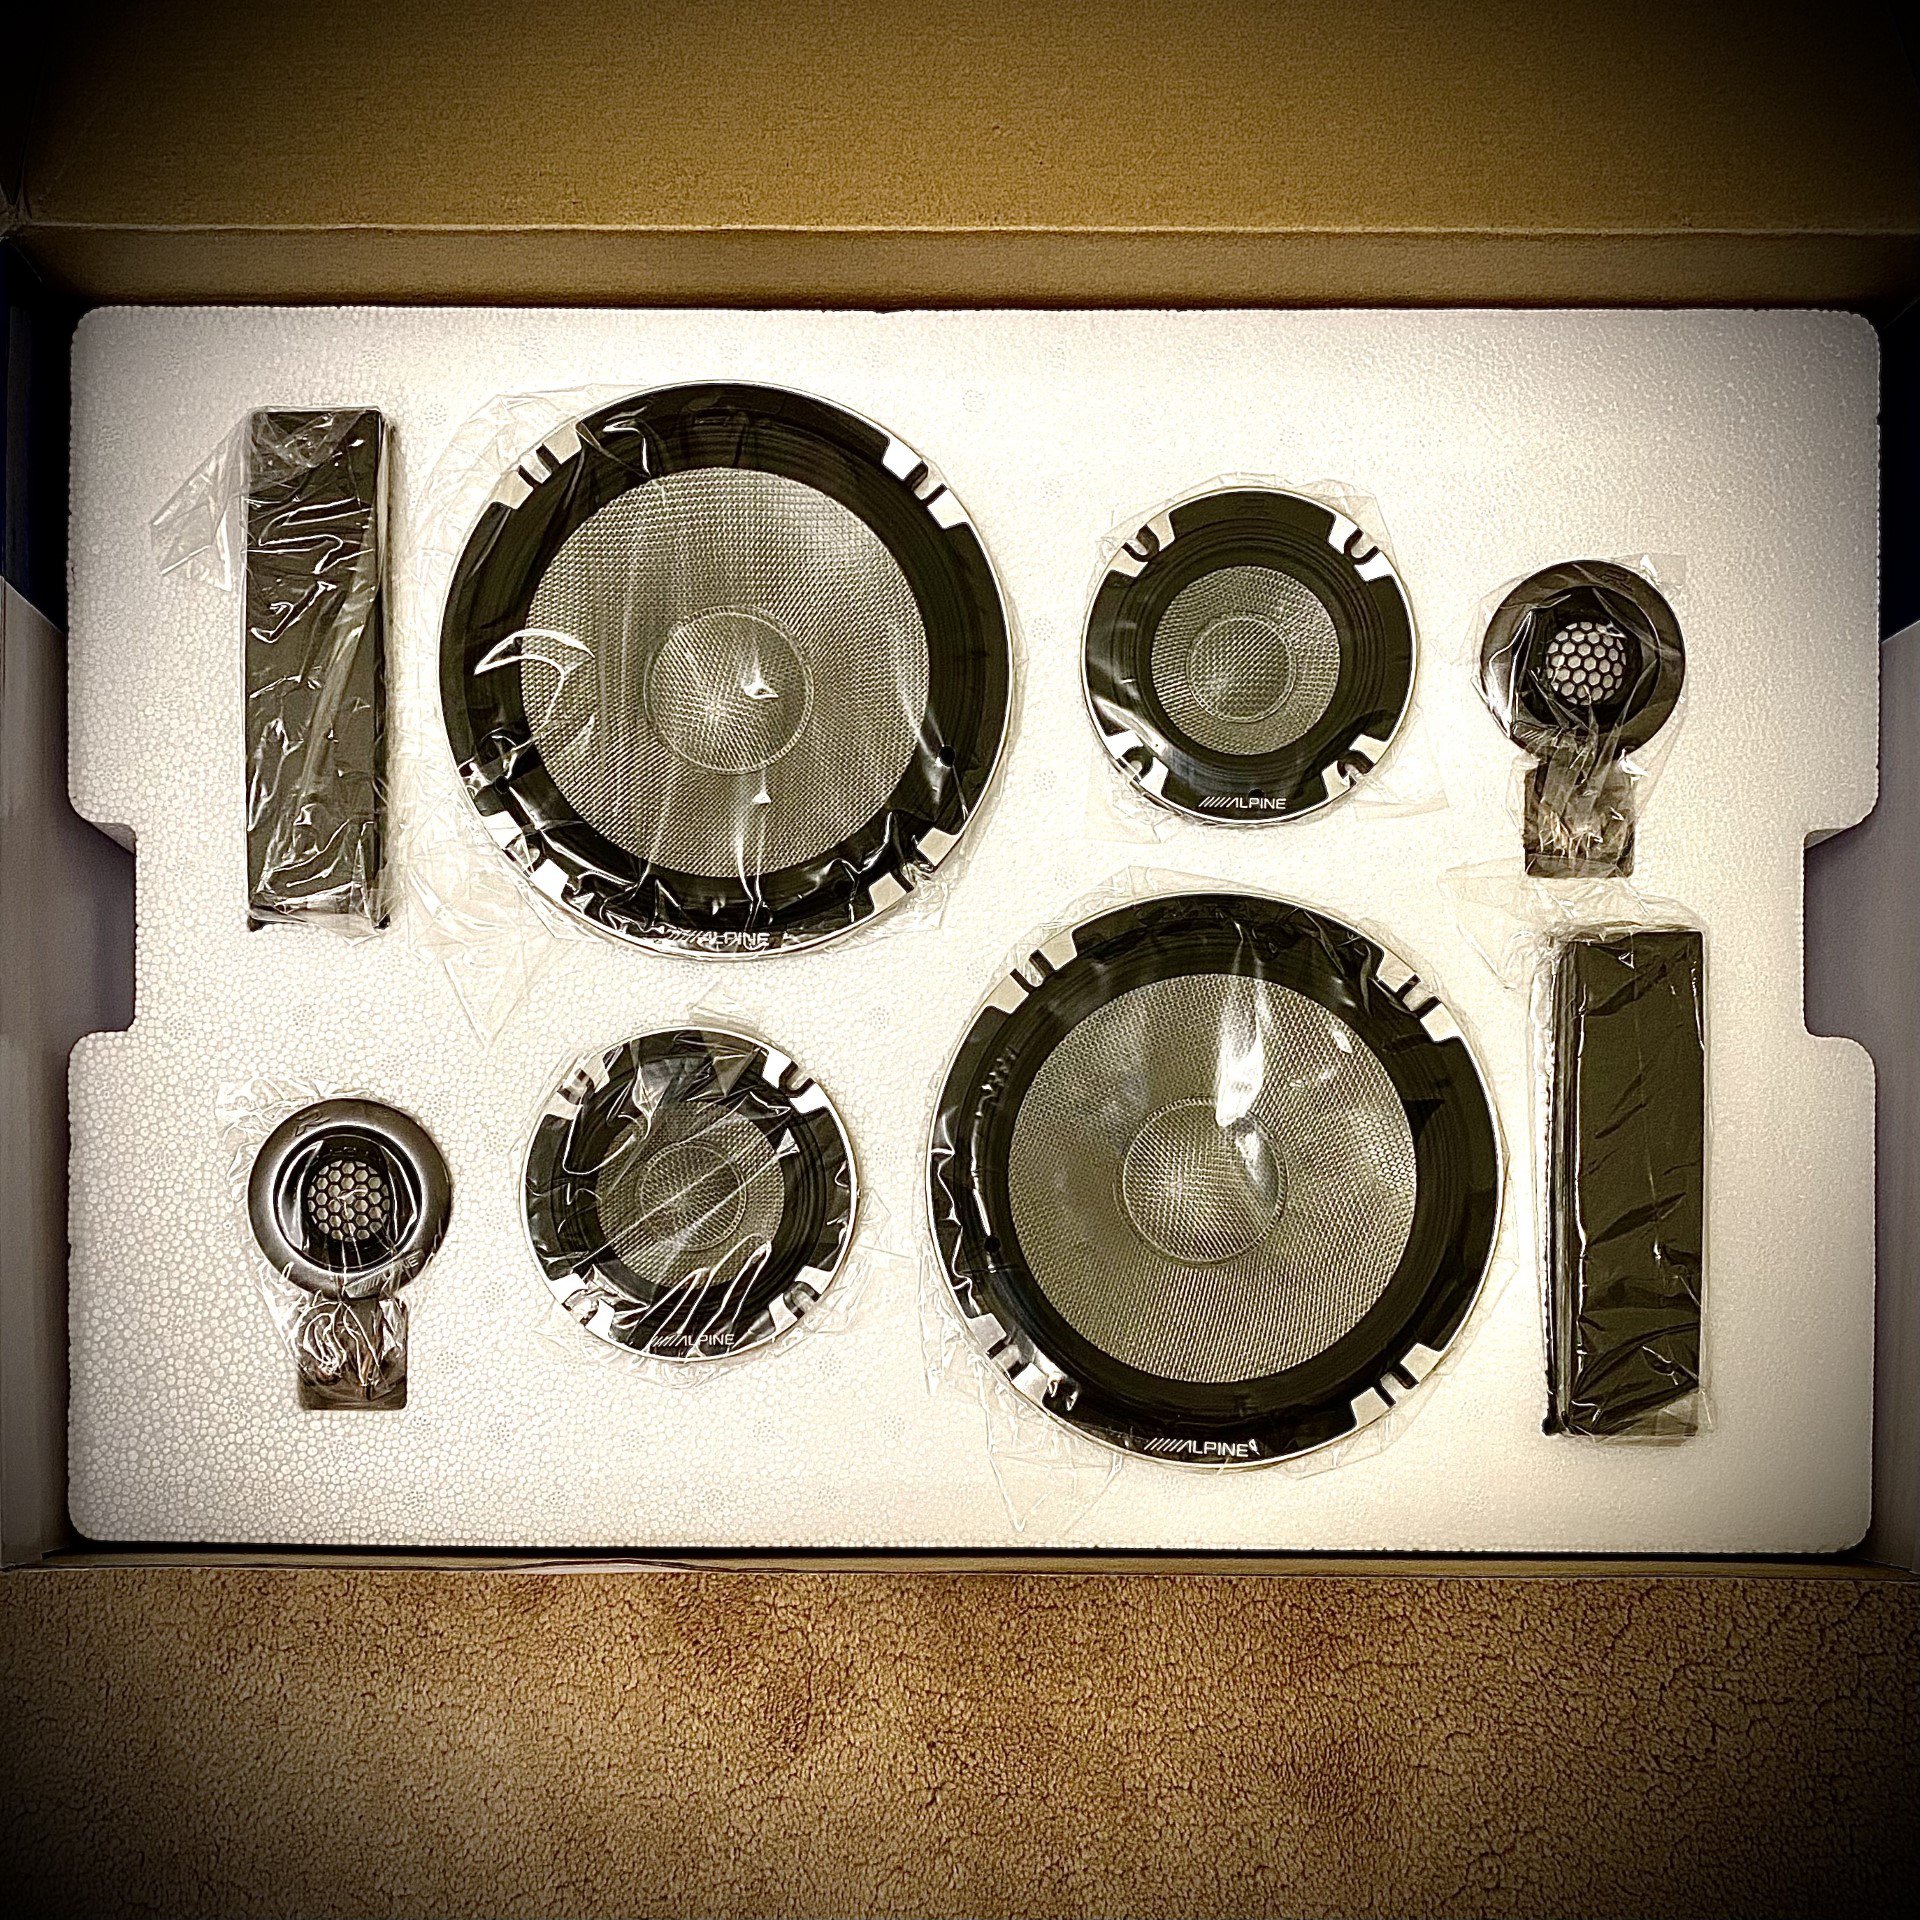
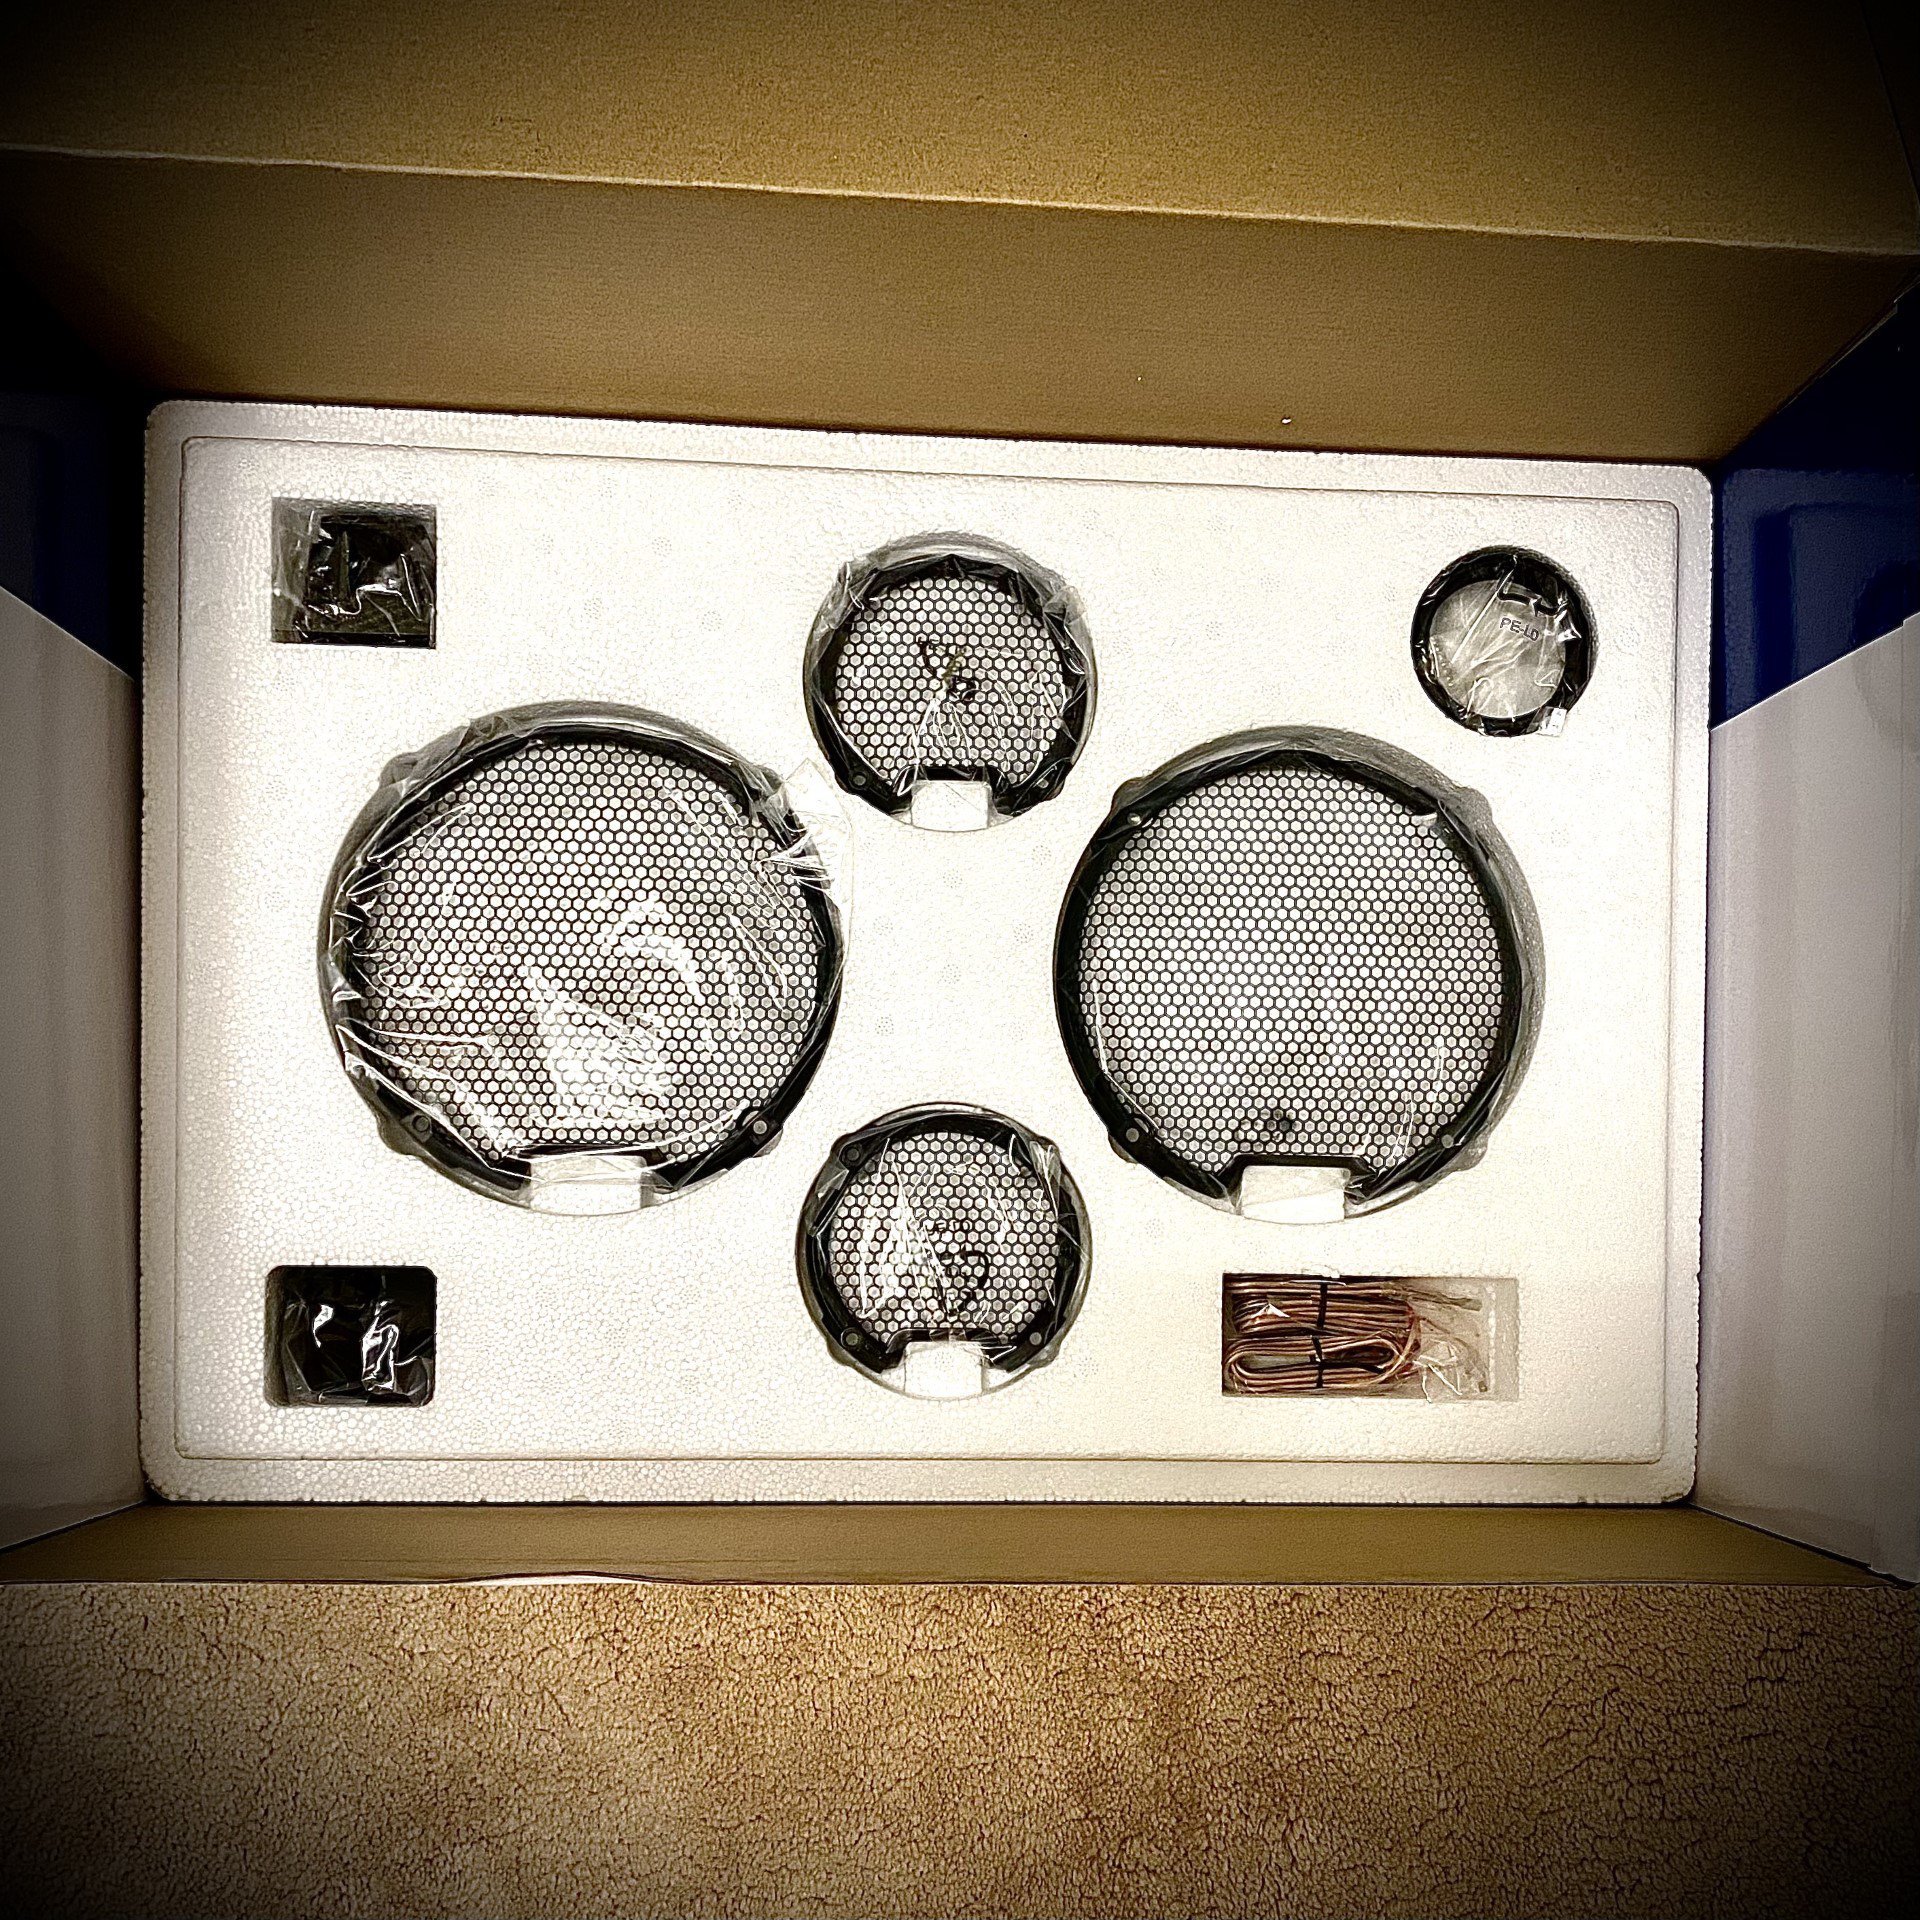
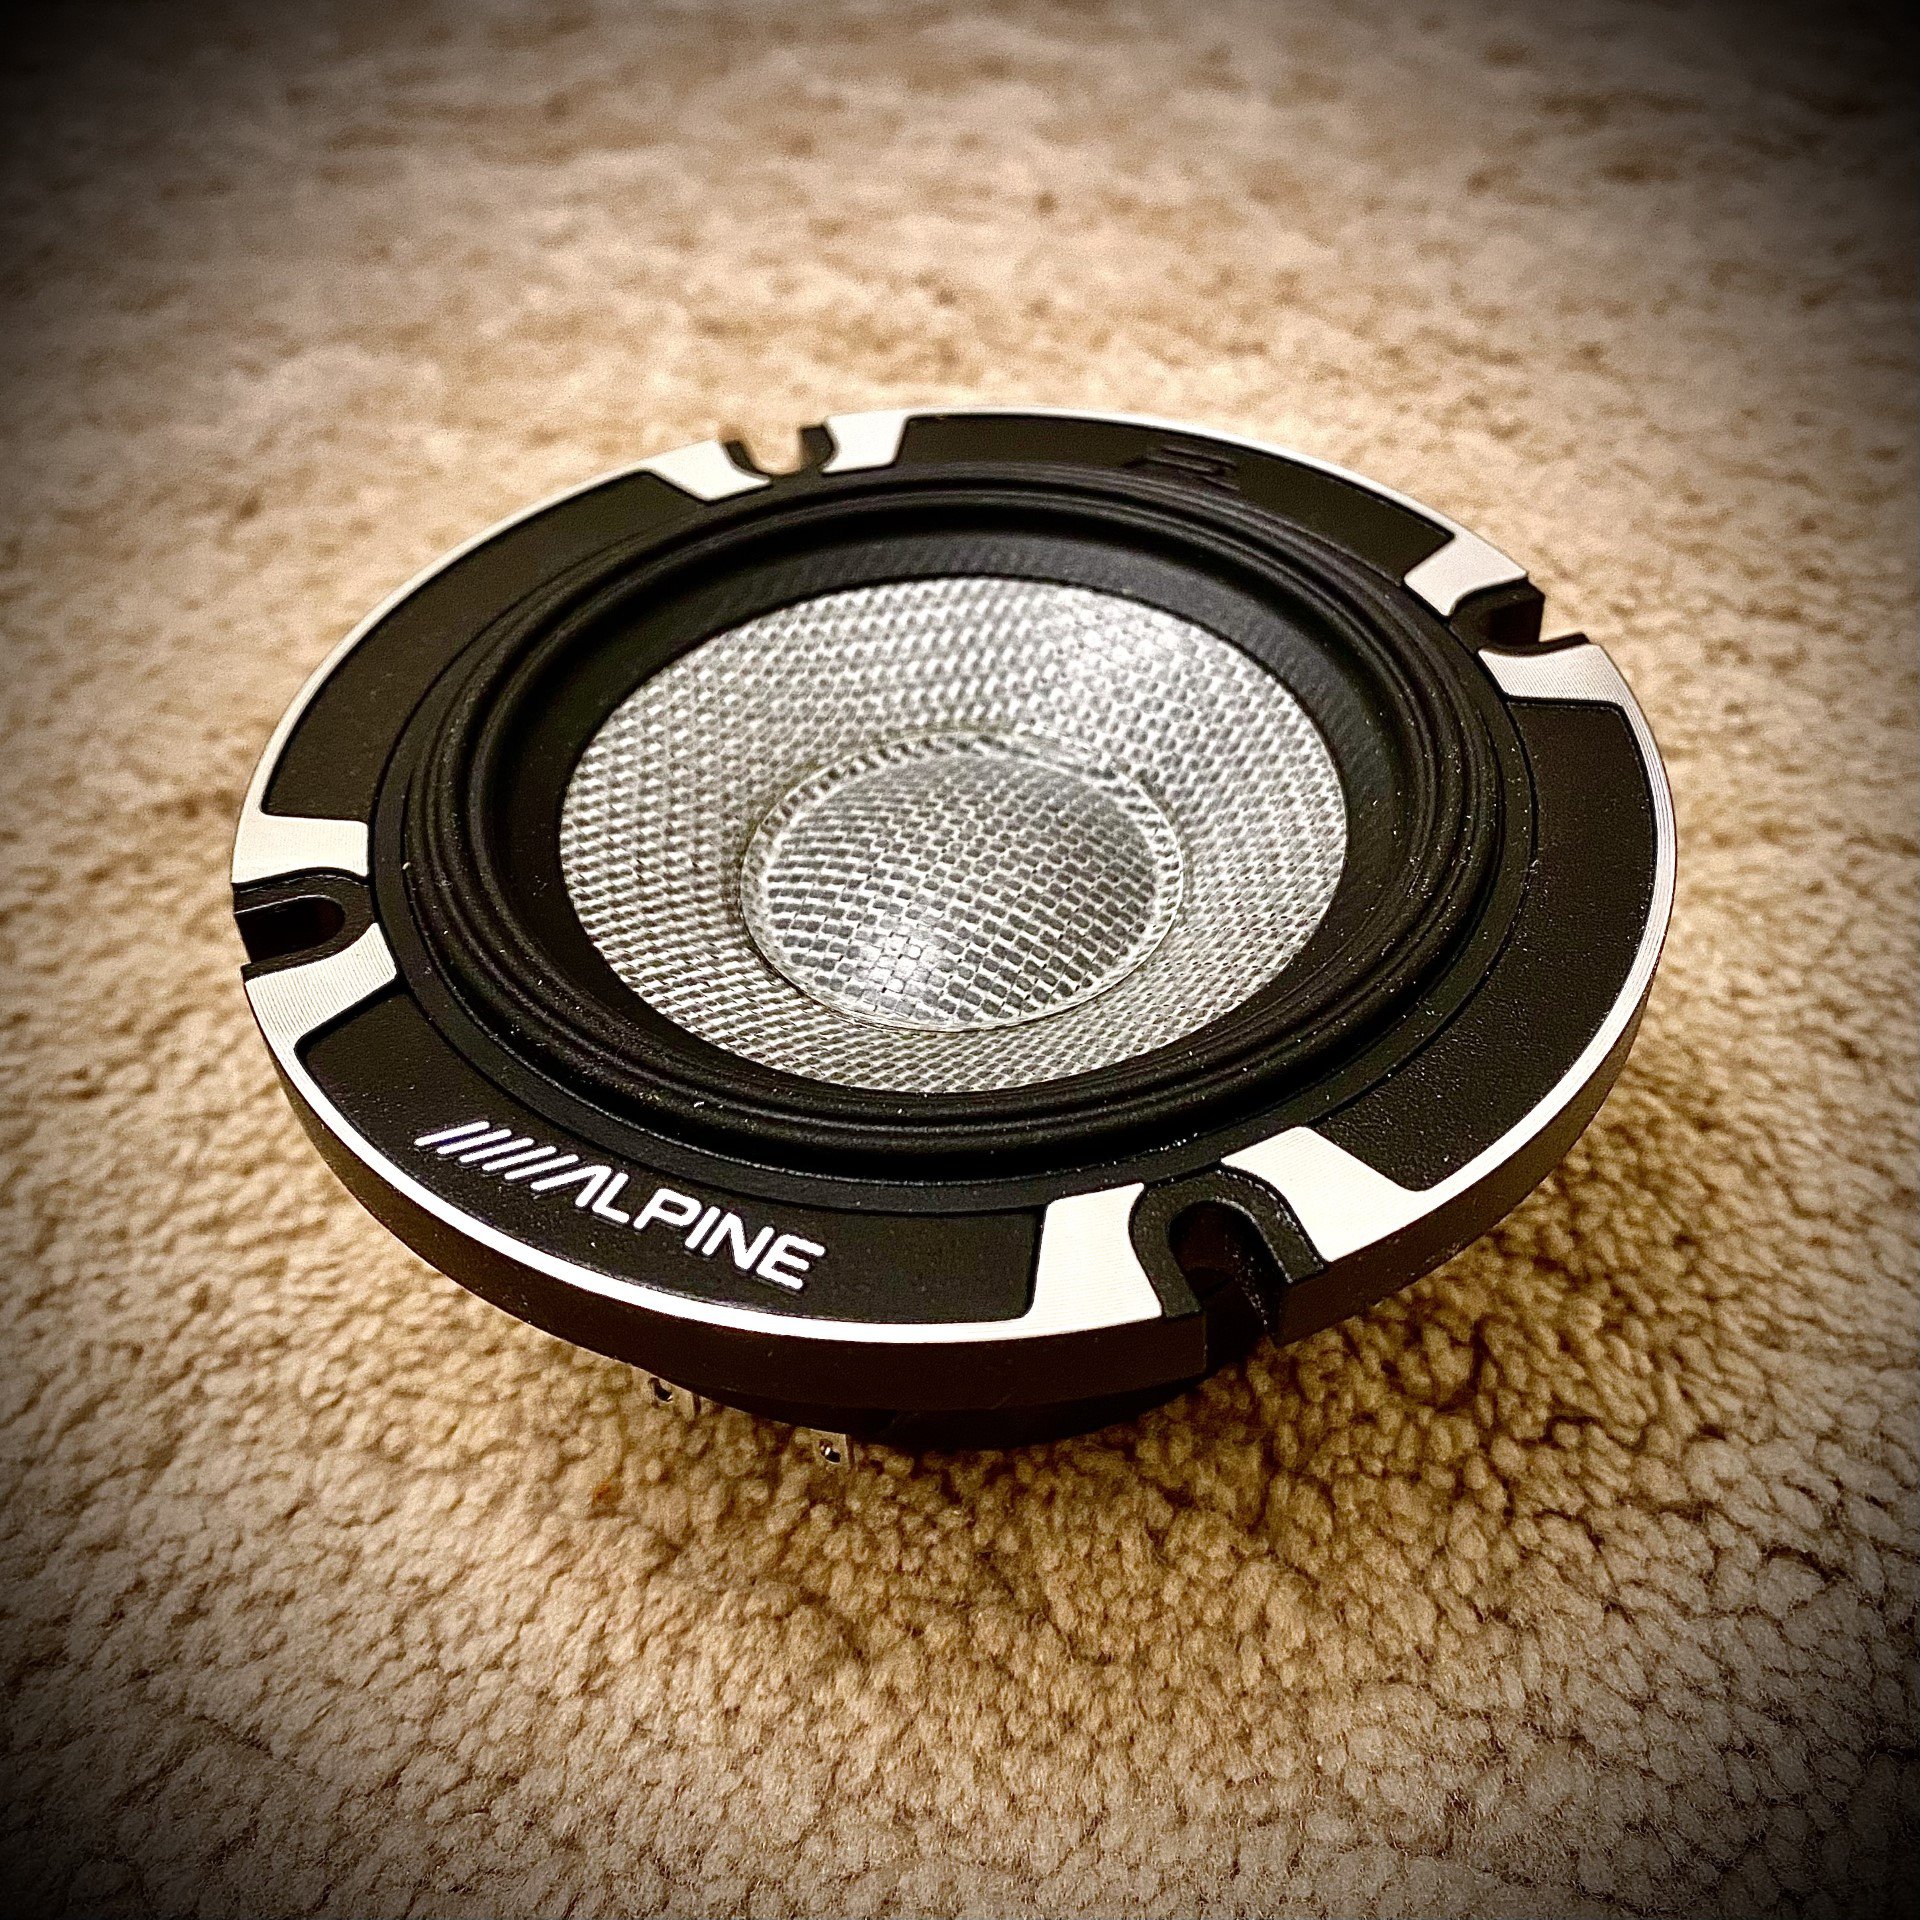
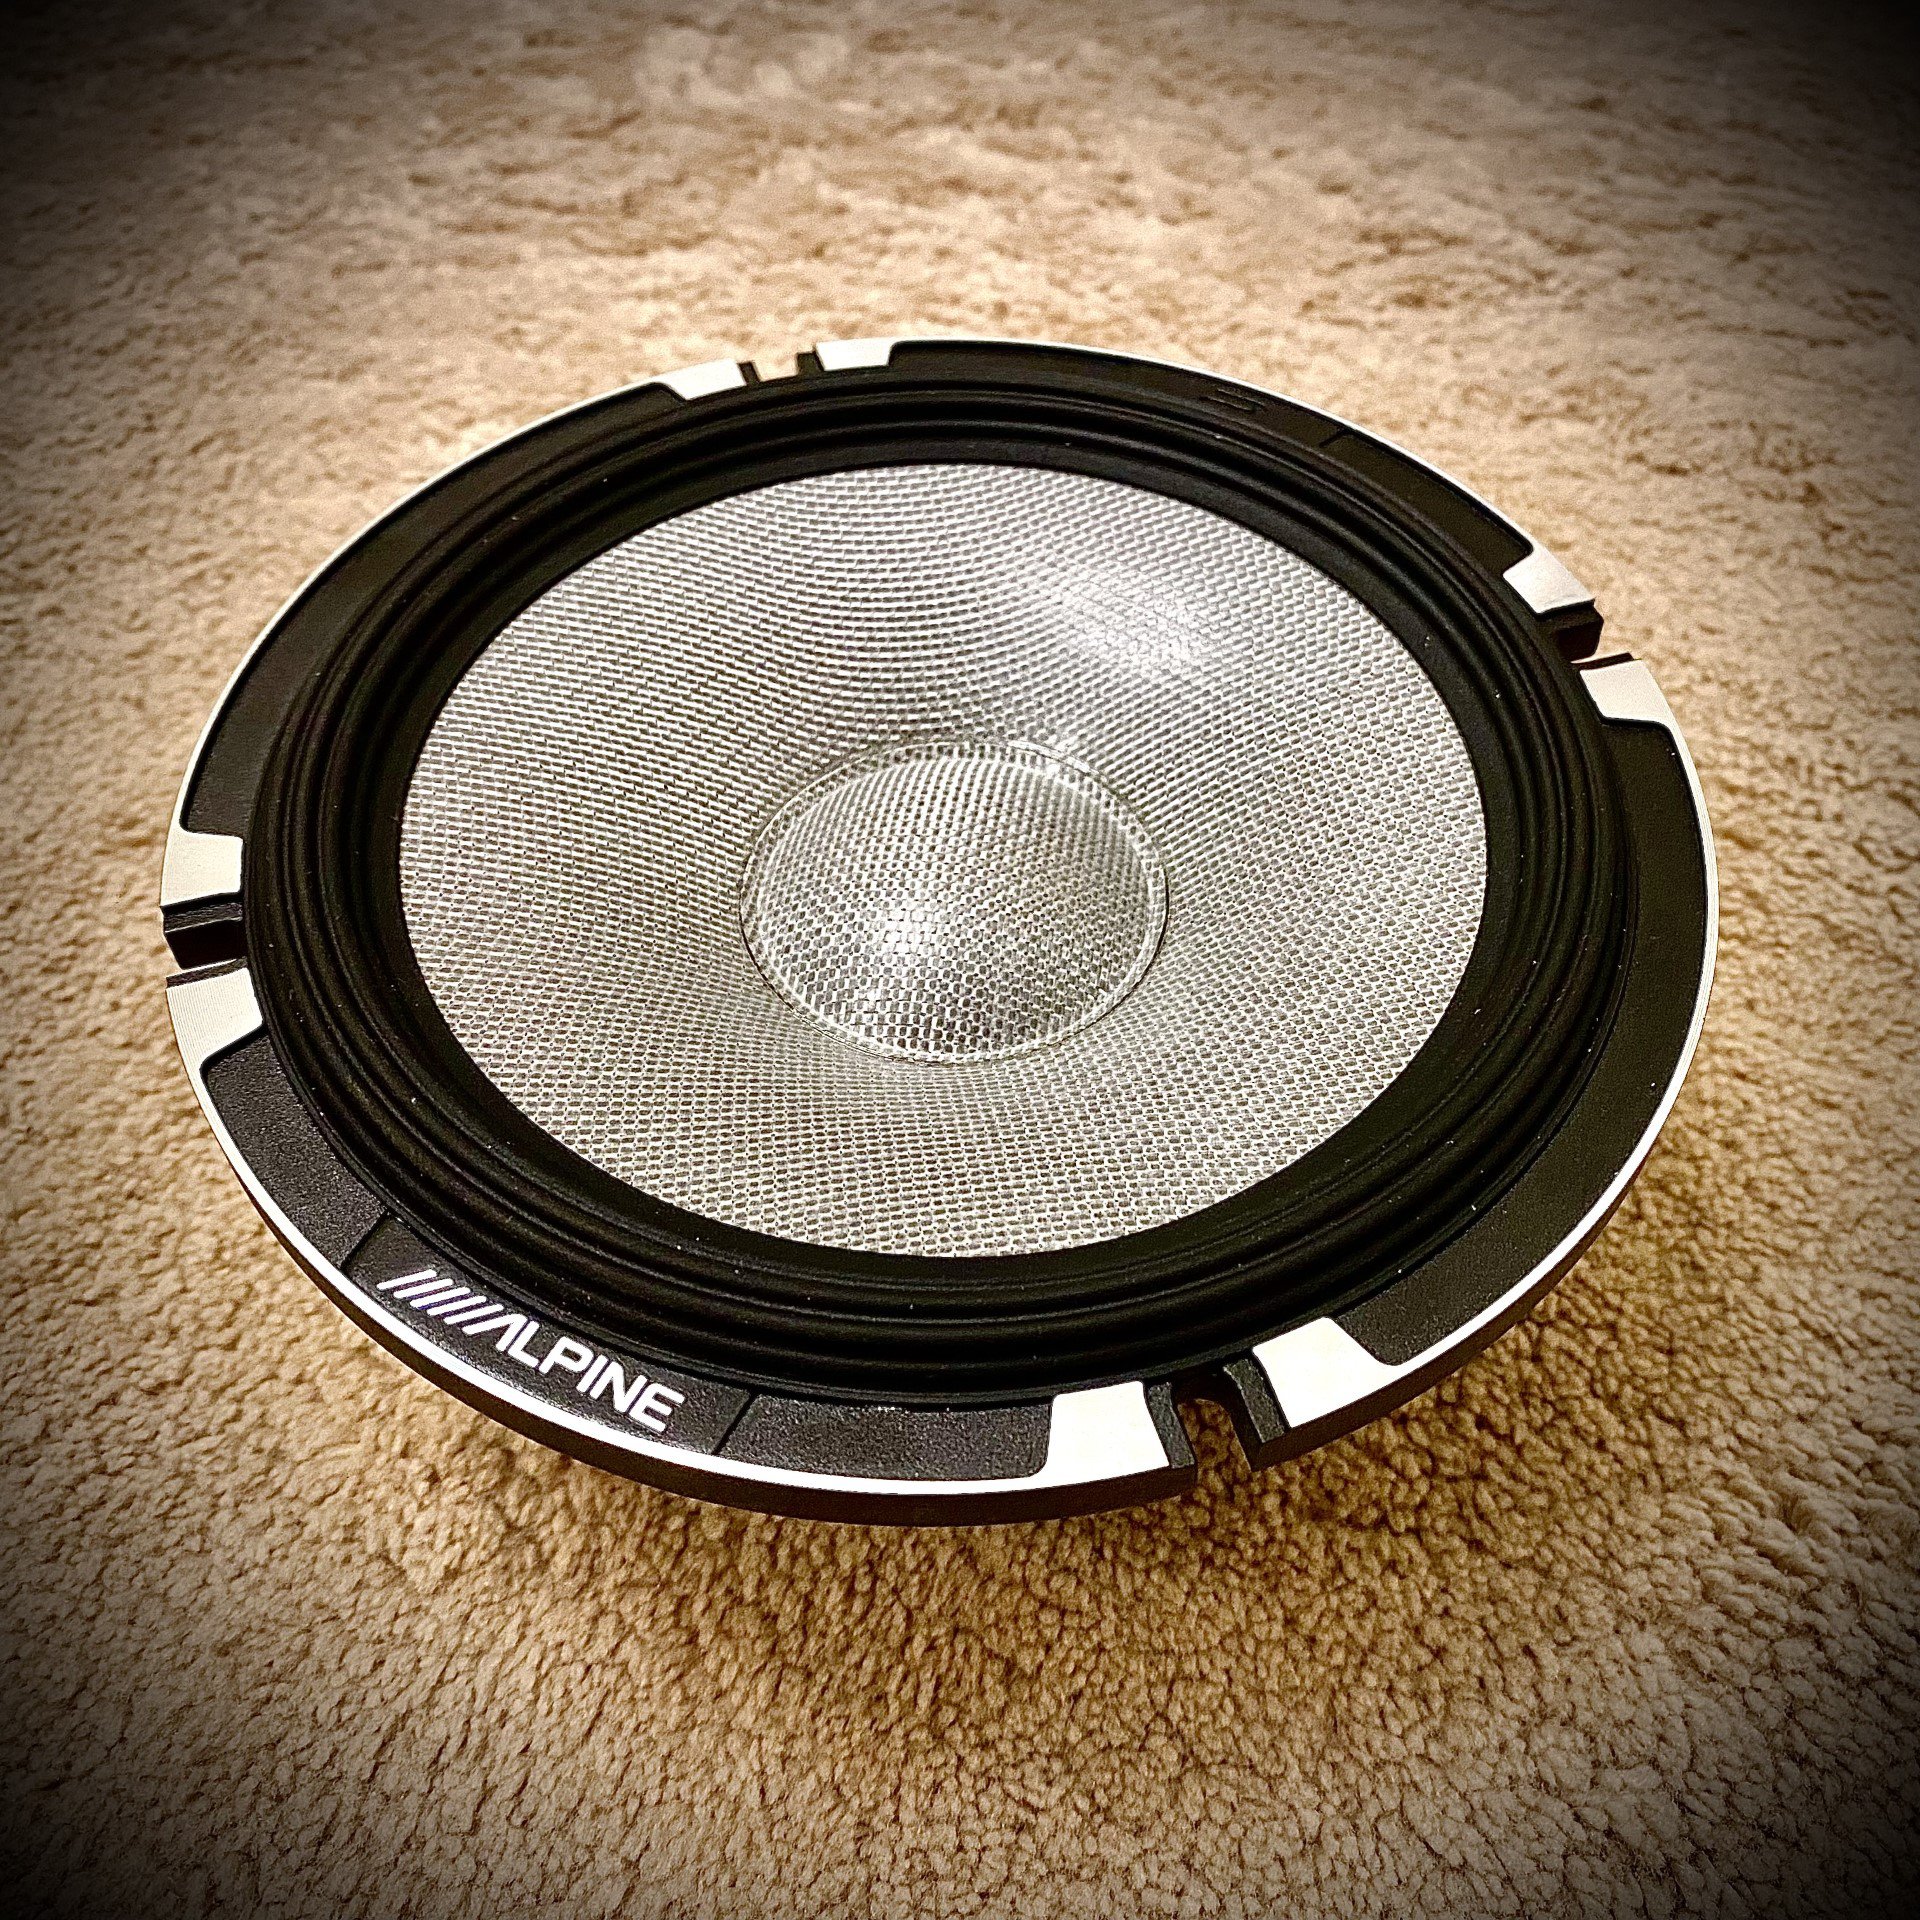
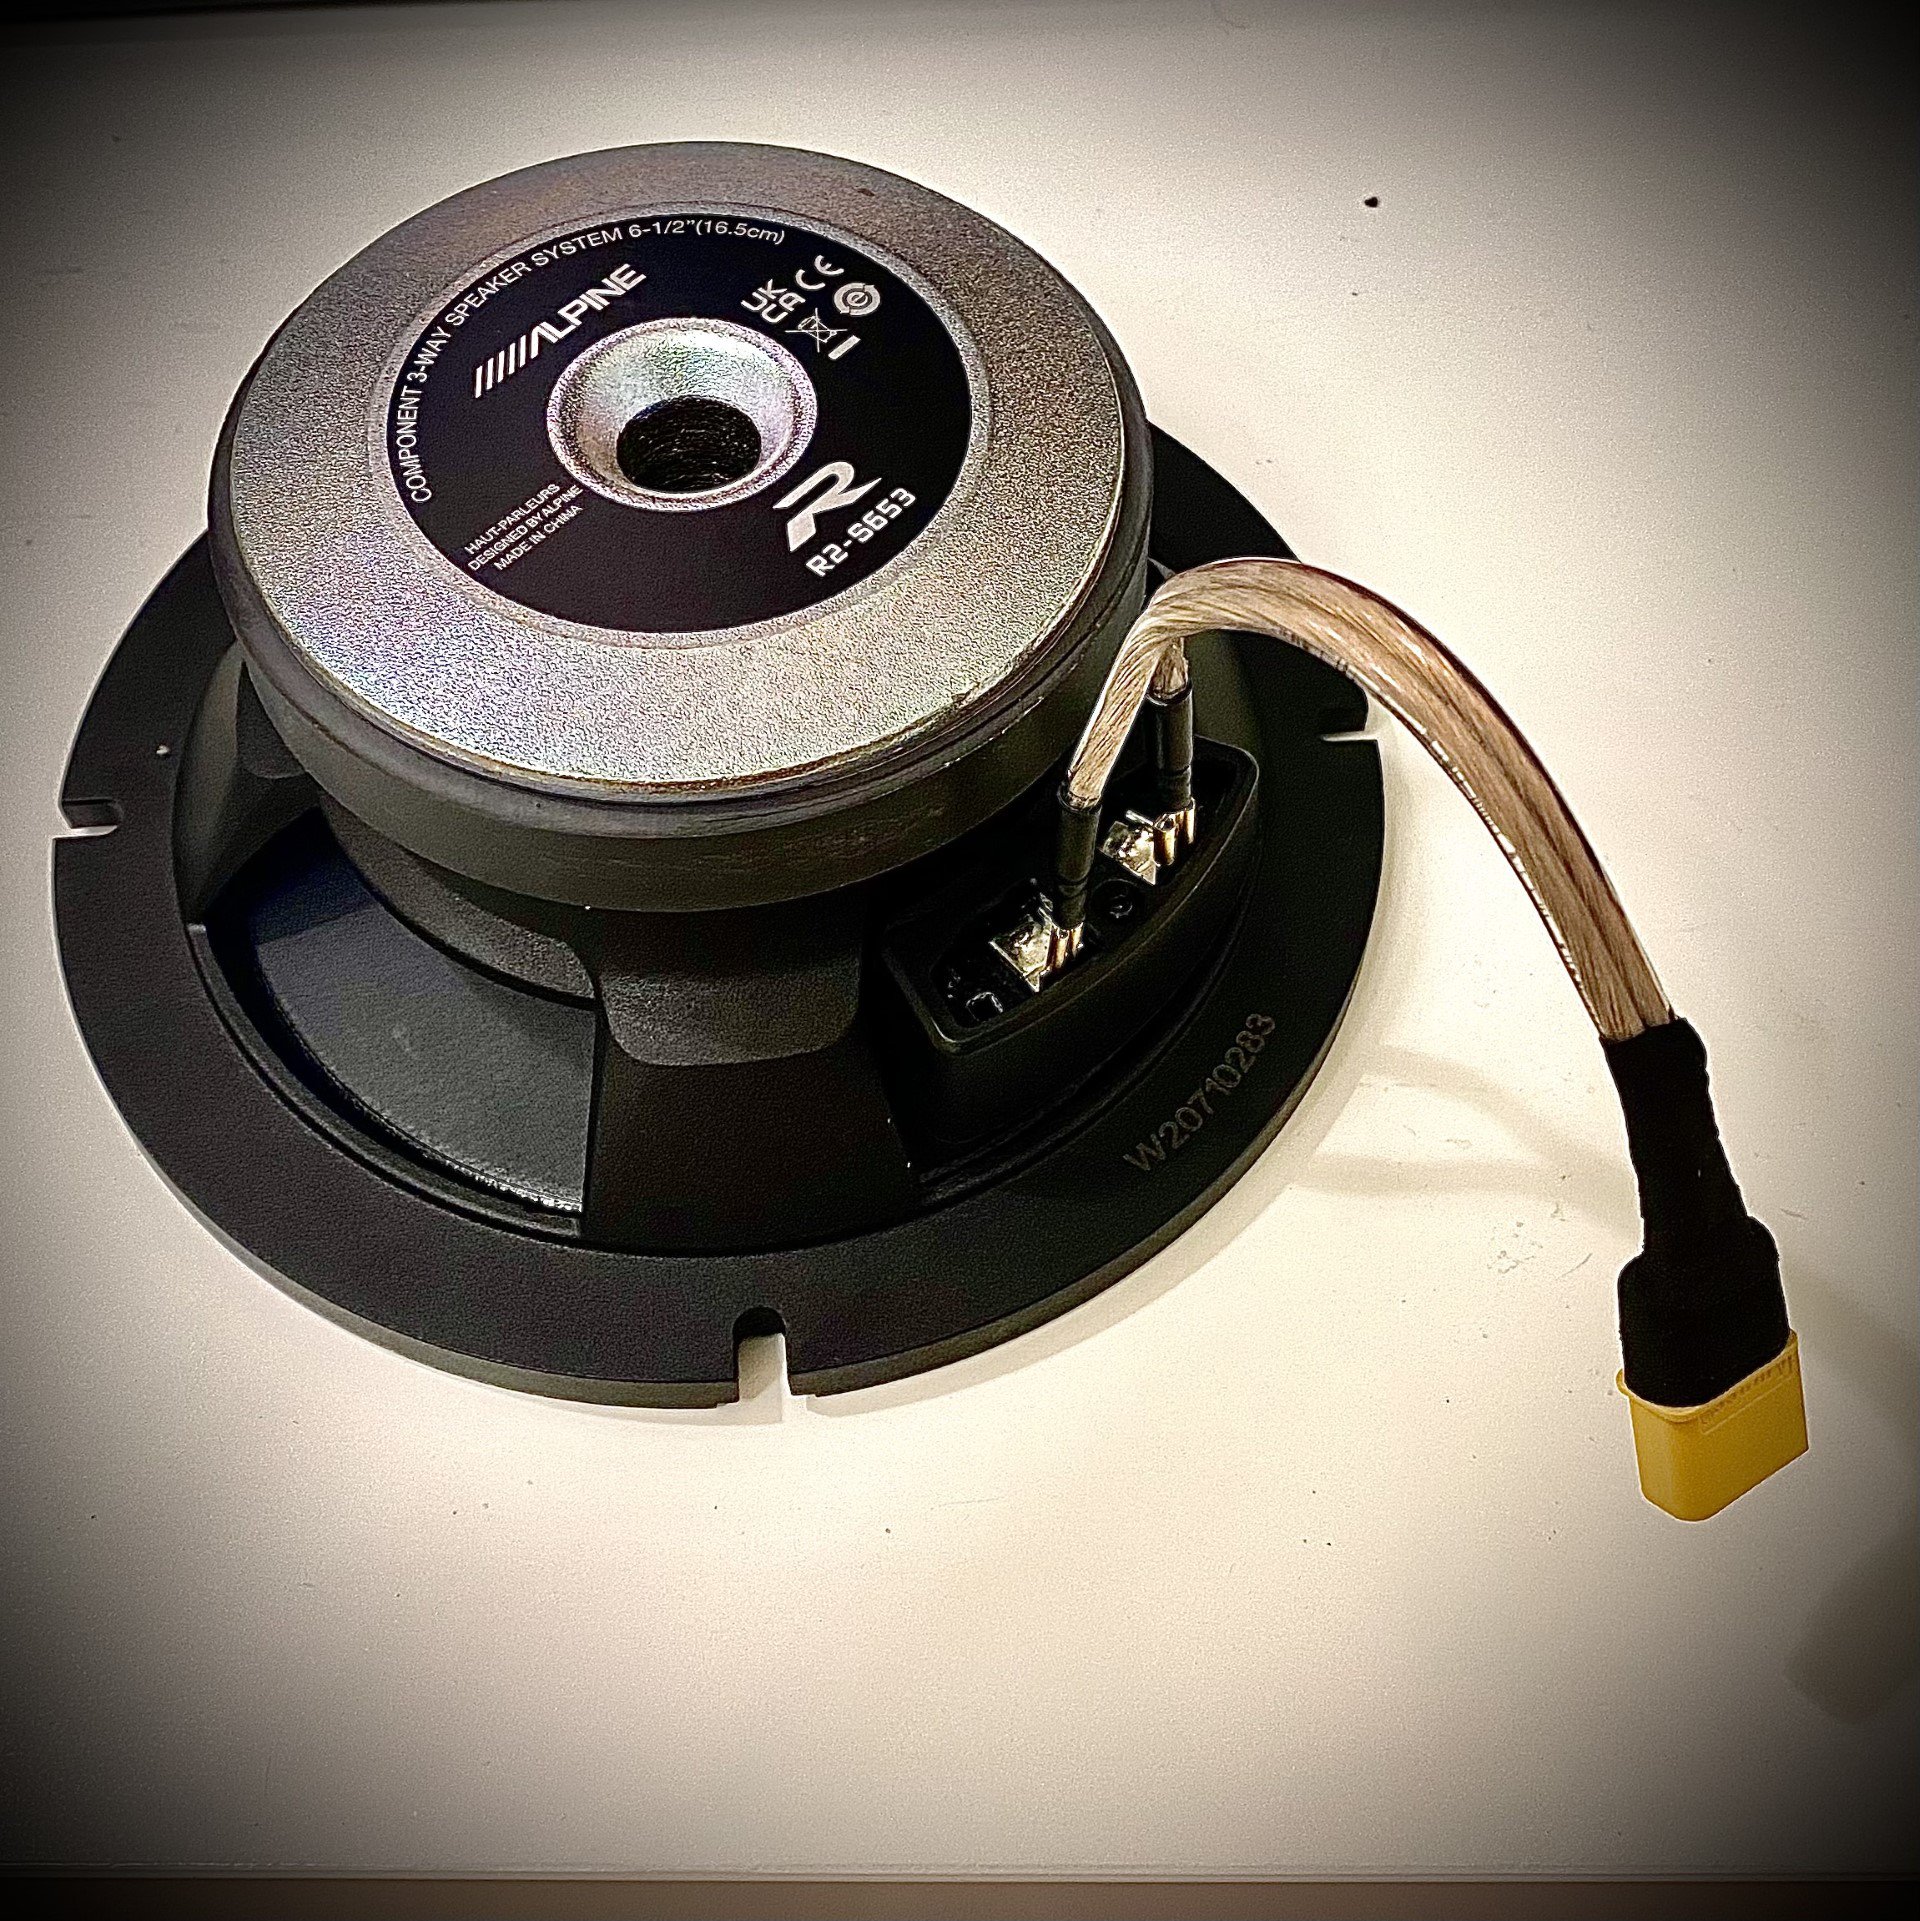
3- Two Alpine R2-S653 3-way Component system, 6.5 inch woofer + 3 inch mid range + 1 inch tweeter
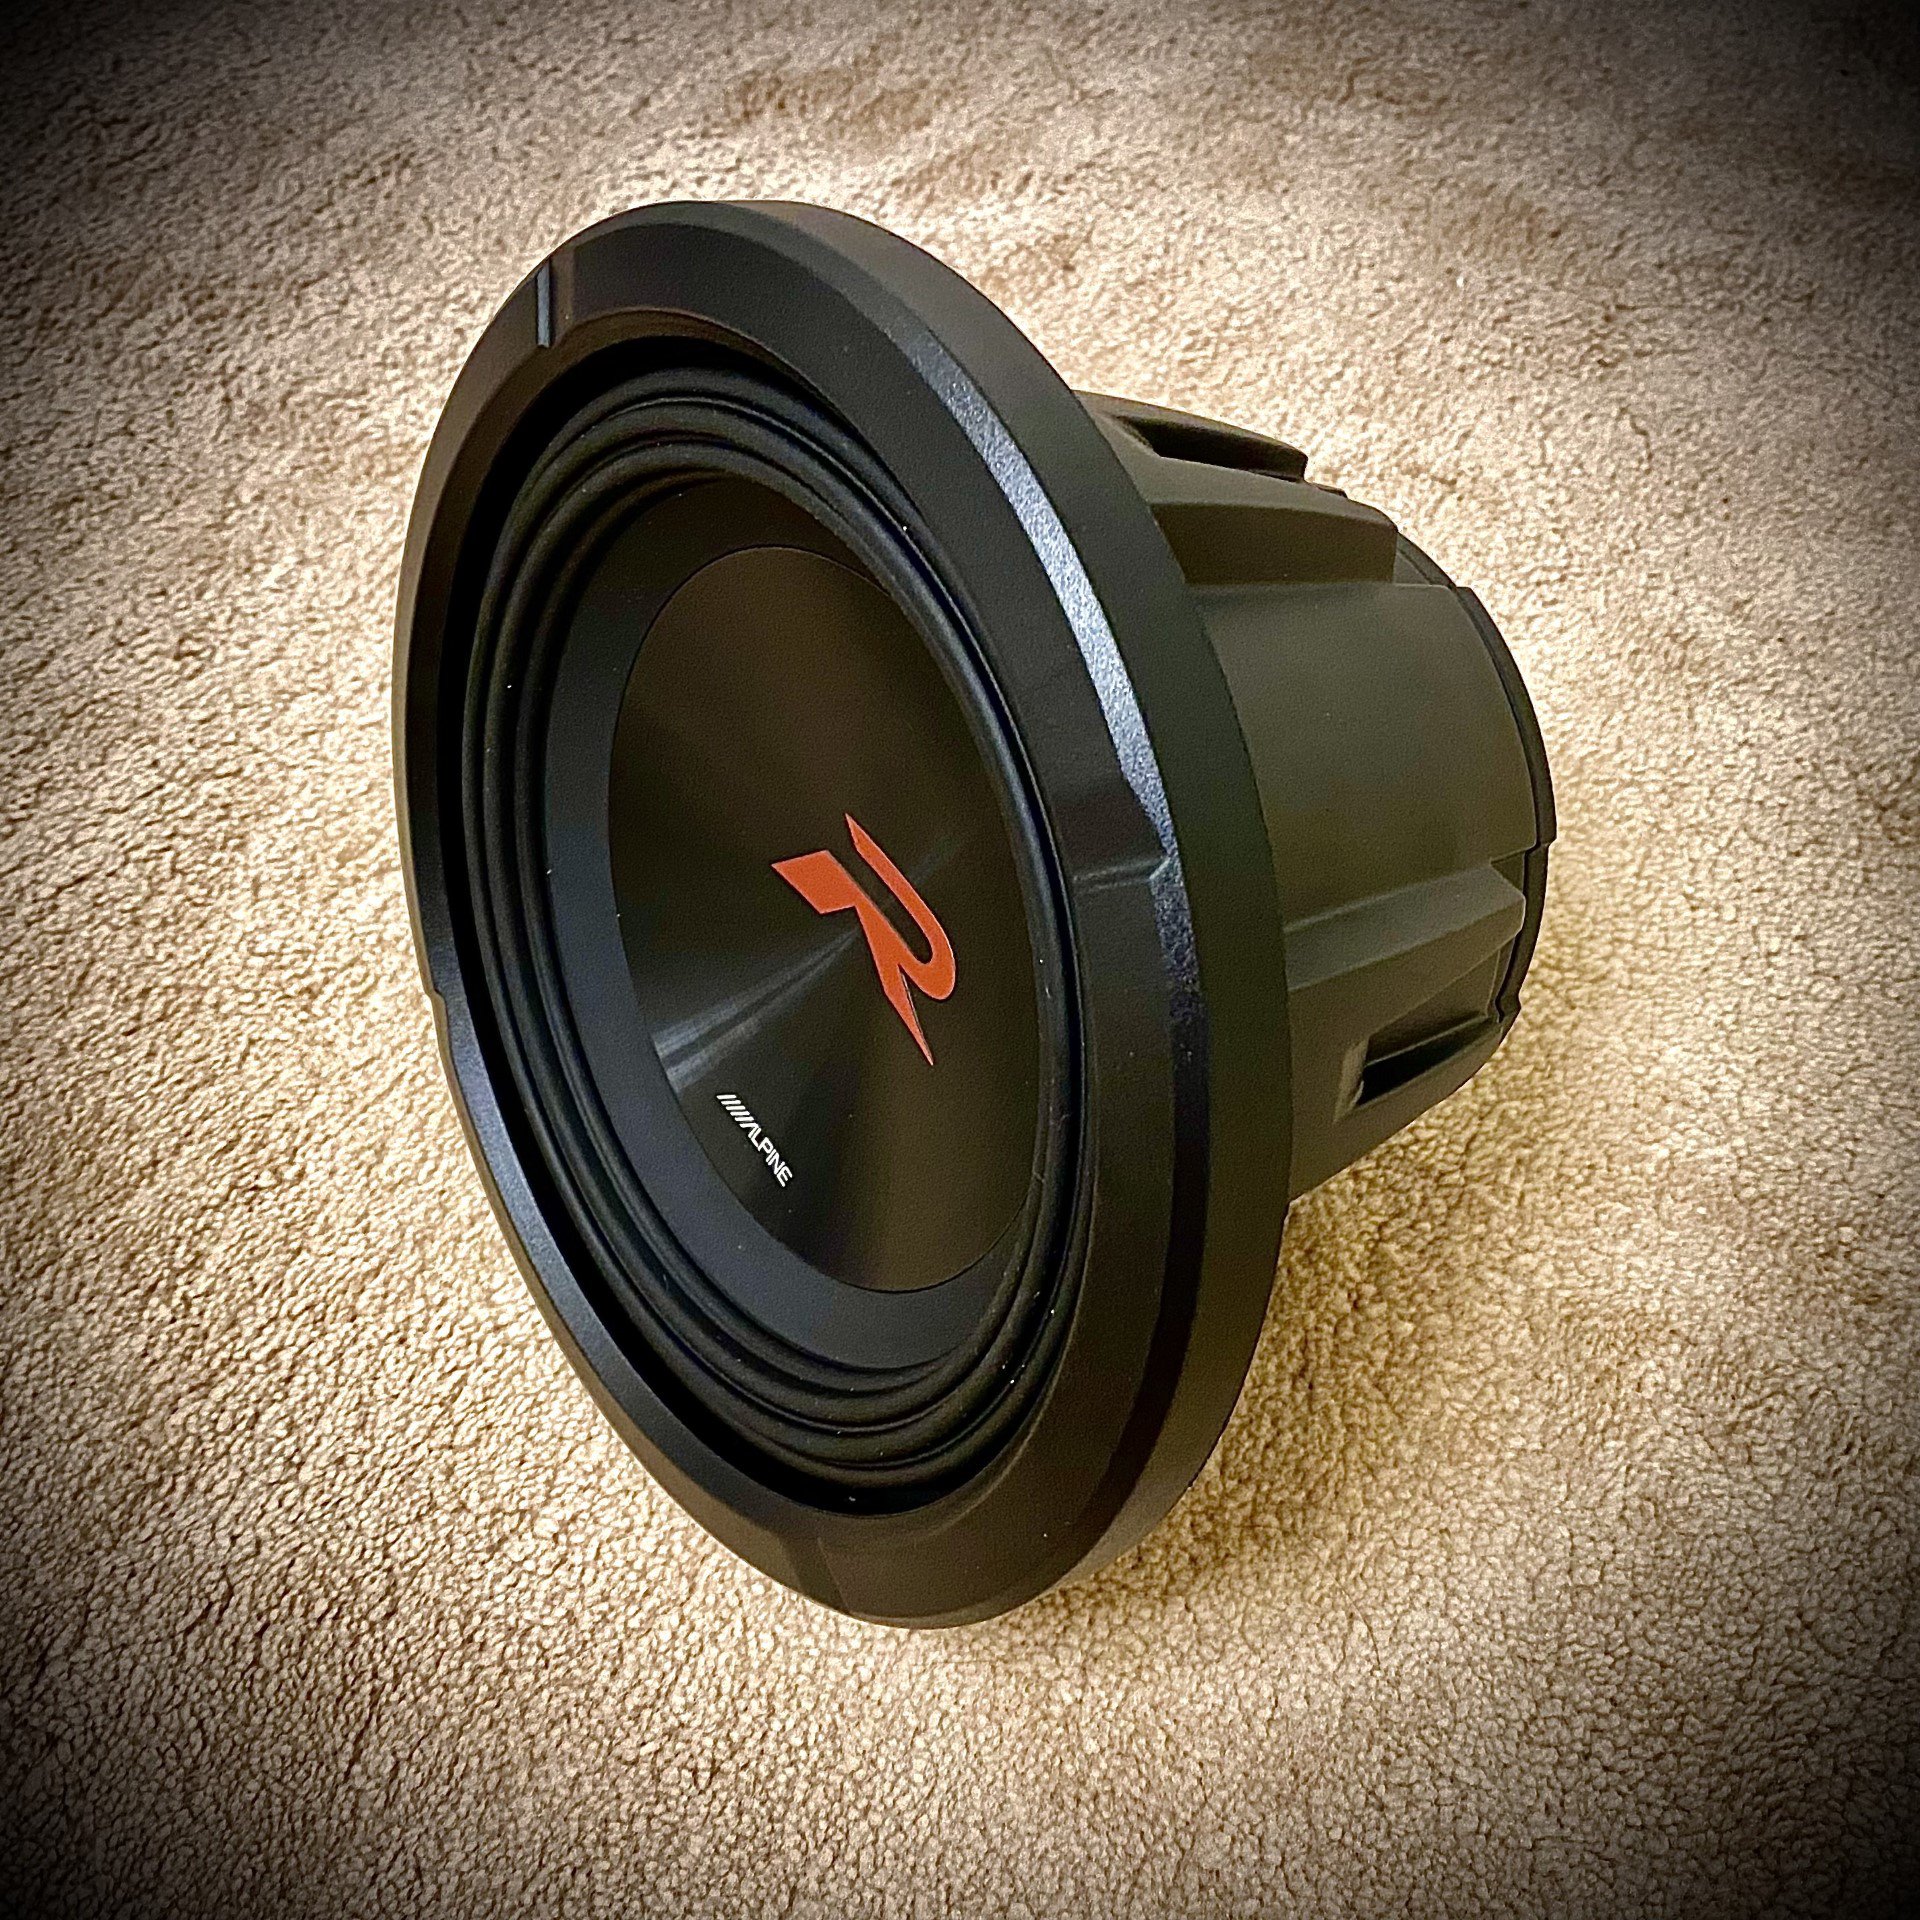
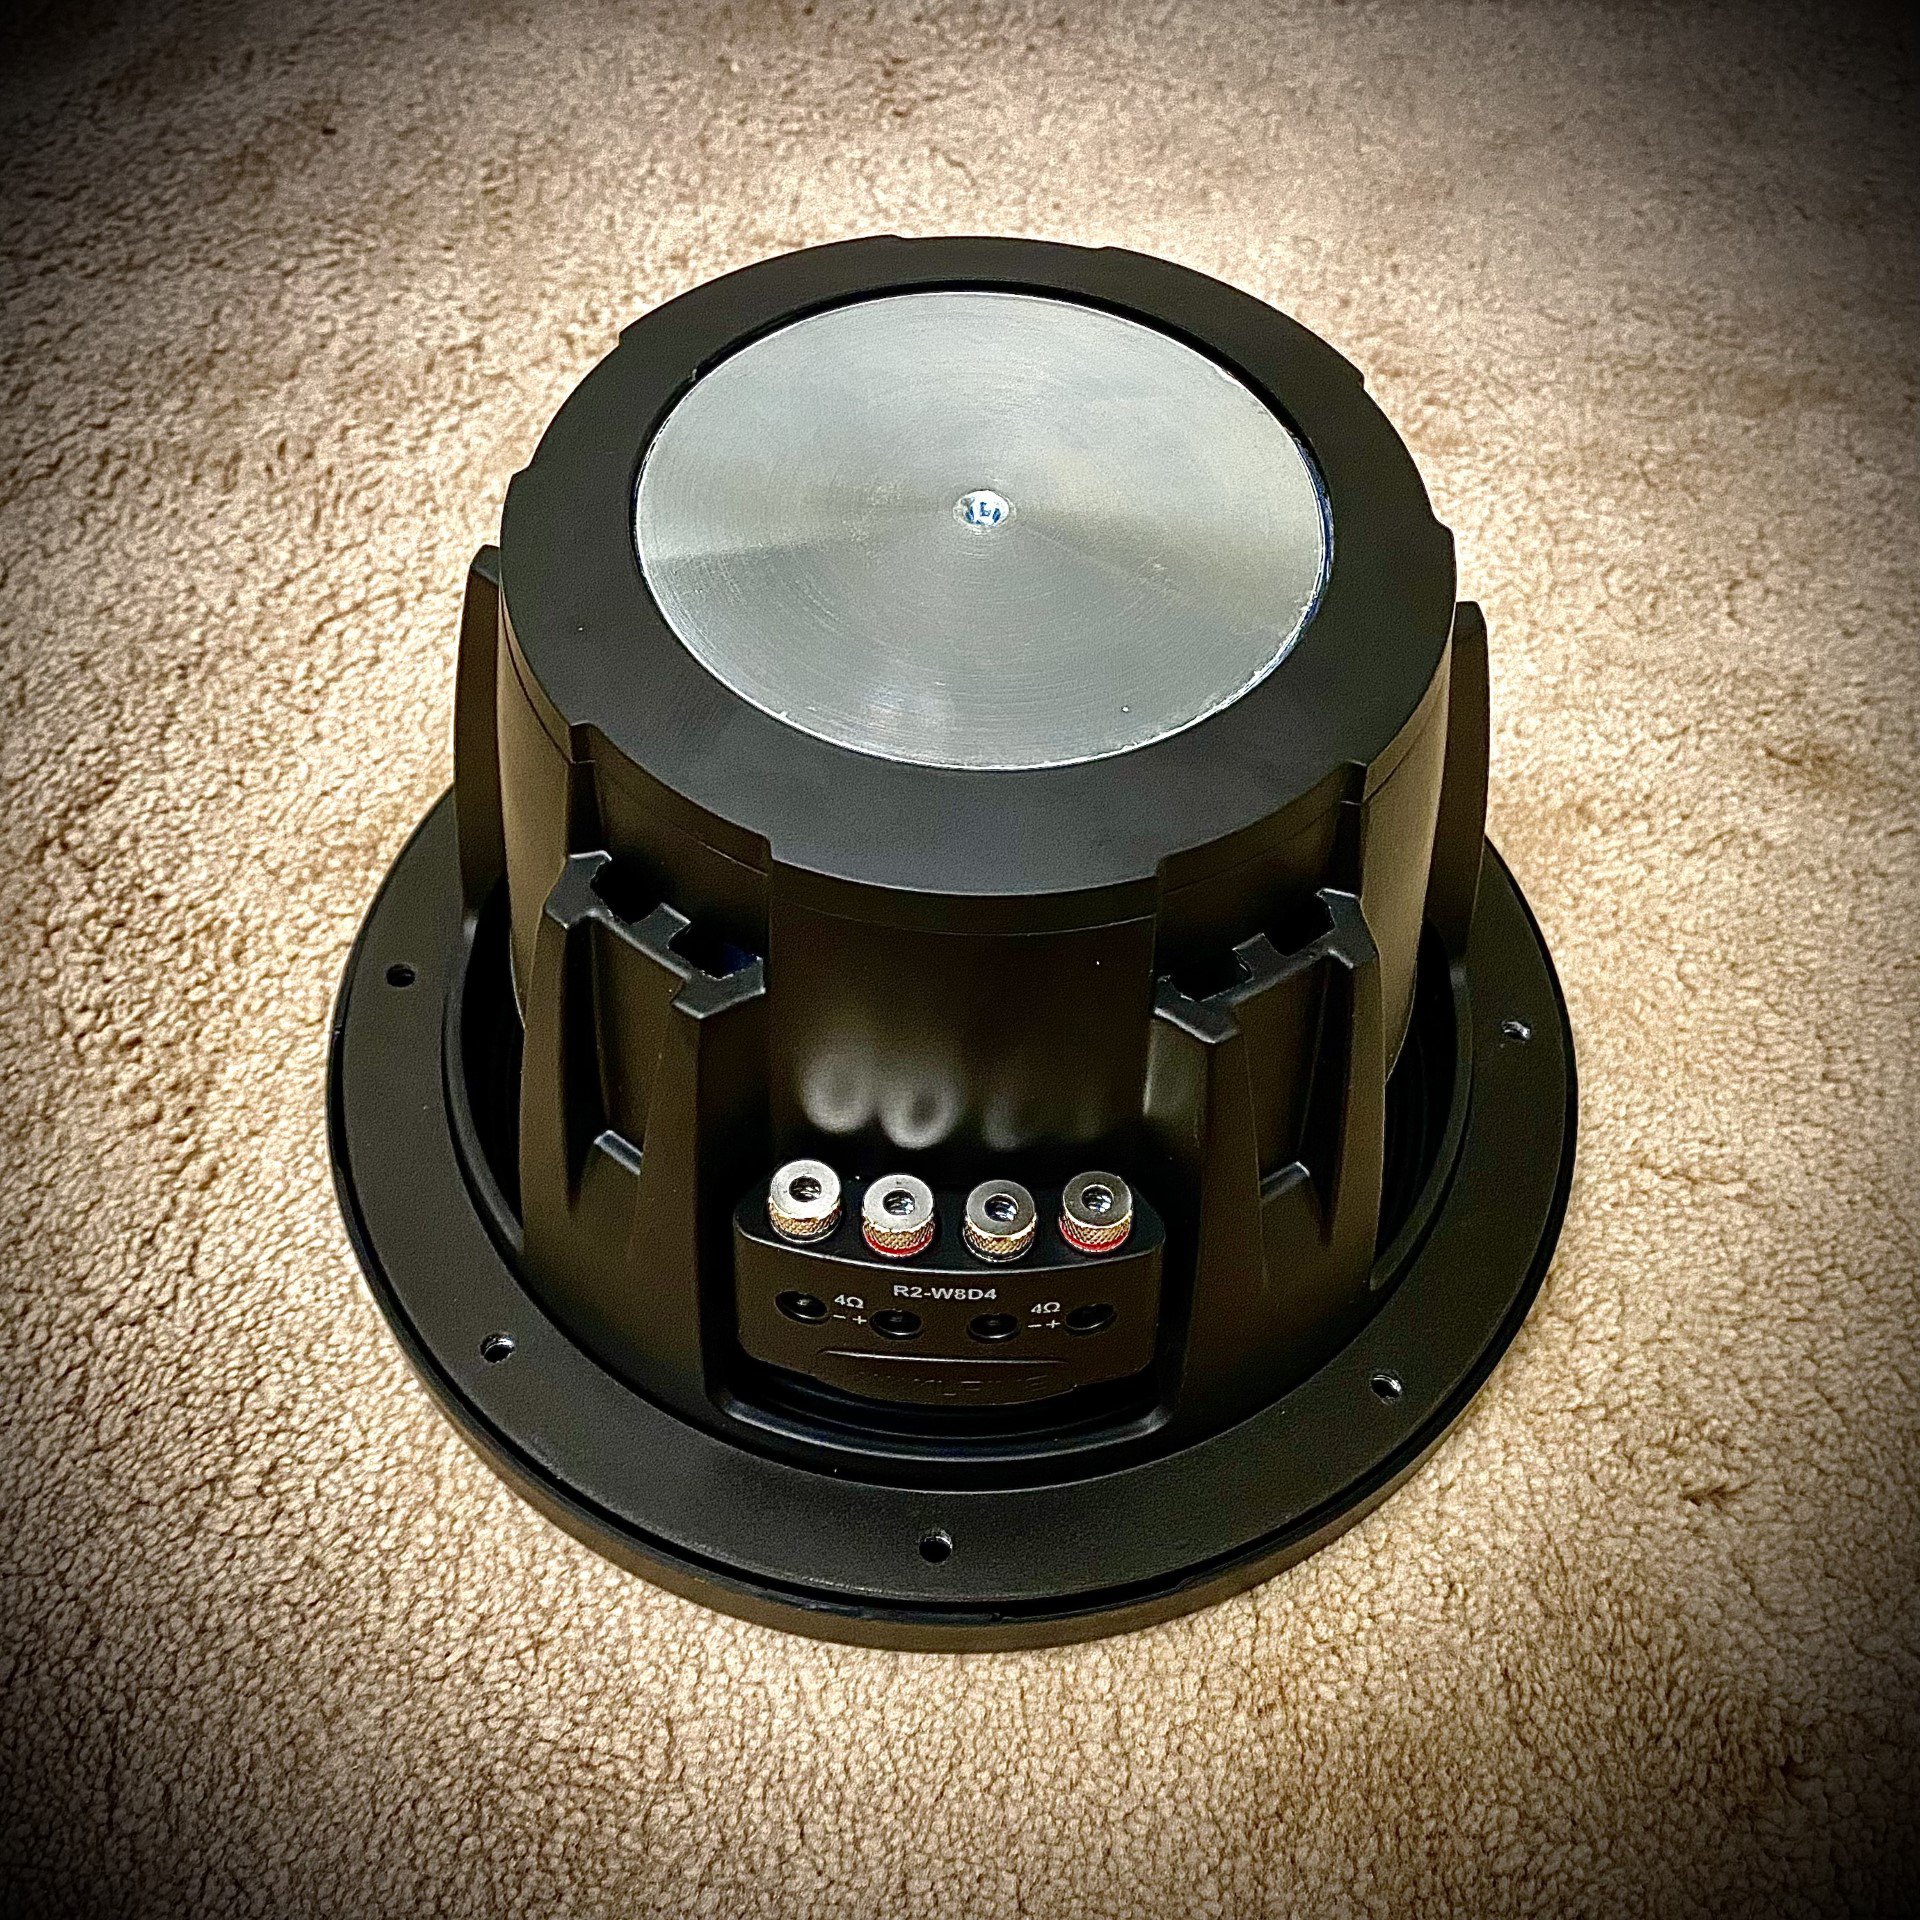
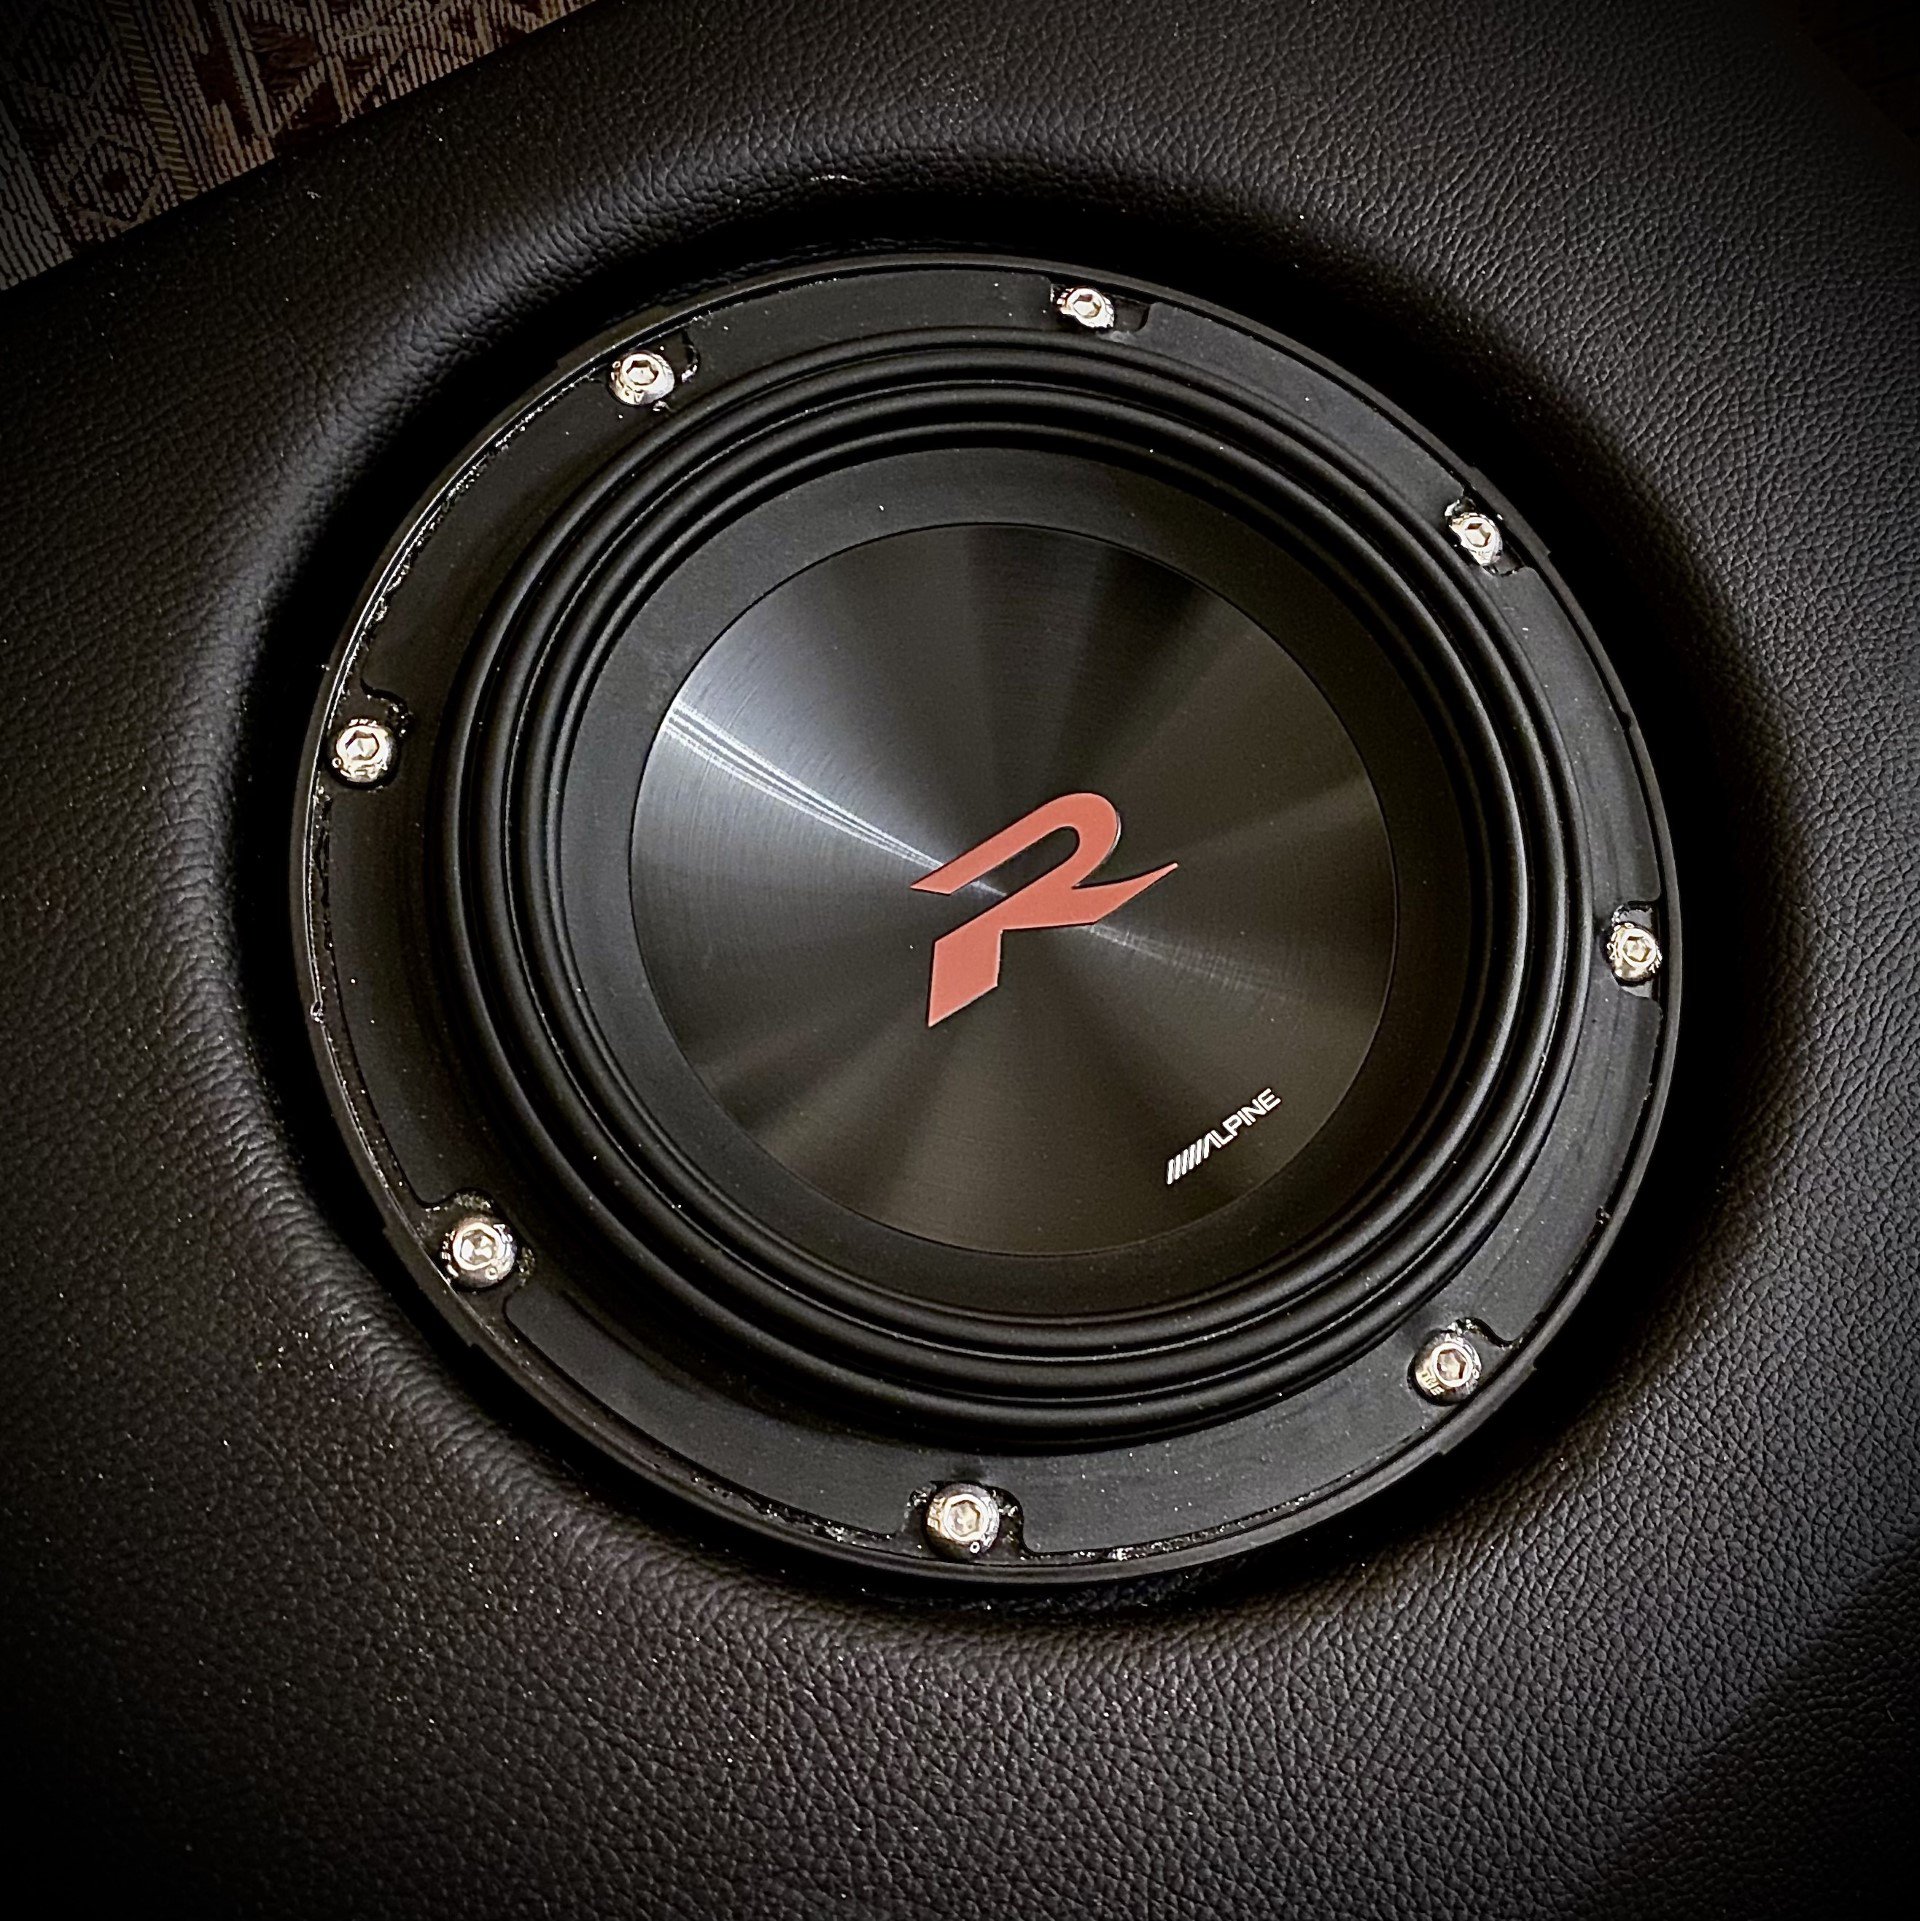
4- Two Alpine R2-W8D4 8 inch Subwoofer
The whole system
3-way component
speaker grills included
1 inch Tweeter
\
3 inch Midrange
6.5 inch woofer
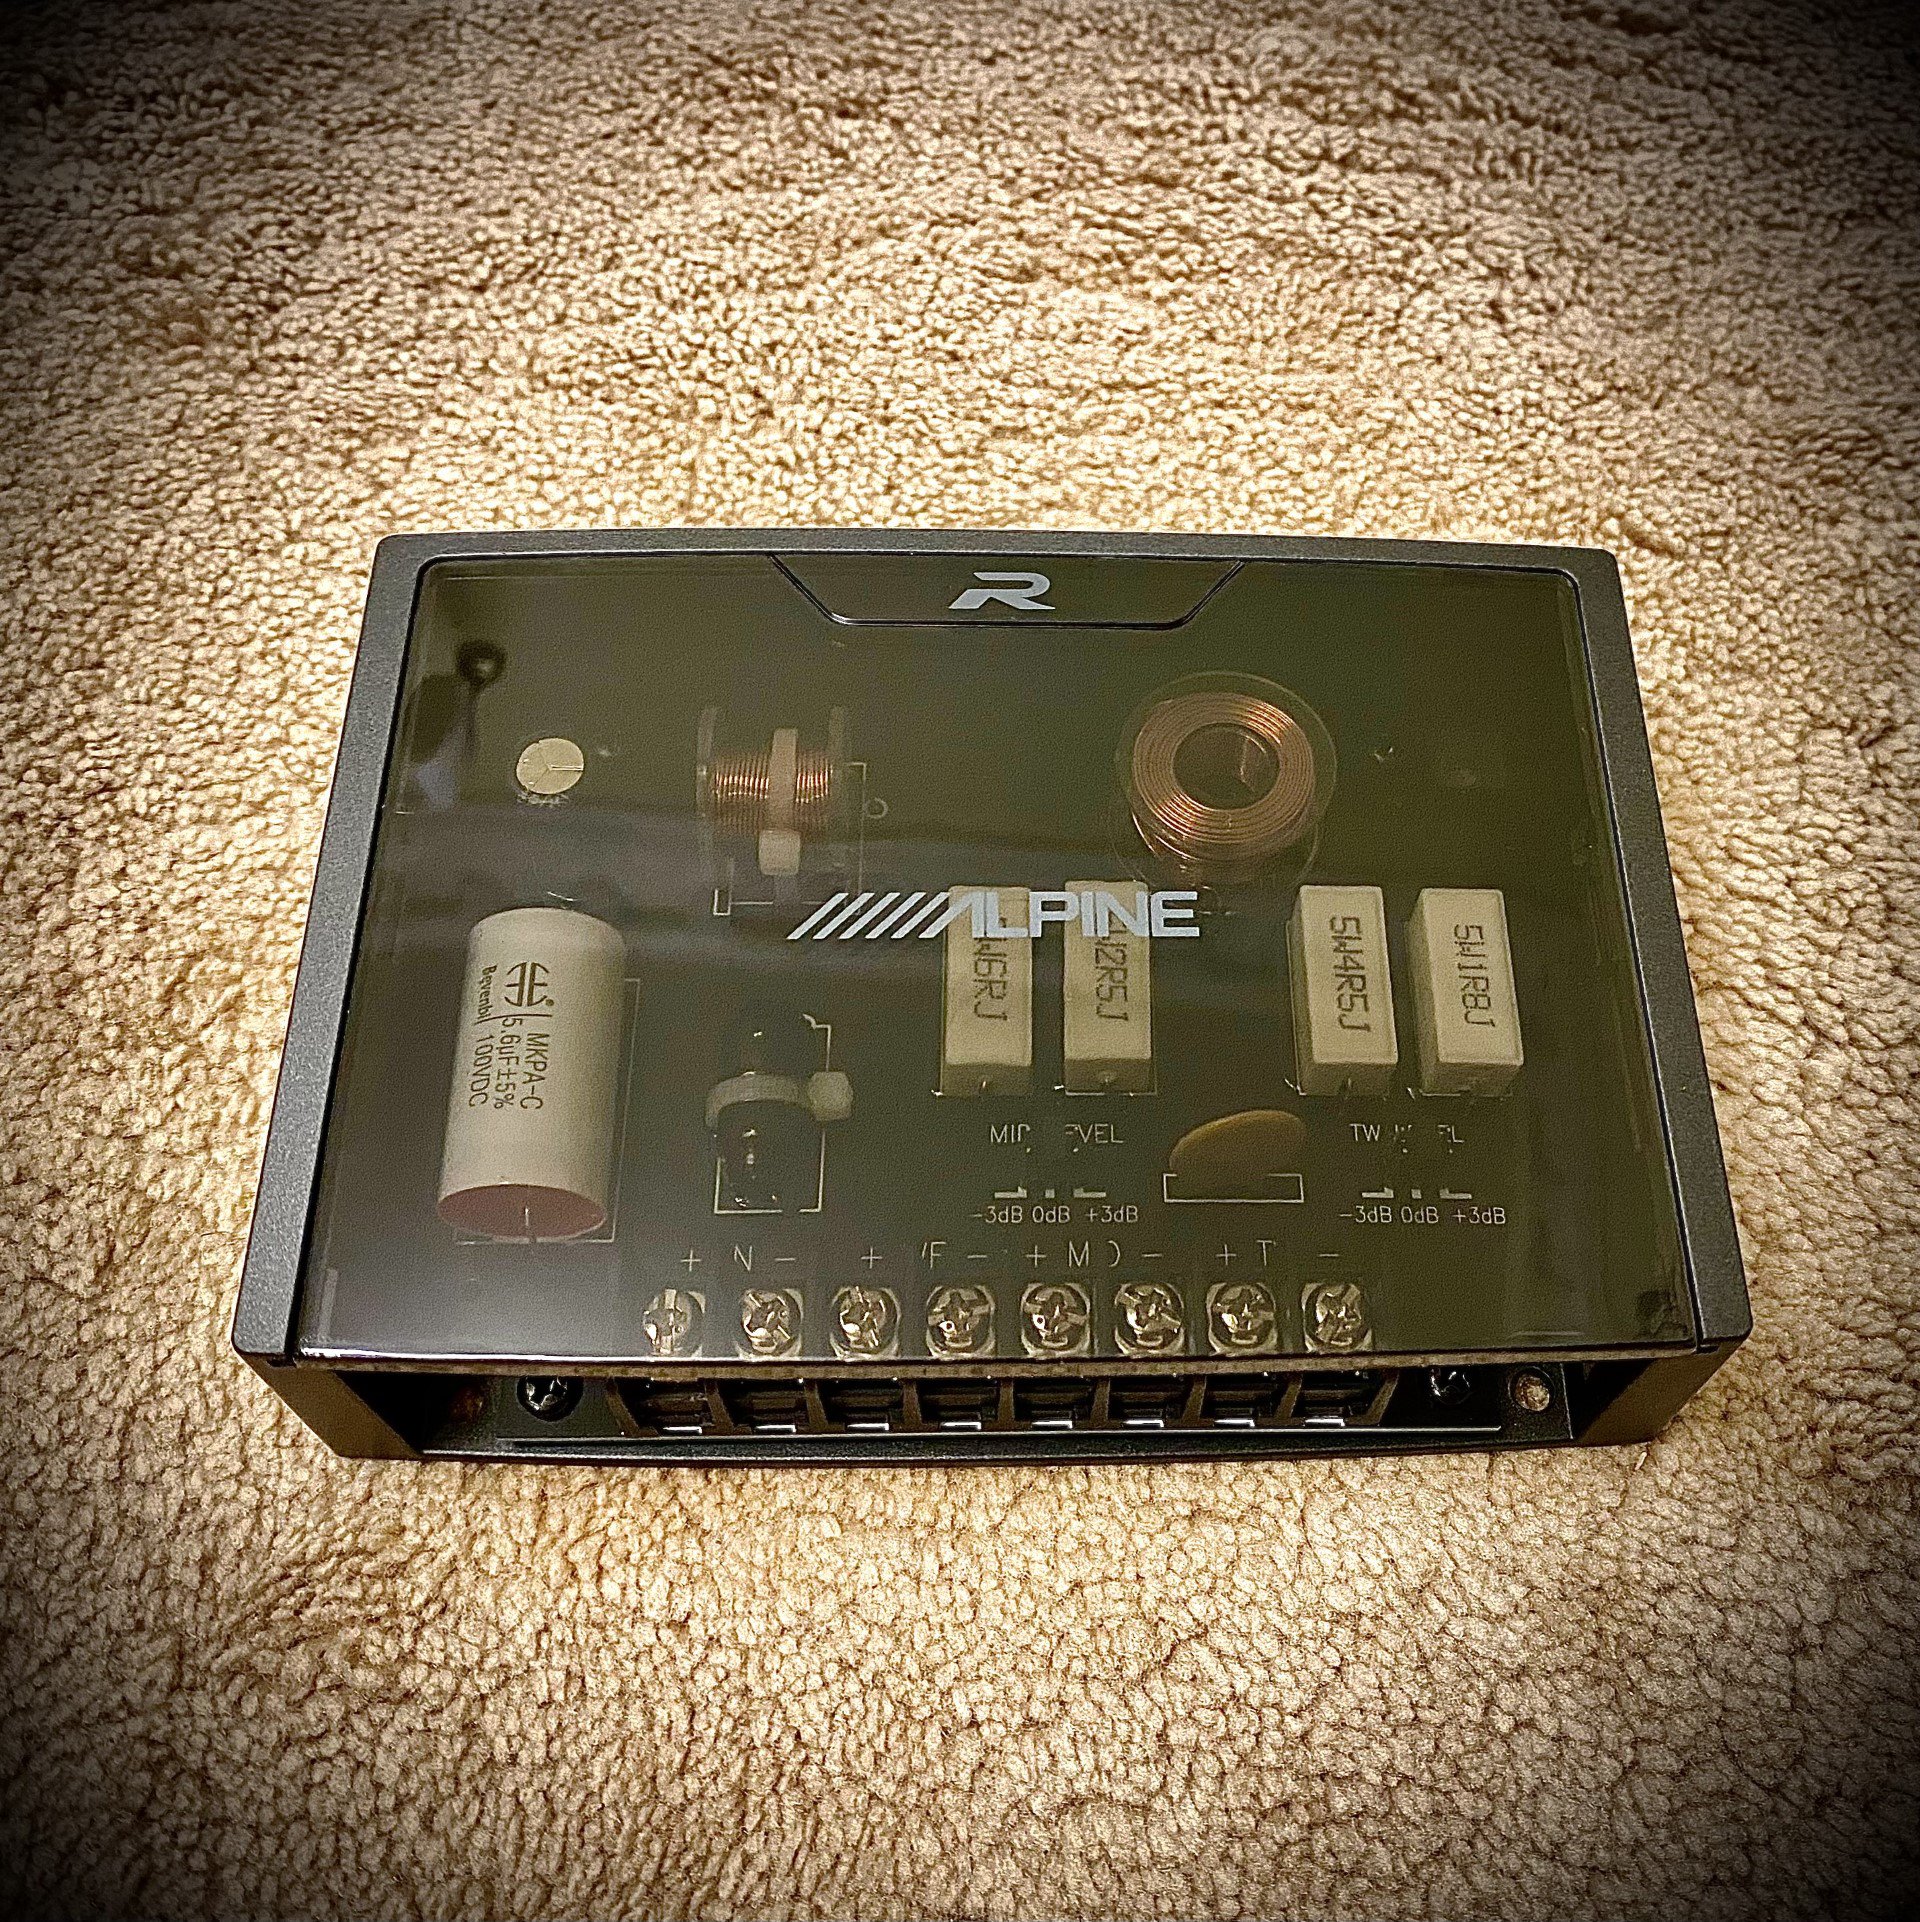
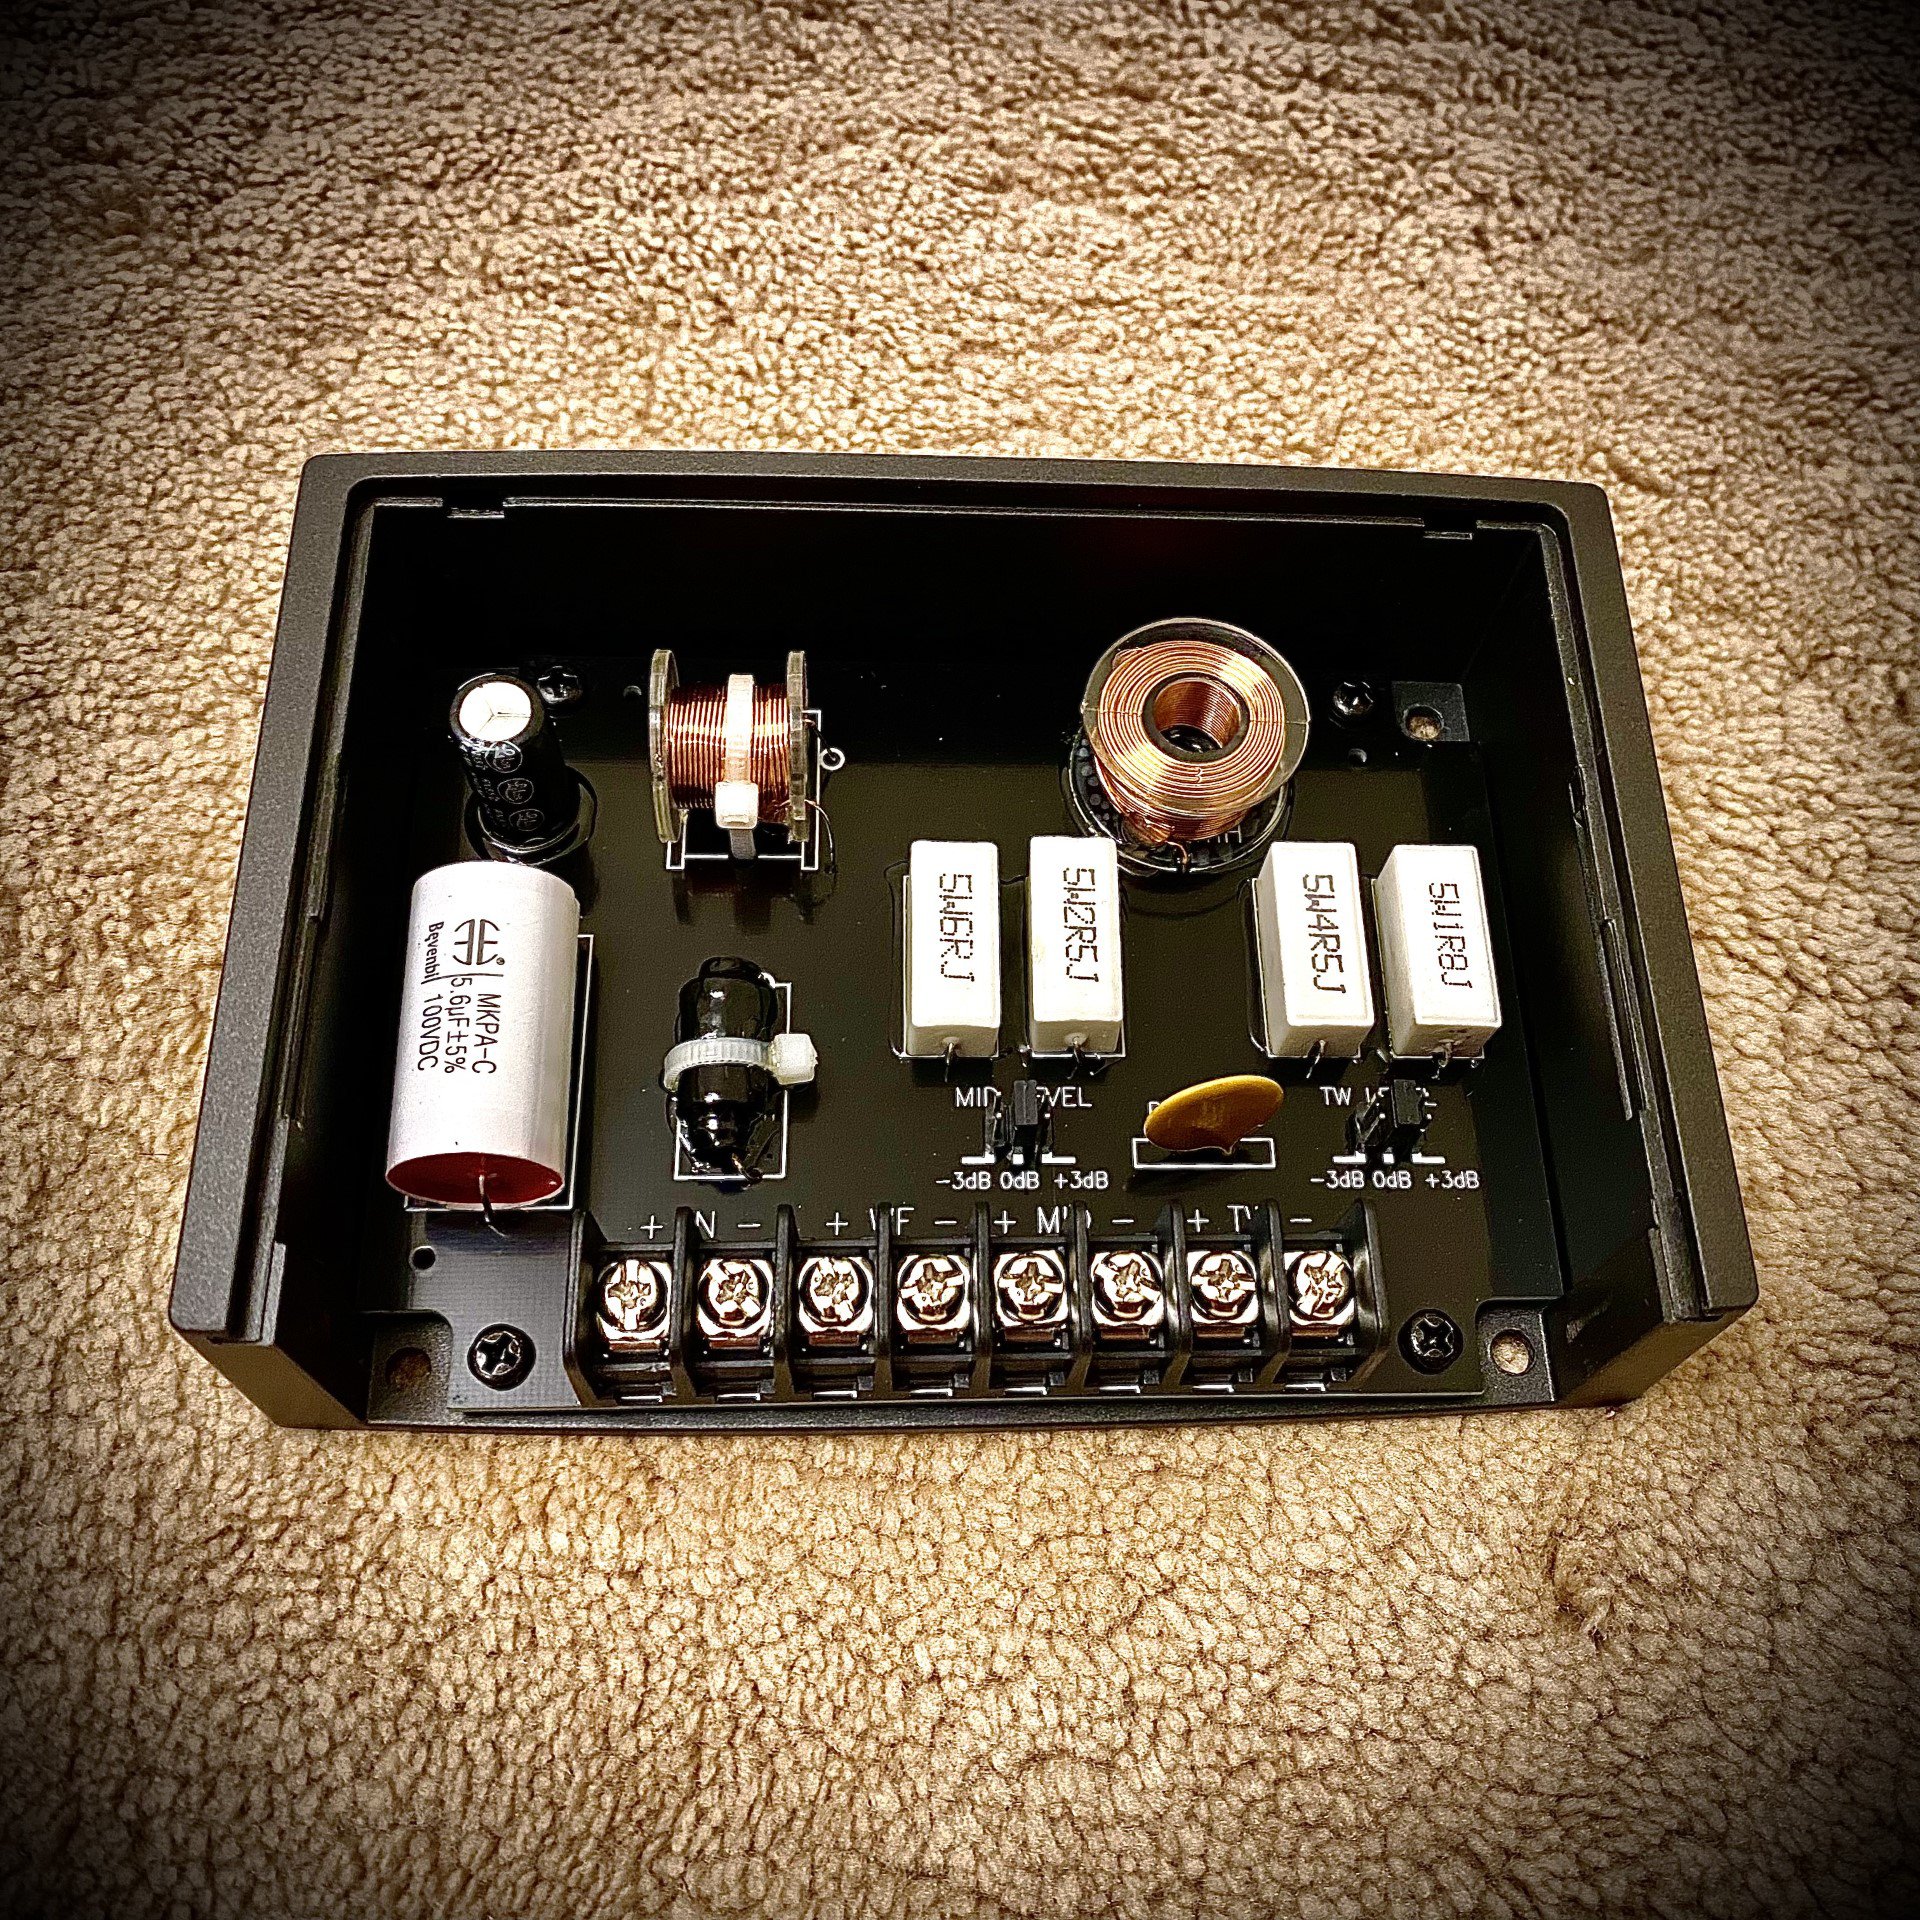
Crossover network
8 inch subwoofer
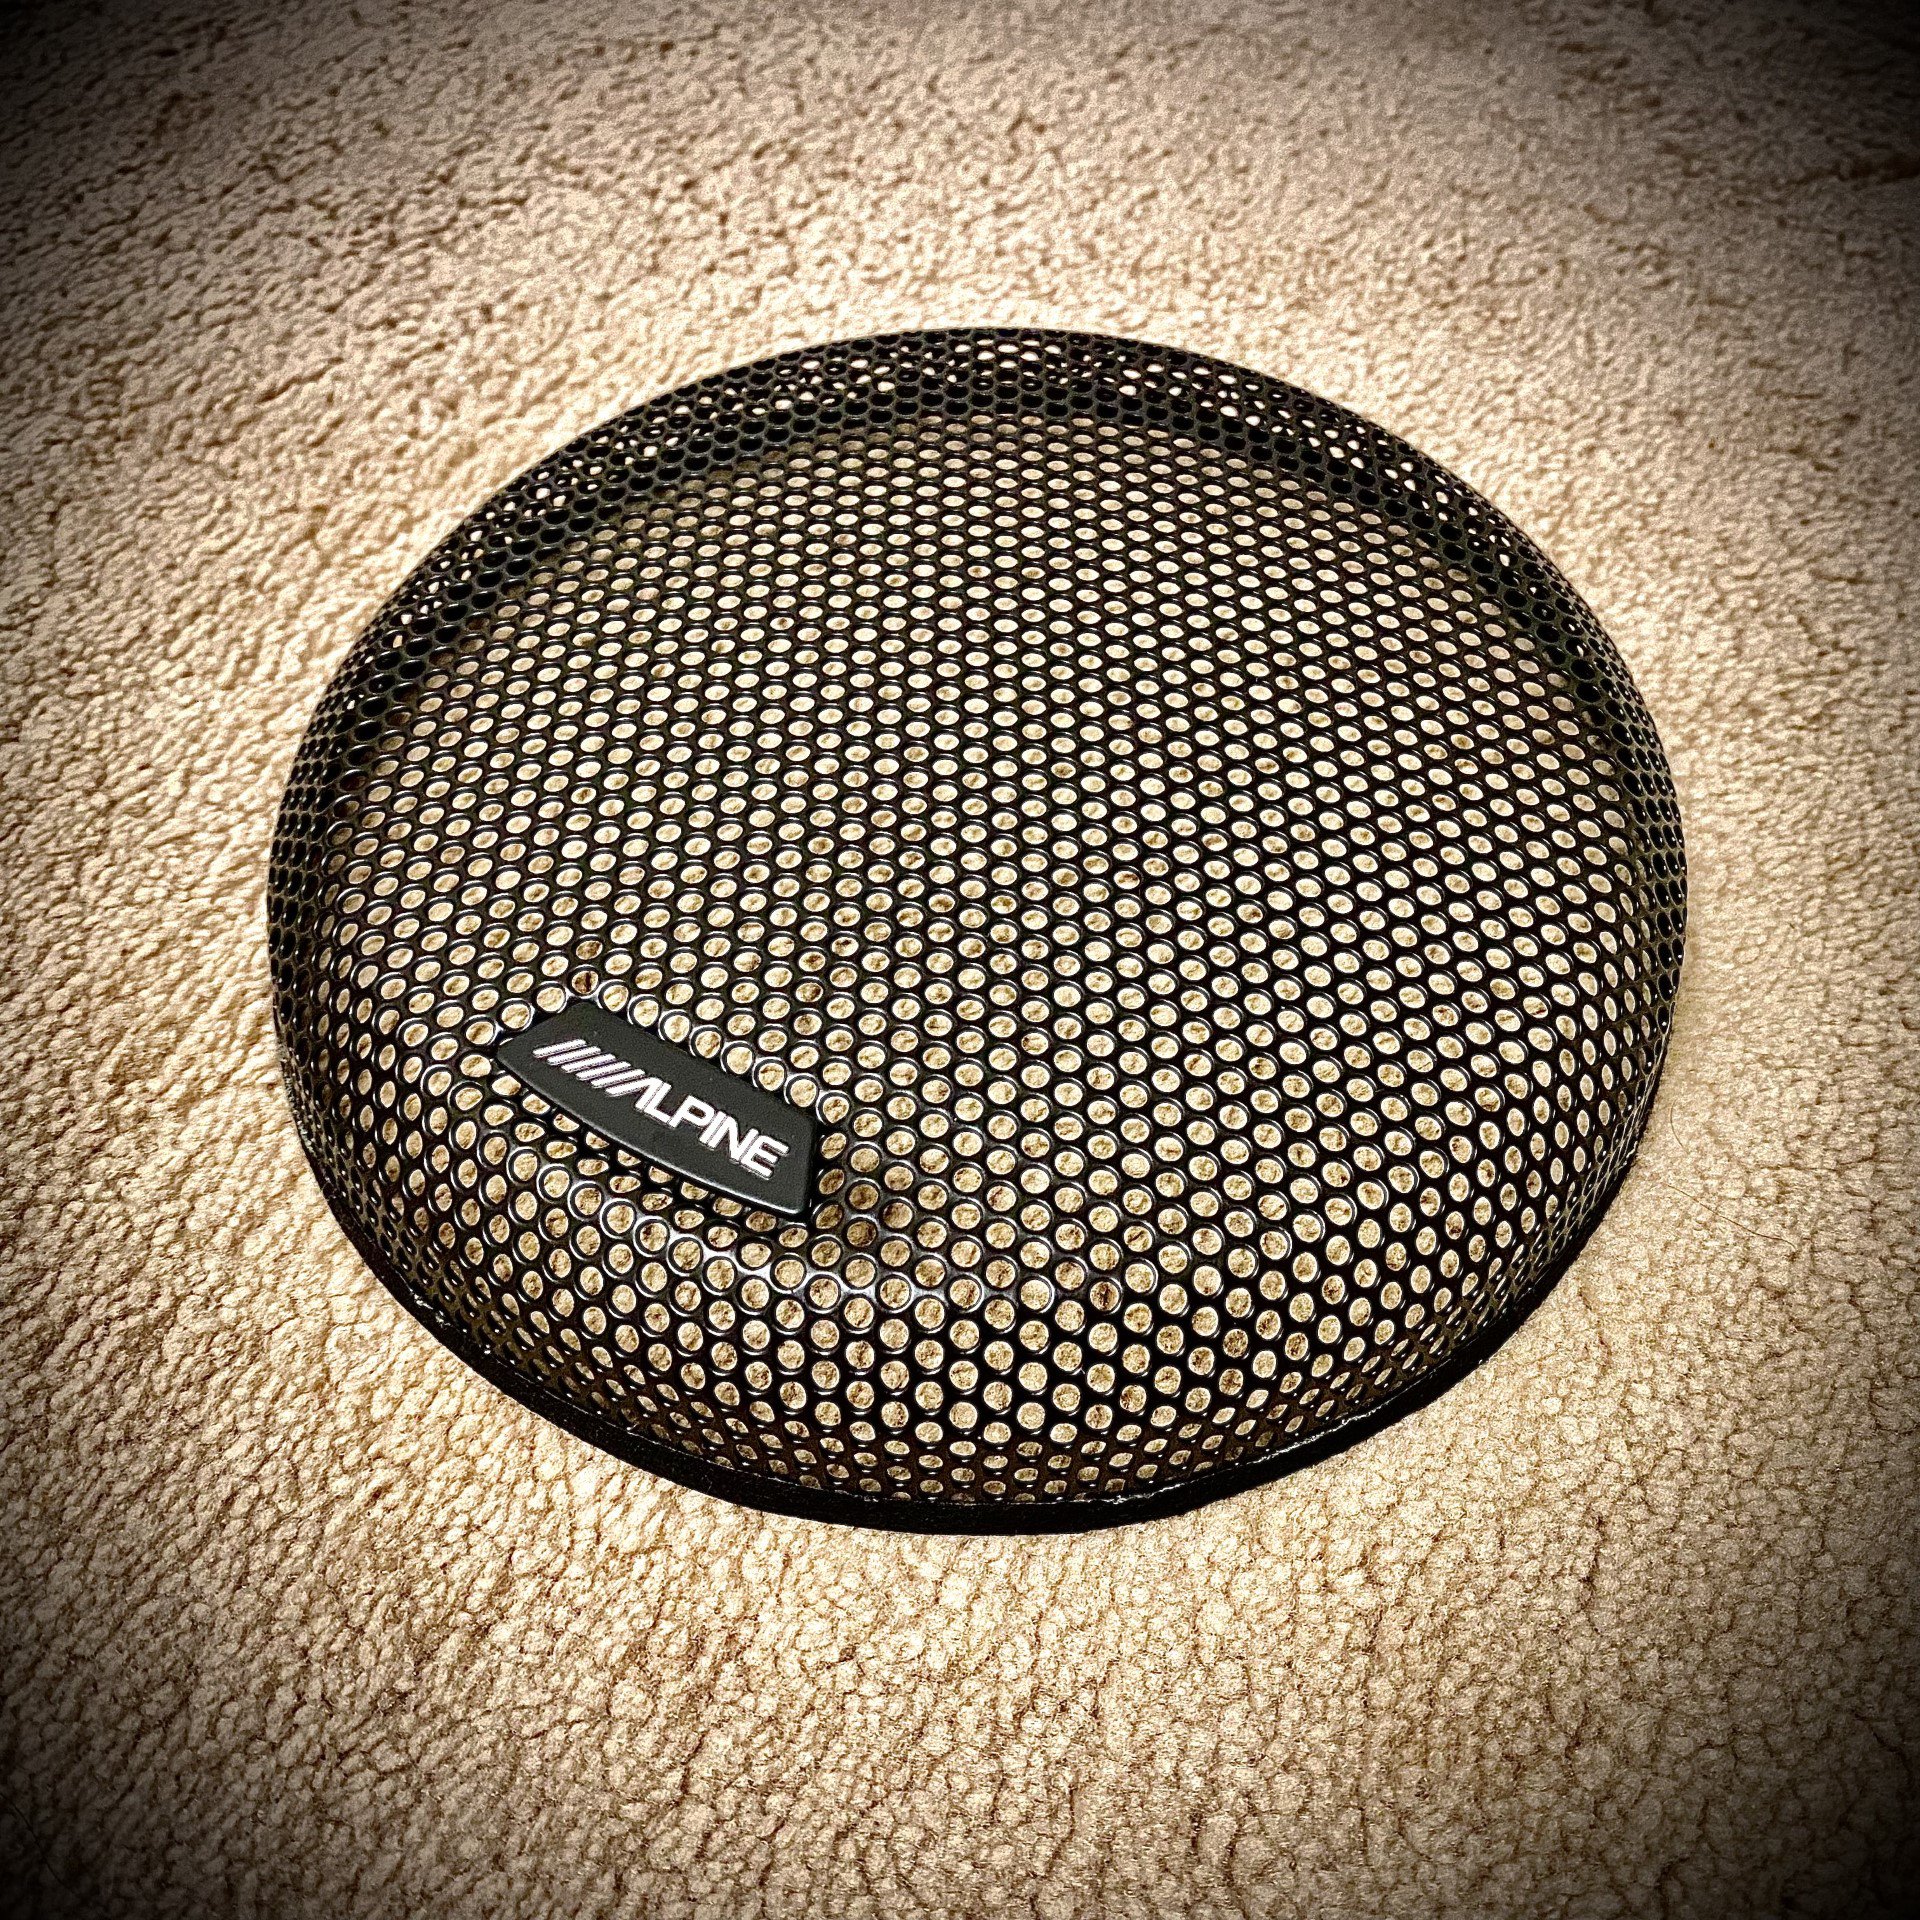
Subwoofer grill
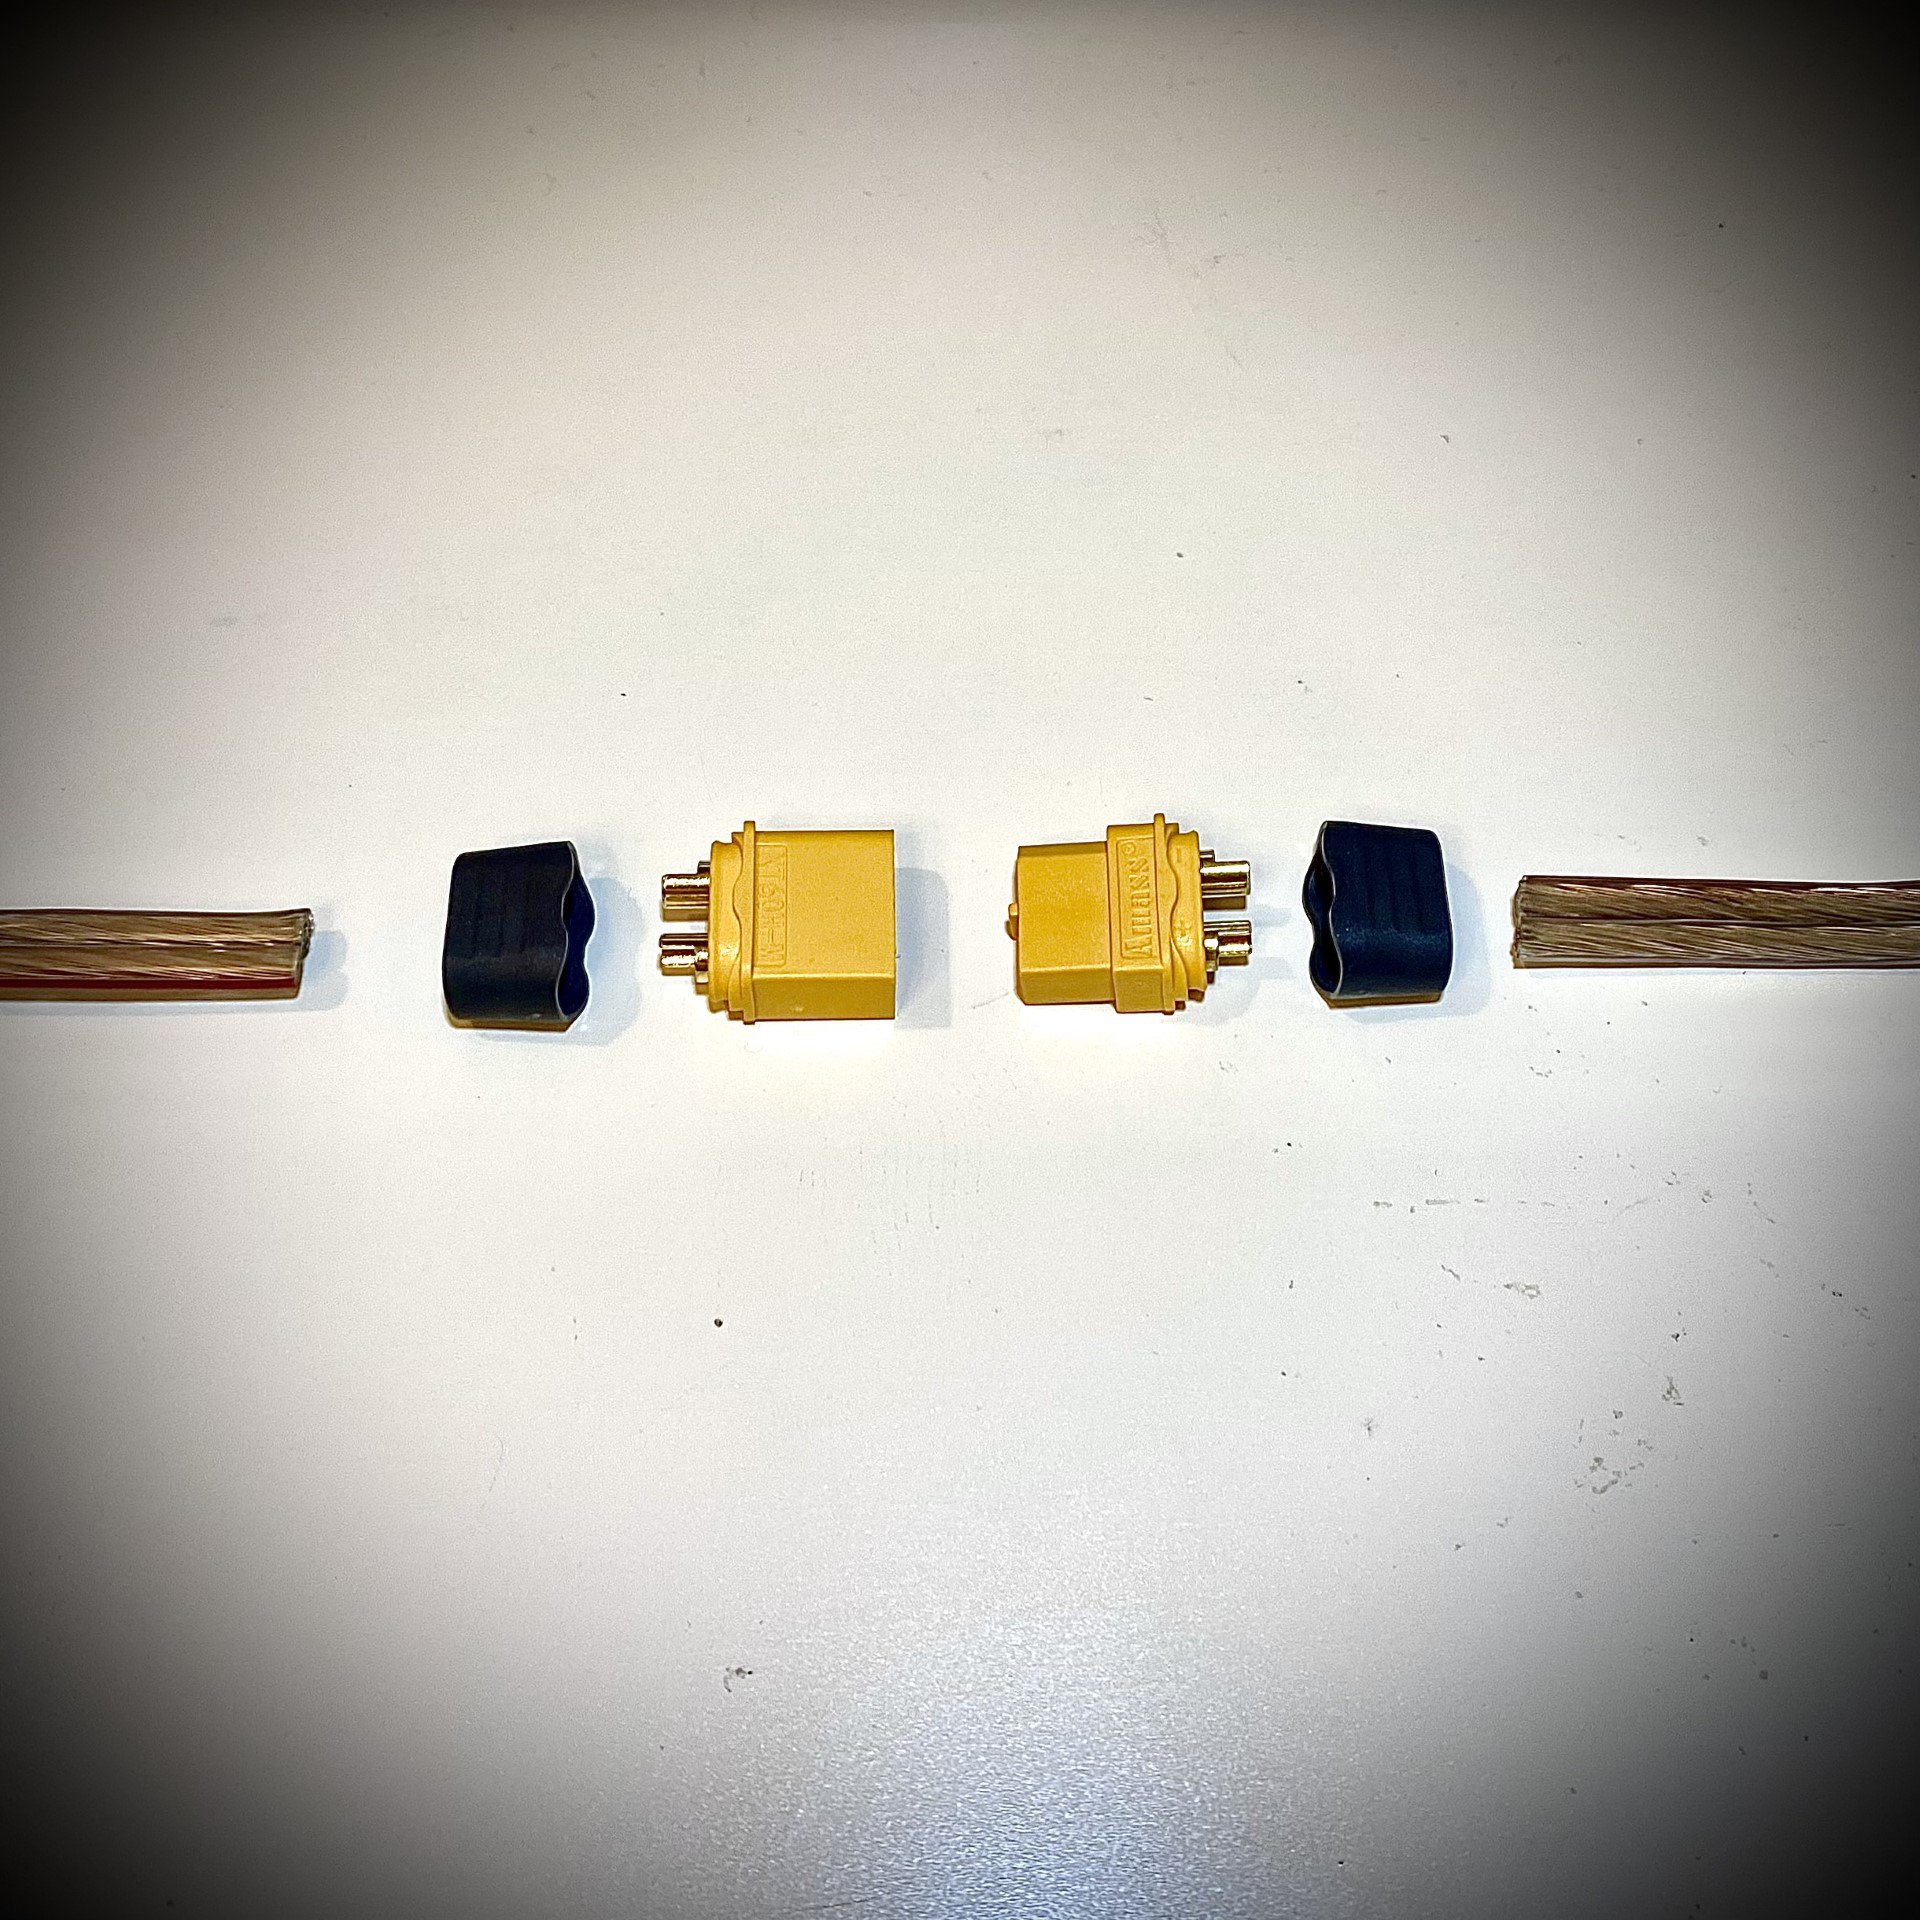
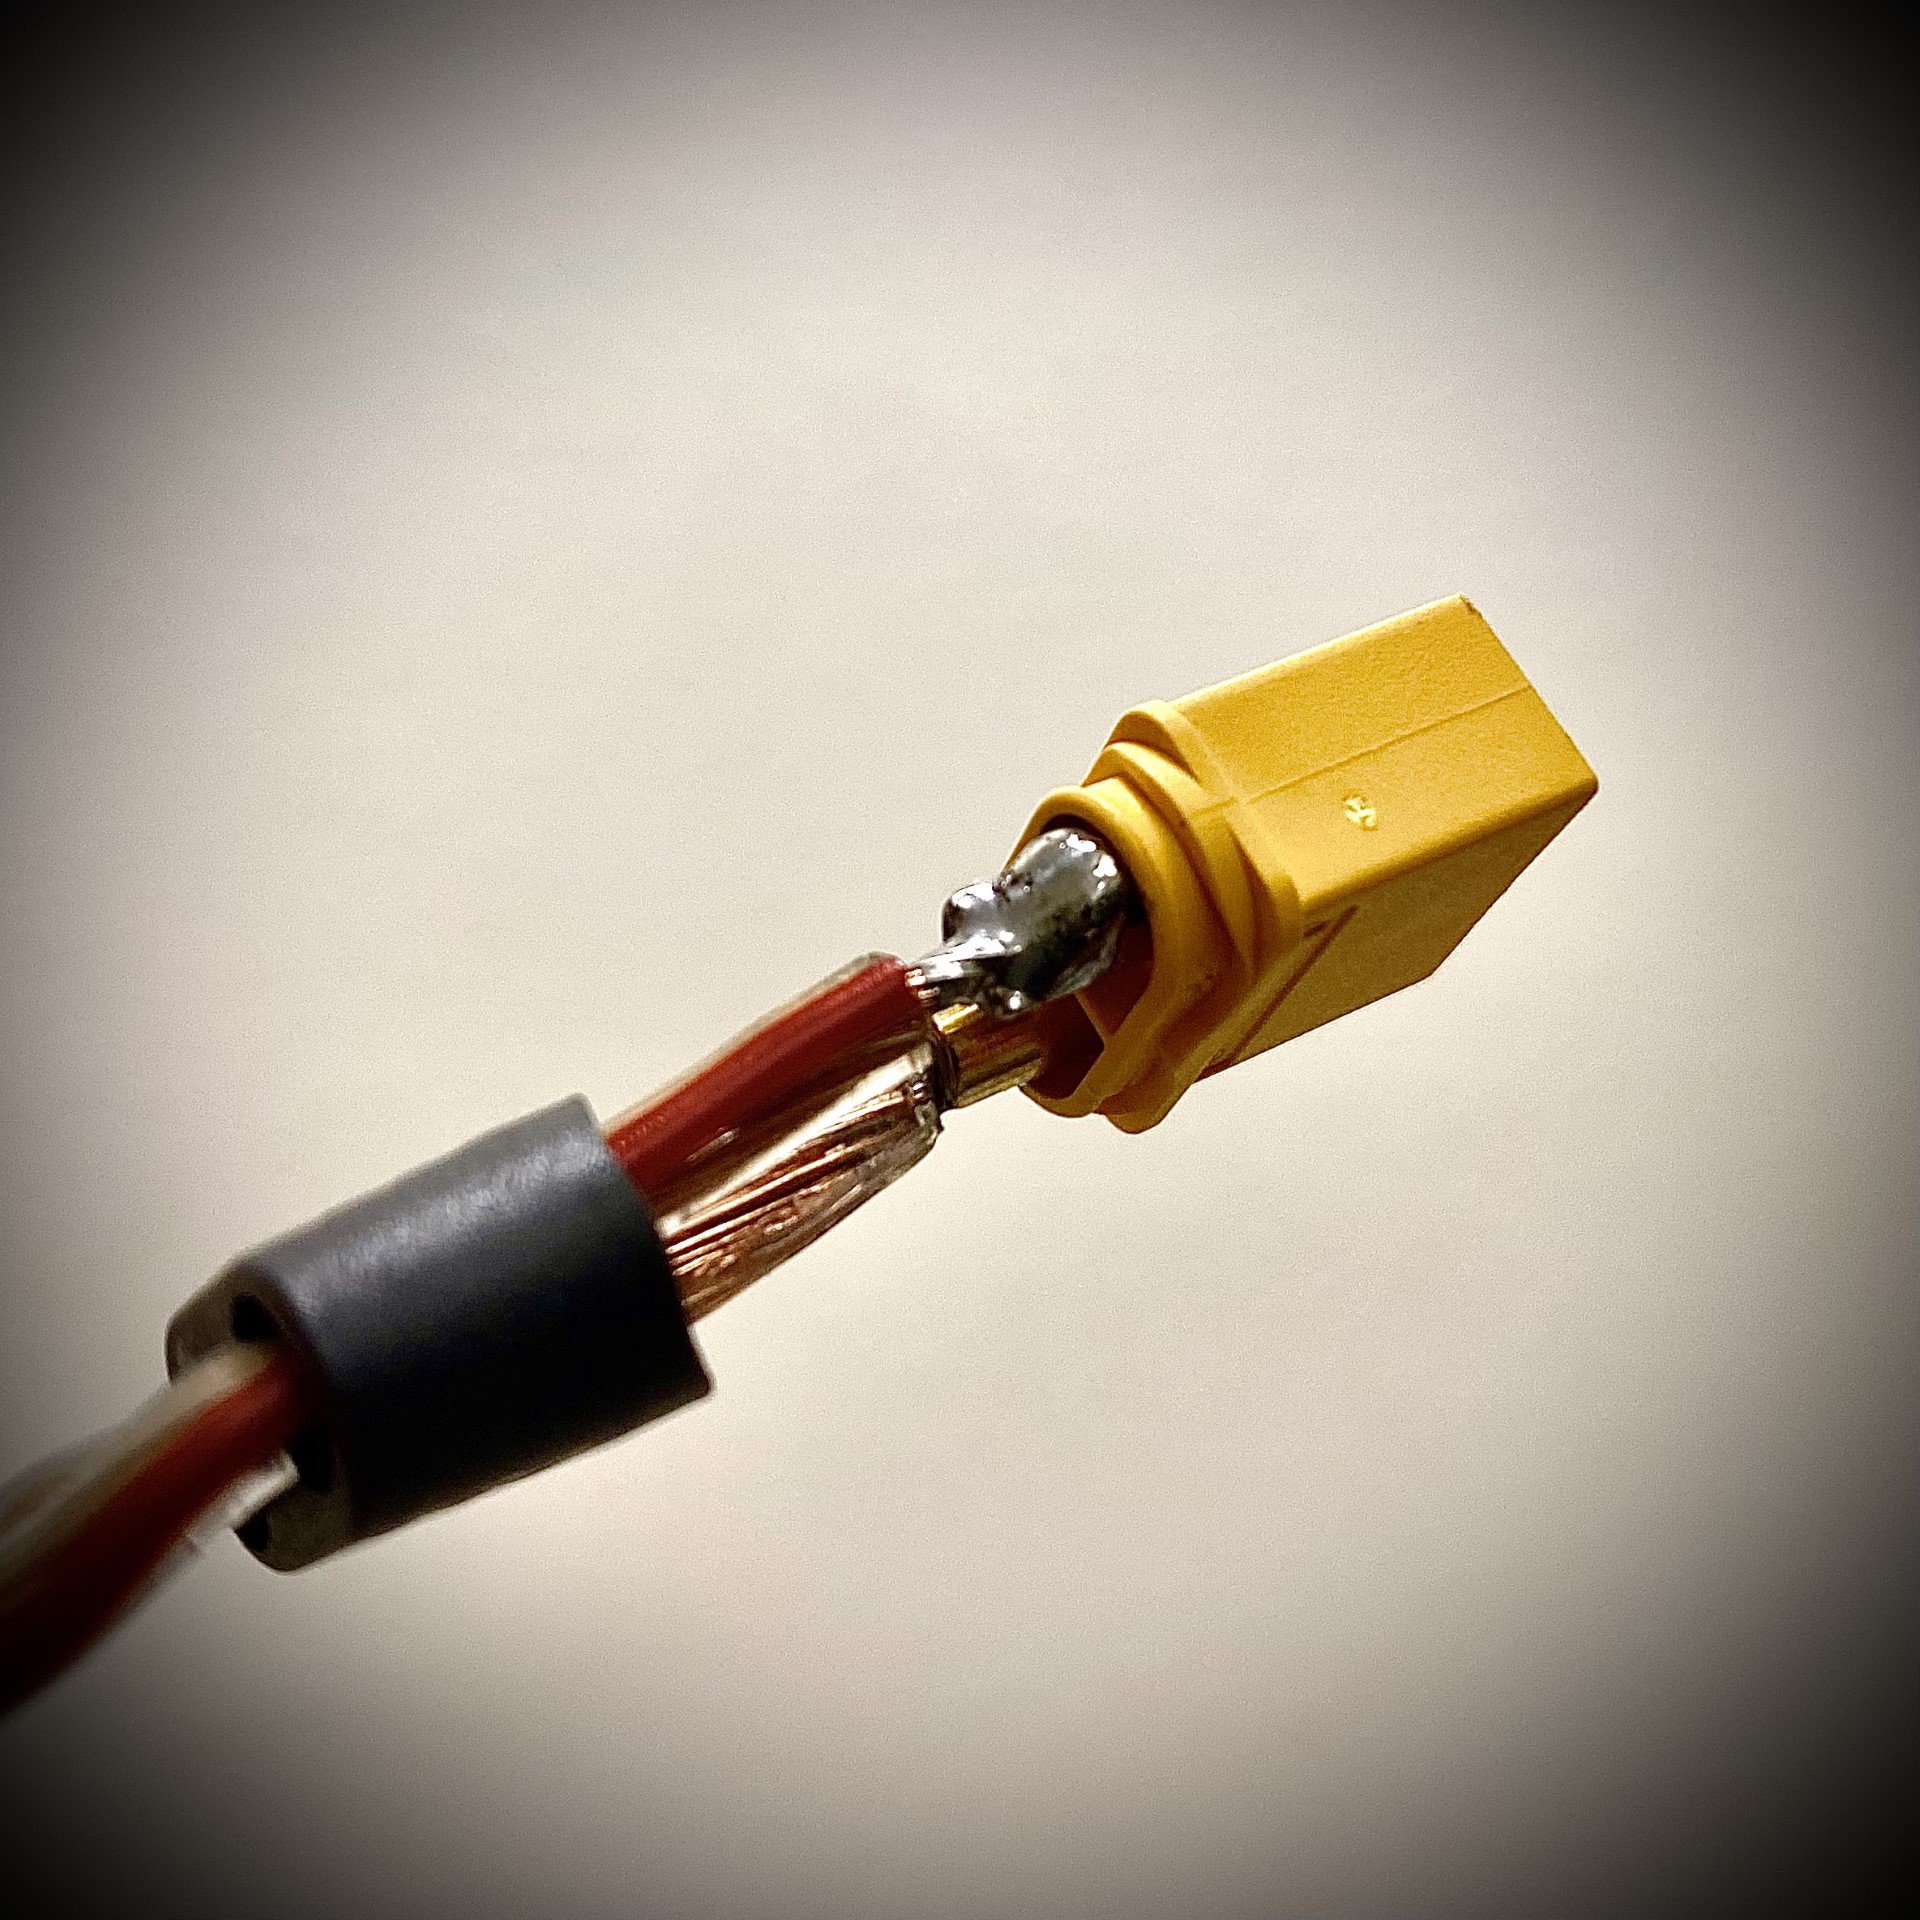
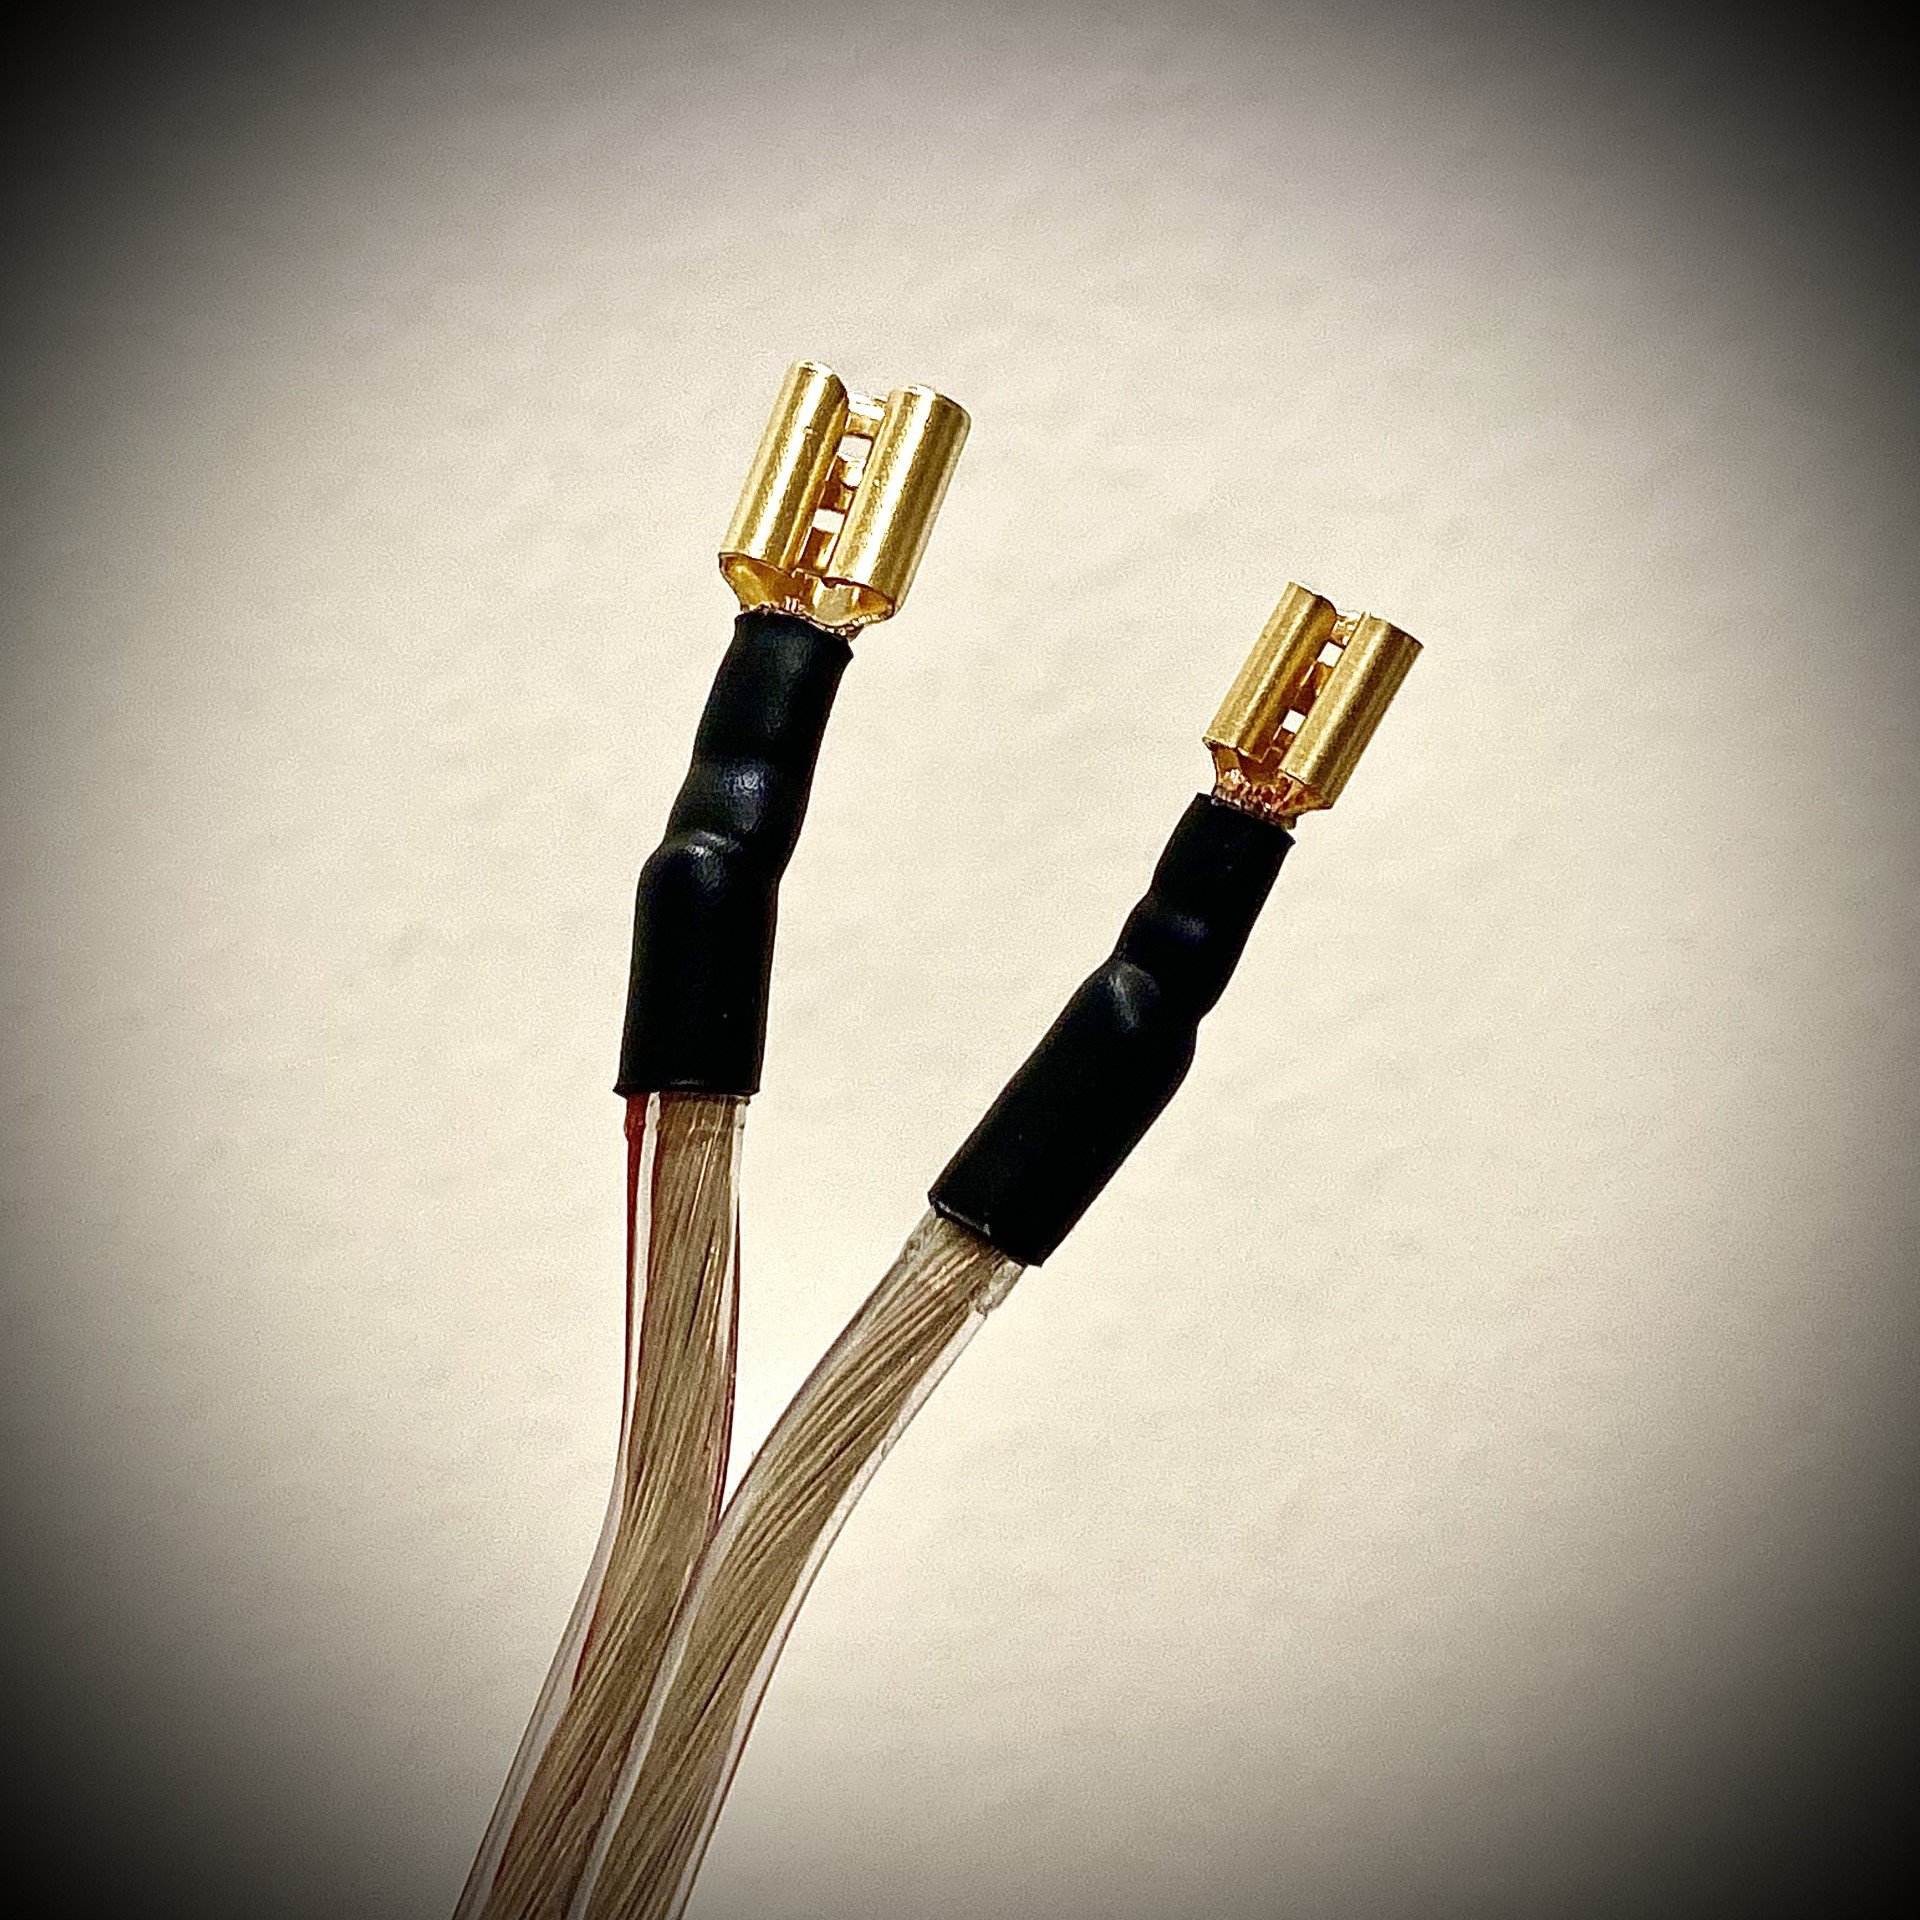
I decided to run a new 14 AWG speaker wires instead of the factory speaker wires for better sound quality, also made easy connectors for the speakers for ease of removal and installation.
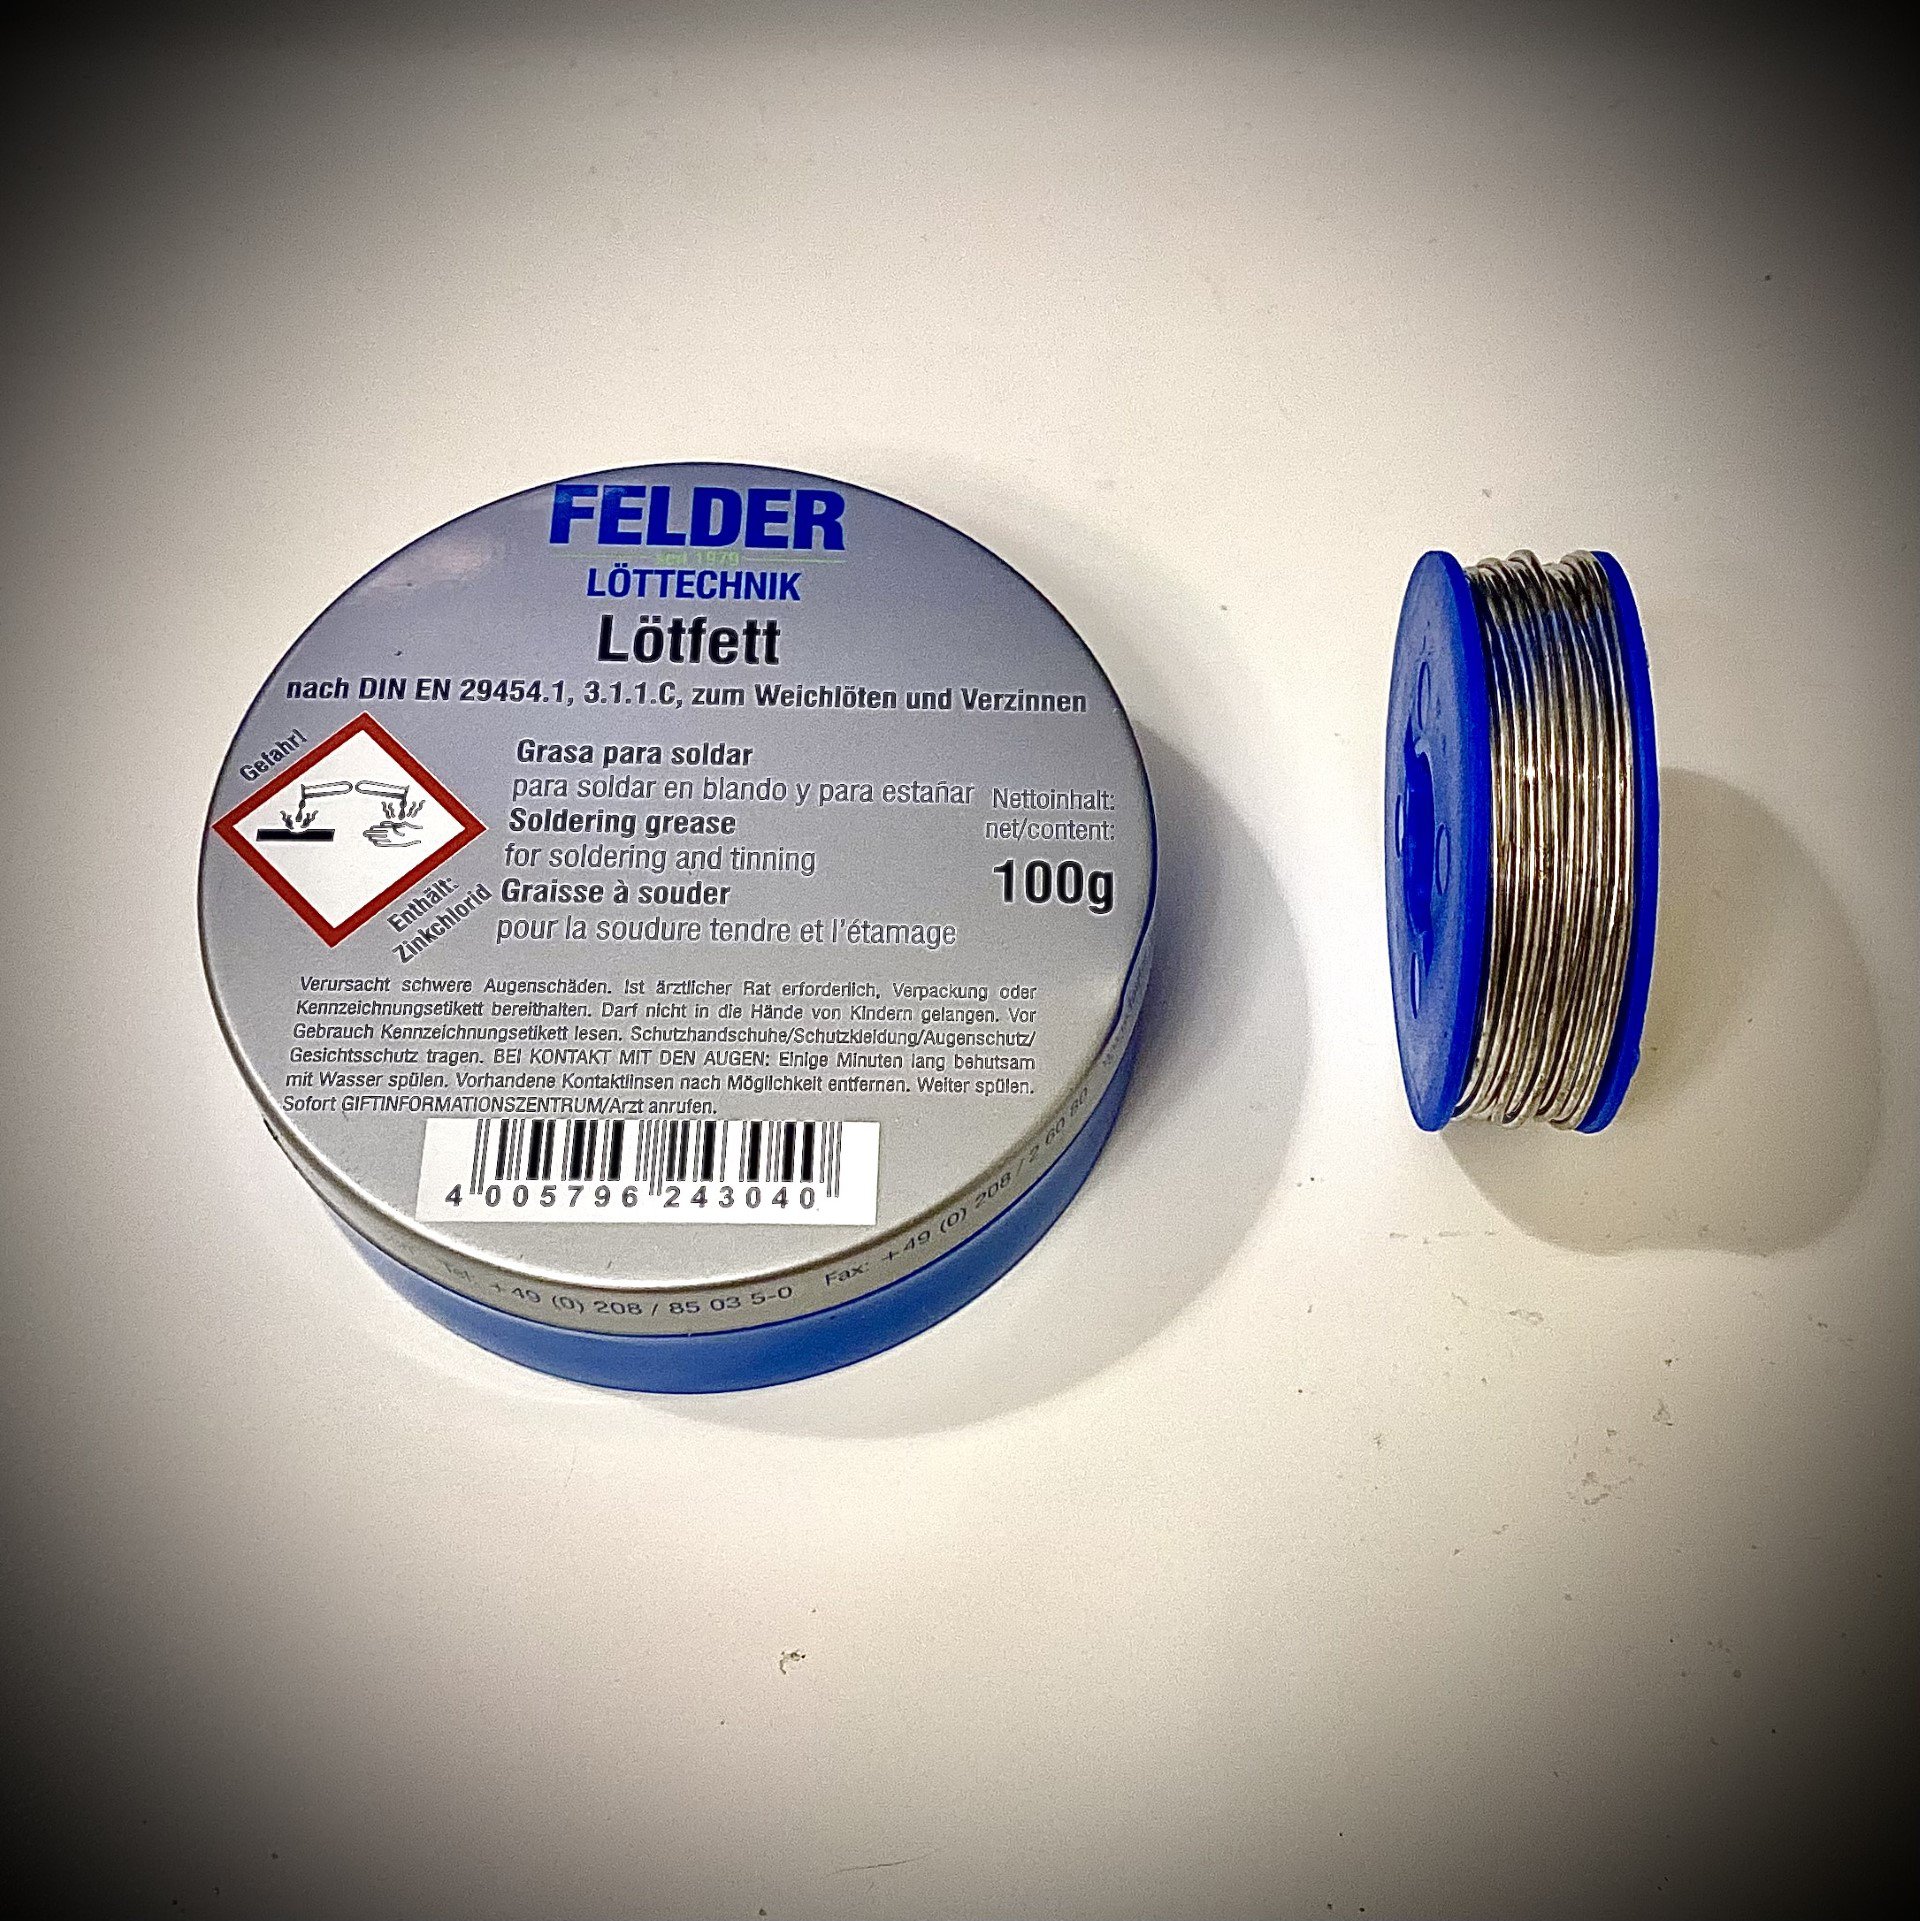
Proper soldering is needed for that perfect connection
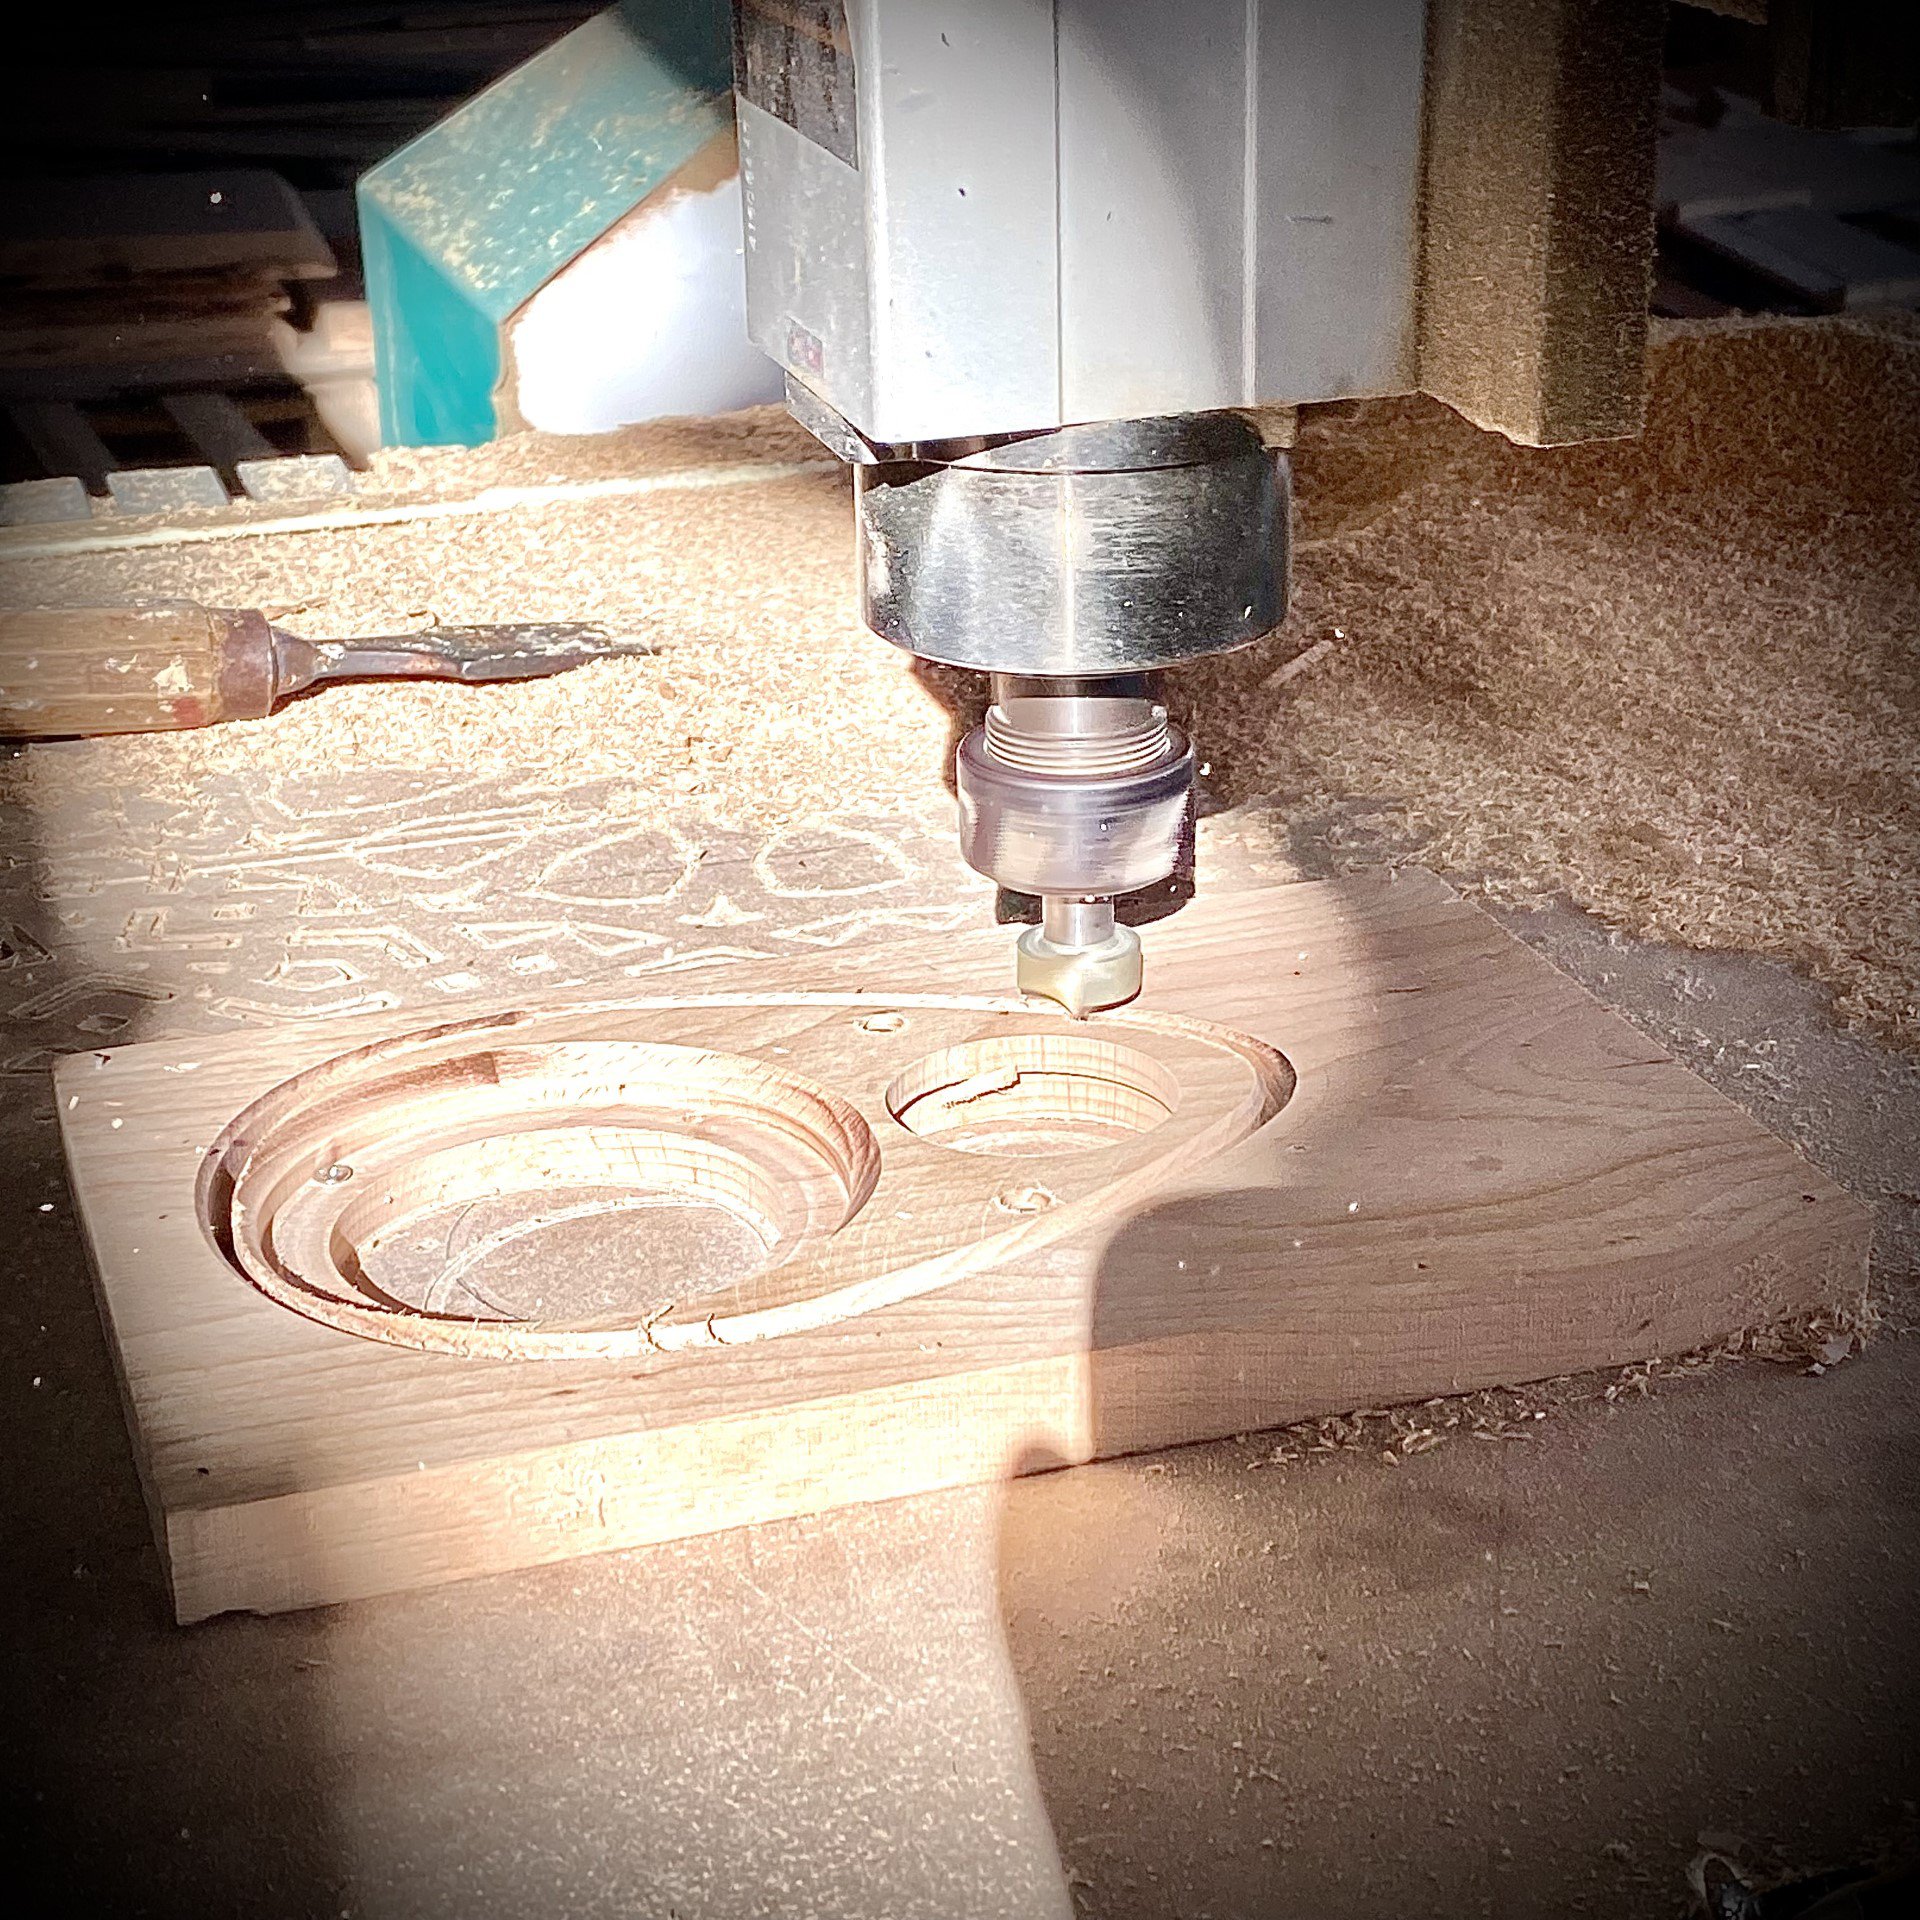
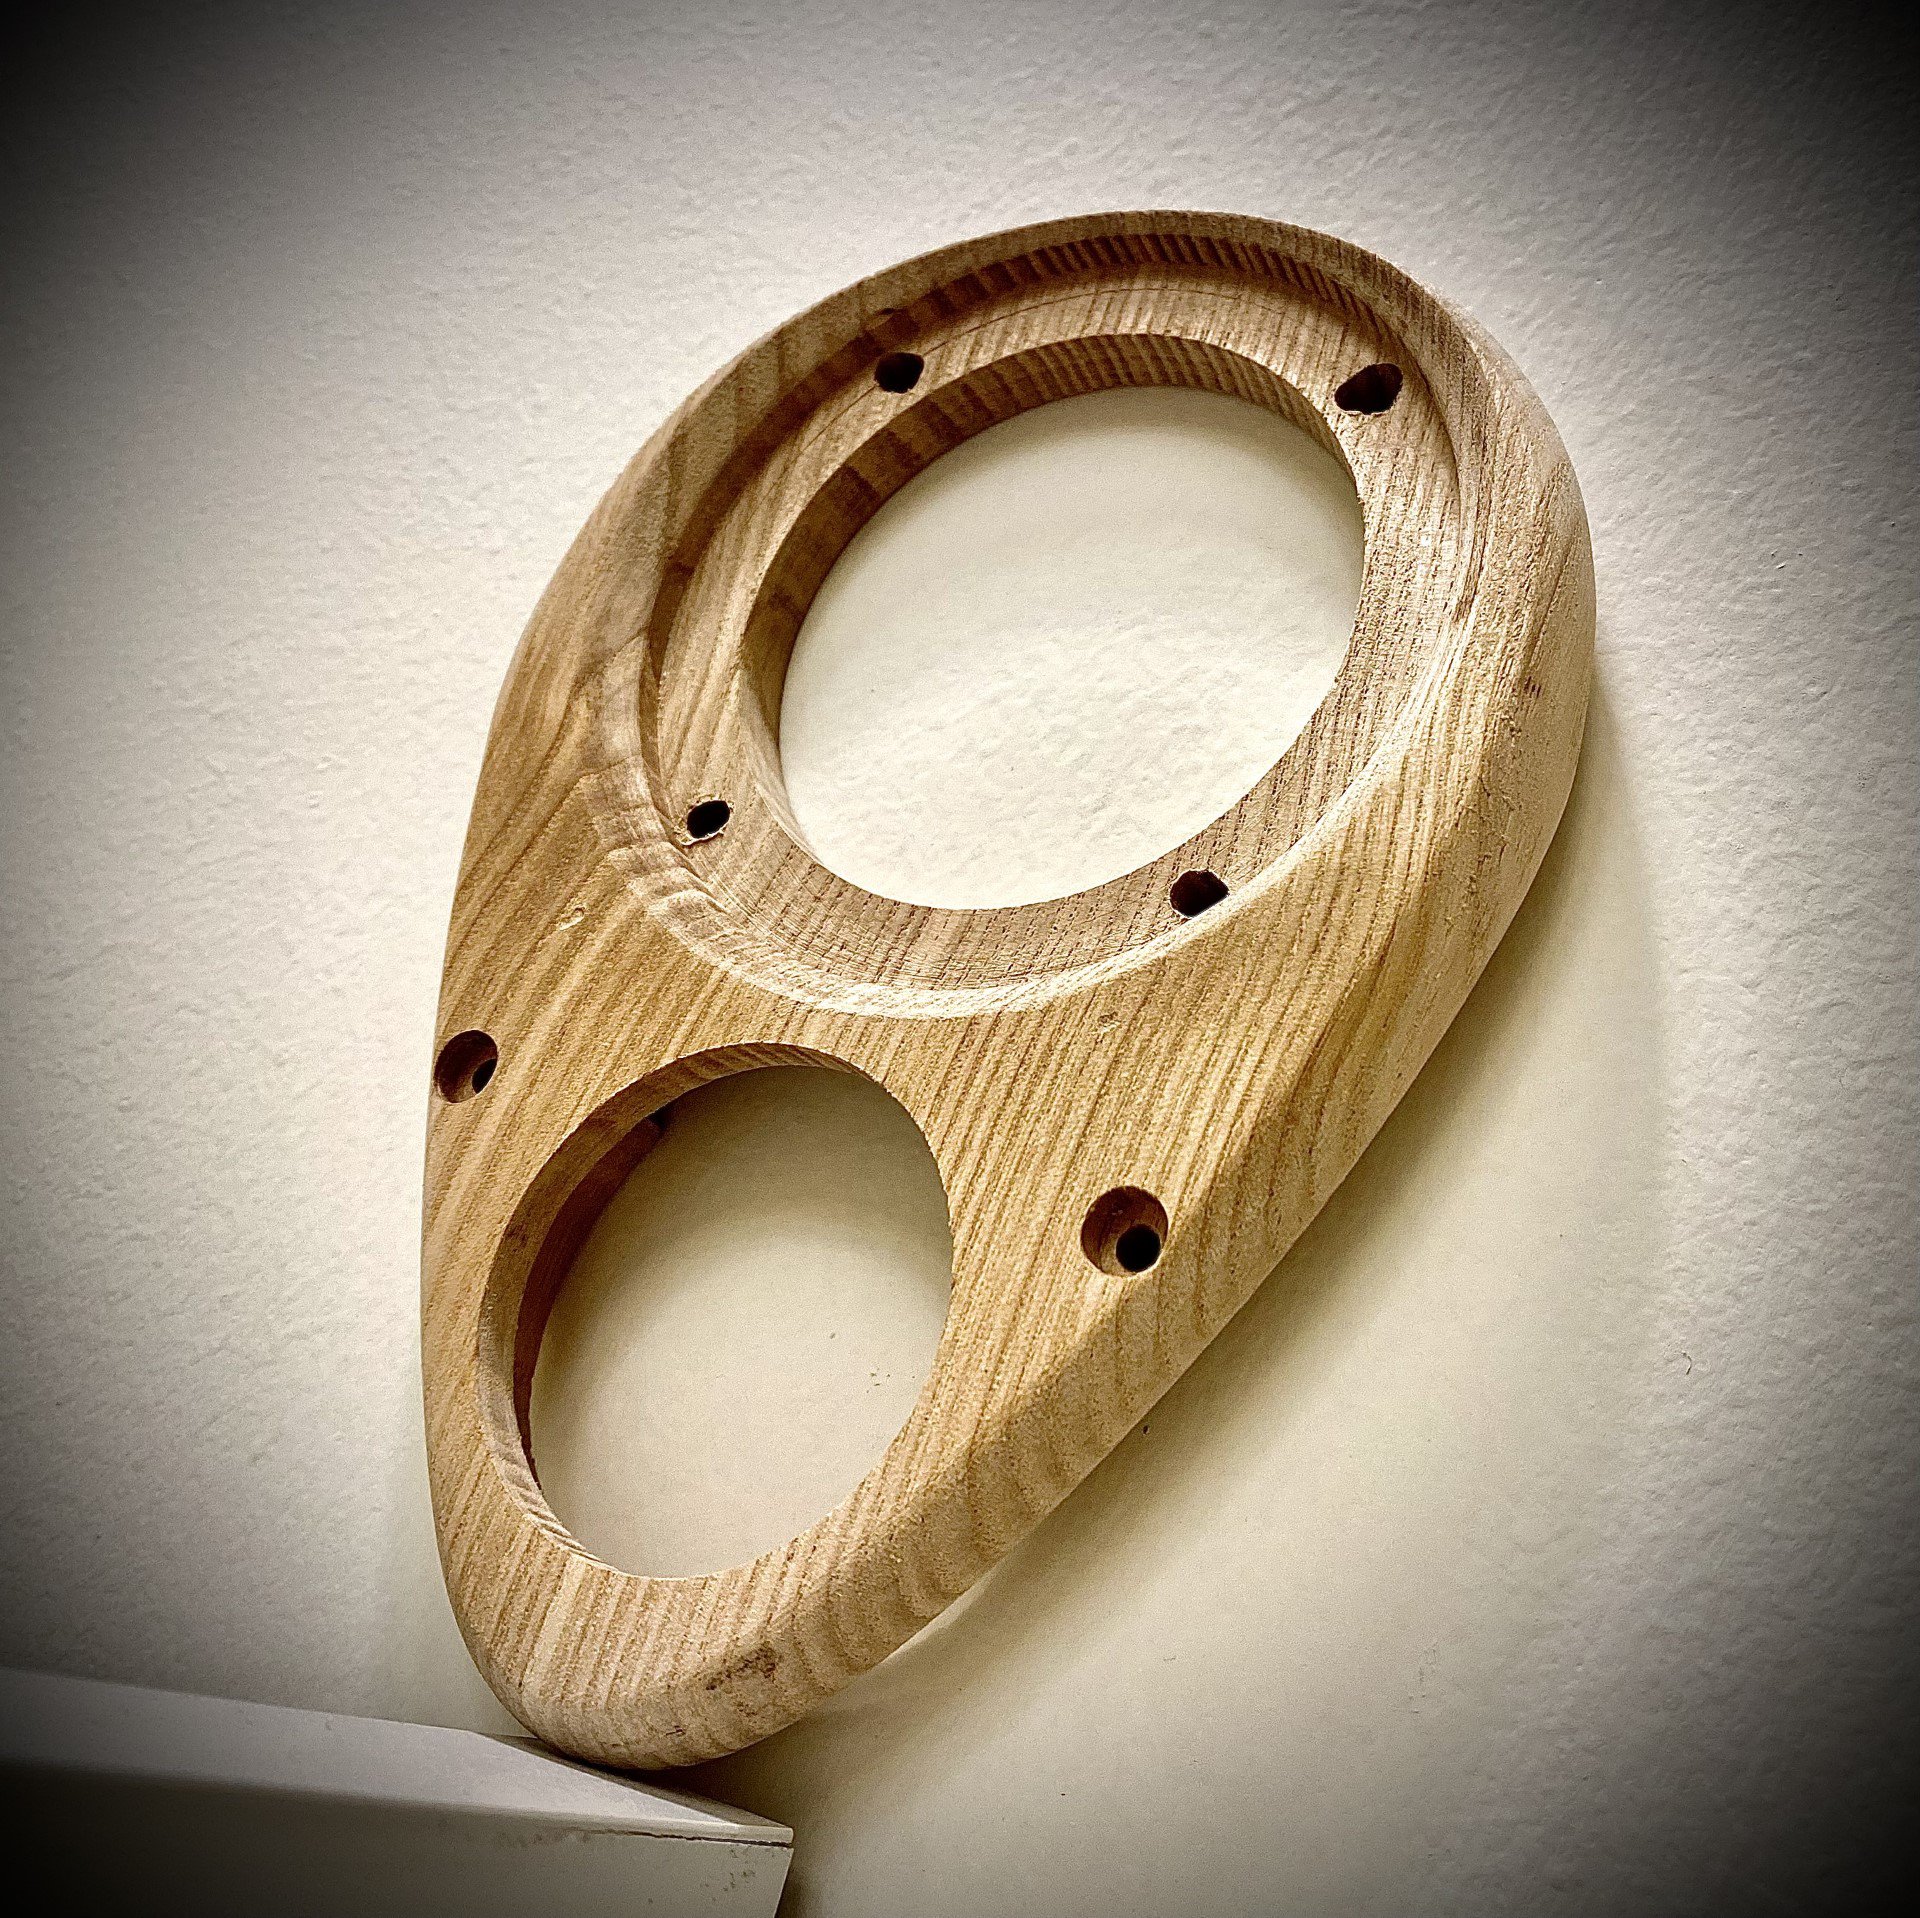
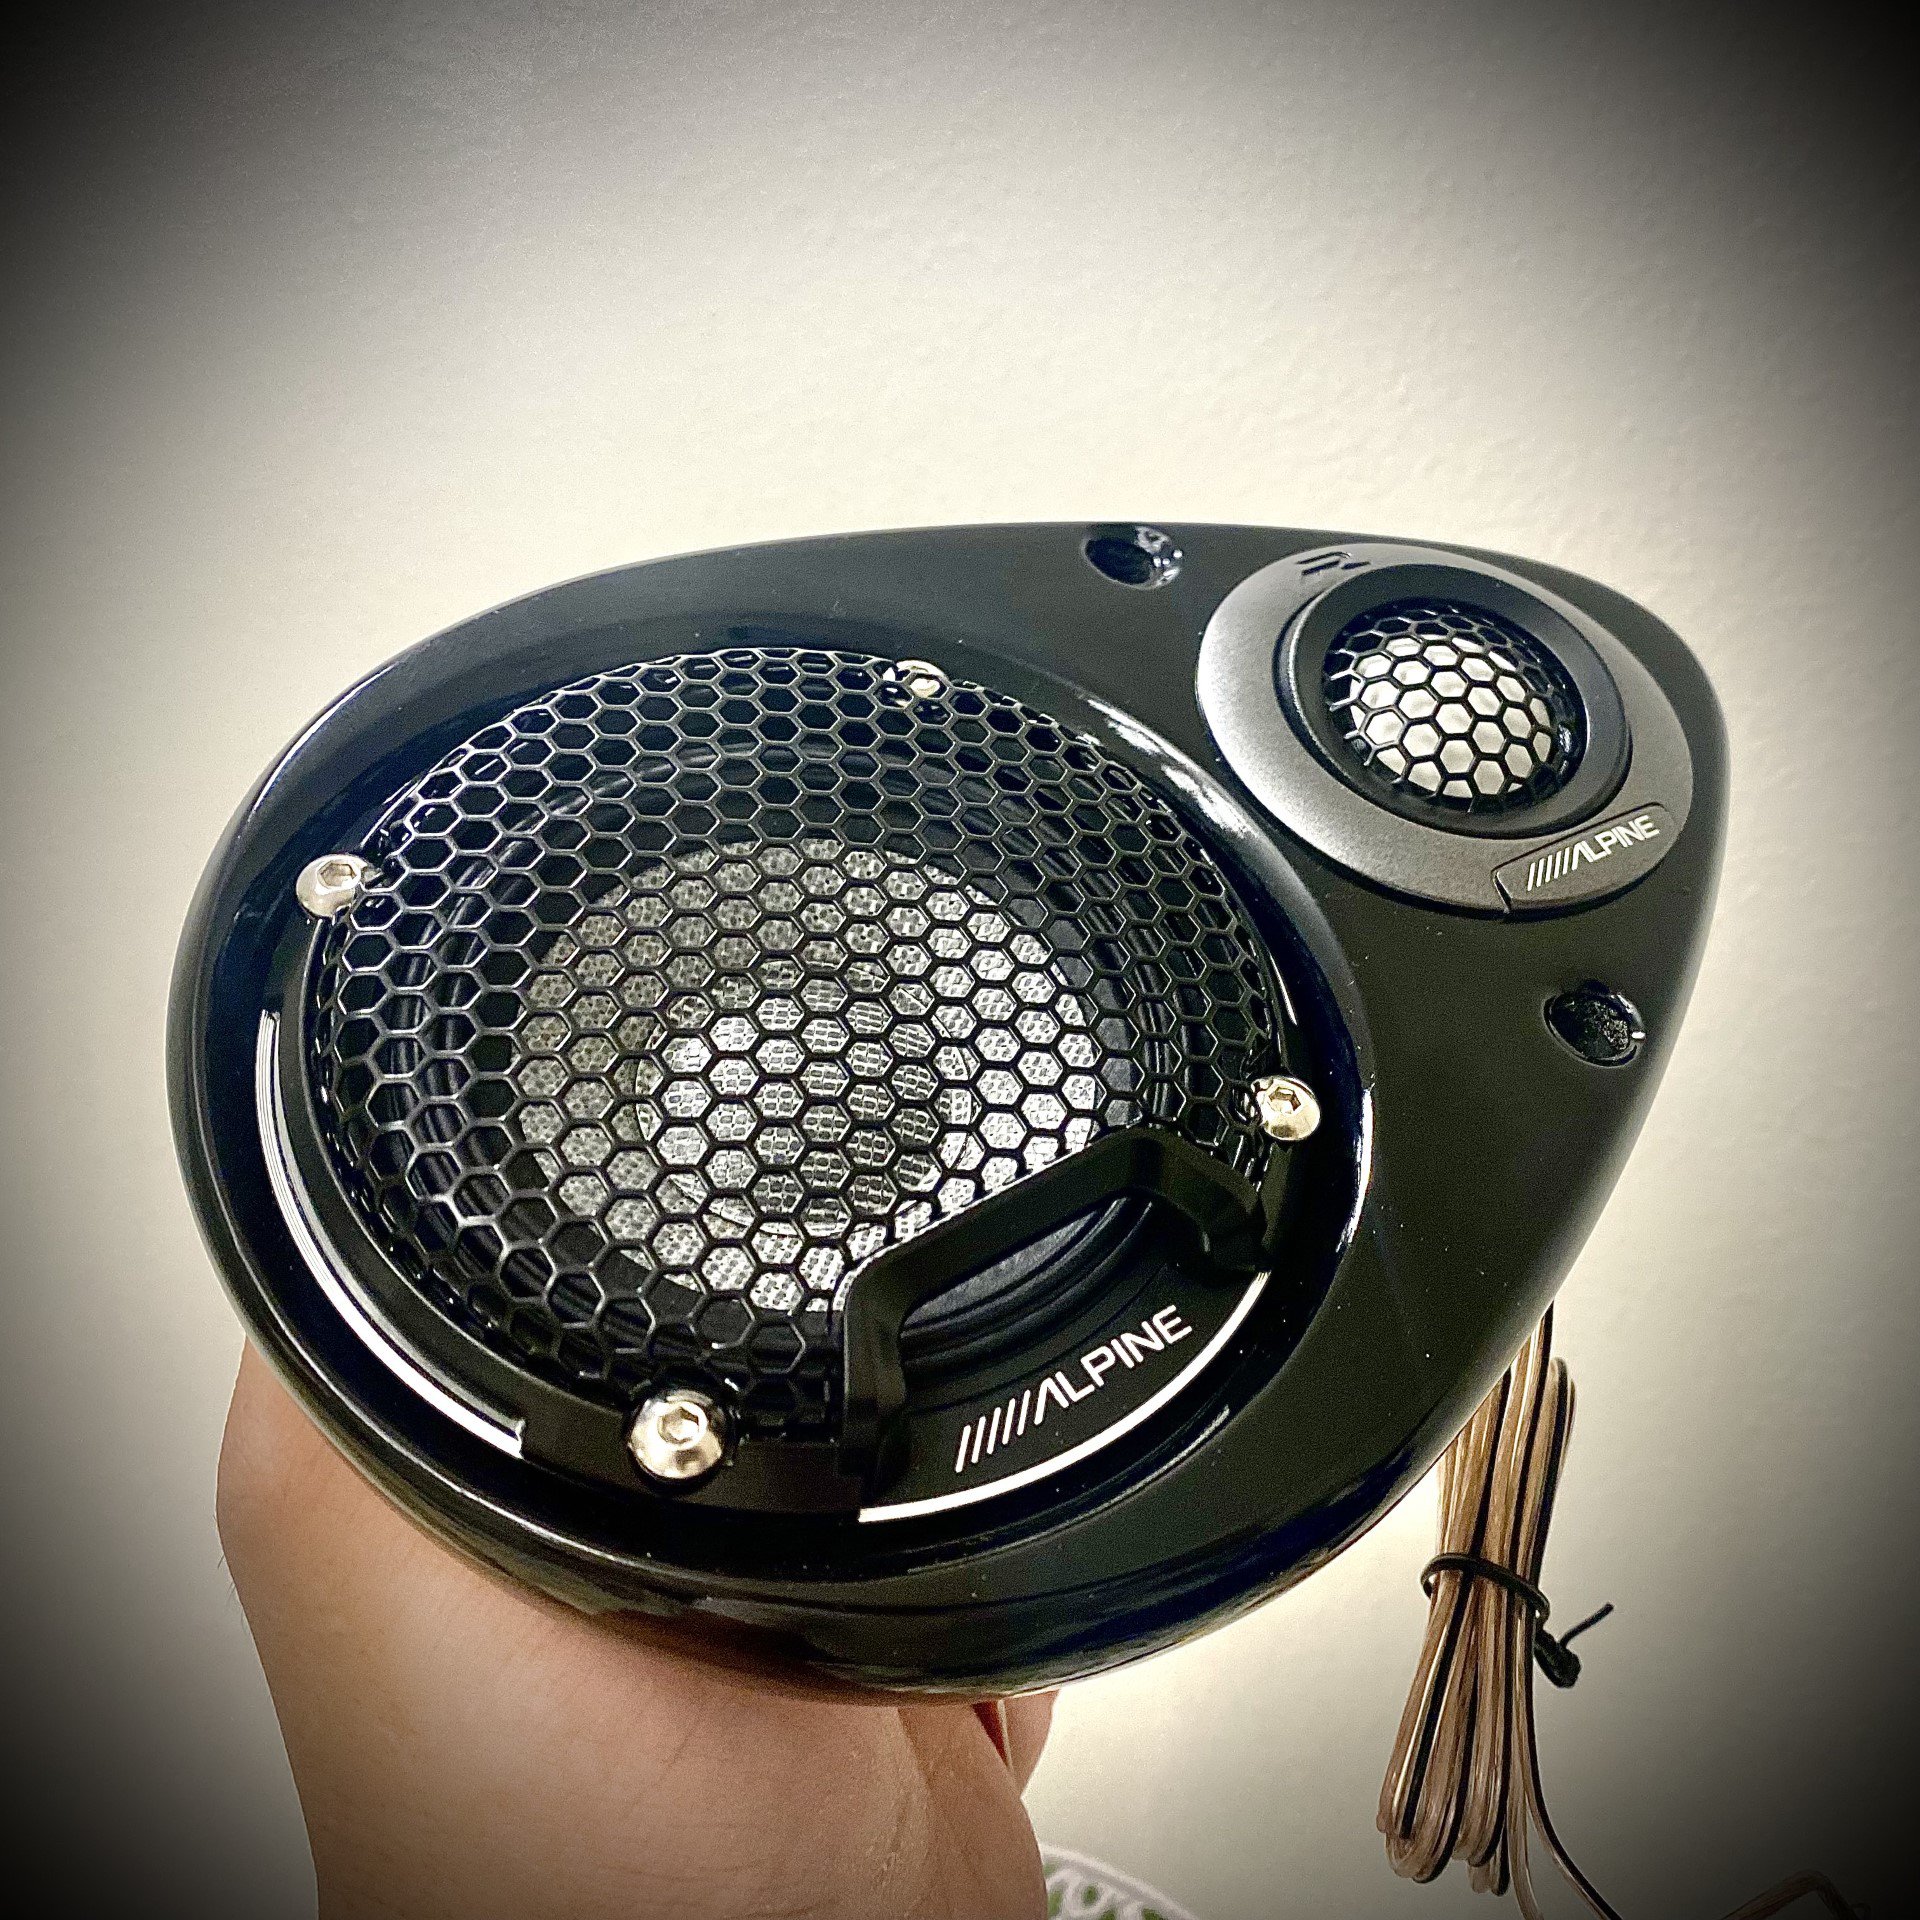
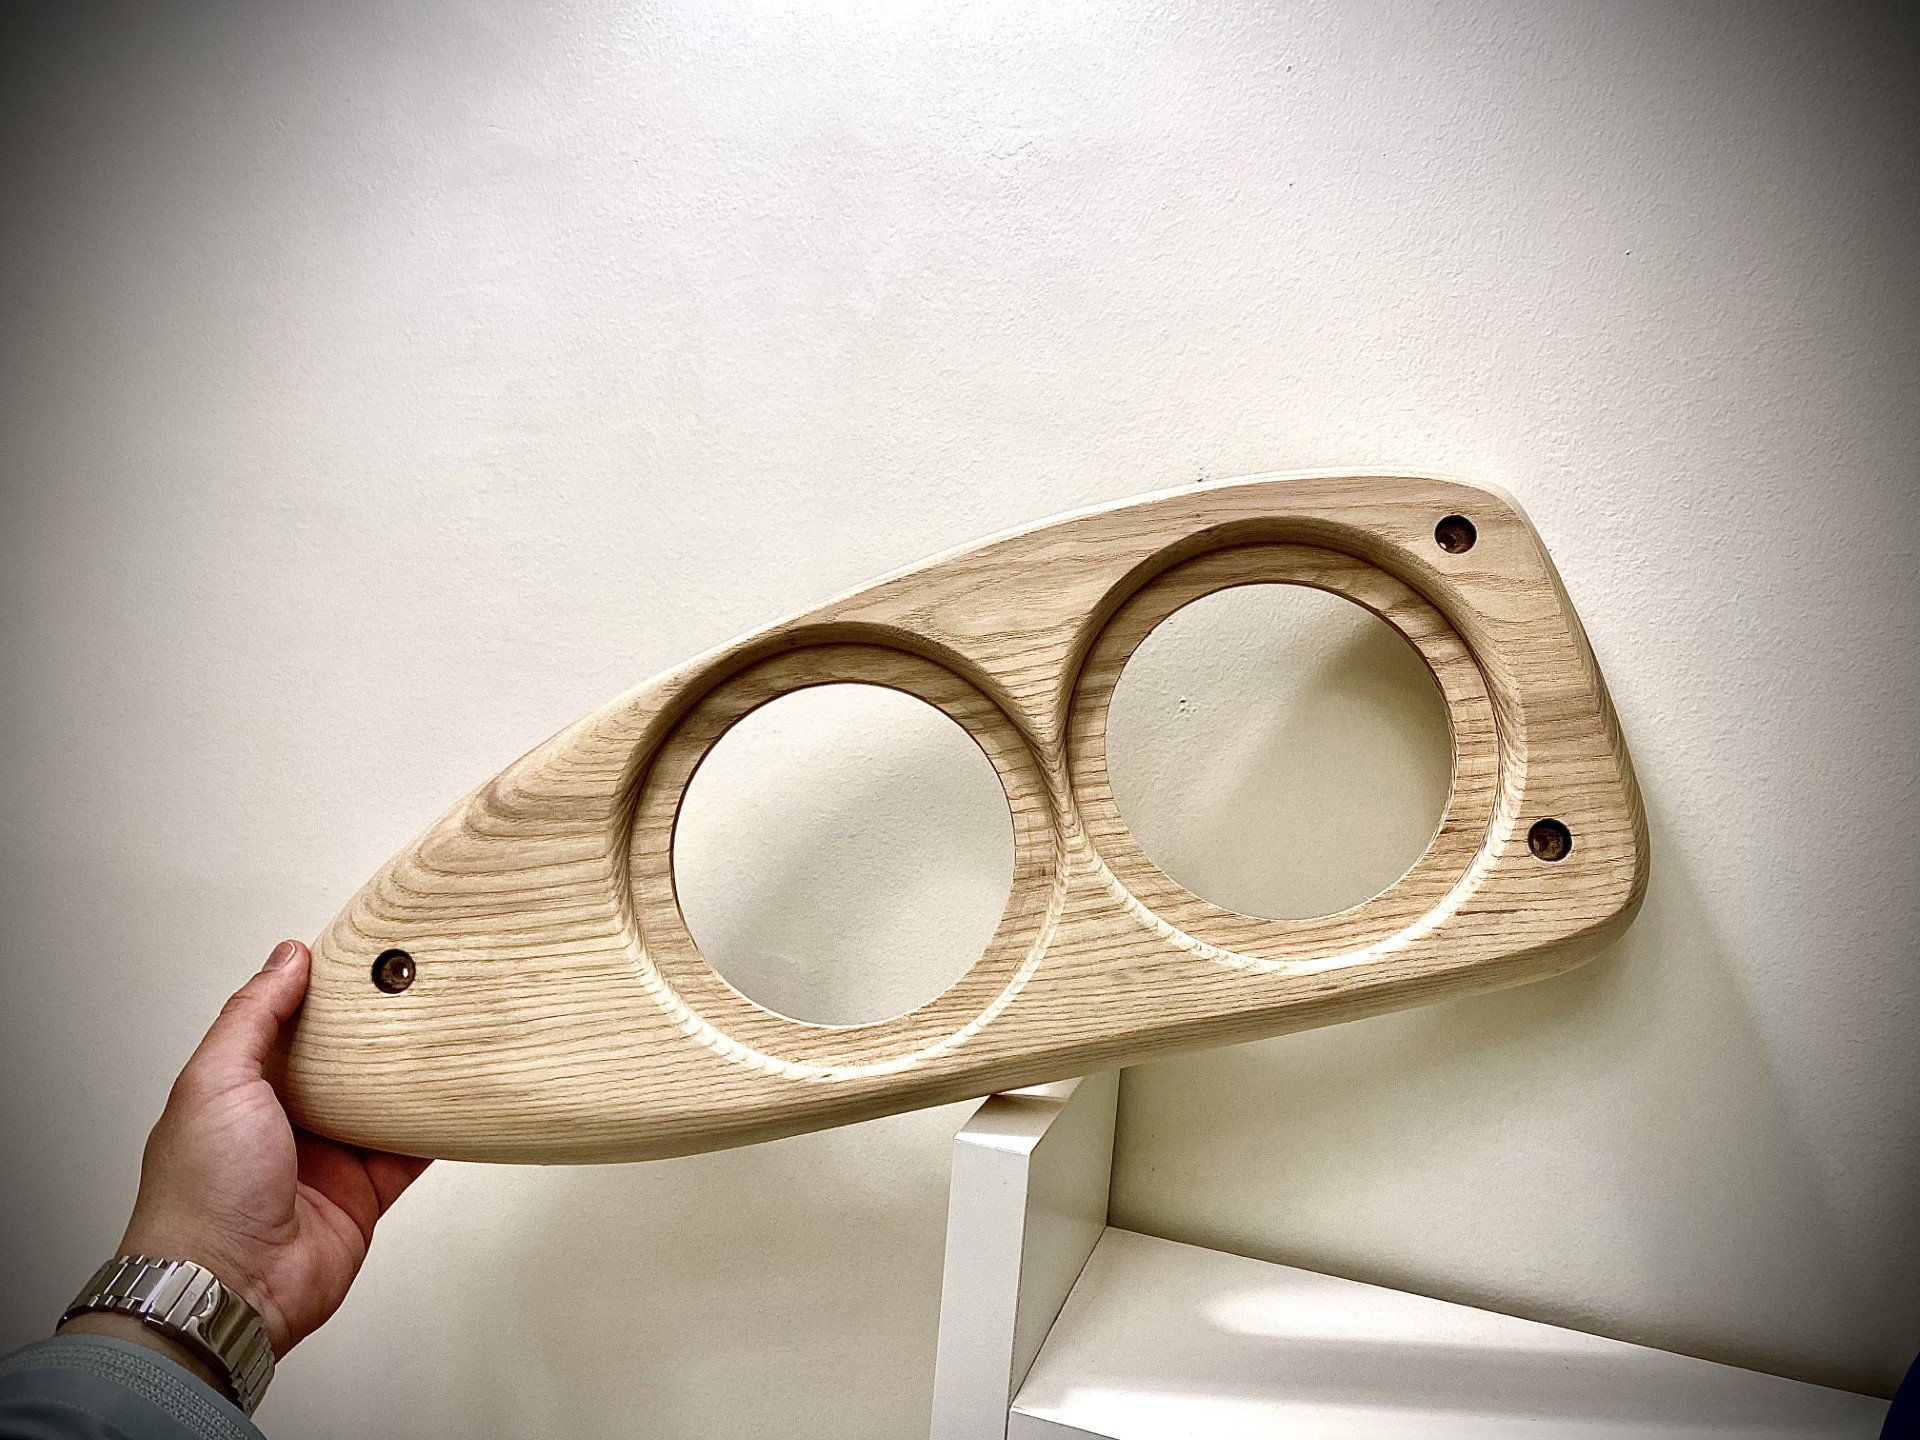
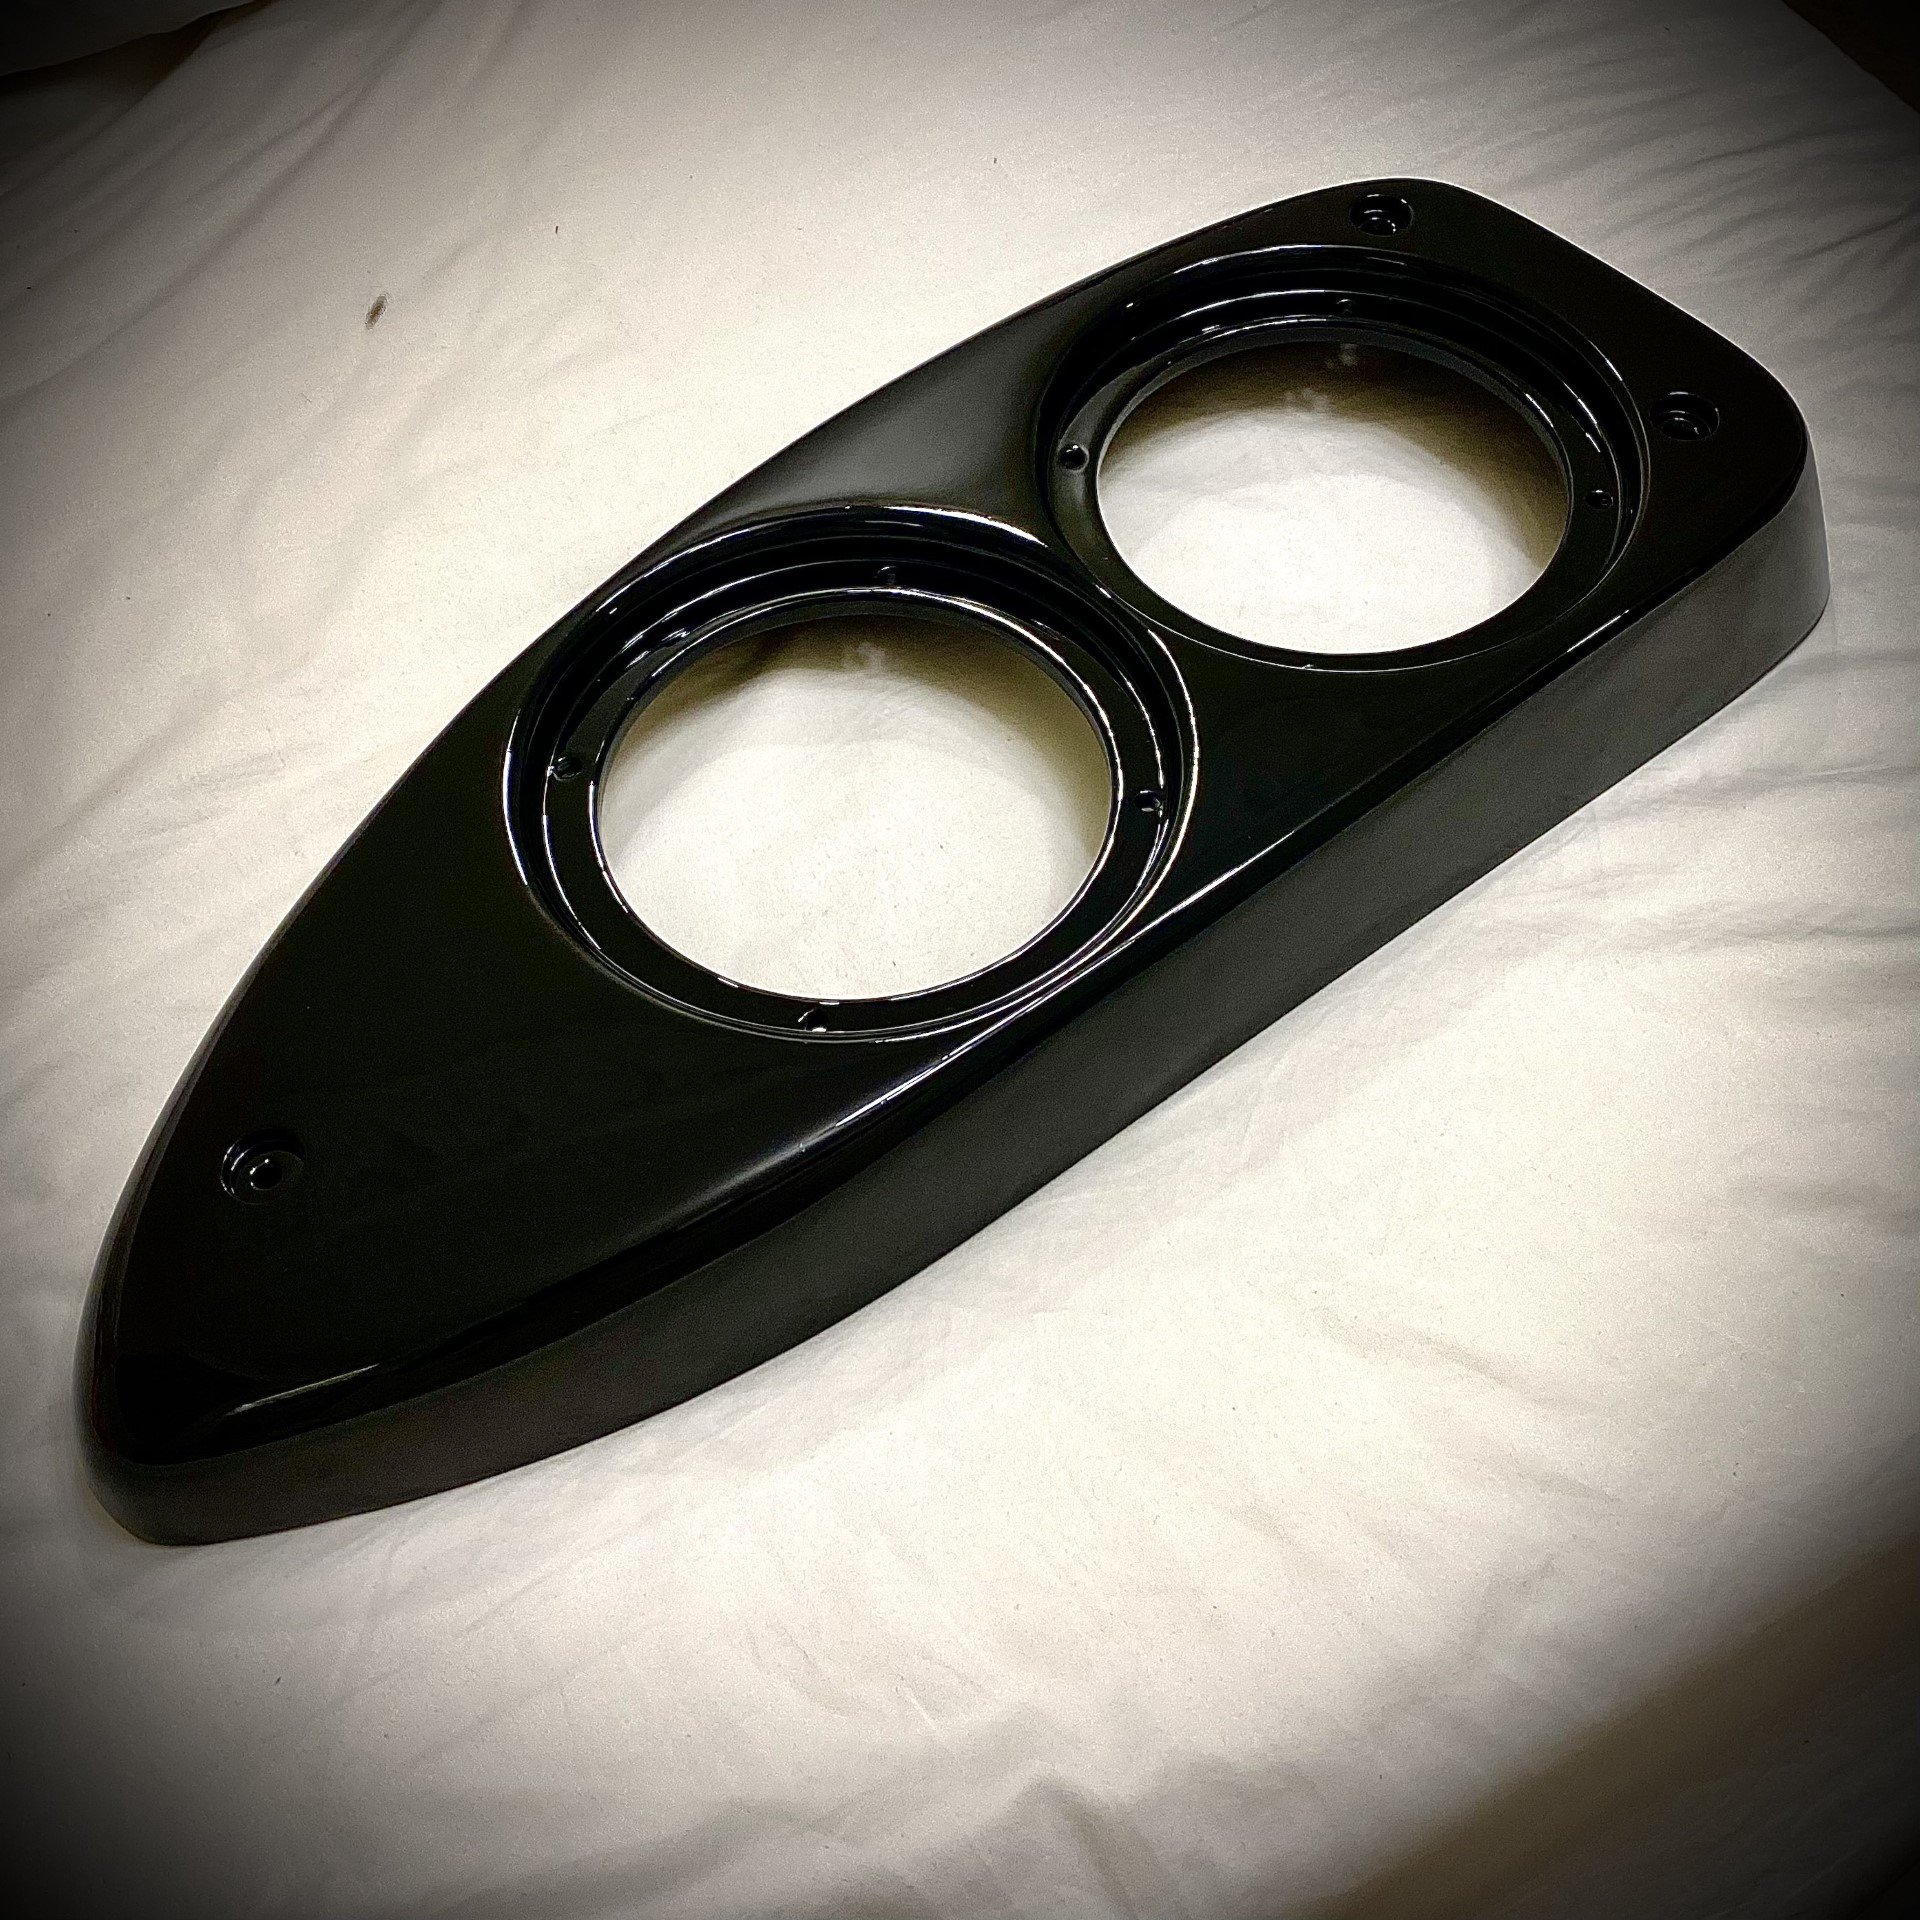
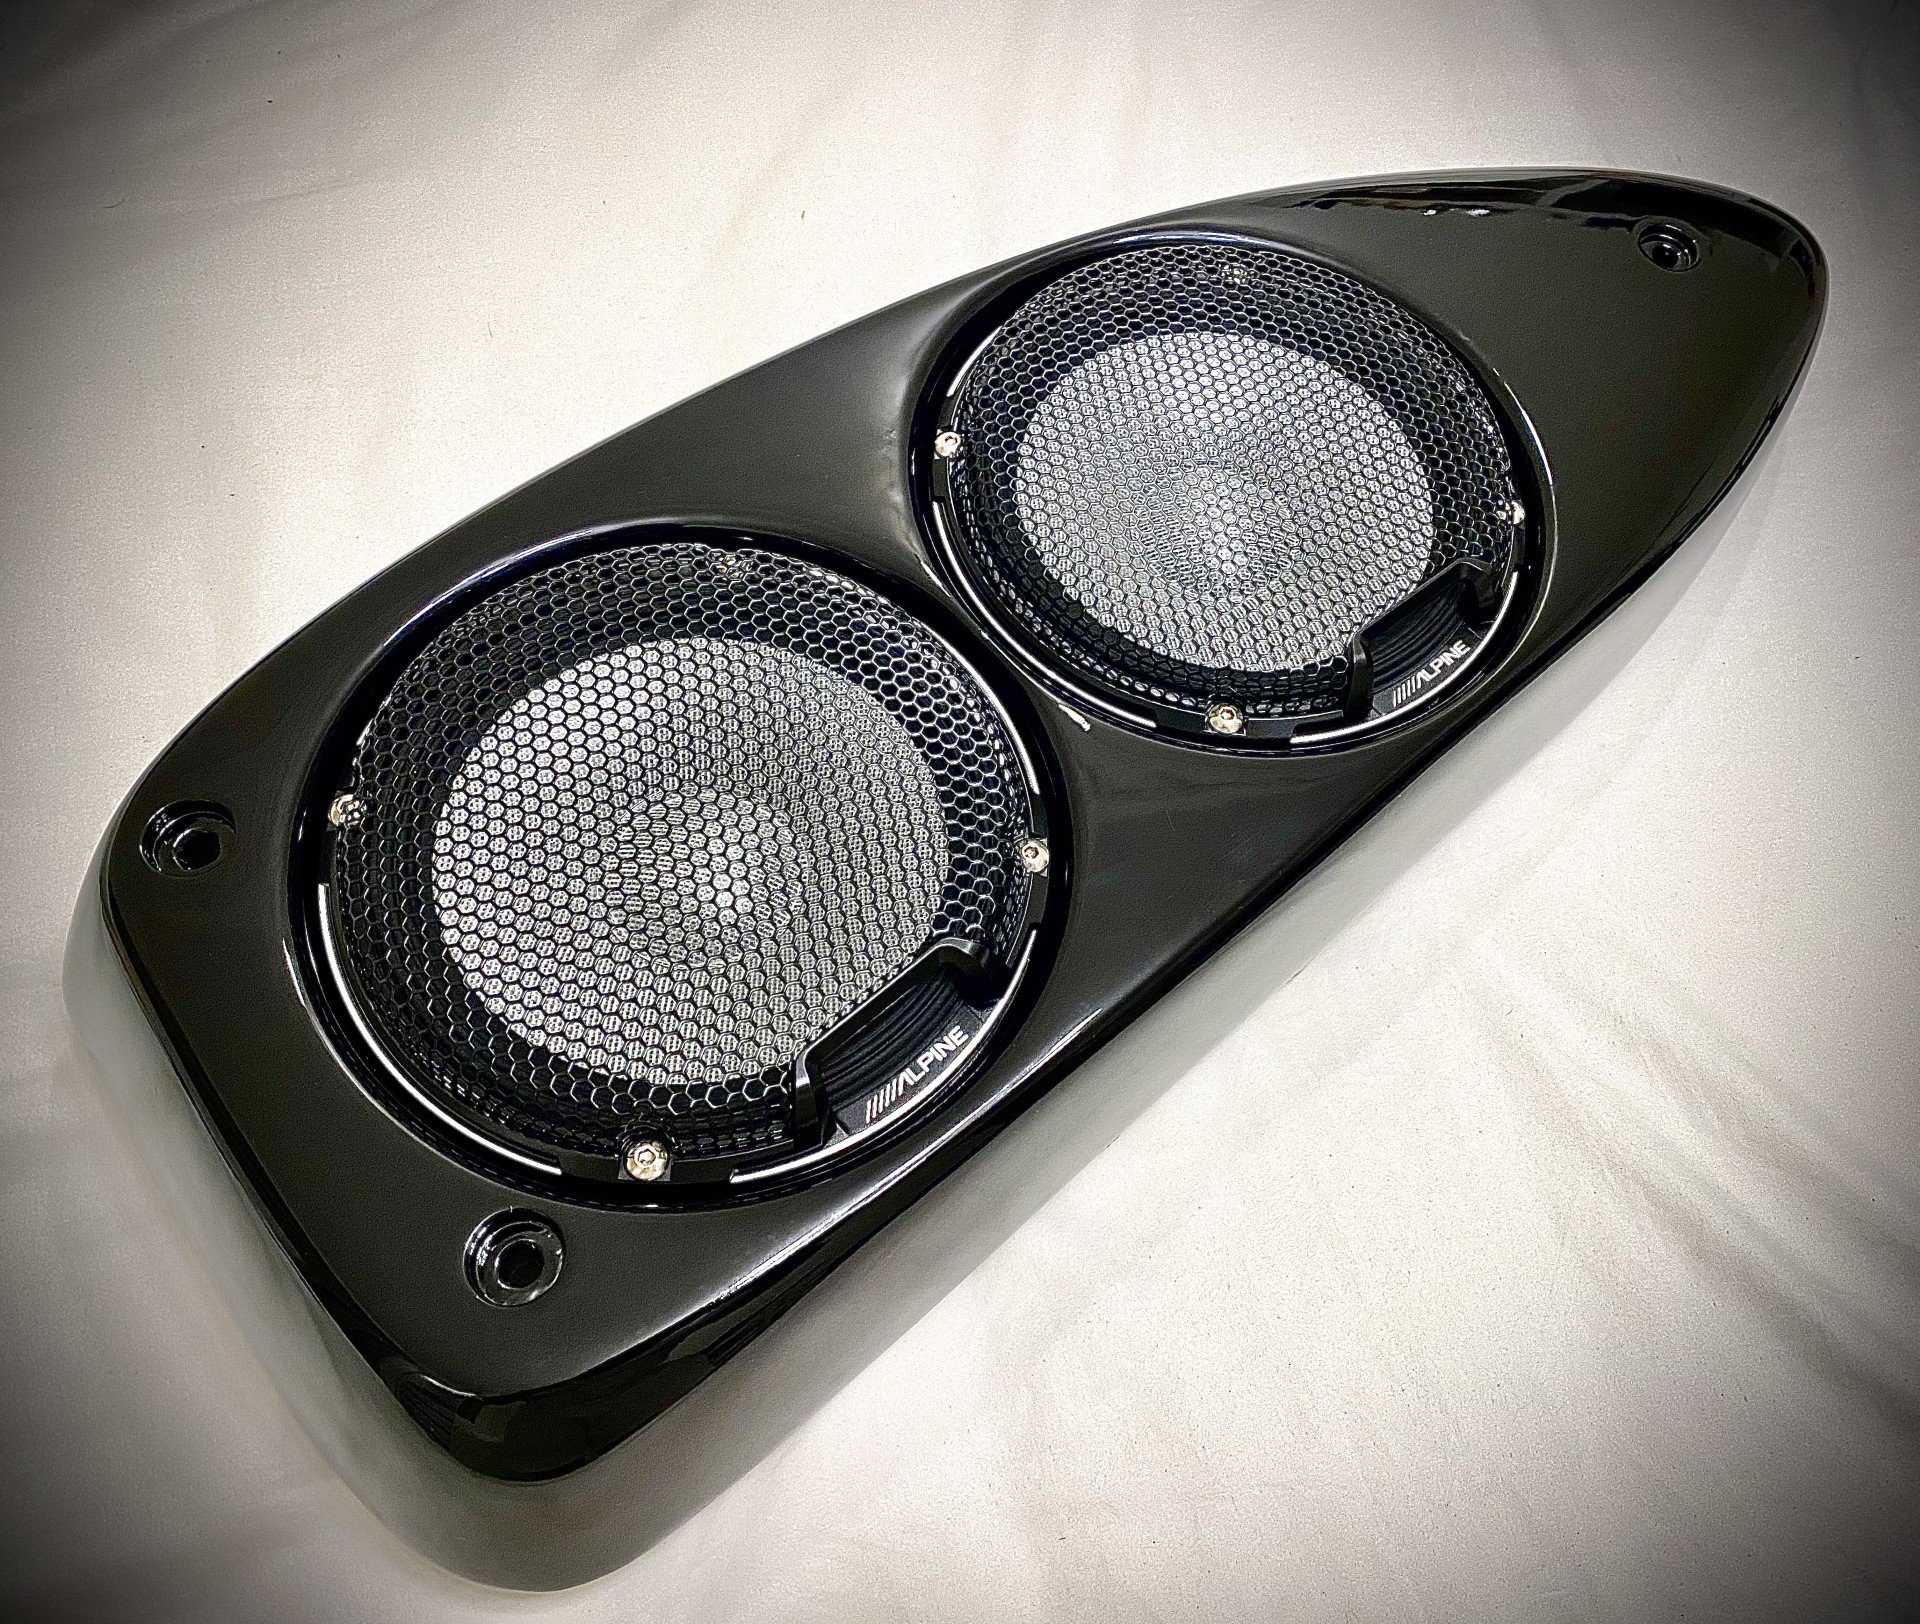
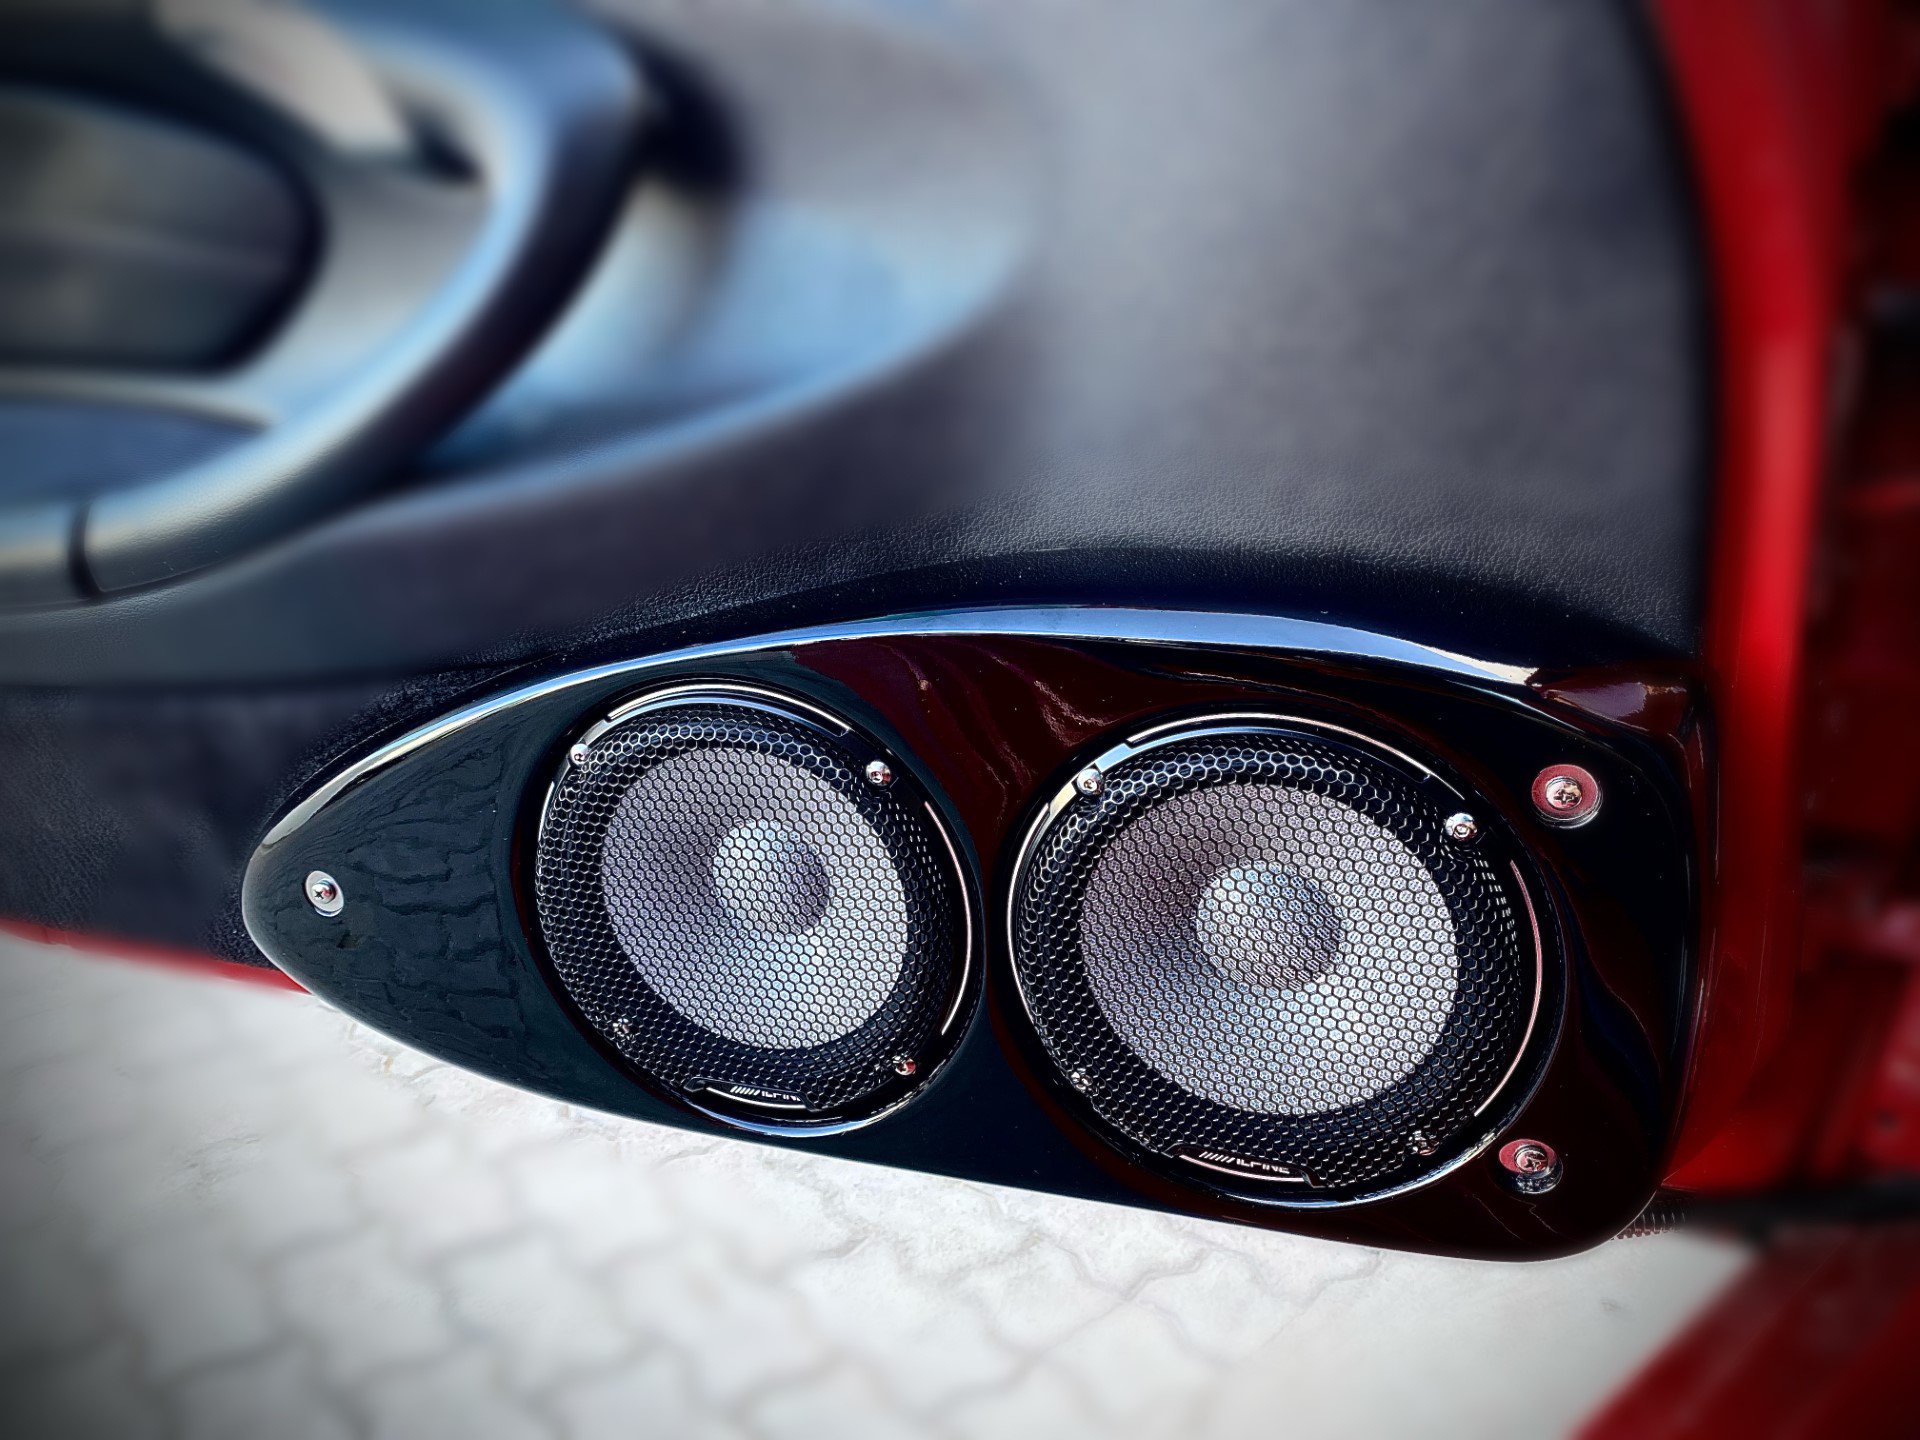
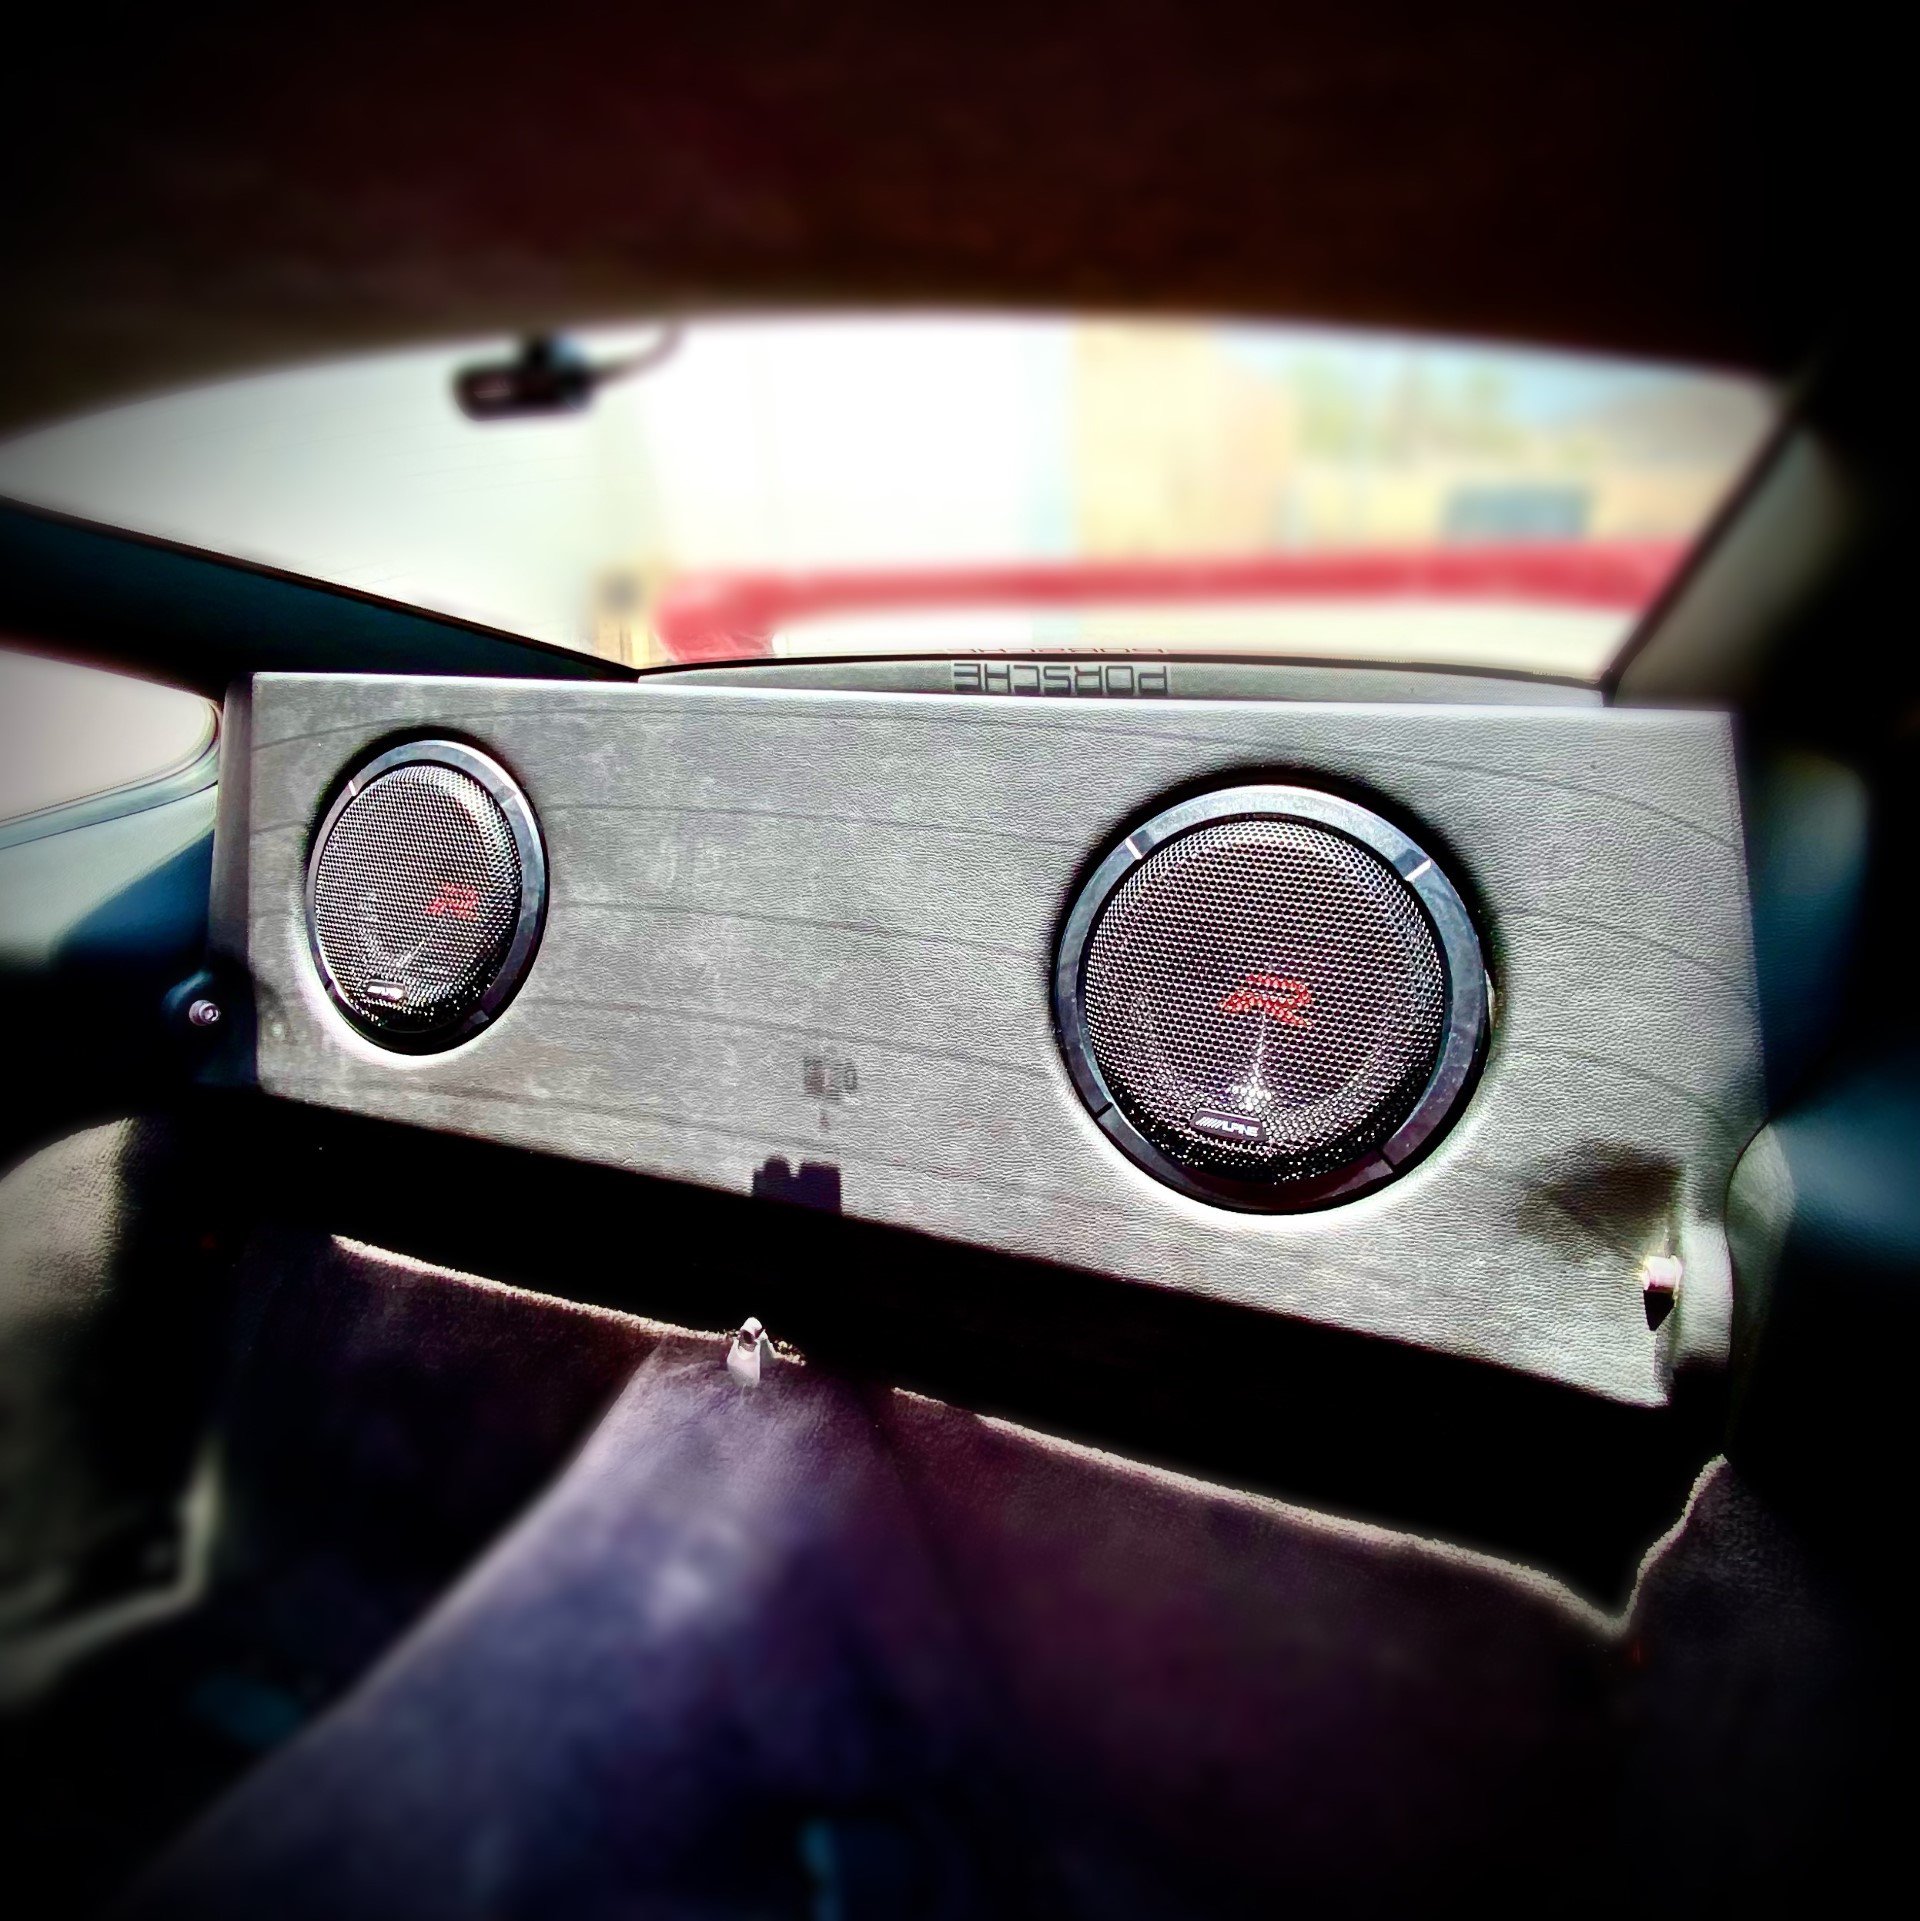
Now with the dash speaker in the 996 are one unit and the only way to fit an aftermarket speakers is to use adapter which will involve cut & glue, and personally I don't prefer this option as the speakers will sit a bit under the dash and speaker installation/removal is difficult, therefor I had to design dash speaker pod that allows for ease installation with great look so I opted for Ash wood for quality and durability:
Wood cutting
Midrange and tweeter fitted and installed
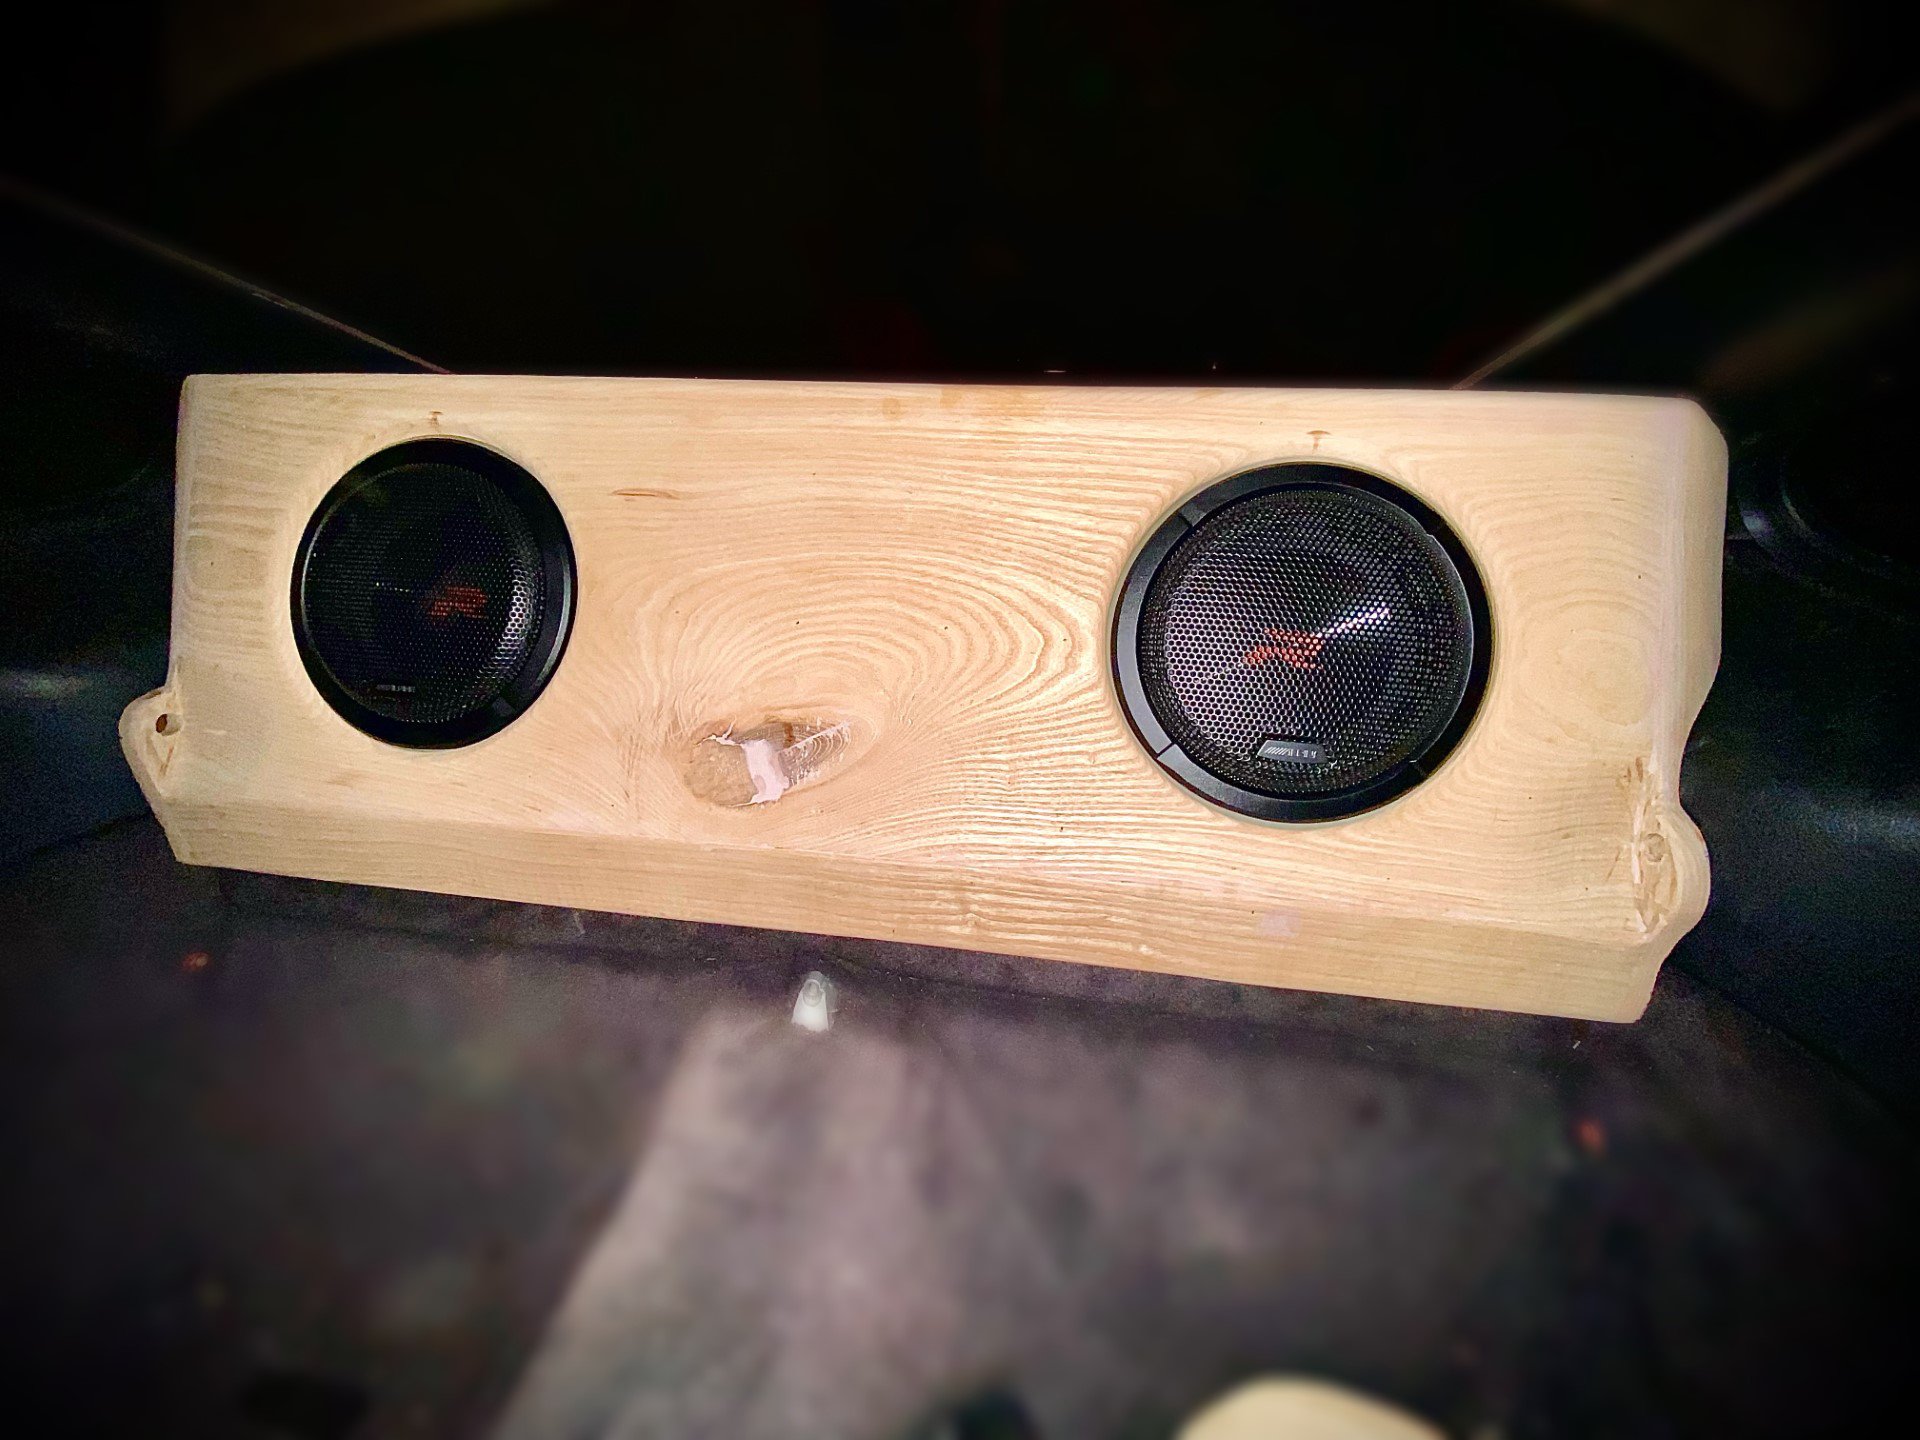
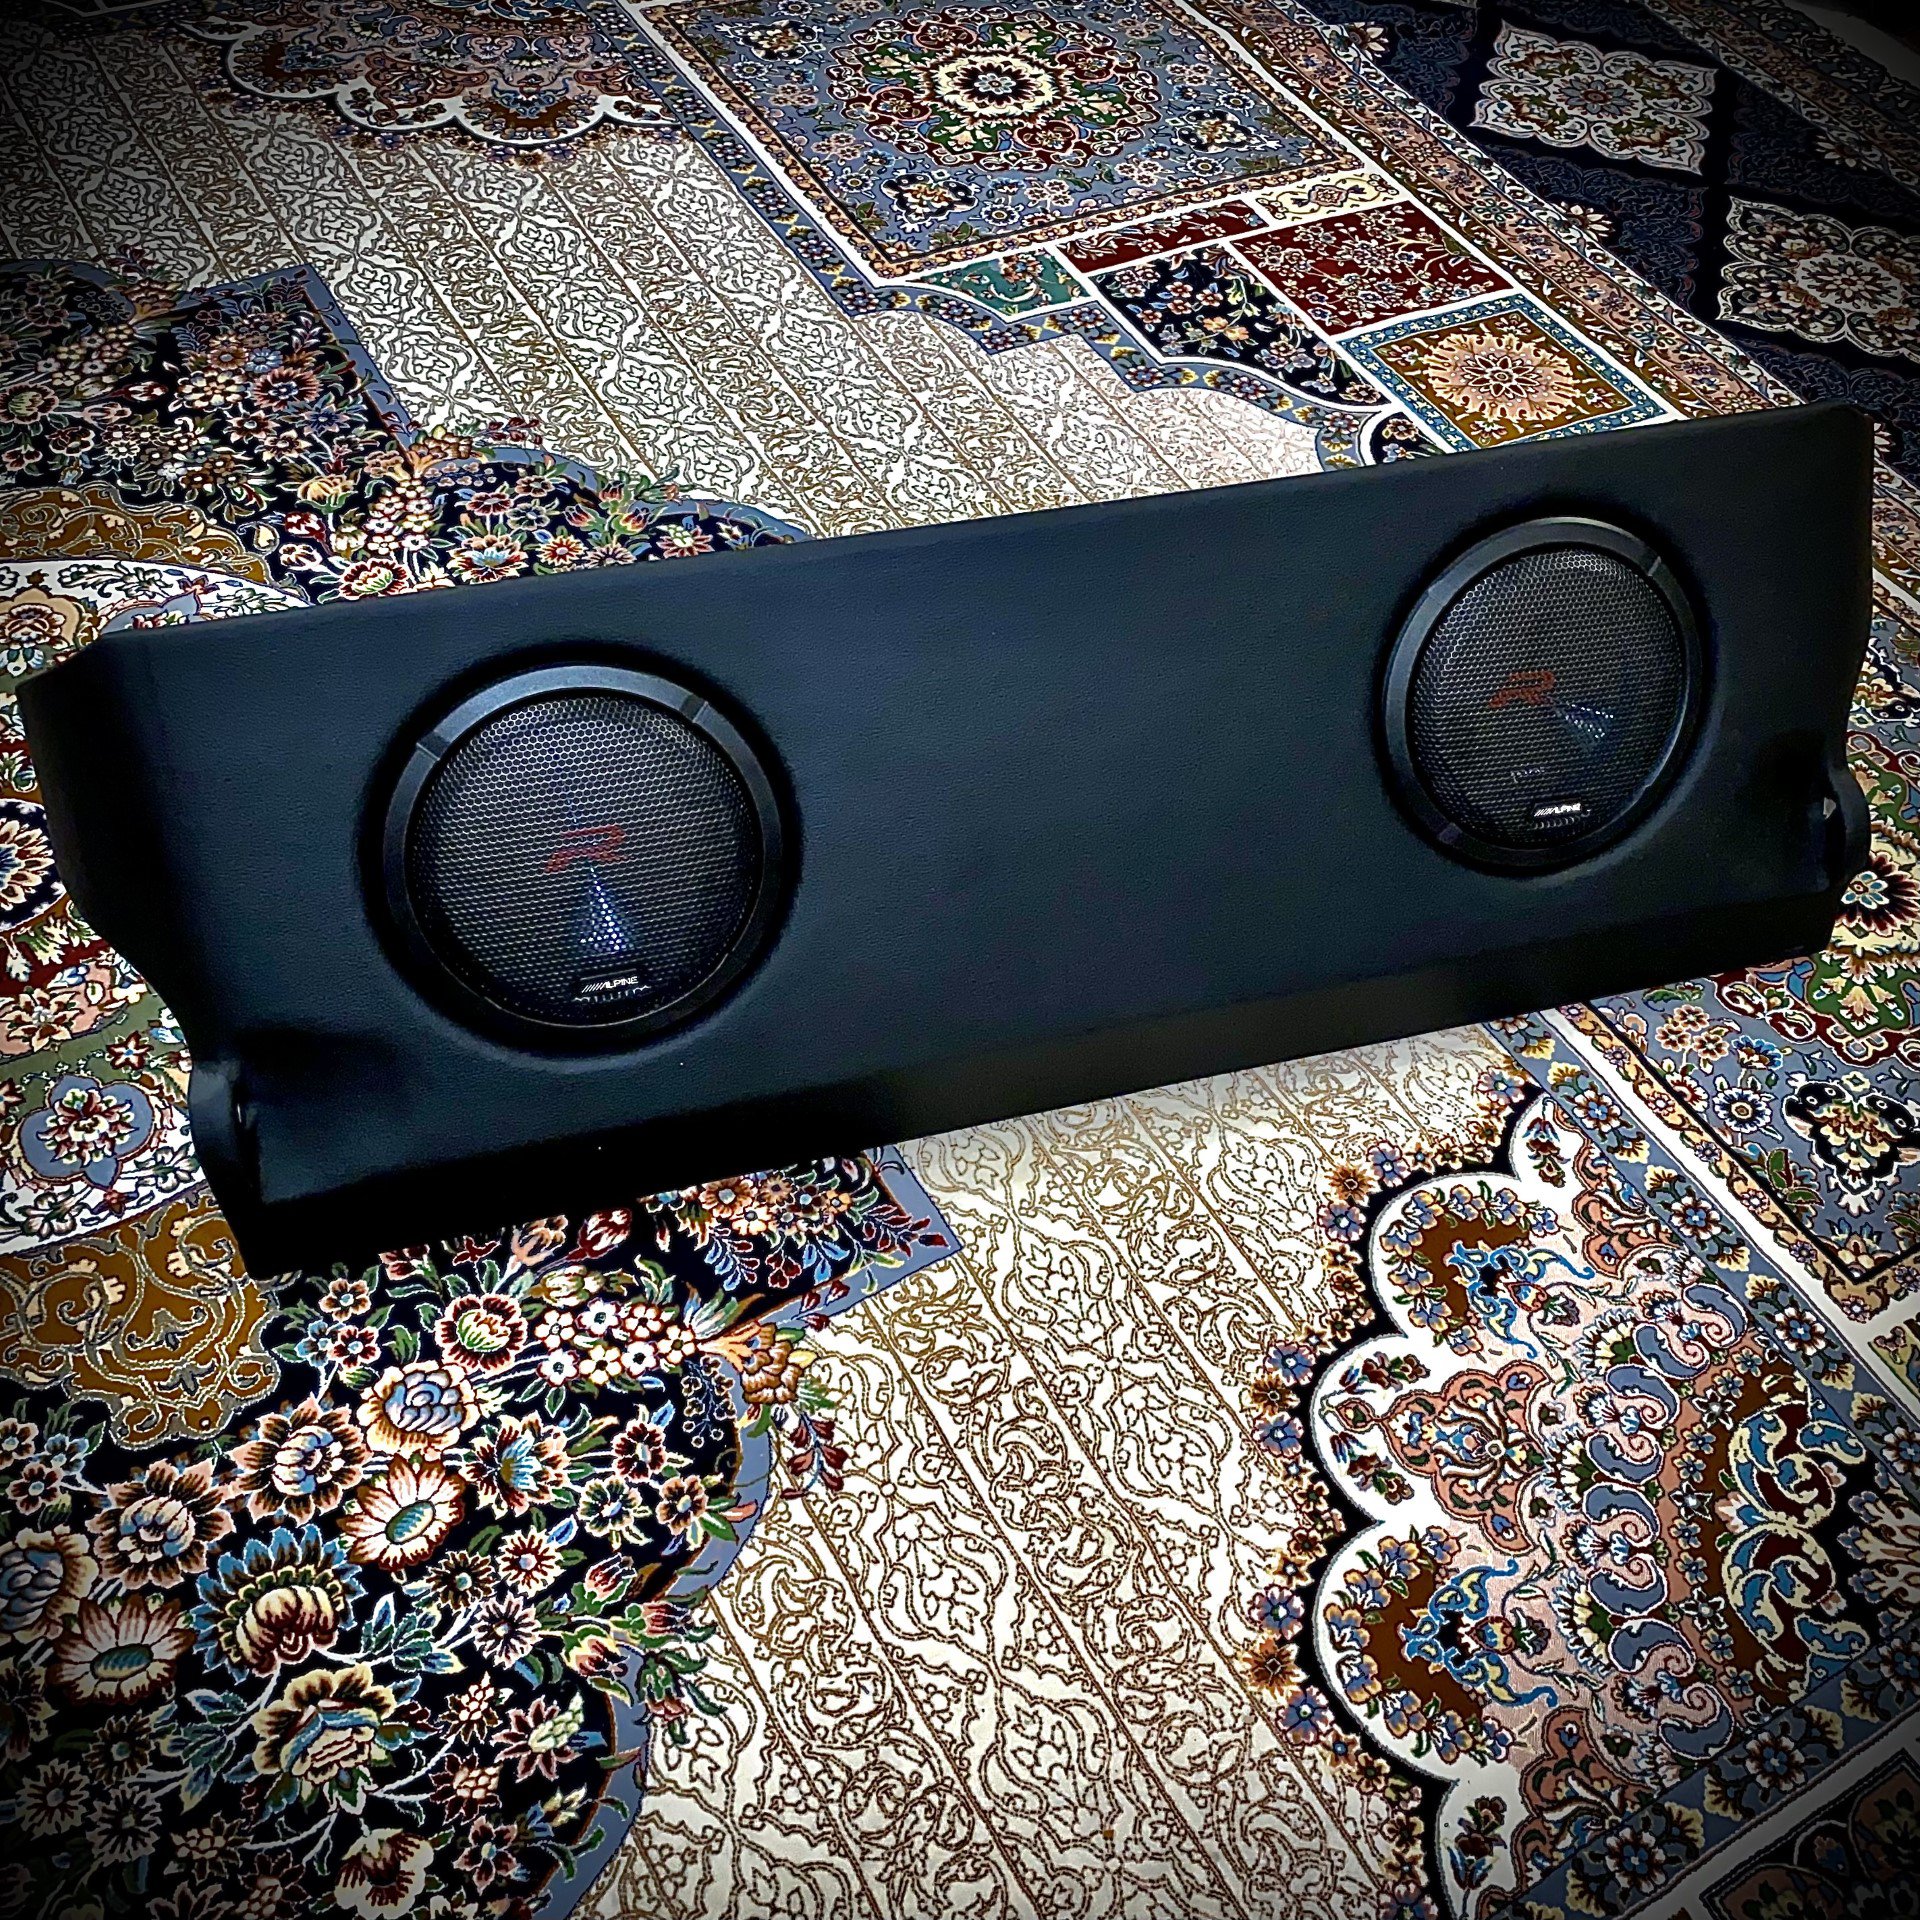
For the door speakers I had to go for a custom pods as I will be fitting two 6.5 inch woofers and these are heavy also the Porsche HPAS pods are made from plastic that would break easily, again Ash wood is used:
Wood cutting
Painted high gloss black
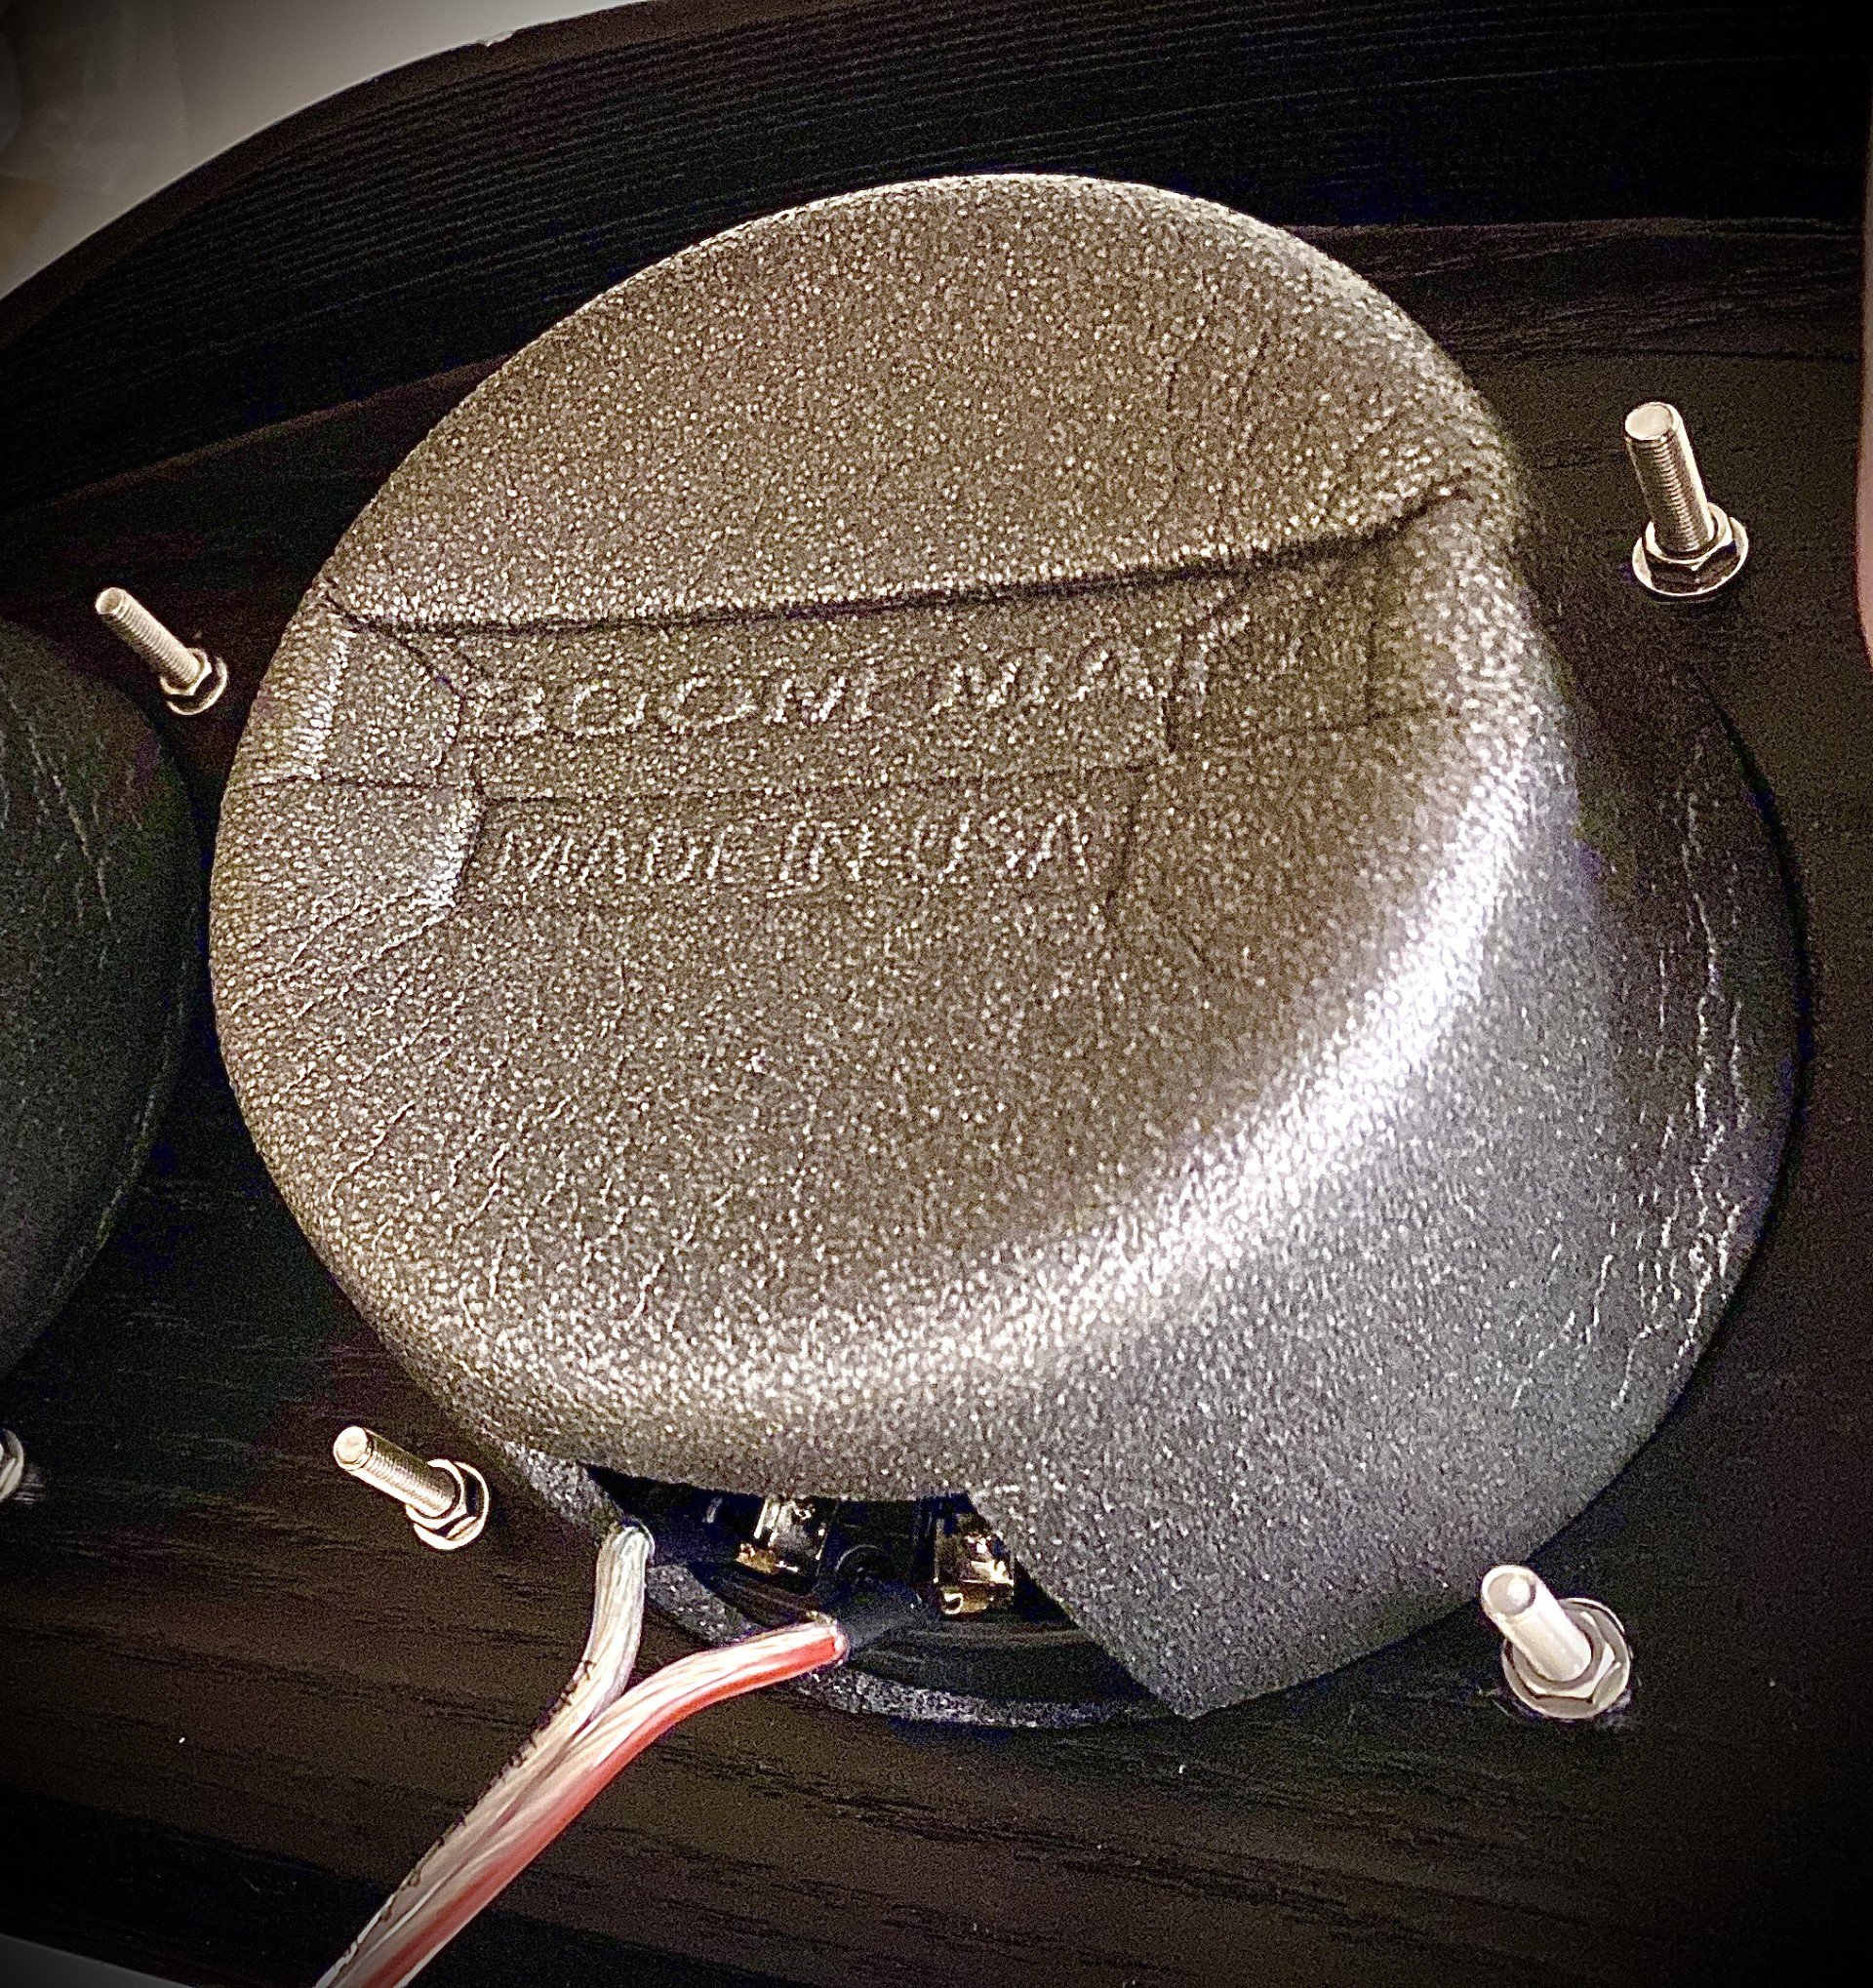
Used Boom mat speaker baffles to protect the speakers
And the pods are installed
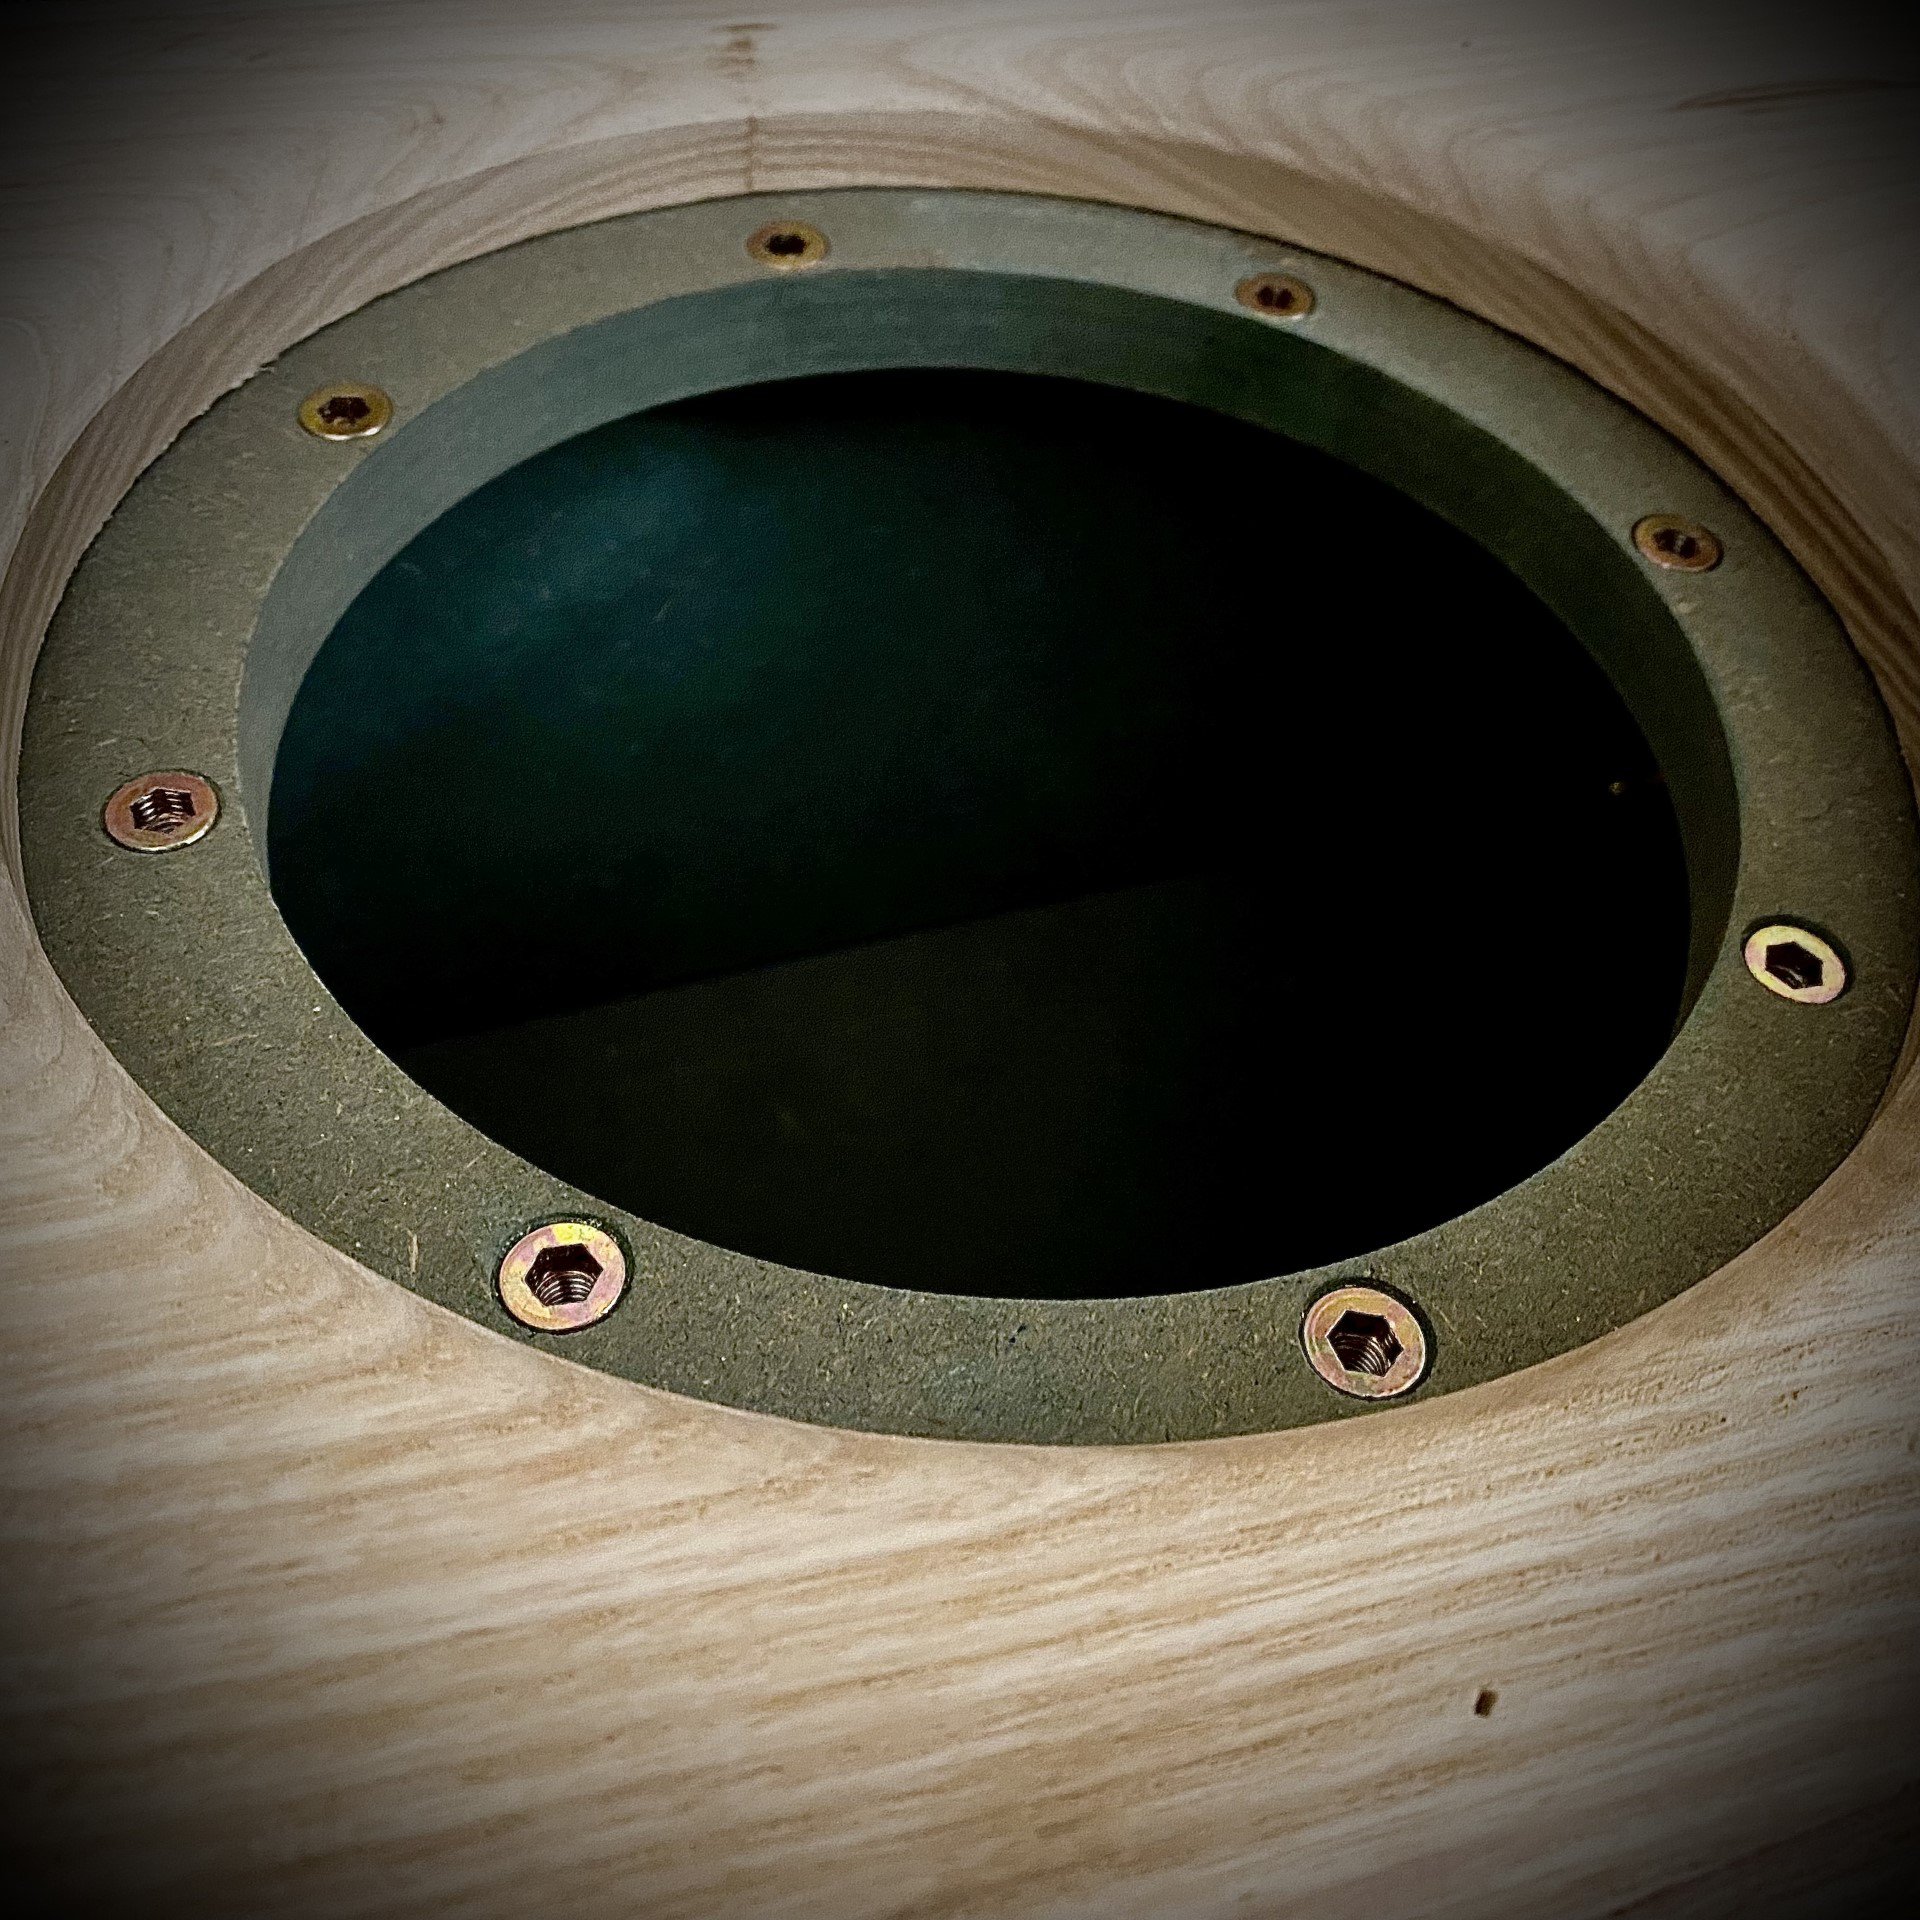
With the 3-way component installed now we switch to the subwoofer where a custom subwoofer box is made, utilized 18mm waterproof MDF and for the perfect fit and look I had to use Ash wood then cover it up with leather.
Threaded insert for ease of installation and removal in future.
Stainless Steel screws to secure the subwoofer to the box
Rear seat delete so I'm not concerned about them.
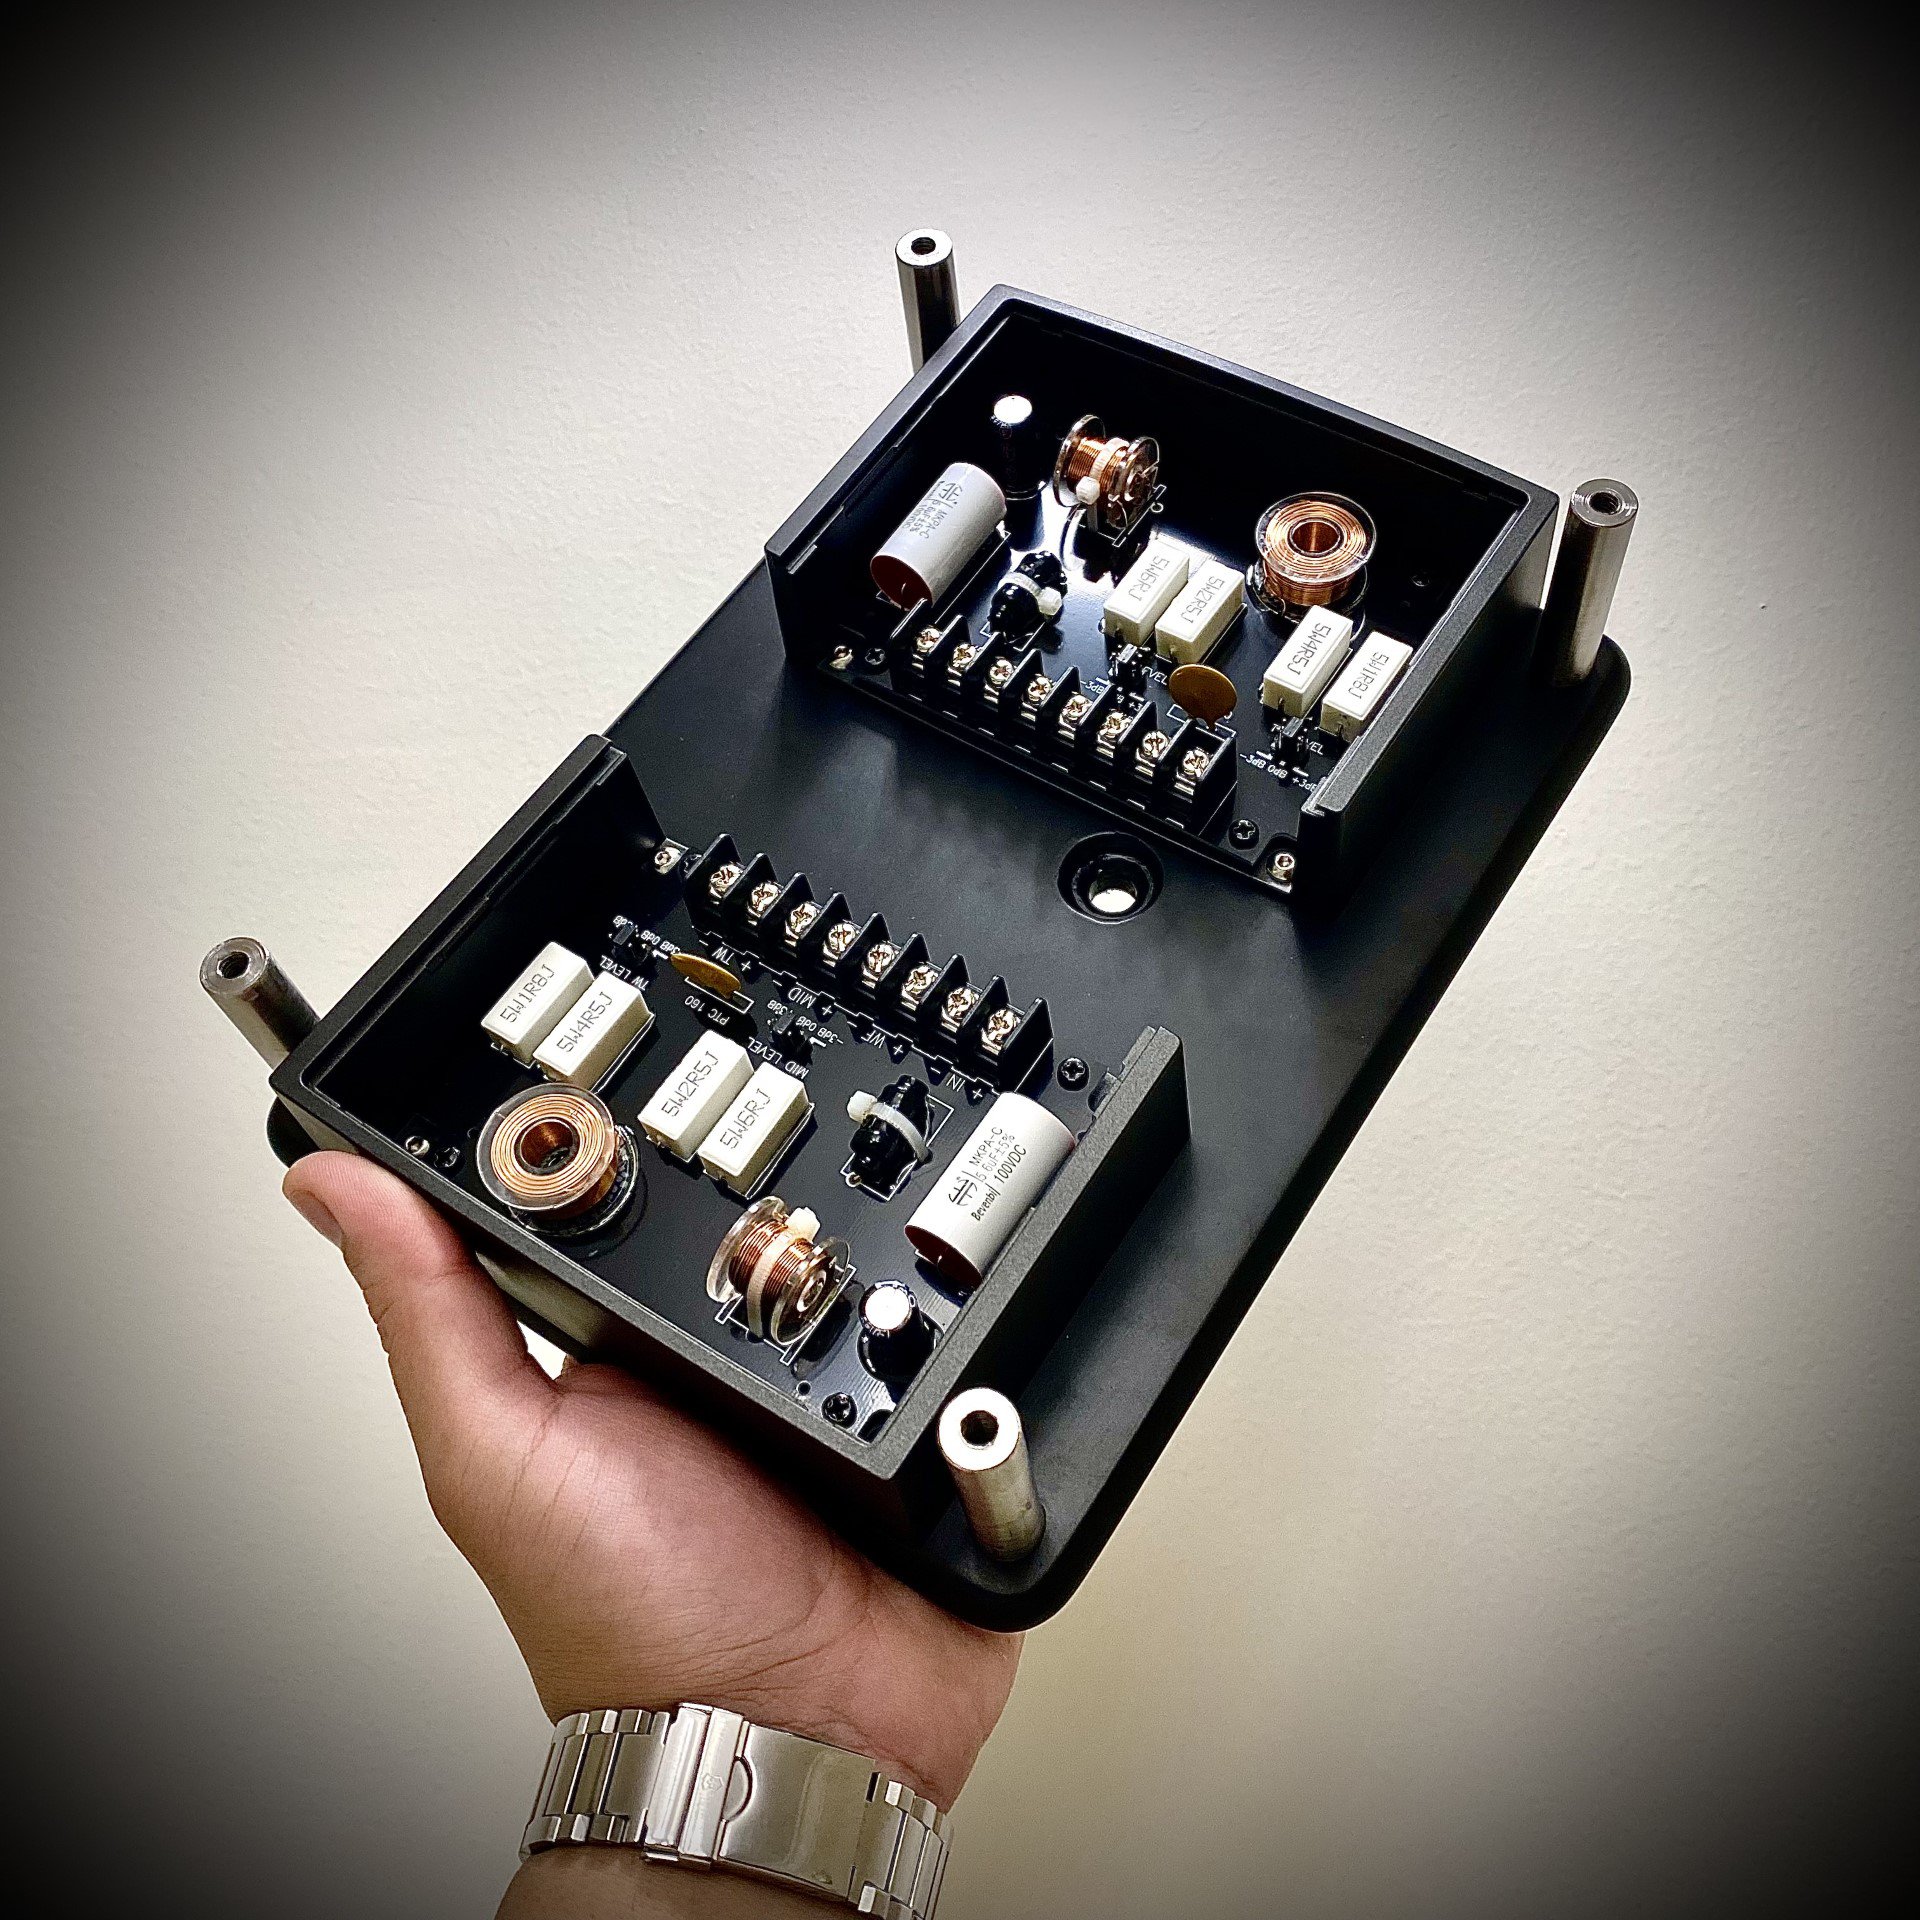
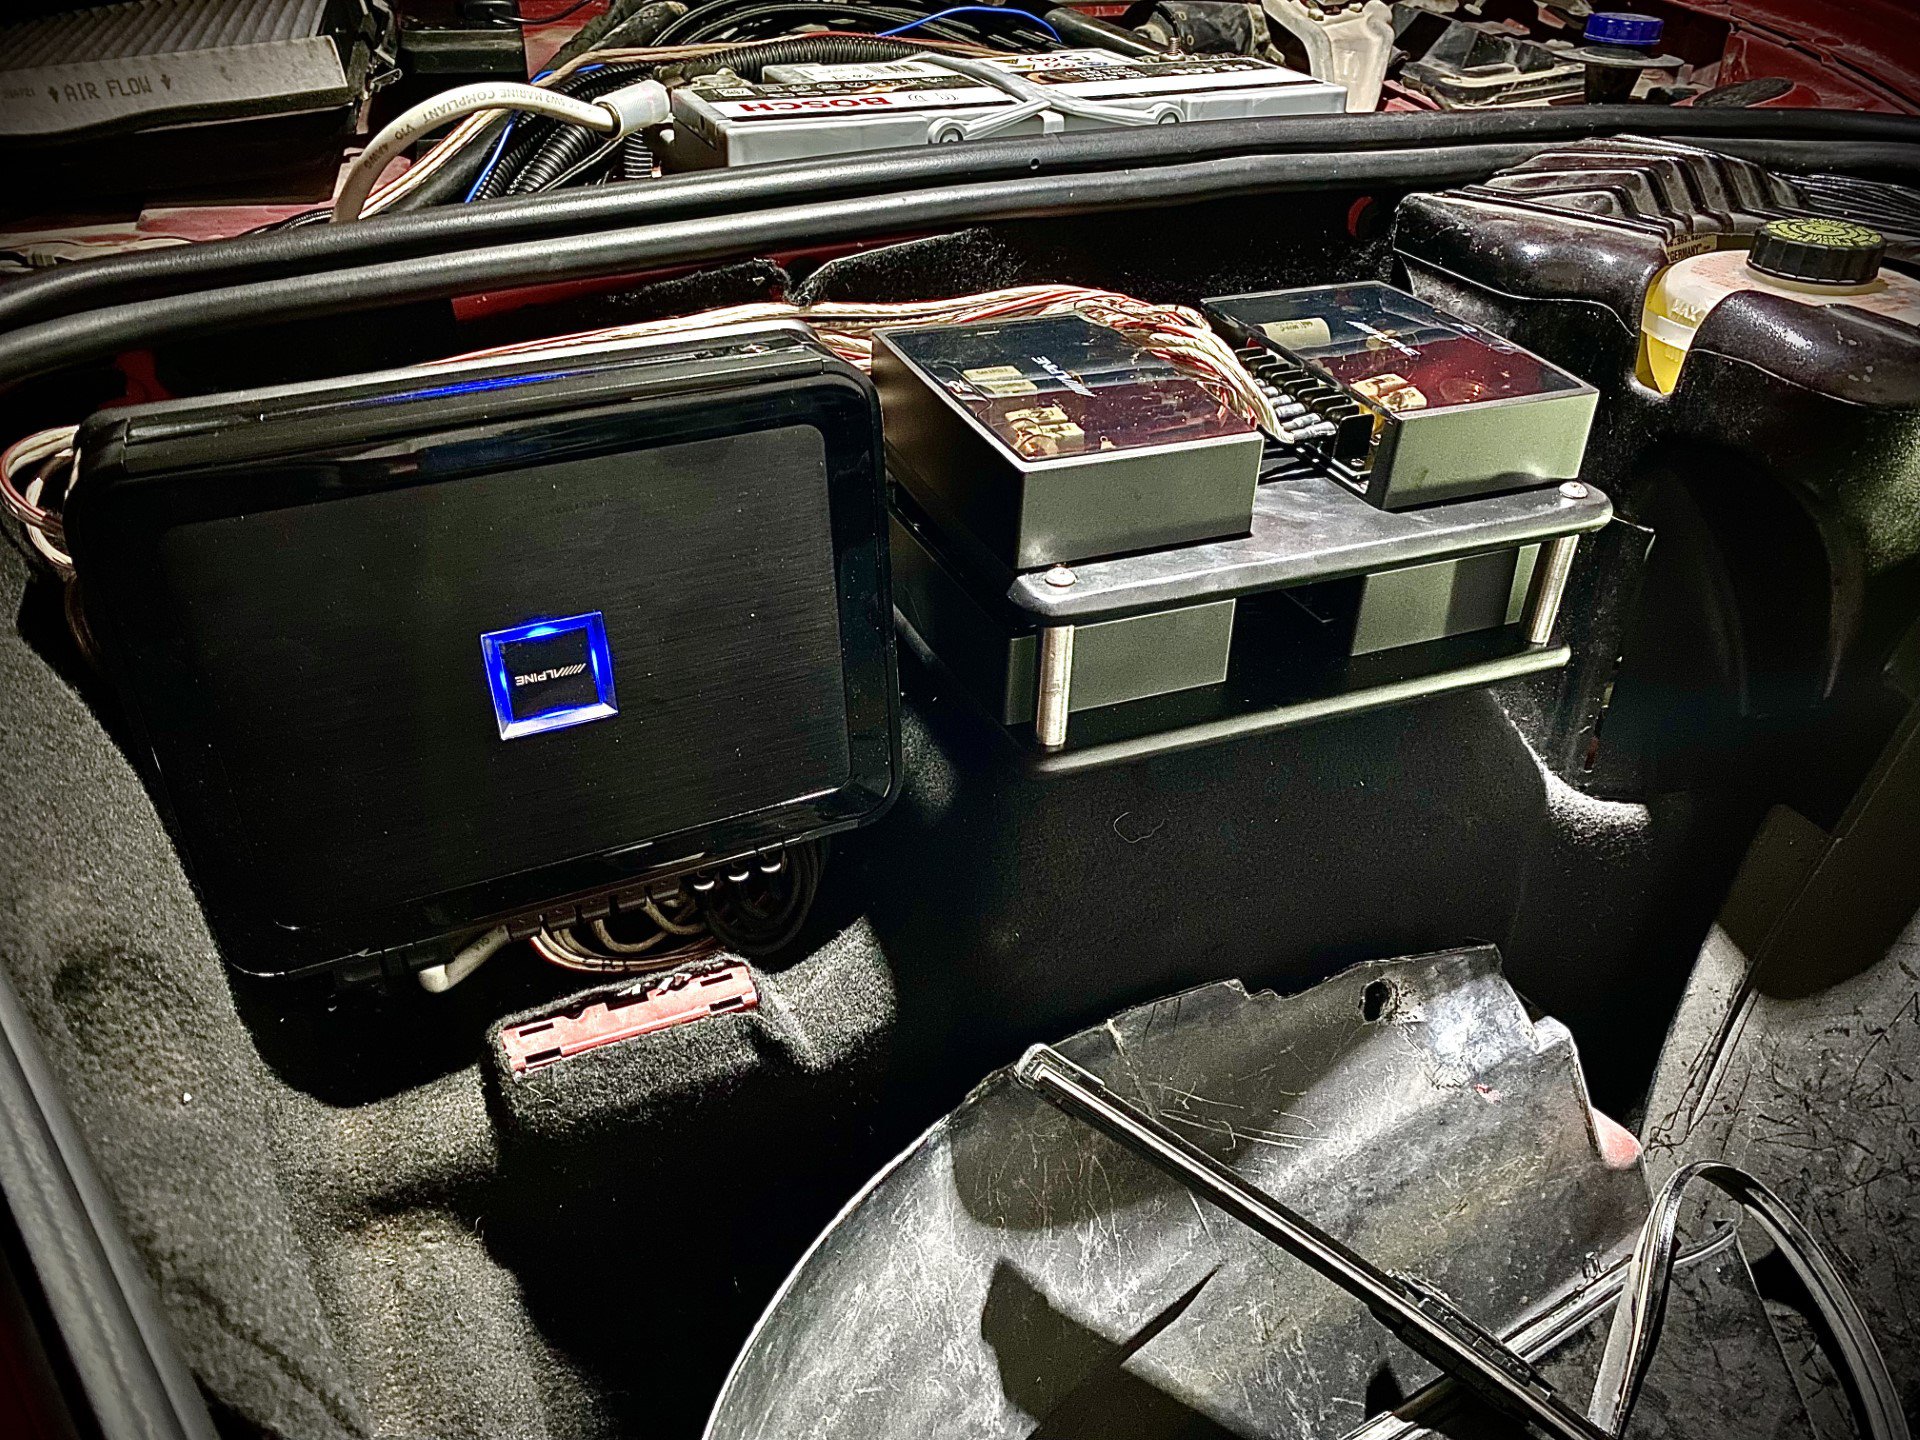
Now we move to the amplifier and crossover network setup. The amp:
Crossover network
Crossover rack
Amp and crossover rack installed
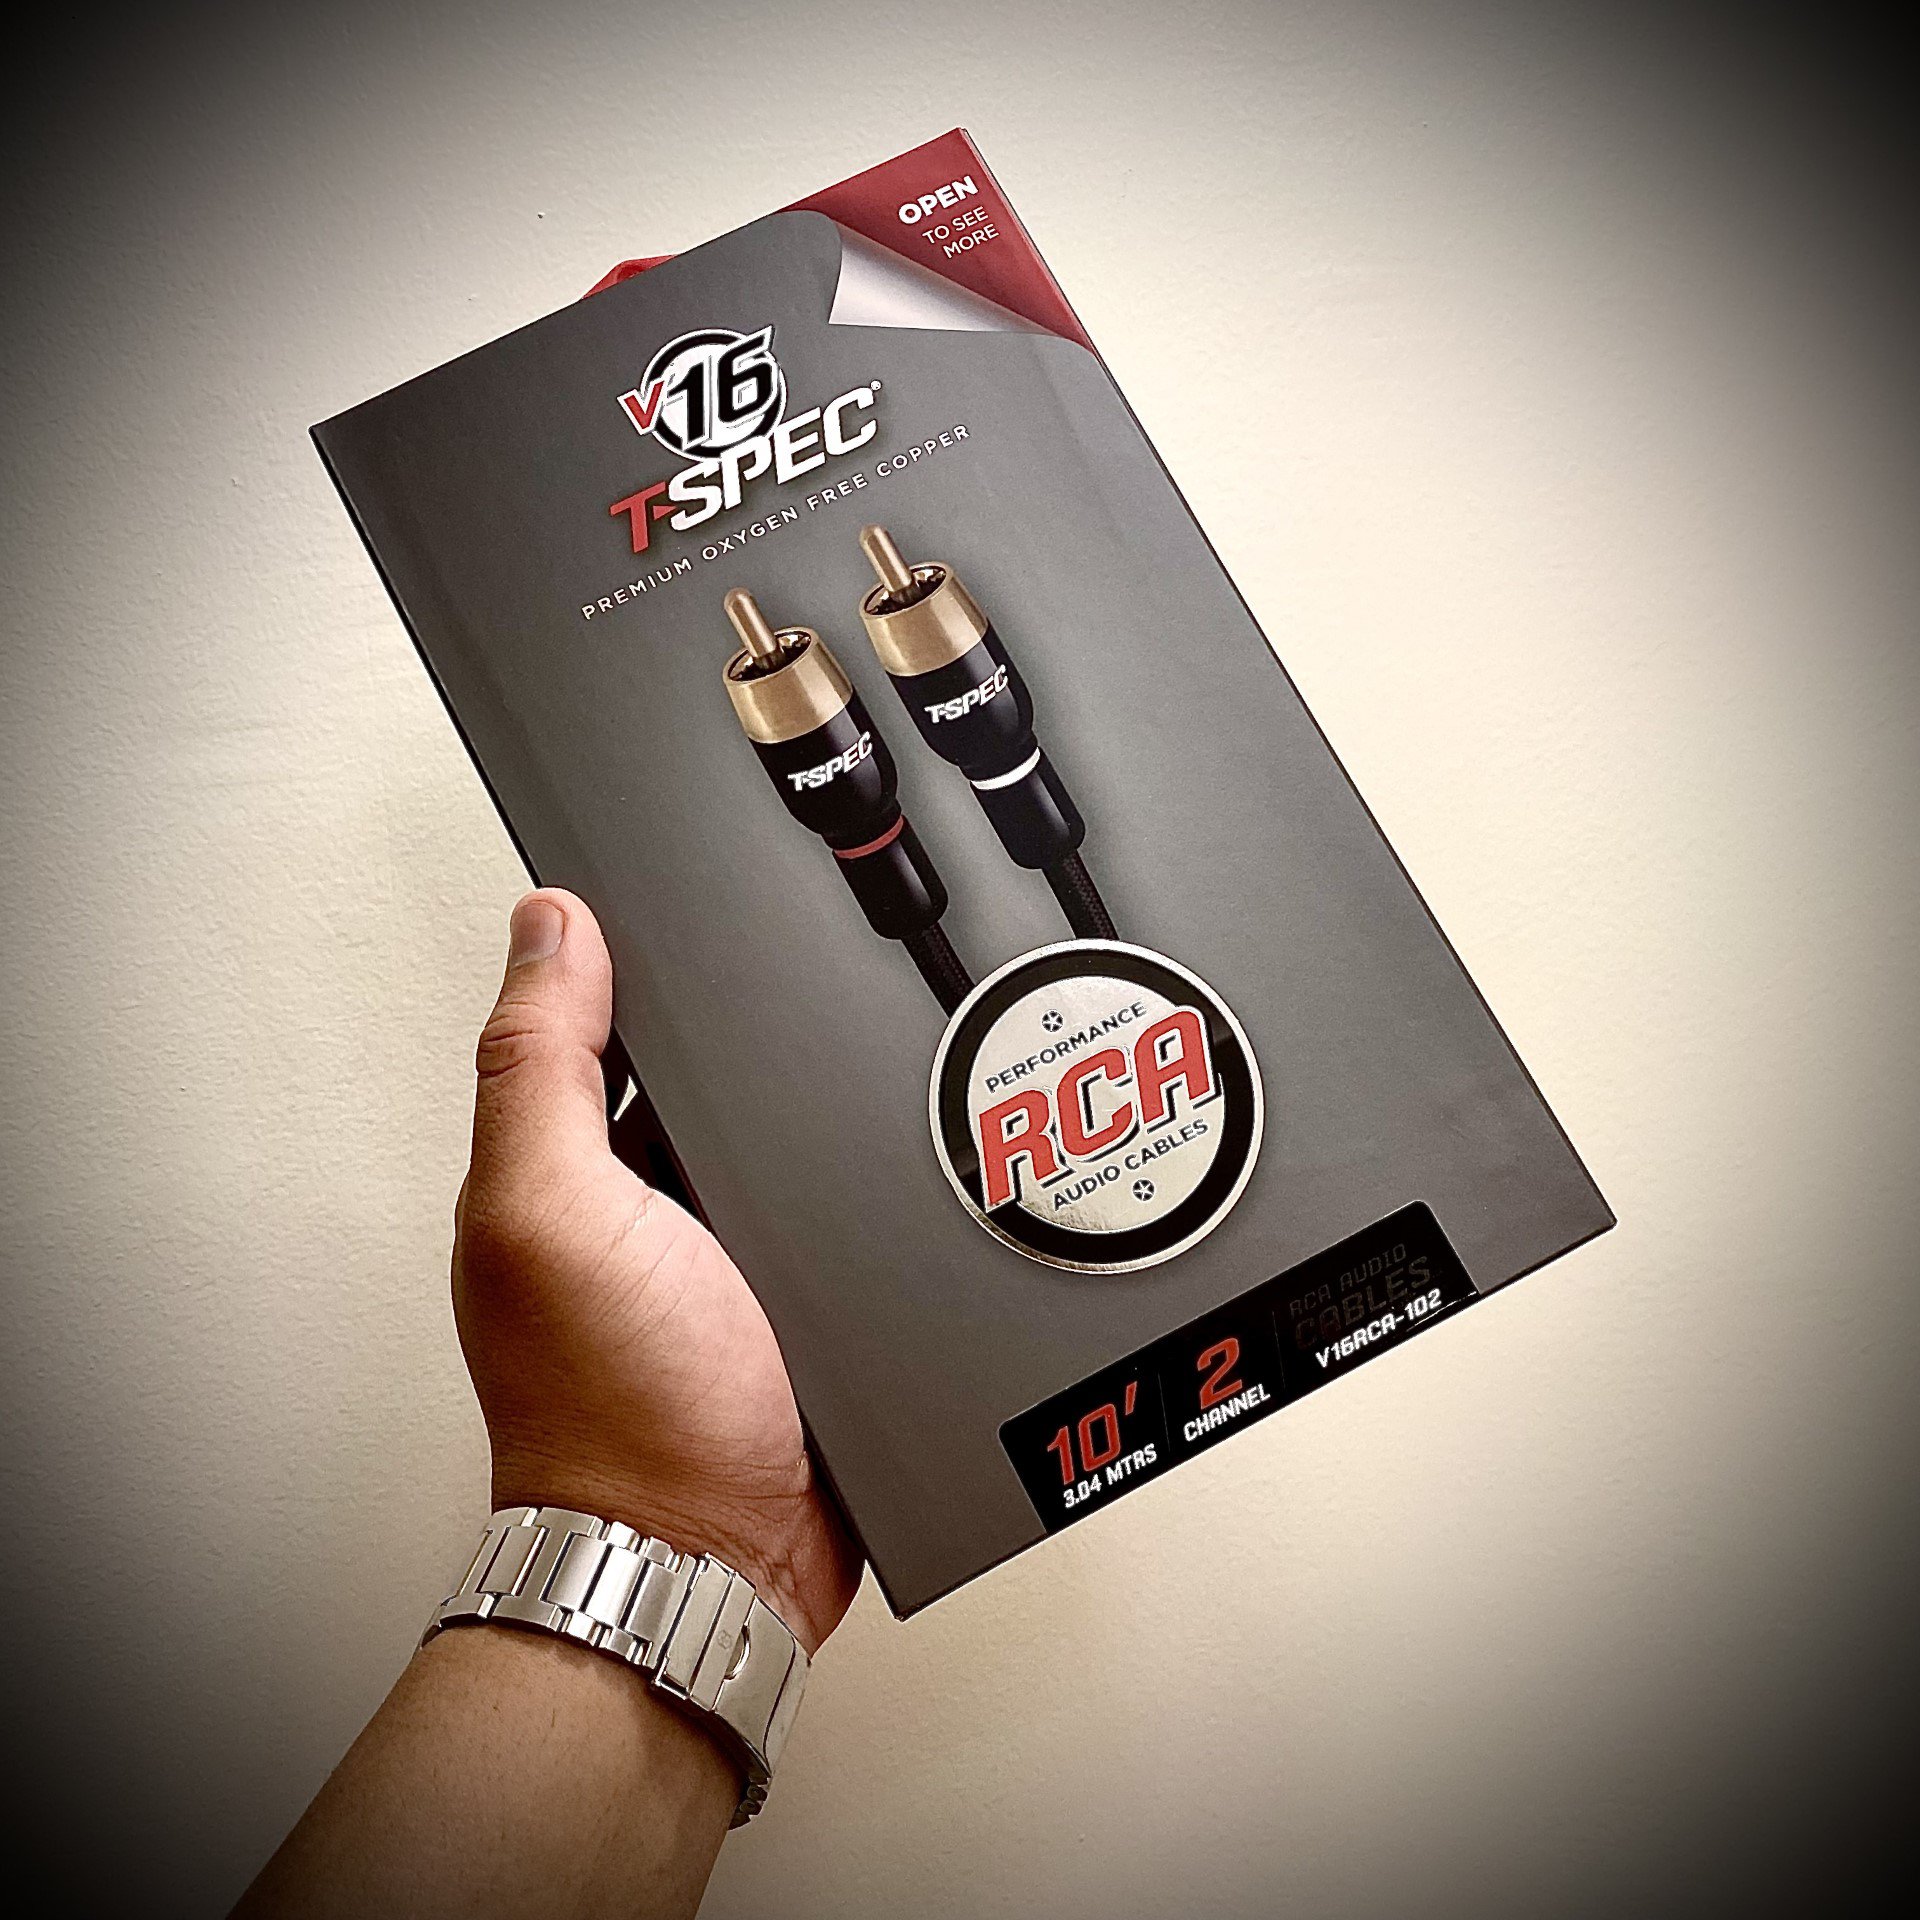
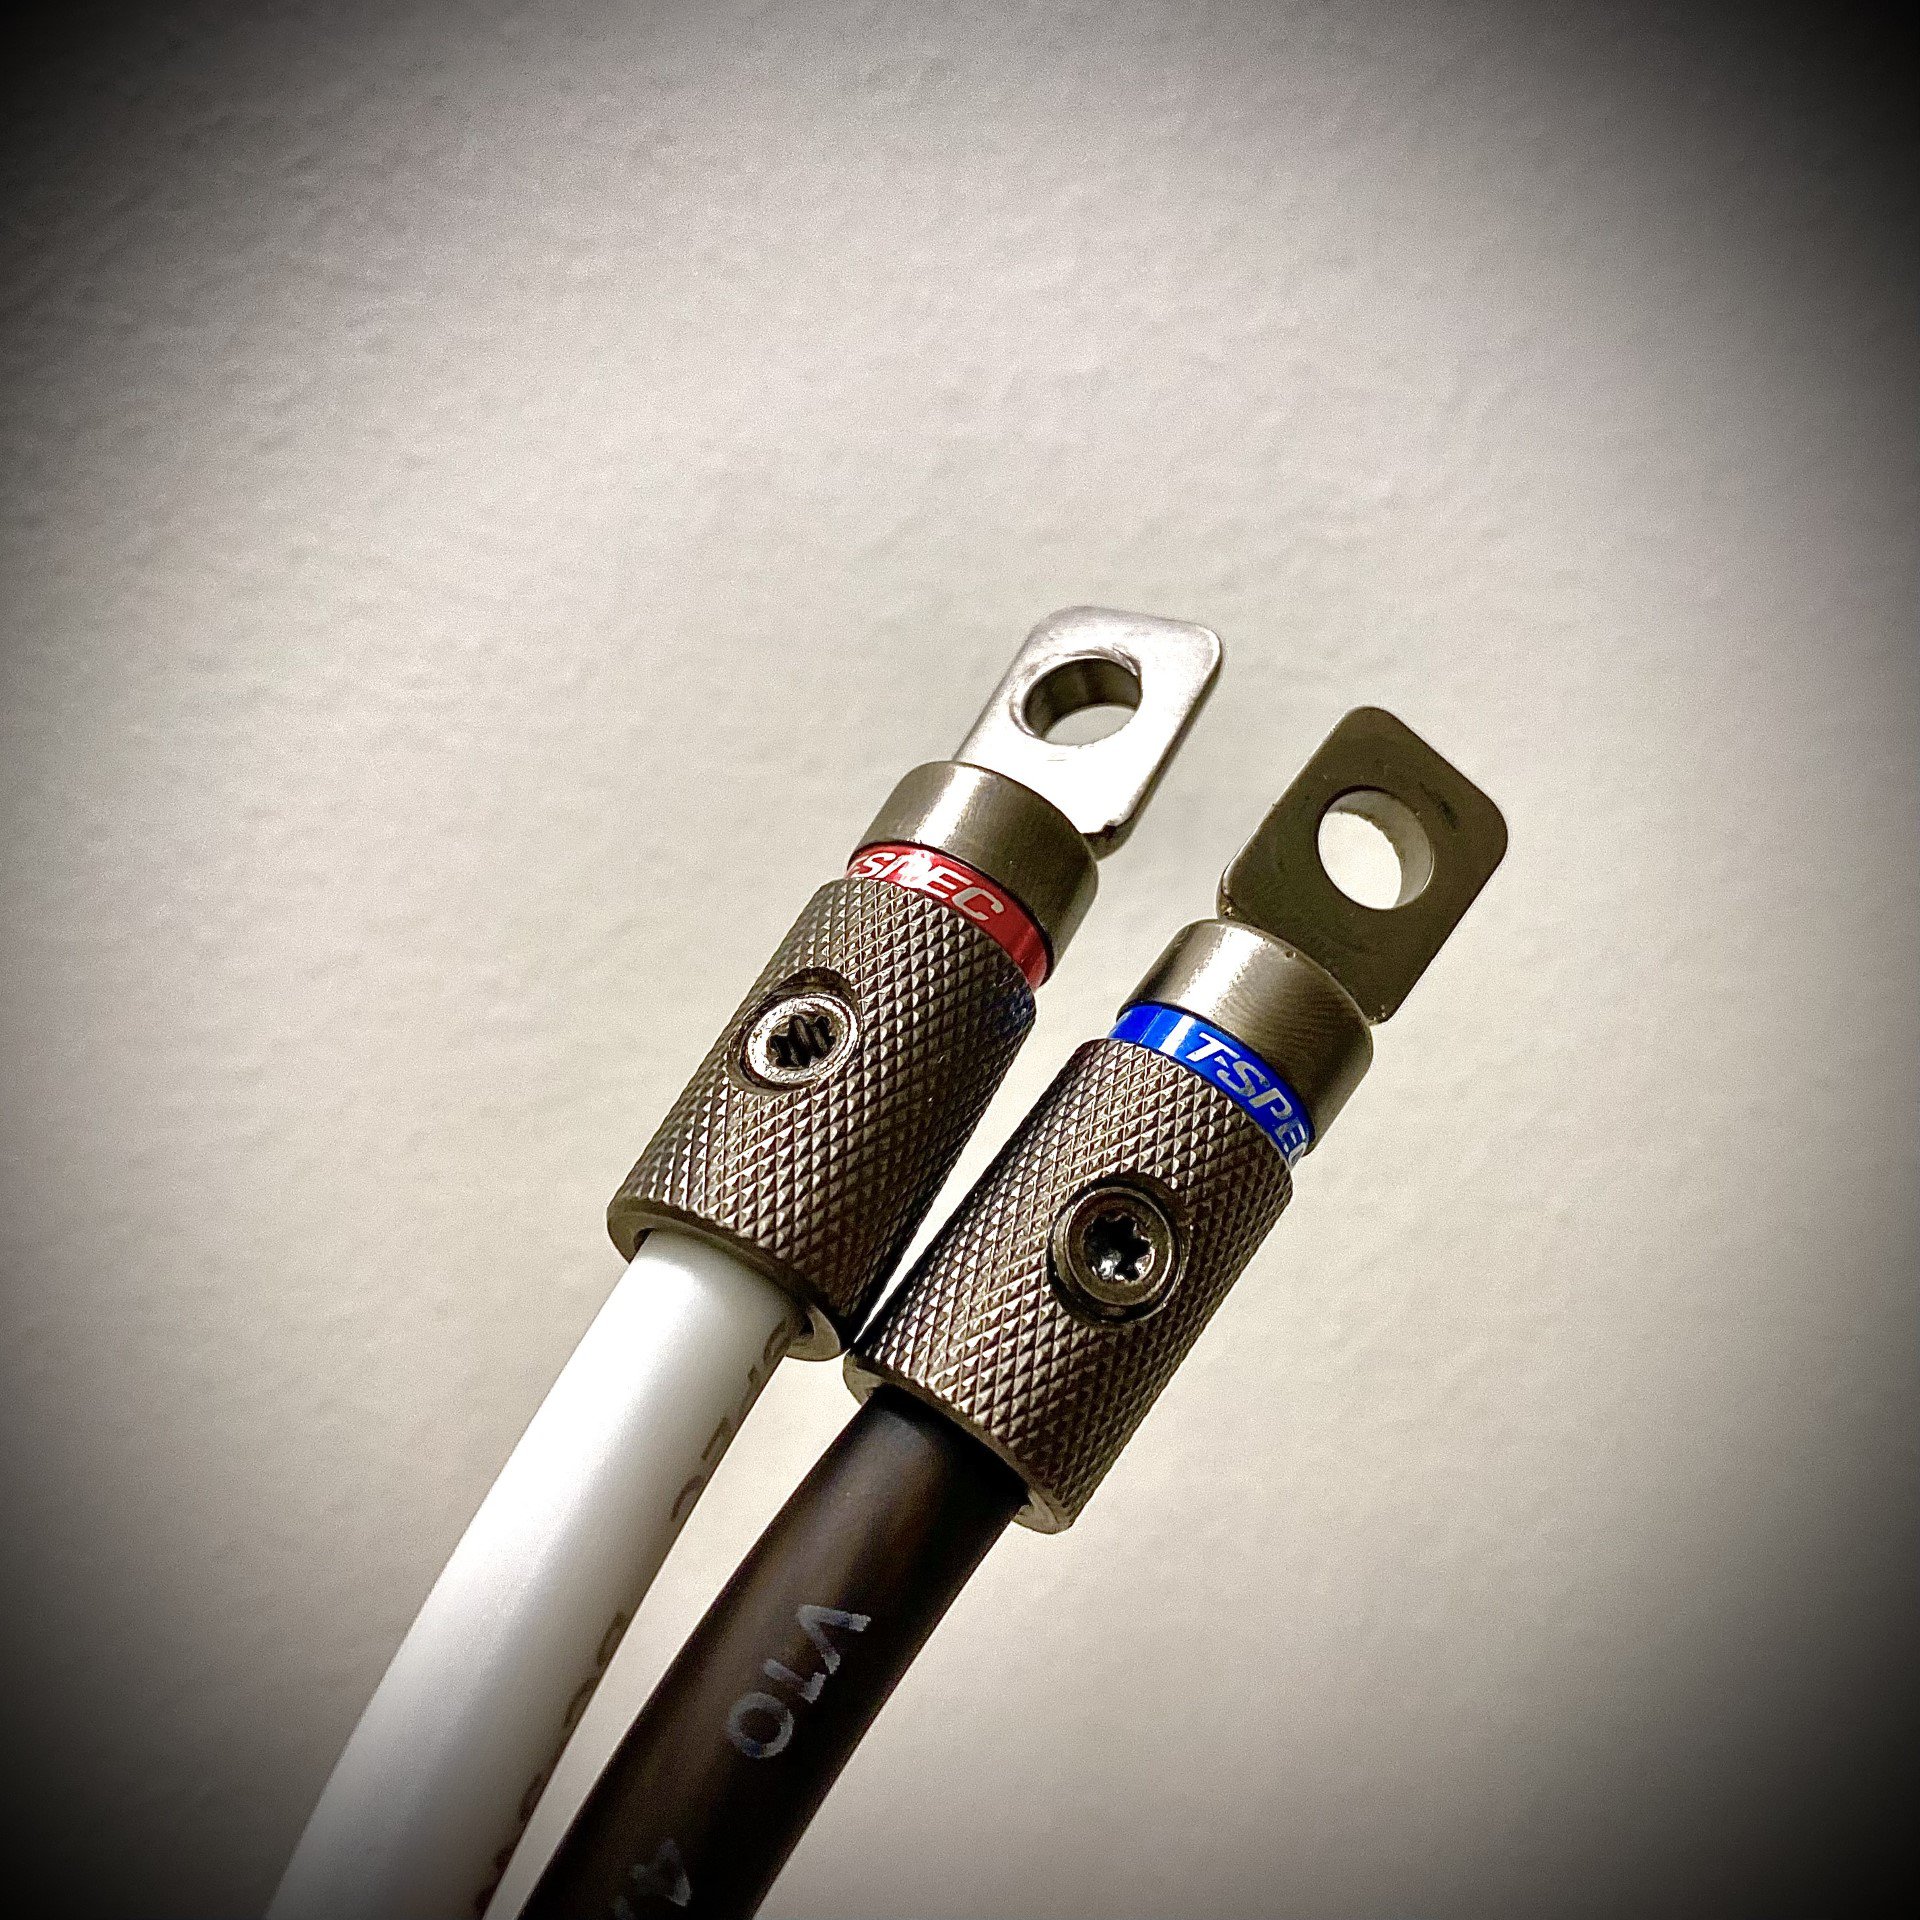
T-SPEC V16 RCA cable were used to insure clear signal
T-SPEC Amp power and ground wires with connectors
Again T-SPEC fuse holder
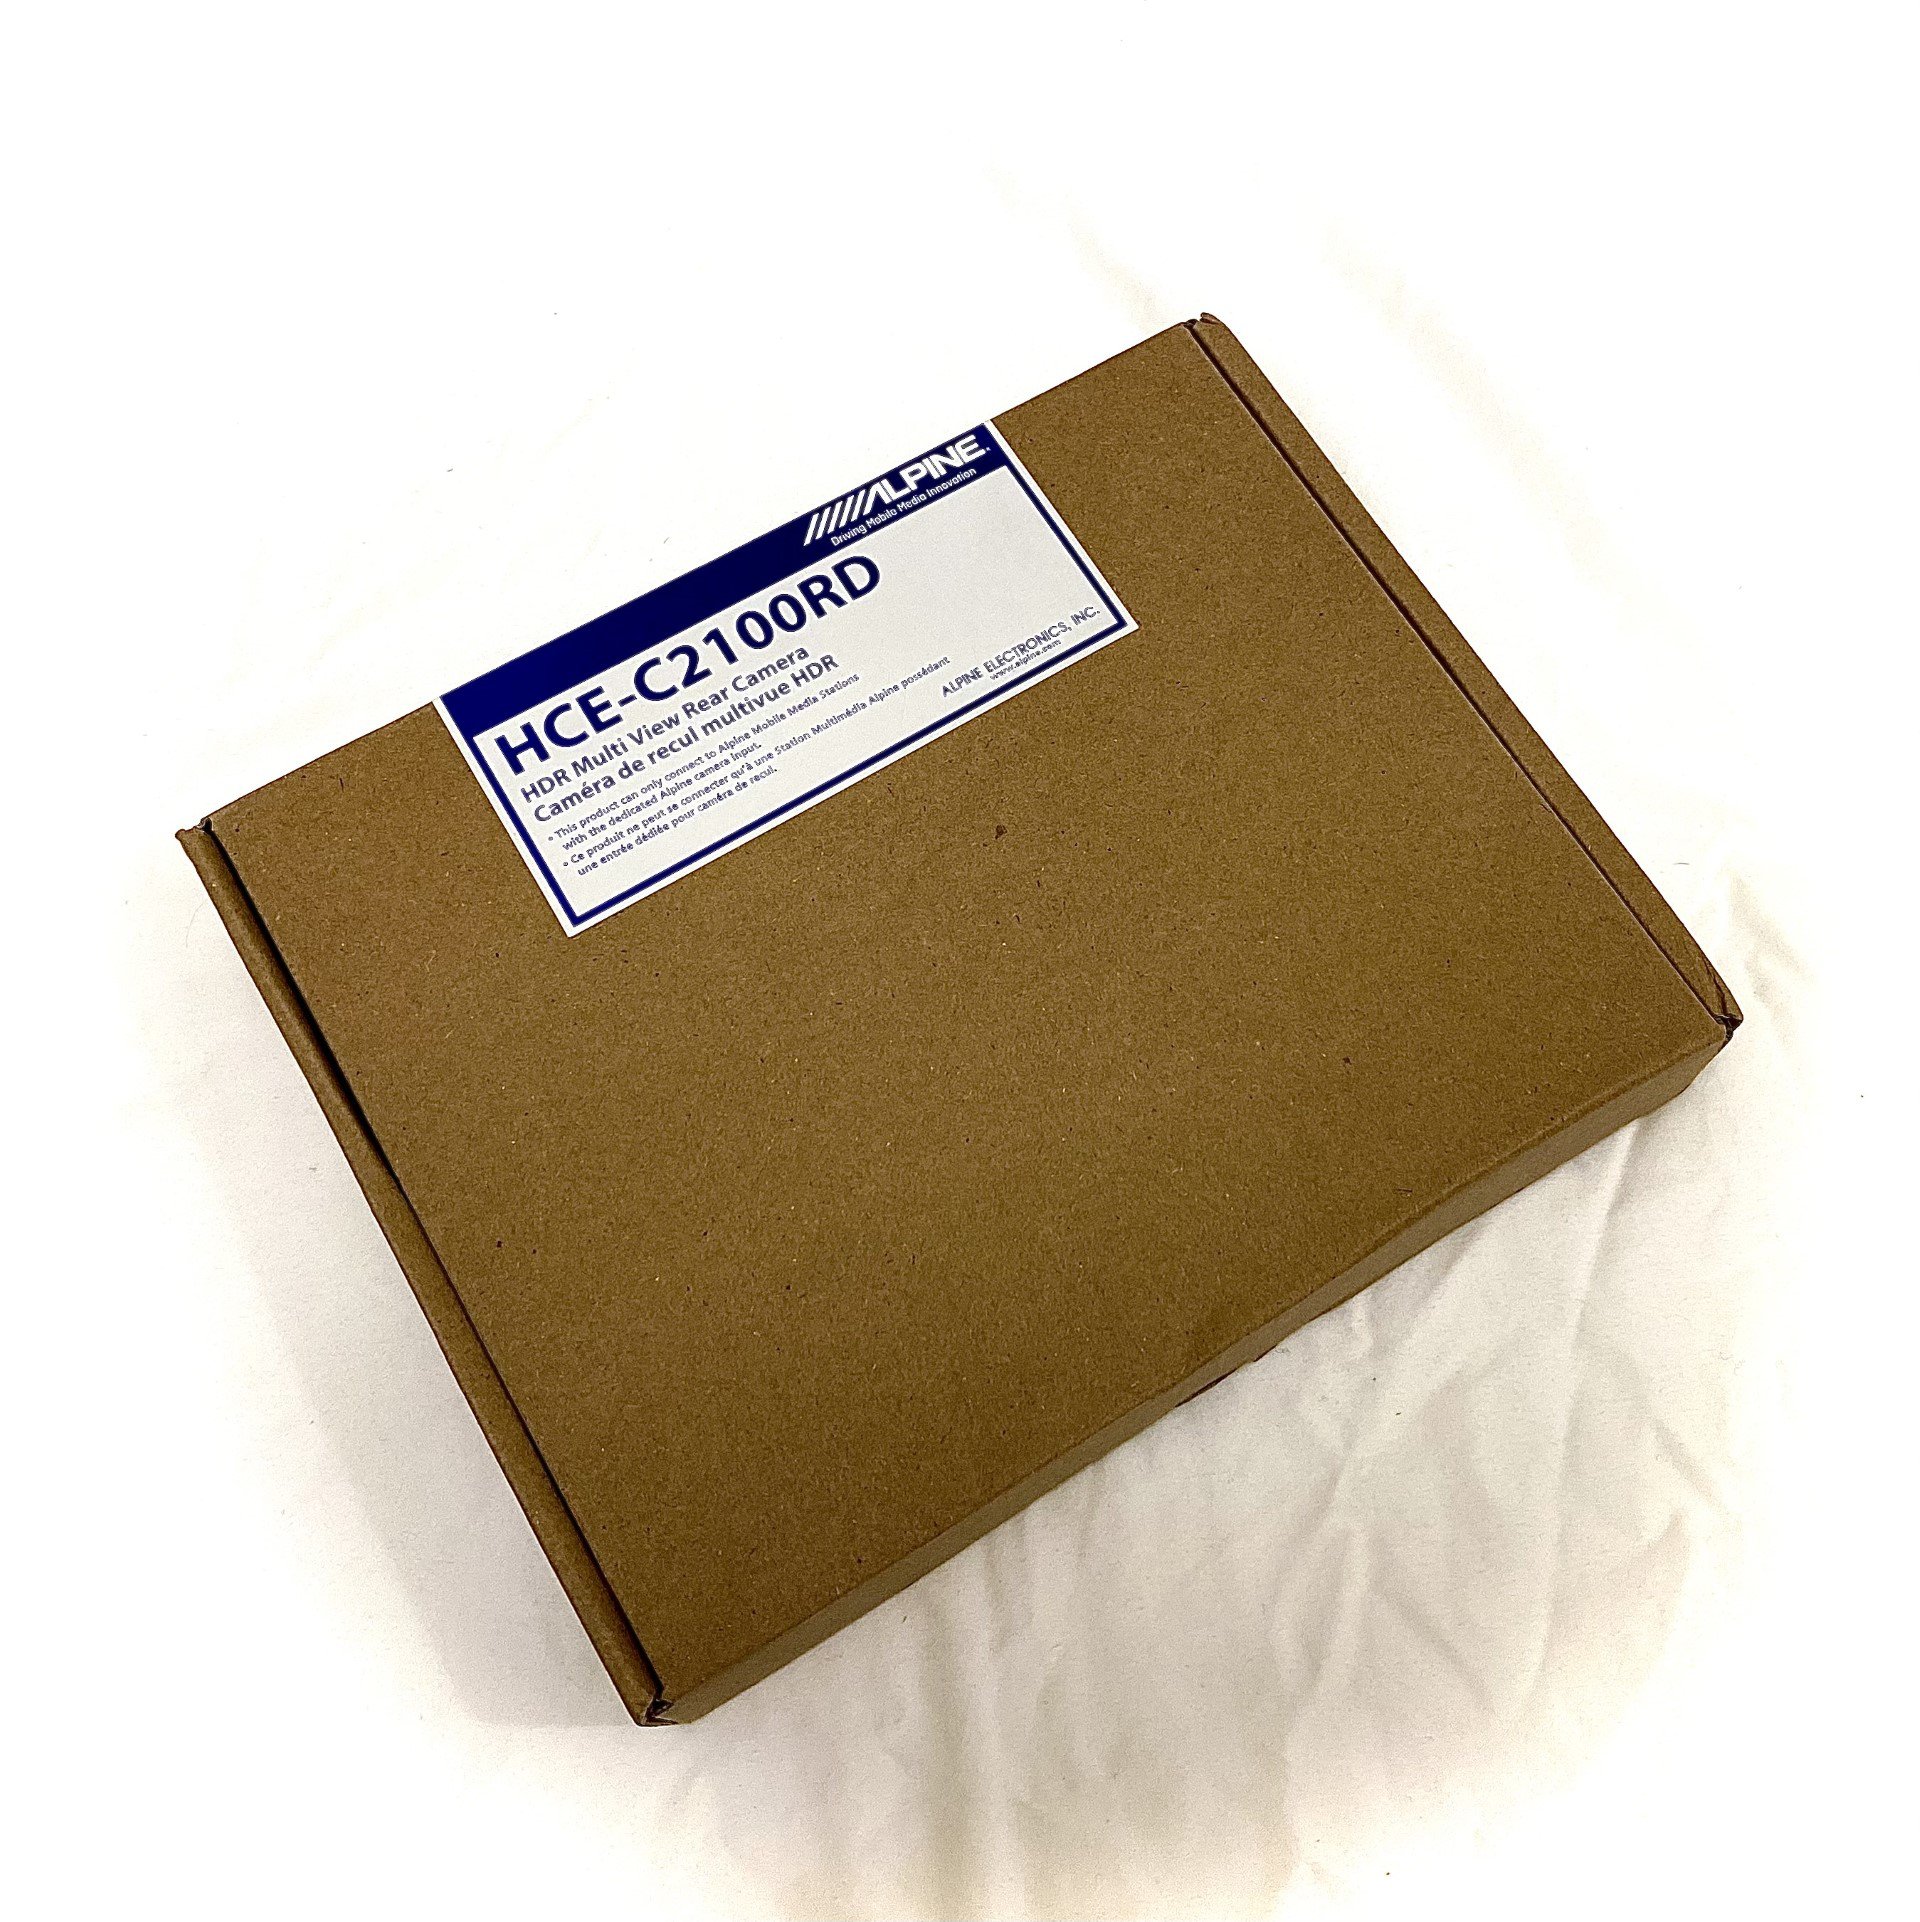
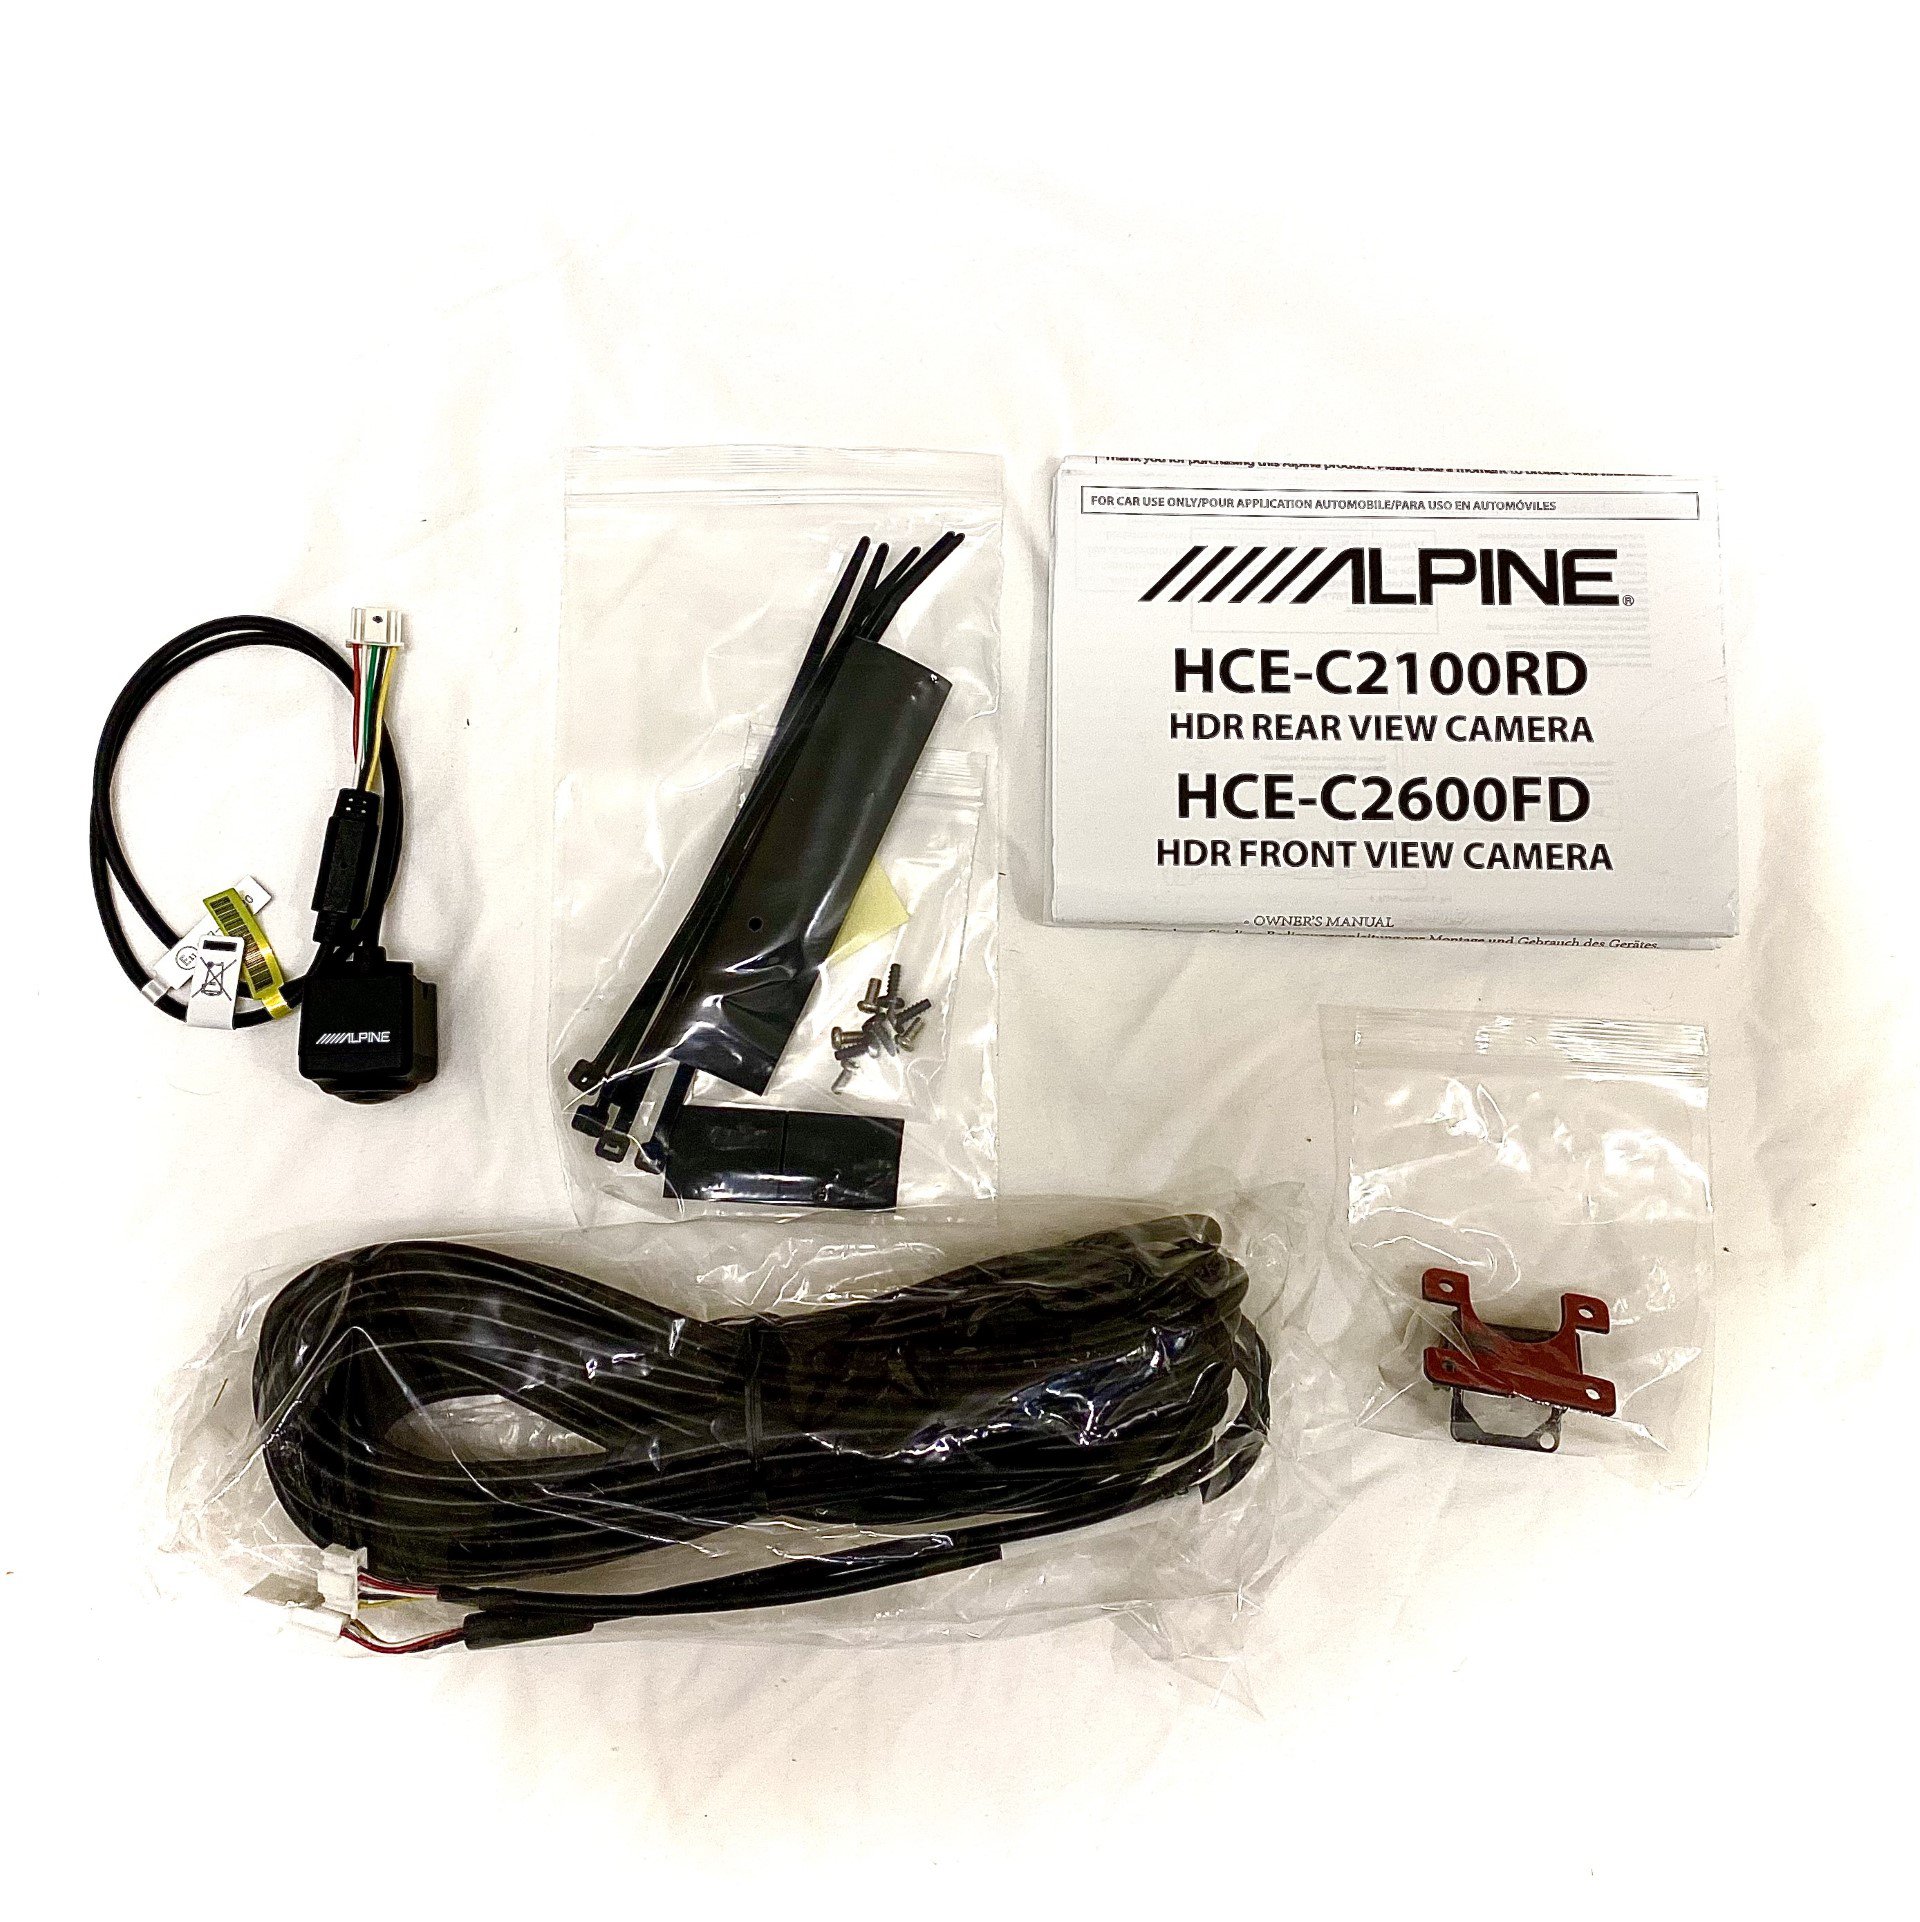
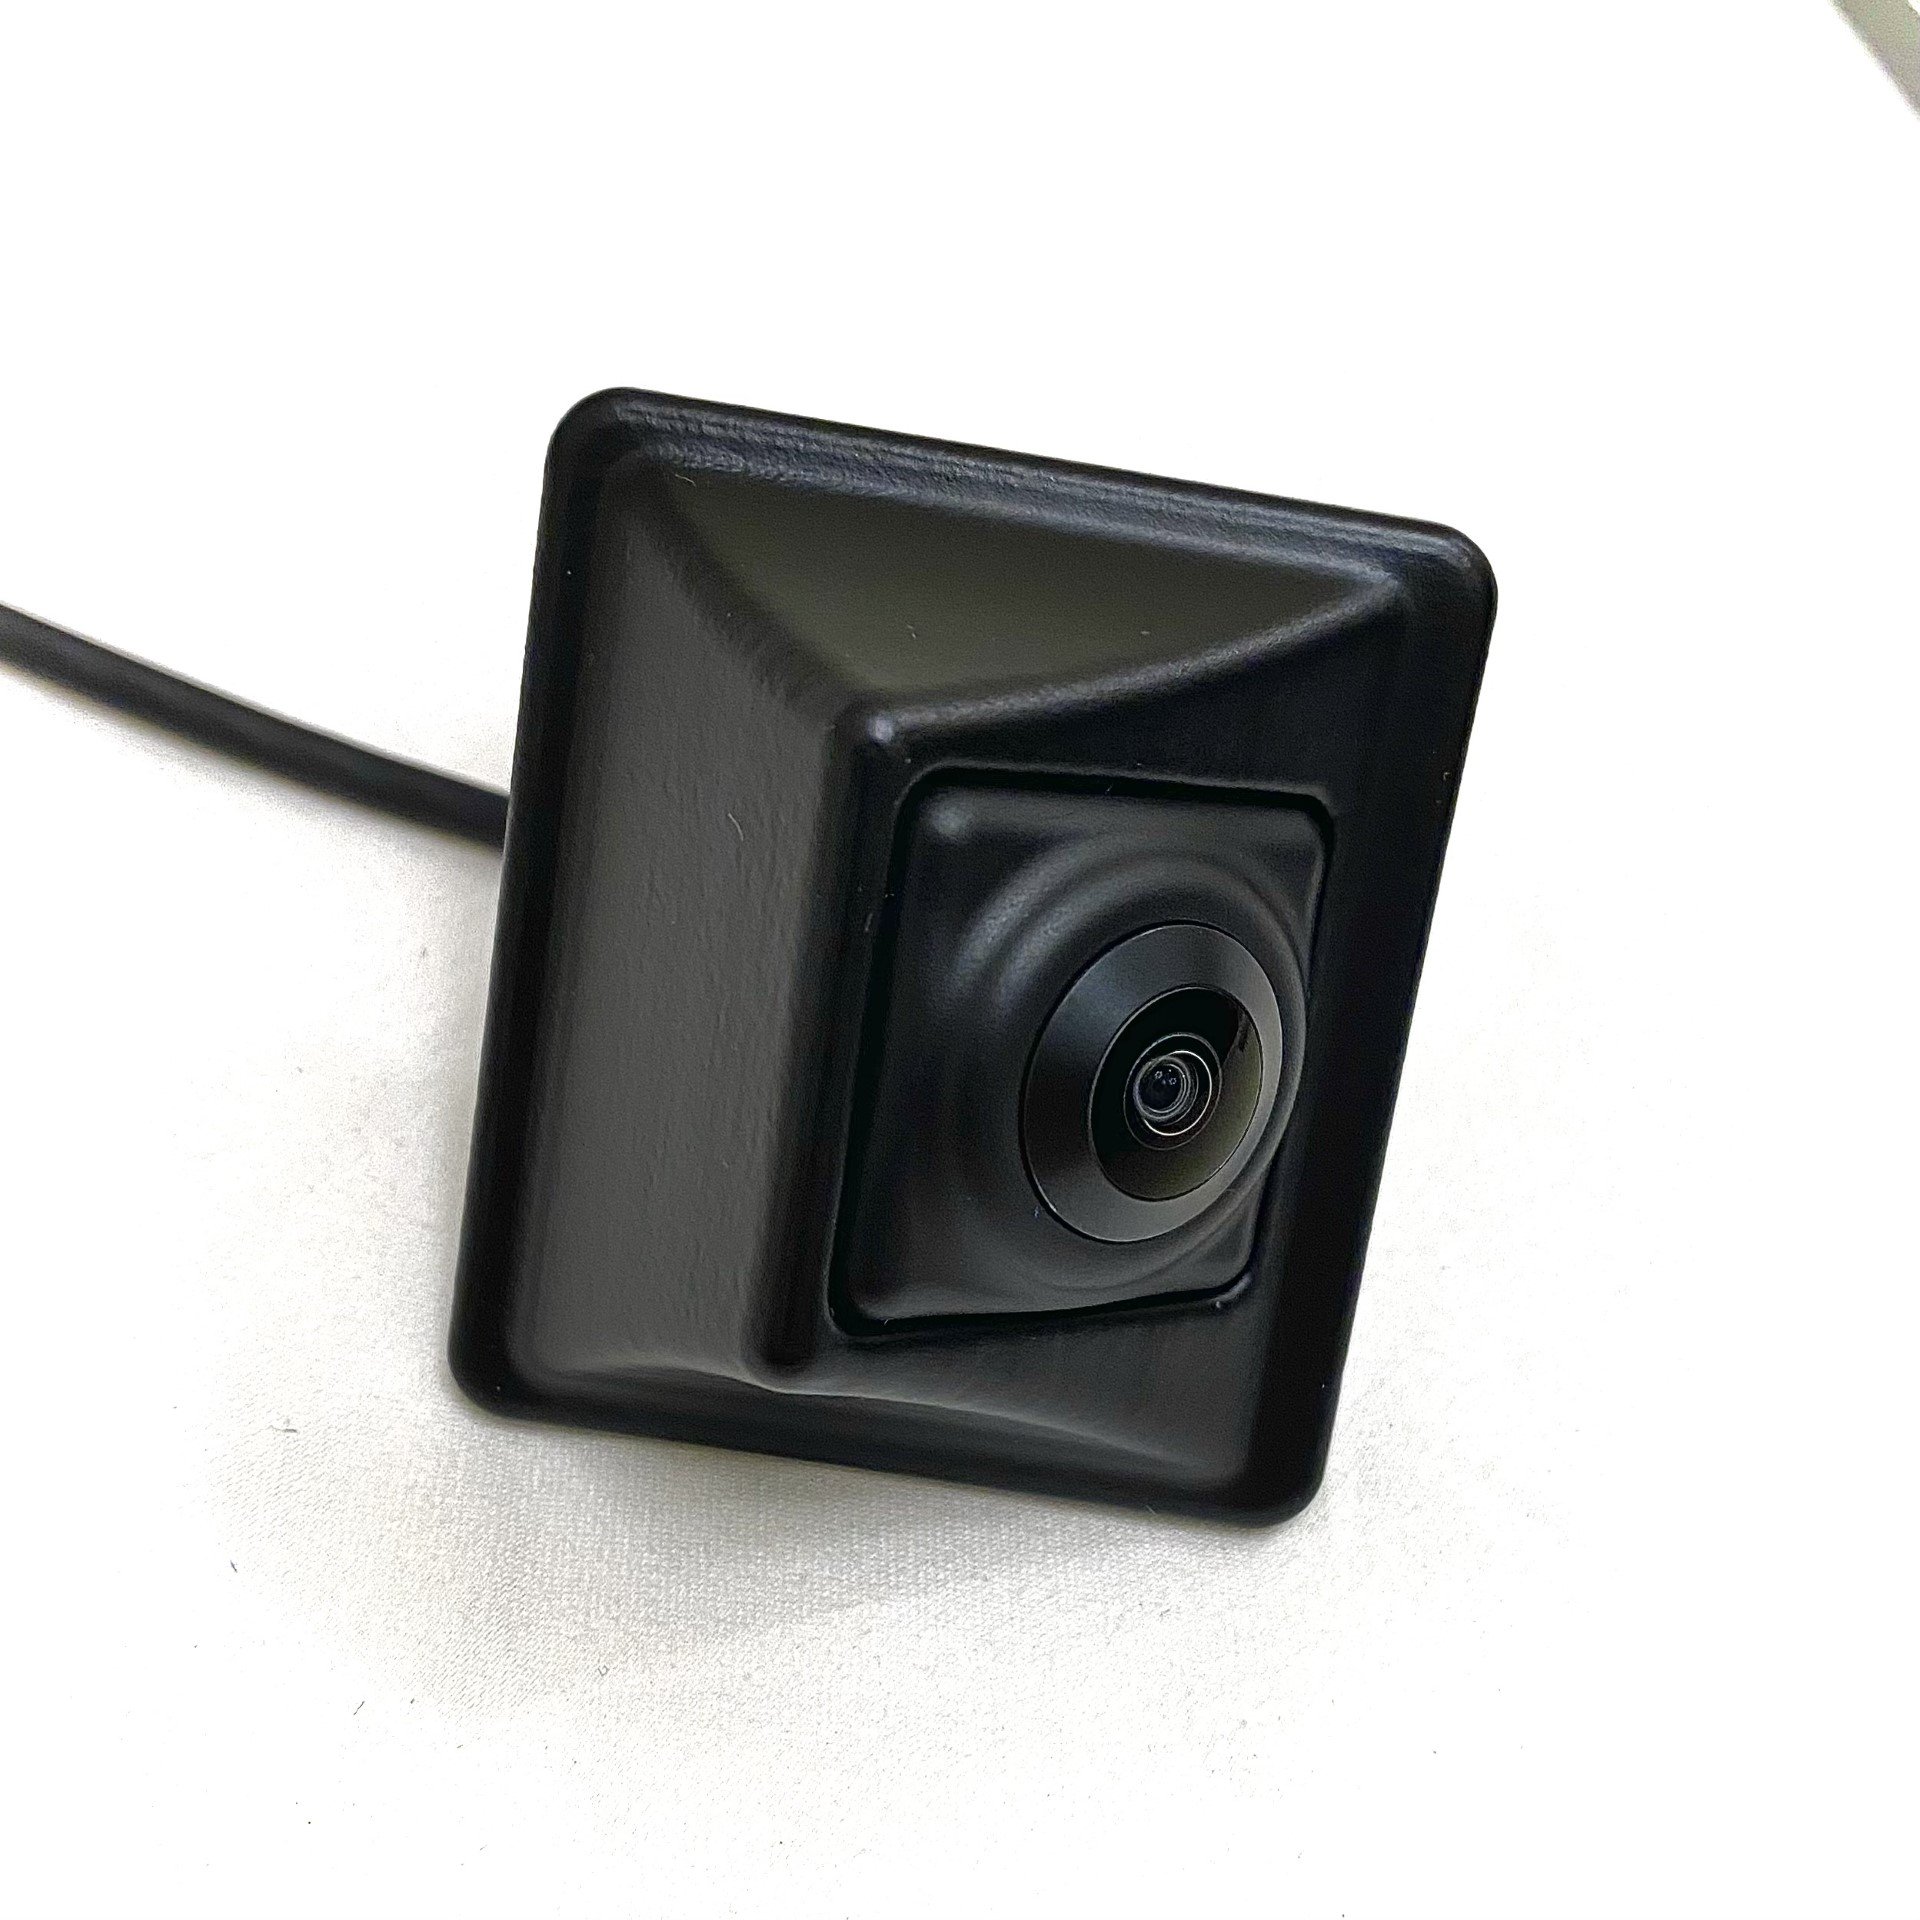
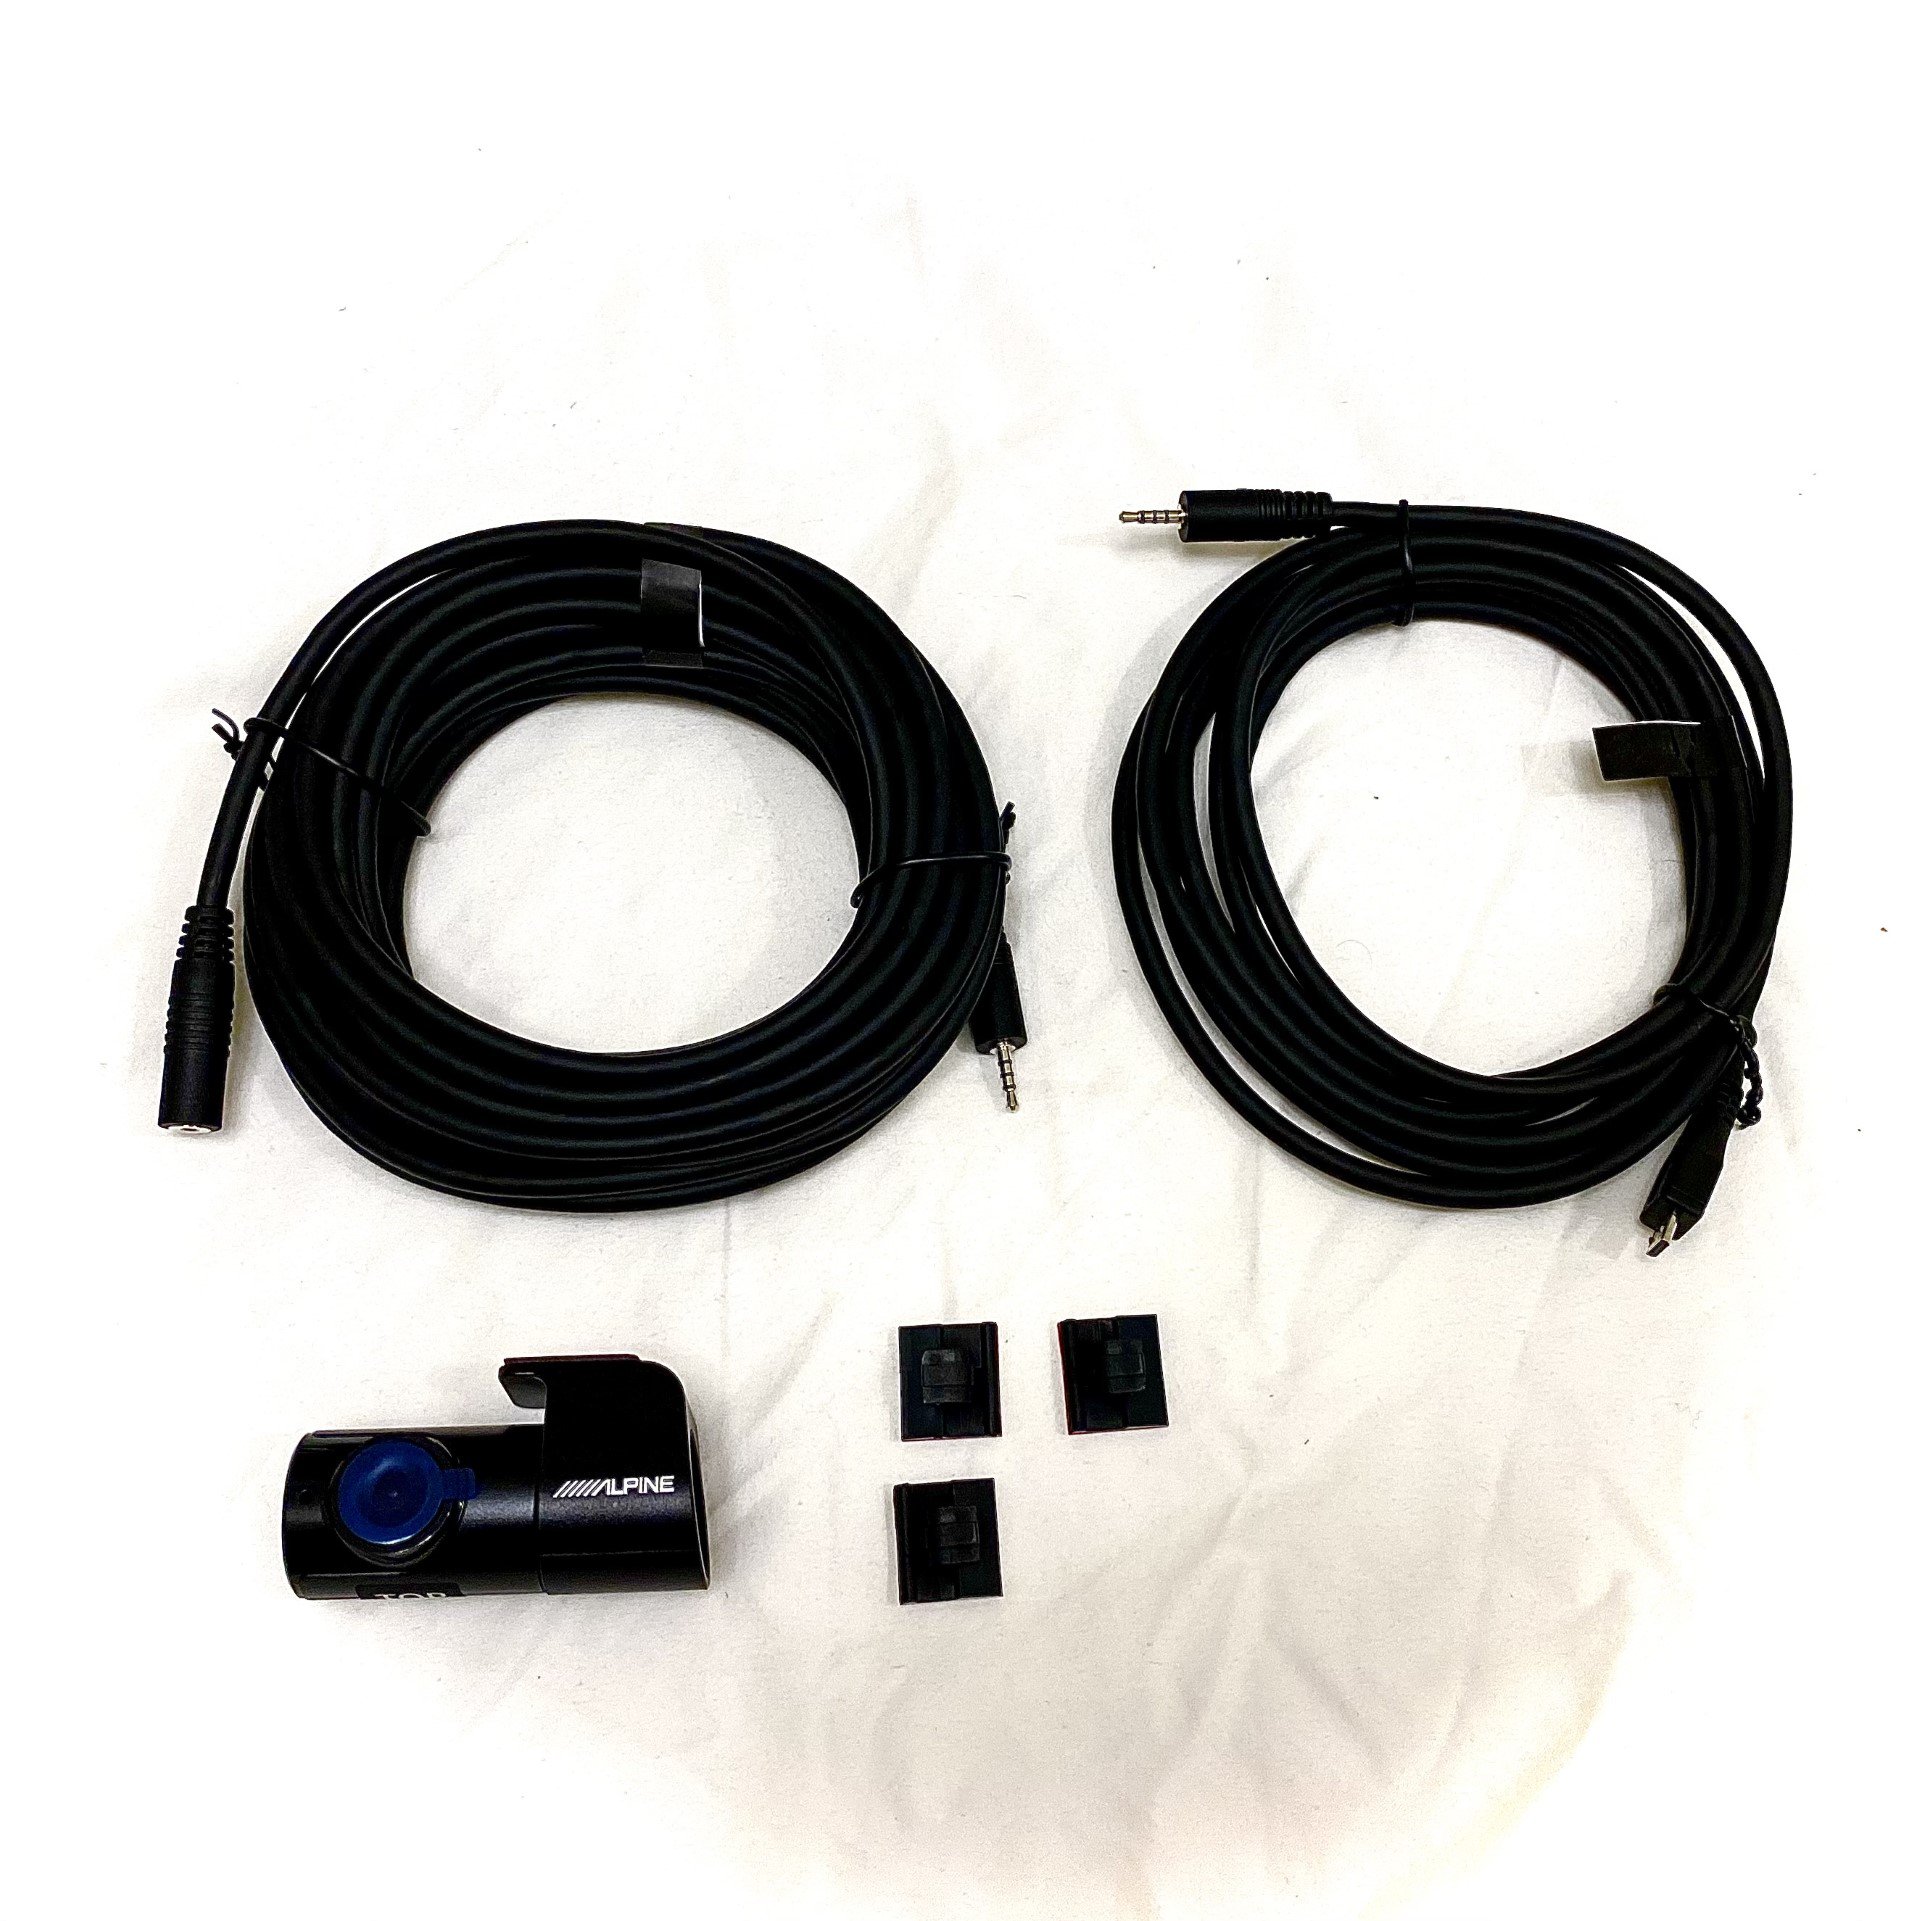
With the Alpine iLX-705D supports integrated solutions I had to add newer technology and safety features to the 996, starting with the Alpine HCE-C2100RD rear view camera:
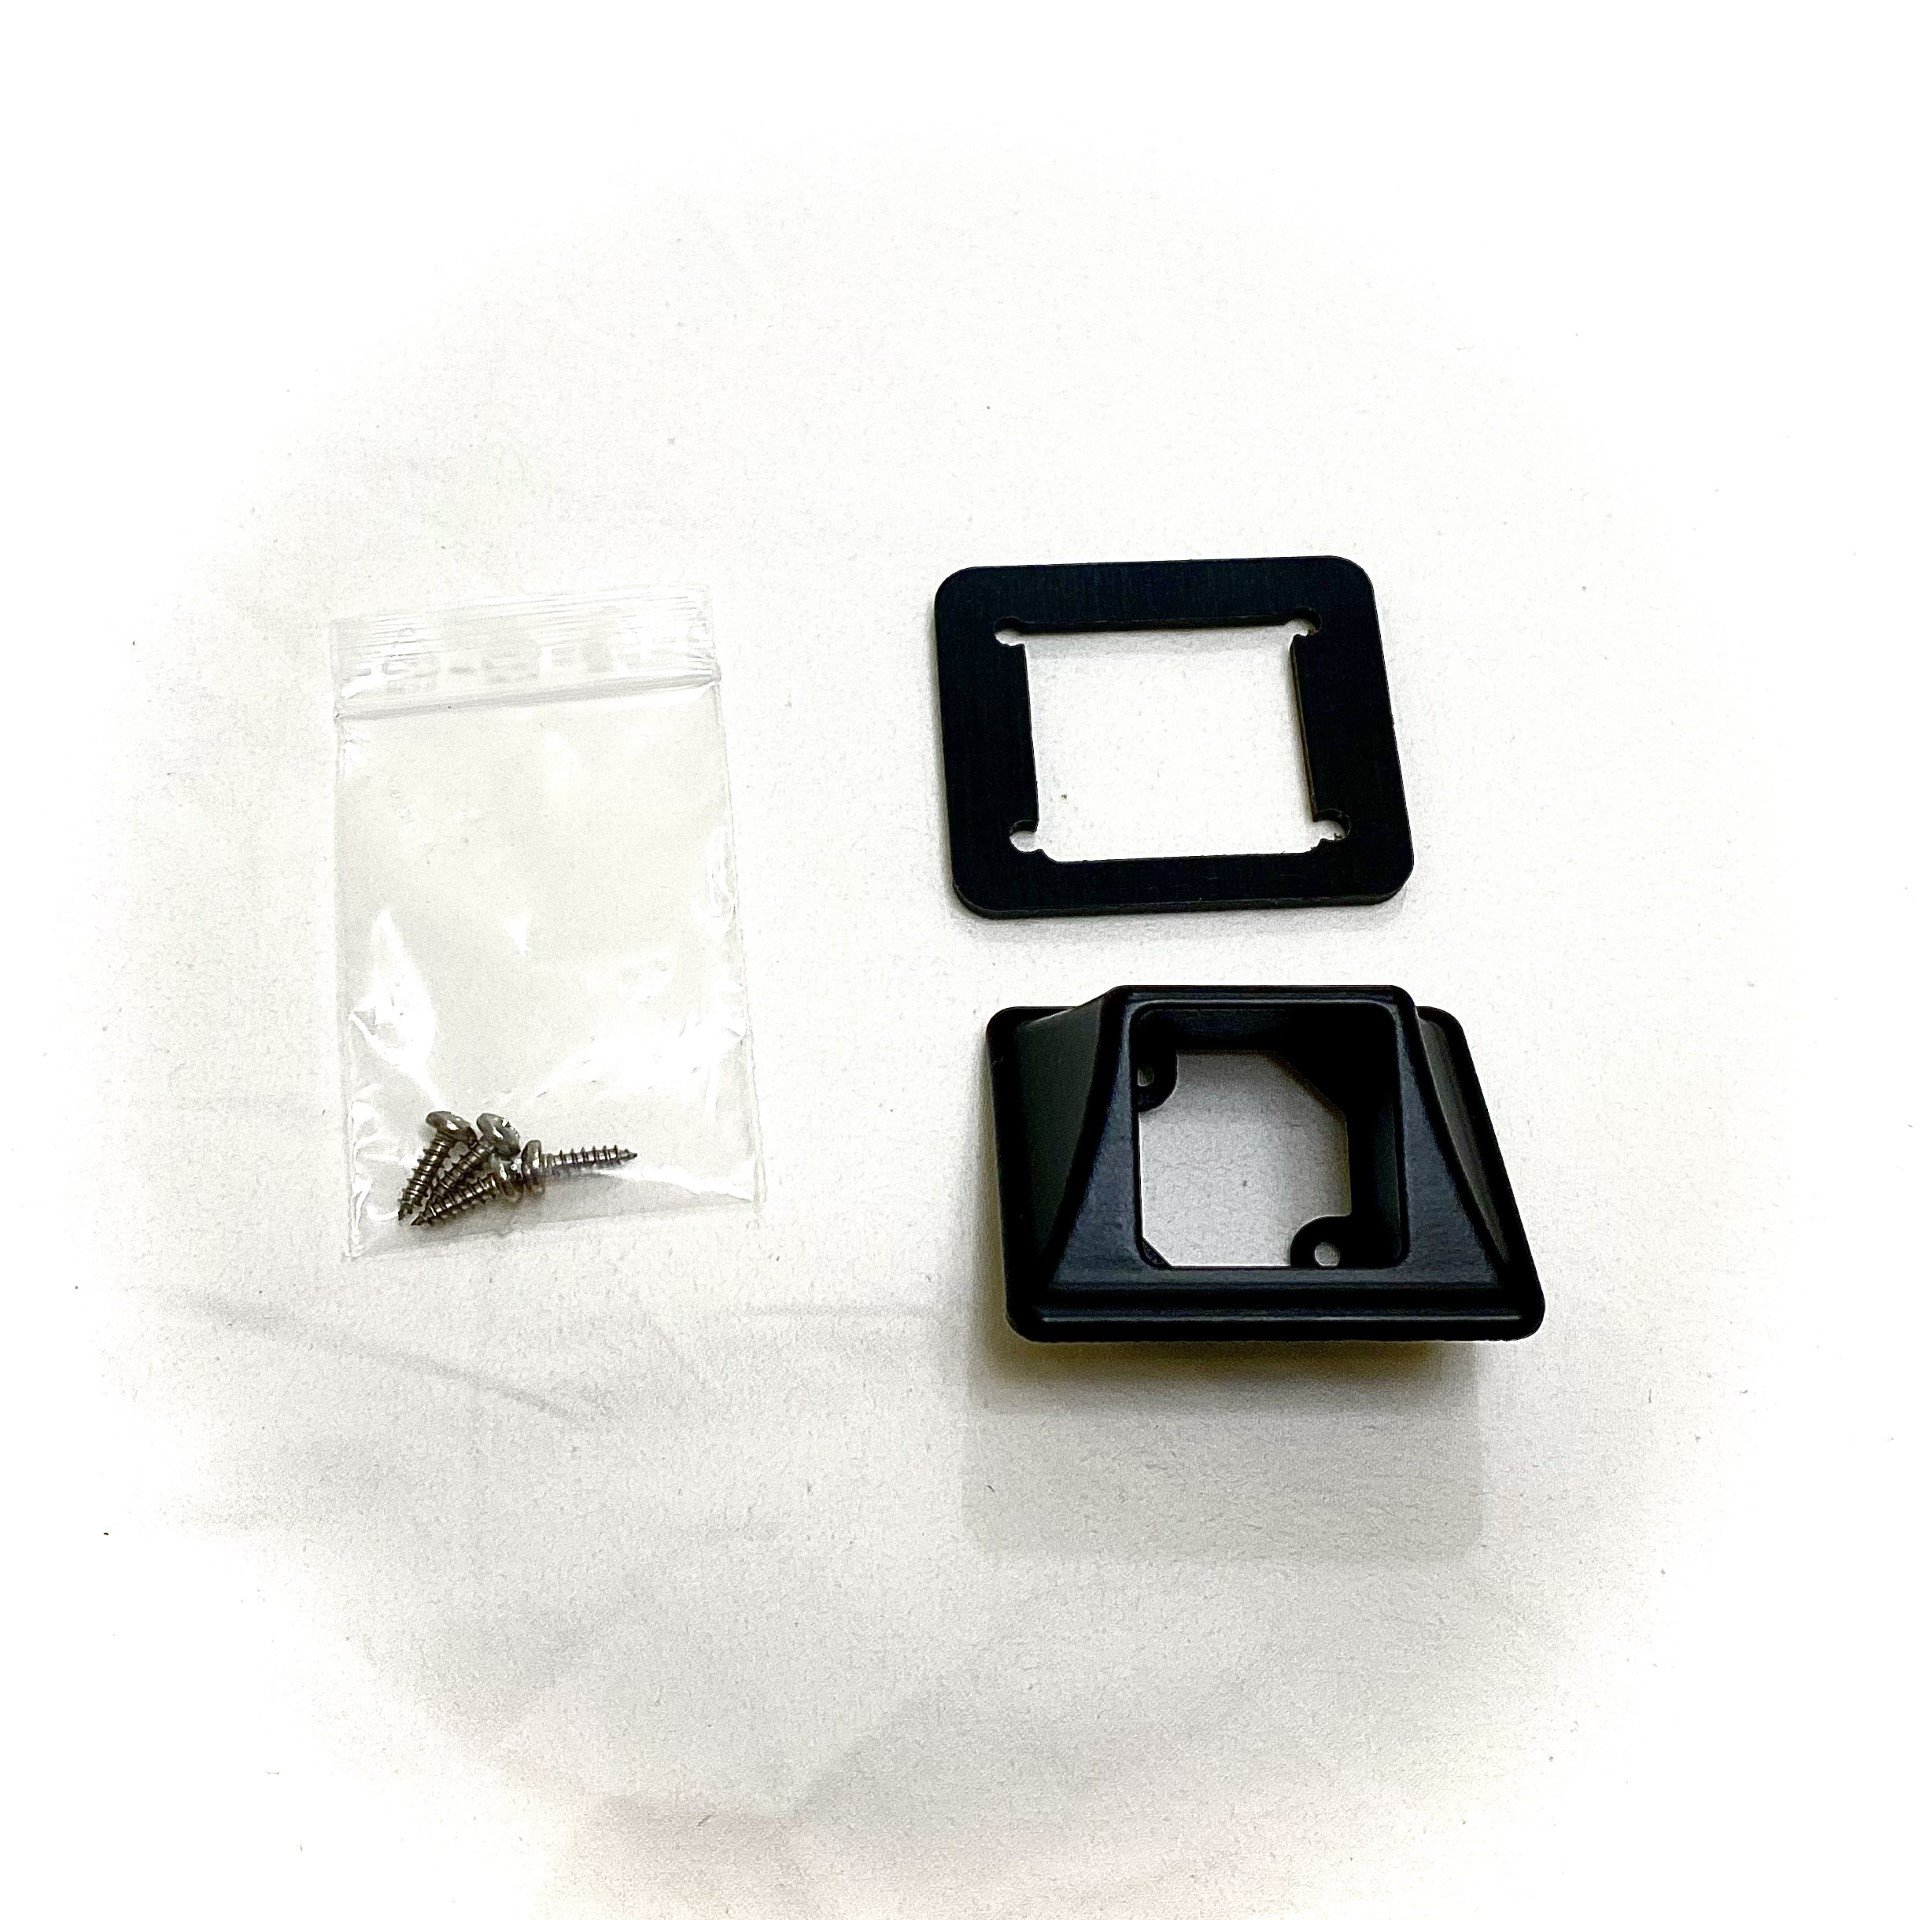
Camera mount to have the OE look and angle
That OE look....
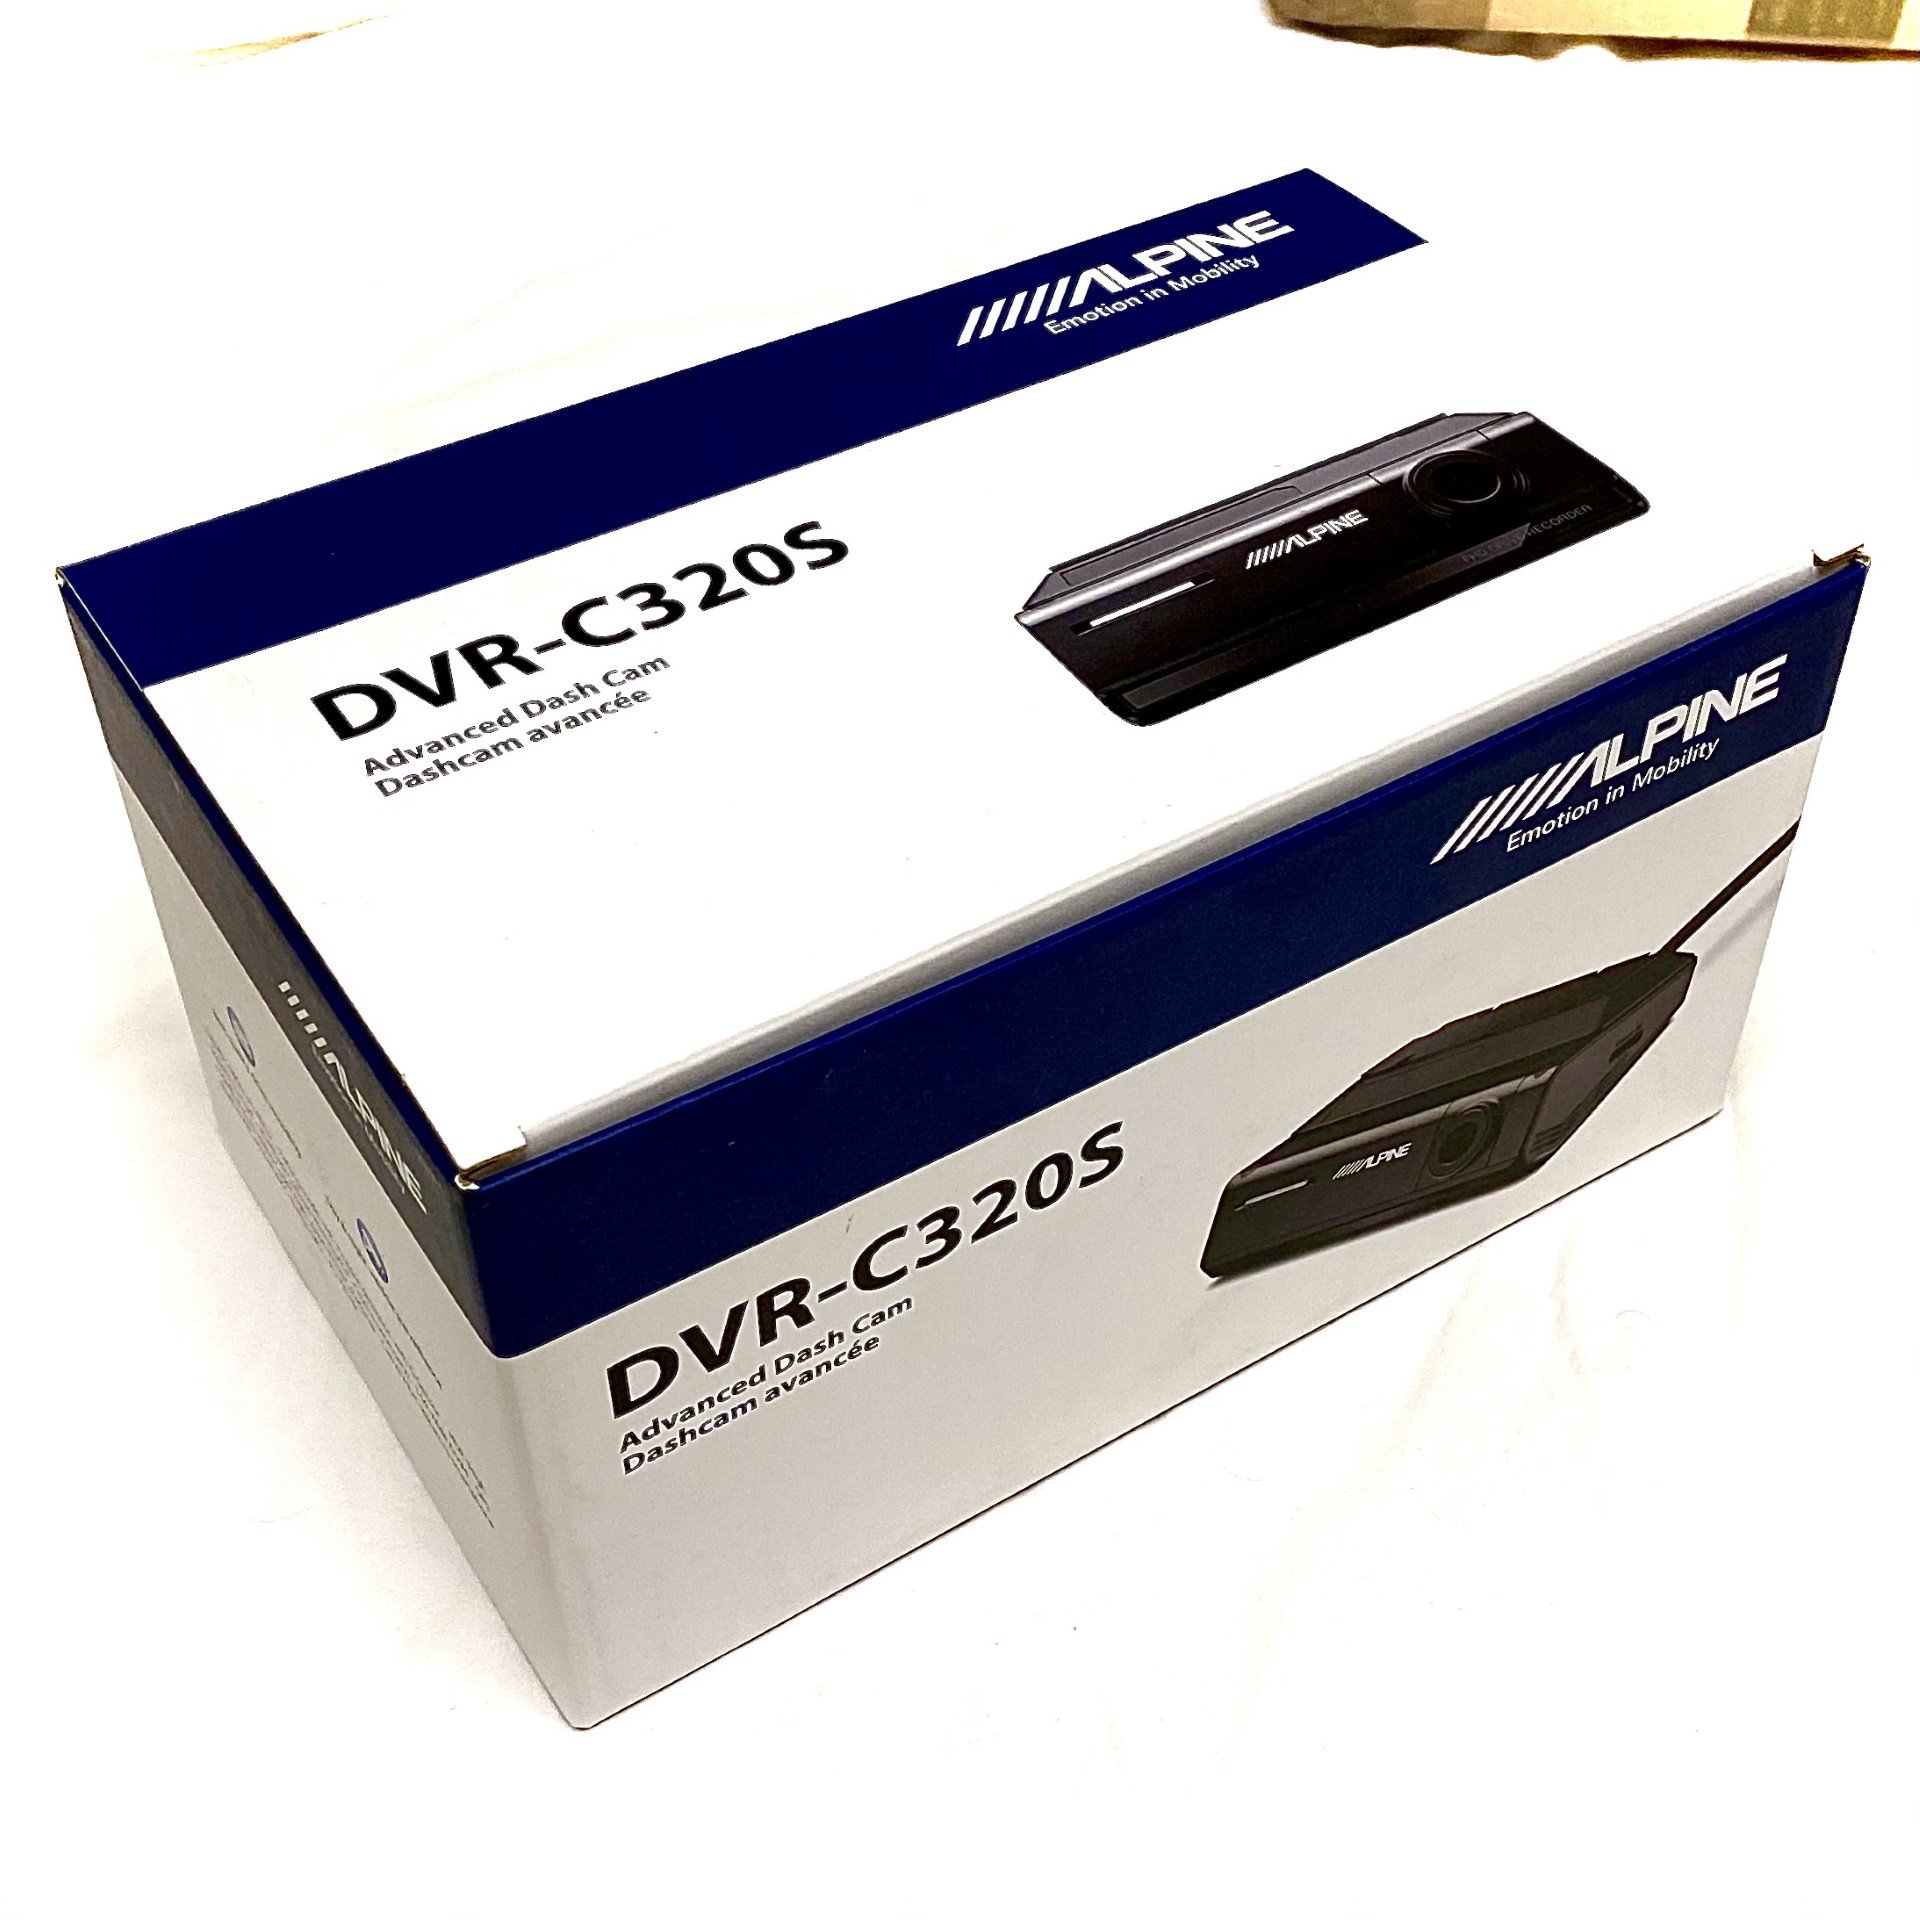
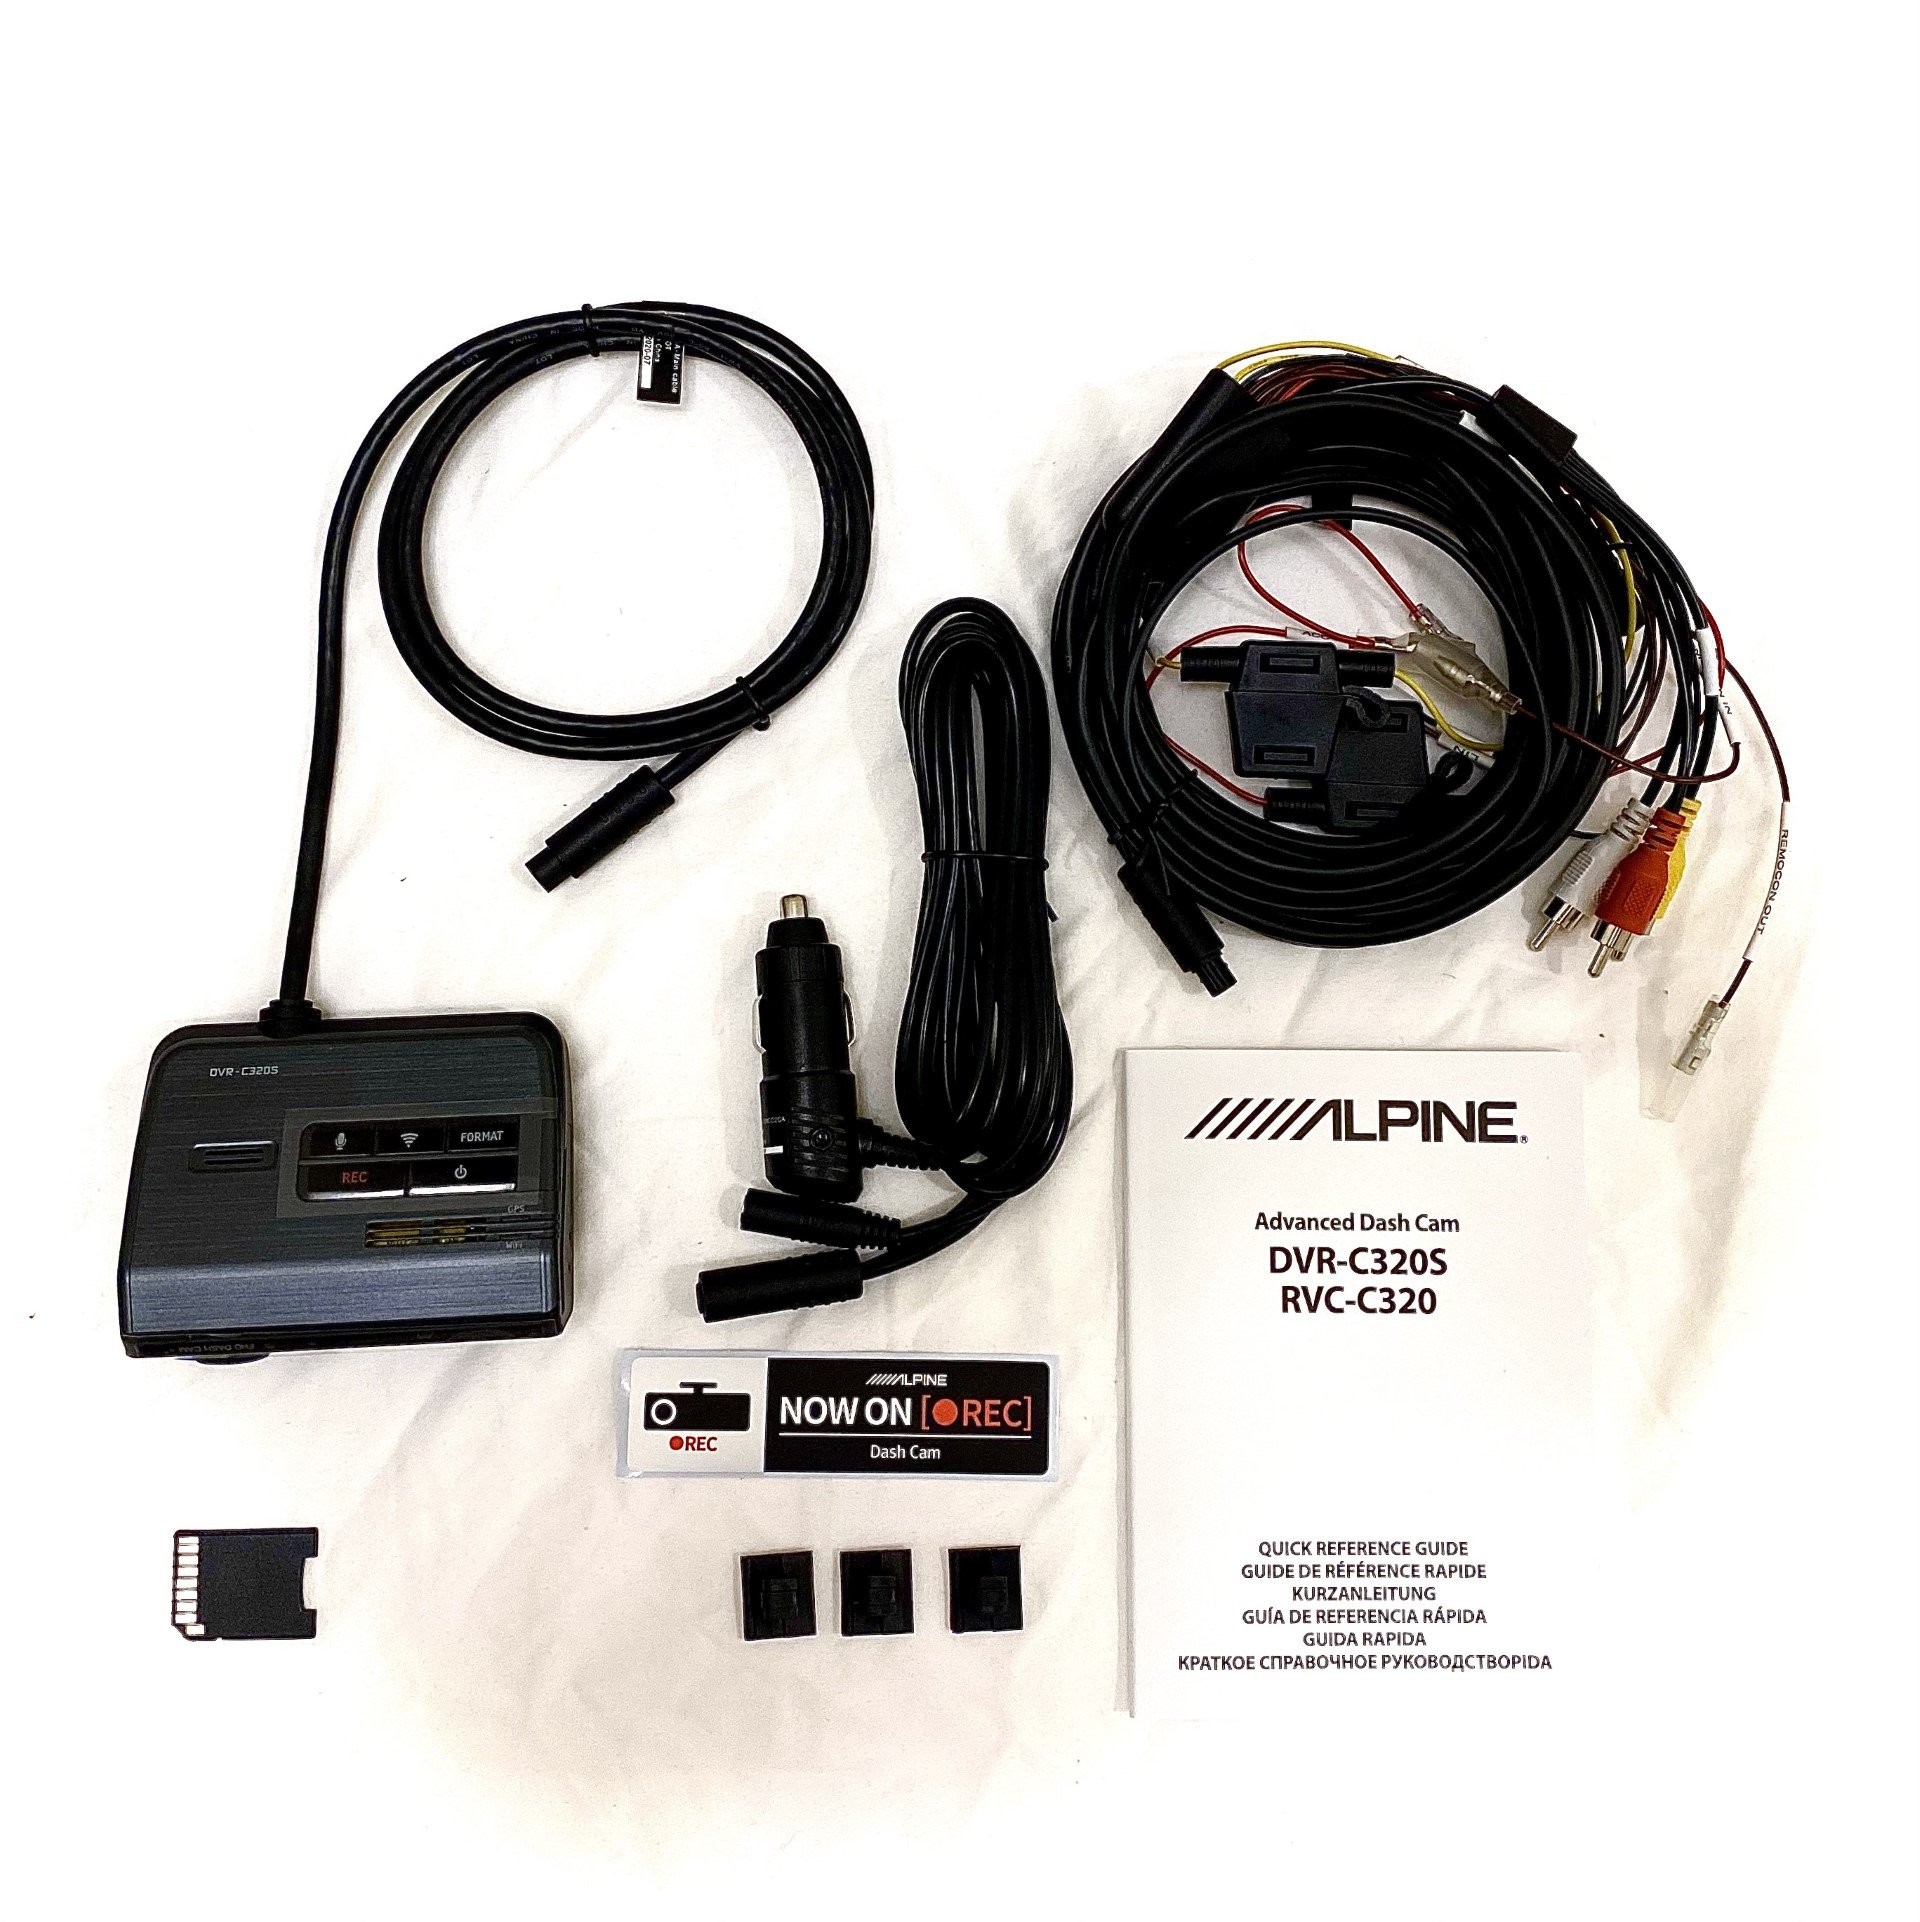
And we move to the front Dash cam where the Alpine DVR-C320S is installed along with the rear dash cam Alpine RVC-C320:
This dash cam is advance and it offers the following safety features:
1- Forward Collision Warning
2- Back Collision Warning
3- Front Vehicle Departure Warning
4- Rear Vehicle Approaching Warning
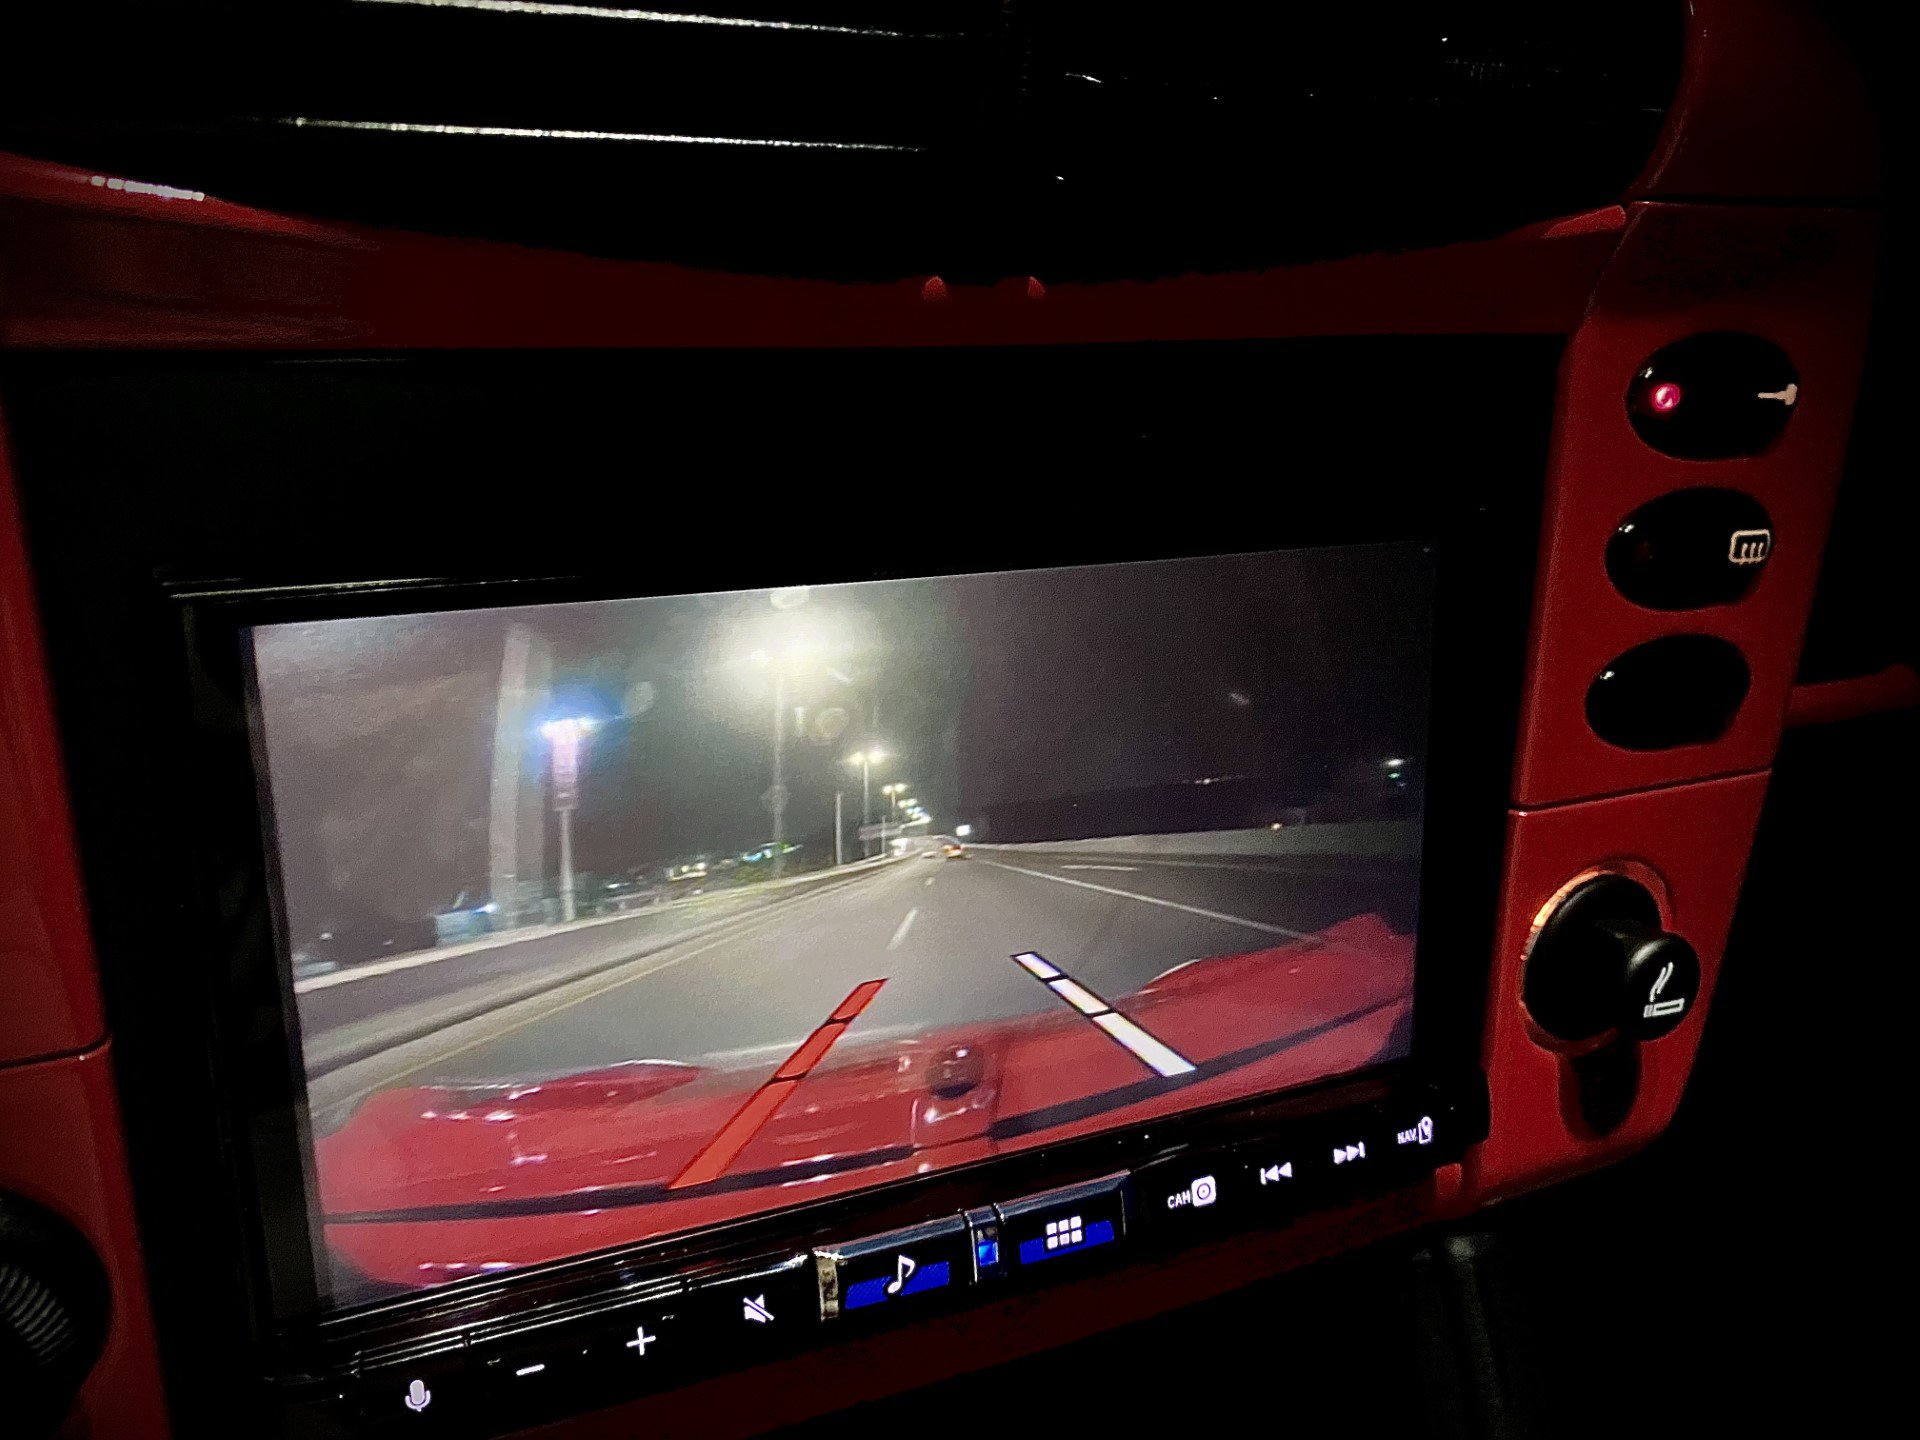
5- Lane Departure Warning
Lane departure warning in action
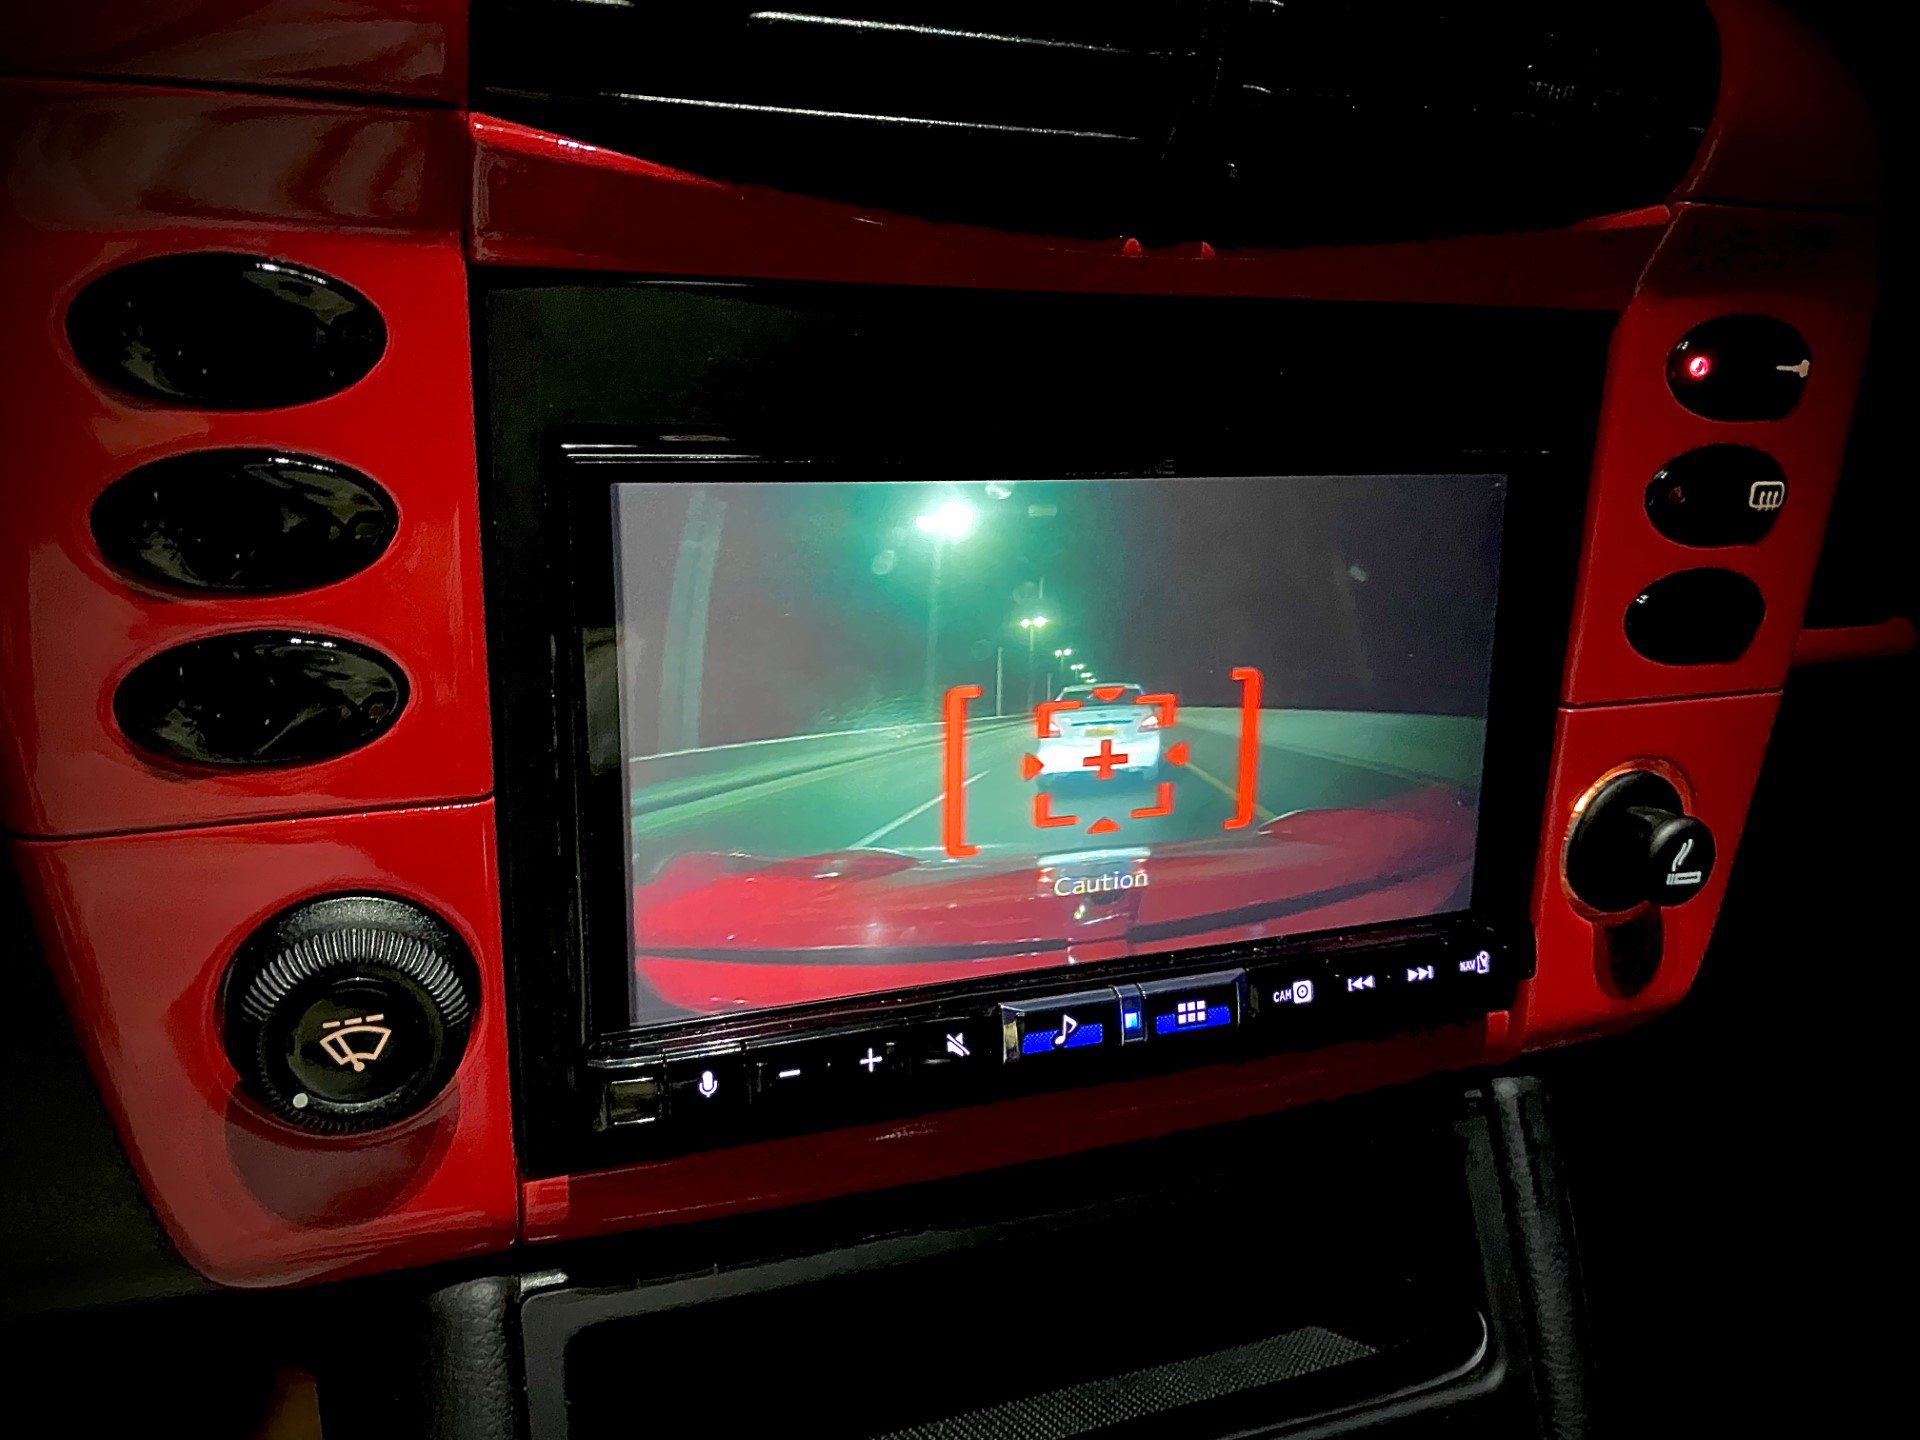
Forward collision warning in action
And finally the Alpine iLX-705D head unit installed
To clear our thoughts, I wasn't sure if an aftermarket system would perform or look like OE as the level of challenges and limitations would require a full custom solution but when you get to hear a system that is Hi-Res capable with 900W RMS power you would realize that we are limited by OE.
-
Thanks guys but opening the engine lid by the emergency cable is what I do also I have replaced the parts linked to it (7 and 8 from the part diagram above. also the lid opening switch) . However, I want to fix the electric function of the opening mechanism, so is there a way to track the problem exactly?
-
Hi guys,
When I try to open the engine lid by the switch it doesn't operate, I changed almost everything (lock mechanism, electric switch) but still it doesn't operate. is there a way to test the engine lid system?
Regards.
-
Hi everyone
I'm out to buy a new diagnostic tool and I came into two options:
1- Durametric Pro
2- Autel MaxiSys Elite
The price difference between Durametric and Autel unit is big but in my case I have to get laptop or PC that support Durametric and this will bring the price to a range closer to the Autel unit. The question is what functions in the Durametric Pro that is not available in the Autel MaxiSys Elite?
Here is the Function list for the Autel unit:
-
I guess this explains why my math teacher was upset

-
 1
1
-
-
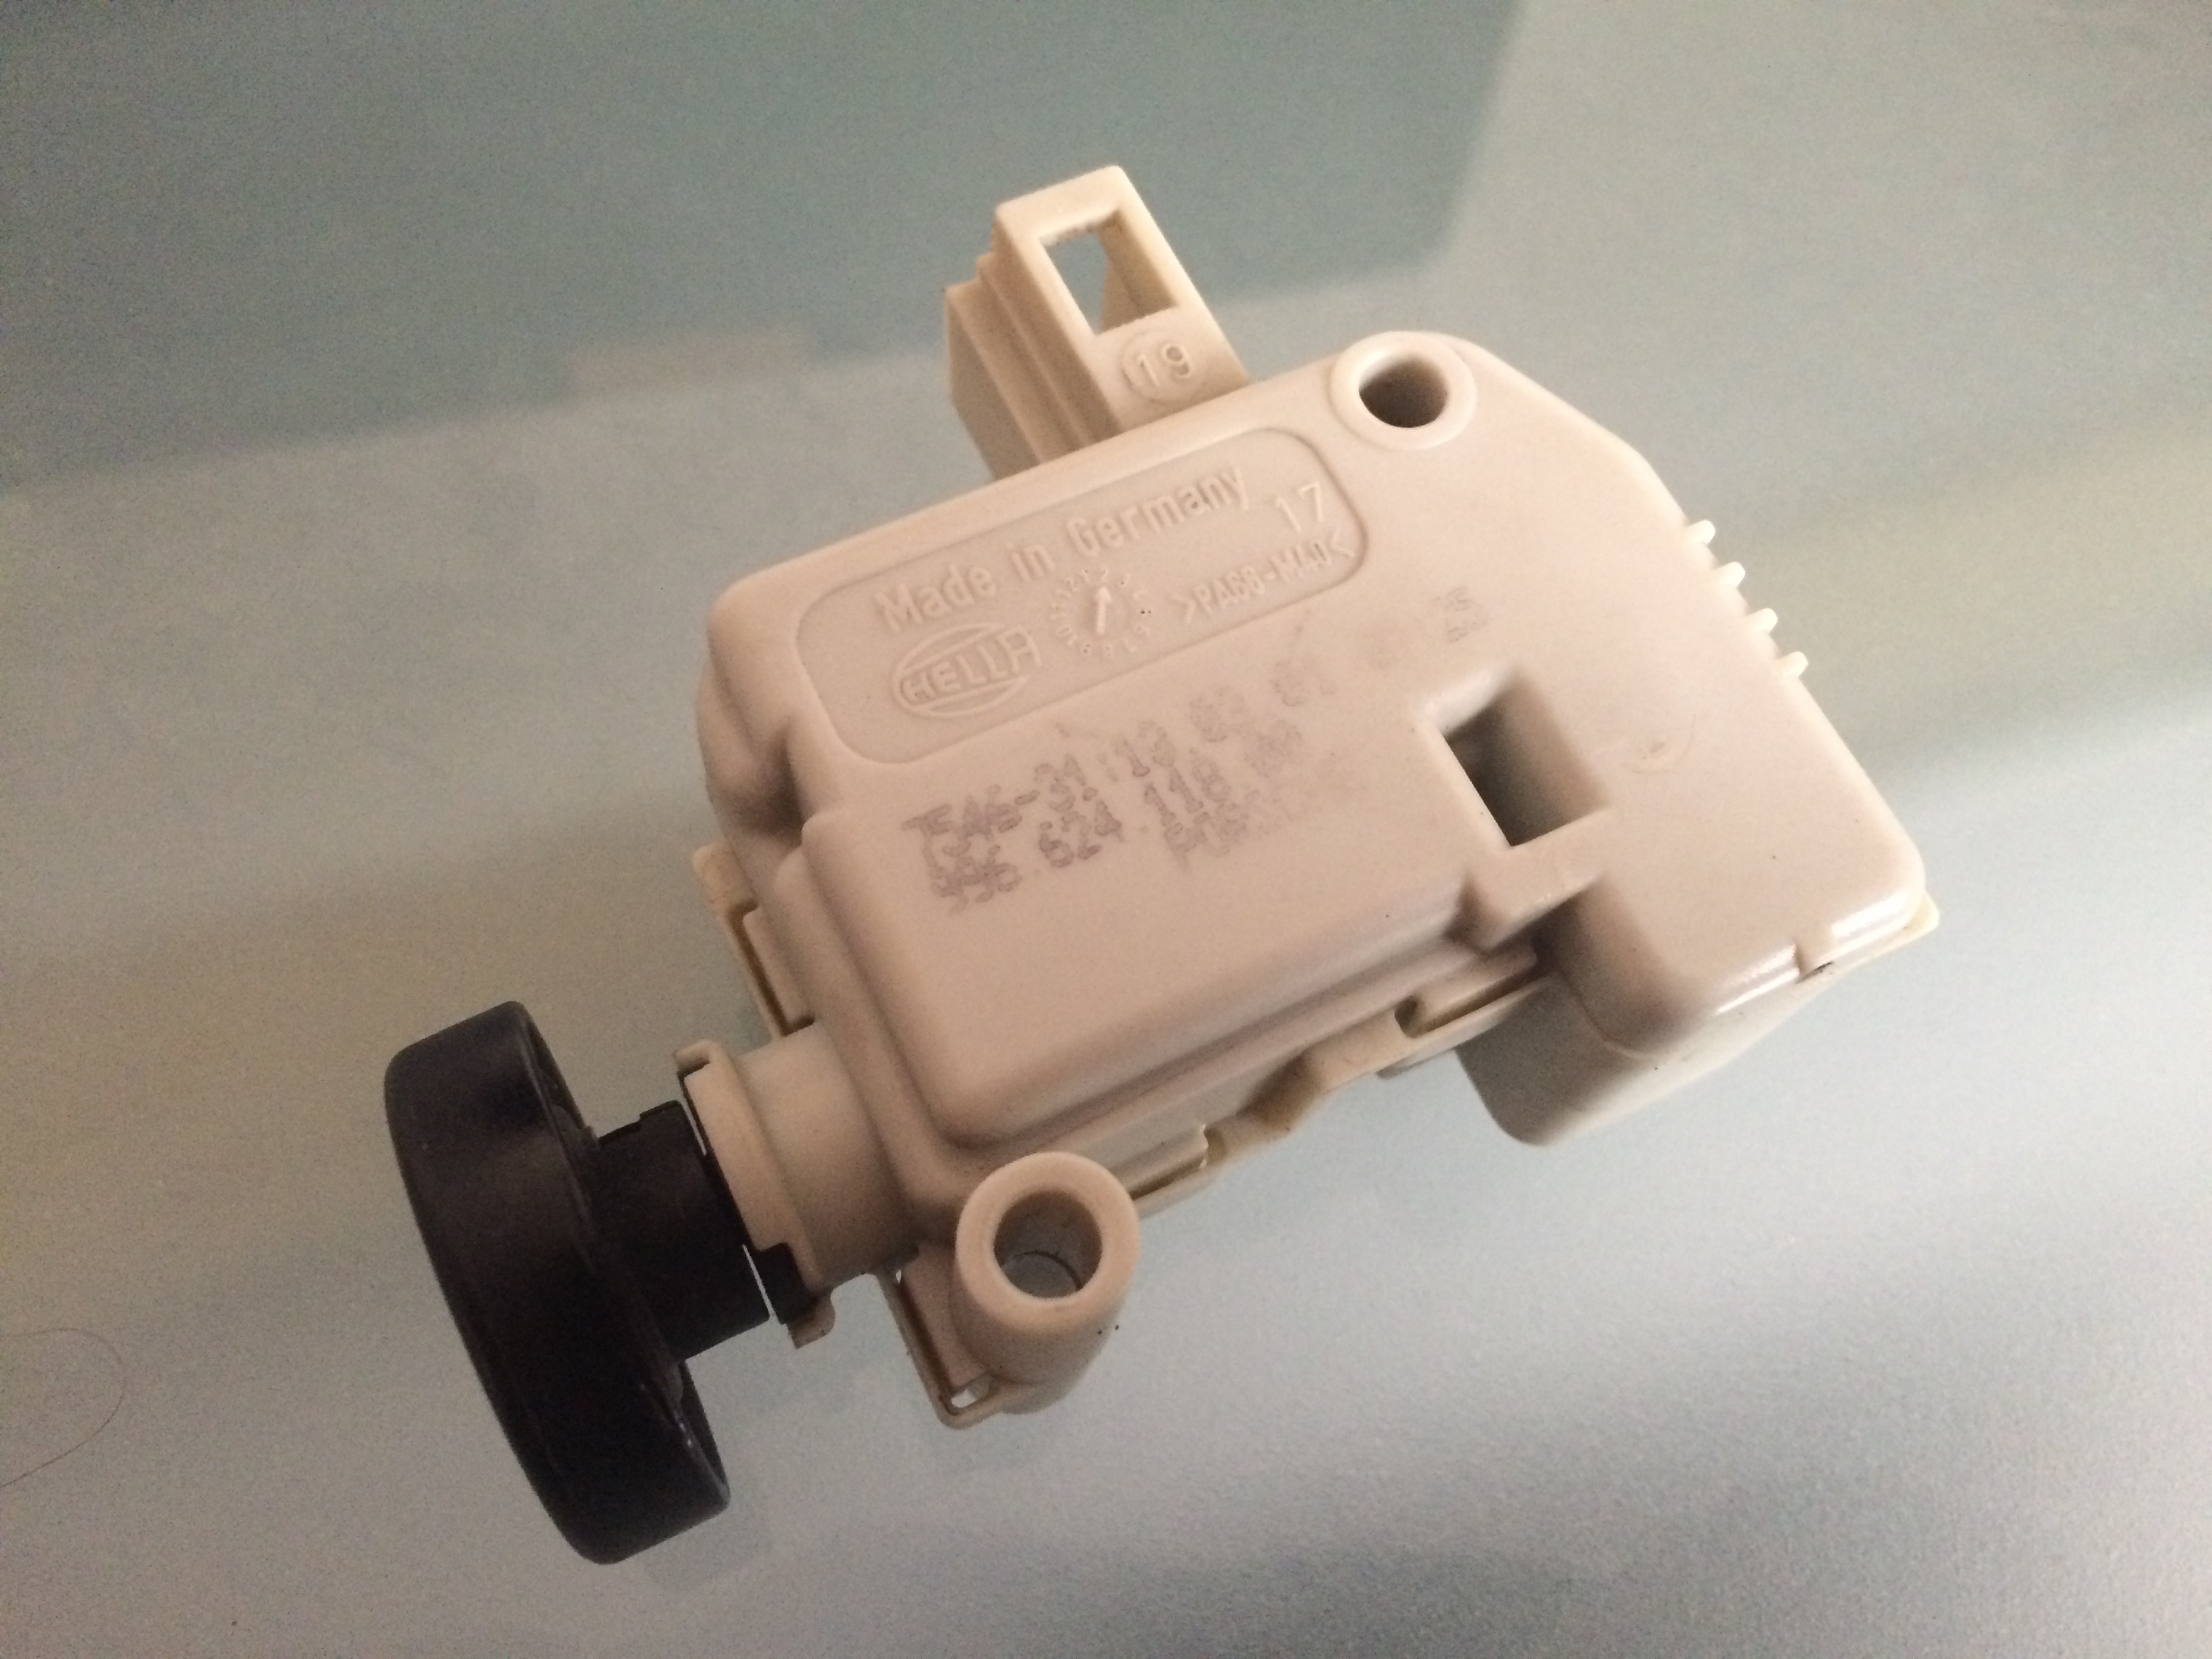
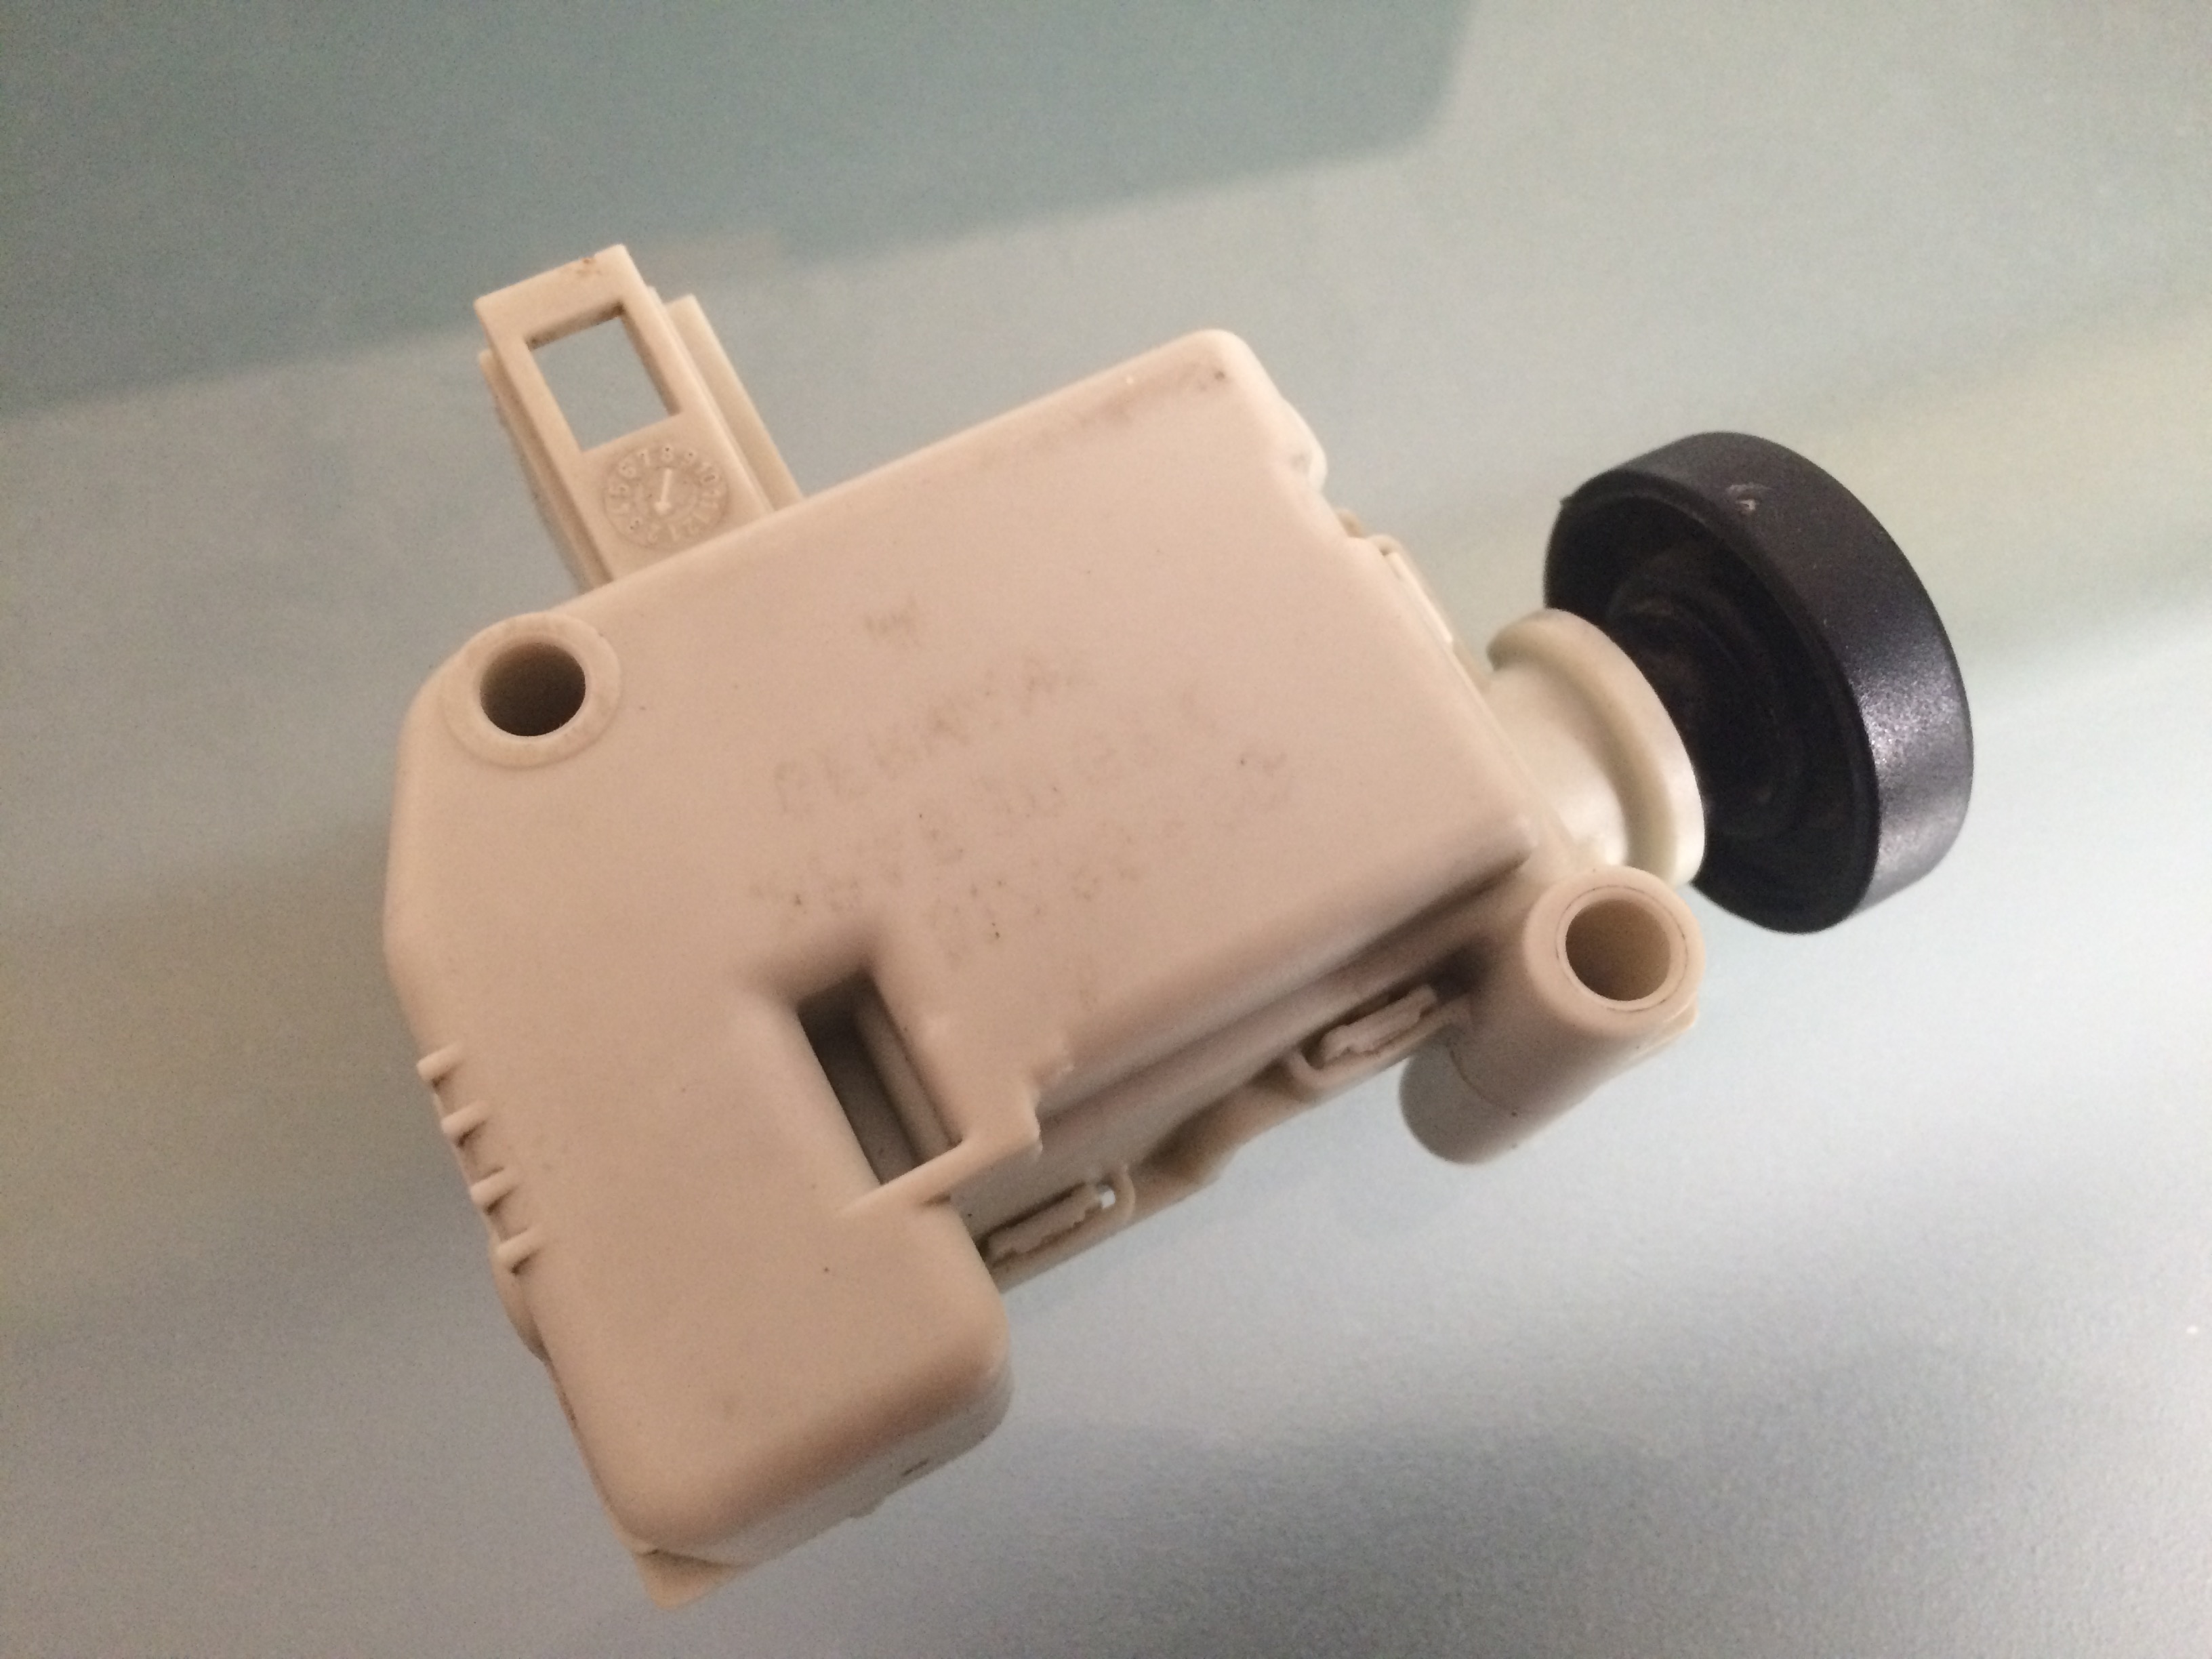
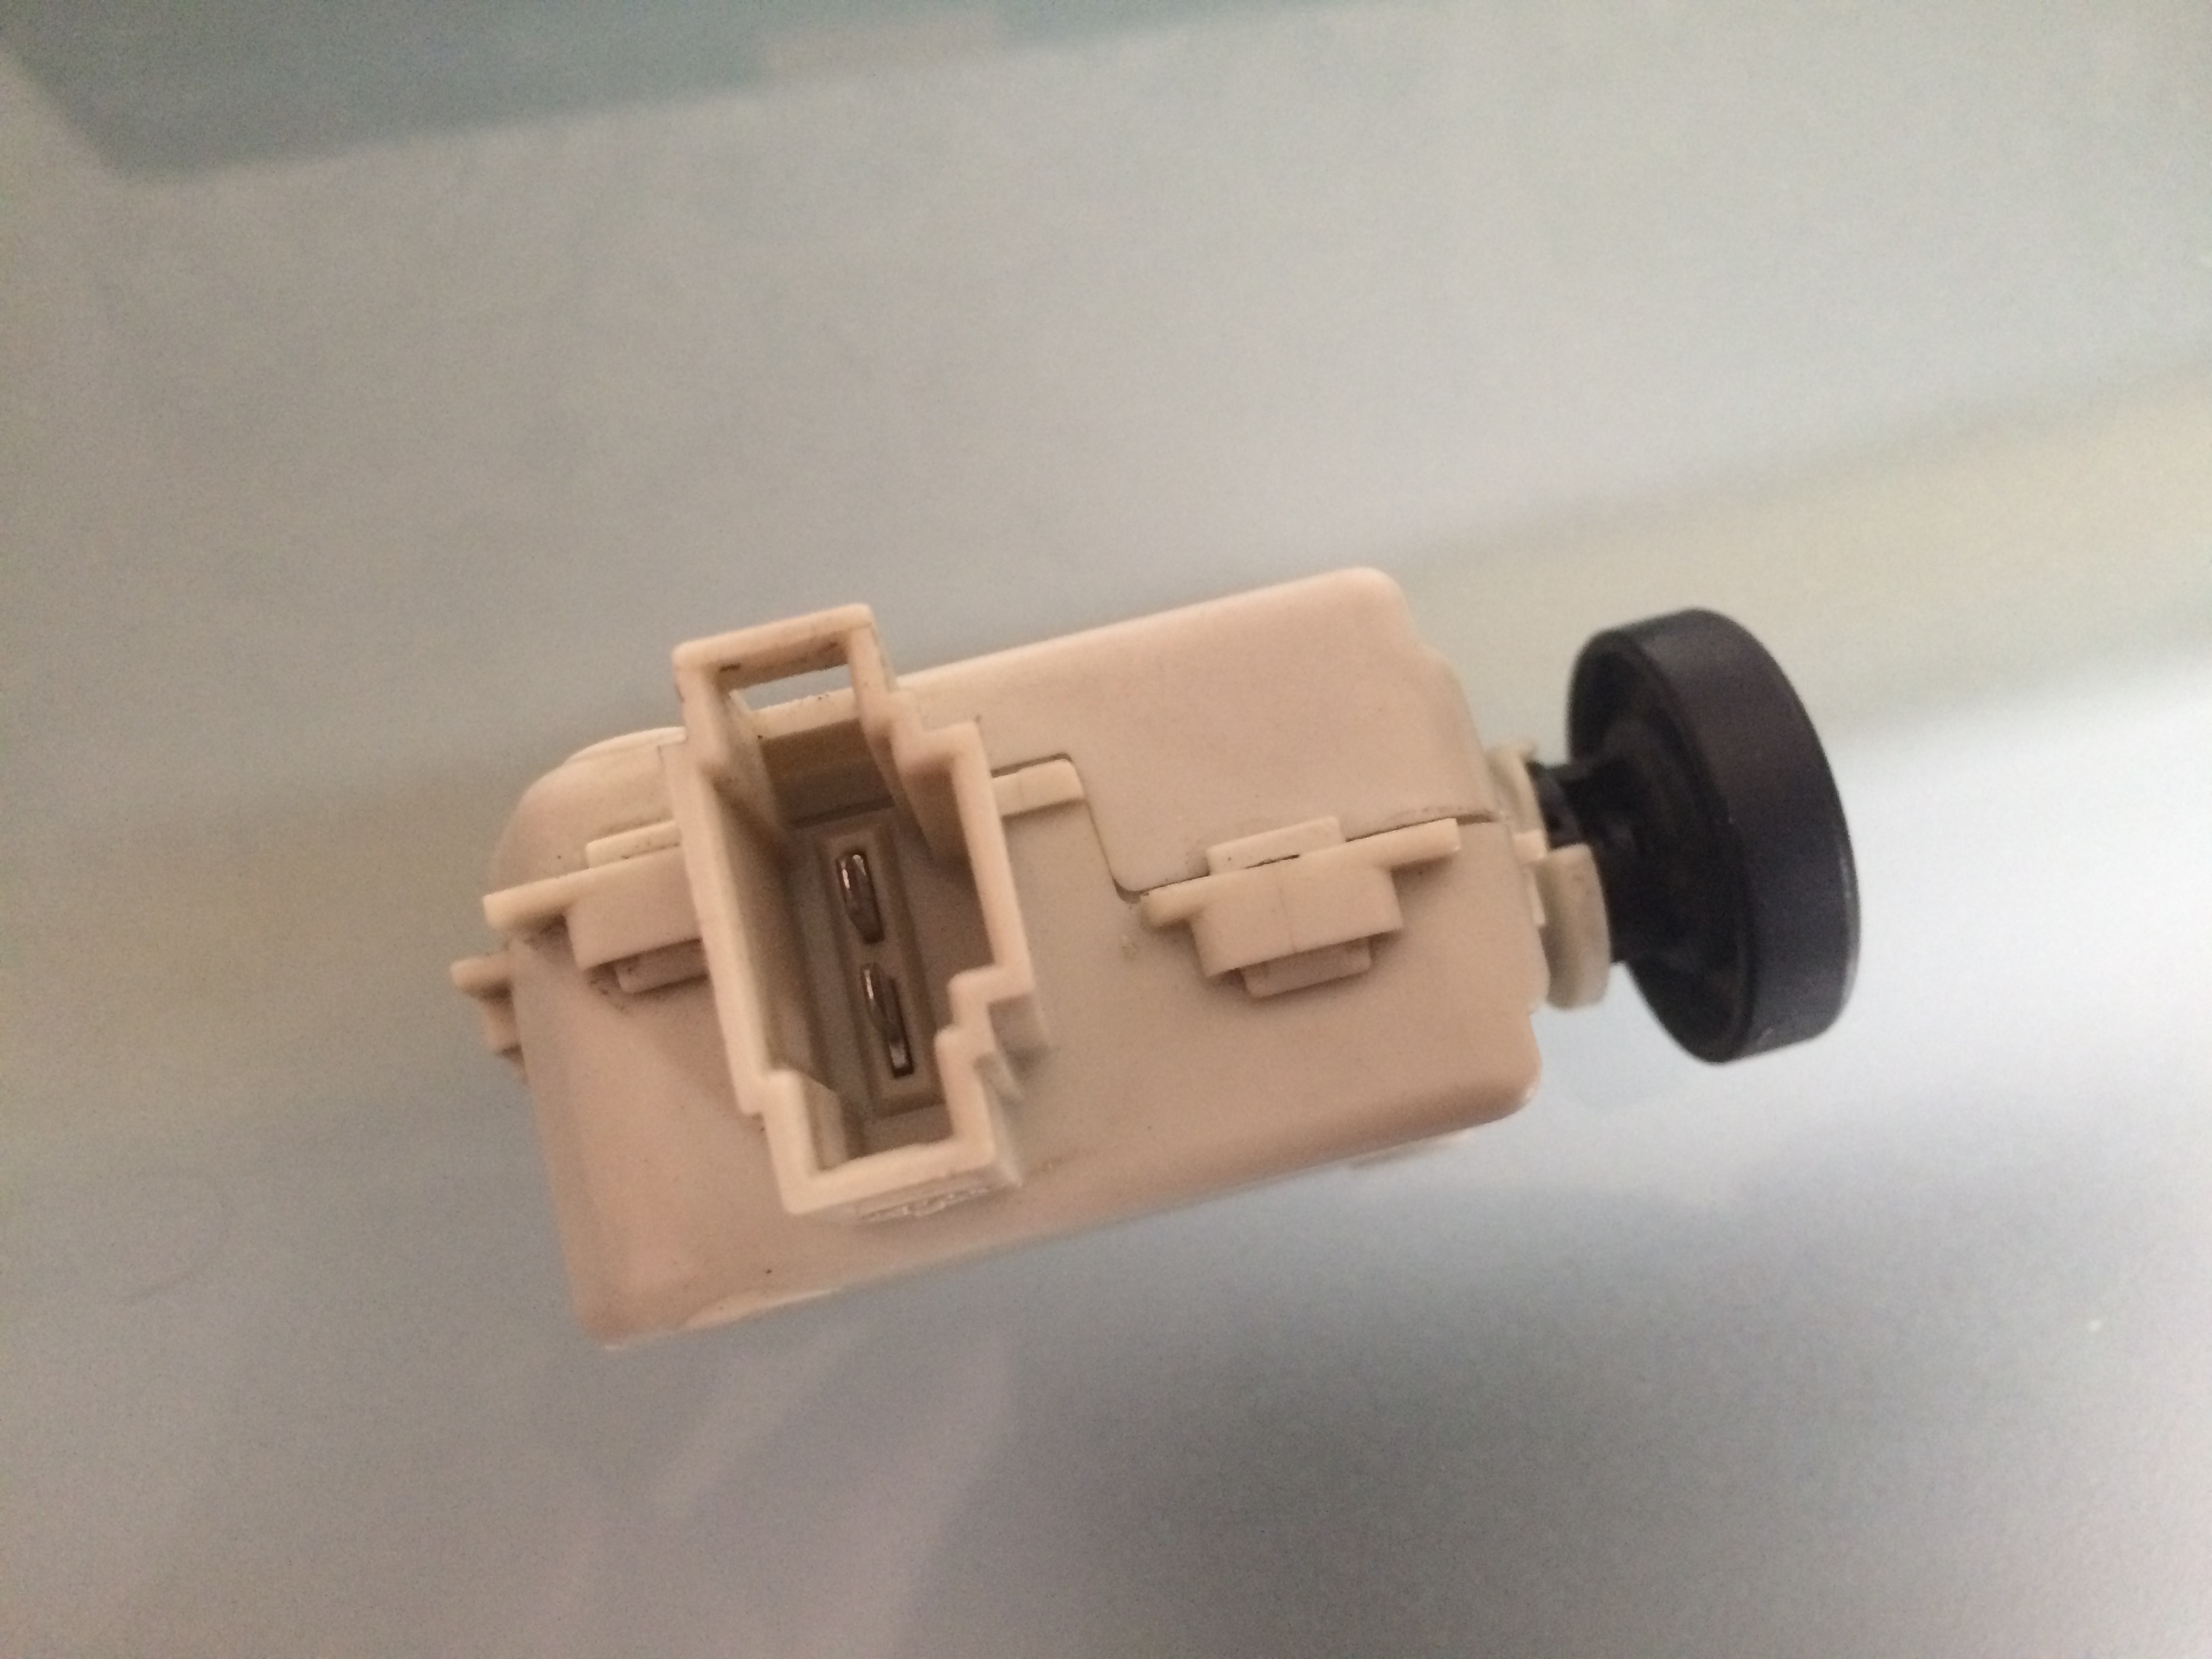
Exactly as I think that the lock rod is attached to this solenoid but when looking at 99662411800 I'm not able to identify where does it link. also when doing some research I have found that there are more part numbers that have the same solenoid like the 99662411700. However, the difference is in the linkage part and the electric connection:
-
This part consist of three different part number, two of them are just a casing (99651226500 and 99651205500) and the other is an electrical part (99662411800) but it is not available in the parts diagram nor the dealer. However, is this part is connected to the rear latch mechanism?
-
Actually I wanted to know the function of this part as in the Porsche parts diagram it seems to be actuator related to the anti theft system (number 8 in the diagram):
http://www.autoatlanta.com/porsche-parts/hardparts.php?dir=996-99-05§ion=803-05
-
Hi
Could someone explain the function of the locking throttle control actuator (99651205500)? if it went bad what are the symptoms? and could it effect the engine while running?
Many thanks
-
Thanks Loren but could you please tell us the drift sizes available in the B90 tool? as the ABN tool has the following sizes (Drift Sizes: 50, 55, 60, 64, 67, 70, 72, 74, 75, 78, 82,84, and 88mm) and the price difference is huge between to two tools, I understand that the B90 tool has the alignment adapter which the ABN doesn't have but still want to compare the sizing available in each kit.
-
Hi everyone,
I'm about to rebuilt the axles on the my 996 and at the same time will change the wheel bearings. However, I need some tools to get the job done properly and safely so I searched and I saw this tools from ABN:
https://www.amazon.com/gp/product/B00QL1APQQ/ref=ox_sc_act_title_1?ie=UTF8&psc=1&smid=A1UMBRA5ZTBCX8
Is this going to work with my application? I mean will I be able to remove and install the wheel bearings (front and rear) using this tool?
Thanks
-
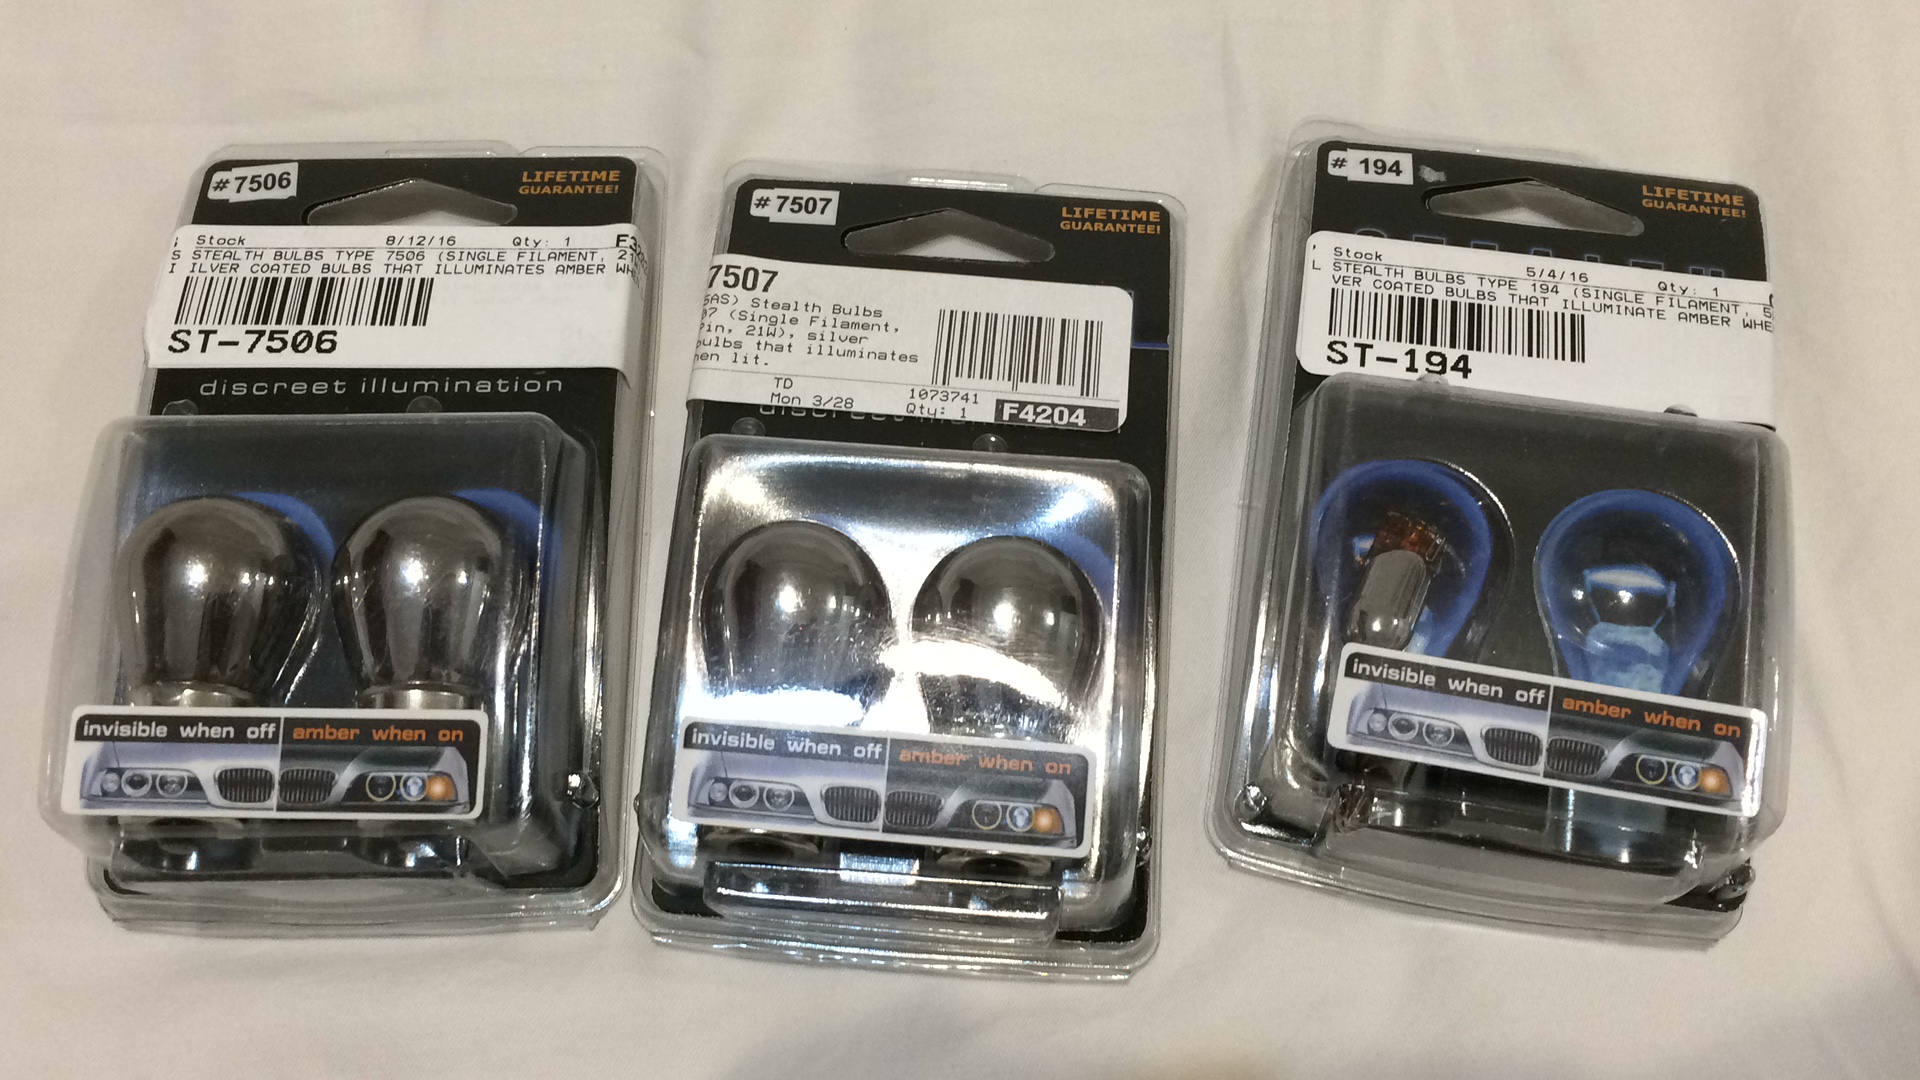
Hi Everyone
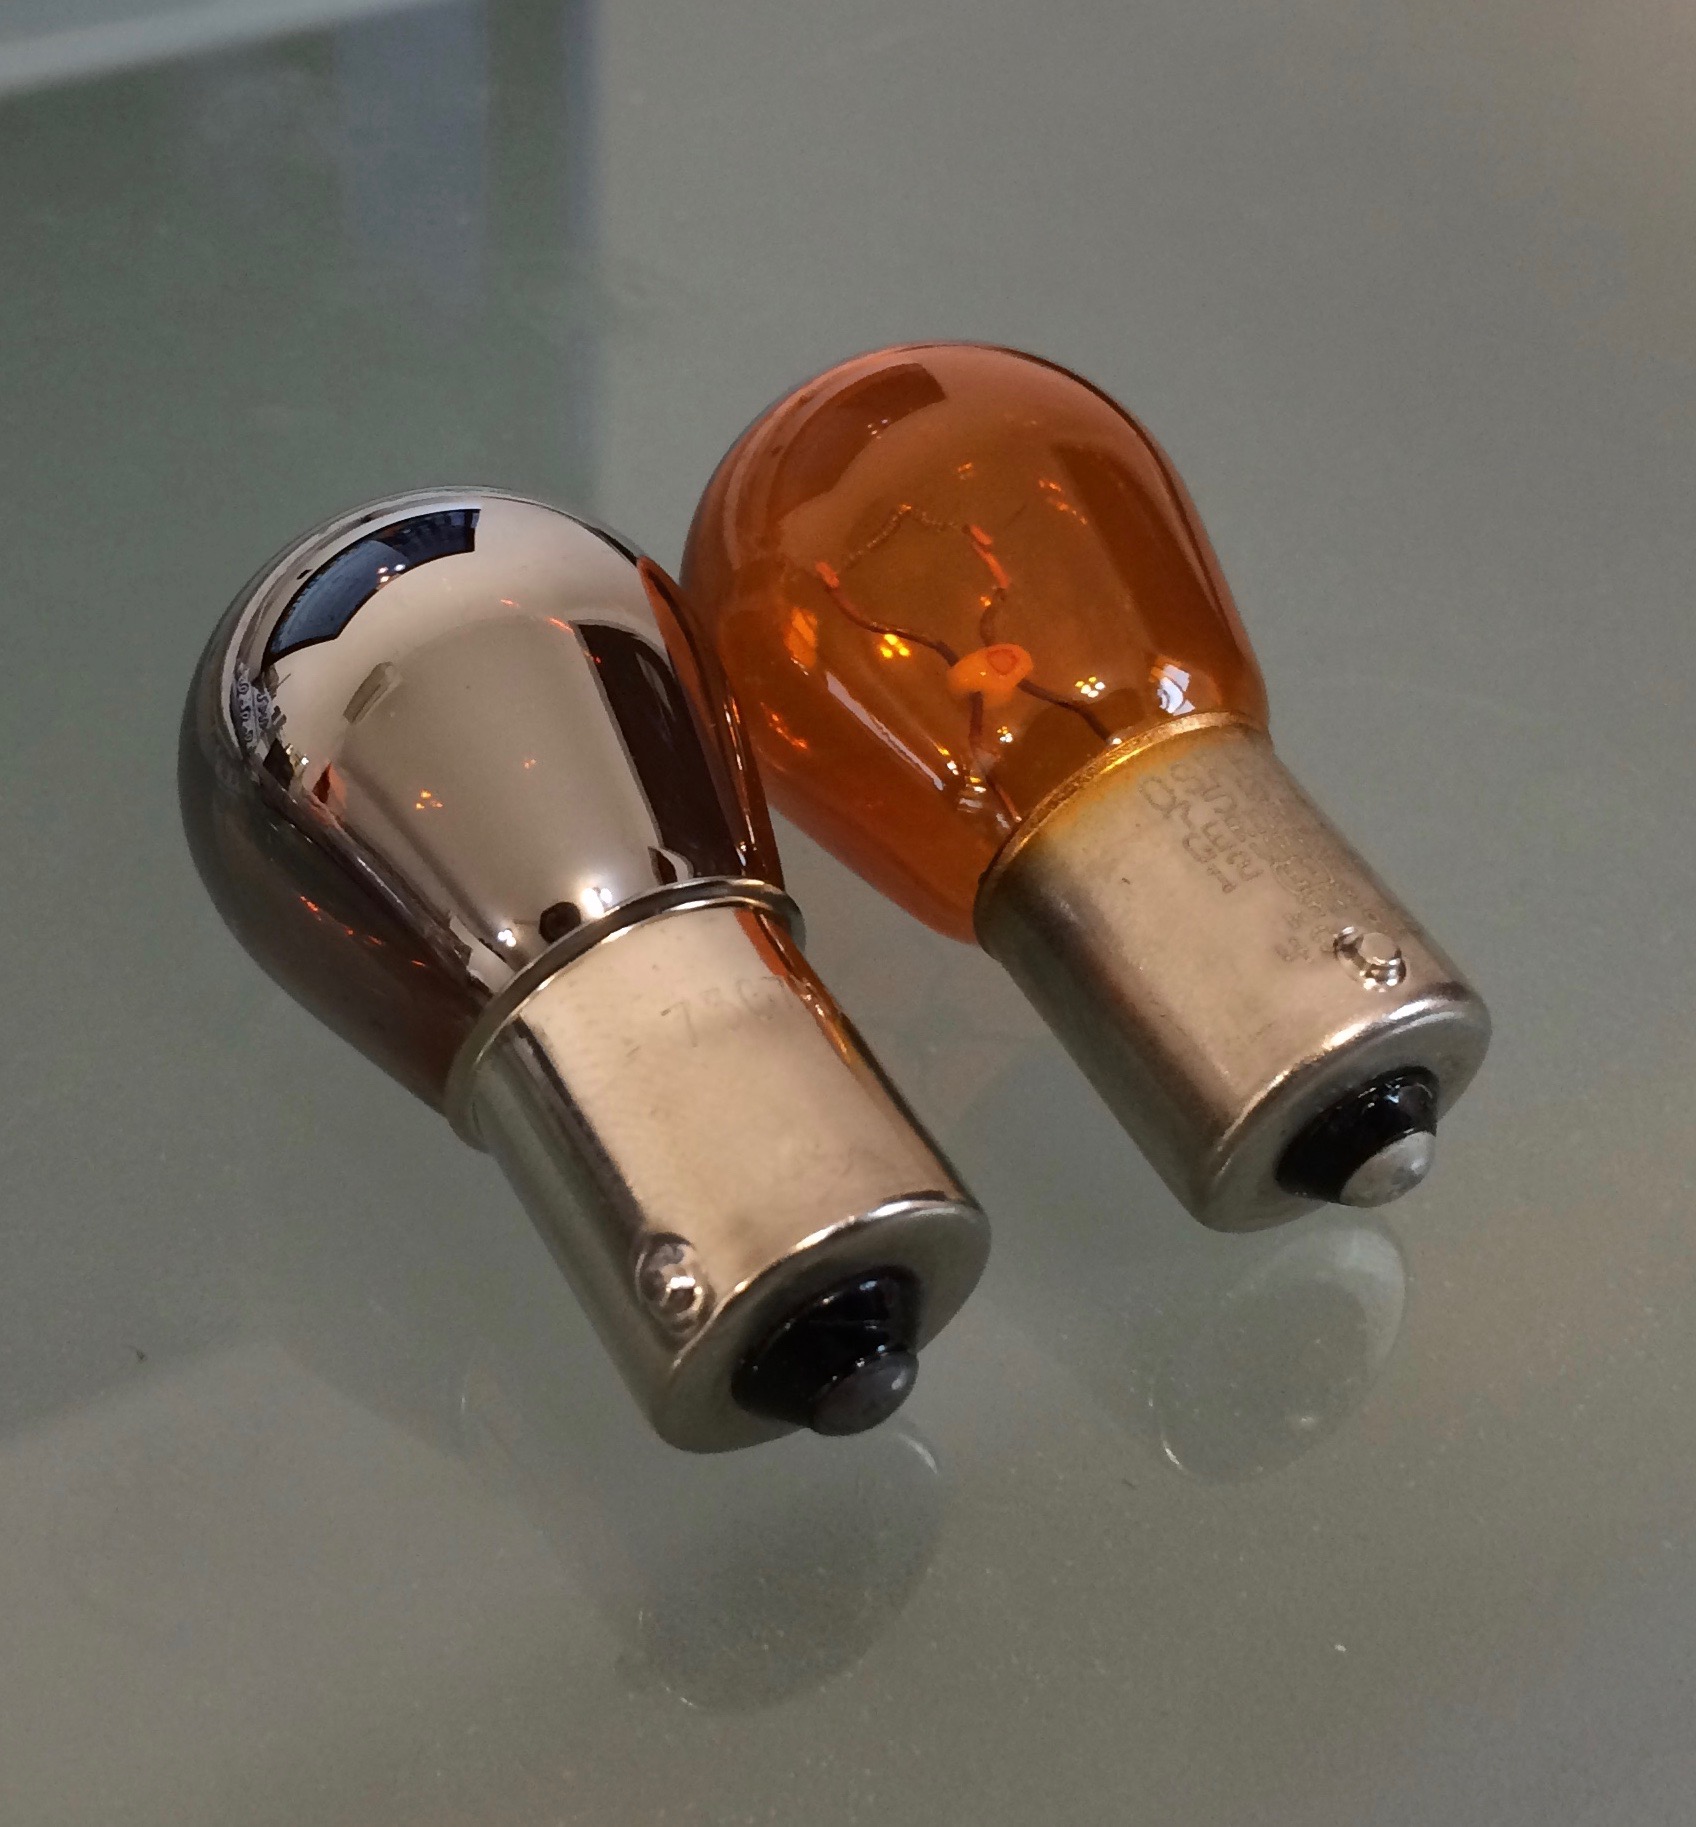
Recently I bought the stealth bulbs for the 996 to test the look and function of these bulbs and compare it with the OEM bulbs. This review is based on the Porsche Carrera 996 MK1 and we will be comparing four main points (Quality, look, function and price).
1- Quality. Starting with the packing, these bulbs are packed and presented well. However, the 194 bulbs are packed with the same mold used for the 7507 and 7506 bulbs.
And here is the stealth bulb along with the OEM blub:
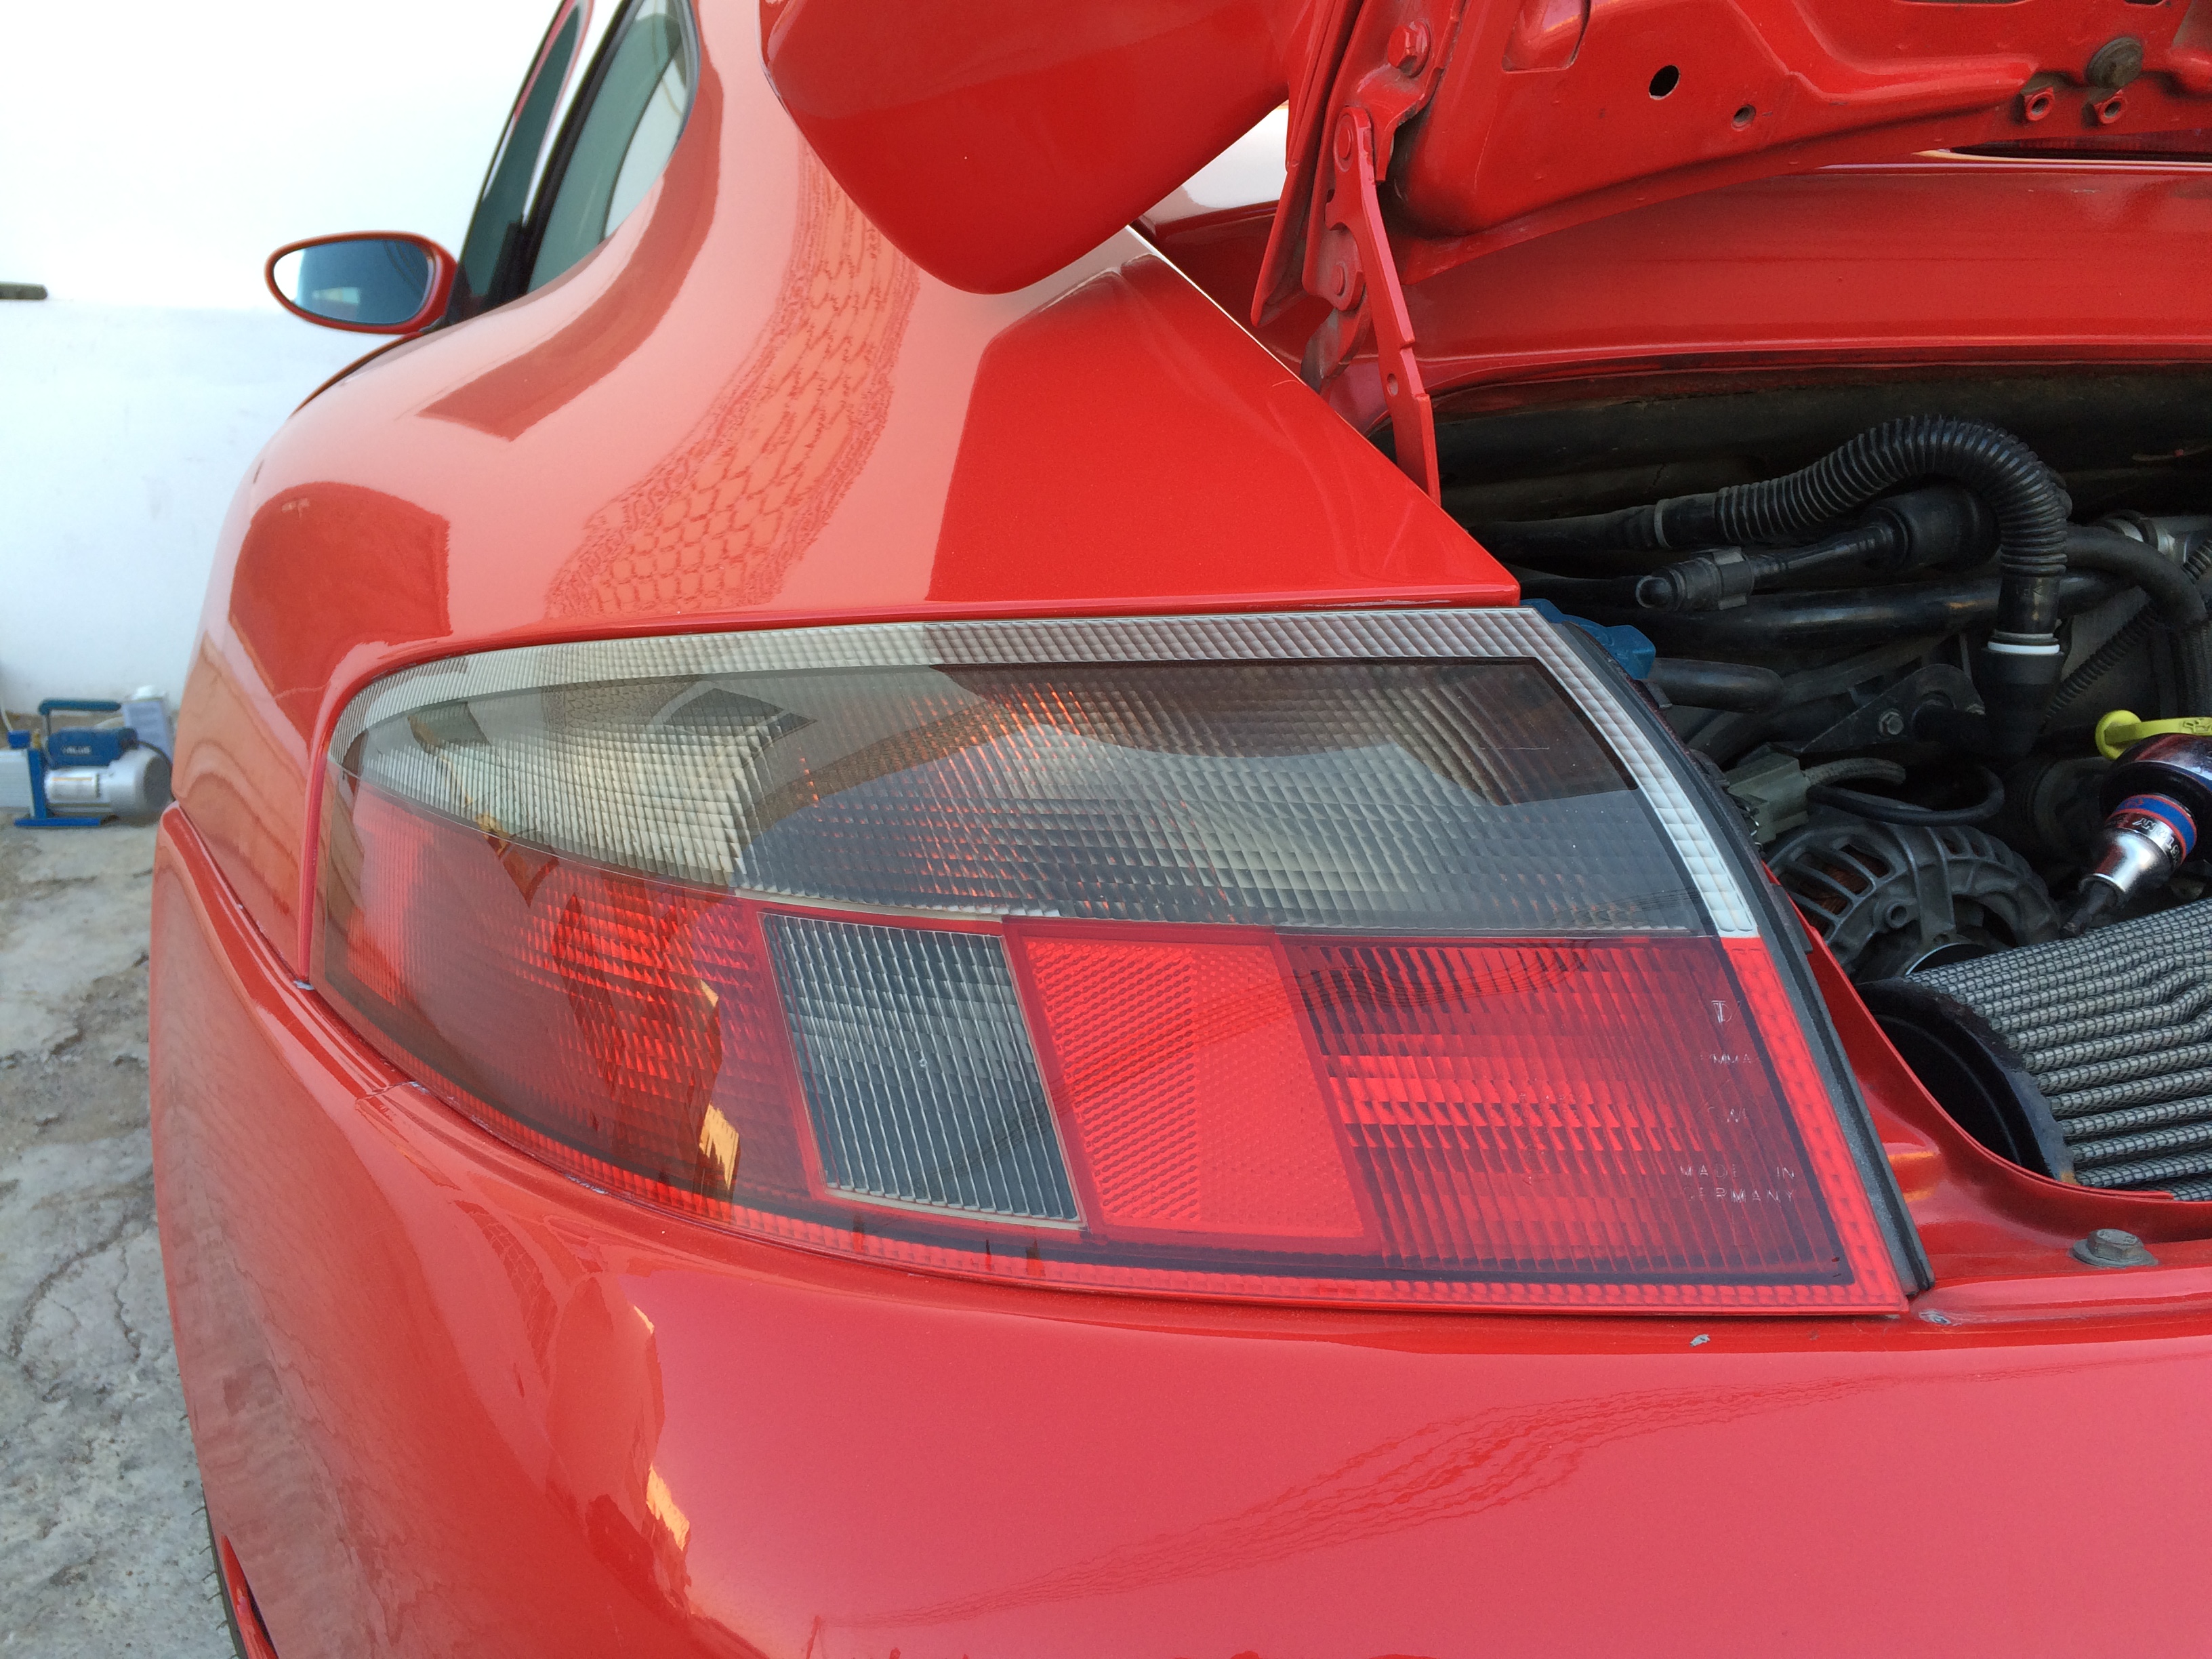
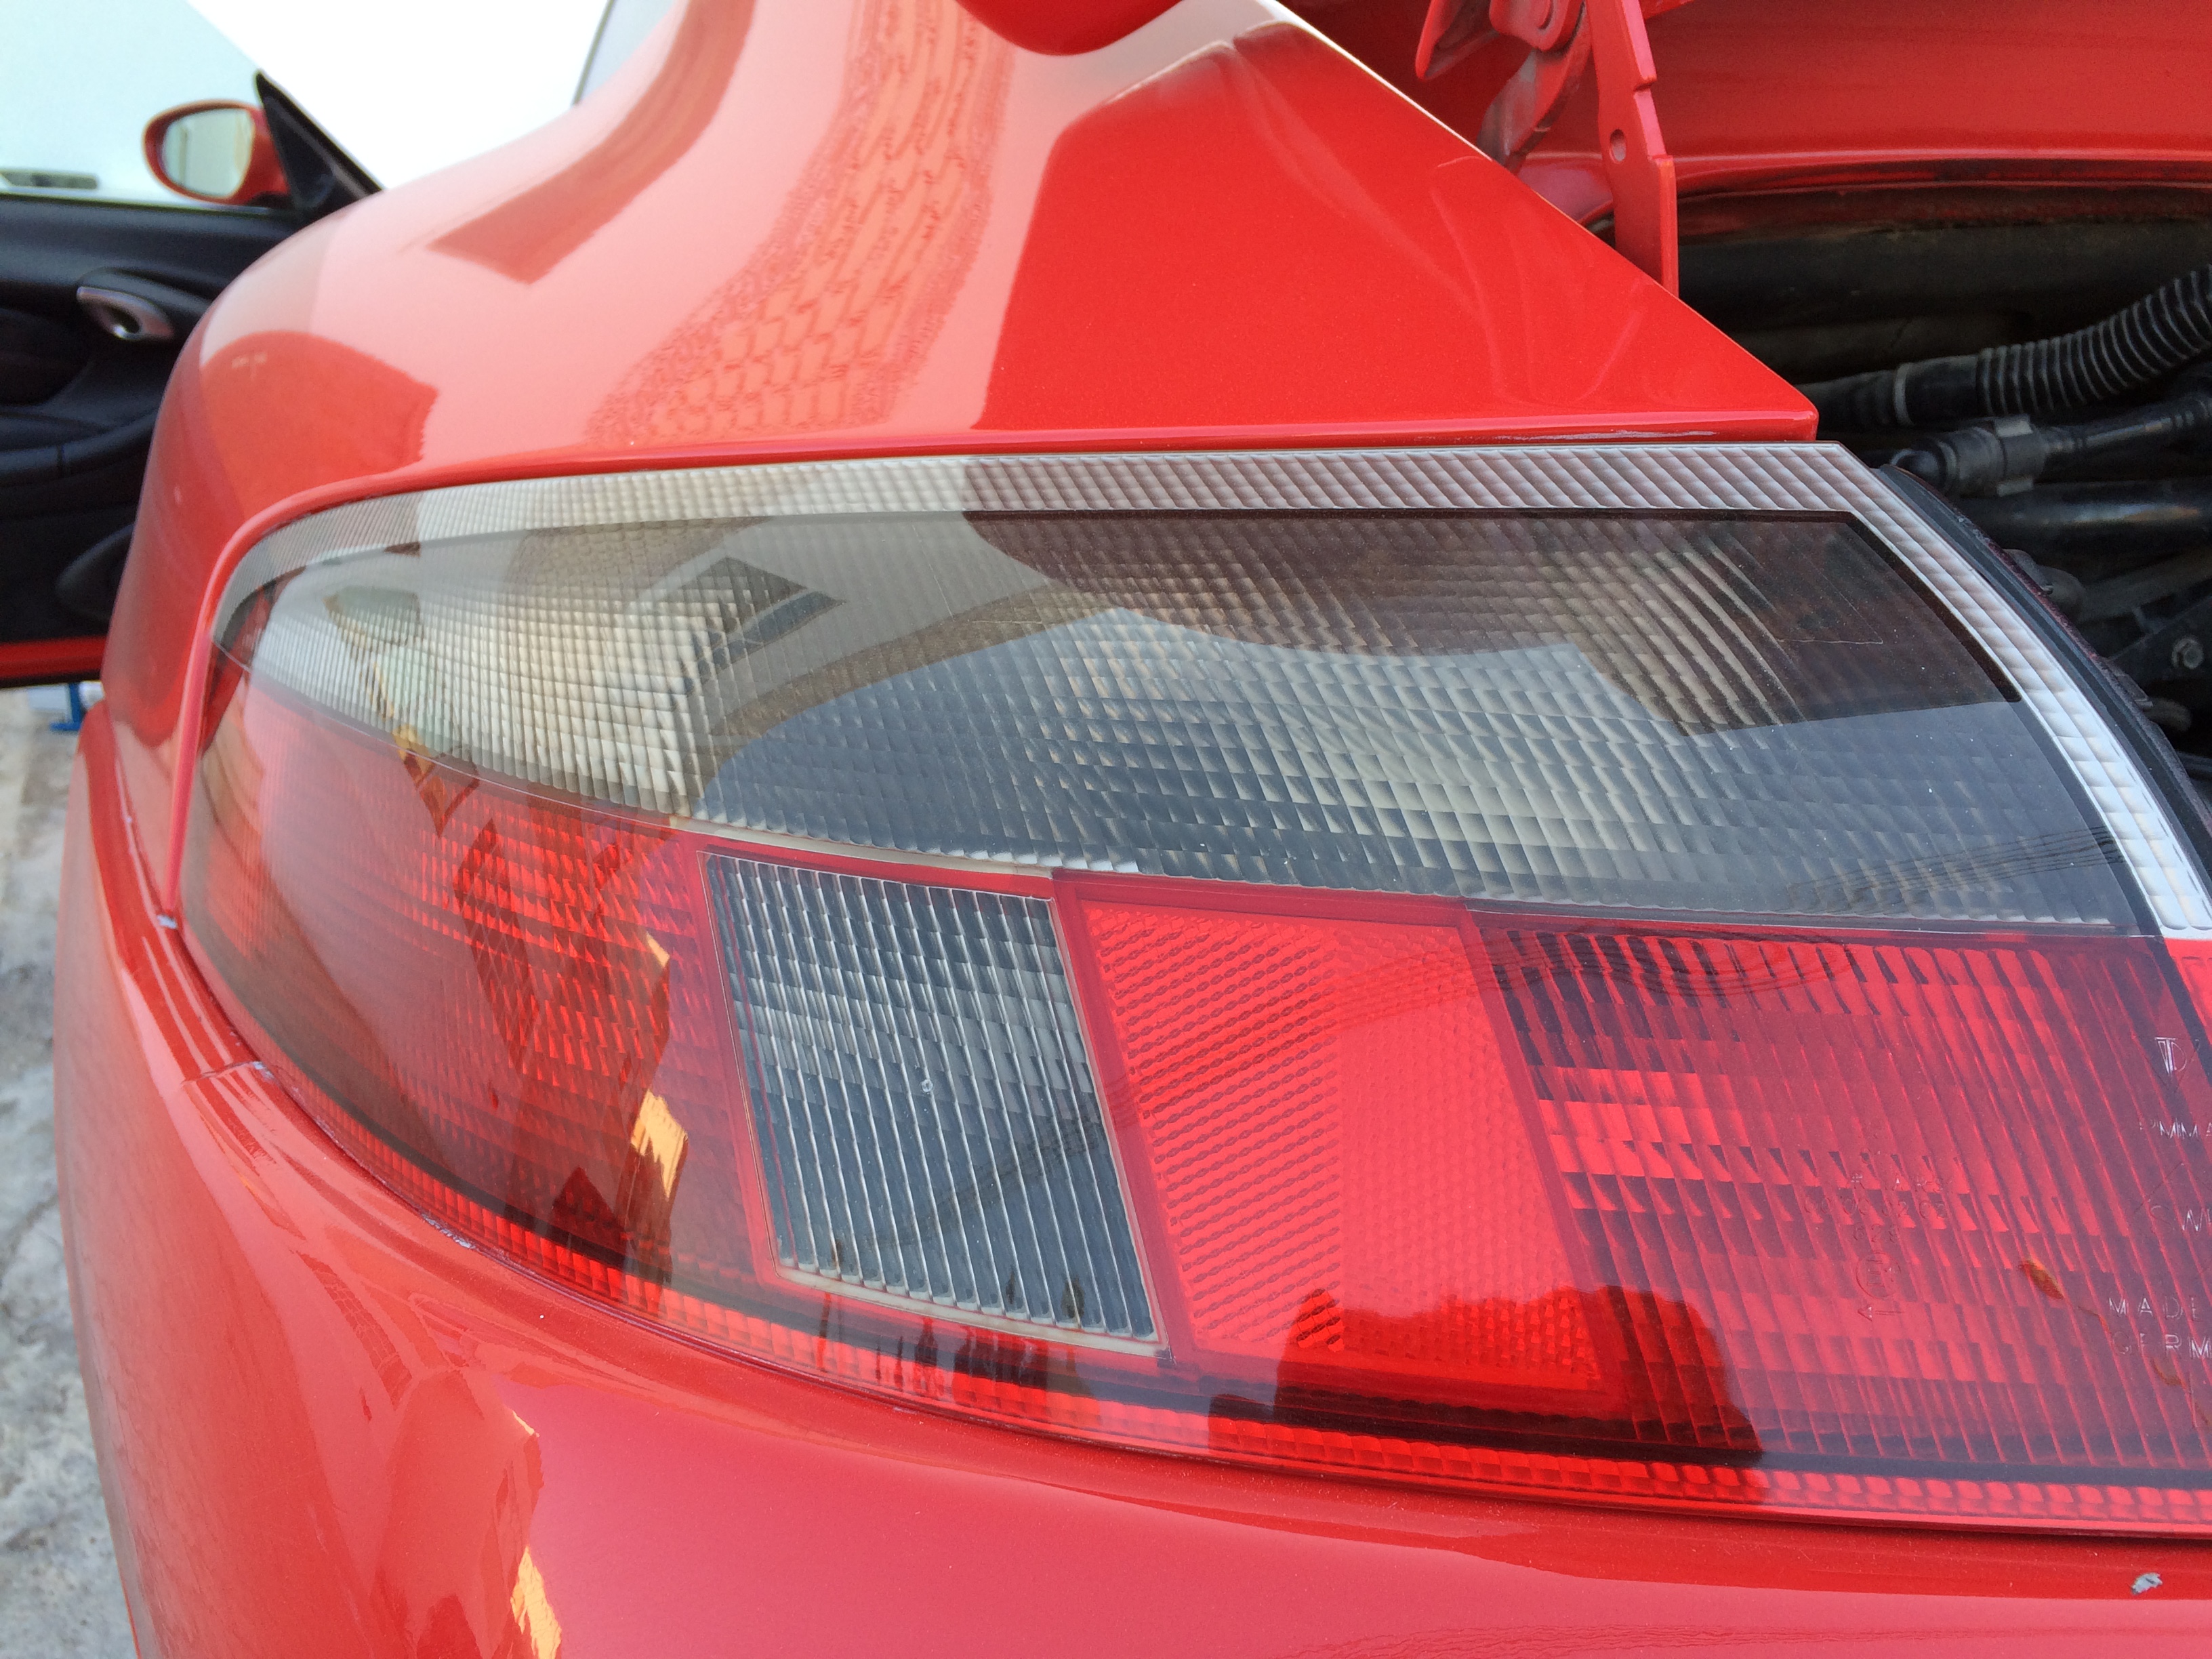
2- Look. When used for the side and rear turn signals the stealth bulbs does remove the orange hint in the turn signal housing. However, for the front turn signals there is no use because the internal lenses inside the headlight is orange and the OEM bulb is clear.
OEM Bulb
Stealth Bulb
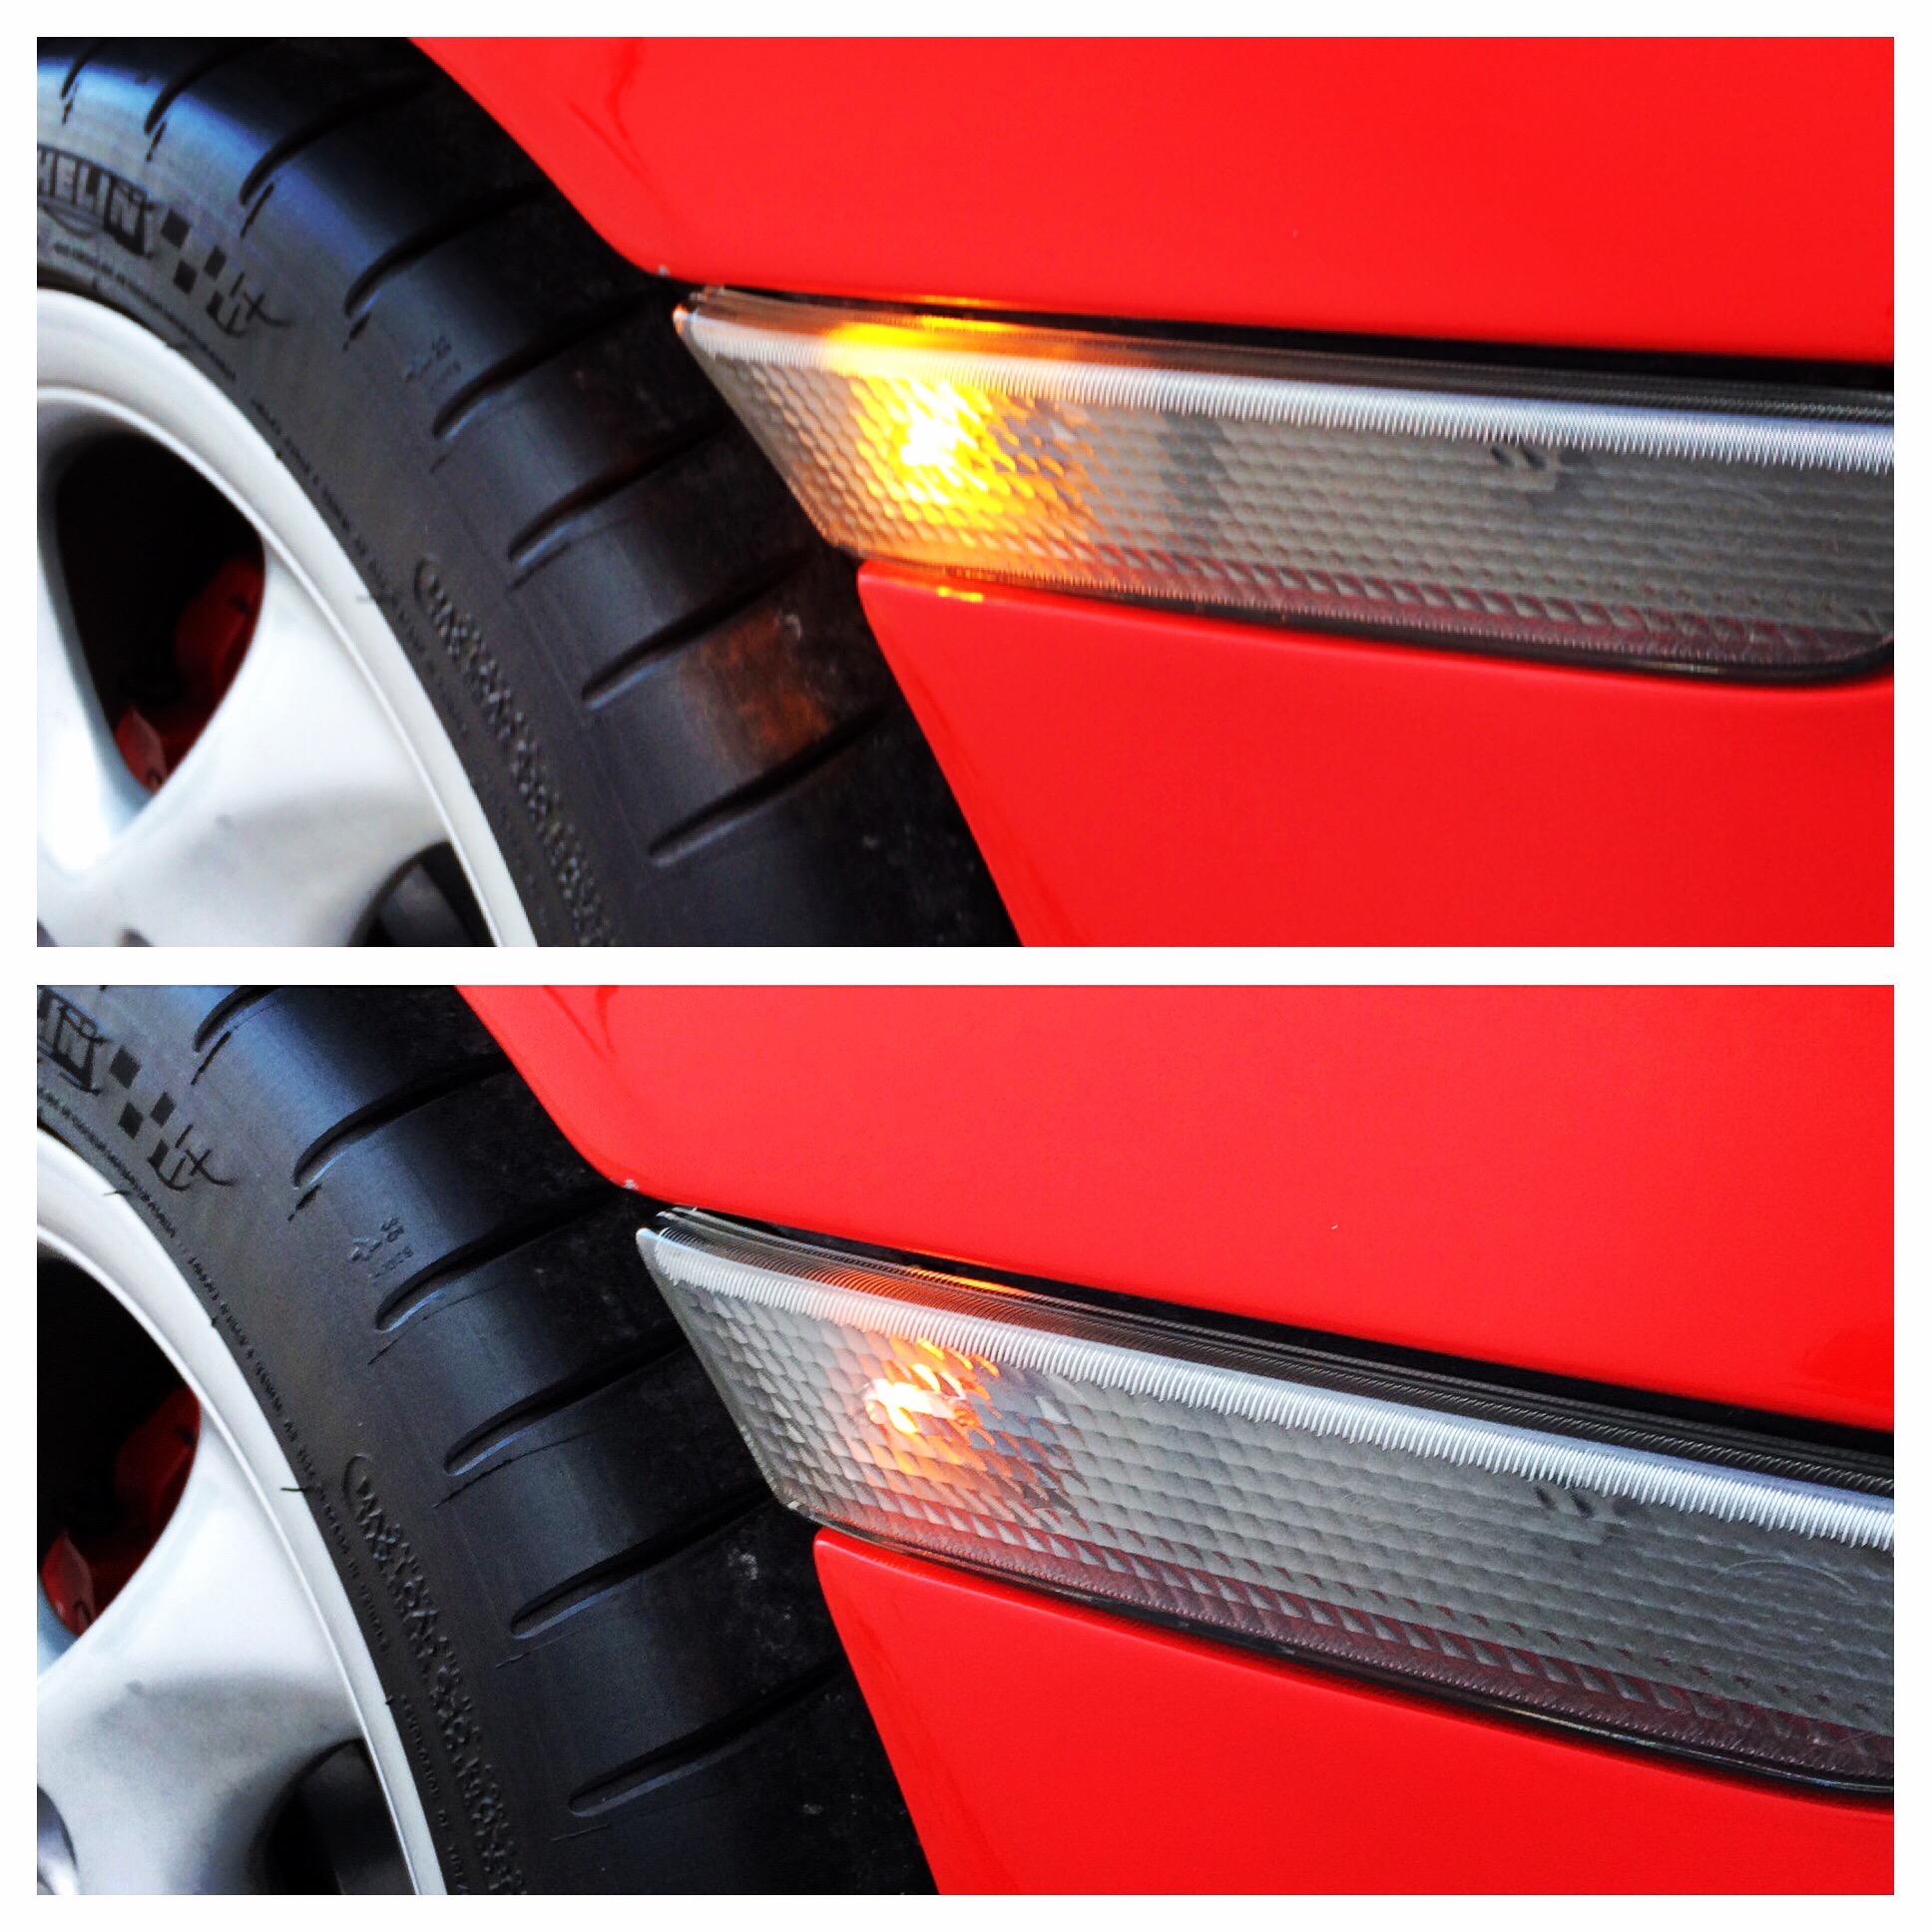
3- Function. When operating the turn signals the stealth bulbs will illuminate less than the OEM bulbs as shown here in the following pictures:
4- Price. The price difference between the stealth bulbs and the OEM bulbs are as follows:
OEM 194 bulb = $4.5
Stealth bulb = $28.99
Difference = $24.49 = 84%
OEM 7507 bulb = $4.5
Stealth bulb = $29
Difference = $24.5 = 84%
OEM 7506 bulb = $9.25
Stealth bulb = $29
Difference = $19.75 = 68%
In conclusion, the quality and the look of the stealth bulbs are good and does enhance the look of the rear and side light housing by eliminating the orange hint. However, the function and price are in the favor of OEM bulbs.
-
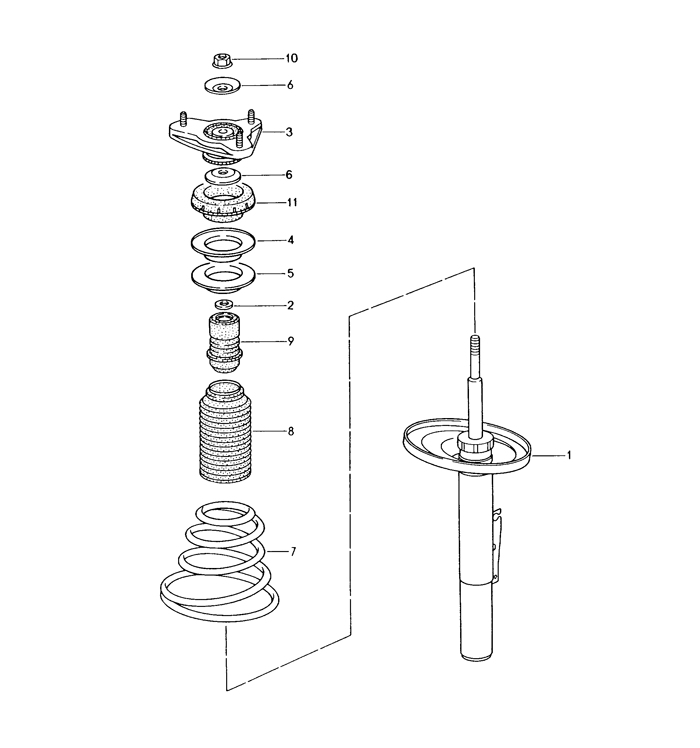
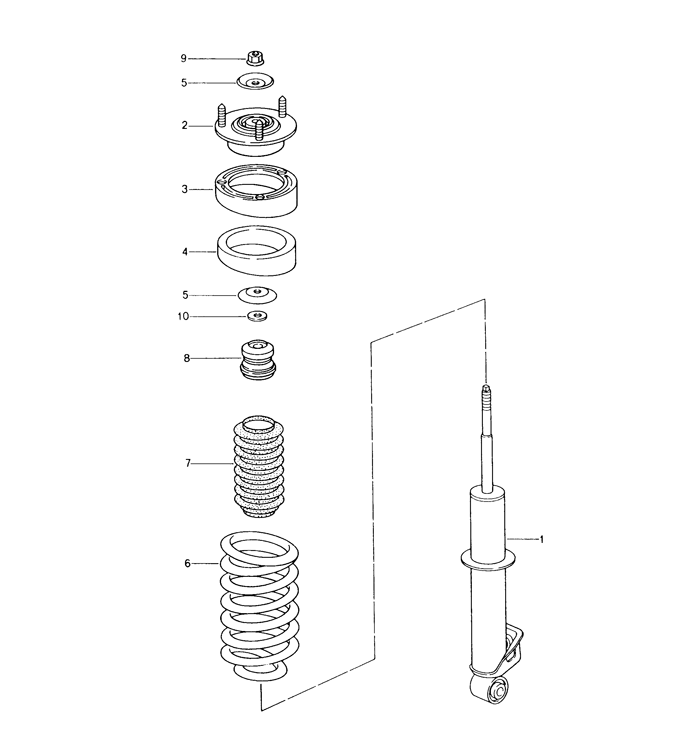
Hi everyone
I'm trying to find out how to identify the correct compensation plate thickness for the 2001 Porsche Carrera 996? with assumption that the car has no compensation plate or suspension system to check the current compensation plate thickness.
Part number 5 from this diagram:
Also part number 3 from this diagram:
-
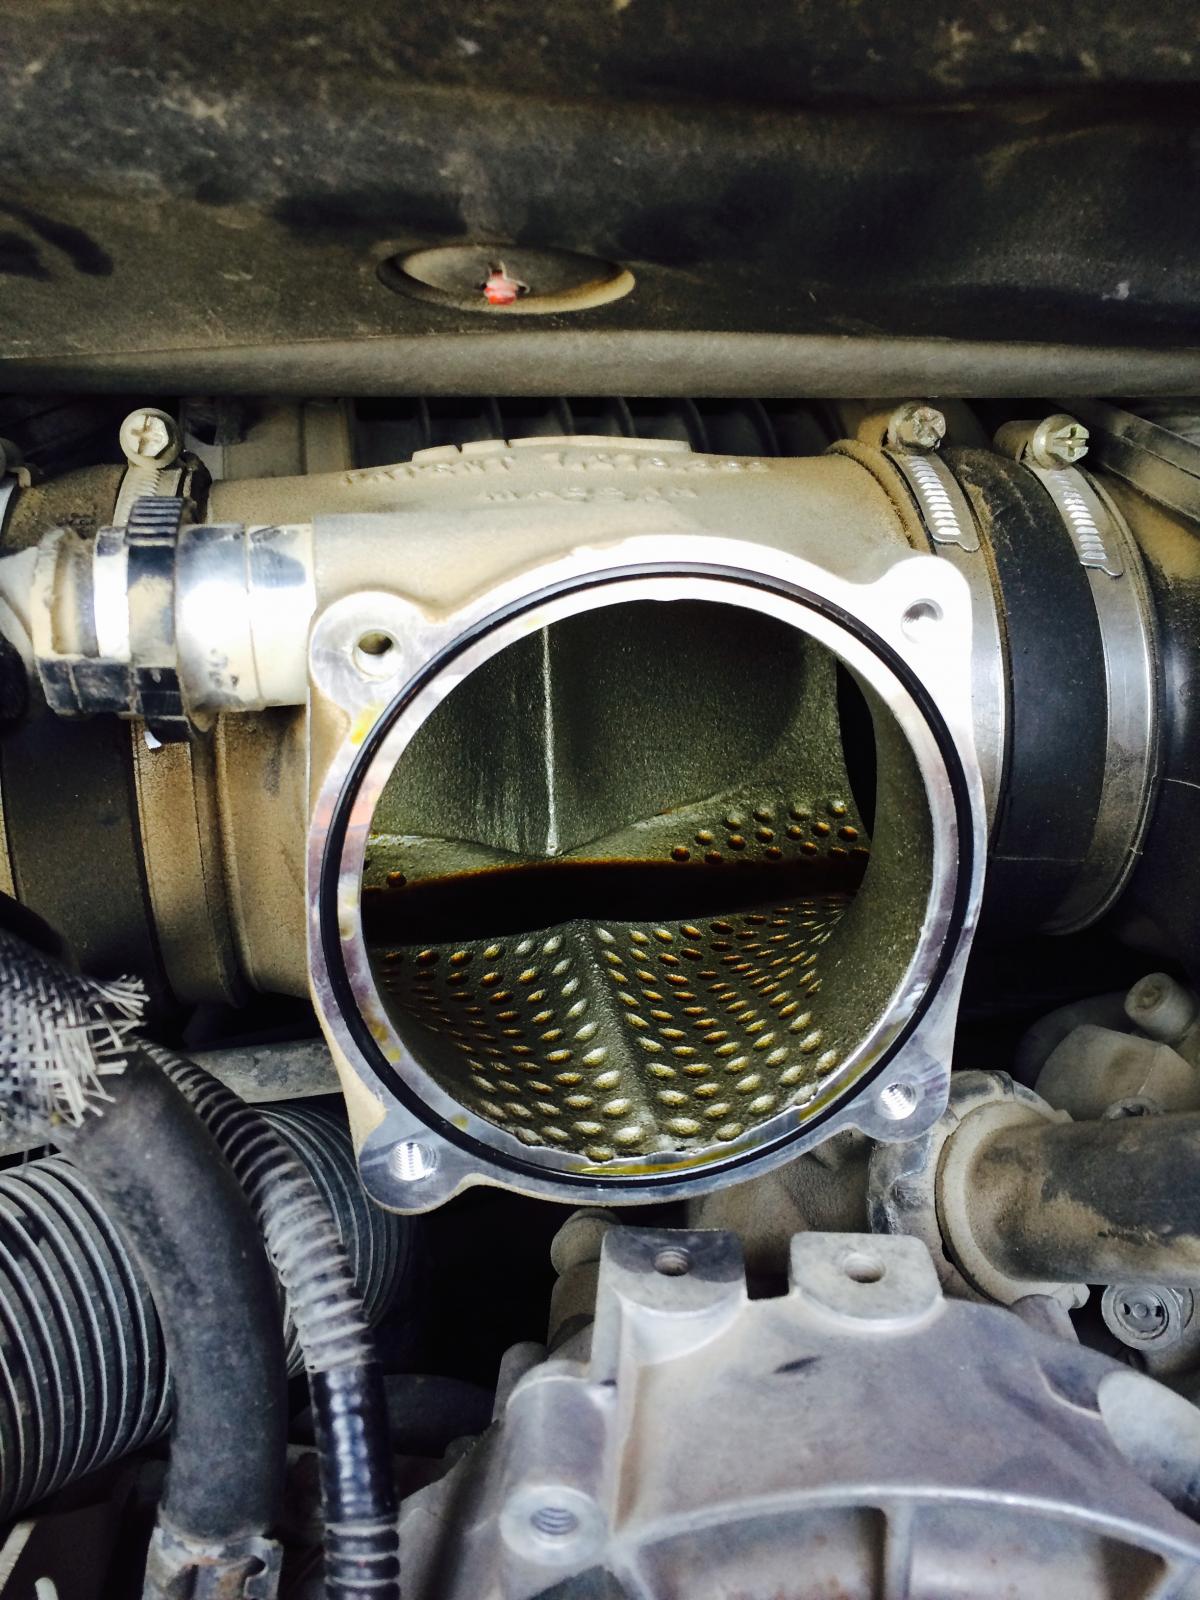
My AOS on the 2001 996 failed just before couple of days and replaced it. I was able to identify the failure at the beginning when the engine started smoking a bit I turned it off immediately. However, I decided to change the internal units too (inside the oil pan) when I removed the oil pan I saw some broken plastic pieces around the pickup tube so I had to clean it off and replaced the two oil separators (99610708054).
The job was a bit easy but the clean up toke a good amount of time because a significant amount of oil was found in the intake, when sealing the oil pan back you should let the sealant cure properly before adding engine oil. Also it is a good idea to change the oil filter at the same time.
After the work is done make sure that everything is fitted properly and the oil level is at the max mark (if replaced the oil filter fill the oil filter cap with oil before installation) then start the engine and let it idle for some time to circulate the oil in the engine. you might experience some noises and smoke during idling this will be present as the intake got some good amount of oil in it.
-
1
-
-
Problem solved Just drove it for less than 100m and the light is off. Thanks Loren.
-
Polarity should not matter - but I guess you could try swapping them.
If that does not work then you might have a bad speed sensor.
Measure resistance between pin 1 and pin 2 on speed sensor.Display should read: 1 k ohms to 3 k ohmsIf not, then it needs to be replaced.I have done the swap between the wires but the same result I get
Measured the resistance of the speed sensor and it shows just below 2K ohms ( Around 1.9 )
Could it be I have to drive the car so it could make adjustment or what might be the issue?
-
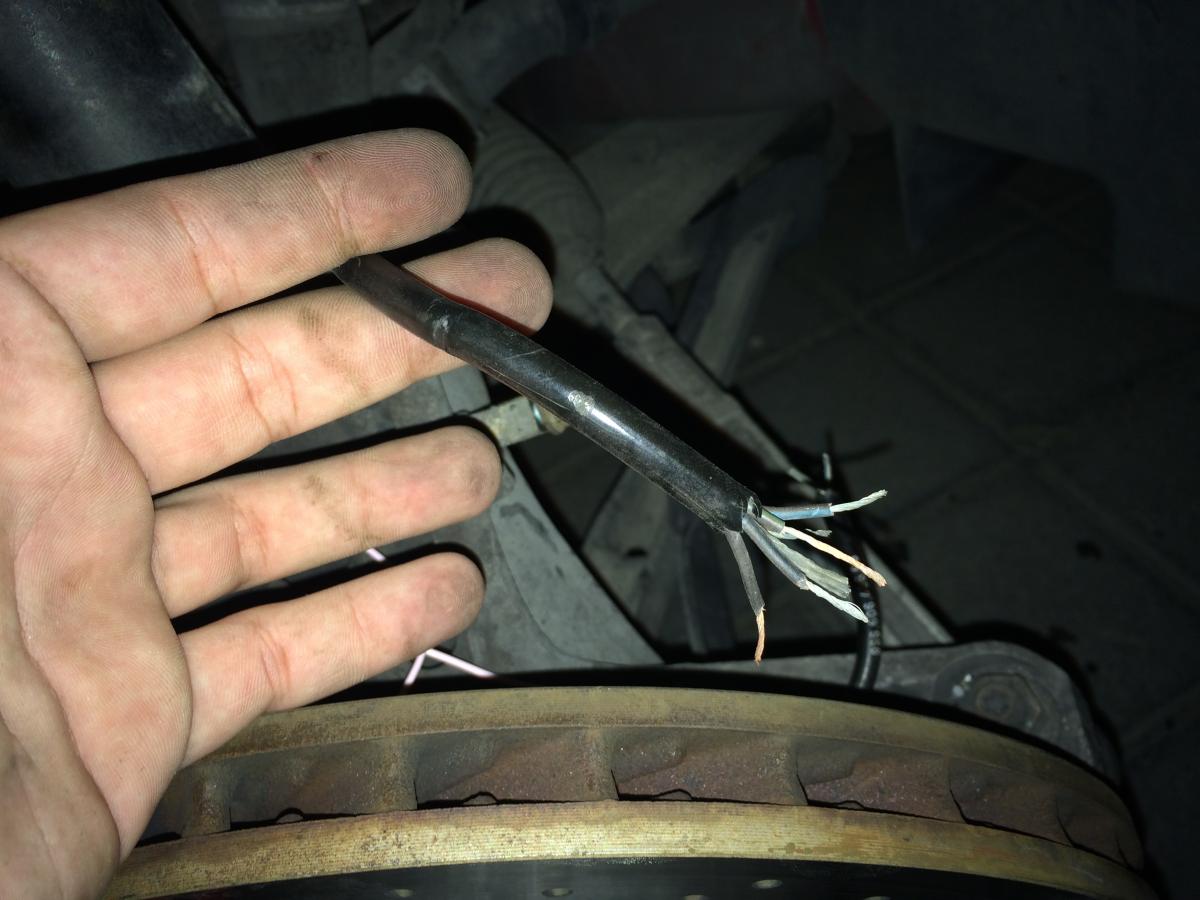
Brown/Green and Borwn/Black got to the brake pad sensor.
Brown/Blue and Brown/White go to the speed sensor.
brown wire goes to ground (chassis) at the wheel carrier screw point.
Thanks Loren the brake pads warning light is off but still the ABS light is on. I did the BB with the black wire and the BW with the red wire, is it correct or should I do it the other way around ( BB and red, BW and black )?
Many thanks
-
Hi everyone
I have some issue with my Carrera 996 2001. I am having the ABS and the brake pads lights on so I checked the connections and I have found that the front right hand connections are broken. However, when I opened the wires from the main wire and I found that there are five wires, but the abs and the brake pad sensor only having two each totalling 4 wires....could anyone help me with the wiring diagram because I want to solder the wires together.
Many thanks
-
Just to update Yesterday I have changed the spark plugs to the correct ones and the problem still there. However, I removed the catalytic converters and I have found that the two of them are clogged + one is broken from the inside so I removed them and everything went back to normal no misfire at high rpm also it runs much smoother than before.
-
My reference says the OEM plugs for your 3.4L are Beru 14 -gr-6-kqu, which should cross reference to a Bosch FGR6KQE, so you are running a bit too cold. Black velvety or sooty looking plugs are a sign of an overly rich condtion, so if a hotter plug does not clean up, I would start looking at your intake system for reasons why.
Thanks JFP for clearing this thing up for me I will change the sparks from the FGR5KQE to FGR6KQE and will report back. Many thanks.
-
Just to update..got the car up and removed all of the coils and plugs cleaned the sparks and shifted them around also the ignition coils but still the same misfire I have on cylinder 6. However, I added some fuel system cleaner and drove the car hard the weird thing is when the CEL doesn't show all the times previously I had it from 2nd gear to the 6th but now the 1st and 2nd I don't get any CEL only at 3rd gear upwards and not all the times also sometimes I get a misfire on cylinder 6,5,4
I noticed that all of the spark plugs are black but dry so could it be that I'm having a cold spark plugs? because the dealer fitted the Bosch FGR5KQE and when I checked with Pelicanpart.com they show the Bosch FGR6KQE as a replacement spark plug for the Carrera 996 which is a hotter plug when compared with the FGR5KQE which is fitted right now.
Many thanks
-
Thanks guys for the information it is really helpful I will be going for the oe stuff for sure.
Here is a link to what I am planning to get for my car:
http://www.pelicanparts.com/catalog/SuperCat/0905/POR_0905_TCLUTC_pg1.htm#item0
Any add up needed on this super kit? recommendations pleaseAlso regarding the IMS thing is it recommended to change it? and which type should I go for? as I have seen there are the Single and the double. My car is 2001 3.4L
Many thanks
-
Hi everyone
My clutch and flywheel are done they need to be replaced so I went through Pelicanpart.com and a lot of choices are there from oe clutch and flywheel to upgraded parts and I will be going for the clutch super kit as I want to change everything. so I want your opinion guys on having everything oe or to switch to upgraded parts?
I was thinking of having the lightweight aluminium single mass flywheel and one of the spec clutches which comes in different stages, any thoughts on this? and which stage should I go for? I was thinking something like stage 2+ or stage 3. I need something that is long life and withstand harsh and hard driving.
Many thanks


Help - 996 door locking and frunk light issues
in 996 Series (Carrera, Carrera 4, Carrera 4S, Targa)
Posted · Edited by Haiyan
Assuming that the central lock switch + door locks + wiring harness are good, then you need to recode/reprogram the alarm unit via a Porsche tester it's the only tool that will be able to do the coding feature don't waste your money on aftermarket tools, also the IPAS codes are not needed when recoding/reprogramming the alarm unit as long as the unit is not replaced.
Coding is straight forward thing and it takes less then a minute to do:
1- Insert the Porsche tester and turn the ignition on
2- choose alarm module then click Coding/Programming tab
3- Under "Country Coding" choose the correct country code.
4- Write the coding via the tester, after the coding is done and completed.
5- switch off ignition and remove key
6- switch ignition again and clear codes and you are good to go
Note: sometimes a different country code will work with you even if your car has a different code.