Welcome to RennTech.org Community, Guest
There are many great features available to you once you register at RennTech.org
You are free to view posts here, but you must log in to reply to existing posts, or to start your own new topic. Like most online communities, there are costs involved to maintain a site like this - so we encourage our members to donate. All donations go to the costs operating and maintaining this site. We prefer that guests take part in our community and we offer a lot in return to those willing to join our corner of the Porsche world. This site is 99 percent member supported (less than 1 percent comes from advertising) - so please consider an annual donation to keep this site running.
Here are some of the features available - once you register at RennTech.org
- View Classified Ads
- DIY Tutorials
- Porsche TSB Listings (limited)
- VIN Decoder
- Special Offers
-
OBD II P-Codes - Paint Codes
- Registry
- Videos System
- View Reviews
- and get rid of this welcome message
It takes just a few minutes to register, and it's FREE
Contributing Members also get these additional benefits:
(you become a Contributing Member by donating money to the operation of this site)
- No ads - advertisements are removed
- Access the Contributors Only Forum
- Contributing Members Only Downloads
- Send attachments with PMs
- All image/file storage limits are substantially increased for all Contributing Members
- Option Codes Lookup
- VIN Option Lookups (limited)


rattles
-
Posts
179 -
Joined
-
Last visited
Content Type
Profiles
Events
Forums
External Paint Colors
Downloads
Tutorials
Links Directory
Collections
Store
Posts posted by rattles
-
-
Did you find a solution to your problem? i have the same problem and i am interested to know how you sorted it out???
thanks
Loren mentions tyres as a posiible source of the noise, my 99C2 had this problem, sounded like very worn wheel bearings and was most noticable around 30mph, a new set of rear tyres fixed it completely
-
IMO, anyone who is worried about failures like bearings and continues to use Mobil's 0W40 or equally inferior oil, is justified in their concerns.
My IMS failed with M1 20w-50.
Why some people insist on running the weakest of the oils on the approved list makes no sense to me."Weakest" oil? My opinion is that the 0w-40 is probably better for the tight tolerances of these engines. But this is pure conjecture, isn't it? I'm no expert... so I won't pretend to be either.
The photos that Tool Pants posted show that the IMS bearing is sealed and has its own lubrication built in so the type of engine oil used should not have an effect on that bearing. I'm no expert either but if a sealed bearing fails makes me think it's either poor quality or it's been overloaded in some way.
Most of the reports that I have read say the IMS failure is immediate, you dont get any warning. Compare that with other ball bearing problems in cars or machinery, usually the faulty bearing will continue to work for a while but gradually gets noisier.
-
I can't see how you drive the car having anythng to do with the failure of the intermediate shaft bearing. It is a rotational beaing that permits the shaft to spin. The shaft need to spin in order to operate the camshafts and oil pump. This claim is internet talk, and the same thing is said on the internet about the RMS.
I have been told by Peter Smith and another mechanic that Porsche went from a double to a single ball bearing in 2001. That is the same year Porsche changed the intermediate shaft. That is the year Porsche went from a roller type chain to a tooth type chain. I started Boxstering in 1999 and do not remember intermediate shaft faiures. That happened later.
Next time someone reports a confirmed intermediate shaft failure then make note of the model year and if it is the original engine. I am not claiming that pre-2001 is immune from an intermediated shaft failure.
The other factor in my lay understanding is that the bearing is sealed. If you look at my first picture you can see the black seal. That bearing is exposed to engine oil so I do not know why a sealed bearing is used. This has been noted by Baz Hartech. http://www.pistonheads.com/gassing/topic.a...Shaft%20Warning Hartech also notes that this type of sealed bearing is typically used in a transmission.
I have a Toyota truck and I am on some technical boards. Toyota uses sealed/shielded bearings in some transmissions. This bearing is exposed to gear oil, so why is it sealed? People who rebuild their Toyota transmission and replace a sealed bearing are warned not to remove the seal/shield, or the bearing will not last as long. Hartech on the other hand implies the seals should be removed for a Porsche M96 motor to improve lubrication.
This is an example of a sealed bearing from my truck. This the pilot bearing for the transmission. It is inside the flywheel. It is not exposed to any type of oil, but relies upon grease inside the seals for lubrication of the bearing for the life of the bearing.
Thanks for the detailed reply and the link to Hartech's post. The car I mentioned that had the IMS problem was a 1999 model so early cars are not immune. When you consider the various points raised it seems to point to either an alignment or stress problem or maybe just poor quality bearings. I have found enough low quality parts in my 99 model to make me question ''Porsche quality'' so maybe they were cutting costs on the IMS bearings as well.
-
IMS Failures,
I had the IMS fail on my '99 996 just 3 days after I bought it with 80K Kms on the clock ! Since then I have done a lot of research and concluded that cars that have spent long periods inactive are much more prone to this failure. For sure the original design is weak - that's why Porsche have changed it several times over the years, but long periods of inactivity are not good for an engine.
I guess the advise is 'drive it every day' ! That's what I do.
'99 996 C2 Coupé
Thanks, mine does not get used that often but my friends car that did fail is used every day to get to and from work and has not been tracked. The bearing in the shots that Tool Pants posted looks large enough to do the job but maybe the shaft does not have enough support at other points or there is a lubrication problem for the bearing.
Mine is still going OK so fingers crossed, I was just interested to find out why they were failing and if there had been a fix from Porsche since then.
-
There is a ball bearing on the back of the engine case. The bearing fails and the shaft is no longer supported. First pic is a 1999 996 with no problem, and the second is a 2003 Boxster with a failed bearing.
Thanks both for the info. and also the link, I searched for IS not IMS so missed that post.
-
I agree not as common as RMS but on the 1st page of topics today there is one maybe two reports of I.S problems. My friends 99 996 died about a year ago and needed the replacement engine and I have heard about many others here and on the forum.
For such a major and expensive failure I was curious to know why they fail and if there was some sort of fix that could be done before they do.
-
Intermediate shaft failures seem almost as common as RMS problems but I have not been able to find any information on why they actually fail.
I have a 1999 996 C2 with 30,000 miles, the engine so far has not given any problems.
It would be interesting to know why these fail and if it is just a matter of time and mileage before this happens or is it a result of hard driving, faults in the shaft, shaft bearing failures or as with the RMS, alignment problems in some cases.
If it is a known mechanical problem is it possible to have it fixed before it detonates.
Porsche in Australia have a policy of supplying a replacement engine for I.S. failures at the bargain price of A$27,000 [uS$22000] !!!!!
Lots of questions here but it would be good information for those of us that are owners of early 996's if anyone has the answers.
Thanks.
-
2001 996 C2
I've still got an ongoing problem with my aircon in another thread but can someone tell me in the meantime if the two aircon pipes under the car (under drivers side on a UK car) from front to back are exposed to the elements or should they have a cover over them? You can feel the two pipes on mine just beyond the sill, going from the front to the back of the car.
Thanks
On my 1999 996 C2 they are uncovered, it is also a RHD model.
-
Eric,
My 99/996 manual had similar problems, there is a TSB that covers it. I thought that they had fixed the problem for the 2004 models but it would be worth double checking with your dealer.
They had 4 attempts to fix my car but finally had to remove the gearbox and replace the throw out mechanism. No problems since then and that was 8 years ago.
OK, posted this to Loren, got some great advice (thank you).Would appreciate any opinions on those who've been down this road.
2004 C4S Cab, 16.5k miles, dealer maintained since day one, no tranny issues, etc. Engine was replaced in late May (Porsche's tab, thank you), and at that time, the top tech who does all the svc on my car did the job. He had the tranny out, so we looked at the clutch just in case, and in his opinion, it looked like new.
All lube points were taken care of during the engine swap and the car runs like a champ (though I do have to go through break in again).
A few weeks prior, I did hear a slight noise when I was almost ready to fire the engine up and was pushing in the clutch, but I did not give it a second guess.
So a few days after this is all done (engine died while driving, no idea what it was, but engine was replaced with new), I notice as I push the clutch in before I start up in the garage, I can hear that spring noise. So I stop, and release the clutch, and can hear it on the up travel too. I figure it's related to the pedal and I'll deal with it later.
Clutch travel is normal, engages where it always has, no trouble with tranny/gears/etc. Engine sounds great (PSE), so while driving, you don't hear it.
I swing by the dealer for a review, and the tech can hear it quite well, and it seems to be stronger from the rear.
I get out while I had a tech lube the pedal points, and he presses in then lets out, and I too can hear it from the rear wheel well quite easily. Lube to the pedal points does not change the noise at all.
So, there are some opinions that this is common, no problem other than noise, drive on.
There are others, dealer included, who say I need to replace the pressure plate, though all the internals were fine upon inspection back in May.
And others are suggesting slave cylinder (lubed), other points along the way (all lubed during engine swap), etc.
So I'm stumped. I don't want to risk anything (and don't think I will should I opt to leave it alone), but I also feel like something is amiss, and should be rectified. But most folks agree that a pressure plate should not be shot at 16k miles, or that it may not be the root cause. Is there a cable we've missed, or a lube point we should hit?
Any other suggestions? And I'm no mechanic, so this may be something I'd do on my own if simple, or I may ask the dealer to do it. But I'd really appreciate any help from someone who may have experienced this same problem.
Thanks!
-
here you go, you did say tasteful :D

-
My 996 C2 had a similar problem, eventually traced to incorrect rear wheel alignment. The inside edges of the tyres had cupped and produced a wheel bearing like sound at around the same speed you mentioned, it decreased when the speed increased or as you said became less noticable. I had Bridgestone S02 at the time, new tyres and an alignment fixed the problem completely.
-
http://astore.amazon.com/renntechorg-20/de...7385299-8190032
$17.50 (and Renntech.org get a tiny percentage) :D
Currently showing as unavailable but Samstag Tools have the Hazet 2169 on special at $19.99
-
Looks like a worthwhile project, but I guess you can run into some challenges putting it all back together as new.
My temp also goes slightly to the right of 180 occassionally. I imagine I've got a similar collection of bug guts. :)
There is a very good series of posts about this in the 996 DIY section, it's not difficult and is really worthwhile doing regularly. You wont get all of the stuff out with a vacuum or leaf blower. Loren has listed a step by step guide for removal and re assembly.
-
rattles. I have the same ocean blue metallic C4. I'm new to the self detailing job as far as waxes, clays etc are concerned. Can you give me some more details on how you do your routine? I don't even know what a "clay" or "claybar" is? Much less how or why it's used. Any advice would be great! Thanks
bmohr
Try logging on to Autopia Car Care, they have a lot of good step by step instructions.
I start by washing the car with Meguiars NXT Wash, washing can cause a lot of damage if its not done carefully, dirt trapped in the sponge, wash mit or chamois can ruin clearcoat. I have a bucket of carwash Meguiars NXT and another bucket of clean water. I hose off as much loose dirt as possible and then wash the top sections of the bodywork using a washmit, rinsing it after every panel. I have separate sponges for lower body panels and another for wheels. I dry using a microfibre towel, rinsing this after each panel.
Most polish makers sell a claybar kit, I use Meguiars QuikClay, it comes with a bottle of detailing liquid and a claybar, instructions are on the box. The first time you use this you will be amazed at how much stuff comes off your paint work.
Then I use a cleaner with the orbital sander, followed by a polish with the orbital sander and finally hand polish with Meguiars NXT. I dont do this every time I wax the car, just when I can see light swirls or scratches.
When I use the orbital I only use light pressure and usually not at top RPM.
I am sure others will have slightly different methods and use different brands of polish but this system works for me. The important part is not doing more damage each time you wash the car by rubbing dirt into the clearcoat. After washing use light pressure with the orbital sander and the minimum amount of polishing to achieve the result you want.
Hope this helps, post some photos so we can see the final result.
Glenn
-
I've got a bad case of "dandruff" on the front bumper and first 1/3 of my 2000 ocean blue metallic 996. I just put $300 into Griots products including their 6" random orbital. They say that their #3 polish is so lightweight that it is totally safe but Ive heard that you dont want to use an orbital on the edges of your surfaces or on the dramatic curves due to possible burn in.
What is your experience with using good quality tools and polishes on your 996 curves and edges? You know it is hard to find a totally flat surface on our cars. I expect to hand polish the mirror enclosures, rear deck, etc. But is there a problem with clear coat damage using a good quality orbital on the front end, hood, fenders etc? Also, should you avoid the panel edges when polishing with the orbital?
Thanks!
I have been using a random orbital sander on my 99 Ocean Blue 996C2 for about 4 years, absolutely no problems on any part of the car. I clay first then use a cleaner, polish and finally wax, currently using Meguiars products and the results are great. I only use the sander when I can see light swirls, probably three times over the 4 years, in between clay and NXT polish bring it back to a mirror finish. The car has won the 996 class in our club concours wash and polish both times it was entered.
-
It may still be worth removing the switch and cleaning or replacing, they are not expensive, I seem to remember another post where someone had cleaned a reverse light switch that was not working and after that it worked OK. My mirrors were failing intermitently before they failed completely so it could be similar problem to yours.
-
Go to 996 DIY section, common repairs, and check this post ''Replacing Reverse Lights/Back-Up Lights Switch''
-
Well, the actual replacement would be pretty easy. Just remove the front bumper and remove and replace the AC condensor. I would guess I could do it less than 1 hour.LorenMy car has been diagnosed with a slightly leaking near side air con radiator. I;ve seen them in the UK for £125 - do you know how many hours labour it should be to replace one side?
Thanks
But since you have had a leak they will likely need to recharge you AC and test that it will hold pressure. If it was open for long you may also need a new AC dryer (desiccator).
Thanks Loren
Does your one hour include removing and replacing the bumper as well? That seems very quick. How easy is it to remove the bumper?
This was found on the pre-sale inspection so at last I think I may have sold my car!! Had a go in a 997 C2S on Saturday - boy are they good!!
John,
I did the bumper removal last weekend, it is not difficult, there is a DIY for it in the Carrera 996 DIY section in this forum
Glenn
-
I did the bumper removal and radiator cleaning last weekend, followed the instructions shown in this DIY and found it to be a reasonably easy job. Loren just one point that may need a bit more explanation, in point 4 it says to remove screws and spacers 6 & 7 on the retaining strips on each side, there is no photo of the location in the scan you attached so maybe a brief mention of the location would help others, they are just forward of the wheels on the underside on both sides.
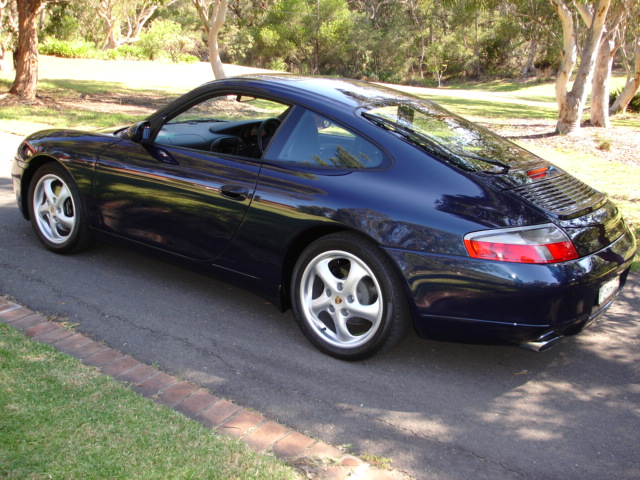
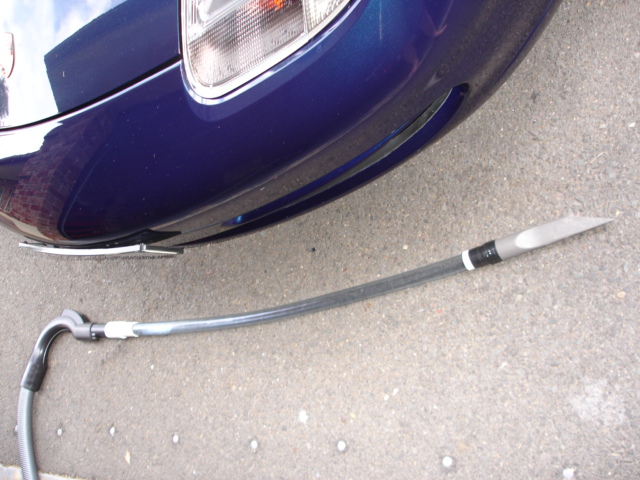
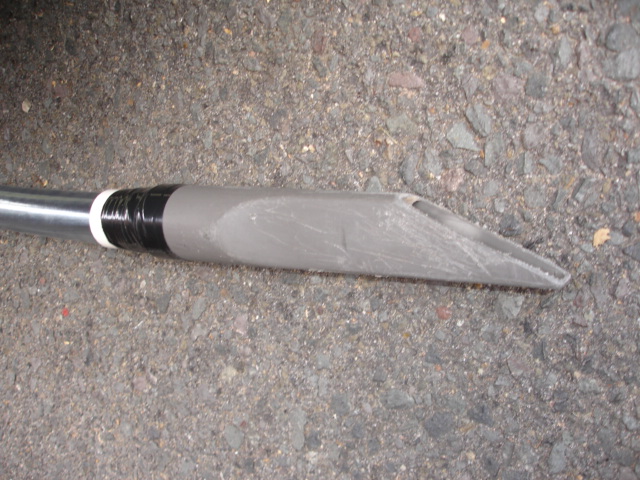
After doing the work I made up a simple attachment to fit a vacuum cleaner, it wont solve the problem completely but will remove a high percentage of the rubbish that finds its way in there before it turns to garden mulch and works its way between the two radiators. I plan to vacuum the radiators each time I vacuum the car from now on.
I cut the end of an old vacuum cleaner attachment shaping the aperture so it fits flush against the face of the radiators, connected it to a piece of flexible PVC pipe with some fittings from the local hardware store, about $5 all up. It works well.
Glenn
-
Thanks for the info.
Glenn
-
I have three tire pressure gauges and each one shows a different pressure, time to get one I can rely on. If anyone has suggestions on which high quality gauge to get and where to buy it would be appreciated.
Thanks.
-
Thanks James!
A couple more pictures... Besides Southern Colorado, we passed through Petrified Forrest (AZ), then onto Pinetop (AZ), and the Salt Canyon, AZ. The Southwest offers great driving!
John
I know how you feel, isn't it great?! Great pics. Post more if you have them! I'd love to take my car out west to the desert...-James.
John,
Thanks for sharing this, I know these roads well and try to get to that part of the US every couple of years, Unfortunately my car has to stay in Australia. Next trip in May 08, maybe I can hire a c4 in Las Vegas.
Glenn
-
:renntech:
Stunning fastboydave...Thank you!
Tried this out this morning and it absolutely works! Here's what I did...
- Yesterday, I got caught in light rain on my way back and immediately noticed that the creaking was much reduced, substatiating the that the rubber trim was creaking against the dry bodywork.
- This morning with my car dry in a covered garage, I pressed along the edges of the rubber windshield trim and sure enough, there was significant creaking along various areas!
I then proceeded to clean under the rubber trim with meths and soapy water using a thin soft cotton cloth wrapped tightly around an old plastic credit card;
- at the bottom of the windshield I got it in between the trim and glass
- at the sides along the A-pillar and roof in between the bodywork and trim
The creaking came from the rubber trim moving and rubbing between these surfaces.
Using the same setup of the thin soft cotton cloth around plastic card, this time soaking it with some silicone lubricant, I ran along the inside of the same surfaces at least twice to get enough silicone lubricant in them. Waited for a few minutes and cleaned off excess with meths and soapy water and voila!
I enjoyed my drive this afternoon so much more without the distraction of the creaking upfront :) . Like fastboydave, this was getting worse and so becoming so unbearable to me that I considered replacing the windshield (see my earlier post on this thread). Thanks to fastboydave for sharing his experience for this rather simple fix!
What is/are meths????
Denatured alcohol is ethanol which has been rendered toxic or otherwise undrinkable, and in some cases dyed. It is used for purposes such as fuel for spirit burners and camping stoves, and as a solvent. Traditionally, the main additive was 10% methanol, which gave rise to methylated spirits.
- Yesterday, I got caught in light rain on my way back and immediately noticed that the creaking was much reduced, substatiating the that the rubber trim was creaking against the dry bodywork.
-
If you have tried to repair the mirror door hinge mount on the sun visor only to have the little mount crack again you may wish to consider a relatively inexpensive fix.
The mirror insert itself is replaceable. You can choose the lighted ones (996-731-903-01-01C) for $48.00 each at Sunset or you can choose the unlighted mirror insert for $11.66 each also from Sunset (986-731-901-01-01C).
Simply remove the existing plastic insert and pop the new ones in. I choose this time to go with the unlighted ones. They are cheaper and if they break again, I'd rather pay $23.00 than $96.00.
If you go with the lighted ones you will have to splice into the existing wiring in the mirror assembly or solder the wires to the contact points in the mirror assembly.
The unlighted ones took 10 minutes to install and the lighted ones may take 30 minutes depending on how quickly you can solder.
Hope this is useful...
Jim :drive:
Jim, Did the replacement mirrors last any longer than the originals, just wondering if they actually improved the design or are they still them same :censored: quality.
Glenn


So you can't use the rear engine jack point with the OEM engine pr
in 996 Series (Carrera, Carrera 4, Carrera 4S, Targa)
Posted
This system has worked well for me, The jack and crosspiece are available from Pelican Parts. AC brand is expensive but there may be cheaper copies around in the US. The ramps are made from chipboard and give just enough height to run the jack under far enough to reach the crossmember.