Welcome to RennTech.org Community, Guest
There are many great features available to you once you register at RennTech.org
You are free to view posts here, but you must log in to reply to existing posts, or to start your own new topic. Like most online communities, there are costs involved to maintain a site like this - so we encourage our members to donate. All donations go to the costs operating and maintaining this site. We prefer that guests take part in our community and we offer a lot in return to those willing to join our corner of the Porsche world. This site is 99 percent member supported (less than 1 percent comes from advertising) - so please consider an annual donation to keep this site running.
Here are some of the features available - once you register at RennTech.org
- View Classified Ads
- DIY Tutorials
- Porsche TSB Listings (limited)
- VIN Decoder
- Special Offers
-
OBD II P-Codes - Paint Codes
- Registry
- Videos System
- View Reviews
- and get rid of this welcome message
It takes just a few minutes to register, and it's FREE
Contributing Members also get these additional benefits:
(you become a Contributing Member by donating money to the operation of this site)
- No ads - advertisements are removed
- Access the Contributors Only Forum
- Contributing Members Only Downloads
- Send attachments with PMs
- All image/file storage limits are substantially increased for all Contributing Members
- Option Codes Lookup
- VIN Option Lookups (limited)


03 Boxster
-
Posts
4 -
Joined
-
Last visited
Content Type
Profiles
Events
Forums
External Paint Colors
Downloads
Tutorials
Links Directory
Collections
Store
Posts posted by 03 Boxster
-
-
On 09/22/2017 at 5:59 PM, 1schoir said:
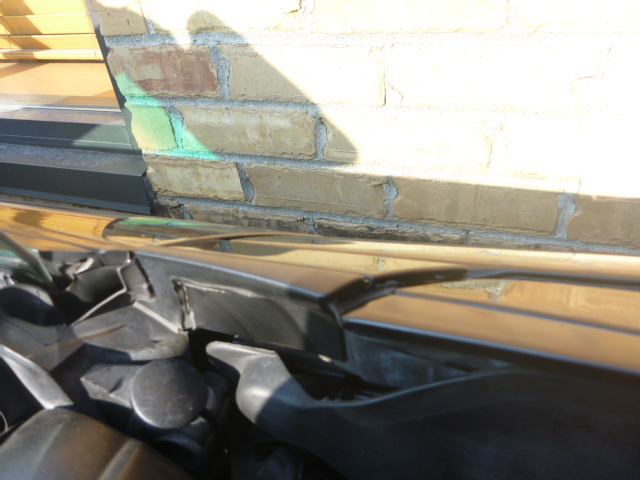
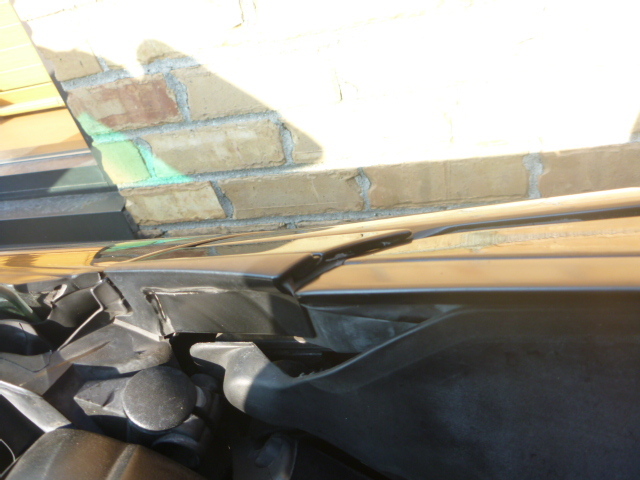
There is a small, black, two-piece plastic part located a few inches back from the very front of each "arm" of the clamshell. It is located under the clamshell, in the rain channel and it can be used to adjust the height of the final position of the front of each arm. If you look at it closely, you will see that it is just a matter of pulling the two pieces apart (lowers it) or pushing the two pieces towards each other (raises it.).
If the driver's side front of the clamshell is sitting closer to the proper height as you describe, try to adjust the passenger side to the same configuration as a starting point and go from there. Then you can go back to the driver's side and make perfect.
Regards, Maurice.
Can possibly post a picture what it looks like would greatly appreciated.
-
On 2/12/2008 at 11:34 AM, 1schoir said:
GTO:
From these first three photos, it looks like your left (driver's) side convertible top inner transmission cable is either broken, frayed, or that it has "retracted" inside its outer sheath so that it is no longer driven by the electric motor. (Note: it's not the inner metal cable that retracts, it's actually the outer black plastic sheath that stretches, but it produces the same effect).
If the inner cable (speedometer type cable) does not stick out at least 3/4 of an inch outside of the end of outer black plastic sheath, it will not be driven by the motor. Since it looks like you still have some access to the motor, you can reach around and pull the metal "u-clip" up from the left (driver's) side of the motor and pull the black cable out. Then try to turn the inner metal cable by hand. If you are able to turn it by hand, it is probably broken or frayed somewhere inside the black outer sheath. Then try to pull the inner metal cable out by hand. Again, if you are able to pull it out, you will find that it has broken somewhere inside the outer sheath.
If you cannot move it by hand, or pull it out by hand, hook up the end of it to your drill and you should be able to then rotate the V-lever by turning on your drill in the right direction. Spin the cable with the drill until the left side of the clamshell matches the right side and you can then go gradually back and forth from the left side to the right side until you get the clamshell in the maximum (45 degrees) up and back position. If you do too much on one side, you may end up twisting or tweaking the clamshell and thus putting a crease in it.
If you do a search in the Convertible top DIY section here, you will see posts by Tool Pants that describe the 3/4" problem.
Try the above so that you can have good access to all of the parts that you will need to inspect and/or replace and post your results here, then we can try to tackle the repair.
Regards, Maurice.
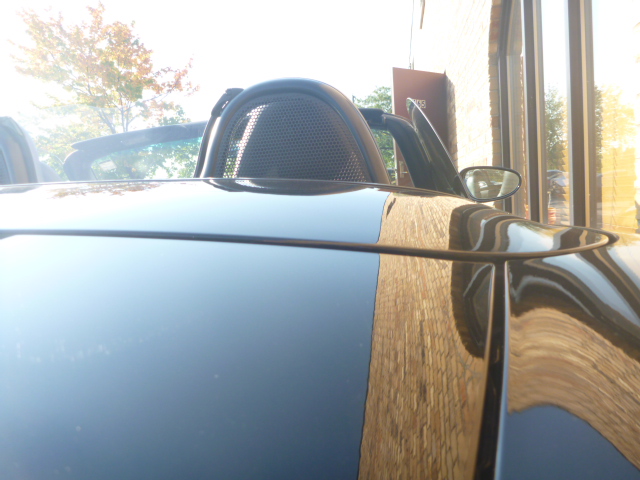
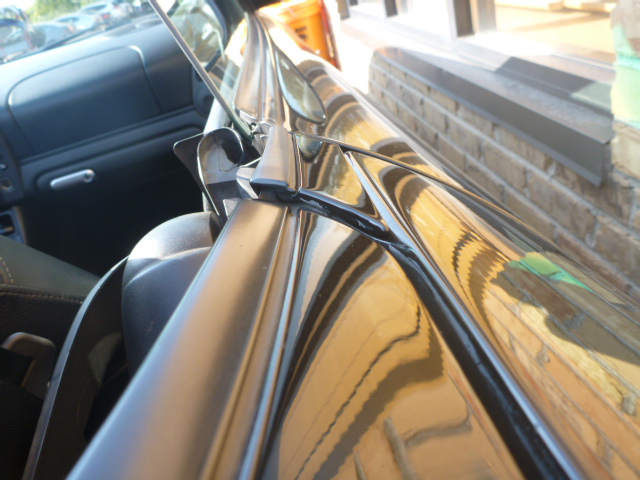
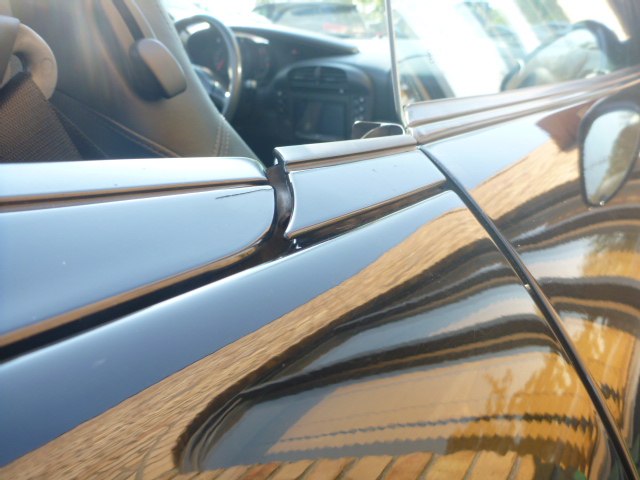
Hi I have 03 Boxster clam shell on the right side to Rt Quarter panel not flushed the claim shell at front is roughly 1/4 down to Quarter panel, the left side is half that. How do I adjust the clam shell (raise rt side front so it is even height with the quarter panel)? Here are some photos.
Thanks in advance....

-
On 2/12/2008 at 11:34 AM, 1schoir said:
GTO:
From these first three photos, it looks like your left (driver's) side convertible top inner transmission cable is either broken, frayed, or that it has "retracted" inside its outer sheath so that it is no longer driven by the electric motor. (Note: it's not the inner metal cable that retracts, it's actually the outer black plastic sheath that stretches, but it produces the same effect).
If the inner cable (speedometer type cable) does not stick out at least 3/4 of an inch outside of the end of outer black plastic sheath, it will not be driven by the motor. Since it looks like you still have some access to the motor, you can reach around and pull the metal "u-clip" up from the left (driver's) side of the motor and pull the black cable out. Then try to turn the inner metal cable by hand. If you are able to turn it by hand, it is probably broken or frayed somewhere inside the black outer sheath. Then try to pull the inner metal cable out by hand. Again, if you are able to pull it out, you will find that it has broken somewhere inside the outer sheath.
If you cannot move it by hand, or pull it out by hand, hook up the end of it to your drill and you should be able to then rotate the V-lever by turning on your drill in the right direction. Spin the cable with the drill until the left side of the clamshell matches the right side and you can then go gradually back and forth from the left side to the right side until you get the clamshell in the maximum (45 degrees) up and back position. If you do too much on one side, you may end up twisting or tweaking the clamshell and thus putting a crease in it.
If you do a search in the Convertible top DIY section here, you will see posts by Tool Pants that describe the 3/4" problem.
Try the above so that you can have good access to all of the parts that you will need to inspect and/or replace and post your results here, then we can try to tackle the repair.
Regards, Maurice.
Hi 03 Boxster clam shell on the right side to Rt Quarter panel not flushed the claim shell at front is roughly 1/4 down to Quarter panel, the left side is half that. How do I adjust the clam shell (raise rt side front so it is even with the quarter panel)? Here are some photos.
Thanks in advance....


How to manually lowering convertible top
in 986 Boxster Convertible Top Issues and Solutions
Posted · Edited by 03 Boxster
Thank you Maurice for the photos of the adjuster, I couldn't of done it w/o your help. Clam shell height is adjust. Since you have a good knowledge of the convertible top I like to see if you can help me with 2 more top issues i'm having. When I put my top in service mode I found a gray strap just laying in the lt side convertible gutter. Bottom end of the strap is attached to bottom left corner of the convertible top and the other end i have no idea where on the conv. top attaches to , any idea where the top strap mount to on the convertible top ? also both sides of my convertible top where folds has crease lines in multiple areas on the top and the fabric is wearing pretty bad(fraying)-i'm afraid its going to wear through soon. i searched 986 forum one post says it is normal but one guy in that post says it maybe tension cable that wa back in 2013 no update post if problem was fixed or not. Is the wear(fraying) normal?
Again thank you for your help.