Welcome to RennTech.org Community, Guest
There are many great features available to you once you register at RennTech.org
You are free to view posts here, but you must log in to reply to existing posts, or to start your own new topic. Like most online communities, there are costs involved to maintain a site like this - so we encourage our members to donate. All donations go to the costs operating and maintaining this site. We prefer that guests take part in our community and we offer a lot in return to those willing to join our corner of the Porsche world. This site is 99 percent member supported (less than 1 percent comes from advertising) - so please consider an annual donation to keep this site running.
Here are some of the features available - once you register at RennTech.org
- View Classified Ads
- DIY Tutorials
- Porsche TSB Listings (limited)
- VIN Decoder
- Special Offers
-
OBD II P-Codes - Paint Codes
- Registry
- Videos System
- View Reviews
- and get rid of this welcome message
It takes just a few minutes to register, and it's FREE
Contributing Members also get these additional benefits:
(you become a Contributing Member by donating money to the operation of this site)
- No ads - advertisements are removed
- Access the Contributors Only Forum
- Contributing Members Only Downloads
- Send attachments with PMs
- All image/file storage limits are substantially increased for all Contributing Members
- Option Codes Lookup
- VIN Option Lookups (limited)


kbrandsma
-
Posts
1,103 -
Joined
-
Last visited
-
Days Won
8
Content Type
Profiles
Events
Forums
External Paint Colors
Downloads
Tutorials
Links Directory
Collections
Store
Posts posted by kbrandsma
-
-
K:
Nice work, and nice way to freshen up your Boxster!
Did you use all new parts for the center radiator install?
If so, do you have a complete parts list?
Did you use Pedro's copper Y tube solution or use stock parts? Again, part numbers and source would be appreciated.
Regards, Maurice.
I looked at Pedro's site but decided on purchasing the entire KIT with hoses and speed nuts etc.
I purchased this 3rd radiator KIT from Sunset.
Part no:
000-044-100-14
List Price - $516.61
Sunset price - $406.96
This KIT was for a GT3 Bumper. Depending on the bumper, a KIT might be different. The good folks at Sunset will help.
The installation was quite simple and straight forward. I used Loren's post for that.
Loren's DIY Link is HERE
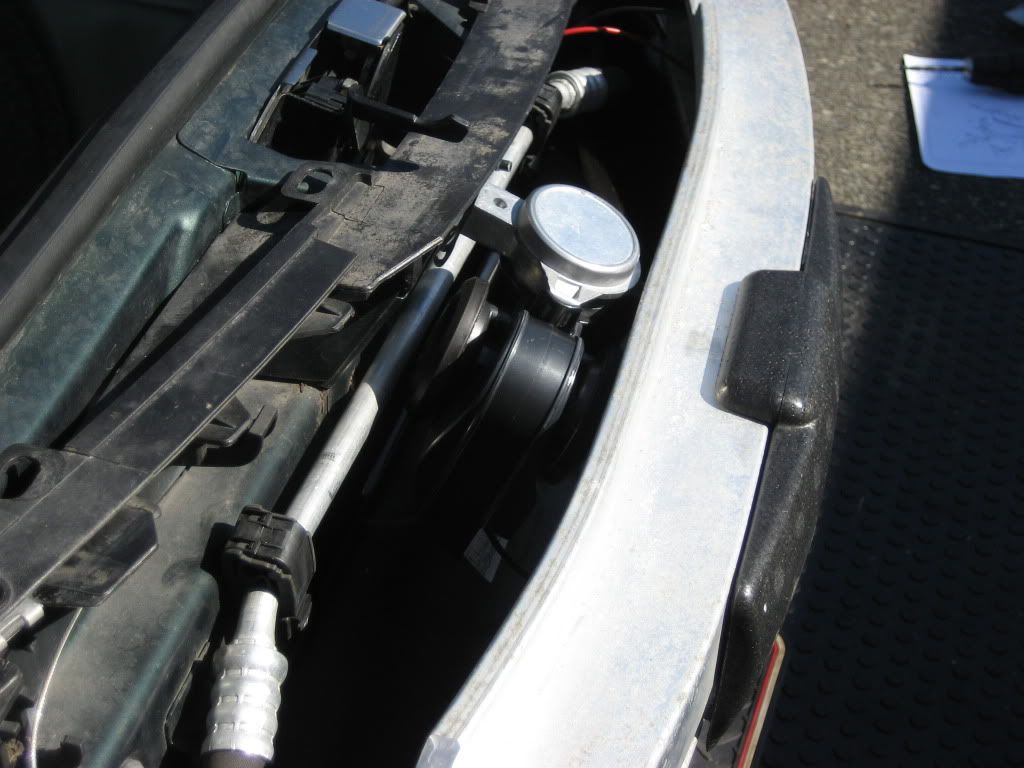
I also added the Italian Air horns as mentioned on other posts by Loren and installed them above the center radiator. Here is a photo of the Airhorns after installation.

I used the PET diagram for parts and ordered all new attachment hardware from Sunset. Here is a Link to a previous thread that tells more. Loren as usual was extremely helpful.
Thanks Loren!
-
I received the new painted GT3 Bumper back from the paint shop today. I also had them repaint the hood, the little piece that covers the rear spoiler and some speed humps I found on Craigslist over the winter.
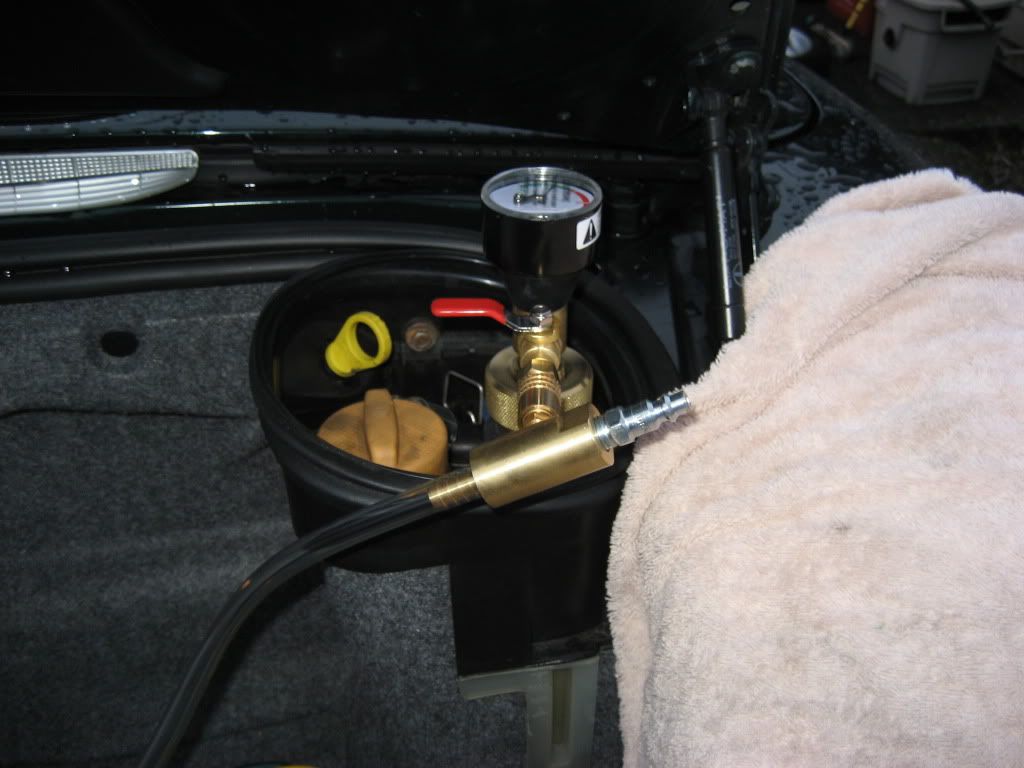
I finished installing the third center radiator and cleaned up the side radiators and AC condensors as well as the air scoops and front wheel liners. I checked the system for leaks using the Airlift tool from Uview and refilled the car with 50/50 antifreeze/water mixture.
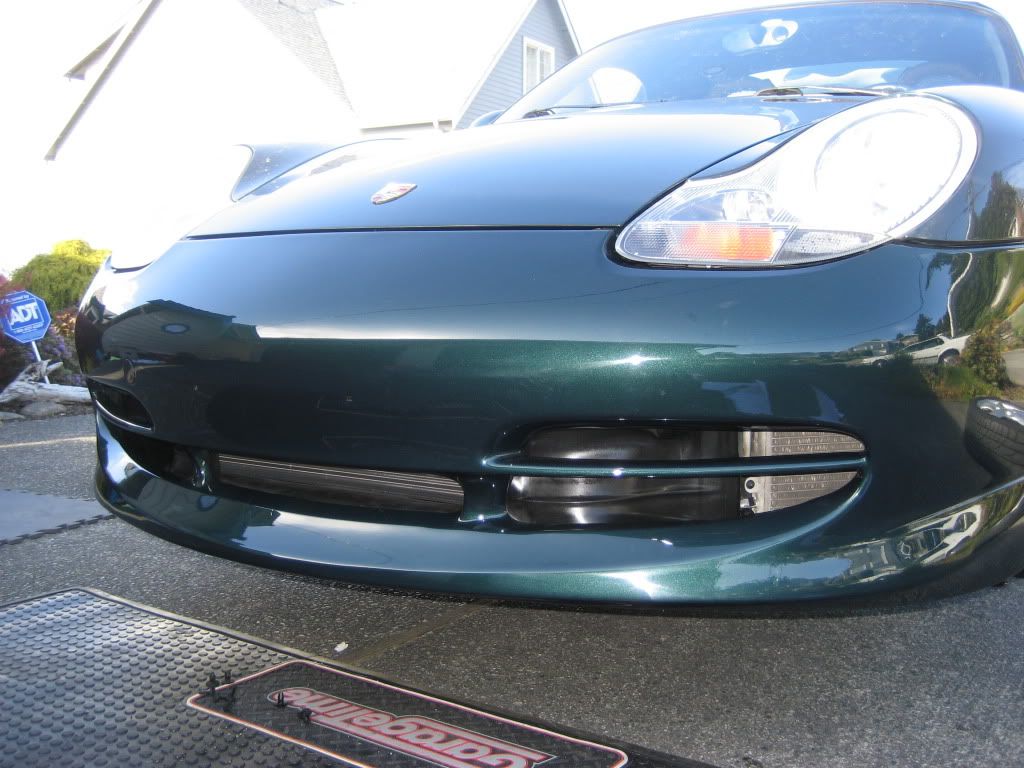
Here are some photos of the finished center radiator after the installation.
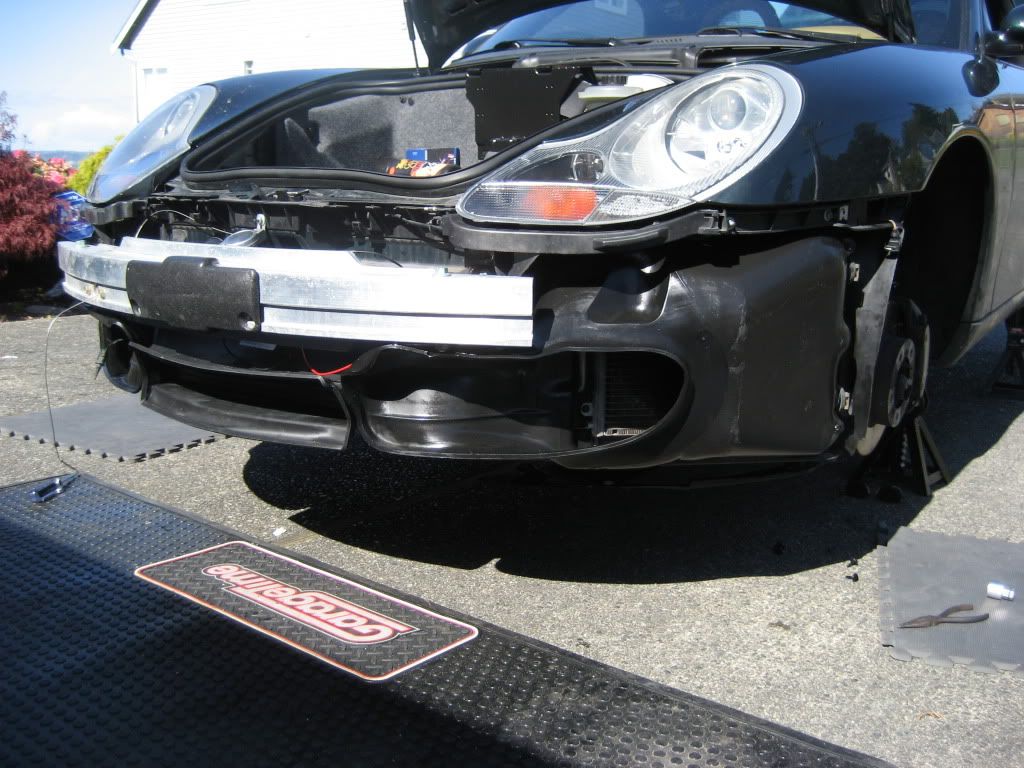
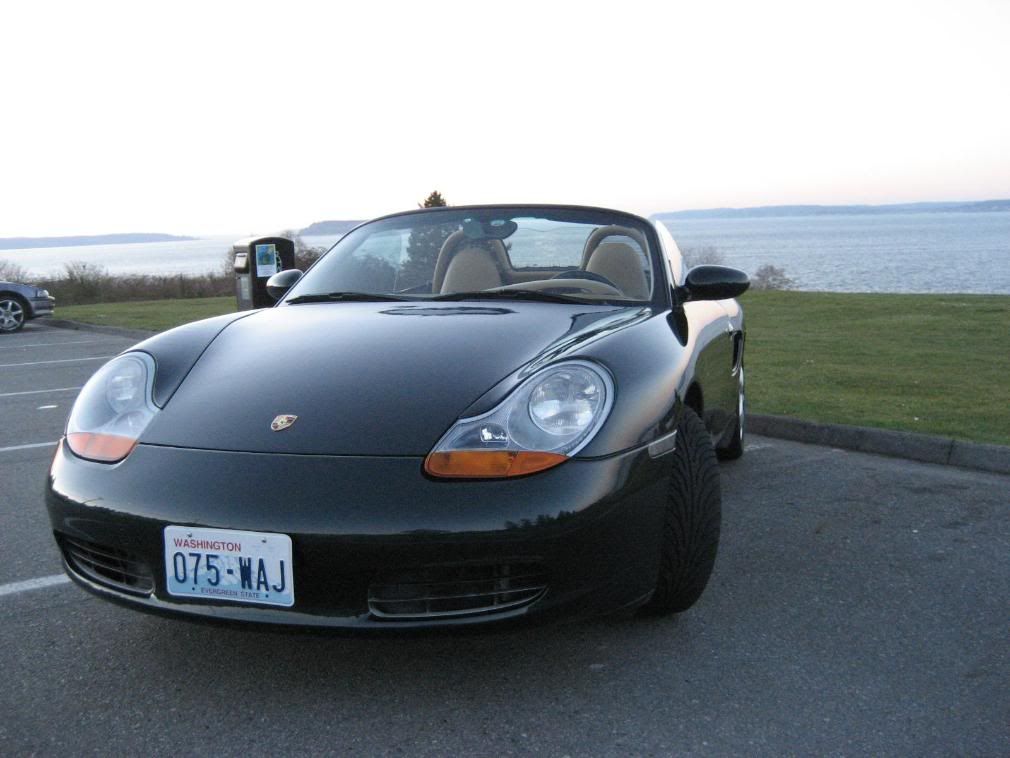
Here is the before picture with the stock OEM bumber.
Here is the new bumper primed but not painted yet
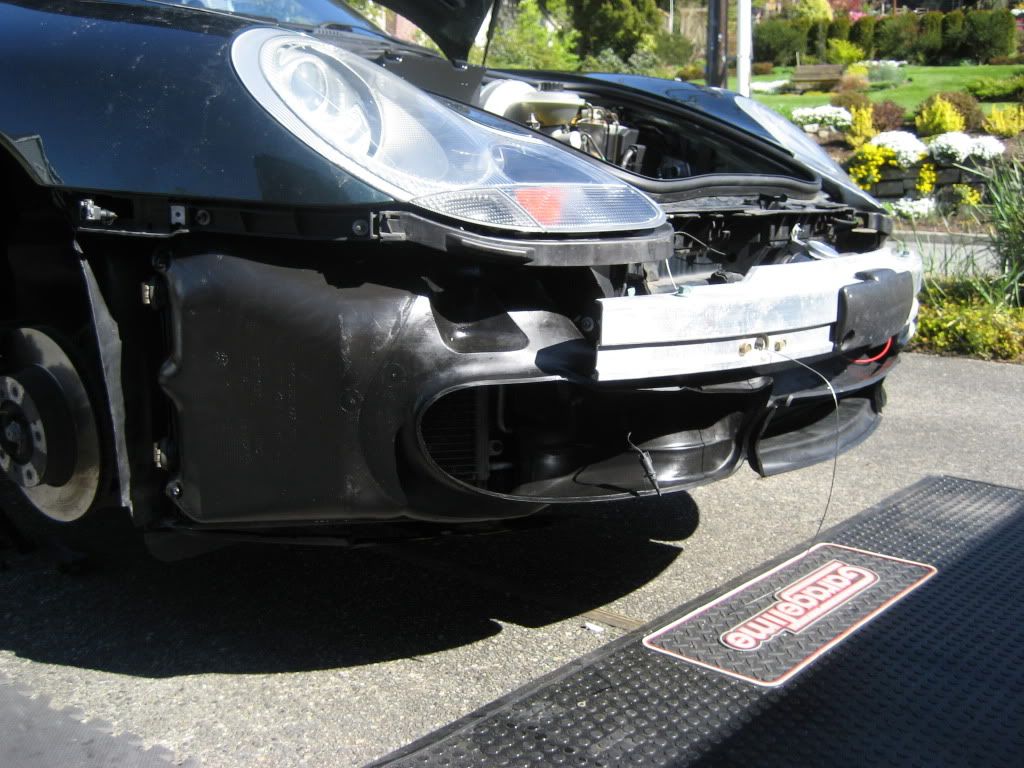
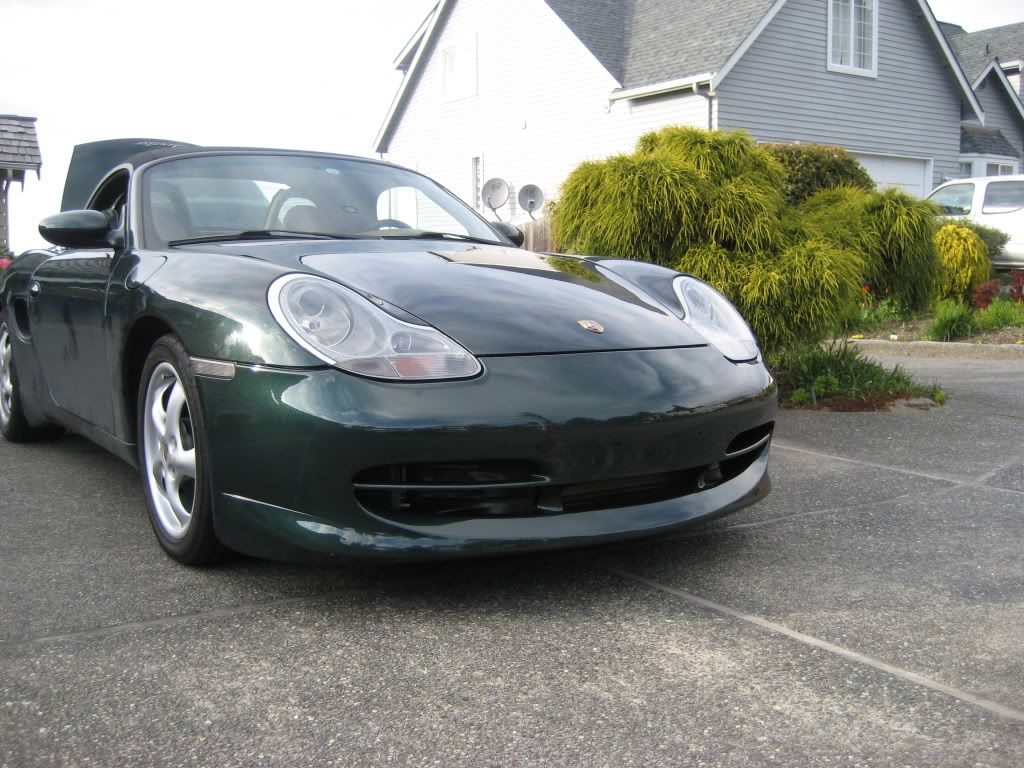
Here are the photos after installing the new bumper
-
Spring is here, so I must do the labor. A teeny plastic retention nub broke off and popped out of my 2002 Boxster turn signal in fall. When I asked Sunset Imports (truly a great help) if I could add the trip computer by replacing the broken three-stalk instrument module with the four stalk (a few bucks more), they said yes, compiled the list of extra parts and sent them to me. They also suggested that the instructions for this relatively easy DIY were somewhere here on RennTech. I have searched, to no avail, but I may be looking in the wrong spot. Any help would be appreciated. Also, does anyone know if the Durametric systems for the Boxster will allow user activation of the computer to stalk interface (thereby saving me the trouble and expense of visiting the local not-so-smart dealership)? Durametric tutorials seem more focused on diagnostics than systems manipulation.
Thanks in advance for any good advice here! 2 seatcollector
You should search for OBC (On Board Computer) hack. About 8 pages of results...
http://www.renntech....showtopic=19446
Thank for this Loren. Looks like the needed info is scattered about. Nothing on whether or not the any of the Durametric kits will allow OBC turn on though. Perhaps I'll post a separate query on that.
Thanks again.
2seatcollector
The newer Durametric is capable of turning on the OBC.
-
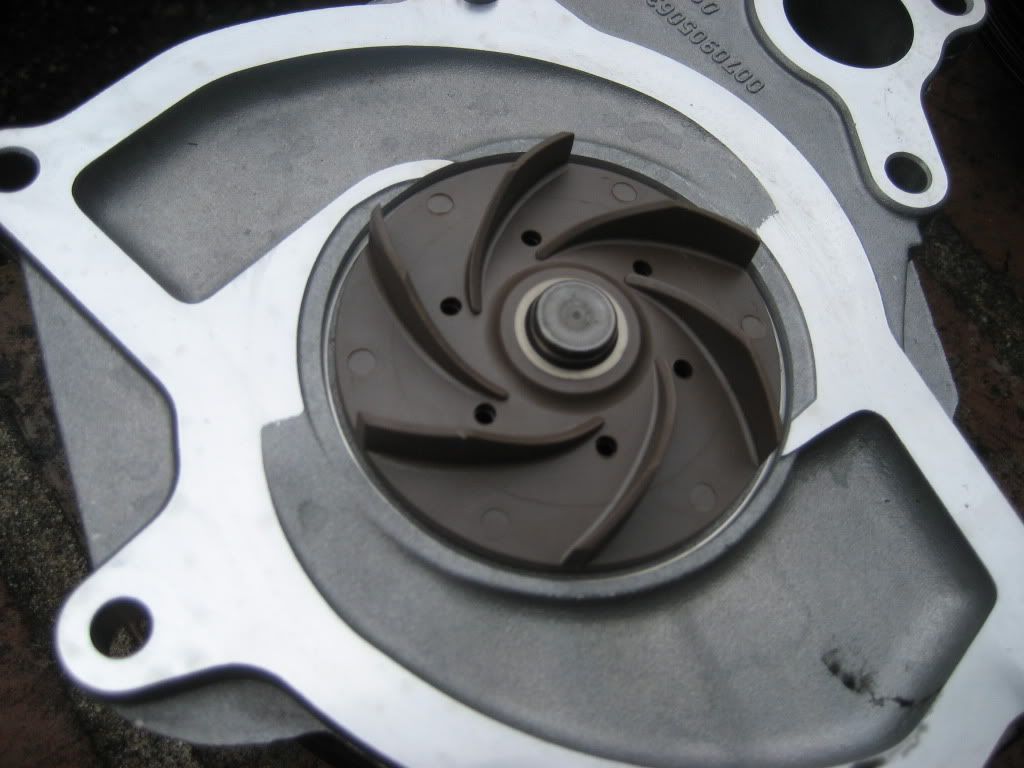
I replaced the water pump and installed the TSTAT 160 today.
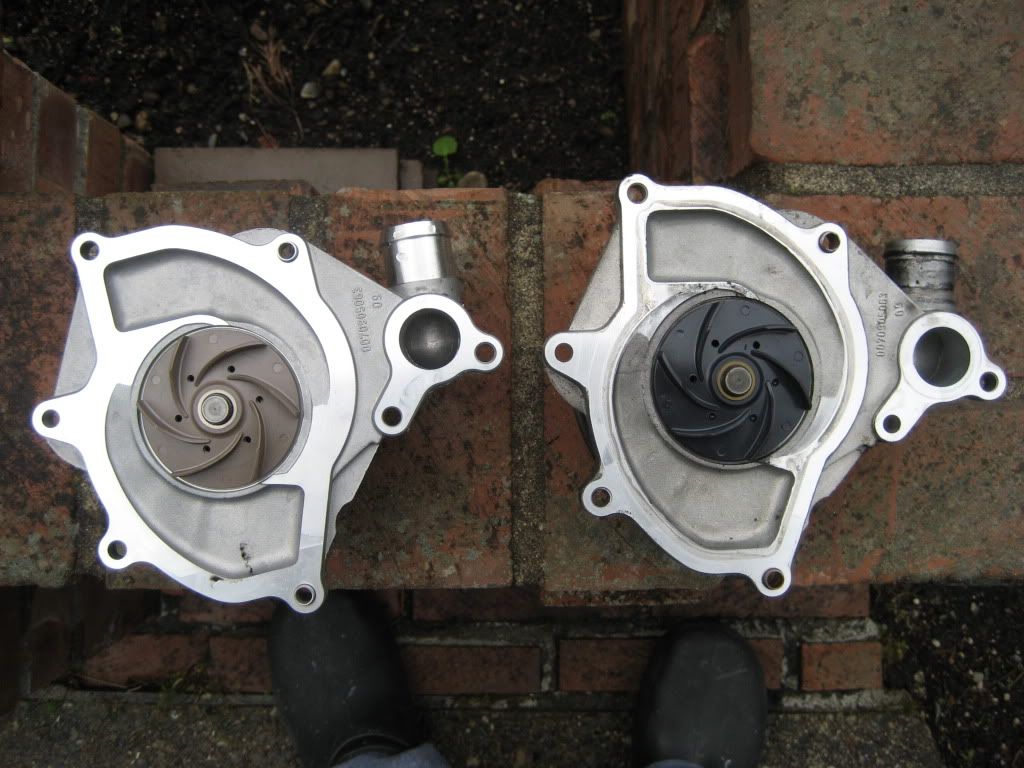
The water pump has seven bolts and two of the bolts are slightly longer than the other five. The bolts at 3 and 10 o'clock are the longer ones. Bolts are tightened to 7 ft-lbs. Photo below shows improved design. Less plastic and more metal in the turbine. I installed the pump from inside the cabin. With 2 bolts removed from underneath. I removed the passenger seat and opened the engine access panel behind the seats. Read Pedro's garage for some additional info and another way to remove the water pump from below the vehicle. I decided not to follow that route. I also replaced the serpintine belt at the same time.
Here is another shot of the new water pump.
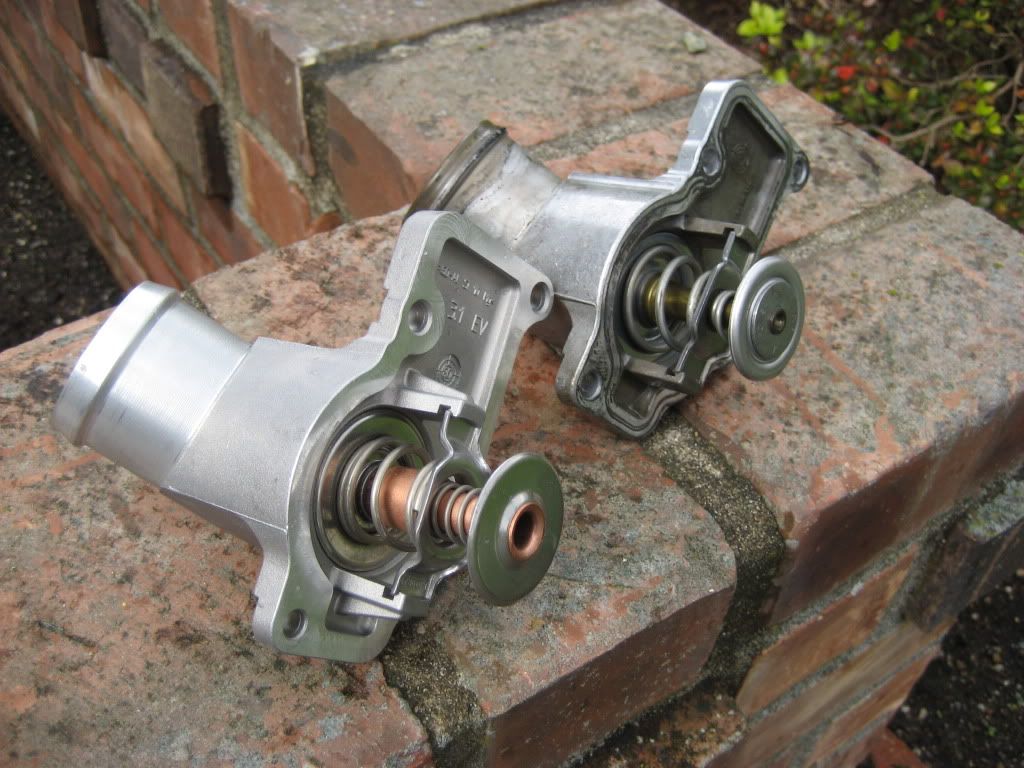
I also installed the LN Engineering T160 termostat. Everything inside engine was pristine clear as you can see from the photo below.
There are four bolts and was very easy to install. I also replaced several hoses and clamps. The three I replaced are the main ones that leave the engine; TSTAT hose (1 Y that connects to a couple of smaller hoses) and the two main hoses that route to the radiators up front. Here is a shot of the TSTAT 160 and the OEM one.
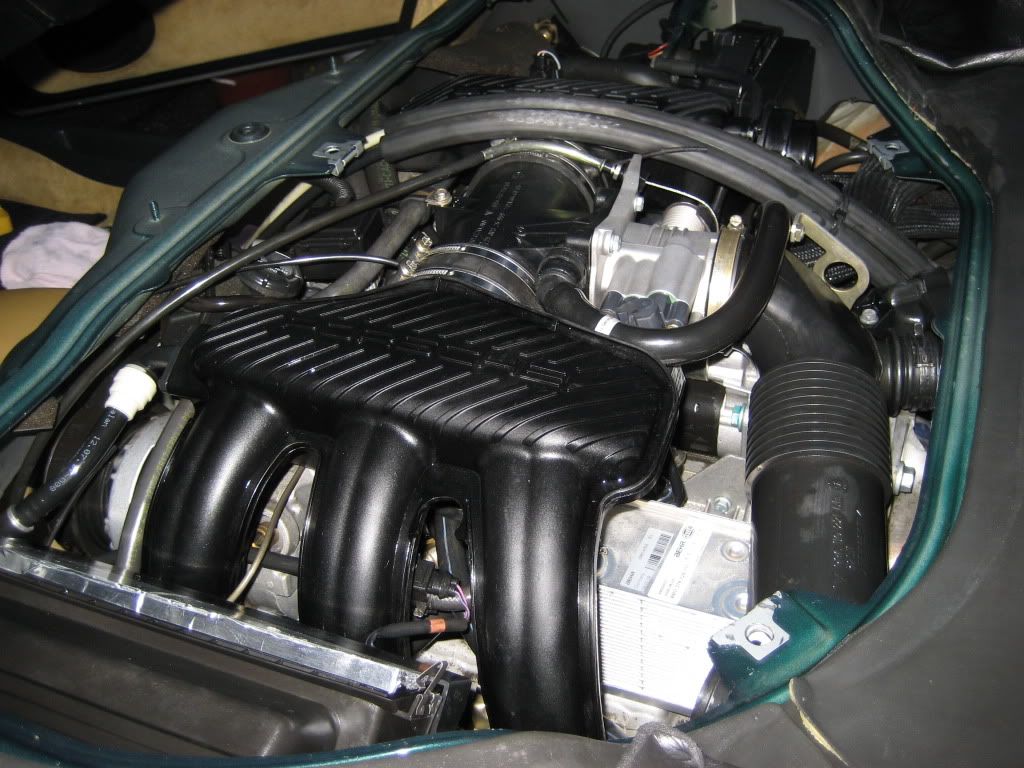
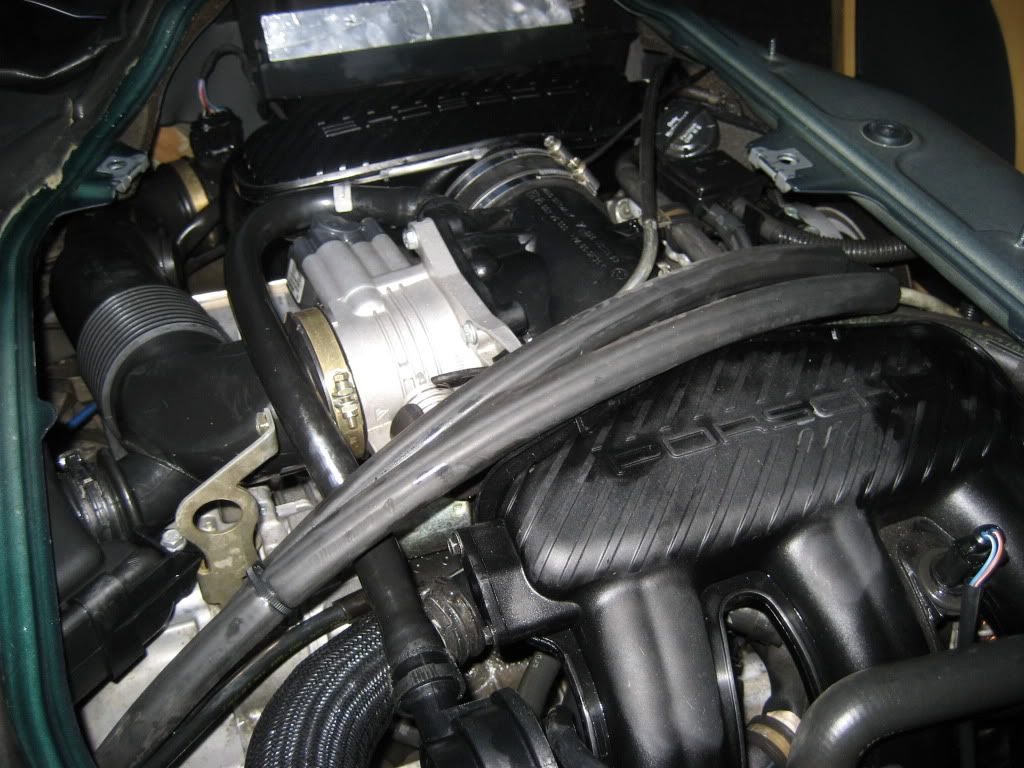
I also clean the engine compartment. I followed Orient Express's lead and used a spray bottle with 1/4 Simple Green and 3/4 water. I sprayed then let it soaked. Rinse and sprayed again. Then used a couple of terry cloths and wiped everything reachable downed. Sprayed again and repeat. Just like your hair shampoo.
-
Recently I bought a 97 Boxster with 98,000 on the Odo. The car ran fine but I had a engine check light on. I bought a meter to check and erase the codes and it read 02 sensors with 3 variations of potential problems. I opted to change out ALL 4 02 sensors and bought the kind with the correct ends and replaced the units. I'm STILL getting an engine check light and 02 codes after clearing the codes! Any suggestions?
Did you use any electrical spray on the O2 connections. Porsche recommends not to. To clean the connections they recommend connecting and reconnecting a couple of time. I had codes P1115 P1117 P1119 P1121 after purchasing new O2 ans tried the connecting and reconnecting thing and it seemed to do the trick.
-
I changed my entire switch several months ago and removed the gauges and the steering wheel cover. It was and additional 8 screws and made it extremely simple.
-
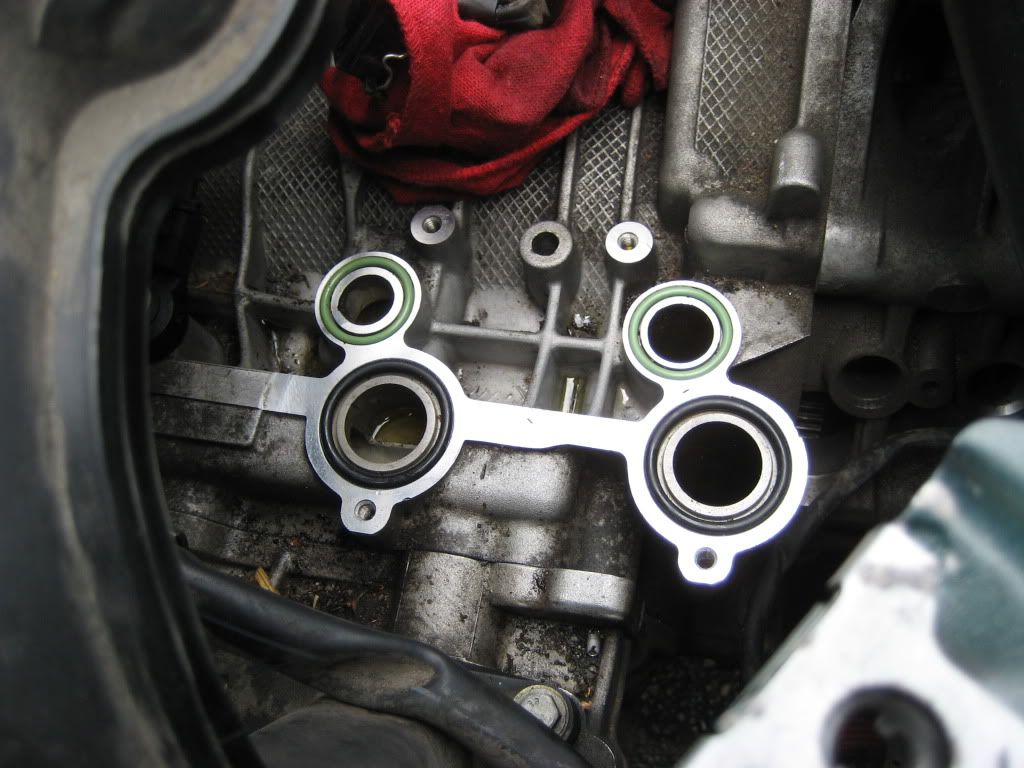
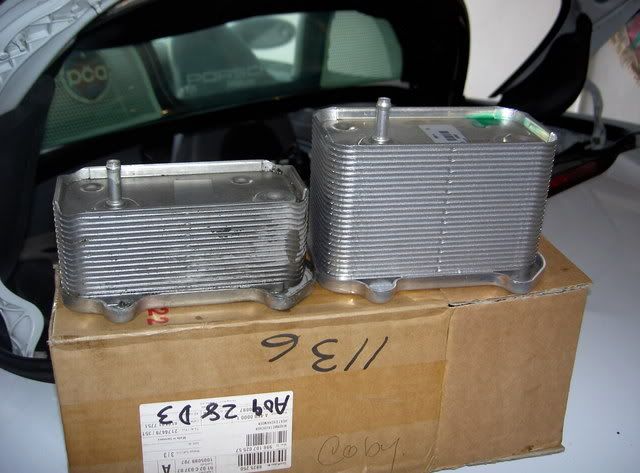
I installed the oil heat exchanger today. It took four O rings.
The green ones are the smaller ones part # 999-707-409-40-M17
The black ones are larger and came in a package of 4 but only 2 were needed, part #999-707-389-40-M100
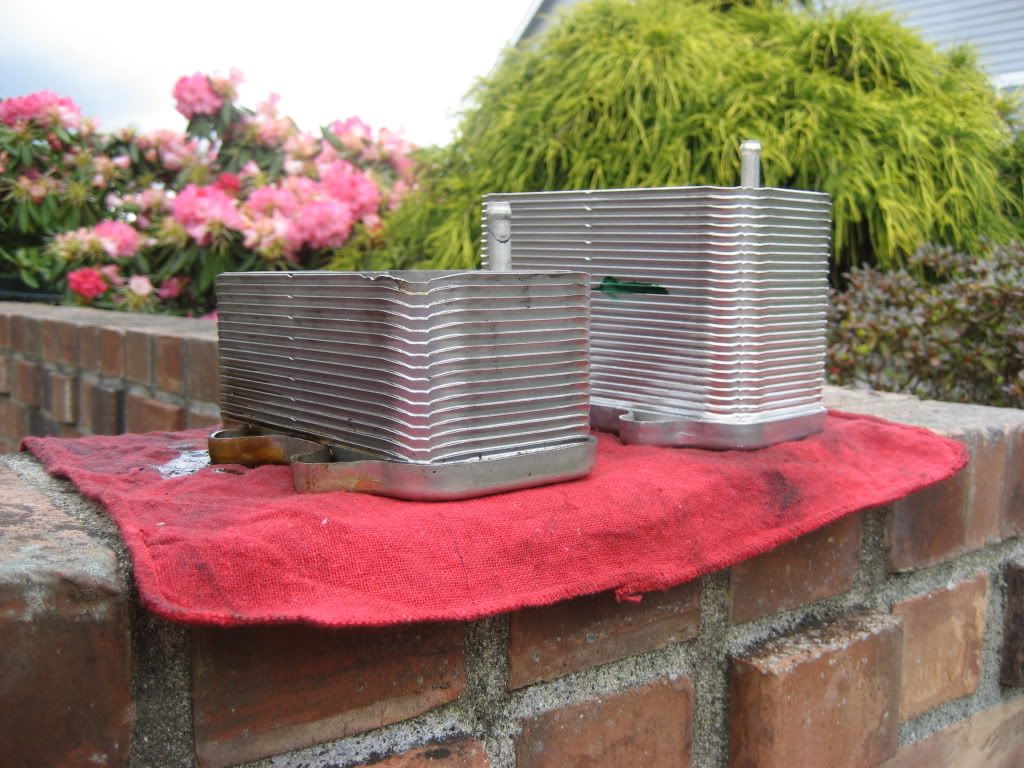
You can see the difference between the 986 oil heat exchanger and the 986S one.
To install you have to:
Drain water from engine block
I drained my oil and changed the oil filter
Place top in service position
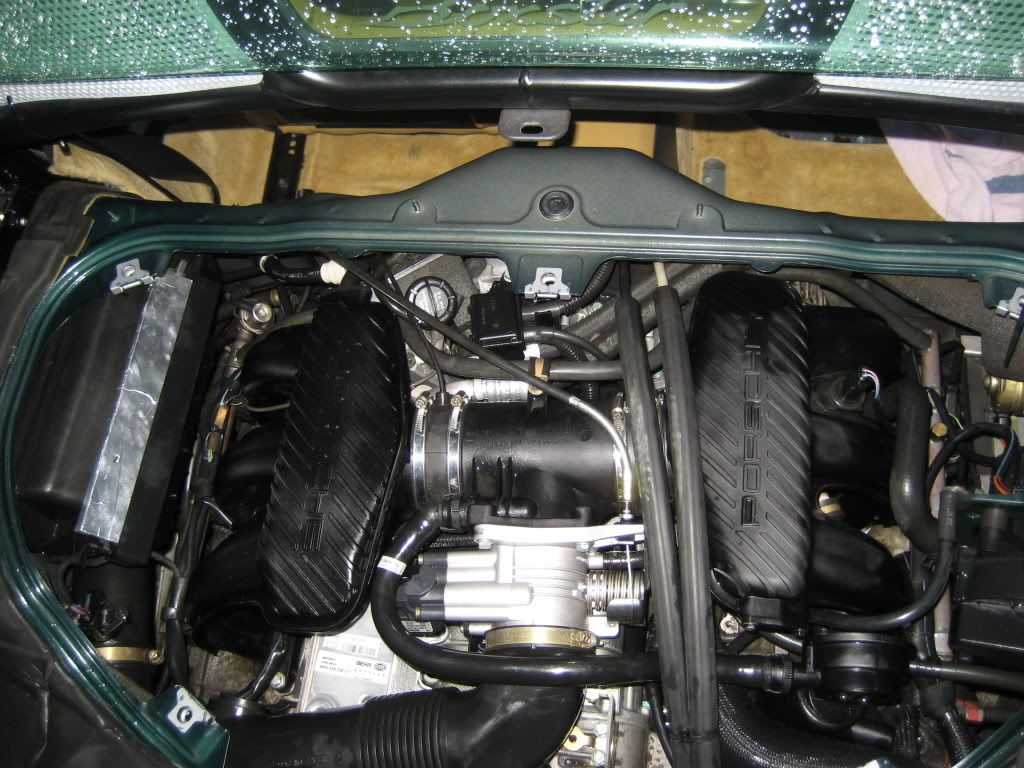
Open engine compartment
Remove air tube from throttle body and air box
Remove J tube
Detach throttle body and place aside (good time to clean it)
Take care in removing vacuum tubes one on each side
Remove oil heat exchanger - 4 torx screws
Replace O rings
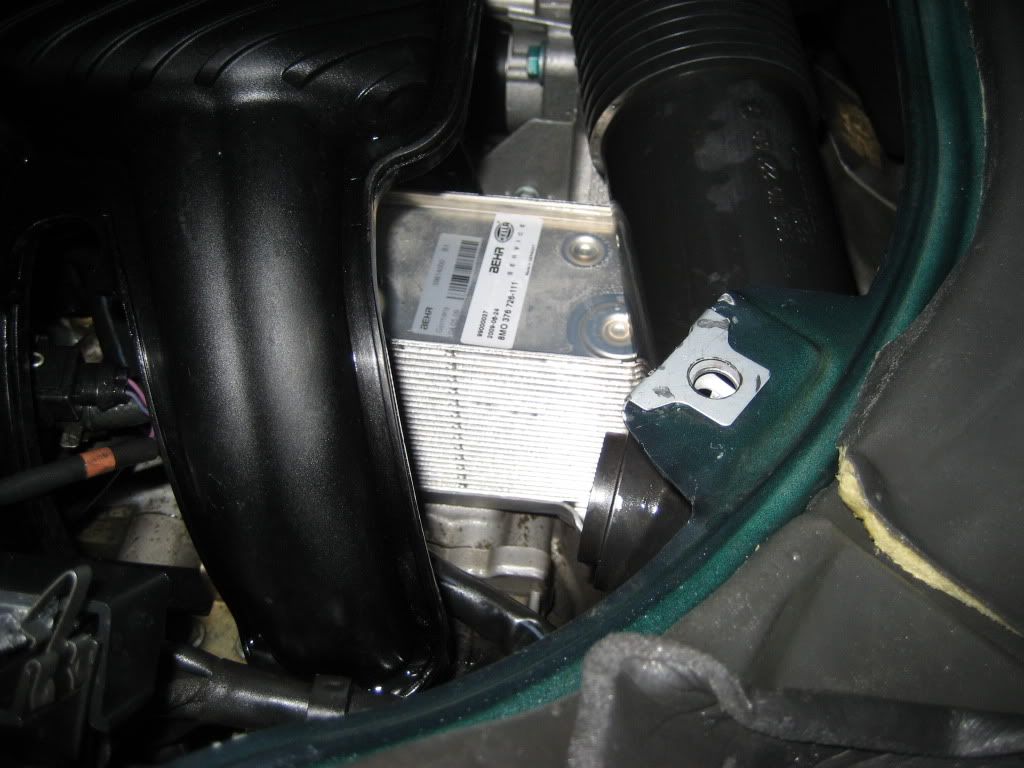
Install new 986S oil heat exchanger (tighten to 7lbs torque)
Installation is the reverse of removal
fill radiator
fill oil
Finished installation
-
I am installing the oil heat exchanger today!
-
Oil heat Exchanger
Found one at Pelican Parts
part number:
996.107.025.57
price:
$151.75 plus shipping
I ordered the O rings as well. The next best price was $250.00 plus at Sunset, special order with a 1 week wait.
K:
How many O-rings are needed for the conversion to the "S" oil cooler? Part numbers?
Regards, Maurice.
Seven (7) total parts ordered. I'll know more after I finish the install.
996-107-025-57-M6 - Oil Heat Exchanger - $ 151.75
999-707-409-40-M17 - Rubber o-ring - .75 each - 2 needed - $1.50 total
999-707-389-40-M100 - Rubber o-ring - $1.00 each - 4 needed - $4.00 total
I hope this helps!
-
i have a becker radio cr 220 type 4362 in a 2001 Carrera.Serial # Y5030097. I have no idea what the code is. Can anyone help me out?It would be greatly appreciated. thanks.
Hi, You can request security codes for radios on Renntech only on a certain thread/place.
You can post your request here which is a link to that thread.
-
The serp belt should have been replaced at 60k. If you are doing the thermostat, I'd replace the the waterpump, and belt if you are not positive it was done. I don't know that flushing the coolant is needed, sounds like you'll have it apart enought to just about completely drain it. You'll need two gallons of coolant and two gallons of distilled water to refill it.
Yes, I changed my serp belt myself at 62K . I might just do the waterpump and serp belt again while I'm at it.
Anybody have any thoughts on changing the waterpump with 82,000 miles as preventative maintenance?
-
Is it a good idea to run a 160 degree thermostat? What state do you live in as I doubt a California car would run well with one.
I live in Washington State. Around Seattle the temp is very moderate, however I take several road trips into Eastern Washington where temps last summer around Lake Chelan reached 107 degrees. I don't track my car and the more I looked into it I just thought it was a great mod.
-
I am doing a little spring work on my 98 5 speed Boxster. I am upgrading my OEM front bumper to a GT3 bumper. I also plan to add the third radiator and the 160F low temperature thermostat by LN Engineering.
My Pcar has 82 K on the clock and I thought while I had everything apart I would also replace my antifreeze.
My question is there a recommended radiator flush to perform, hoses/clamps, drain plug to replace, or even replacing the water pump as preventative maintenance while I had most of the water/antifreeze out?
There should be no flush needed, but you will need a new o-ring for the coolant drain plug (fifty cent item) and a dab of anti seize to put on the plug threads before you re torque it.
Check the condition of your water pump; you will need to drain the system all over again if it craps out 5 min. after you do your upgrades.
As you have a 5 speed car, you can also upgrade to the "S" oil cooler which is about twice the size of the base unit, and is a simple bolt in swap for about $200 or so (parts at retail). The larger cooler is one of the biggest bang for the buck mods you can do for a base car.....
Oil heat Exchanger
Found one at Pelican Parts
part number:
996.107.025.57
price:
$151.75 plus shipping
I ordered the O rings as well. The next best price was $250.00 plus at Sunset, special order with a 1 week wait.
-
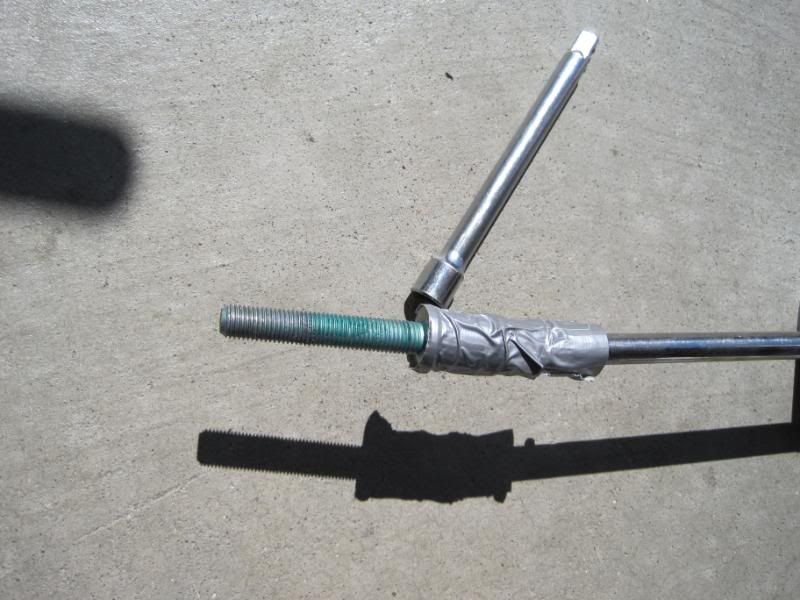
For that problematic bolt located at the top of the tranny, wrapping a universal joint in duct tape barely catching the lip of the bolt holding it in place and ganging every extension you have (mine came up to nearly two feet) makes life a bit easier:
Good Luck Guys.....Mark.
Great write-up. I accessed the top bolt from inside the engine compartment. I had removed my air tube from the air filter box to the throttle body to give the TB a good cleaning. With this black tube removed you can access the upper bolt from above.
-
I am doing a little spring work on my 98 5 speed Boxster. I am upgrading my OEM front bumper to a GT3 bumper. I also plan to add the third radiator and the 160F low temperature thermostat by LN Engineering.
My Pcar has 82 K on the clock and I thought while I had everything apart I would also replace my antifreeze.
My question is there a recommended radiator flush to perform, hoses/clamps, drain plug to replace, or even replacing the water pump as preventative maintenance while I had most of the water/antifreeze out?
-
Loren, Can you install the Griot's Air Horn in the same location even with a 3rd radiator?
-
Radiator is the same number as your DYI
Top and Bottom brackets are too.
Hoses increase version numbers to:
996-106-666-55 (was 52)
996-106-665-57 (was 55)
Air Duct was the same
All hardware came in unmarked bags
It did come with a plastic bumper insert that I believe is not needed for my gt3 mk1 bumper
I think all will be fine.
-
Any idea what would be different in this kit?
-
Here is the parts list for the GT3 Mark 1 front bumper. The same parts work regardless of whether you put it on a GT3, 996, or 986.
Carnewal.com still has the 3rd radiator kit on their site - though with the poor value of the dollar you want to compare the individual parts prices at Sunset Imports (Porsche Parts at Dealer Cost).
The complete parts list is in my DIY article here. Please have them double check the part numbers as some may have changes or been updated.
I purchased the 3rd Radiator KIT from Sunset
Part no:
000-044-100-14
List Price - $516.61
Sunset price - $406.96
-
I odered and received a Durametric Tool last week and ran the codes. It indicated a passenger seat belt problem. Sprayed electrical cleaner into the seat belt receptacle on the passenger side and used canned air to dry and clean. Cleared the code and light has stayed out going on a week now. If it comes back I'll will replace the passenger buckle and electrical harness per TSB. The drivers side was done by previous owner in 2006.
Update - it will soon be 2 years without an airbag light.
-
Forgive me if this has already been covered, I did a quick search and could not find exactly what I was looking for. .
Currently I have a CR-210 in my car i beleive ( cassette with 6CD under the hood ) , and i want to switch over to a CDR-220 (Single CD fold down faceplate ).
I was wondering if this is a direclty plug and play application as far as the wiring goes, or if any modification would be needed. Also Would the CD changer under the hood still work?
Im sure there are lots of ppl that have swapped out the Cassette deck, any feedback on what you did and how easy or difficult and how you like it would be much appreciated.
The CR-210 can be switched out to the CDR-220 very easily. The 210 has a sleeve that will need to be removed. The same radio removel keys are used for both the 210 and the 220. All harnesses snap into place in the 220 as the 210. Go fo it.
-
Thanks Geoff and 1schoir!
-
CDR 220
Model Number
BE 4462
Serial Number
Y5047465
-
I am thinking of upgrading my OEM HID headlights to a set of Litonics on my 98 Boxster. Does anyone know what it takes to install these or even if they will work?
Thanks in advance!


GT3 Bumper Install
in 986 Series (Boxster, Boxster S)
Posted
The parts fit perfectly. Here is a picture of the installation before the new bumper was installed.
And here is a photo after the center radiator was in place and the new bumber installed.
More info can be found HERE at this thread! Thanks for your help Loren!