Welcome to RennTech.org Community, Guest
There are many great features available to you once you register at RennTech.org
You are free to view posts here, but you must log in to reply to existing posts, or to start your own new topic. Like most online communities, there are costs involved to maintain a site like this - so we encourage our members to donate. All donations go to the costs operating and maintaining this site. We prefer that guests take part in our community and we offer a lot in return to those willing to join our corner of the Porsche world. This site is 99 percent member supported (less than 1 percent comes from advertising) - so please consider an annual donation to keep this site running.
Here are some of the features available - once you register at RennTech.org
- View Classified Ads
- DIY Tutorials
- Porsche TSB Listings (limited)
- VIN Decoder
- Special Offers
-
OBD II P-Codes - Paint Codes
- Registry
- Videos System
- View Reviews
- and get rid of this welcome message
It takes just a few minutes to register, and it's FREE
Contributing Members also get these additional benefits:
(you become a Contributing Member by donating money to the operation of this site)
- No ads - advertisements are removed
- Access the Contributors Only Forum
- Contributing Members Only Downloads
- Send attachments with PMs
- All image/file storage limits are substantially increased for all Contributing Members
- Option Codes Lookup
- VIN Option Lookups (limited)


keninirvine
-
Posts
52 -
Joined
-
Last visited
Content Type
Profiles
Events
Forums
External Paint Colors
Downloads
Tutorials
Links Directory
Collections
Store
Posts posted by keninirvine
-
-
Turn the radio on an FM station - pull one at a time and when the station goes - you have the right antenna. (courtesy of RFM)
Thanks Loren. I should have done that when I installed the device. But when I did it last weekend, I went ahead and intercepted the yellow antenna lead, and everything worked so I assumed I had the right antenna. But I didn't check the other lead as well. I'm concerned about the low gain of the devices being played through the modulator (XM radio or iPod), so started wondering if perhaps I had chosen the wrong antenna. I was hoping to avoid pulling the PCM again if I already have it installed correctly. The low gain results in having to turn up the volume to hear properly, compared to the level required for regular FM stations. Then when I turn off the ignition, the modulator is instantly powered down whereas the radio stays on until the key is pulled. During that interval, I get a blast of white noise on the system due to the volume being so high. I have to remember to turn down the volume before turning off the ignition. It could be an inherent weakness in the modulator, and if so, may need to install the Dension.
-
When I went to install an FM modulator on my PCM (06 C2S), I found 2 antenna connections on the back. There is a black one and a yellow one. Does anyone know which one is the FM antenna connection?
-
If you have any info and in doubts, remove both antenna cables one by one with the radio on, it will be immediately clear which cable it is, there will be get out no longer music, but only noise.
Excellent suggestion. Don't know why I didn't think of that! Actually, I tried the yellow connector, and everything is working fine (my Nav, the FM radio, the AM radio, and my "iSimple TranzIt" FM modulator/iPod interface. So apparently I guessed right the first time.
-
I'm still not clear which one is the FM antenna. Is it the black connector or the yellow one? I'm installing a FM modulator device and have to intercept the FM antenna connection.
-
i would sit in your car with the door open and look at teh overhead switches in the dome light. there is a set that will control if the footwell lights come on when you have the door open. i think the middle position is automatic and the left/right toggles turns them off or on manually.
thse are seperate from the individual driver/passenger light switches
Bingo. I had set the 2 outside rocker switches to the middle position, but had overlooked the center rocker switch. Once it was set to the middle position, the footwell lights came on.
Thanks
-
Porsche Planet website has a DIY where they show removal of all the trim in the front of a Cayman to get to the CDC ... - I think it was actually for a DVD nav install - but its the exact same area.
http://www.planet-9.com/reviews/showproduc...ct=99&cat=5
This same guy Kman-s has a GW500 install article on the same website - its very good.
996 looks different inside the hood.
Do you have a 997 or 996 C4S? In the 997, the CDC is in the trunk on passenger side, outside the plastic shrouding area near battery. On my 997 Targa, I chose to install the Dension behind the PCM inside the car, since the AWD cars have so little space in the trunk.
-
I just purchased my 3rd 997.1, this time an 06 C2S cab. I've noticed that there are under-dash lights over both the driver and passenger footwells, but neither comes on when doors are opened. I can't remember if my previous cars had these lights. Are they supposed to illuminate when doors are opened?
-
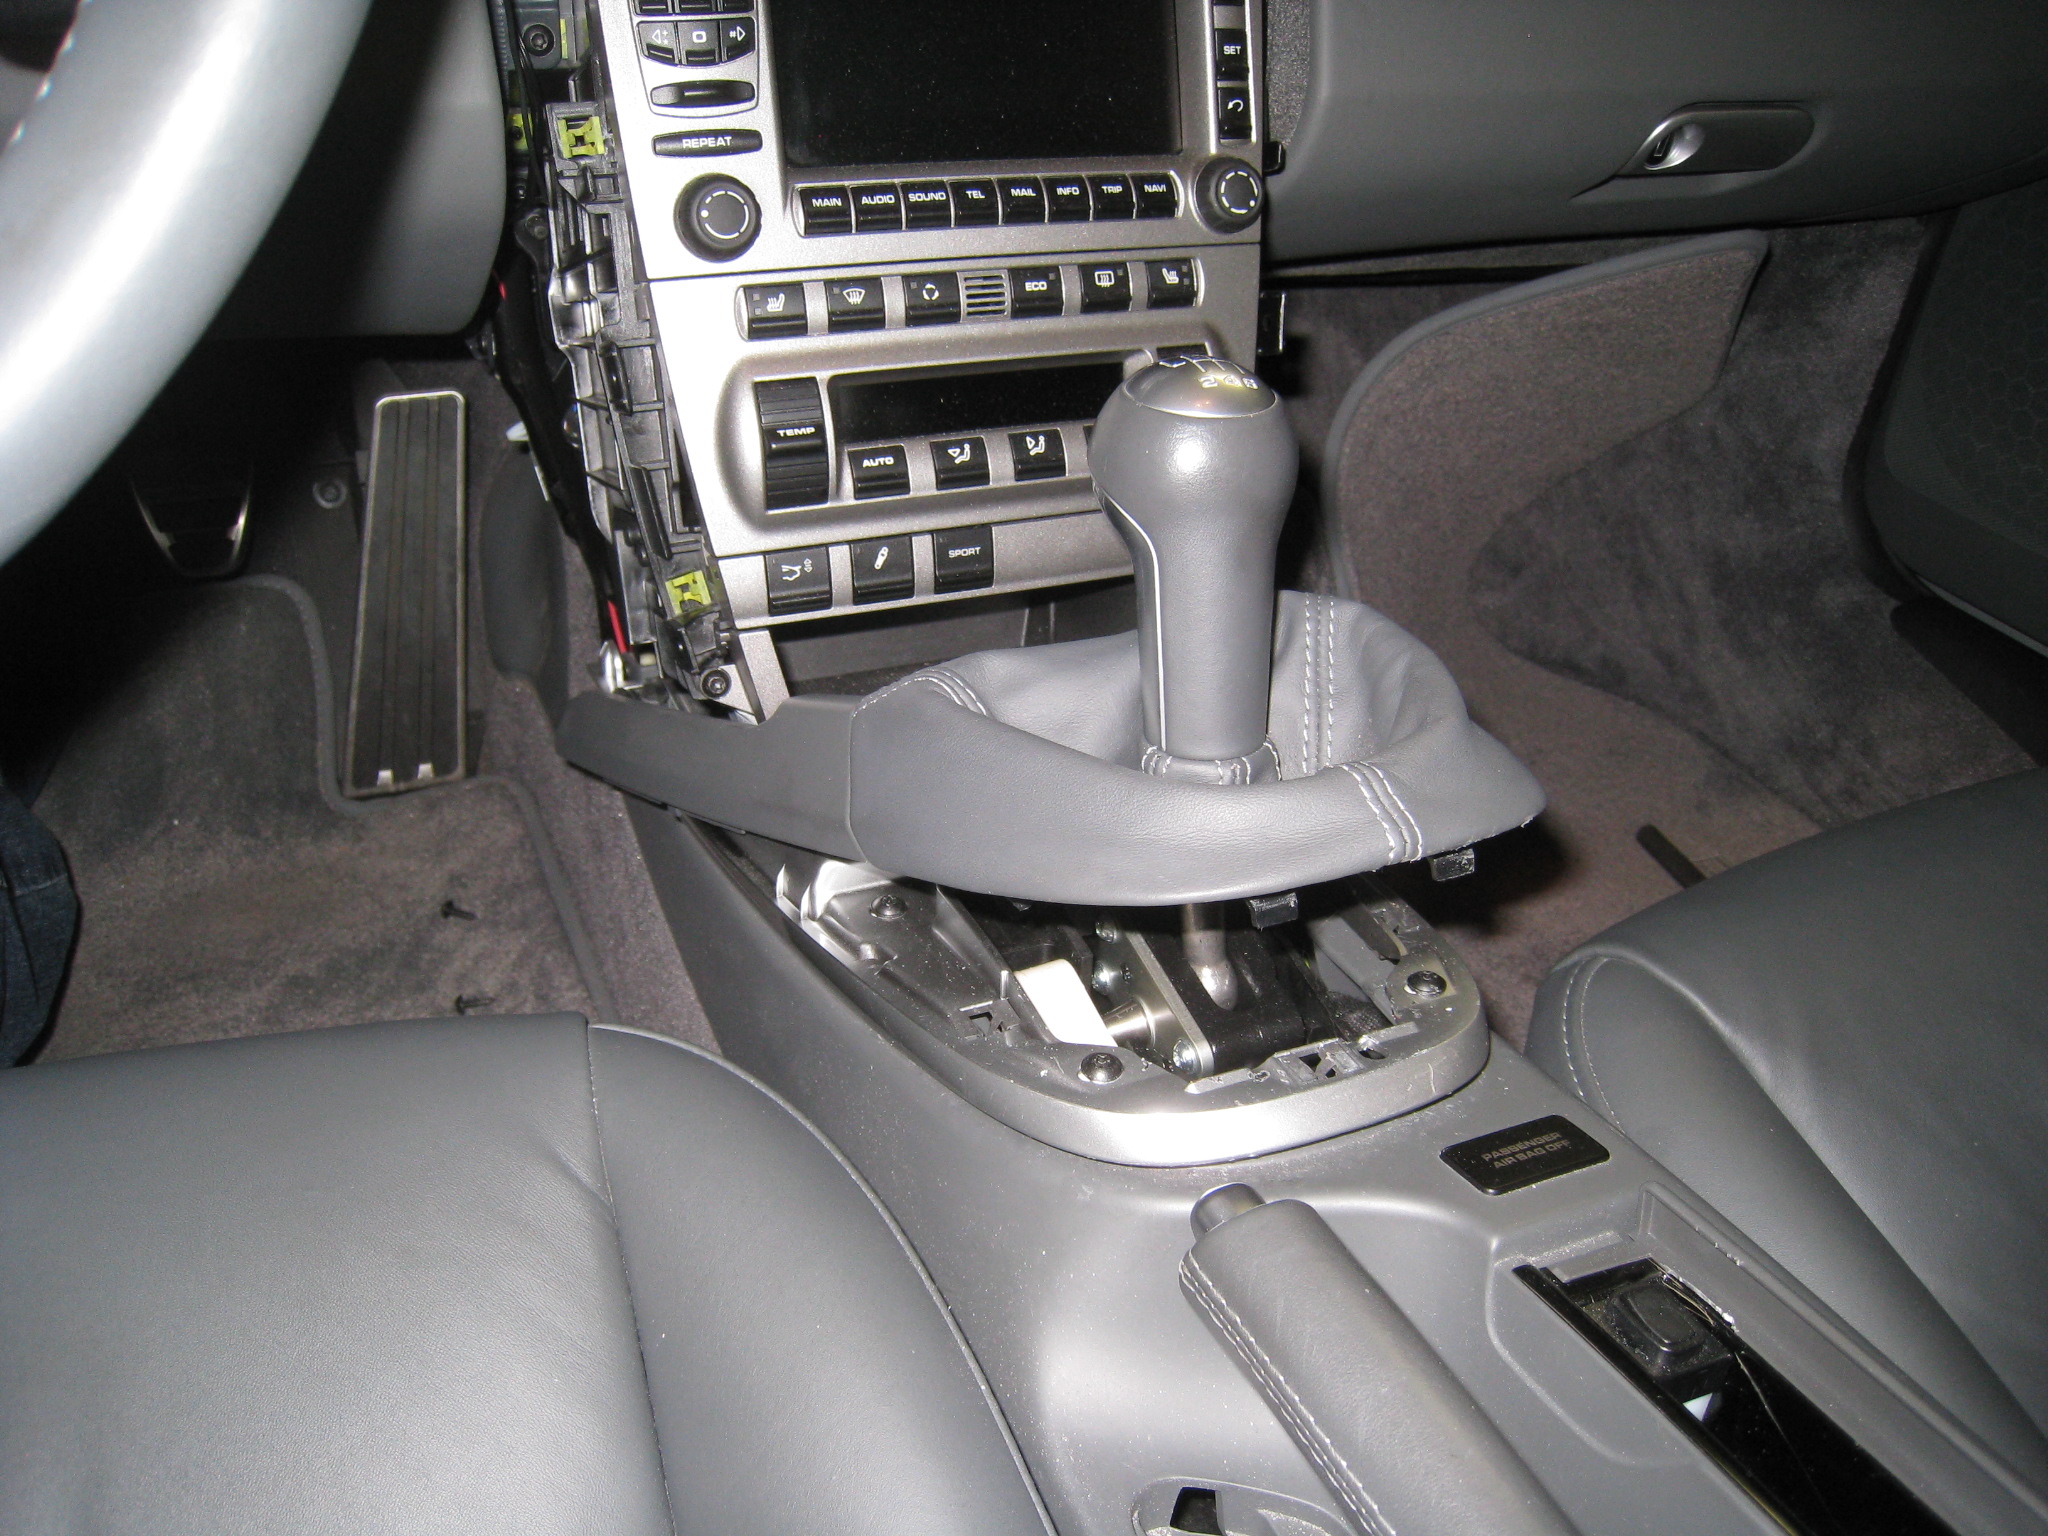
I solved my own problem. I finally popped off the leather boot to expose the screwed down trim underneath. I'm sure glad I didn't try any harder to pry the aluminum horseshoe off.

-
I just purchased an OEM SSK for my 07 Targa4S. It seems the most difficult task, at least for me, is removing the shifter boot and horseshoe trim. I found an older thread that suggested that on the 07 and newer cars, the horseshoe is screwed down. Is this the case, and if so, how is the leather boot taken off to allow access to the screws? If it isn't the case, where does one pry up on the horseshoe trim to get it off without breaking a tab? I have got the rear-most end to come up about half an inch, but can't get it to release along the edges towards the PCM console. I have been prying with a flat tool wrapped in masking tape, but to no avail.
Any suggestions?
-
Caution: It isn't as easy as it appears. Bumperplugs does repaint the face plates, but only if you remove everything first and send them the piece. It requires removal of the complete PCM module, and then the removal of all the buttons etc. so that only the face is left. It is not for the faint hearted or anyone not experienced in disassembling a complex device like this. I'd be surprised if you can even get one in carbon fiber. Re-painting alone runs around $300 I believe. Do a search on the 6speedonline forum, as I think it was discussed there at some length in 2008.
-
Did you remove just your PSE mufflers, or the control system as well? Will you be keeping or selling the PSE?
Nice car BTW. Congratulations on the nice combo.
-
any thoughts to share? thanks!
Changes to your suspension won't have any impact on your LSD. Bilstein makes PASM and non-PASM versions of their PSS9/10, as I understand it. I believe the only difference is the PSS10's have 10 adjustments vs the 9 available on the PSS9's. I'd contact Bilstein to confirm this info.
Everyone that has PSS9 or 10 seems to swear by it. I'm considering PSS10 for my PASM-equipped 07 T4S. You would get more feedback from the Rennlist forum and the 6speedonline forum. Suggest you post your questions there.
-
I had the same problem with my 05 C2S cab with power seats, sport chrono etc. My dealer said it couldn't be done on my car, even though my manual, like yours, said there should have been a menu item for DT running lights.
In my current 07 T4S, the menu item was there, and I was able to set up DT running lights myself without any PIWIS or dealer involvement.
Just another aggravation with the whole obscure PCM system and confusing instructions in manuals. And ignorant dealership personnel.
-
Not without spacers.
Spacers would make the problem worse. This was already answered on the other forum. Spacers make the offset less, not more. Narrow body cars normally have 57mm front offset and 67mm rear offset. Some reduction is possible, but anything over 10mm reduction is pushing it, especially on the front wheels where steering geometry is affected by offset.
-
Nice looking unit and install. Does it affect any of the computer functions on the instrument cluster? Can you provide a ballpark price for this conversion?
-
Sport Chrono simply adds the "Sport" button which re-maps the throttle and stiffens the PASM. I'm not aware of it doing anything with brakes. It is the least used option I have, as I find the re-mapped throttle somewhat useless (and problematic in autocross applications). And the chrono thing is so complicated I have no interest in trying to use it. In my opinion, you're not missing anything by not having the "sport" button.
-
I suggest you have the dealer take it out if it has to be removed.
-
Congrats on your purchase. My first Pcar was a 05 C2S Cab, and I LOVED it. The cabs are wonderful. Enjoy, and good luck with finding good service tech. I'm in OC so can't recommend anything in the LA area.
-
I've heard good reports from Porsche owners about Tucker Tire. There is one in Mission Viejo. I don't know if there are others.
-
I am no heel toe expert but I use the ball of my foot for the brake and blip the throttle with the pinky toe. No heel involved. I have driven some cars where a simple aluminum plate was added to the gas pedal to make it an easier reach. Worked great.
I think most Porsche drivers find it easier to roll their right foot, with the left side on the brake, and right side on the accelerator. The use of the heel on the accelerator generally seems awkward for most of us (from what I've read).
-
Carrera Sport offsets are 55 front/67 rear, vs 57 front/67 rear on other factory wheels. Rim widths are 8.5"/11.5" vs 8"/11" on other wheels.
I would think you'd be fine with 295's on the 11.5 inch rims, but check with the folks at Wheel enhancement since they have plenty of experience in this area.
-
If the alignment is ok and it is still off center, just take it off and rotate one or two spline positions. There are lots of posts about steering wheel removal. The trickiest part (for me) is releasing the air bag.
-
are 997 cabs not offered with a hardtop?
The 997 Cabs are offered with hardtops, but very few are ordered with them. The 996 cabs all came with hardtops, but few owners used them and eventually sold them, or left them at the dealers who also sold them (very cheaply in some cases). I've seen many for sale in the $400 to $800 range.
-
So if I do it how your're suggesting, do I need the vacuum lines, vacuum reservoir, etc. Sorry I just don't quite understand. My mufflers arrive tomorrow, so once I actually get them, it will make more sense. Thanks for the help.
Yes you need the vacuum lines and t's, you tap into the brake booster I believe, no additional reservoir, and all accessory vacuum piping to the solenoid.
instead of the large included electrical harness you only need several wires to fuse box-switch-solenoid and a ground. We used a few wires of the original harness and capped the rest.
Since the original harness had the plug on it for connecting to the electric solenoid, I used it and just used the 2 wires (1 for power, one for ground). I attached the ground near the DME unit in rear of passenger compartment, and then joined a new wire to the power lead and extended it to the switch in ash tray in console. Then I ran a wire from fuse box (via a fuse of course) to the switch.
All the wiring does is activate or de-activate the solenoid, which in turn controls the supply of vacuum through the tubing to the diaphragms on the mufflers.
Removal of driver's side air vent module
in 997-1 Series (Carrera, Carrera 4, Carrera 2S, Carrera 4S)
Posted
I am trying to chase down the source of a periodic noise under the left side of my dash on my 06 C2s cab. I decided to just start removing things bit by bit until it goes away or I can see where the noise is coming from (it sounds like body creak, as if 2 plastic pieces are rubbing when driving over rough surfaces). Tonight I tried to remove the air vent by driver's door, and managed to get it out about half an inch, but something is holding it from coming out any further. It seems to be constrained on the left side (towards door). Any suggestions why it won't release and come out of the hole?