Welcome to RennTech.org Community, Guest
There are many great features available to you once you register at RennTech.org
You are free to view posts here, but you must log in to reply to existing posts, or to start your own new topic. Like most online communities, there are costs involved to maintain a site like this - so we encourage our members to donate. All donations go to the costs operating and maintaining this site. We prefer that guests take part in our community and we offer a lot in return to those willing to join our corner of the Porsche world. This site is 99 percent member supported (less than 1 percent comes from advertising) - so please consider an annual donation to keep this site running.
Here are some of the features available - once you register at RennTech.org
- View Classified Ads
- DIY Tutorials
- Porsche TSB Listings (limited)
- VIN Decoder
- Special Offers
-
OBD II P-Codes - Paint Codes
- Registry
- Videos System
- View Reviews
- and get rid of this welcome message
It takes just a few minutes to register, and it's FREE
Contributing Members also get these additional benefits:
(you become a Contributing Member by donating money to the operation of this site)
- No ads - advertisements are removed
- Access the Contributors Only Forum
- Contributing Members Only Downloads
- Send attachments with PMs
- All image/file storage limits are substantially increased for all Contributing Members
- Option Codes Lookup
- VIN Option Lookups (limited)


Blue Monster
-
Posts
34 -
Joined
-
Last visited
Content Type
Profiles
Events
Forums
External Paint Colors
Downloads
Tutorials
Links Directory
Collections
Store
Posts posted by Blue Monster
-
-
and just happened again
-
Just happened again after getting the car detailed and I remember it happened last time after I got it washed, so intermittent, but seems to be related to when the car gets water on it.
-
Funny, the codes just came back for the first time in 5yrs (looking at my old posts, had them cleared, let's hope for another 5yrs
-
Thank for this post, just used the TSB, not obvious how to get the grommet out
-
Just completed this DIY today. Many thanks to Loren and SCB71. I am a newbie to working on cars. So far in my 996 TT I have replaced/fixed/installed - headlight washer unit, hardwire radar detector, clear sidemarkers, sanded headlights and added x-pel protection, and changed most of the bulbs. The info/photos were great and easy to follow. I would only add that the screws that hold the switch are tiny flathead screws that only need the smallest amount of torque to loosen. I bought my part at NAPA and other than buying another set of TORX screwdrivers this DIY was done for less than $20. Thanks again and I love Renntech!
-
Thanks, if I get the codes again, I'll post here, reading up on it, seems like a non-essential part of the car, heats up the catalytic converters, but if not working correctly it may not pass state inspection
March 12th, still no codes, hopefully I haven't just jinxed myself....
-
How about a few taps from a rubber mallet??? Neurosurgery with a hammer.Dude, I am in the same boat, also have 2003 Turbo Coupe, the bar under the headliner continues to rattle driving me crazy, I was told it is a multi hour project to remove all the interior parts to get to the bar so I have been just dealing with it, I share the pain, but even with all that I love TT, even in 12" of snow!
Did you know, there is a couple of TSB's on this subject. #6028 tilting/sliding roof noises, and a second one also #6028 Noises from the new style sunroof frame.
Thanks for the suggestions, I'll take a look at those TSB's again
-
Dude, I am in the same boat, also have 2003 Turbo Coupe, the bar under the headliner continues to rattle driving me crazy, I was told it is a multi hour project to remove all the interior parts to get to the bar so I have been just dealing with it, I share the pain, but even with all that I love TT, even in 12" of snow!
-
Thanks, if I get the codes again, I'll post here, reading up on it, seems like a non-essential part of the car, heats up the catalytic converters, but if not working correctly it may not pass state inspection
-
My car just had the same codes, p0491 and p0492. I had them cleared and they have not come back. The weather was extremely cold that day, but not sure if that had anything to do with it. I can post my full readouts if anyone cares. Just wondering if anyone else had the same experience. Thanks.
--BM
-
Interesting post. I have changed out the yellow-ish bulbs for whiter ones in the past and found they lasted only a few months. I realize there are quality differences between brands, but the fact that these white bulbs run much hotter, makes me sceptical. Can anyone of you that have tried this, post back in 6 months or so and report on durability?
Joost
I'll post back here in 3 months and let you know how they are holding up
3 months later....all bulbs still good.... ;) hopefully won't burn out tomorrow
-
I would choose 2 - too much oil is as bad as not enough.I would do 1.5...add to 1 bar below full. LOL.
Thanks, will do.
-
Looking for some guidance on adding oil to my 2003 996TT. I had my last oil change 4,000 miles ago and after some heavy use recently I ran the oil check on a level surface and noticed that the oil indicator was one bar above halfway. Wanted some advice on:
1) Should I add more to take it to full?
2) Should I just add a little to get to say 3/4 full?
3) Should I add none just wait for another 1,000 and do an oil change?
4) None of the above :)
Thanks.
--BM
-
for number 3 get a roll of quarter to half inch insulation tape..the kind you put around windows and lay it on the piece below your skylight window..the piece that the window sits on. That will take care of the noise.
I have a similar problem, the headliner rattles when I have the sunroof open and I go over bumps in the road. Sorry to ask, but could you take a picture and post? Thanks
--BM
-
I just ordered the replacement part shown above but have everything but the plate still installed.
What is the correct way to Remove the old assembly?
I pulled on it a bit but it doesn't seem like it just pulls out. I don't want to break the assembly.
2002 C2 Cab w/BiXeon
Same thing happened to me; were you able to fix it by just replacing the cover? I don't care about buying the assembly but i just need to replacethe cover, or find it on the freeway!
Dito with me anyone have any new advice?
I've just replaced my chrome cover and this is how you do it:
1) Switch on your headlights
2) Get someone inside the car to activate the headlight washer (the pop-up headlight washer won't work unless you have the headlights on)
3) The little spray head under the (missing) chrome cover will pop up out of the hole in the headlight and washer fluid will start to spray onto the headlight
4) Grab the spray head and hold it (it has quite powerful spring loading that wants to pull it back into the headlight)
5) There is a little square plastic tab with a square hole in it on the base of the spray head that has to be flexed back slightly to get the spray head to disengage from some plastic teeth on the nozzle (look at the replacement chrome cover and spray head and you will see this tab). Once you have lifted this tab up slightly the spray head will slide right off the nozzle.
6) To install the new cover and spray head unit, simply put the spray head opening over the nozzle and push the chrome cover onto the headlight until it is flush with the surface of the headlight. The little square pastic clip on the end of the spray head clicks down the teeth on the nozzle and the height is adjusted automatically.
It is actually quite easy to do - the hardest part is holding up the nozzle against the spring loading, while levering the square plastic clip off the jagged teeth on the nozzle at the same time. There is a little square hole in the plastic clip that you should be able to fit the tip of a small electrician's screwdriver into. This makes it easy to flex back the tab slightly so that it disengages from the teeth on the nozzle and slides off it.
Thanks, I just did this today, worked well with a small flat head screwdriver
-
Interesting post. I have changed out the yellow-ish bulbs for whiter ones in the past and found they lasted only a few months. I realize there are quality differences between brands, but the fact that these white bulbs run much hotter, makes me sceptical. Can anyone of you that have tried this, post back in 6 months or so and report on durability?
Joost
I'll post back here in 3 months and let you know how they are holding up
-
hey there blue monster,
i was wondering what lights you ordered from superlumination.com? specifically the part numbers. i searched the site and seem to have found the signals but for foggers im getting lost. the picture you have doesnt match up to any of those products imo. hoping you could tell me exactly the color and part number you ordered from them, thank
my best,
tecra
Sure, just saw your note.
Go to
wwww.superlumination.com
then click
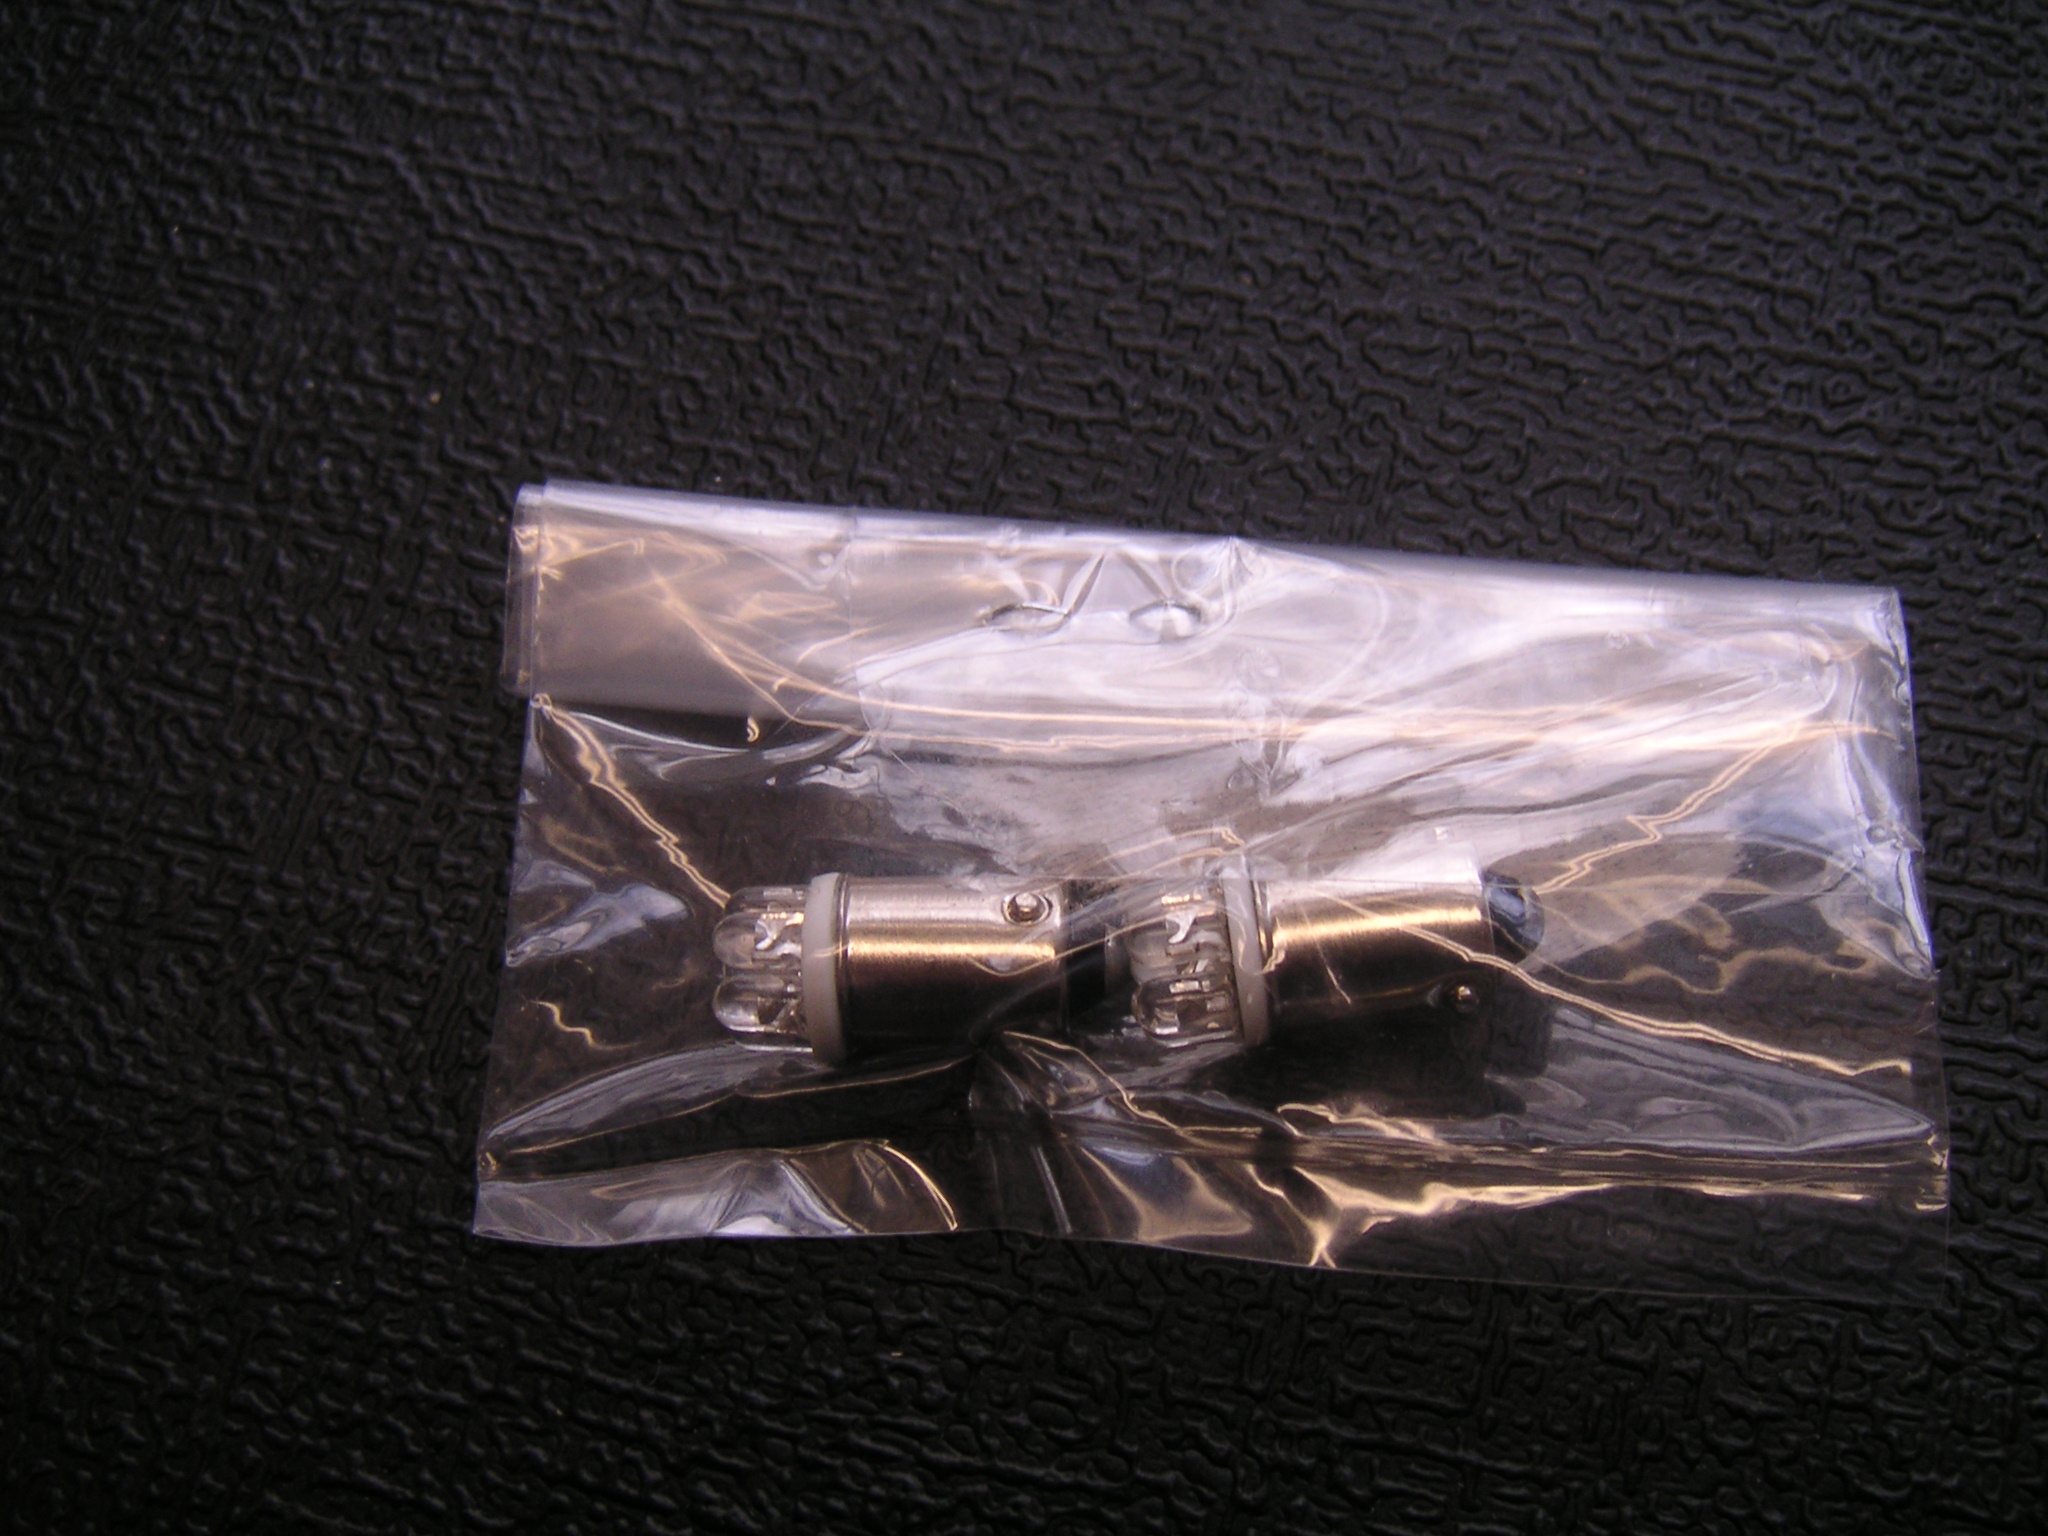
For the Parking Lights:
Ba9s, E10, Ba7s, Small Ba15s and Bay15d Bayonet Bulbs (on the left in the middle)
scroll down until you get to:
H6W BAX9s 64132 Bayonet Bulbs (Offset Bayonet Pins)
I used the 6 LED Cool White for $6.99
As a followup - the LEDs are not brighter, but they do shoot the light beam much farther, almost like a high powered flashlight.
For the Fog lights:
click Headlights & Foglights
scroll down to
"Xenon Plasma
Note: These are sold in pairs only, & are blister packed as shown.
Choose your Color. Wattage and Type Below"
H3 55watt SuperWhite 5800 - $8.99 per pair
The graphic they show does not match the photo I took, but it is the same.
They are OK, probably not the best fog lights, but at least the colors match. Frankly, I don't use the fog lights that much.
If you are still having trouble send me a PM.
--BM
-
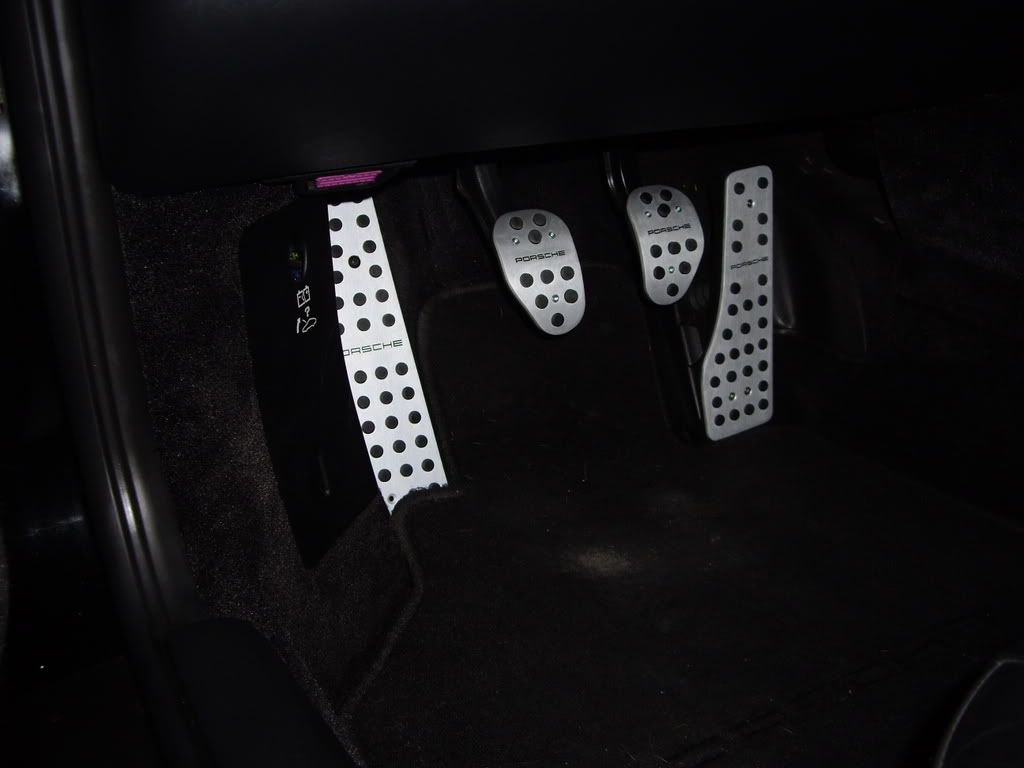
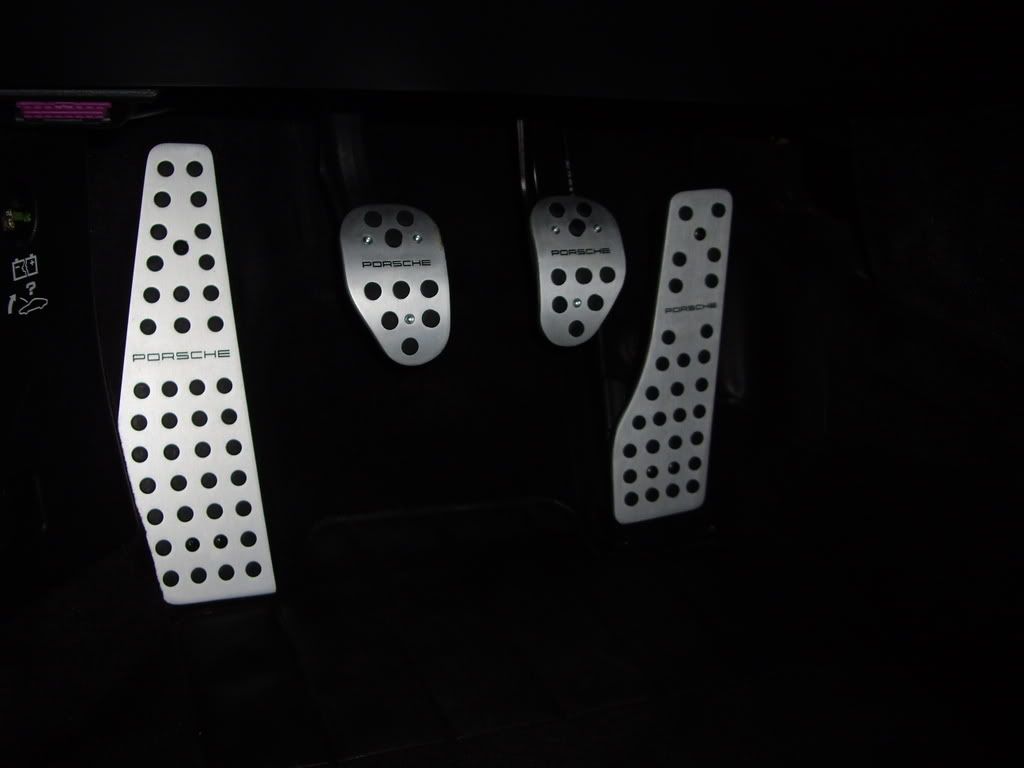
I got a set of aluminum pedals from ebay and installed them a couple days ago. Very easy installation and they look fairly good. I won't go over the installation since it has been covered extensively. The pedals came with two different types of screws: 6 socket (allen head) machine screws with washers and nuts for the brake and clutch pedals, and 6 phillips flat head countersunk sheet metal screws for the rest and gas pedals. Anyway, the socket screws looked okay but I really did not like the way the phillips flatheads looked. They were small and stainless so they did not even match the aluminum. They also made the pedals look as if they were missing 3 rubber plugs. So I got 6 black pan head screws to replace the ones for the rest and gas pedals. The new screw heads are almost the same size as the rubber plugs so it doesn't look that weird. The camera flash make them obvious, but they really blend in and looks just like another rubber plug. What do you guys think?
Here is a picture that shows the gas pedal with the small flat head silver screws:

And here is a photo of the rest and gas pedals with the new black pan head screws:
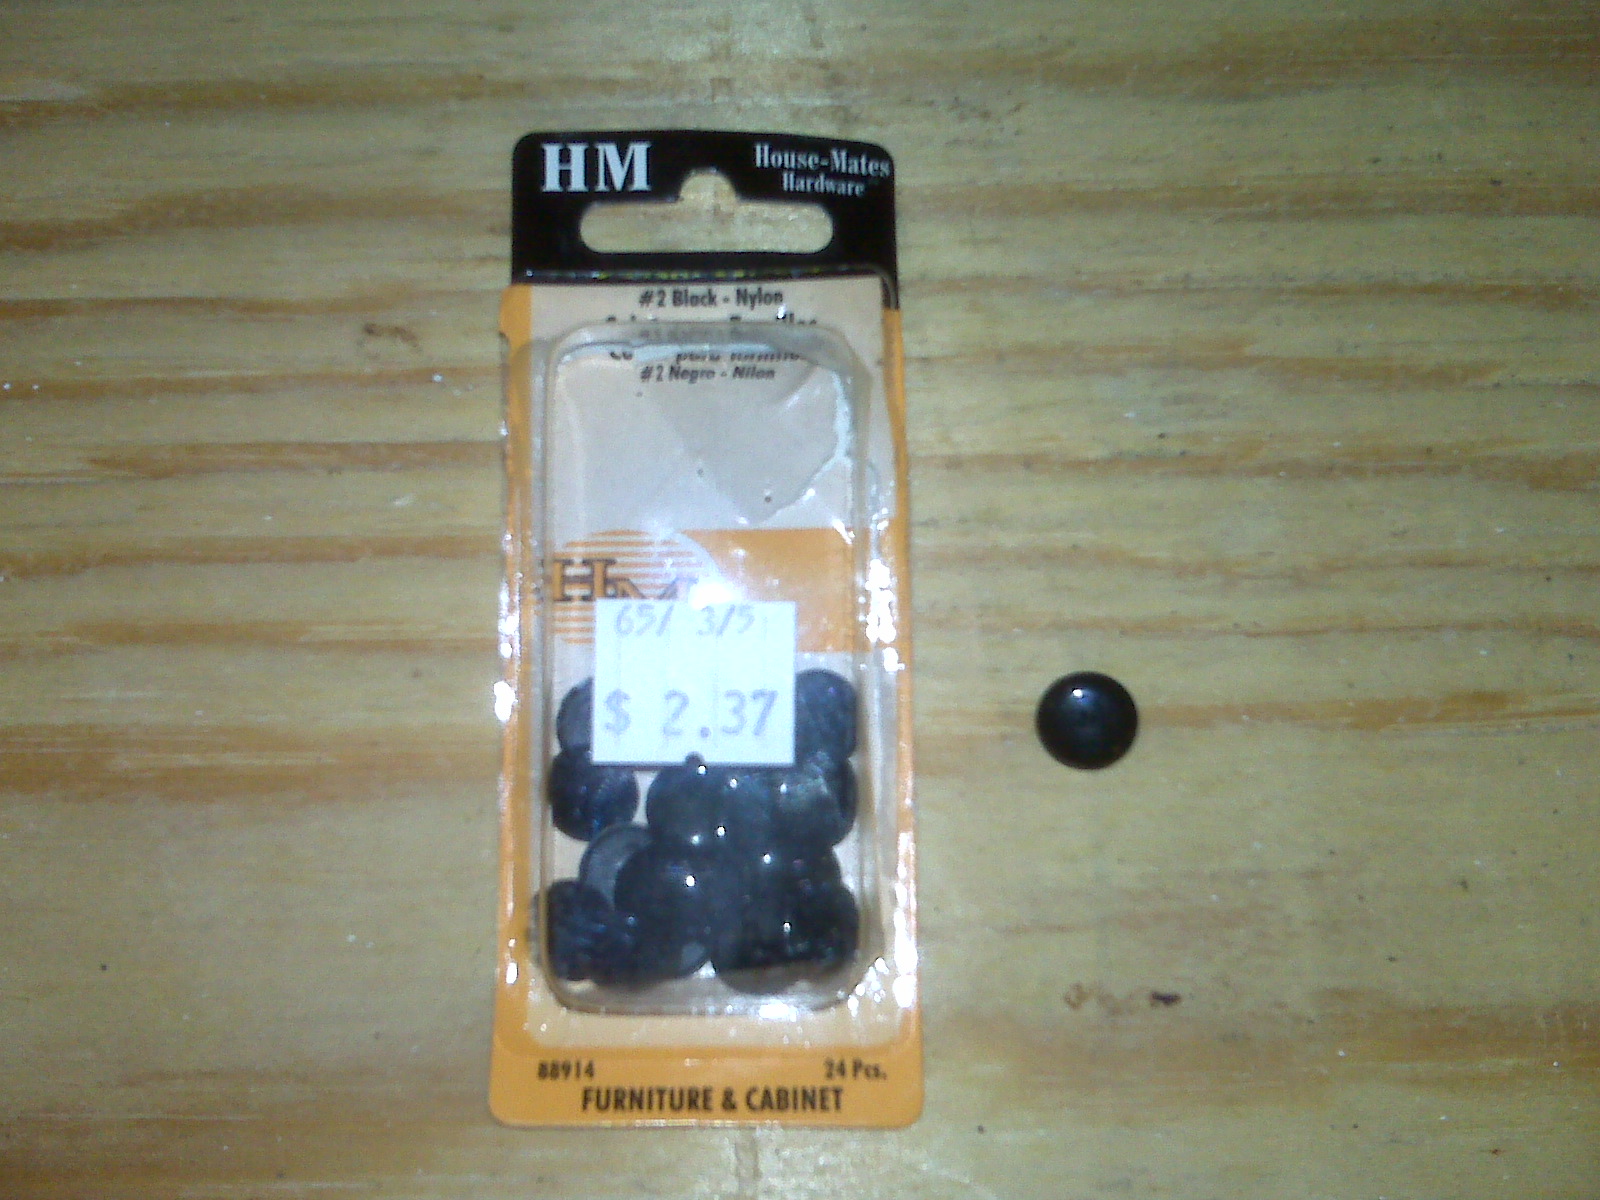
Oscar
This is a great solution and I tried to find similar screws. But, I found these instead at Home Depot and they seem to work well for now. They are black plastic screw covers.
--BM
-
Blue Monster thanks for the post...I have been searching around for bright LEDs for the taillights and turn signals...the ones they sell at PepBoys are junk. Do you have any recommendations?
Thanks, I don't, but M32 on 6speedonline gave me great advice. I would track him down, he has swapped out his turn signal bulbs.
-
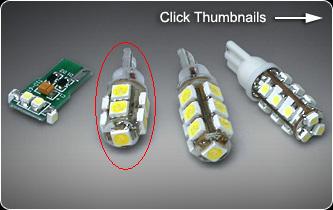
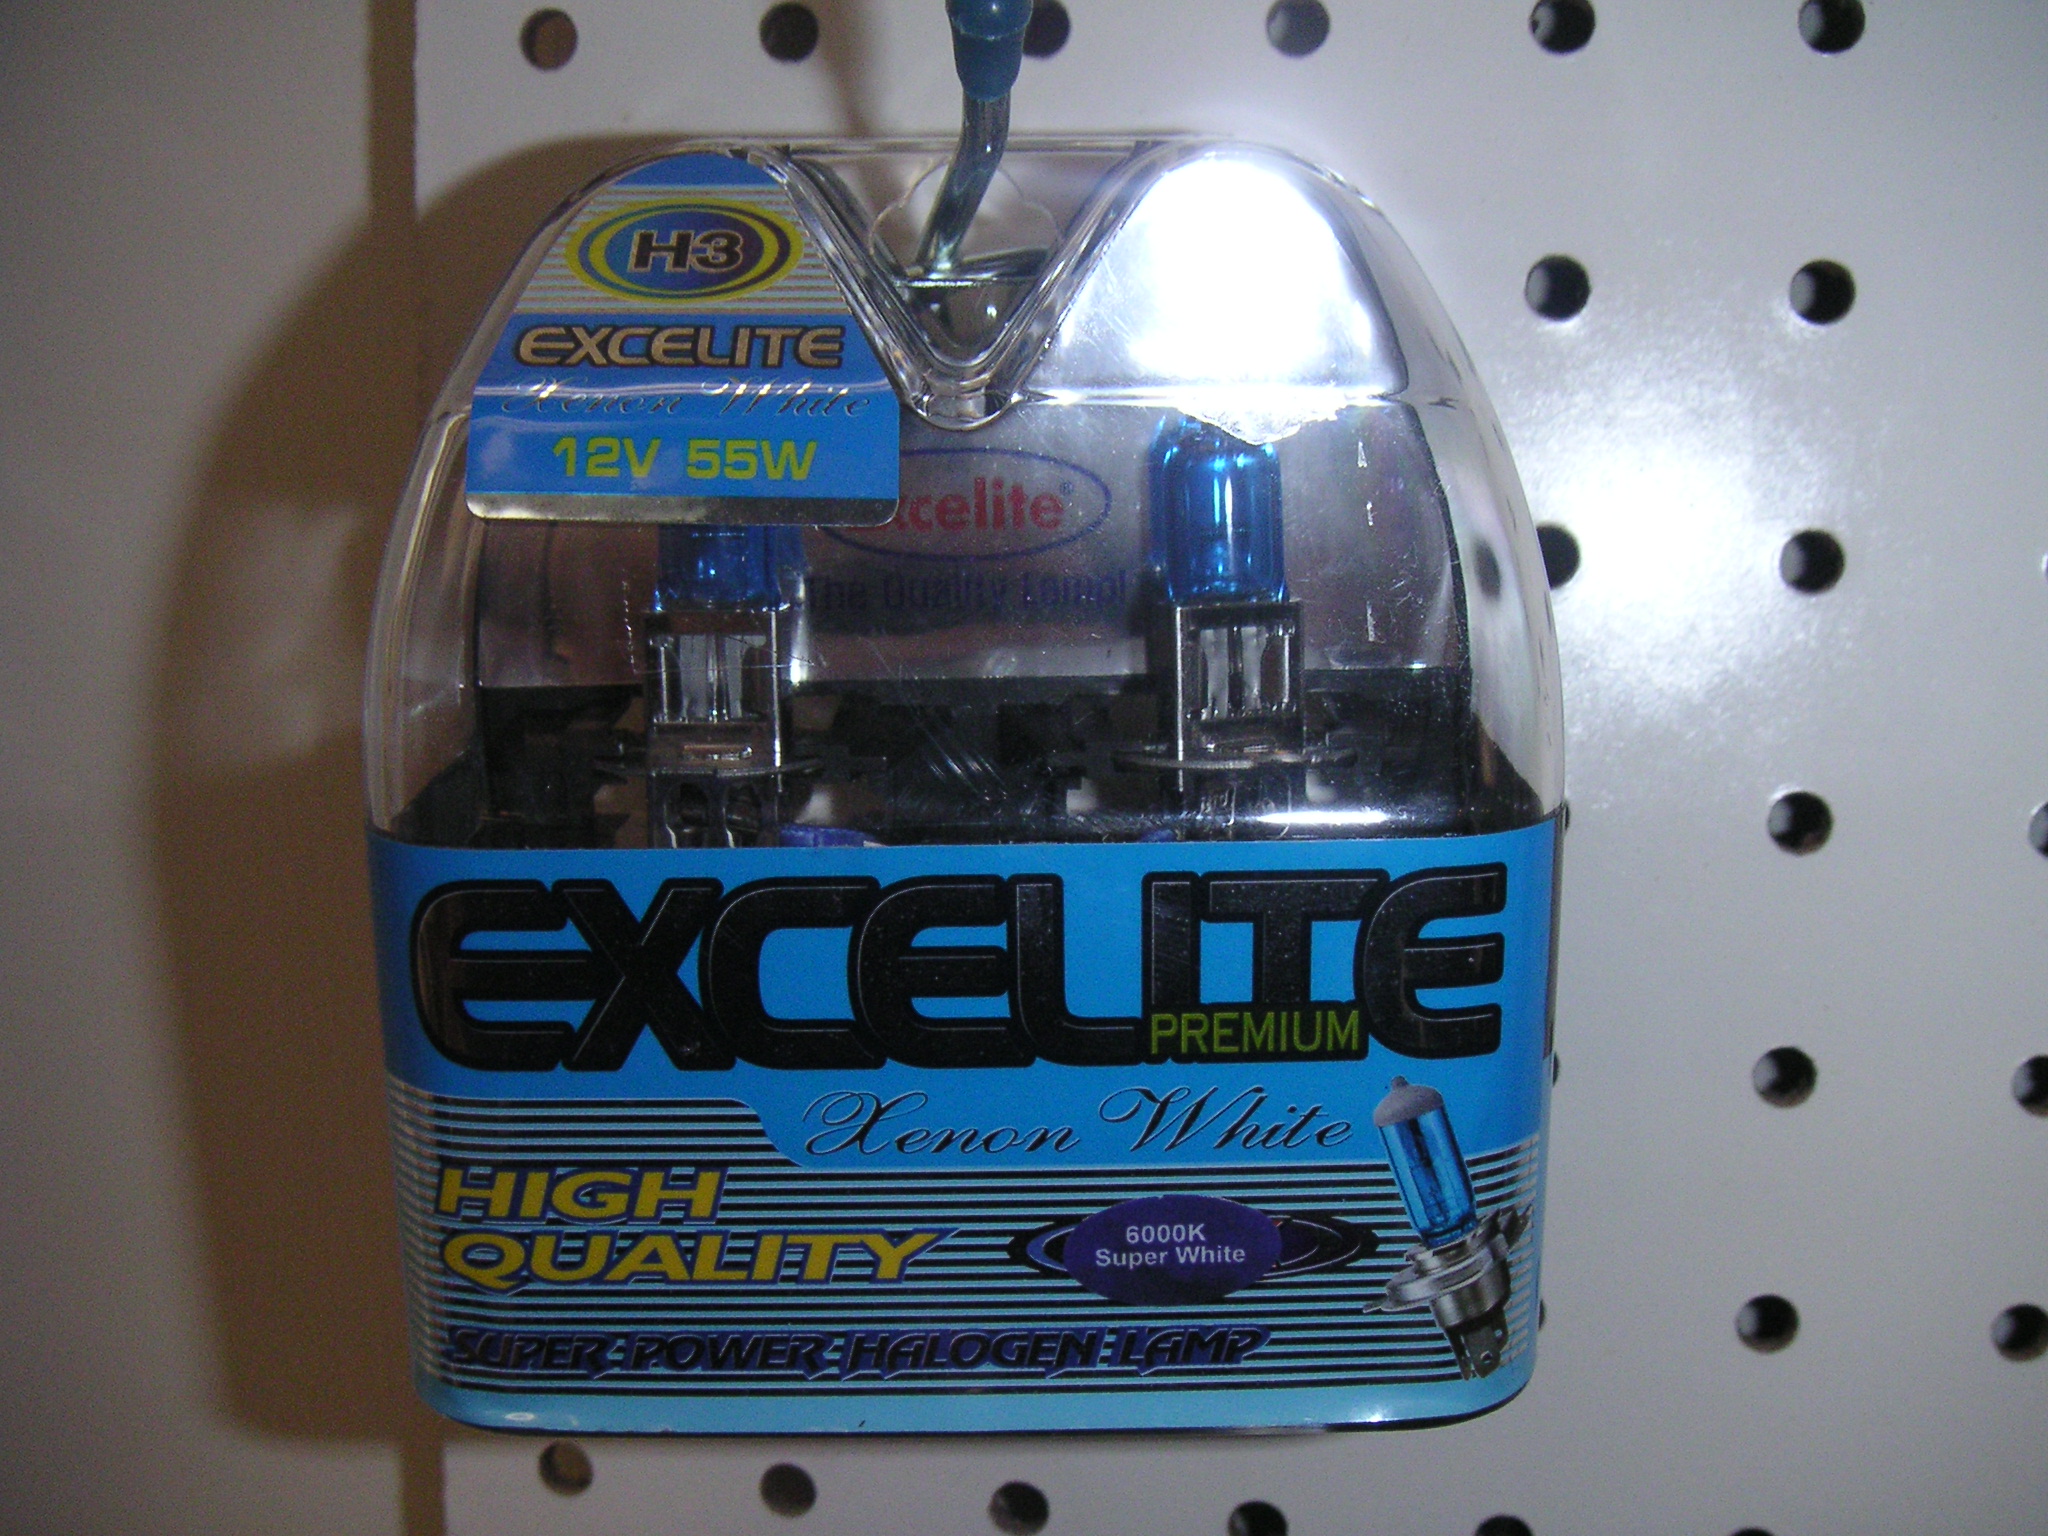
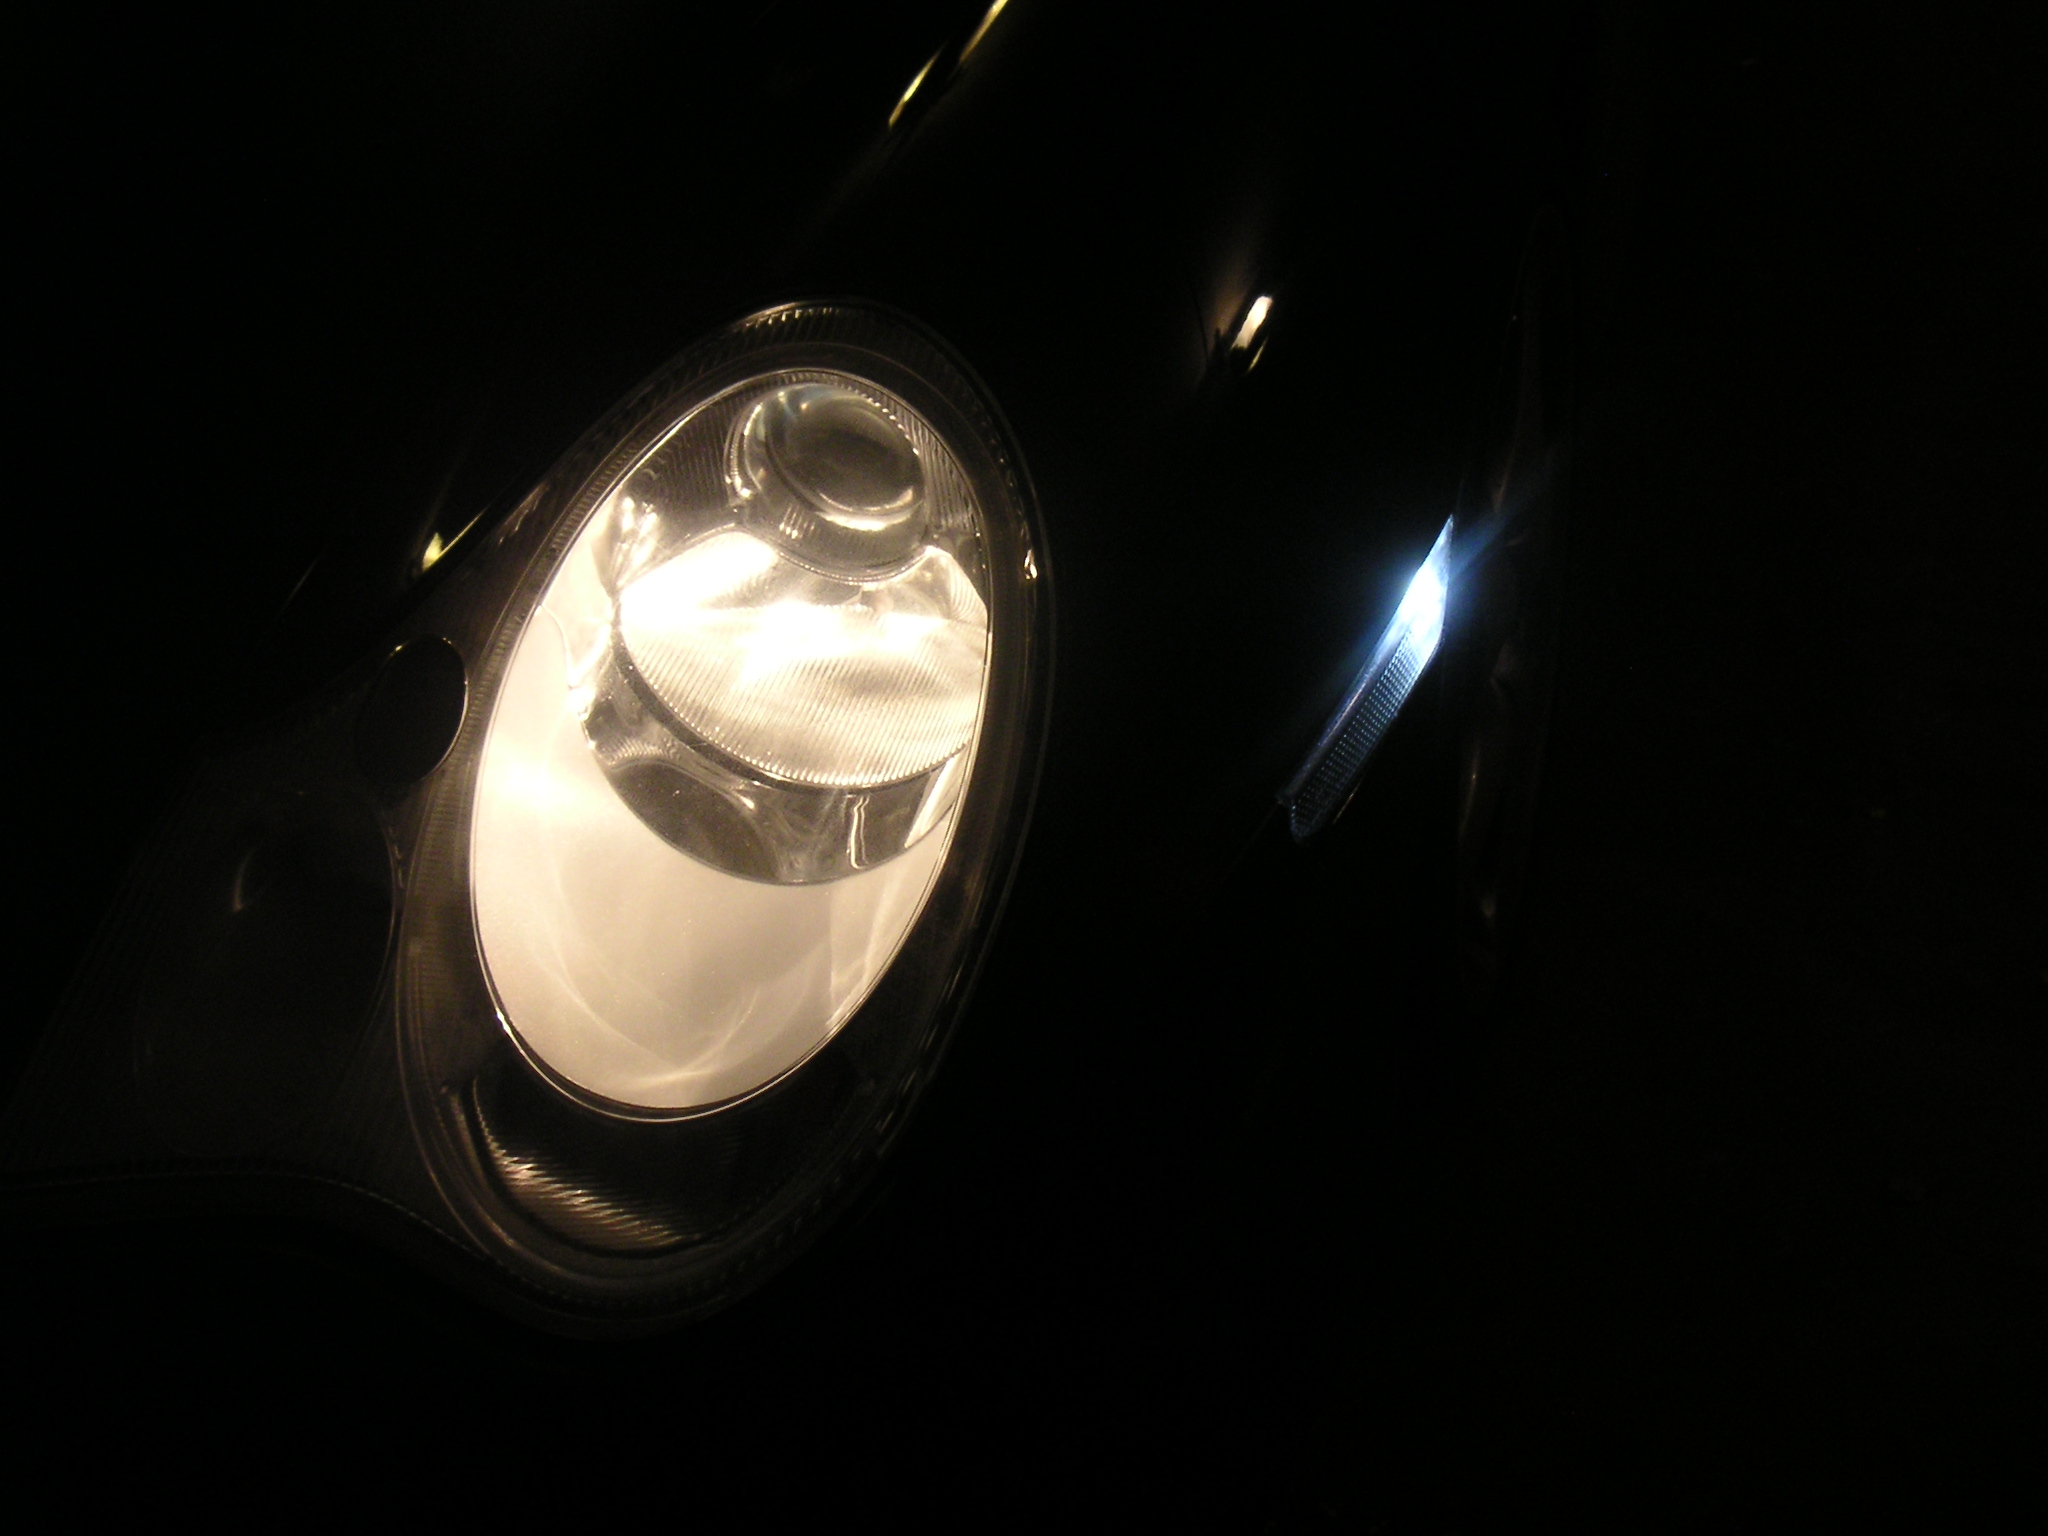
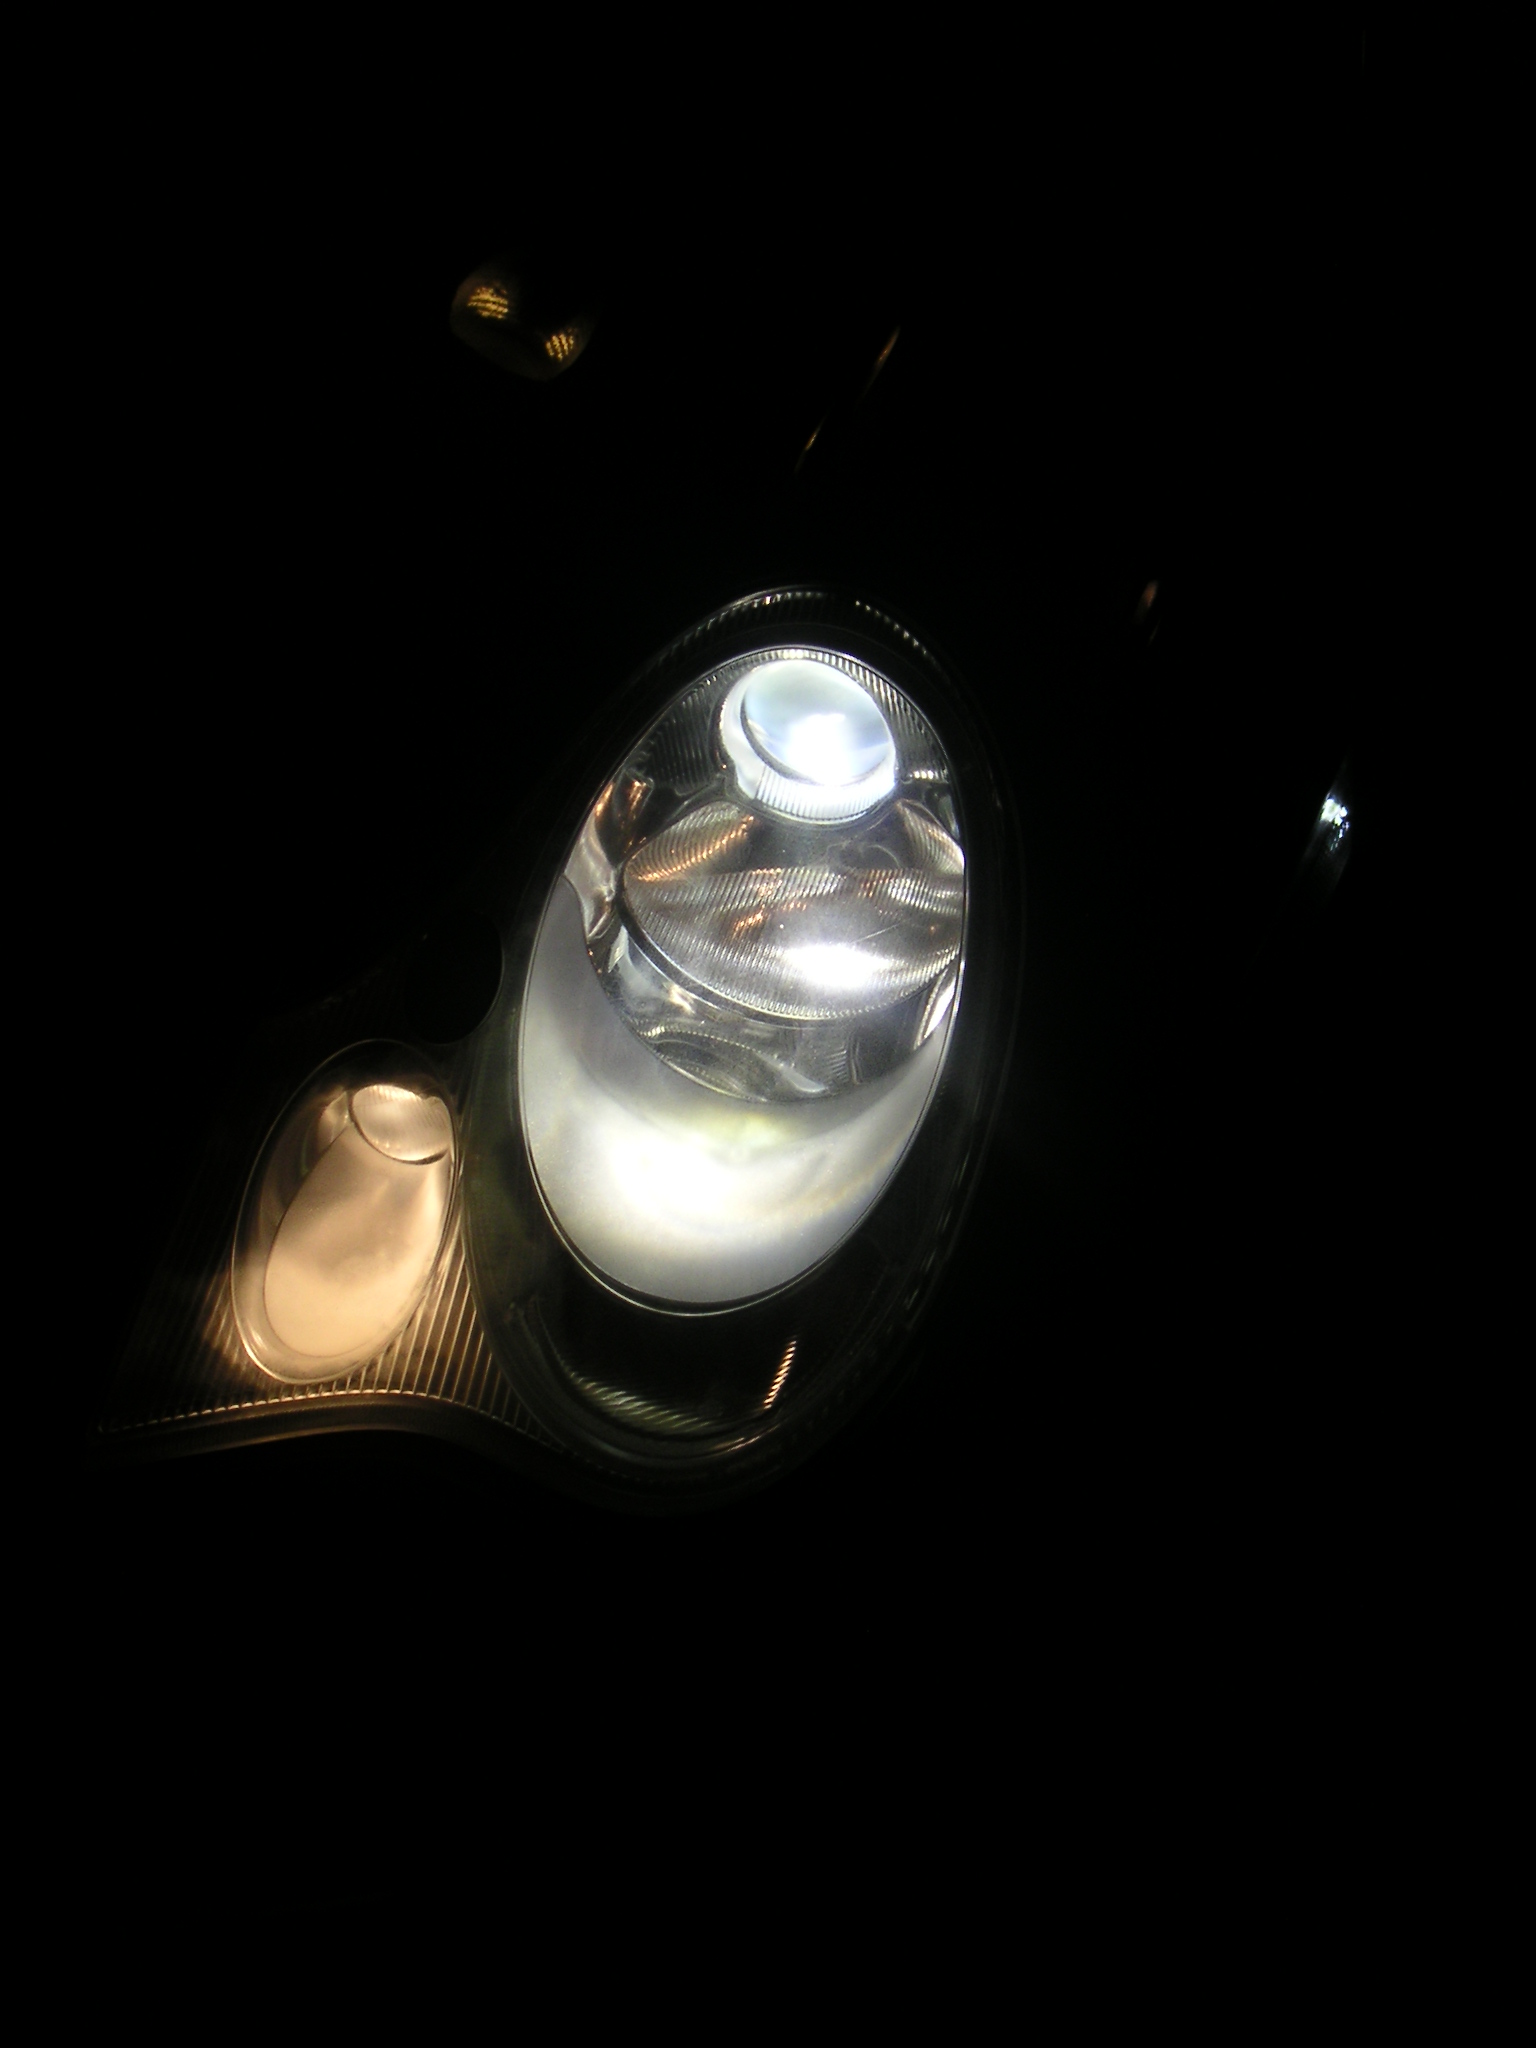
The mix and match of the white HID Headlights and the yellowish sidemarker, parking lights, and foglights always looked strange to me. For less than $40, you can make them all white. Here is what I used:
Sidemarker LEDs from www.superbrightleds.com circled in red (they just fit)
Parking light LEDs (BAX9) from
http://superlumination.com/otherleds.htm
H6W BAX9s 64132 Bayonet Bulbs (Offset Bayonet Pins)
Foglights Blue Halogens(H3s)
http://superlumination.com/headlights.htm
Special thanks to M32 for his advice
here are the photos:
-
The rear roof crosses (reinforcement) where the headliner is connected to, just above the rear window, can hit the roof if the fasten kit came loose. The noise sounds as a drum, this was a known problem on some cars. I don't now what kind of sound the noise makes in your car but you can always give it a try.
Thank you, I'll take a look into that
-
yes..have had rattles since i bought mine. Finally figured out it a few months back...was the black flange under the rear lip of the moonroof. Just put some sticky window insulation tape across the top of it(in the grove) and it will solve one of the many source of rattles.
Thanks, I have a similar noise but only when the moonroof is open. I thought it was the headliner coming loose. I'll try your suggestion. Do you have a photo by chance?
-
Justin, PM me and I'll be happy to answer any questions you have.
-
I live outside of NYC and did the same thing last spring. I spent 6 mos tracking the market and researching the exact specs that I wanted. There are plenty of cars out there, but make sure you have it FULLY inspected and drive it before purchase. I daily drive mine and love it. I have tracked it a few times as well with no major modifications. Not sure what I will be doing this winter, but so far driving it every day. And if anything does go wrong..... you always have Loren!
:renntech:

996 TT 2002 tip with DTC p0491 p0492
in 996 TT, 996 TT S, 996 GT2
Posted
Thank you