Welcome to RennTech.org Community, Guest
There are many great features available to you once you register at RennTech.org
You are free to view posts here, but you must log in to reply to existing posts, or to start your own new topic. Like most online communities, there are costs involved to maintain a site like this - so we encourage our members to donate. All donations go to the costs operating and maintaining this site. We prefer that guests take part in our community and we offer a lot in return to those willing to join our corner of the Porsche world. This site is 99 percent member supported (less than 1 percent comes from advertising) - so please consider an annual donation to keep this site running.
Here are some of the features available - once you register at RennTech.org
- View Classified Ads
- DIY Tutorials
- Porsche TSB Listings (limited)
- VIN Decoder
- Special Offers
-
OBD II P-Codes - Paint Codes
- Registry
- Videos System
- View Reviews
- and get rid of this welcome message
It takes just a few minutes to register, and it's FREE
Contributing Members also get these additional benefits:
(you become a Contributing Member by donating money to the operation of this site)
- No ads - advertisements are removed
- Access the Contributors Only Forum
- Contributing Members Only Downloads
- Send attachments with PMs
- All image/file storage limits are substantially increased for all Contributing Members
- Option Codes Lookup
- VIN Option Lookups (limited)


Speedobird
-
Posts
41 -
Joined
-
Last visited
Content Type
Profiles
Events
Forums
External Paint Colors
Downloads
Tutorials
Links Directory
Collections
Store
Posts posted by Speedobird
-
-
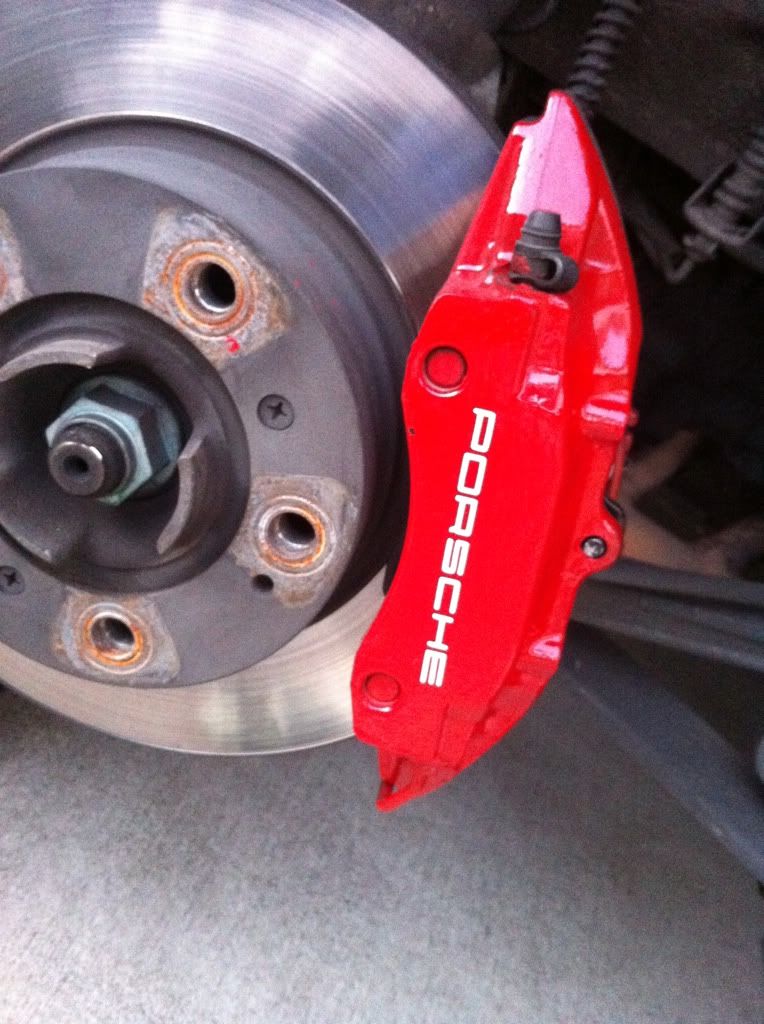
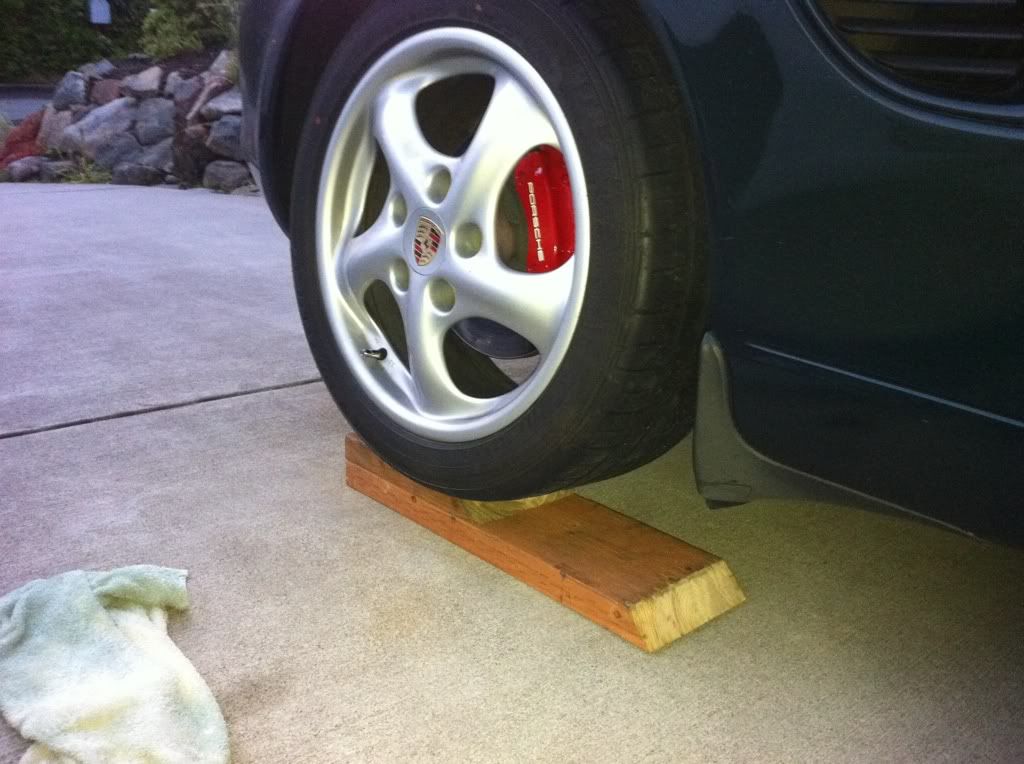
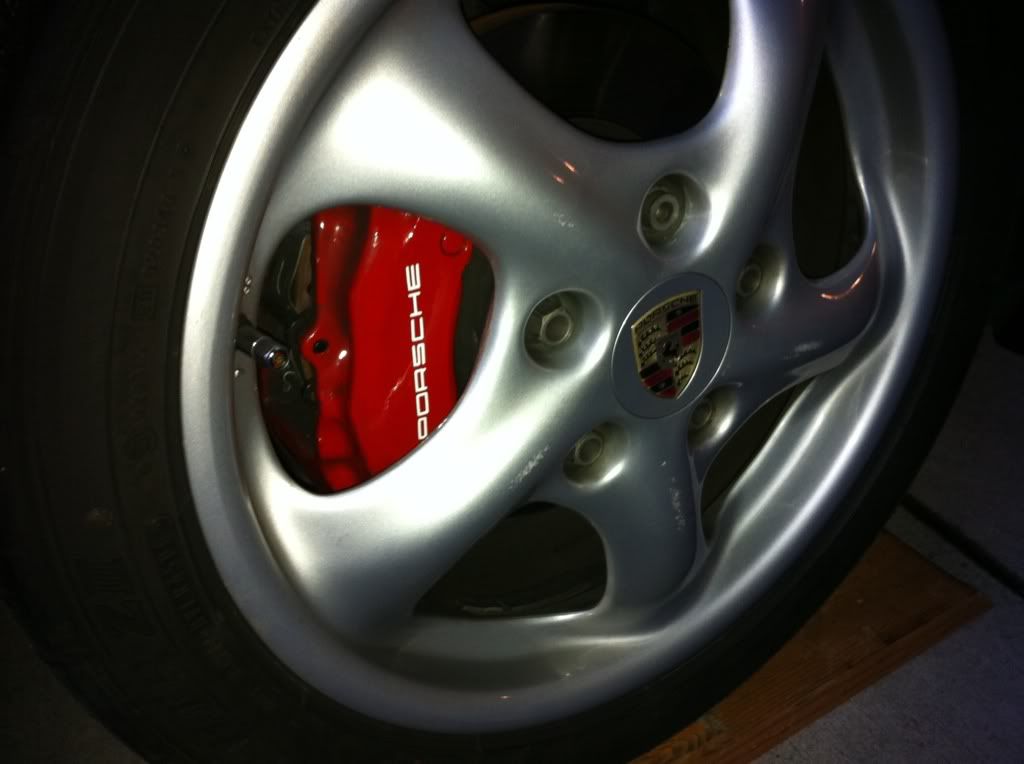
Awsome! I too was thinking to repaint the caliper. Could you tell me how the caliper paint from Tirerack (I think?) is holding and where you got the decal?I installed the brake decals today.

-
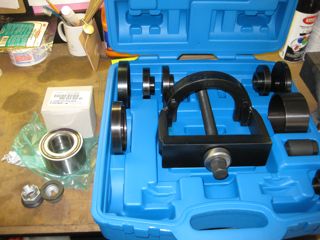
Rear Wheel Bearing R&R for MY99 996
Some of you may be curious how well Sir Tools B90 works for rear wheel bearing removal and installation. Here are some pictures and comments. Although I bought the full Porsche kit, I didn't have to use the horseshoe piece. 1. Here are the picture of B90, new bearings and hub nuts. The new hub nuts use two-piece design instead of one. Sunset Porsche offered the best price for bearings. 2. First, remove the hub nut. I used a breaker bar plus homemade pipe extension. I have actually placed a j
-
Author
-
Category
-
Submitted07/22/2010 01:12 PM
-
Updated12/17/2012 11:06 AM
-
-
No. You need to pull the axle (doesn't always come out without difficulty, disconnecting the hub from the lower control arm helps) in order to use the tool. By that time, it is just as easy to pull the hub out and do it on the bench or in a press............. The tool works fine instead of a press, but you need to get at it from behind in order for it to work..............
Ok. I overcame fear of touching drive shaft. Disconnected at the flange, lifted the hub with second jack and played with the space allowed. It came off reasonably easy. I did find it useful to have 8 mm ball-tip hexa bit socket as the space was limited. I'll post the pictures later. Thanks!
-
I'm stuck and need a guidance
I'm replacing rear wheel bearing with Sir Tool bearing kit. Now wheel hub came off easy. But I'm trying to figure out if I can move the drive shaft out of the way to use the sir tool without disassembling the hub housing from the car. Does anyone know how this should be done correctly? Thank you very much in advance. -
I would expect to pay about 5 hours for one rear wheel bearing. They are quite a bit more difficult as the parking brake mechanism has to be removed, which is quite a PITA. The entire wheel carrier is removed and the bearing is pressed out. If the repair is done as per the factory manual, no alignment is technically necessary as none of the eccentric bolts are touched. Also the brake lines do not need to be opened so I wouldn't pay for a brake system bleed either.
Thanks PTEC. I read that you have to release the cable in the center console for the parking brake mechanism. Is there more to it that you know?
-
Found it. The labor breakdown was as follows; This was for both sides
Rear Wheel Bearing R&R 1.4 hrs
Wheel bearing housing R&R 2.9 hrs
Rear Brakes R&R 2.3 hrs.
Bleed Brakes .6 hours
Front & Rear check alignment 1 hr.
Front & rear Adjust alignment .9 hrs.
Parts 2 bearings 999.053.050.00, 2 nuts 999.500.092.00
So a total of 9.1 hrs "shop time" at the 2003 labor rate of $119/hr. I think the dealer is $169/hr. now.
So not $2,000, but pretty expensive, loved that warranty.
The hours for R&R sounds about similar to what I spent on the front bearings. May be it is not much different after all. Thank you very much.
-
Hi, Does anyone have experience working with the rear wheel bearings on 996? I would much appreciate any insight that I can get before jumping into this project.
I have just replaced the front wheel bearings that were causing grinding noise (much like road noise). Now it is much better but I still hear some from the rear. This leads me to think that I need to replace the rear wheel bearings (I've also been annoyed by occasional "clunking" noise too). According to the official service manual, the procedure seems similar except that it now talks about hub extractor with a big circular plate with five bolts that go into the rug nut holes on the disc/hub. It also talks about drive shaft removal etc. which I didn't have to deal with before.
Because I had a very challenging front wheel bearings I'm getting a bit apprehensive. Appreciate any experience you can share with me.
Thank you in advance,
-
Wheel bearings been replaced?
Never thought about it. Does it make a noise similar to road noise? . I probably should check them out as it is coming close to 60K miles. Will report back when I get to it. Thank you very much.
-
I am curious about this too. Try this question in the main 996 forum, it will get answered faster.
Thanks for your suggestion. I thought I posted in 996 forum but I guess not.
-
Hi - I'm looking for a consensus on how best to reduce the road noise coming into the cab. I searched under this topic and got fragmented answers. So here are a few questions if you will:
1. Is there something that can be done to shock towers or their base to reduce road noise transmitted through structure?
2. If we go with viscoelastic material like Dynamat, what would be the most effective areas to place this material?
3. Is there any other thoughts on how to reduce the road noise besides buying a quieter tires?
Hope someone has experience in this that they could share.
Thank you very much in advance, :renntech:
-
I have repeated P1130 codes that happen every couple of weeks just as the engine warms to normal operating temp if I get stopped at a traffic light. I erase the code and CEL stays off for weeks at a time. Conventional wisdom on this board is that code is set by MAF, not due to a problem with O2 sensor. I cleaned the MAF two weeks ago, but the light came on again this morning. Car runs perfectly with no perceived problems other than the CEL.
Car is a US Boxster S, 2001 model built in Finland with Tiptronic.
1. How do I further diagnose to determine if it is MAF or is actually O2 sensor?
2. If it is the O2, can someone provide a photo of the location for the sensro that sets P1130 and replacement instructions.
Thanks,
Bruce
I had the same issue with code 1130, after I blew the air box I guess the MAF got dirty. I cleaned the MAF with MAF cleaner and Kaboom cel gone. Try it!!!!
Hi Bruce - I saw somewhere in the forum that we have to be careful in selecting which cleaner to use because some MAFs have coating inside. Can you tell us which cleaner you used for this? Thanks,
-
Perhaps some experts here will chime in... but here is what I was told.
First it helps if the car has sat in the sun on a warm day, if not you can use a hair blow dryer on high speed and hot setting. It is even easier to remove if you use a heat gun, but be careful. If you have no previous experience with a tool like a heat gun, hire a detailer. You can easily damage the paint or plastic components on the vehicle.
Starting on one corner, you slowly and carefully heat the film, keeping the heat gun about 8-12 inches away, doing so one square foot at a time, DO NOT KEEP HEAT GUN IN ONE SPOT always keep the heat moving around. You will notice that the film is warm to the touch, sometimes a little to warm but you just peel it off a section at a time. Lifting the edge back and pulling slightly as you go. Don't rush and it will come off perfect. Follow up with a light surface clay and a light wax.
So happens I had a heat gun from repairing ski boots. The film needed to be warmed up to the point where it is almost too hot to touch. Then, it became easier to peel off. I buffed out the gummy stuff from adhesive residue with paint cleaner, polish and wax using electric buffer. The result looks fantastic! You saved my weekend. Thanks, Loren :thumbup:
-
My 996 came with a clear vinyl film on parts of the body (tip of front fenders, lower bumper, headlight etc.) to prevent paint chipping. I think it's non-OEM but I'm wondering if anyone has experience removing these and cleaning up the gunk that's left behind. Appreciate any comments.
-
Just to guild the lilly on this: That thing in the back is a spoiler, not a wing. So it isn't meant to create downforce, which I guess is what you might mean by 'performance'. A spoiler is so-called because it disrupts airflow, in this case preventing the car from turning into a giant wing that lifts the back end off the ground.
Actually, I was looking for a decorative tail on my 99 996 but this caught my eyes. I had to write into this stream to share. If you are interested in how auto makers develop aerodynamic design, please read on:
Road Adhesion: The rear spoiler reduces (spoils) the lift created by upper half of the body compared to lower half (under carriage), hence increasing the pressure/lift differential between the two and creates downward force. This increases road adhesion in conjunction with so called ground effect, which is a suction created by the tunnel effect between the road and undercarriage.
Drag control: As for the drag, this is a high speed phenomena. For most of us, it probably does not have significant impact because, of all drag components including road drag, mechanical drag and aerodynamic drag, aerodynamic drag should be the smallest in magnitude. But there is a need to control the source of aerodynamic drag, wake. Wake behavior behind the body determines aerodynamic performance. Smaller wake cross sectional area is desirable because, simply put, the body is more streamlined that way. (static pressure differential between two cross sections just in front of the car and behind determines momentum loss in air flow. This translates into aerodynamic drag.) Although I haven't seen this particular simulation or wind tunnel results, structure like this could be installed to "control" the flow structure. By disrupting the flow, wake becomes more manageable or predictable, like vortex generators on airplane wings. Spoiler controls the size of wake and ensures that it does not behave erratically like wild oscillation at certain speed and angle of attack, which leads to,
Stability: Auto makers, particularly Europeans, are concerned with aerodynamic stability in addition to drag and lift. The flow disruption by the spoiler makes the wake behave more regularly without wild oscillation at some high speed. Wake, although not visible, acts on the body just like when you have a strong cross-wind on high way. This becomes more pronounced at higher speed. Auto makers usually measures this by placing car body in a wind tunnel at an angle to measure torsional force.
Like I said earlier, if you know of good tail to install, please let me know.
Cheers,
 I'm replacing rear wheel bearing with Sir Tool bearing kit. Now wheel hub came off easy. But I'm trying to figure out if I can move the drive shaft out of the way to use the sir tool without disassembling the hub housing from the car. Does anyone know how this should be done correctly? Thank you very much in advance.
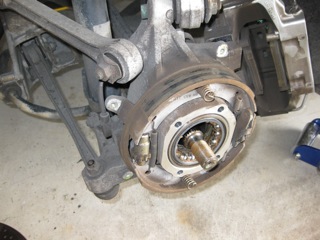
Seat reupholstery on 996
in 996 Series (Carrera, Carrera 4, Carrera 4S, Targa)
Posted
Hello
Does anyone know of a reputable shop that sells new leather covering for Porsches? I would like to refurbish the seats on my 996 (MY99). I tried recoloring the worn part with a custom dye but it started to crack again after 3 years. It probably needs new covers (for Xmas project).
Also if anyone knows the name or color code of the tannish seat I would be grateful.
Thank you in advance,