Welcome to RennTech.org Community, Guest
There are many great features available to you once you register at RennTech.org
You are free to view posts here, but you must log in to reply to existing posts, or to start your own new topic. Like most online communities, there are costs involved to maintain a site like this - so we encourage our members to donate. All donations go to the costs operating and maintaining this site. We prefer that guests take part in our community and we offer a lot in return to those willing to join our corner of the Porsche world. This site is 99 percent member supported (less than 1 percent comes from advertising) - so please consider an annual donation to keep this site running.
Here are some of the features available - once you register at RennTech.org
- View Classified Ads
- DIY Tutorials
- Porsche TSB Listings (limited)
- VIN Decoder
- Special Offers
-
OBD II P-Codes - Paint Codes
- Registry
- Videos System
- View Reviews
- and get rid of this welcome message
It takes just a few minutes to register, and it's FREE
Contributing Members also get these additional benefits:
(you become a Contributing Member by donating money to the operation of this site)
- No ads - advertisements are removed
- Access the Contributors Only Forum
- Contributing Members Only Downloads
- Send attachments with PMs
- All image/file storage limits are substantially increased for all Contributing Members
- Option Codes Lookup
- VIN Option Lookups (limited)


Dwiggy
-
Posts
57 -
Joined
-
Last visited
Content Type
Profiles
Events
Forums
External Paint Colors
Downloads
Tutorials
Links Directory
Collections
Store
Posts posted by Dwiggy
-
-
-
Hi all,
I have a 99 C2 that buzzes very loudly on occasion. I pulled the plastic covers off of the battery compartment on a very hot day and found that the high pressure line was vibrating when the noise occured. I put the AC gauges on and discovered that the high side pressure was extremely high (>350). The AC seems to work perfectly otherwise.
Has anyone else had this problem?
Is this a common problem on 996's?
-
I just visited the V_Led.com site and filled a cart with all the bulbs on your list. It was $371.39 before shipping.
Why are the V_Leds so much more expensive than the Superbrights? What difference am I going to see in the $7 pair of lights versus the $49 pair of lights?
Let us know if you purchase them.
From Superbrightleds.com the 1156 and 1157 LEDs are not near as bright as the OEM bulbs. The peanut sized bulbs are just as bright if not brighter.
Also, from what I have read about the V LEDs thier 1157s are actually isolated circuits. They have multiple color LEDs for turn and tail light applications. All in all the V LEDs look to be the way to go but at a premium price.
D.
-
Most LED bulbs have an internal fullwave bridge rectifier that negates this problem.
That would work really well on AC... ;)
D.
It also works well to make the LED bulb non-polarity sensitive, as in the above case.
Thanks for the update W. :)
I thought that a rectifier bridge was used to change AC to DC by stripping off half of the wave... but I guess what you are saying does make sense even though I wish I knew where to shop for the right LEDs. I figured they were all made the same.
When I spoke to superbrightleds about this problem they did not have a solution and did not know of the issue entirely. Maybe I bought cheap 1157 LEDs as I found mine on eBay...
In either case if it is not too much trouble can you send a schematic for a full wave bridge rectifier that you describe. I am somewhat familiar with circuitry but I need a visual to understand it entirely. I would like to compare your schematic to the actual 1157 LED schematics for future reference.
Thanks again,
D.
V-LEDs on ebay.
Thanks I checked out V_LEDs and they make a premium product, deffinately the way to go but very costly. They're 1157s are actually electrically isolated. I did some researching and it looks like the bridge rectifier is actually used to direct current in one way so the bulb is not polarity sensitive.
D.
-
As I recall the wire loom goes up behind the instrument cluster and then over to the fuse panel side and then passes into the door.
Thanks again Loren. I'll check it out this weekend.
D.
-
Lower door - near hinge.
Thanks Loren. On the connector sheet its in the door grid (d7, k7). Does this mean that the wires connect to the speakers and then plug into another connector in the door? Aren't there connectors under the dash.
D. :huh:
-
Does anyone know where the X11 and X12 connectors are located in the MY99 Carrera with HiFi sound system?
I circled them in the diagram.
Thanks,
D.

-
First off getting a second opinion is always a good idea. Especially from your dealer.
2001 "seemed" to be the year that cracked cyl. walls were most common. Spark plug condition is an excellent way off diagnosing running conditions. Especially coolant in the cyl.
Borescoping the cyl is a good idea but may be difficult to see a crack b/c the crack will "shrink" when the motor is cold & get larger when motor is hot. And you have to have access to one.
If you do have a cracked wall the reason you're getting smoke on start up is:
-After shutting down the car when hot, there is still pressure in the coolant system. This pressure bleeds into the cracked cyl. Staying there until getting burnt off at your next start.
-When driving car, the combustion is greater than the coolant pressure & combustion will enter the coolant system. When this happens typically you'll get excessive dampness from around the coolant bottle.
Check:
-white smoke from tail pipes while driving
-continous coolant consumption with no visible external leaks.
-excessive dampness around coolant cap/bleeder (not always an indication of a cracked wall)
-bore scoping cyl.
-pressure testing system
If 2001 seemed to be the year with the most cracked cylinders, this post brings up a very good question.
Does anyone have a list of catastrophic failure causes according to model/production year?
For example, my98 996's could be known for RMS failure or maybe my99 996's are known for IMS but not D-chunk.
Research as this could be useful to those of us who primarily find holistic views of 996 catastrophic engine failure rates; as well as offer peace of mind. :huh::rolleyes:
Thanks,
D.
-
Dwiggy,
You did an awesome job. Maybe when we meet you can tell me about how I could change my interior lights to Xenon color. That is so cool. B)
Thanks for the write up! Great job! :clapping:
:cheers:
No problem on the 996 I'm sure the 997 is just as easy...
I bought a ten pack of xenon colored WLEDs for 10 dollars off of eBay and then started plugging them into everything! :D
Thanks for the compliments :) This forum stuff is fun.
D.
-
Most LED bulbs have an internal fullwave bridge rectifier that negates this problem.
That would work really well on AC... ;)
D.
It also works well to make the LED bulb non-polarity sensitive, as in the above case.
Thanks for the update W. :)
I thought that a rectifier bridge was used to change AC to DC by stripping off half of the wave... but I guess what you are saying does make sense even though I wish I knew where to shop for the right LEDs. I figured they were all made the same.
When I spoke to superbrightleds about this problem they did not have a solution and did not know of the issue entirely. Maybe I bought cheap 1157 LEDs as I found mine on eBay...
In either case if it is not too much trouble can you send a schematic for a full wave bridge rectifier that you describe. I am somewhat familiar with circuitry but I need a visual to understand it entirely. I would like to compare your schematic to the actual 1157 LED schematics for future reference.
Thanks again,
D.
-
Thanks D. I'll give it a try next weekend.
When you pry it out it will come out about a quarter of an inch and then seem difficult to move from there. You could clean it, cover it with adhesive and then place the material on it where it sits or continue to remove it.
It is better to remove it as you have more area to work around and you do not risk damaging or coating the leather on the knob.
If you do decide to remove the piece entirely make sure not to hit yourself in the face when you pull it out of the knob. It takes a little more pressure than feels comfortable to pull the plastic cover completely out of the knob and then it will just let go on you! :o
I ended up throwing the darn thing into the back seat on accident and I almost put my eye out with the screwdriver I was still holding...LOL! :unsure:
I thought I should mention this for everyone’s safety.
Have fun with it and let us know how it goes for you. Maybe we can start a custom shifter trend here…
D.
-
Most LED bulbs have an internal fullwave bridge rectifier that negates this problem.
That would work really well on AC... ;)
D.
-
I have an extra one of these shift knobs if anyone wants it. PM me and I will send it to you if you want to experiment. Make me a token offer :lol: and pay the shipping and it's yours. It's black leather and in good condition. It's off my old 99 996.
Phillip
Pillipj I sent you a pm. Let me know how much you want and I'll do a diy write up on it when I get the shifter. :lol:
D.
-
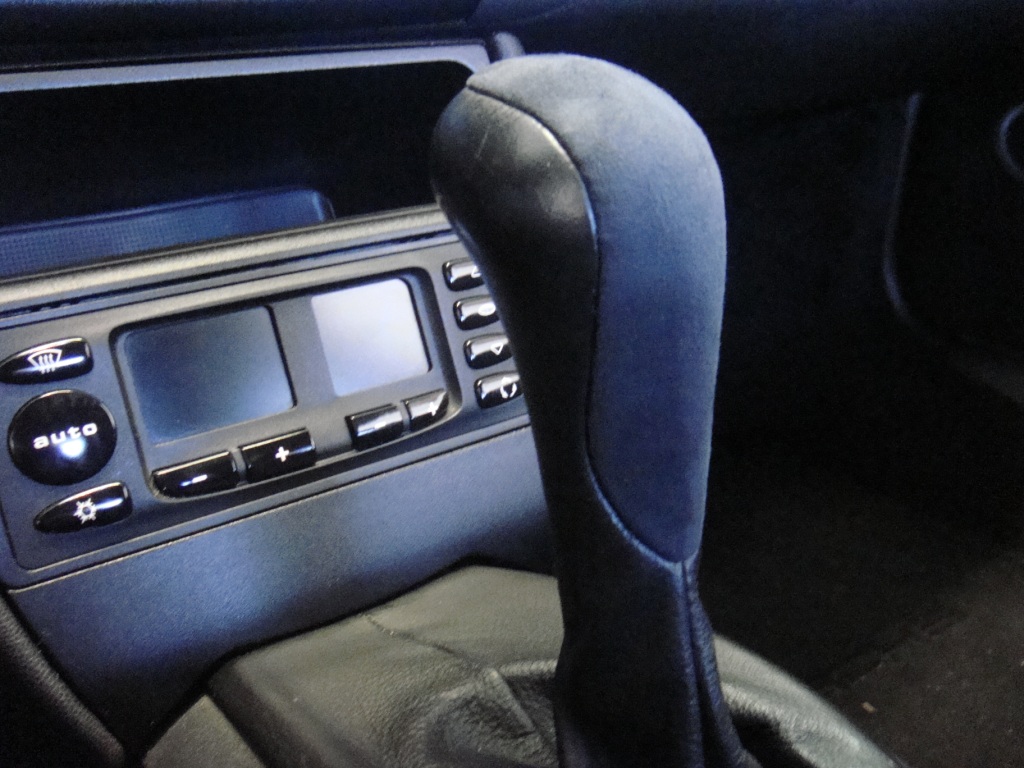
How did you get the curved piece off the shifter that's now covered in suede?
I know the very top part with the gear numbers on is stuck on with glue but the rest of it going down the
shifter? does that just pull off?
Very carefully... ;) It is a press fit.
I had to a small mechanic's screw driver and spent about 15 minutes working it out around the edges as to not damage it. If you damage this part you are in trouble.
D.
-
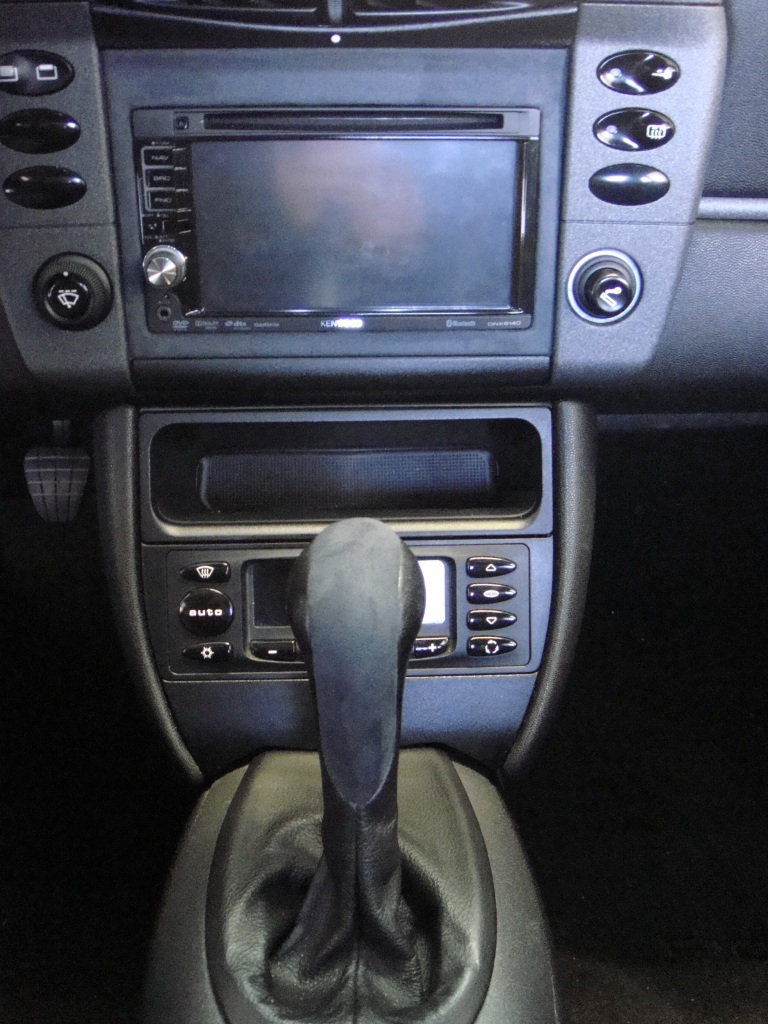
Last night I was a little bored and since I have about eight yards of slate colored Ultrasuede left over from my custom radio bezel I decided to use some on my boring factory shifter.
What do you guys think?
D.
-
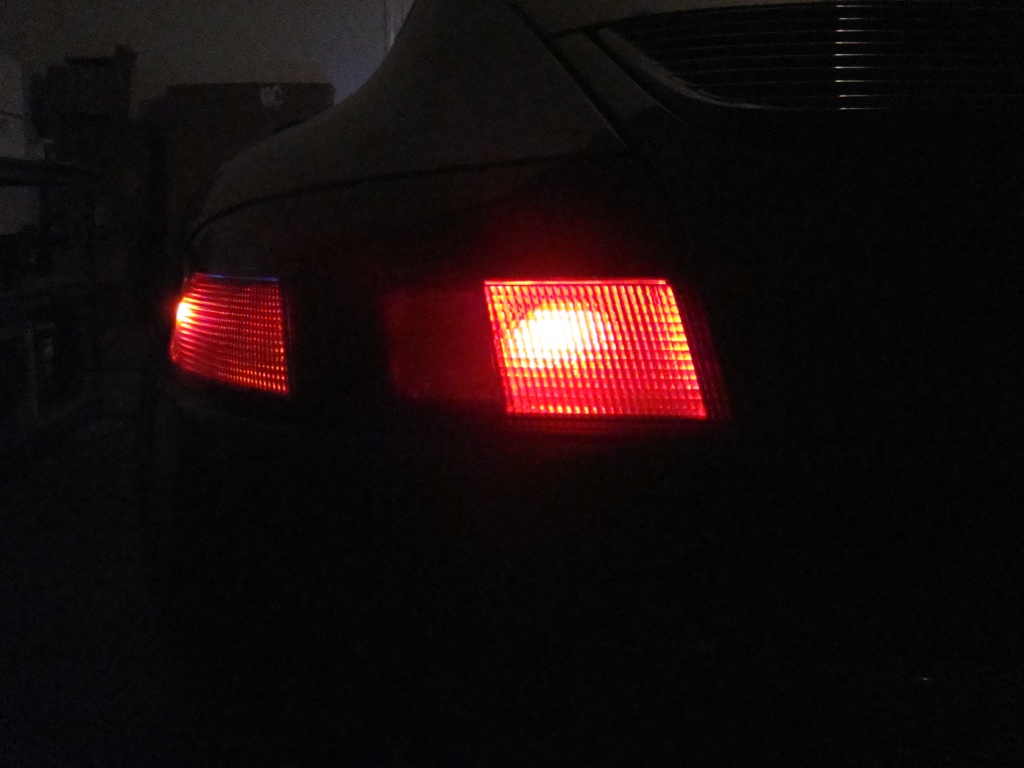
I apologize, I forgot about the rear fog light.
Rear Fog Lamp
OEM: 7506
LED: 1156 Red BA15 24-LED bulb 7.49 ea / Total
You can install two of these bulbs (one on each side) but it is not necessary. The factory configuration has two sockets but there is only a bulb on the driver's side of the car.
Make that new total 133.33.
D.
Dwiggy,
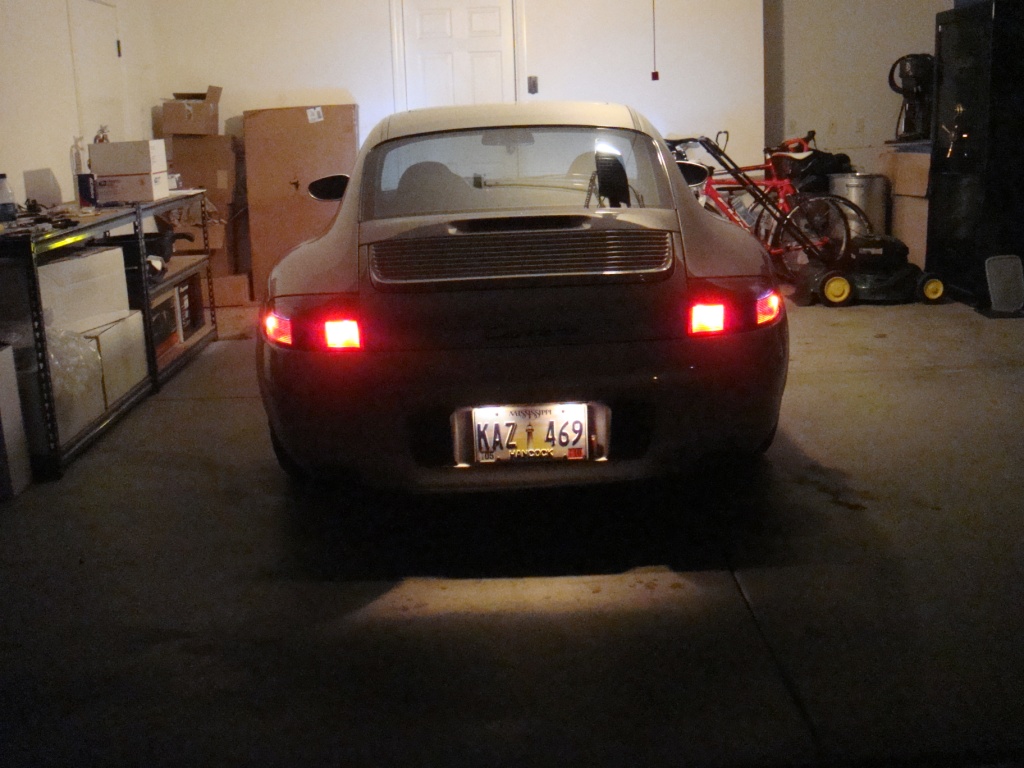
Can you post pics when you are done? Would like to see a picture of the lights "lit" at night. Curious as to the difference between OEM and the LED's.
Thanks, GW
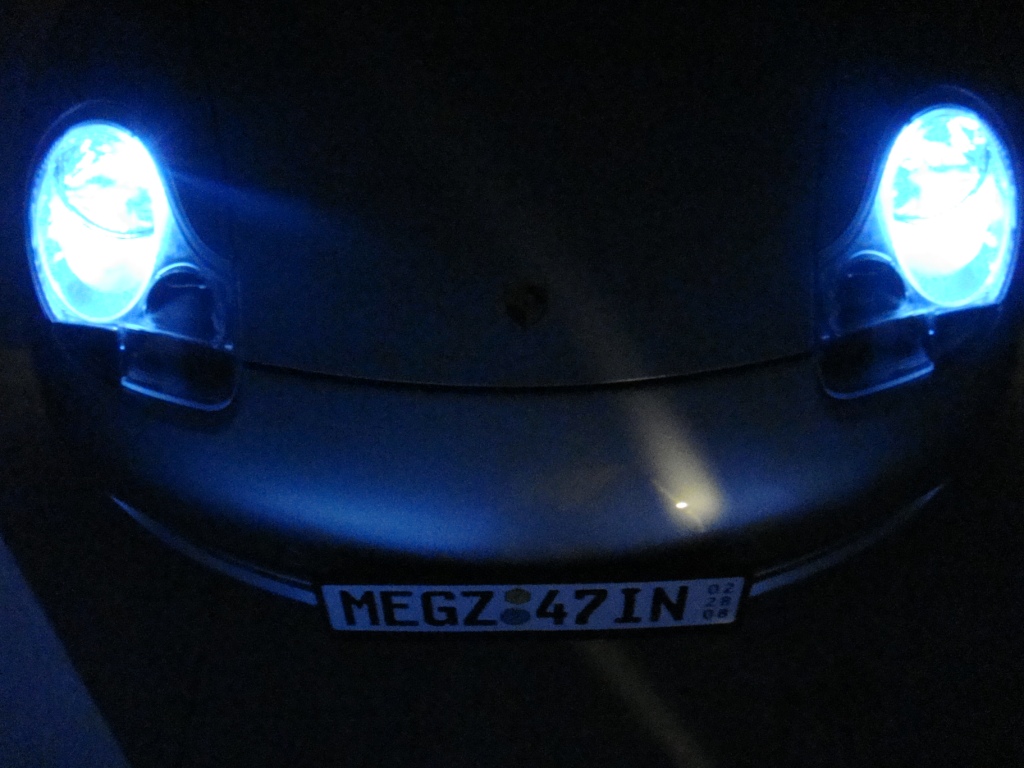
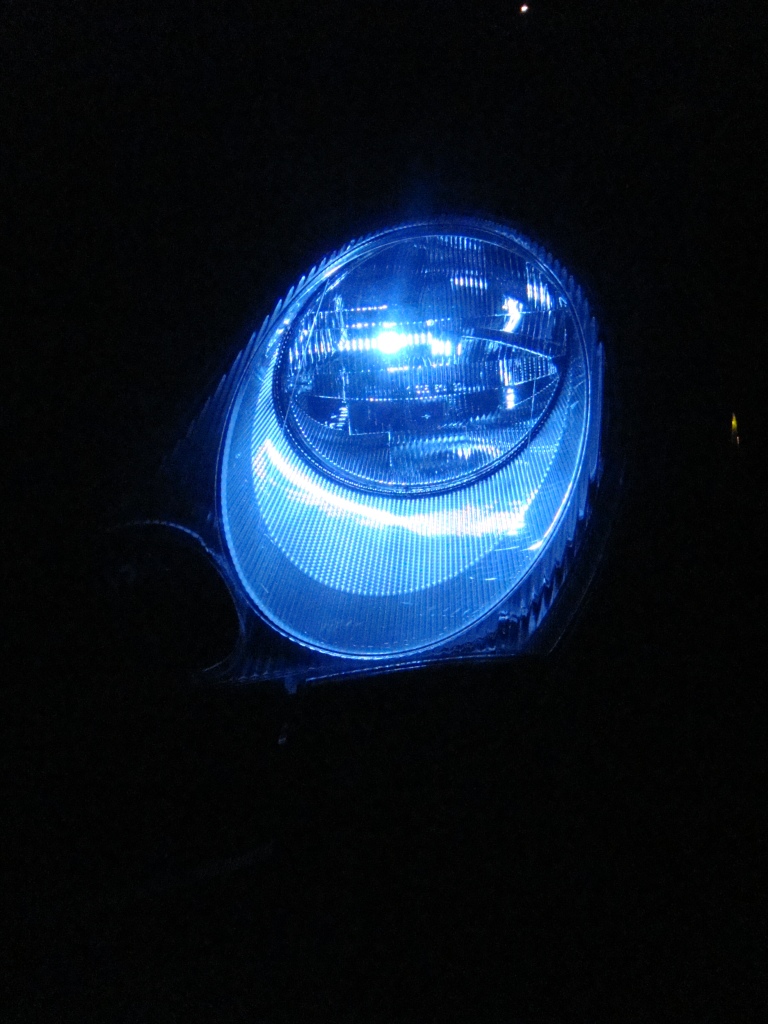
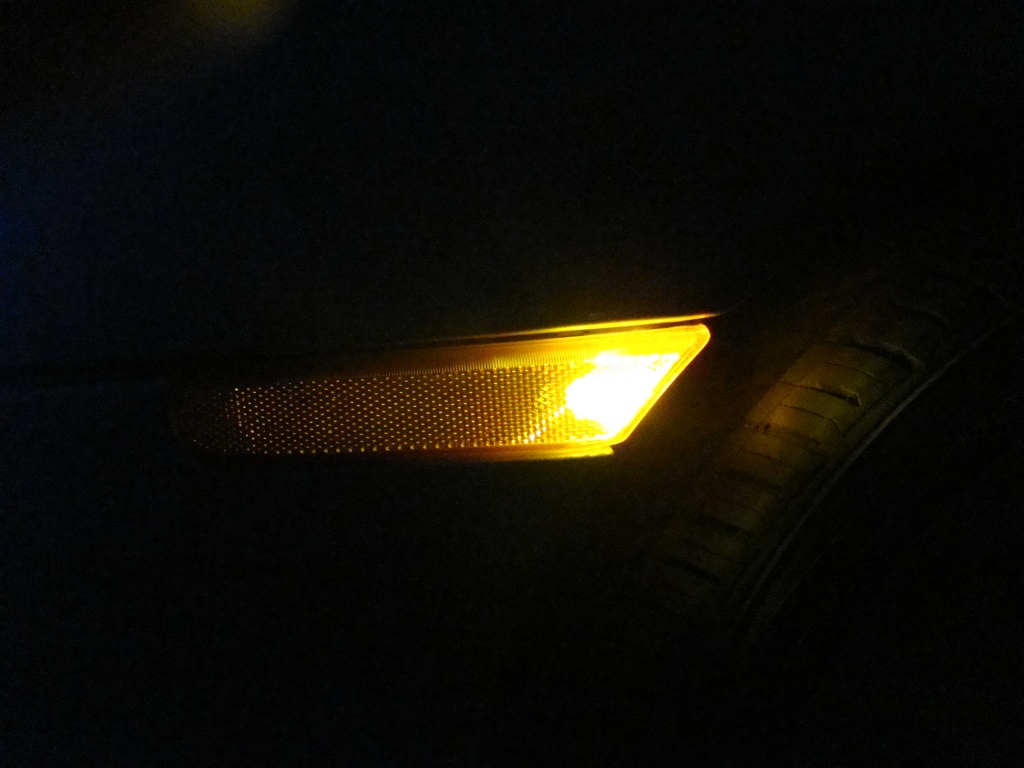
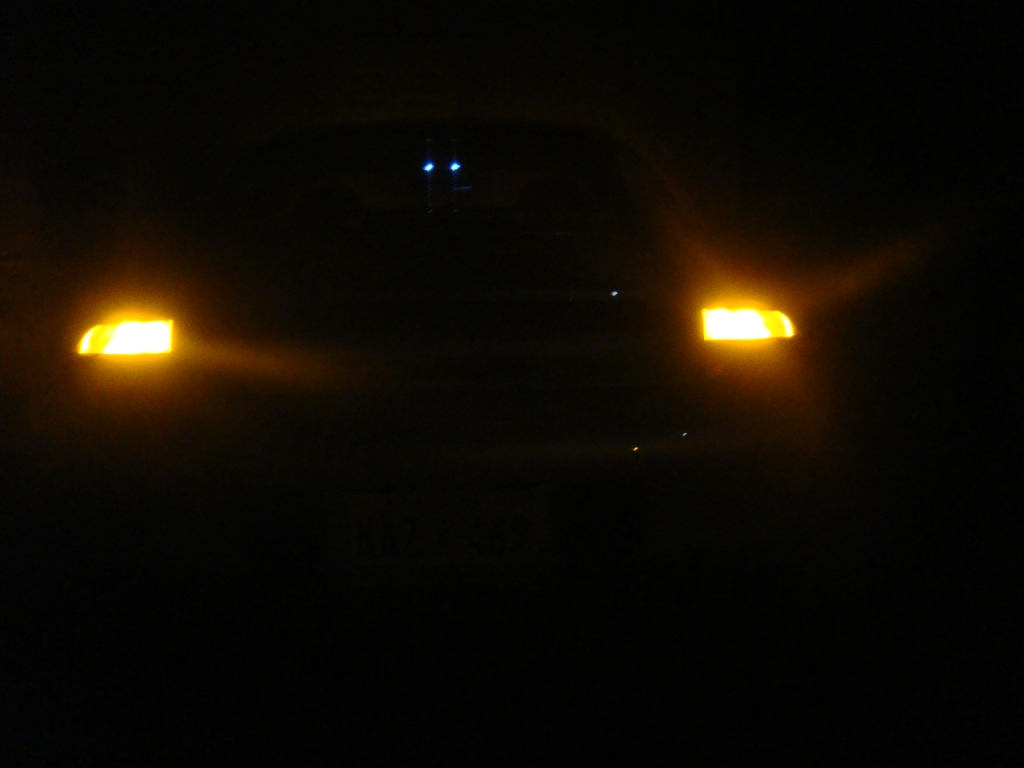
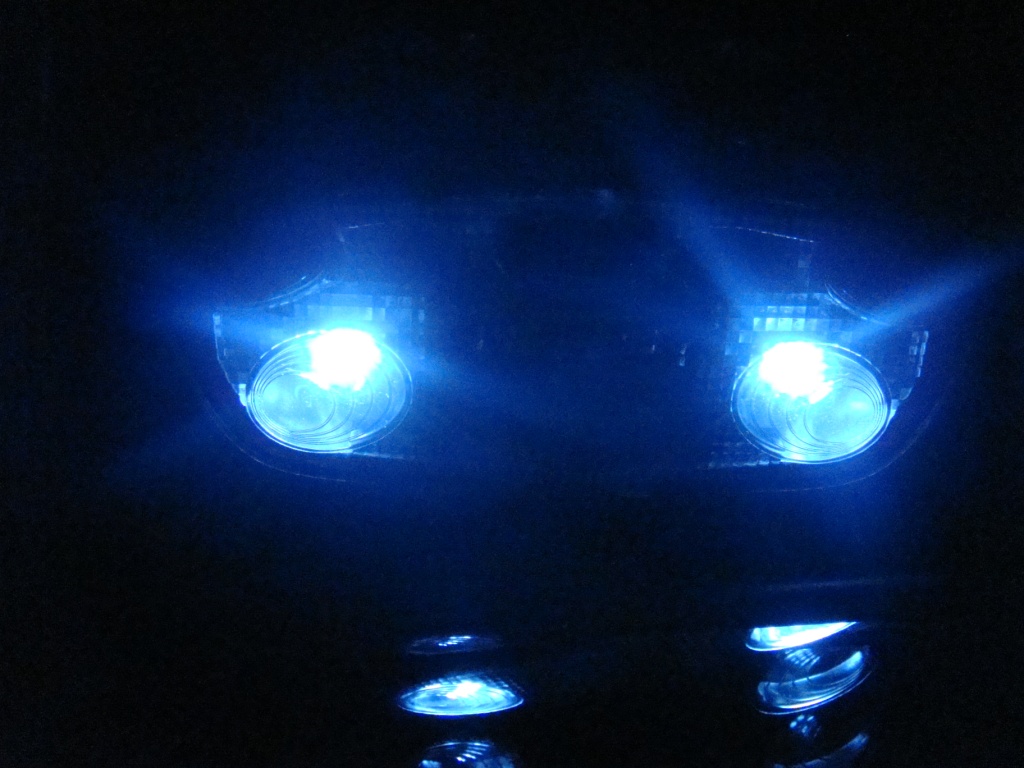
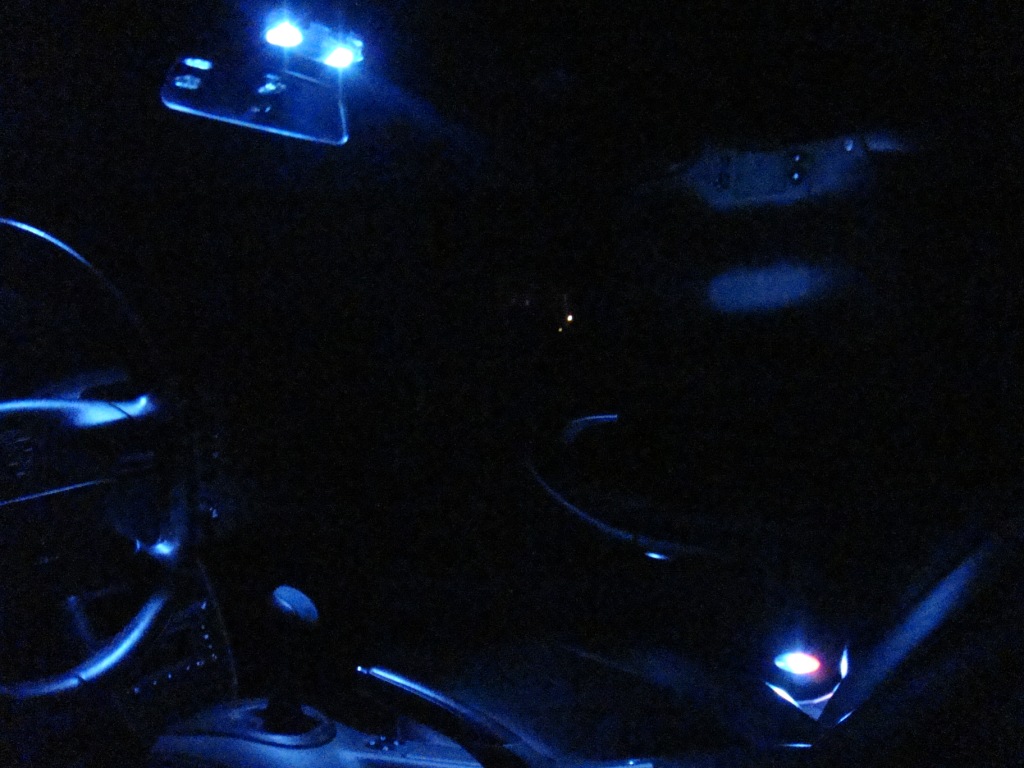
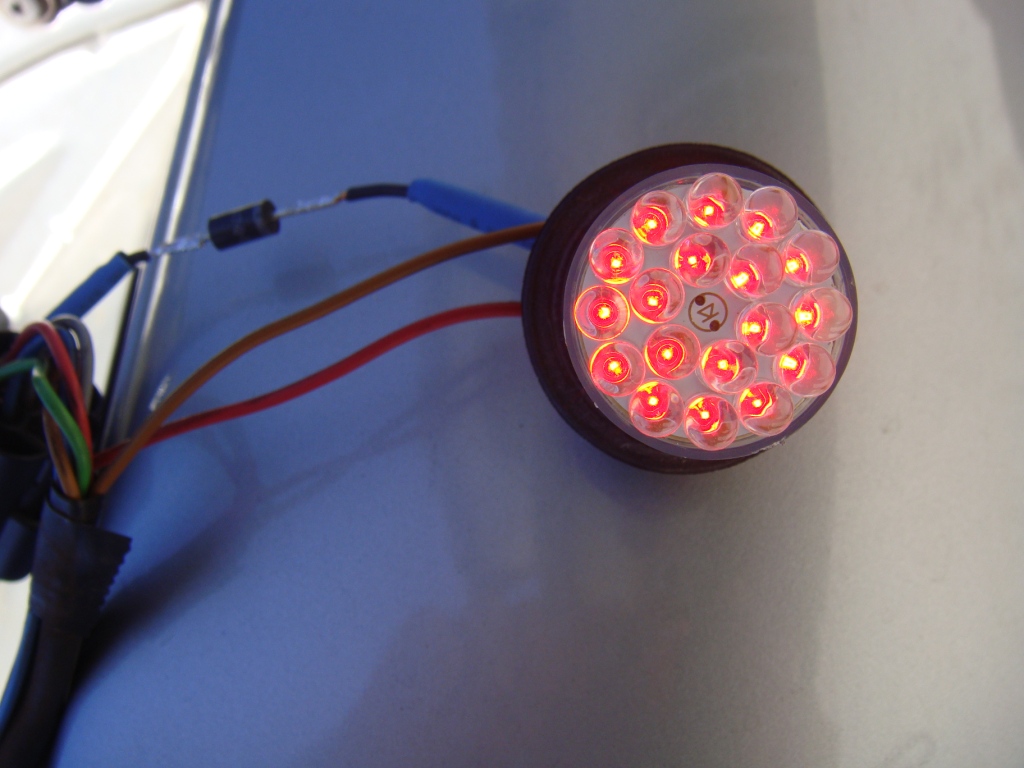
Here are the LEDs installed. I took pictures of the tails, the parks, side markers, hazards, maps and step lights.
I used a xenon color for the interior and the park lights.
What you cannot see in pictures is the clarity of these lights. The interior has a nice cool look. The turns and brakes are on and off instantly. There is no delay in LEDs.
D.
-
I apologize, I forgot about the rear fog light.
Rear Fog Lamp
OEM: 7506
LED: 1156 Red BA15 24-LED bulb 7.49 ea / Total
You can install two of these bulbs (one on each side) but it is not necessary. The factory configuration has two sockets but there is only a bulb on the driver's side of the car.
Make that new total 133.33.
D.
-
Here is a complete parts list for the LED replacement for a 1999 - 2001 PORSCHE 911
Parking light
OEM: 2825
LED: Cool White (Color optional for fun) WLED-x6 LED bulb 3.74 ea / 2 req. 7.48 Total
High mount stop light
OEM: 2821
LED: WLED-Red-x LED bulb .79 ea / 14 req. 11.06 Total
Front side marker
OEM: 2825
LED: WLED-Amber-x LED bulb .79 ea / 2 req. 1.58 Total
Step/Courtesy light/ Map Lights
OEM: 2825
LED: Cool White (Color optional for fun) WLED-x6 LED bulb 3.74 ea / 4 req. 14.96 Total
Front turn signal
OEM: 7506
LED: 1156 Amber BA15 24-LED bulb 7.49 ea / 2 req. 14.98 Total
Tail light/Stop Light
OEM: 7528
LED: Red 1157 BA15 24-LED bulb 7.49 ea / 2 req. 14.98 Total
Back up light
OEM: 7506
LED: 1156-W12 White Wide View LED bulb 6.99 ea / 2 req. 13.98 Total
Rear turn signal
OEM: 7507
LED: PY21W offset 24 LED (Amber) Indicator Bulbs 10.79 pair/Total (Auction)
License plate
OEM: 6418
LED: Cool White 3610-x4 LED Festoon bulb 2.84 ea / 2 req. 5.68 Total
Dome light/Cargo Area/Under Hood
OEM: 6411
LED: Cool White 4410-x9 LED Festoon bulb 4.74 ea / 3 req. 14.22 Total
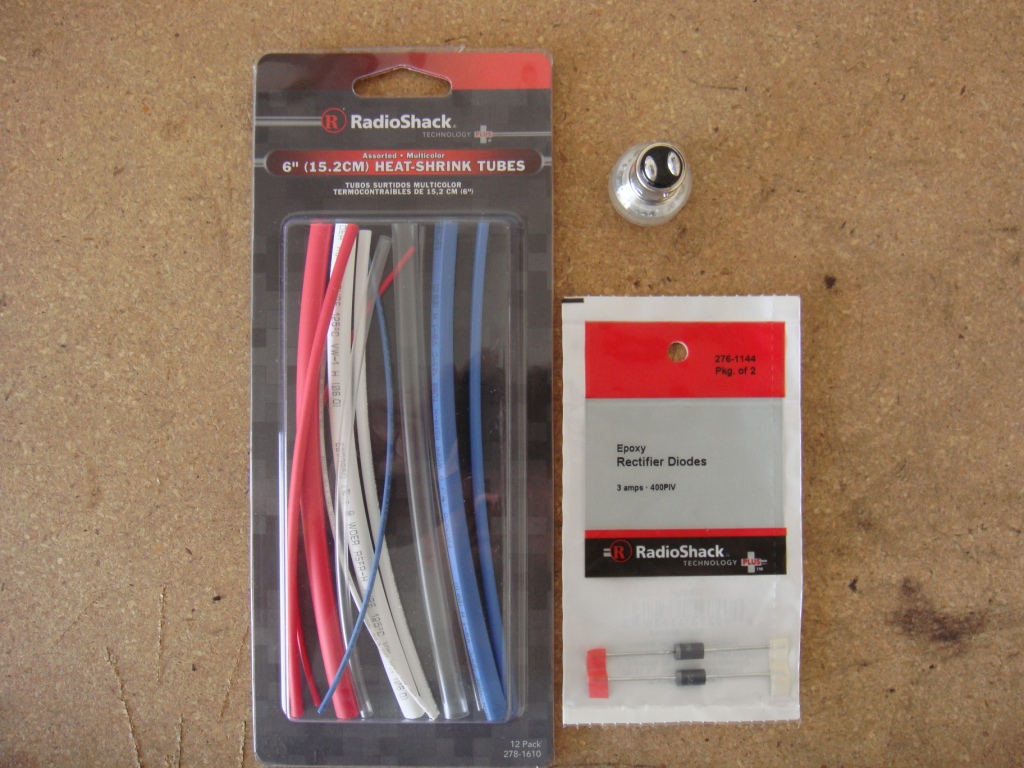
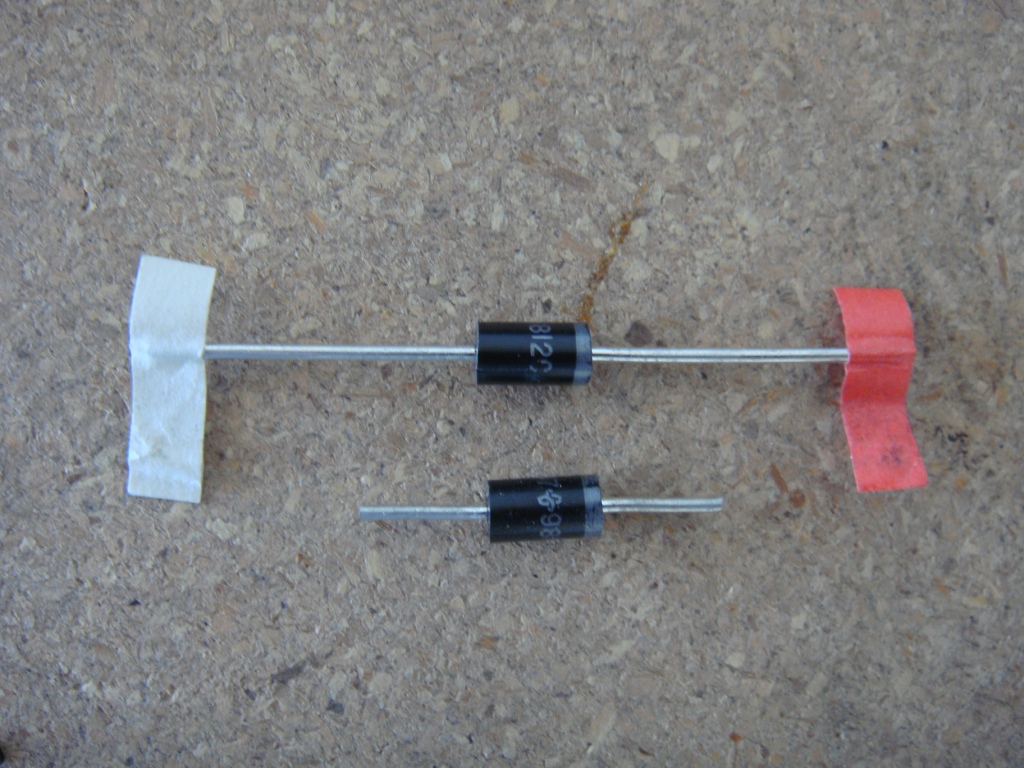
Tail/Stop Light Diodes
2 x 3A 1N5404 barrel diodes 1.59 ea / 2 req. 3.18 Total (Radio Shack)
Turn Signal Relay
LED bulb Flasher Unit CF13 GL-02 12.95 ea / Total
This is a total of 125.84 for all of the parts listed. If you do some shopping around you can find the small WLEDs for less in bundles and so on. Over all it is a cool upgrade with modern technology.
Some things to consider are that LEDs are not as bright as conventional incandescent bulbs unless viewed directly. However, LEDs do require less current and because of this have virtually undetectable radiant heat. If one where to calculate the total current draw from the LED (v) incandescent circuits he or she would discover a significant drop in overall battery usage. Therefore all electrical circuits and components will get less wear and tear throughout the years.
As a final note, the diodes selected for the 1157 install where chosen because they are large enough to use with the factory incandescent light bulbs if needed in a pinch when LED replacements are not available. When installing diodes, cover all exposed terminals and attempt to seal them from submersion. Do not cover the complete body of the epoxy diode as some minor heat dispersion will ensure a component longevity.
References
www.radioshack.com
www.eBay.com
www.superbrightleds.com
* Most of the listed prices are from superbrightleds.com. This post may not be misconstrued as an advertisement for eBay Motors, Radio Shack or Super Bright LEDs. This poster is in no way affiliated with any of the parts vendors referenced in this forum. Finally by posting this discussion, I am by no means responsible for how viewers use this content.
-
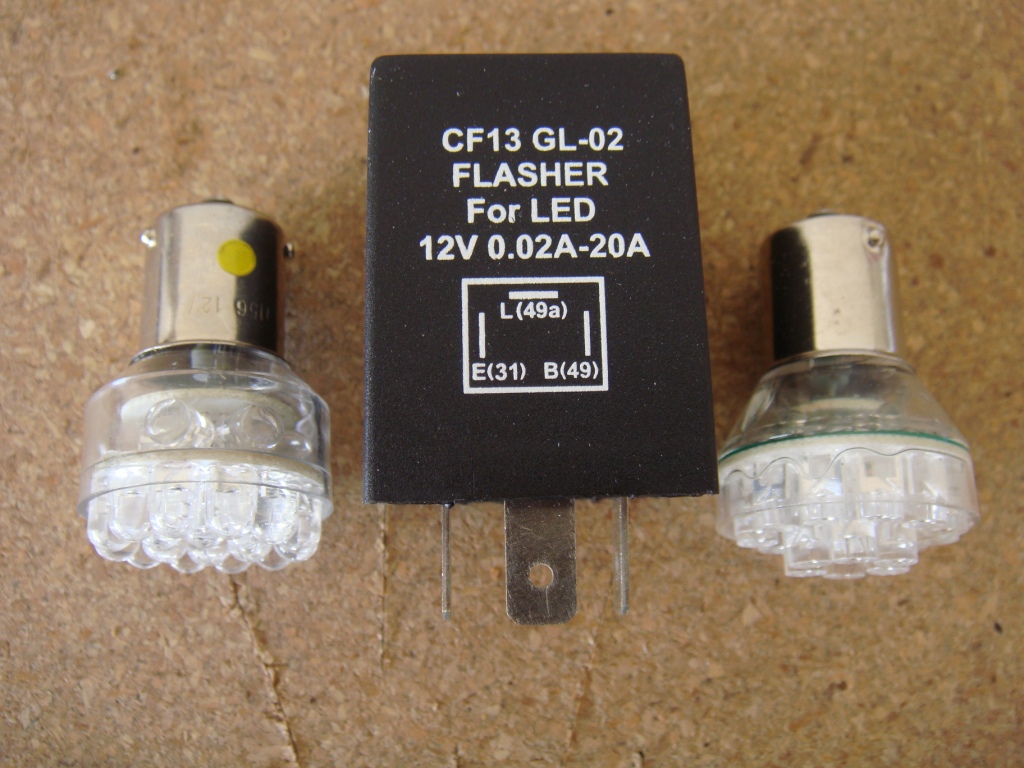
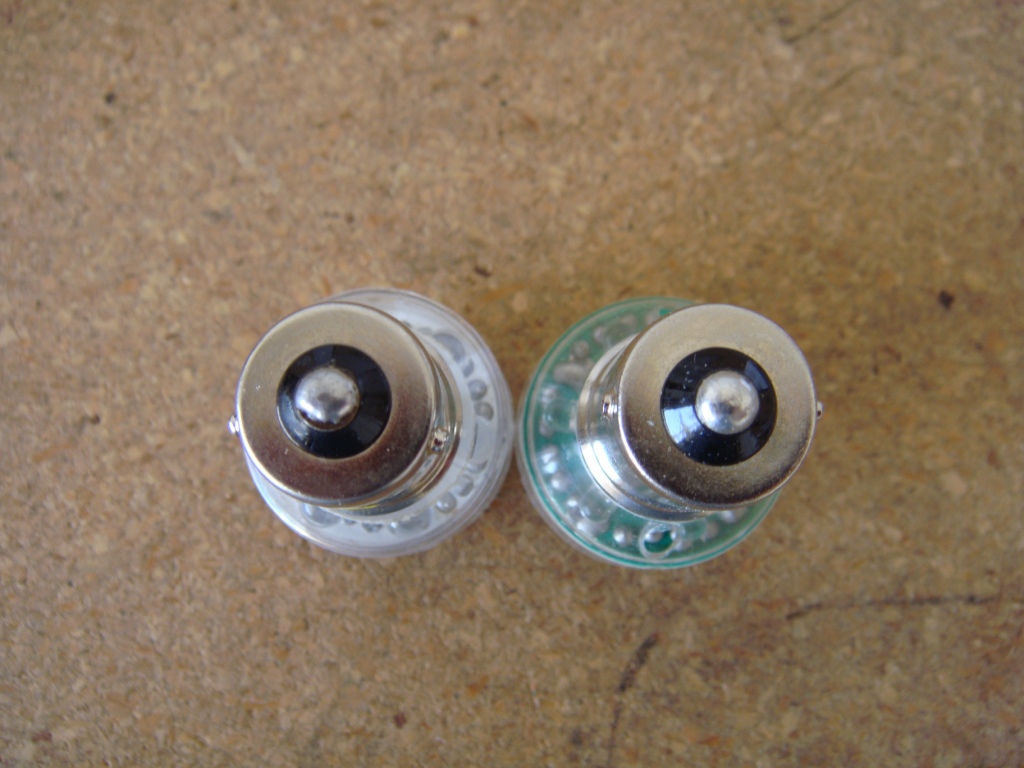
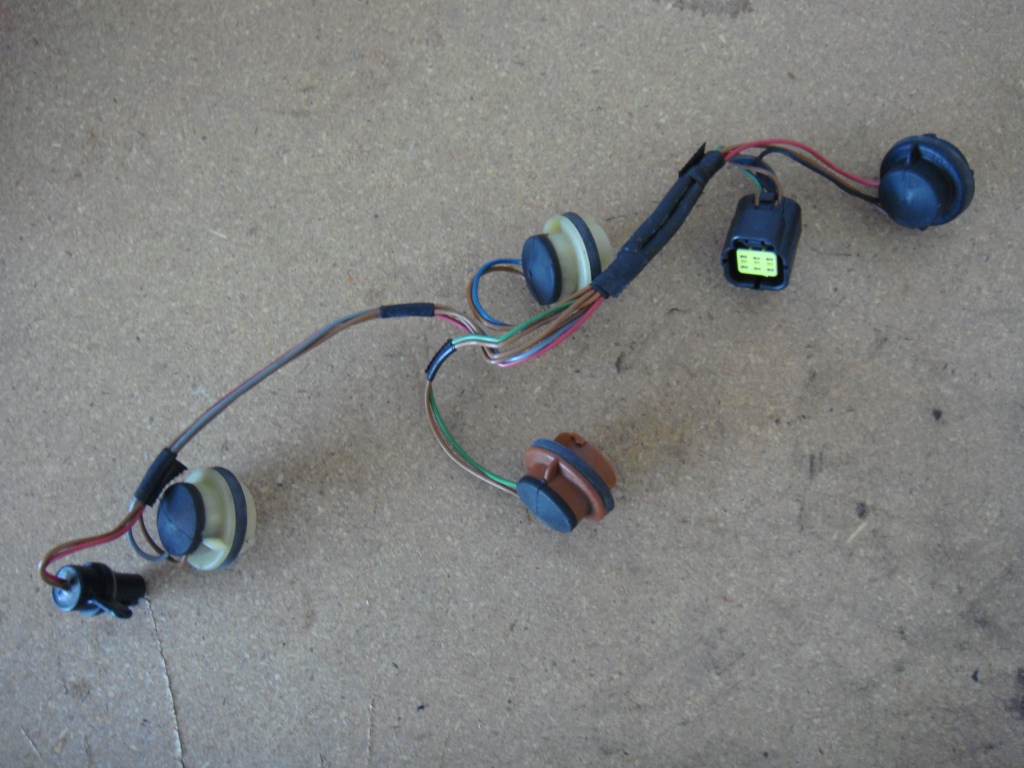
In addition to the 1157 delima there is one more note I should add. If you are not familiar with LED turn signal installations this is a must read. The factory turn signal flasher requires a certain load to operate at normal timing. LEDs require about a 10th of the current that OEM bulbs require and this causes your lights to flash as if a bulb were out (rapidly). It is very simple to fix this problem by simply replacing the factory relay with an LED relay. Here is a picture of the parts required for the turnsignal instal.
Take note that the rear bulbs are 7507s while the fronts are 7506s. It is easy to find the amber 7506 bulbs as they are a standard 1156 single element replacement. However, not all suppliers have the 7507 LEDs which have a different bayonet connector.
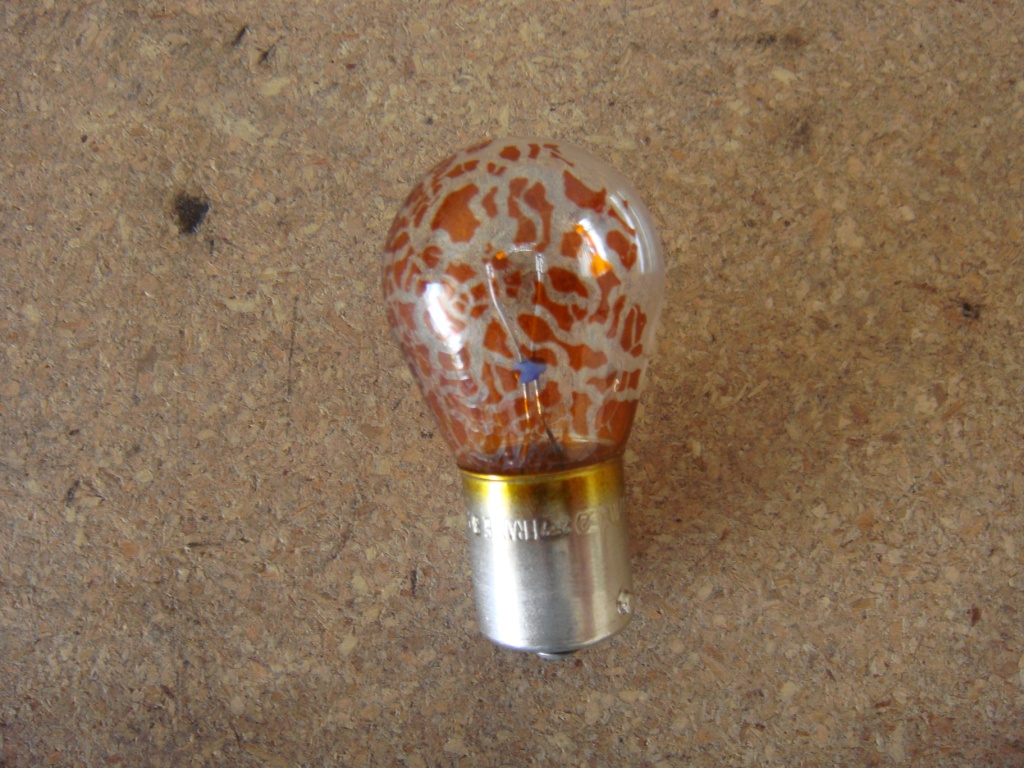
I also attached a picture of my OEM rear turn signal bulb with the orange paint falling off.
-
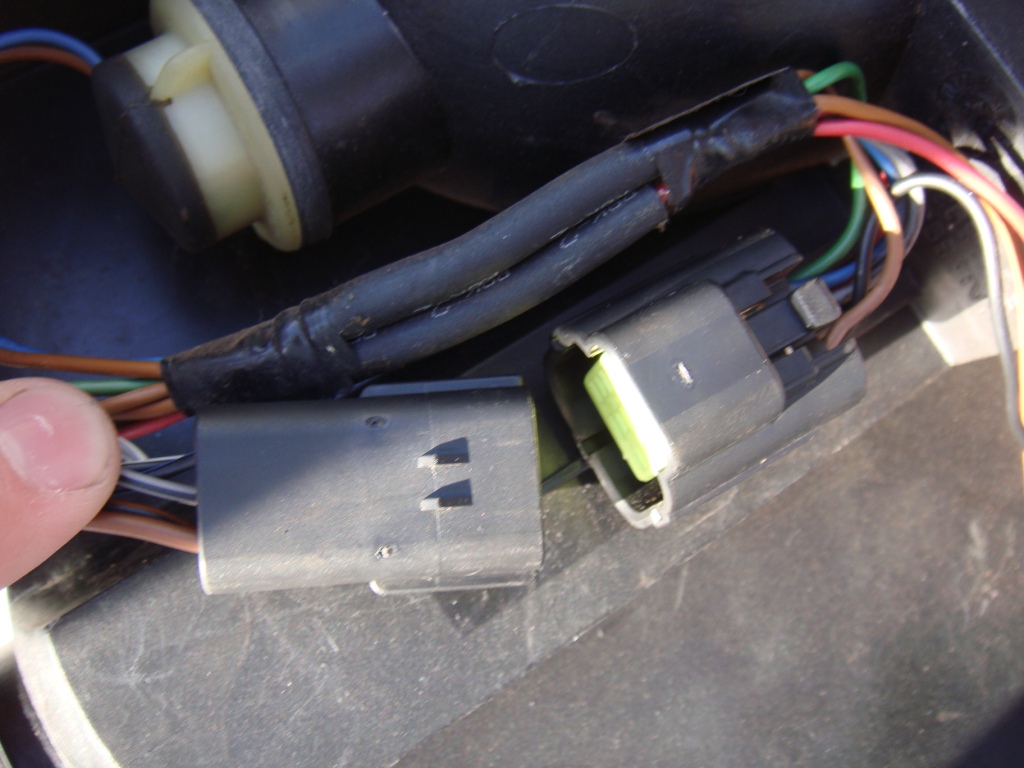
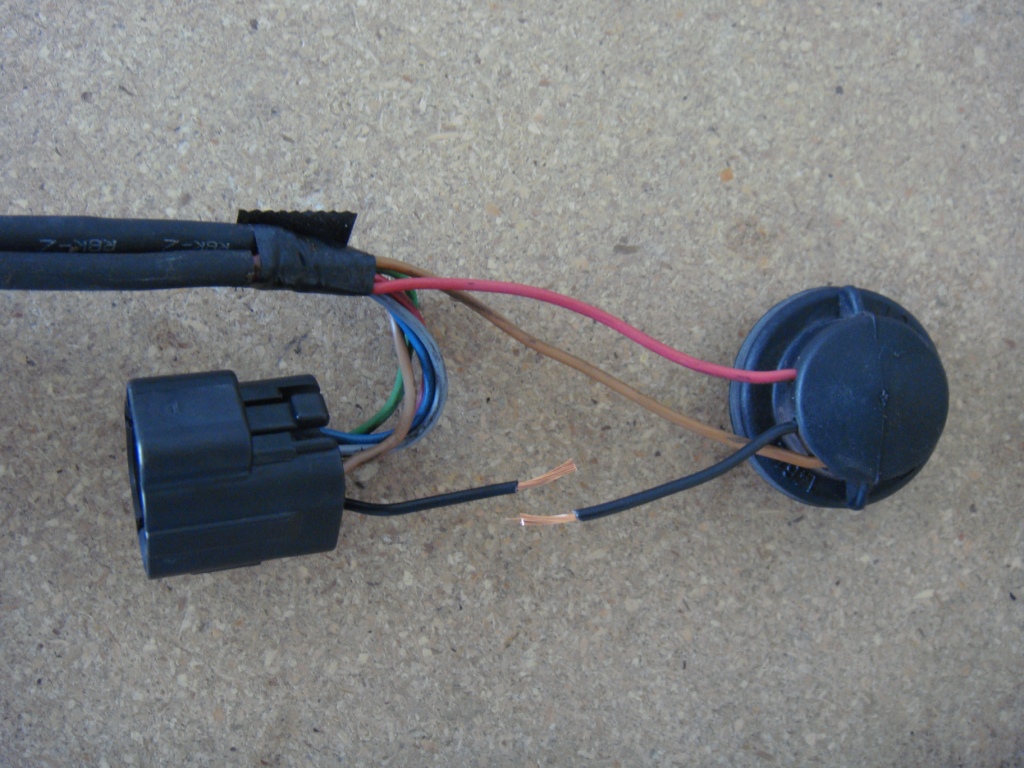
After a long decision to change all of my factory lights out with LEDs I came across a small dilemma. The tail and brake lights share an 1157 dual filament bulb. When installing the 1157 bulb the tail and brake lights would not work independently. I pulled out my multi meter and discovered that all of the light circuits in the Porsche are negative reference. Effectively this means that when a light is turned off its positive lead returns to ground.
On 1157 LEDs the two stage brightness is accomplished through two series of resistors attached to the same circuit of LEDs. When 12v is connected to one lead the light is brighter then the other lead, however they are interconnected.
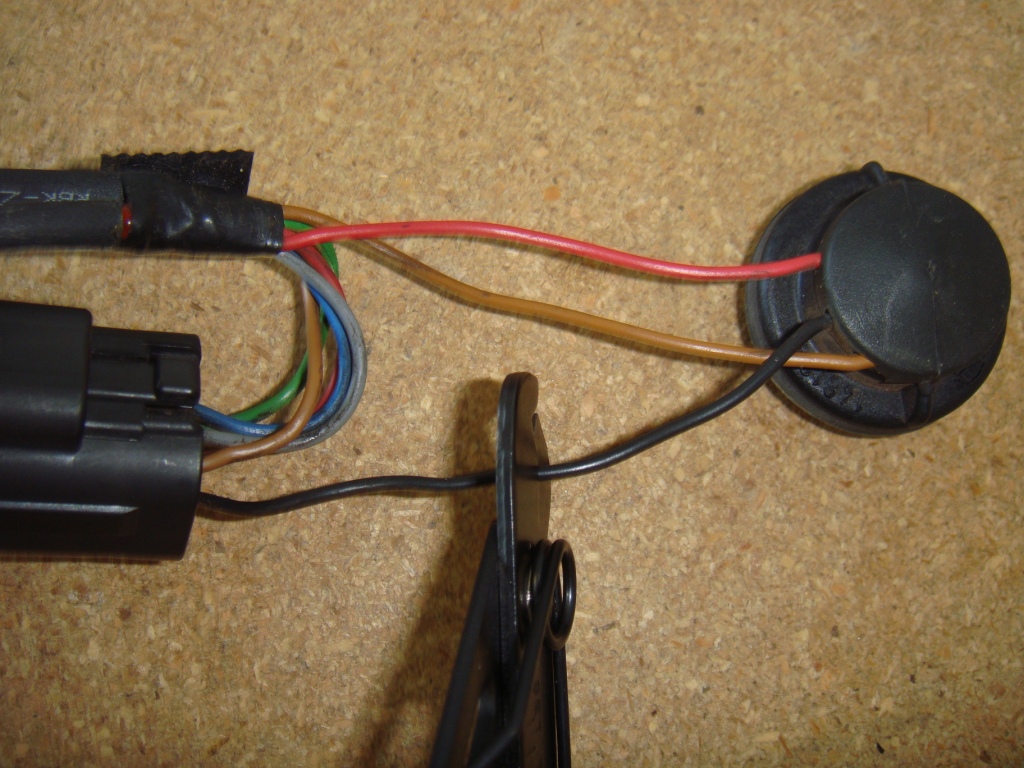
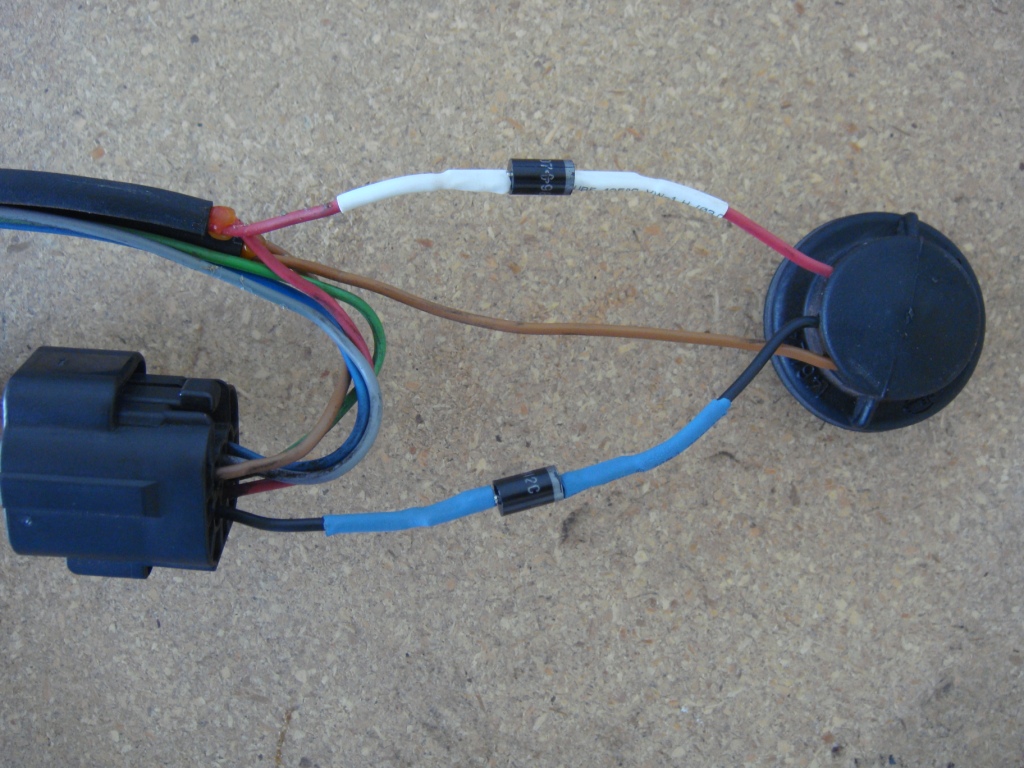
When the tail light is turned on a 12v signal is sent to one of the 1157 leads (for low intensity). However if the brake is not depressed, the other lead (for high intensity) is grounded as well. The grounded lead negates the circuit and the light will not operate. There is a solution through the use of two more diodes. I have attached pictures to visually explain the install process.
As a final note, the diodes are directional, make sure to install them with the silver stripe towards the socket as I have.
D.
-
Are the 996 and 997 doors interchangeable?
Does anyone have mounting pictures of the 997 door panels?
Thanks,
D.
997 doors are different from 996. It appears that the once the 997 factory fenders are mounted on a 996 there is still a one inch wide gap at the bottom of the meeting point.
It would be nice if someone made a light weight fiberglass fender to house 997 lights in a 996 that did not require a different hood or bumper. I imagine it will look very similar to a 993.
D.
-
Are the 996 and 997 doors interchangeable?
Does anyone have mounting pictures of the 997 door panels?
Thanks,
D.
-
Pressures for the MY99: Nominal test values: Stationary engine 3.8 ±0.2 bar Engine idling 3.3 ±0.2 bar
1 BAR = 14.504 PSI at 0 FT above Sea Level -- 3.3* 14.504 = 47.862 PSI at 0 FT above Sea Level
The supplied fuel quantity is 850 cc / 30 seconds total. 850 * 2*60/1000= 102 lph
Fuel pump roughly equals 102 lph at 50 psi.
Anyone know the injectors?
Thanks,
D.
-
I believe this is the DME 5.2.2 can anyone confirm because pin 58 has me a little confused.
1 - Heating of HO2S after TWC
2 - Idle air control valve, closing coil
3 - Fuel injector, cylinder 1
4 - Fuel injector, cylinder 2
5 - Fuel injector, cylinder 3
6 - Ground point 9
7 - EVAP canister shutoff valve
8 - Check Engine MIL
9 - not assigned
10 - not assigned
11 - not assigned
12 - Crash signal (airbag)
13 - knock sensor 1 (cyl. 1-3)
14 - Medium pressure switch (A/C)
15 - Intake air temperature sensor
16 - Engine compartment temperature sensor
17 - Signal, mass air flow sensor
18 - Signal, H02S 2 ahead of TWC
19 - Signal, HO2S 1 ahead of TWC
20 - Ground, speed sender
21 - Signal, camshaft position sensor 1 + 2
22 - Ignition coil, cyl. 4 terminal 1
23 - Ignition coil, cyl. 3 terminal 1
24 - Ignition coil, cyl. 5 terminal 1
25 - Camshaft adjustment, bank 2
26 - Terminal 30
27 - Triggering of DME relay, terminal 85
28 - Ground, electronic system (shield)
29 - Idle air control valve opening coil
30 - Heating of HO2S ahead of TWC
31 - Fuel injector, cylinder 6
32 - Fuel injector, cylinder 4
33 - Fuel injector, cylinder 5
34 - Ground, sender
35 - Coolant fan, stage 1
36 - Coolant fan, stage 2
37 - Triggering of relay (terminal 85), secondary air pump
38 - Version coding (ground for Tiptronic)
39 - Fuel reserve pilot light
40 - not assigned
41 - Knock sensor 2 (cyl. 4-6)
42 - Automatic I/M test
43 - not assigned
44 - Signal, throttle position sensor
45 - Ground, mass air flow sensor
46 - Ground, oxygen sensors
47 - 5-volt supply for mass air flow sensor
48 - Nominal engine torque to TC control module
49 - Ignition coil, cyl. 1 terminal 1
50 - Ignition coil, cyl. 6 terminal 1
51 - Ignition coil, cyl. 2 terminal 1
52 - Camshaft adjustment, bank 1
53 - 5-volt supply, throttle position sensor
54 - Voltage supply for various components
55 - Ground, ignition
56 - Terminal 15
57 - not assigned
58 - Actual engine torque from TC control module
59 - Tuning flap (intake manifold switchover)
60 - Programming voltage
61 - EVAP canister purge valve
62 - A/C compressor On
63 - Triggering of fuel pump relay (terminal 85)
64 - not assigned
65 - Relay of engine compartment purge fan (terminal 85)
66 - Start-inhibit relay (terminal 85)
67 - not assigned
68 - Position switch/clutch switch
69 - A/C compressor requirement
70 - not assigned
71 - Ground, knock sensors
72 - Tank pressure sensor
73 - Oil temperature sensor
74 - Engine coolant temperature sensor
75 - not assigned
76 - Signal, H025 2 after TWC
77 - Signal, H025 1 after TWC
78 - Signal, rpm crankshaft position sensor
79 - Speed signal from ABS control module
80 - Speed signal output
81 - not assigned
82 - Coolant level
83 - Fuel gauge
84 - not assigned
85 - CAN low
86 - CAN high
87 - L wire
88 - K wire
Thanks,
D.


99 996 AC Noise
in 996 Series (Carrera, Carrera 4, Carrera 4S, Targa)
Posted
Sorry about reviving the dead on this one people.
The system had too much freon.
That was it!