Welcome to RennTech.org Community, Guest
There are many great features available to you once you register at RennTech.org
You are free to view posts here, but you must log in to reply to existing posts, or to start your own new topic. Like most online communities, there are costs involved to maintain a site like this - so we encourage our members to donate. All donations go to the costs operating and maintaining this site. We prefer that guests take part in our community and we offer a lot in return to those willing to join our corner of the Porsche world. This site is 99 percent member supported (less than 1 percent comes from advertising) - so please consider an annual donation to keep this site running.
Here are some of the features available - once you register at RennTech.org
- View Classified Ads
- DIY Tutorials
- Porsche TSB Listings (limited)
- VIN Decoder
- Special Offers
-
OBD II P-Codes - Paint Codes
- Registry
- Videos System
- View Reviews
- and get rid of this welcome message
It takes just a few minutes to register, and it's FREE
Contributing Members also get these additional benefits:
(you become a Contributing Member by donating money to the operation of this site)
- No ads - advertisements are removed
- Access the Contributors Only Forum
- Contributing Members Only Downloads
- Send attachments with PMs
- All image/file storage limits are substantially increased for all Contributing Members
- Option Codes Lookup
- VIN Option Lookups (limited)


my996
-
Posts
261 -
Joined
-
Last visited
Content Type
Profiles
Events
Forums
External Paint Colors
Downloads
Tutorials
Links Directory
Collections
Store
Posts posted by my996
-
-
I thought I would post my experience since it has been a while since I tried the methods suggested. I started with the drain and refill process of letting out some, and filling and repeating. See this post for details. After that, my 996 ran a little hot but I thought the culprit was a new bumper I had installed around the same time. Thanks to Loren, I was able to narrow down the problem to possible air in the lines. So, after installing a new overflow tank, when the old one had cracked, I took the 996 to a shop that had a vacuum apparatus to refill the coolant. Problem solved. Car runs cool again and the shop only charged me the labor (about $80) to do the vacuum flush since I replaced my own coolant tank, fuel filter (because it was convinient), and hose rings. Once again, thanks for all the help this site has provided even though it takes me from one season to the next to finally getting around to doing what I wish I could do in one weekend. :) Particular thanks to Loren for all your insight.
-
 1
1
-
-
Is the wood being glued to plastic? - If yes then try "gorilla glue." be careful because it foams slightly but will stay very well. On the other hand, "liquid nails" from home depot with work great as well. Either of these methods will be permanent so make sure you never want the parts to come apart sometime in the future.
-
Here is one:
http://industryfigure.com/berkeley/Porsche...s/valentine.htm
My car has the phone module pigtail on the othe other side of the console. The wires are the same, and you can get power on the V1 with ignition on. I mounted the V1 on the passenger visor, have the readout on the steering column so only I can see it. I did this both on a cabrio and coupe, works great.
Thanks - I think this is exactly what I need and plan on doing this install over the weekend.
This site is great once again!!!
-
Did you see the car phone power connector on one of the V1 install sections? To me it was the easiest location, and the V1 turns on/off with ignition.
[/quote
I think I missed that one. Know where it is?
-
I just did this yesterday in my '02 Cab. In your first pic, the connector with 3 wires one is power and one is ground. I used those. They are constant on so you will have to manually turn the V1 off when you leave the car but no big deal really. Plus leaving the V1 attached to the windshield is an invitation to thieves anyway...
Thanks Midlife, but I really want power keyed to the ingnition since I park in my own garage at home as well as work which is where I drive 95% of the time. :)
-
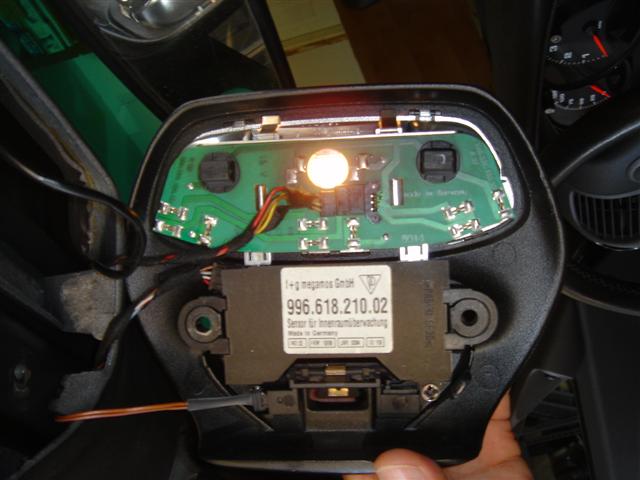
I have read various V1 install threads. I am trying to determine the best (easy to access and switchable power set to turn on/off with the ignition) point to tap for power. I have the remote display too. Please list options that might be good. Also please provide pics if you have them.
Option #1: the headliner connection point. If I chose this area to get power, which wire would I use to get power from? See pic attached. Thanks

-
Love this write up. Two questions. Would this apply to a regular 99 996 as well? And, for clarity sake would you draw arrows to steps 3, 4 and 5 in the pic itself? I am mechanically stupid so the greater the specificity the better. Thanks for an excellent write up.
-
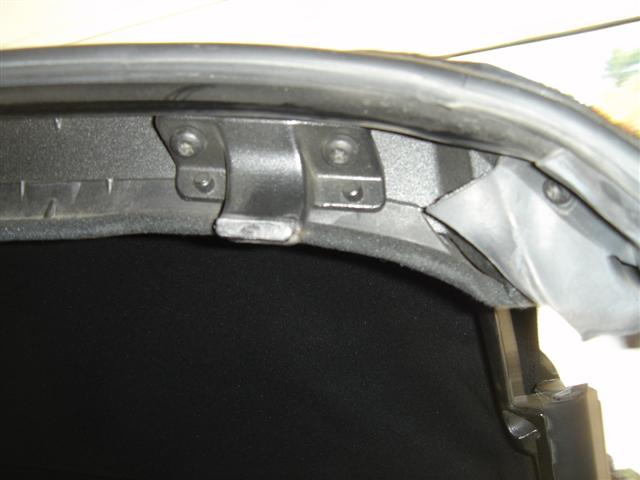
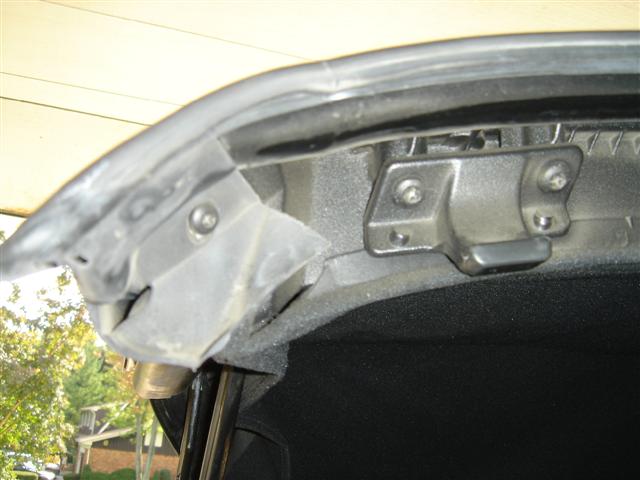
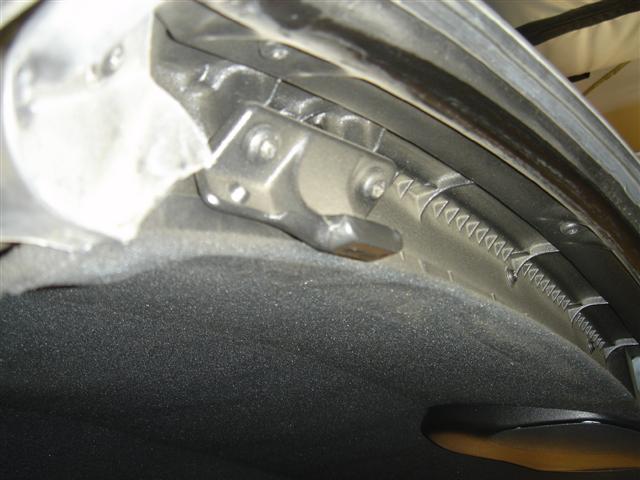
The leading edge to my Cab Top has come loose. I think I have determined what the problem is. As you can see from picture "A", the left side connection, located where the windshield is, has worn down because the mating component on the Cab Top (see picture B and C) is missing a protective edge. Compare photos A, B and C of the left side (faulty side) and photos D and E of the right side (non faulty side). I think what I need to do is to replace both the part that is attached to the top of the windshield (where the sun visor fastens) and the mating part located on the Cab Top. Please confirm so I may fix this ASAP.
Loren, would you please post the part numbers? Thanks
-
I have a 99 996 cab. I need to replace the front windshield wipers. Are these a special part available from porsche only? or can I go into any autozone and pick up a set that fits (ie bosch)? Thanks
-
Does anyone change the oil filter inbetween oil changes to help filter out more contaminants and to prolong the oil life? Like do it at 5k, 10k, etc. intervals.
Since you are going to use synthetic, every 5 is great although you could go longer. It all depends on how hard you drive the car and if it is dusty where you live. You will eventually get an idea of what is best. I change mine about every 5k or so, which happens to be about how much I drive it every season. So just before I garage it for the winter, I change the fluids and let the car go into hibernation for the long winter. Good luck. BTW, Sunset in Oregon is great for parts. I vote for Autozone or Walmart - who ever is having a sale - stock up! I happened to get lucky at Costco one day ($2.50 per quart couple of years ago) and bought like 60 quarts. I am set for a while. :)
-
I capped off the hose locations with vaccum caps and hose clamps. I used a universal rubber cap with a valve in the top. I have had it for quite a while, but I think I may have bought it from a local NAPA dealer. I had to use a clamp on it as well to get it to seal. I put around 15-20 psi IIRC and left it overnight. I have a guage that reads from 0-40 psi on a 2 inch dial. Zero pressure loss overnight.
Could you post pics of vacuum caps, a universal rubber cap with a value in the top, and the clamp used to seal it, and the guage with the 2 inch dial to read 0-40 psi? I'll go out and get all the parts you have and do this right away. Thanks.
Tony
-
I didn't think about pressure testing it before install. I have the tank inserted but not completely fastened in yet. Can it be pressure tested in place or should I take it out and do that first? Also - how do you pressure test it? I have an air compressor if that is needed. Tony
-
Refill with a 50-50 mix of G-12 coolant and distilled water.
There are several places you can get G-12. most economical version is getting a gallon of G-12 under the Texaco Dex-Cool brand. Dex-Cool is available at any auto parts store or Wall Mart.
What quantity of antifreeze is needed to do a complete vacuum flush? Can I just use the 50/50 mix for the entire refill process or do I need distilled water as well?
-
Ok - so as frustrating as this is - I finally have the new tank back in place. :) yahooooooo!. I got everything roughly back in place (just have to tighten the nuts and such. I decided to order a new fuel filter - for under $30 I figured, I might as well replace it now since I have decent access to it now and don't want to do this procedure anytime soon. It should go back in place pretty easy from here - meaning tightening everything down and checking to makes sure nothing was left out.
One thing I decided to do was to do a complete refill of the antifreeze instead of just putting the old stuff back in. I am going to pay a local dealer $90 labor (I supply the antifreeze) to do the vacuum refill. Does that sound like a lot?
Thanks for this post in helping me install this tank - saved a lot of money and I feel reconnected to my car. Cute little thing!!
-
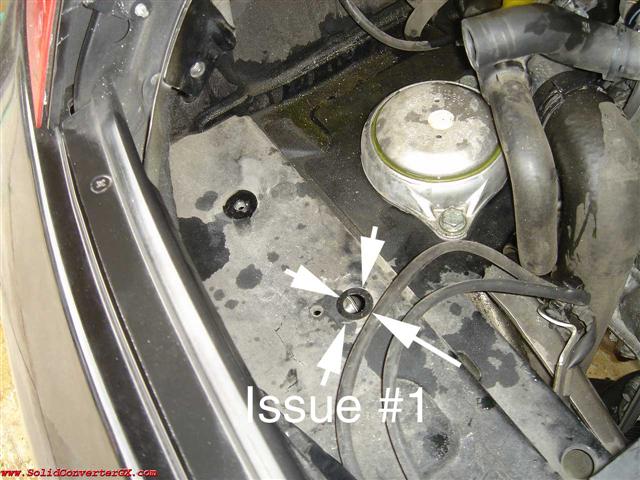
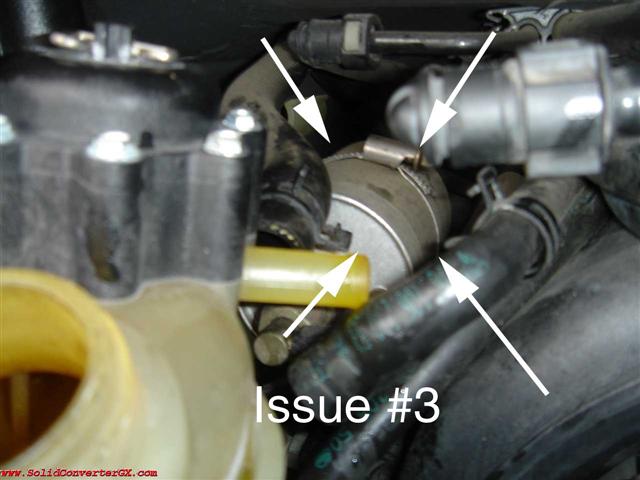
A few issues have come up while I was attempting the process of replacing the coolant tank. I hope someone can help.
Issue #1 : involves loosening the bolts on the air pump. As I removed the bolts, the nut holding the bolt on fell into the cavity where it was attached from underneath. I can see the nut but I am not sure how to get it out and there after how to thread the screw back on to the nut. See Pic below labeled “Issue #1” below for the location I am talking about.
Issue #2 : if I loosen the fuel lines as described at the beginning of this post – quoted here >>>… “There are two fuel lines that will prevent you from removing the tank from the engine compartment. Loosen (17 & 19mm) them and tuck away”. If I do this will fuel come out of this line? If so, is this recommended?!?!
Issue #3 : See the pic below labeled “Issue #3”. What is that? Should I do anything with it to properly remove the coolant tank?
-
Well if the whole system has been emptied then the best way is to use a vacuum (pull) to fill the system and eliminate air.
If you just added a 3rd radiator or replaced the coolant tank then you should not have lost much coolant - in that case I have found the driving with the purge valve open works fine.
anyway to tell if there is air in the system? - also, if I wanted to be anal about this, where can I can a vacuum pump that will help me do this? Any cost ideas?
-
I will be replacing the overflow coolant tank in my 99 999 C4. I was comfortable using the method described in a thread on the board that describes the process - using the relief value and purging air by a combination of opening the value and letting and cool, etc. etc. However, when I had my car at the shop to replace the alternator the other day, porsche mechanic said the only way to purge the air is to use a pressure system. I think he just wants me to pay him to do it but just in case - Loren, or anyone who might know, what is the correct way to remove the air from the cooling system once I have reinstalled the expansion coolant tank? Thanks
-
If the battery is 4 years old or older then it needs to be replaced anyway.
Thanks - I am not sure if it is 4 years old yet but might as well get a new one. Which one is recommended. Aren't there lower weight ones that would be a good alternative? What are your thoughts?
-
Took my 1999 996 out of storage. I placed a battery charger on the battery over night. Still did not charge the battery to sufficiently charge the battery so I had to jump start it this morning. Car started so I drove around for a while (about 30min). Afterwards, parked car in garage and turned it off. Tried to start it right away and no go. How can I tell if this is a bad battery issue or an alternator issue? Thanks.
-
There is a terminal with a plastic cover and a "+" on it. Connect the positive on that and the negative to a grounded body part. Do you have the owners manual? It is all in there. If you don't, download it from the "quick menu" above, it is there with the location.
Thanks - I am going to give it a shot.
-
can you open the engine lid? If so, jump the car with a battery from the contact there (keep the battery connected), and unlock with the key on the door. Should be fine after that
Thanks - I can open the engine lid but where is the battery contact point in that compartment? Thanks - I am so close to resolving this. :)
-
I have had my 1999 996 in storage for a year and am just now getting around to taking it out of the garage. I took the battery out before I stored it. I tried to open the front hood to put the battery back in. When I try to open the hood with the latch at the drivers side door, it will not even go to full extention. It feels like it is locked. I am not sure what to do. Any ideas on how to open it? Thanks
-
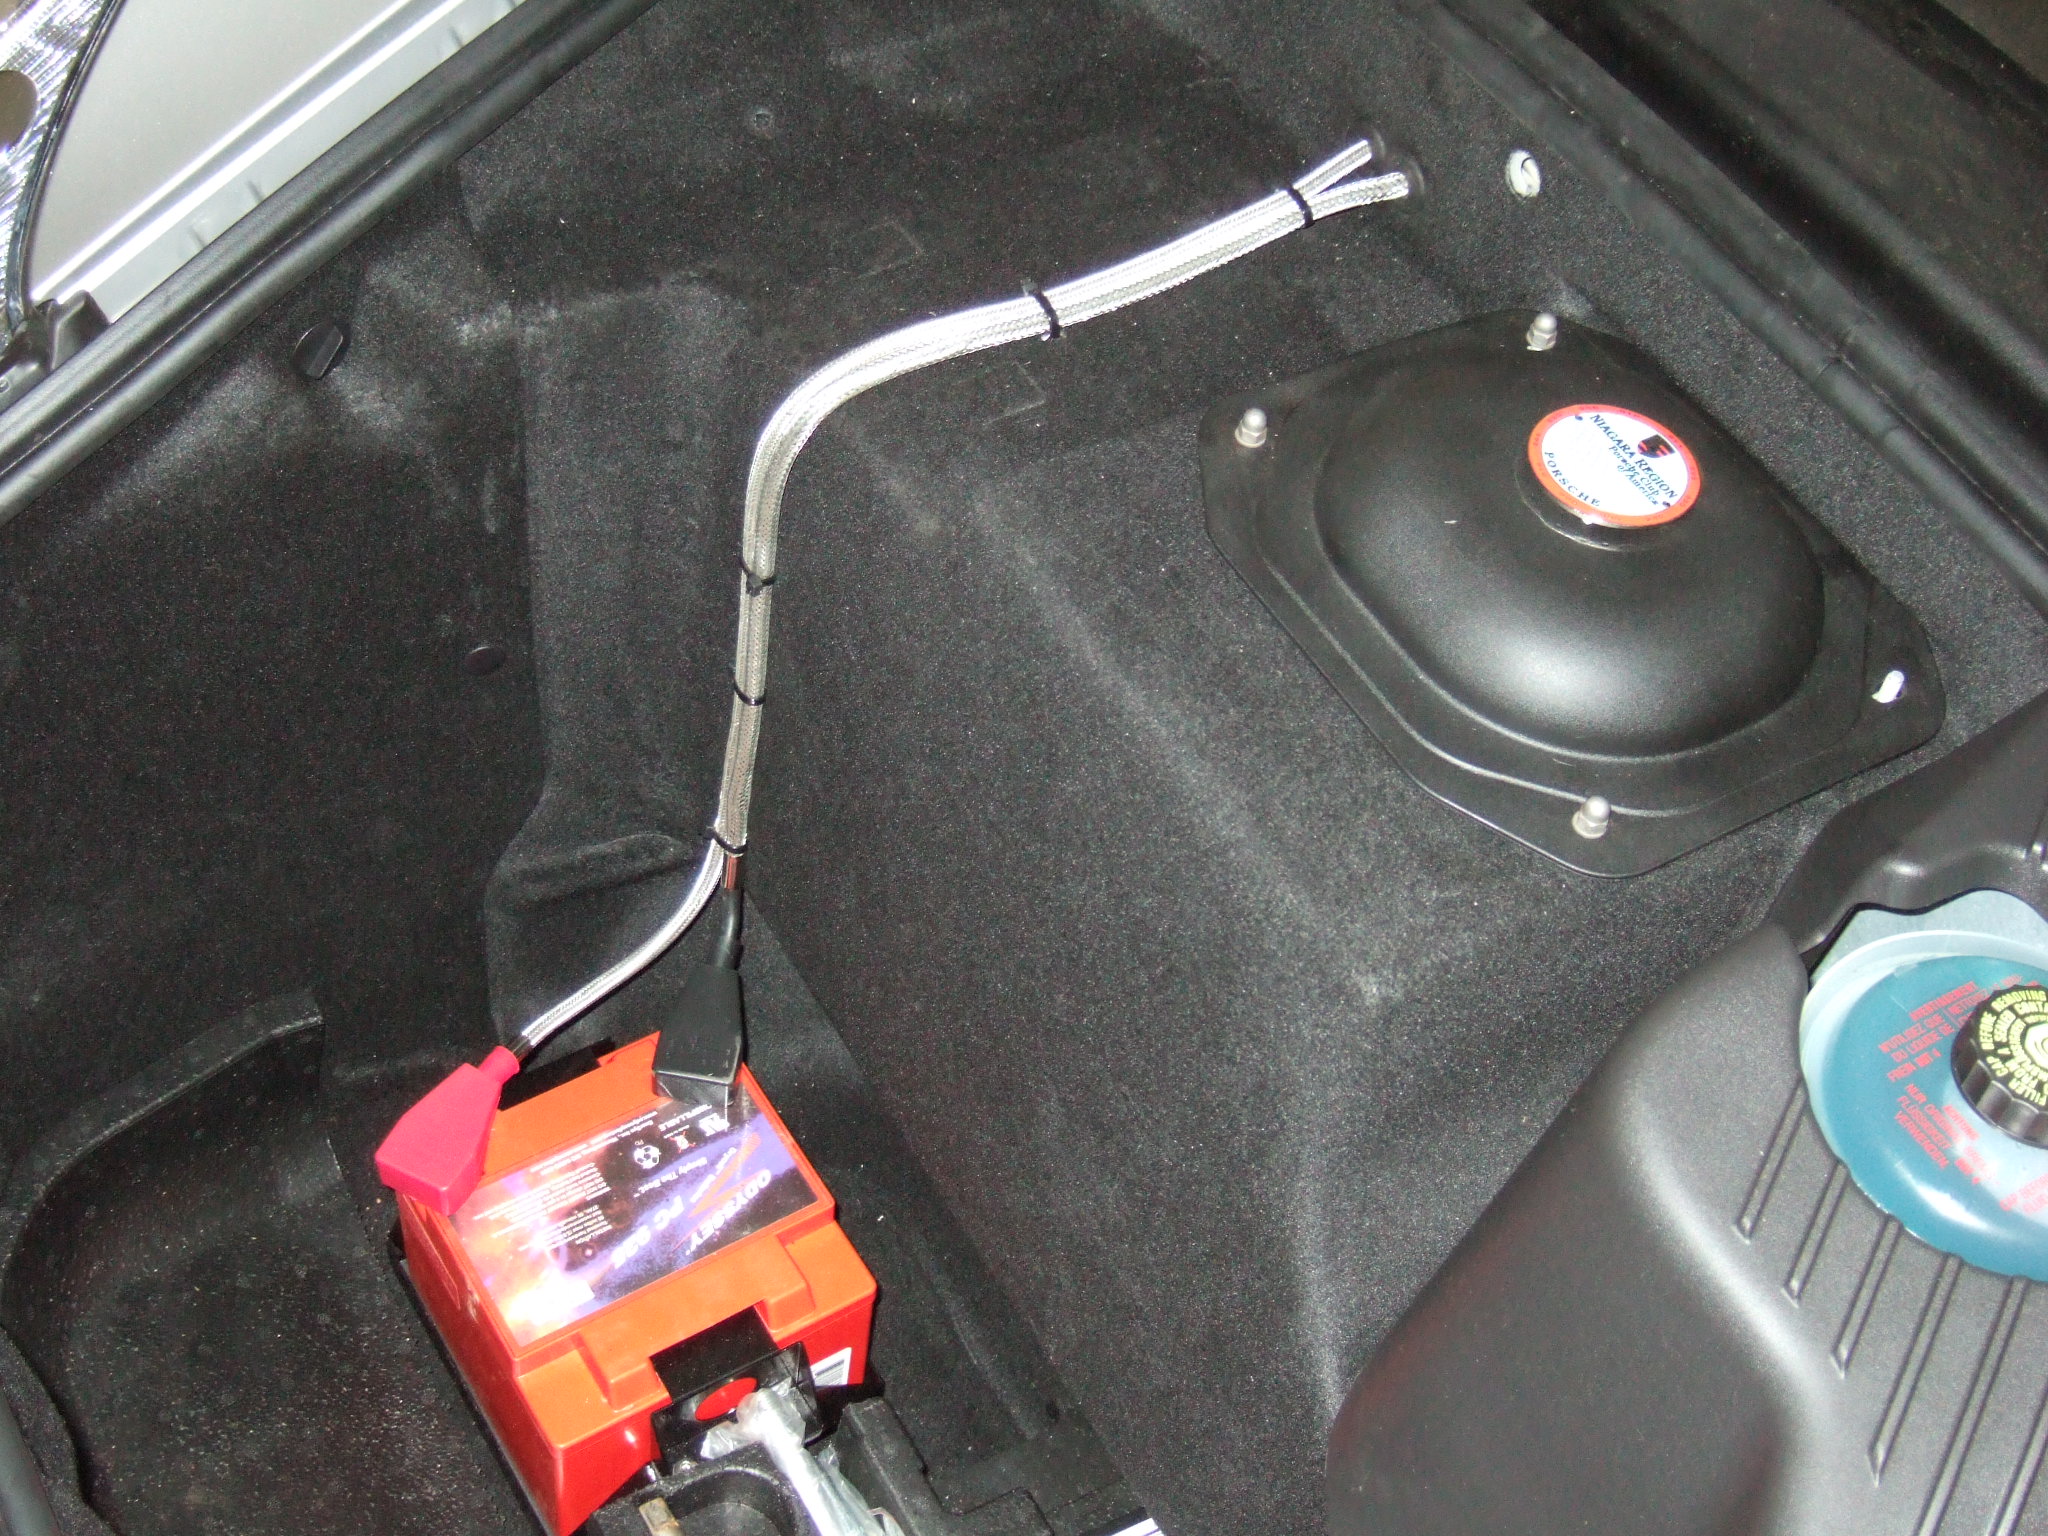
How about the Odessey battery? lightweight, no fluids or vent, better performance and 10 year guarantee. I've had one in my GT3 for 2 years. Pulled the anchor old type and mounted this on the front floor.
Why not keep it mounted in the factory battery tray? Just wondering. --Brian
Hey Ray - can you tell more about how you mounted the battery in this position? - ie cables used, mounting hardware and place fastened, etc. Thanks
-
Unless you break something else - all you should need is the proper tank for your model year AND model type (i.e. C2, C4, C4S, etc.). I like to replace old spring type clamps with the screw type but that it is up to you.
\
Thanks Loren, how many and what sizes clamps should I get for a 99 C4? - these are the same ones from Home Depot right? - Also, any hoses or other things I should replace while I am doing this mod? Thanks again.
Tony


Hood fitment
in 996 Series (Carrera, Carrera 4, Carrera 4S, Targa)
Posted
My hood is getting harder and hareder to shut to the point where now I have to really push to have it engage with the lock. Any suggestions on how to solve this problem. Also, the hood sits a little proud of the rest of the sheet metal- ie its not flush with the other body panels. What should I do??