Welcome to RennTech.org Community, Guest
There are many great features available to you once you register at RennTech.org
You are free to view posts here, but you must log in to reply to existing posts, or to start your own new topic. Like most online communities, there are costs involved to maintain a site like this - so we encourage our members to donate. All donations go to the costs operating and maintaining this site. We prefer that guests take part in our community and we offer a lot in return to those willing to join our corner of the Porsche world. This site is 99 percent member supported (less than 1 percent comes from advertising) - so please consider an annual donation to keep this site running.
Here are some of the features available - once you register at RennTech.org
- View Classified Ads
- DIY Tutorials
- Porsche TSB Listings (limited)
- VIN Decoder
- Special Offers
-
OBD II P-Codes - Paint Codes
- Registry
- Videos System
- View Reviews
- and get rid of this welcome message
It takes just a few minutes to register, and it's FREE
Contributing Members also get these additional benefits:
(you become a Contributing Member by donating money to the operation of this site)
- No ads - advertisements are removed
- Access the Contributors Only Forum
- Contributing Members Only Downloads
- Send attachments with PMs
- All image/file storage limits are substantially increased for all Contributing Members
- Option Codes Lookup
- VIN Option Lookups (limited)


Izzy
-
Posts
740 -
Joined
-
Last visited
-
Days Won
5
Content Type
Profiles
Events
Forums
External Paint Colors
Downloads
Tutorials
Links Directory
Collections
Store
Posts posted by Izzy
-
-
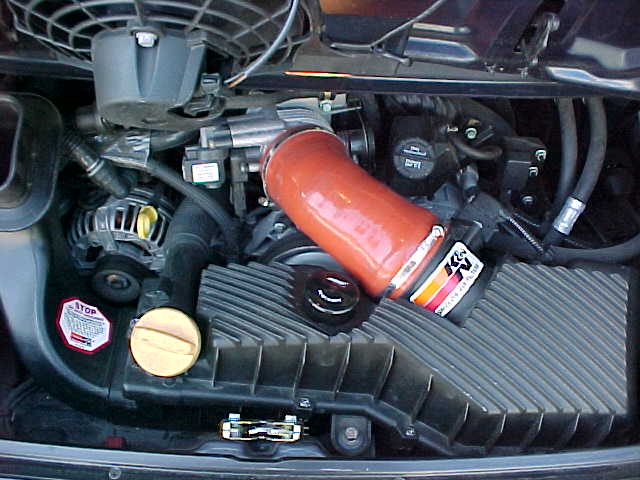
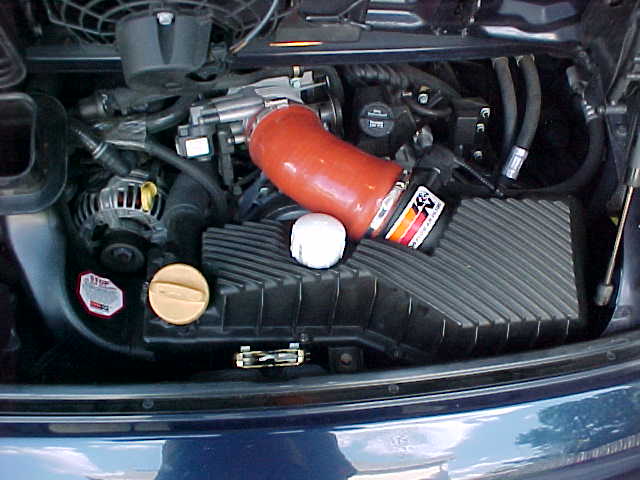
This modification is for the airbox, an inexpensive alternative to the $230 ones out there. You will need the following to start:
1. Schnell air intake kit (Ebay $99 from VertexAuto)

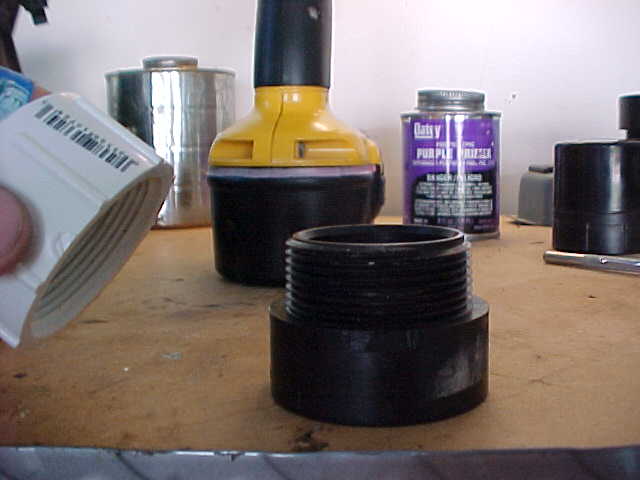
2. PVC pipe threaded adapter (Lowes $0.89)
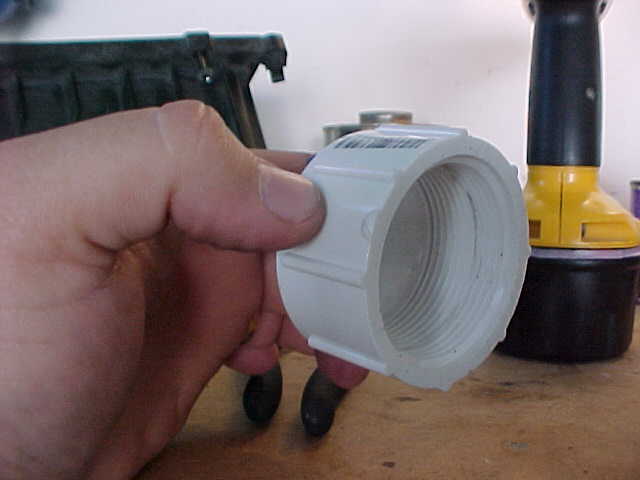
3. PVC threaded cap (Lowes $1.29)
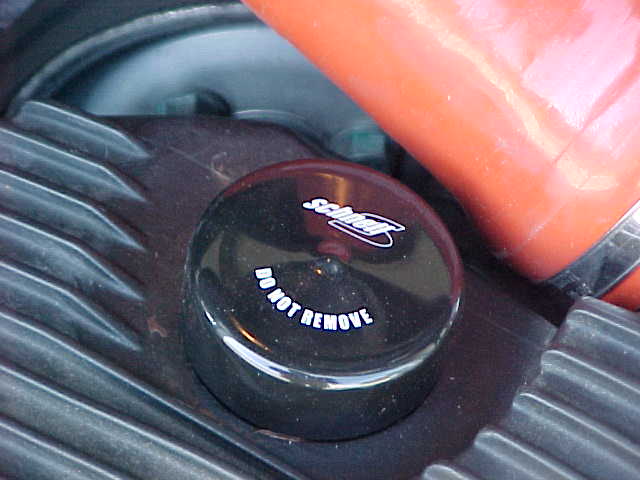
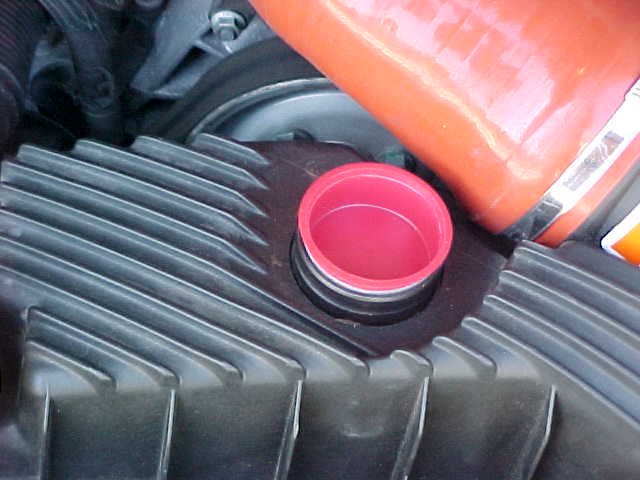
The Schnell kit uses the smooth silicone orange hose, and leaves the air box muffler in. To plug the muffler, there is an orange cap and a black plug that covers the cap.
The modification will not use those, but remove the muffler altogether and use the threaded cap and adapter to seal the hole in the muffler.
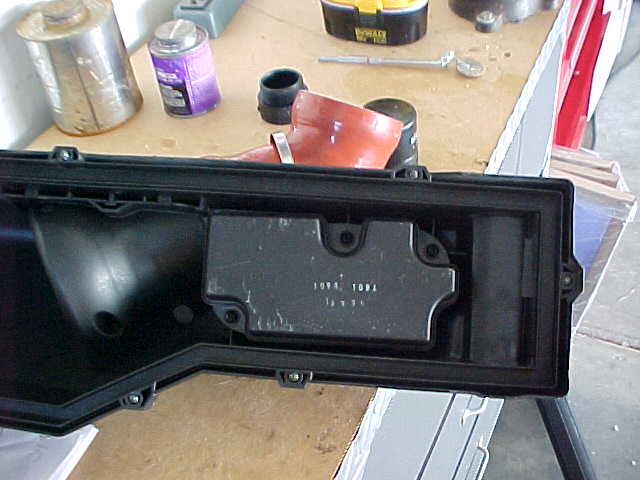
Remove the air box and place on a flat surface, remove the hose and the top of the box. Turn the top upside down and remove the muffler by removing the three screws
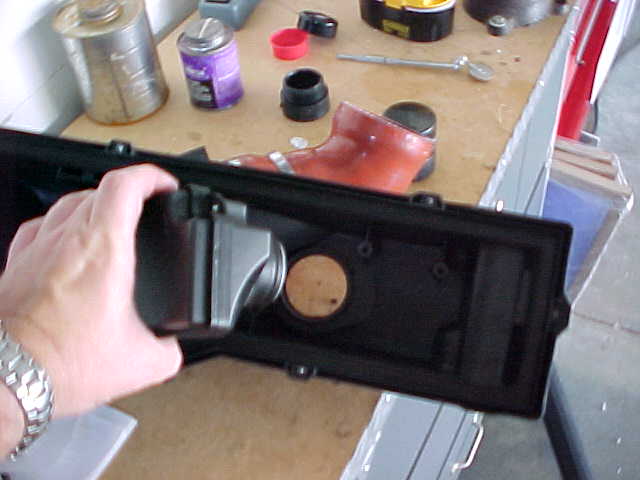
Simply pull the muffler box out or push on the protruding pipe on top of the box
I also removed the MAF plastic screen at this stage. I leave up to you to do the same. If you want to do it, simply use needle nose pliers and pull it out.
**I replaced the stock air filter with a K&N for improved flow and cleanliness.**
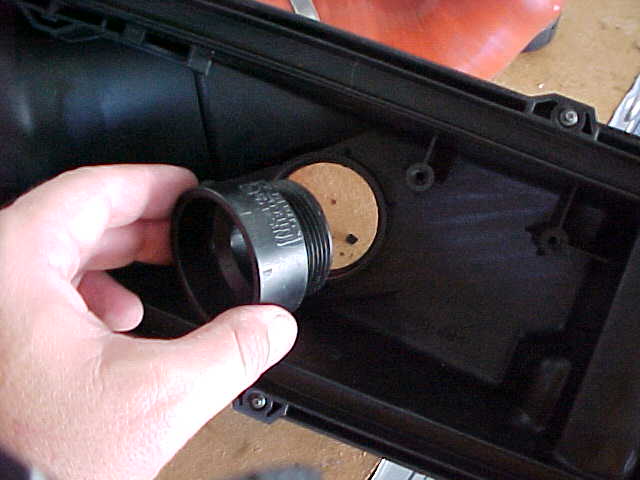
Next, insert the threaded pipe fitting into the underside of the top of the box. It should be almost a perfect fit. If it is too "snug", look for non-circle parts on the fitting part that a simple utility knife can remove.
Now thread the cap onto the protruding pipe fitting threads on top of the housing. You may need pliers to make it a tight fit. Must go all the way in to seal the box.
Finally re-assemble the unit and place back in the car. Don't forget to attach the MAF connector.
The sound when you test the car will be a little bit louder, fuller if you will. The throttle response a bit quicker too. You may paint the cap black, or find it in black PVC in a plumbing store.
Have fun and save some bucks.
-
Sunset was $98 (plus their fee). Dealer was one hour, or $105 plus tax in Charlotte, NC
-
Final word on this, did get the new FOB's from our friends in Sunset, and had them programmed by the dealer. Works like new.
-
Thank you guys, nothing worked, so off to buy a new FOB from Sunset. Tried new batteries, upside batteries, chicken legs, voodoo dolls, accupuncture, etc. What is amazing is how the main key and spare key remotes both stopped working within a week of each other. The spare I only use on the weekends.
Reminds me of some of the "out of toner" conditions in printers I used to design for certain company, we had this "time to die" chip that will force customers to get more of that black gold powder.
-
Has anyone else had similar problems with the remote key FOB. I have a 99 Cab, and the both key remotes stopped working within days of each other. The batteries are fine, the light blinks on the remotes, but wont lock or unlock the car anymore. Thank you
Izzy
-
Not sure about warranty, since I don't have one.
I ordered today, will post some pics and information once I get it. It was only $99 on Ebay
-
Has anyone seen this Schnell cold air intake kit? Does it look like the Fabspeed? I have never seen the Fabspeed but was going to do the "orange cap" mod next weekend.
-
Look in the 996 DIY section. I did some research and the Pennzoil ATF is crossreference to replace the Esso ATF LT 71141. I called them twice and talked to two different tech reps who repeated the same information. Loren has the number, sorry I deleted it. The Pennzoil website has 1-800-990-9811. The quart is $2.99 at PepBoys, and I used about 6.5 (including the tiny spill)
I posted instructions on the fluid and filter change, just did it this past weekend. It is about a 2 hour job, and at 47K miles it made a significant difference in the smoothness of the shifting.
-
Tiptronic Transmission Service
The Tiptronic transmission has a special tool for fluid. First you have to purchase the tool (expensive) or make one (inexpensive). The tool is the V.A.G.1924, runs about $300. You need the following tools and parts to start: 1. ATF fill tool 2. 7 (US) Quarts of Pennzoil Multi-Vehicle ATF 3. Torque wrench for 60 ft lbs 4. Torque wrench for 7.5 ft lbs (90 in lbs) 5. 17 mm allen bit 6. 8 mm allen bit 7. Torx 27 bit 8. Temperature meter with probe.
-
Author
-
Category
-
Submitted08/27/2005 06:17 PM
-
-
The final fix was just the hydraulic fluid in the motor reservoir for the convertible top. Should have done it myself.... But now it works perfectly.
-
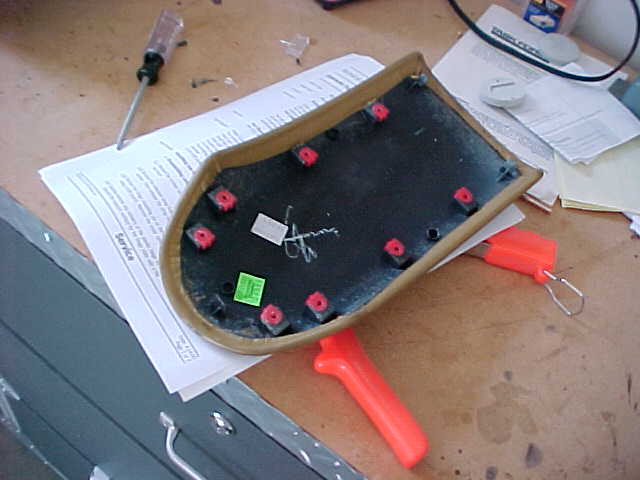
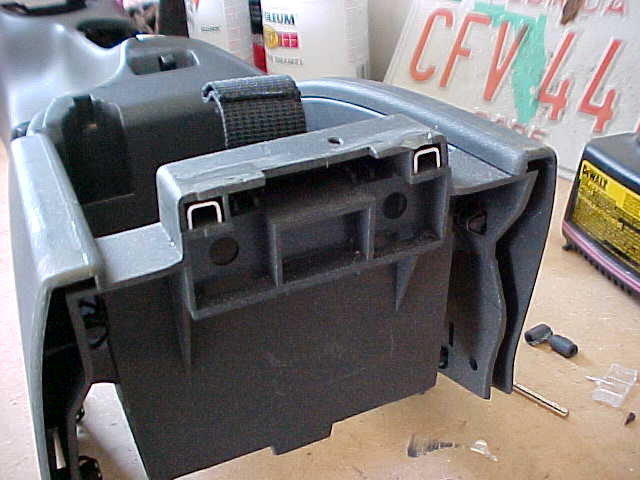
Just finished this TSB and got some pictures to go with the words. This is not stand alone, but use them with the TSB.
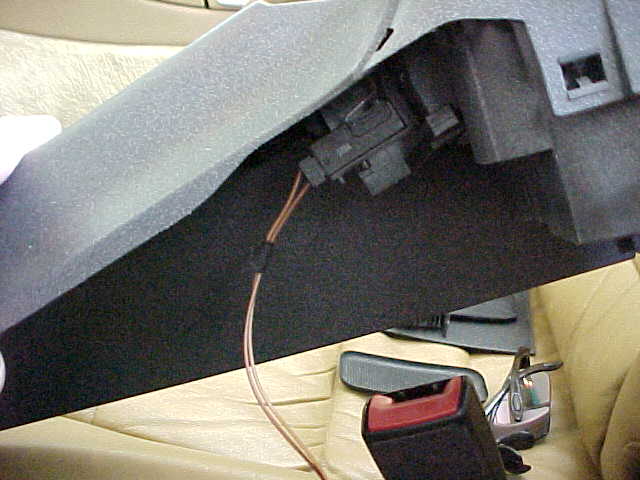
1. Don't forget to disconnect the tray lock connector before pulling the console out. Remeber to lay back the passenger seat for easier removal or console.
2. Use the T10 torx screw driver or bit to remove the 8 screws holding the leather top to the plastic cover.
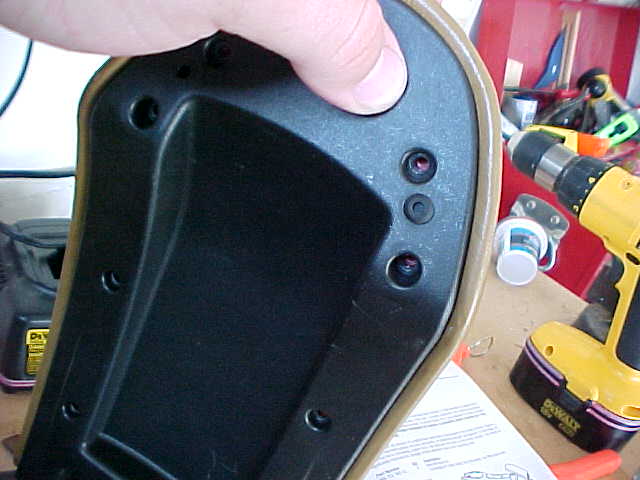
3. Here it is removed, and now the cover looks like without it.
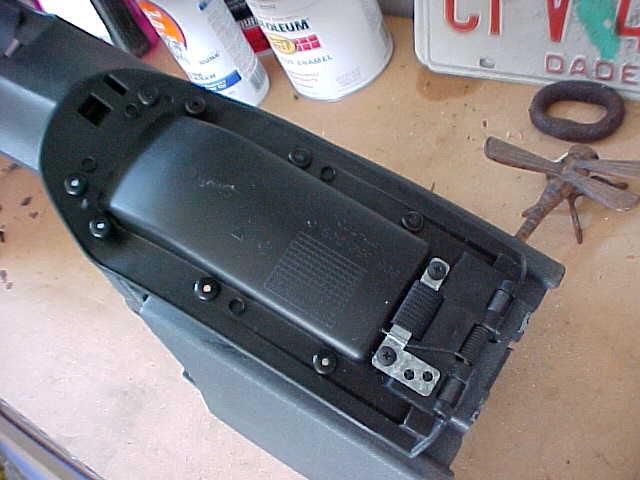
4. One picture above, keep hand for re-assembly. The two phillips screws need to be removed next. Remove the cover from console, and use a pin tool (Sears sells a set for $10) to knock out pin holding the hinge together.
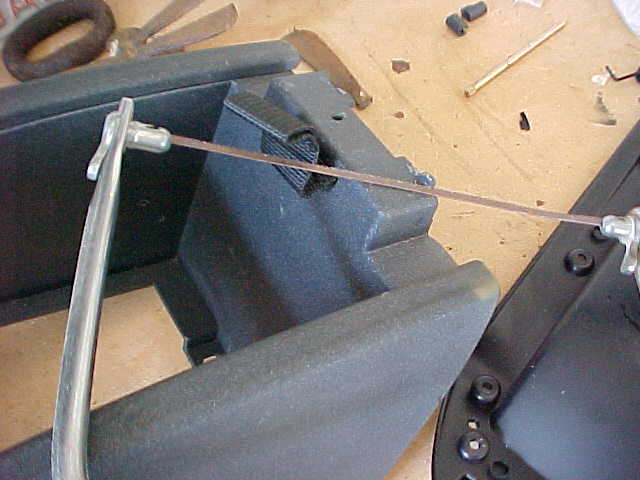
5. Use a small handsaw to remove the plastic that remains from the old hinge. Sand as needed for smooth, but don't go crazy, the new hinge will cover it.
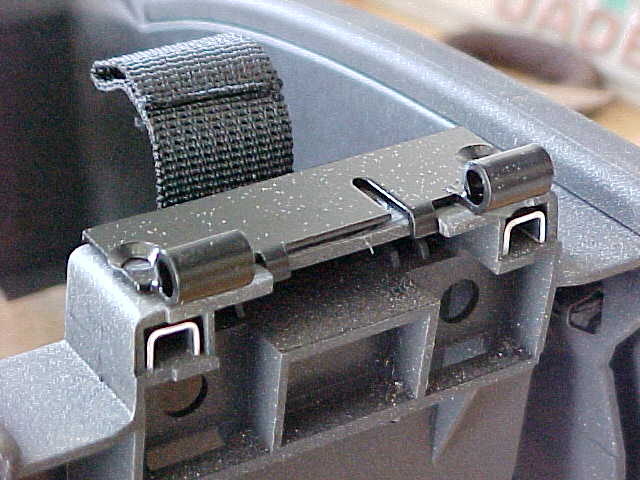
6. Insert the U brackets from kit in this location
7. Next set the metal hinge in to position.
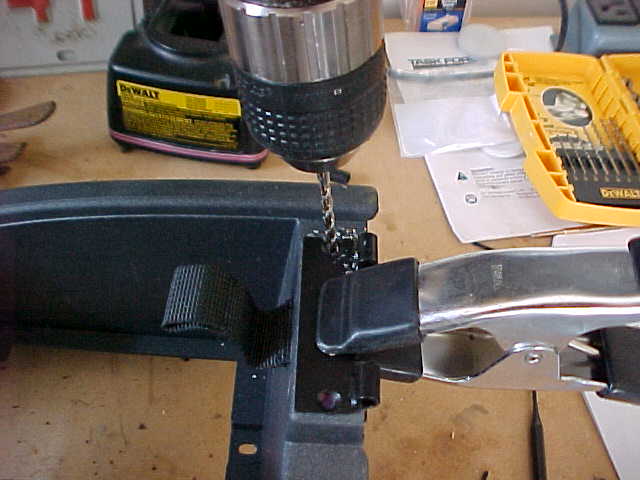
8. Next, I used a small spring clamp to hold hinge in place while drilling hole with 5/32" bit (same as 4 mm). The bit should go through the metal as well as the plastic.
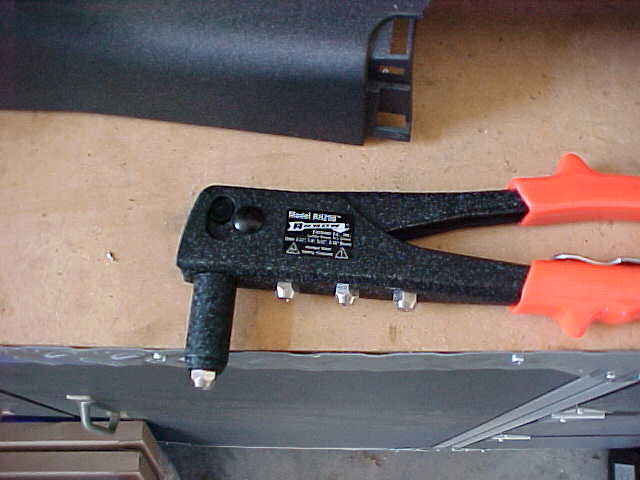
9. Follow the TSB to insert the rivet. I purchased from Lowes a Rivet tool for $16.95 shown below. insert the long part of the rivet into the tool and close the handle. That is all you got to do.
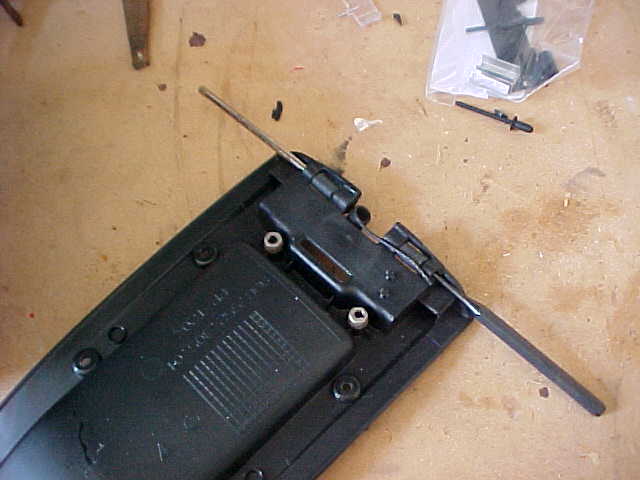
10. Re-assembly is the reverse. Push the pin back in, insert the spring, insert the nylon strap, and screw in place. Partial assembly below for reference.
Good luck, hope it helps
Izzu
-
Just finished this TSB and got some pictures to go with the words. This is not stand alone, but use them with the TSB.
1. Don't forget to disconnect the tray lock connector before pulling the console out. Remeber to lay back the passenger seat for easier removal or console.
2. Use the T10 torx screw driver or bit to remove the 8 screws holding the leather top to the plastic cover.
3. Here it is removed, and now the cover looks like without it.
4. One picture above, keep hand for re-assembly. The two phillips screws need to be removed next. Remove the cover from console, and use a pin tool (Sears sells a set for $10) to knock out pin holding the hinge together.
5. Use a small handsaw to remove the plastic that remains from the old hinge. Sand as needed for smooth, but don't go crazy, the new hinge will cover it.
6. Insert the U brackets from kit in this location
7. Next set the metal hinge in to position.
8. Next, I used a small spring clamp to hold hinge in place while drilling hole with 5/32" bit (same as 4 mm). The bit should go through the metal as well as the plastic.
9. Follow the TSB to insert the rivet. I purchased from Lowes a Rivet tool for $16.95 shown below. insert the long part of the rivet into the tool and close the handle. That is all you got to do.
10. Re-assembly is reverse of removal. The pic below shows the parts in partial assembly
-
Do you have the torque it should go to? I believe I have a similar situation. Where in the picture if the cover? Thank you
-
And it rained, and it did not worked. The top continues to operate intermittently. If I "fiddle" with the microswitches shown above, I can eventually get it to work every other time.
So I decided to blame it on demonic possesion, and take it to the dealer for a full exorcism. As soon as I find out what they tell me, I will try to talk to the mechanic for details and post it here for anyone else who needs it. Sometimes, the dealer is the only option....... I will be selling some securities this week to cover the costs.
-
Drilled the holes to collect some Asbestos, running short on my supply of carcinogens.
Seriously, didn't even think about it, just read some other threads that people drilled them, and followed like a blind sheep. In retrospect, wasted time as I am only using them for the track.
But I showed my wife how clever I was by drilling the holes, so don't you guys go and spoil that for me now....
Cheers
-
I had similar problems. In the end, replacing the MAF did the trick. But before:
Remove battery power for a few minutes to reset computers back to factory standard (make sure you got the radio code).
Check the engine air filter and replace if needed.
How old are the plugs, how many miles? Replace (see DYI in this site) since they are easy and inexpensive to do.
The last one would be the idle potentiometer, rarely they fail.
Most likely sounds like Mass Air Flow Sensor, easy to replace. Same symptons in most cars just like you described. The lack of code is puzzling, but no system is perfect
Good luck
-
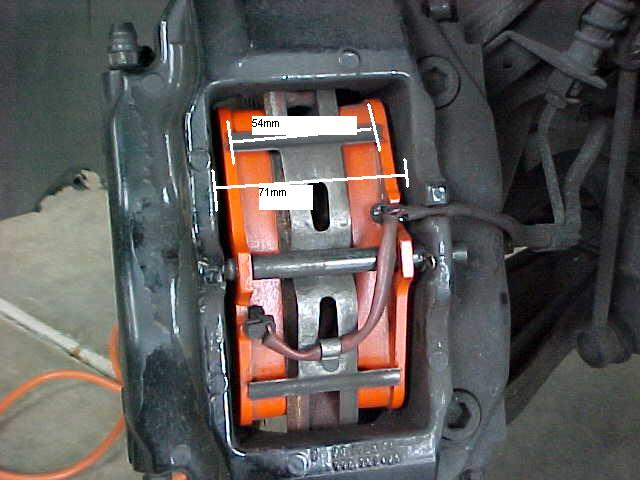
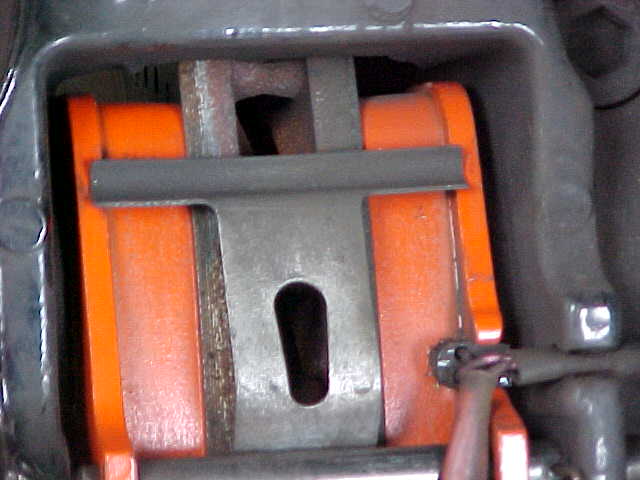
Just changed to Pagid Oranges for track day next weekend. A question I have is regarding the spring that holds the pads in place, and how to position it since the caliper inside dimension is 71mm, and the spring is only 54mm. If the spring moves just a bit, it will rest on the pad and not on the steel part of the pad.
In this close up, you can see what I am referring too. Any problems with using stock springs on Pagids?
Not sure if anyone had had this issue. Drilling of the holes into the pads for the wear sensors was pretty easy. Thank you
Izzy
-
Got it, I think. The top was up, but not fully locked. So here is the solution. You may want to see TSB 6141, which I was in the process of doing. Figure 3 shows to insert an allen key and turn the screw 3 revolutions anticlockwise.
The way I fixed my top was, with the top up, squeeze into the same spot as TSB 6141 calls for, remove the plastic plugs, use a mirror and flaslight to find the screwhead with an allen wrench. Then turn the screw CLOCKWISE.
Repeat for each side one revolution at a time, and tried closing the top. At 3 revolutions, situation resolved.
With top open, added another 1/2 revolution clockwise and tested top. Works perfectly now.
Of course, it will wait until another rainy day to stop working on the down position, but for now, it is back to normal. I am thinking this quick check should be added to any other top operation malfunction, since there are no costs and it can save you all some time. Thank you
Izzy
-
Also removed the relay, tapped them on the floor, top worked once.
Sometimes on the "down cycle" the windows start to come down, then nothing.
Can it be the latch switch? Easy checking on it?
-
I know there has been some discussion on the convertible top malfunction. Before I go to the dealer, some question for any of you who can shed a light on other threads.
The car is a 99 996. The top works intermittently from either the key or the rocker switch. Can operate up or down, can't find a pattern to it.
Changed the hand brake switch - worked once then stuck down. I know if I wait until tomorrow, it will work. Sometimes after a few hours of rest, like over night, it will work. This started yesterday, before that no issues.
There are no "groaning" issues, hydraulic reservoir issues. When it works, it works fine. When not, the "click-clack" sound described many times followed by the blinking light.
Any thoughts or checks before going to the dealer for the big bucks? Thank you all.
Izzy
-
To contact Becker USA parts department, 201-327-3434 extention 1209 to speak with Rob. Phone orders works for them. Just ordered mine
-
Not sure about Texas, but in other states (FL and NY) where I had tickets, all it took was to appear on the court date, stand up with the mass of people who pleaded not guilty or want to contest (the judge asked), get in line when they tell you, and they tell you when to come back at a specified date.
Typically come back 2 weeks later where the District Attorney has moved your speeding moving violation to a non-moving violation and no points. If you accept, and you should, then pay the amount and court fees and save the potential point and insurance issues.
They do this by the masses, so you are pretty much just a number they want to get rid of so they can get to the criminal dockets.
-
Called Sunset and order all parts I need. They are great! You guys too. THANKS!!
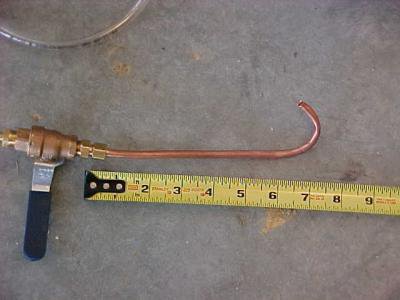
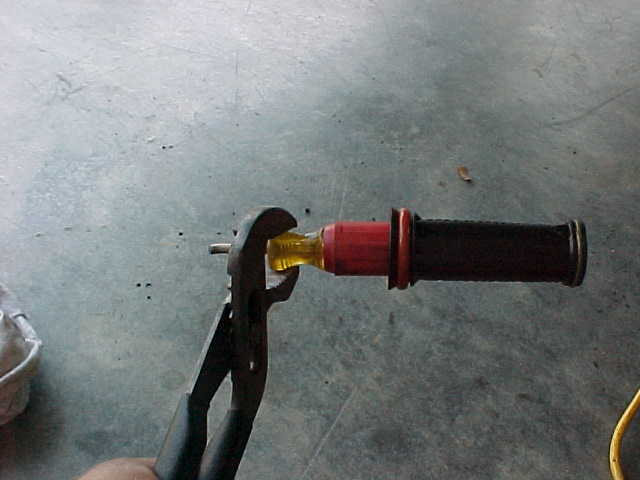
Gang, got the plugs and tubes changed today. Some ideas on removing the tubes with this expensive and complicated tool:
It is an old screwdriver with a rubber handle. The tubes are tapered, so the handle fits most of the way in, then pull out with a pair of pliers and presto, tube is out. Took some practice to get the technique, but once I did the first ones, the rest where easy. Pull it out in an slight angle to give it more friction.
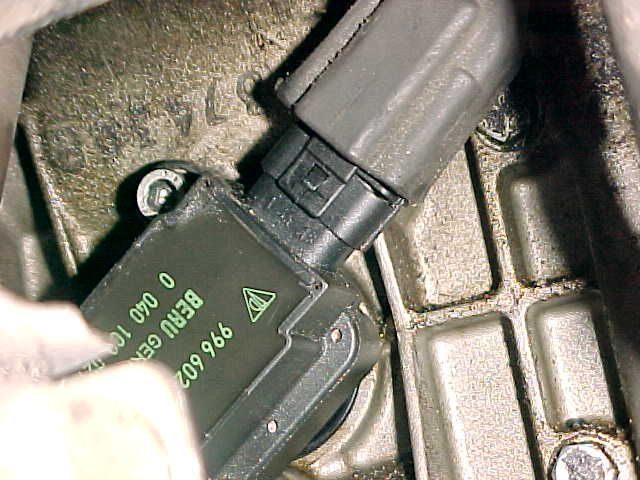
Another trick in changing the spark plugs, pull out the rubber boot from the coil connector, makes it a lot easier to remove and reattach later.
Last trick was related to removing the coil bolts on the rearmost side. Big pain to get to them. Allen 5mm standard wrench can get it loose, then you have a hard time getting your fingers to undo the bolt. Here is what worked for me. A T-30 torx bit. It fits inside the bolt (almost same size as the 5 mm Allen) and then your fingers have a heftier mass to unscrew the bolt. It took me an hour to figure this out while I stare at the little *$**)$(@** bolt.
Now the point to ponder, as I was finishing the work, hands and elbows black, it is 98 degrees outside, dirty. My wife walks by and says "in this fun?". I said "Hell yeah!"
Have fun and be safe. I built and tested the tool for the Tiptronic fluid change. Will do a detailed step by step after I do the work and change the filter/fluid in the tranny.
Izzy
-
I must admit, I had the same issue with my '99, the rear did not close all the way. It took me a while to get to open it and close it. No problem since. The open lid light on the dashboard will not light up, so it was not easy to tell. Simple solution.


Turn Signal
in 996 Series (Carrera, Carrera 4, Carrera 4S, Targa)
Posted
Did you notice right before they stopped working if the turn signals where flashing slower or faster than usual? Often times you can tell the relay is about to go by some erratic behavior like that.