Welcome to RennTech.org Community, Guest
There are many great features available to you once you register at RennTech.org
You are free to view posts here, but you must log in to reply to existing posts, or to start your own new topic. Like most online communities, there are costs involved to maintain a site like this - so we encourage our members to donate. All donations go to the costs operating and maintaining this site. We prefer that guests take part in our community and we offer a lot in return to those willing to join our corner of the Porsche world. This site is 99 percent member supported (less than 1 percent comes from advertising) - so please consider an annual donation to keep this site running.
Here are some of the features available - once you register at RennTech.org
- View Classified Ads
- DIY Tutorials
- Porsche TSB Listings (limited)
- VIN Decoder
- Special Offers
-
OBD II P-Codes - Paint Codes
- Registry
- Videos System
- View Reviews
- and get rid of this welcome message
It takes just a few minutes to register, and it's FREE
Contributing Members also get these additional benefits:
(you become a Contributing Member by donating money to the operation of this site)
- No ads - advertisements are removed
- Access the Contributors Only Forum
- Contributing Members Only Downloads
- Send attachments with PMs
- All image/file storage limits are substantially increased for all Contributing Members
- Option Codes Lookup
- VIN Option Lookups (limited)


Izzy
-
Posts
740 -
Joined
-
Last visited
-
Days Won
5
Content Type
Profiles
Events
Forums
External Paint Colors
Downloads
Tutorials
Links Directory
Collections
Store
Posts posted by Izzy
-
-
Thank you gents!
-
Planning on replacing spark plugs on the 99 C2, and do the tubes and o-rings at the same time. Looking at prior posts, did not see any mention of lubricating the tubes on the outside before inserting.
The workshop manual I have mentions:
"Fit new sealing rings and coat with tyre mounting paste"
Any thoughts or opinions if you have done this or watch the dealer do it? Thank you
Izzy
-
Tim,
what year is it? I have a 99 and went through the same this past winter. Got a new part at the dealer and replaced it. They told me they keep lots of them in stock, very common problem with the spring that is coiled in there. It is a very easy swap.
Once I took off the old one and fiddle with it, was able to bend the spring back to a very strong snap. So probably won't be swaping it again but reusing the old one next time. Good luck
Izzy
-

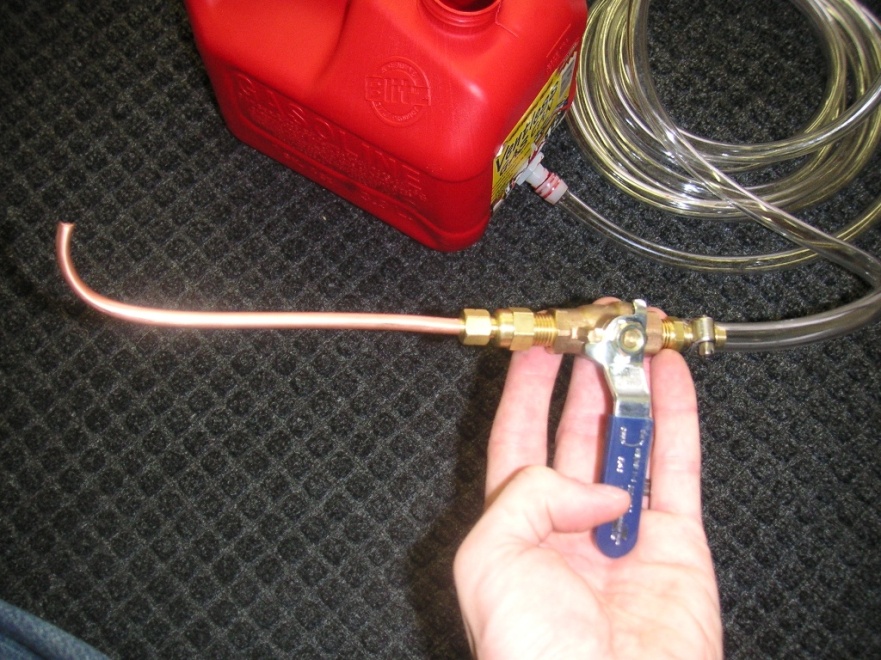
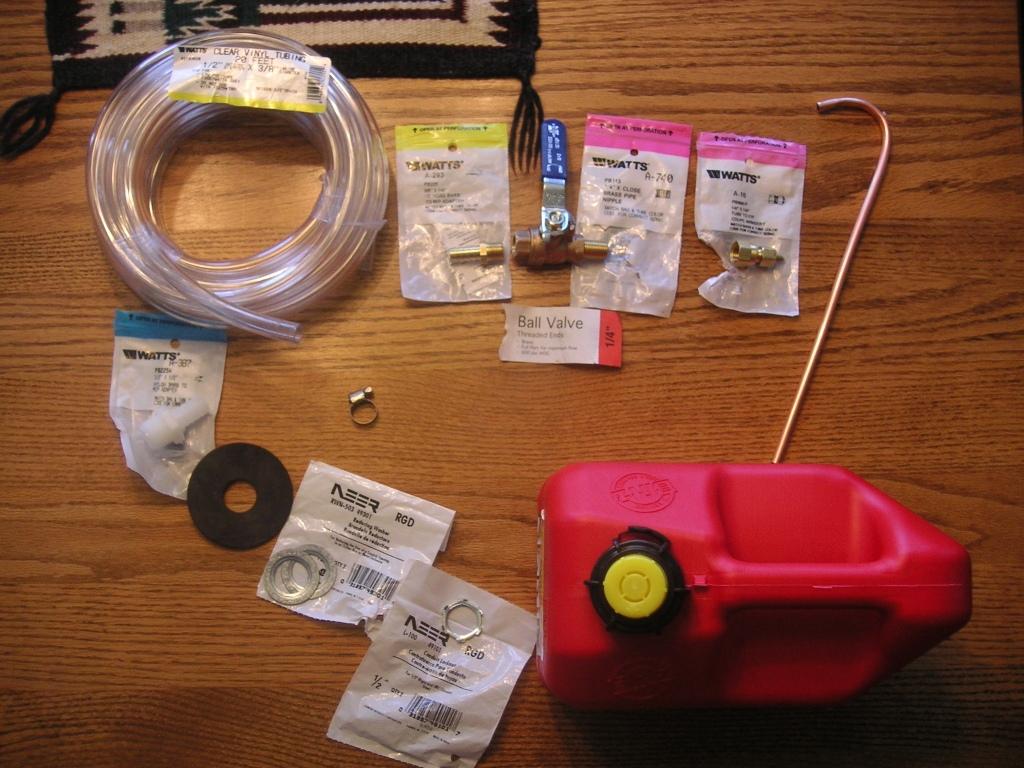
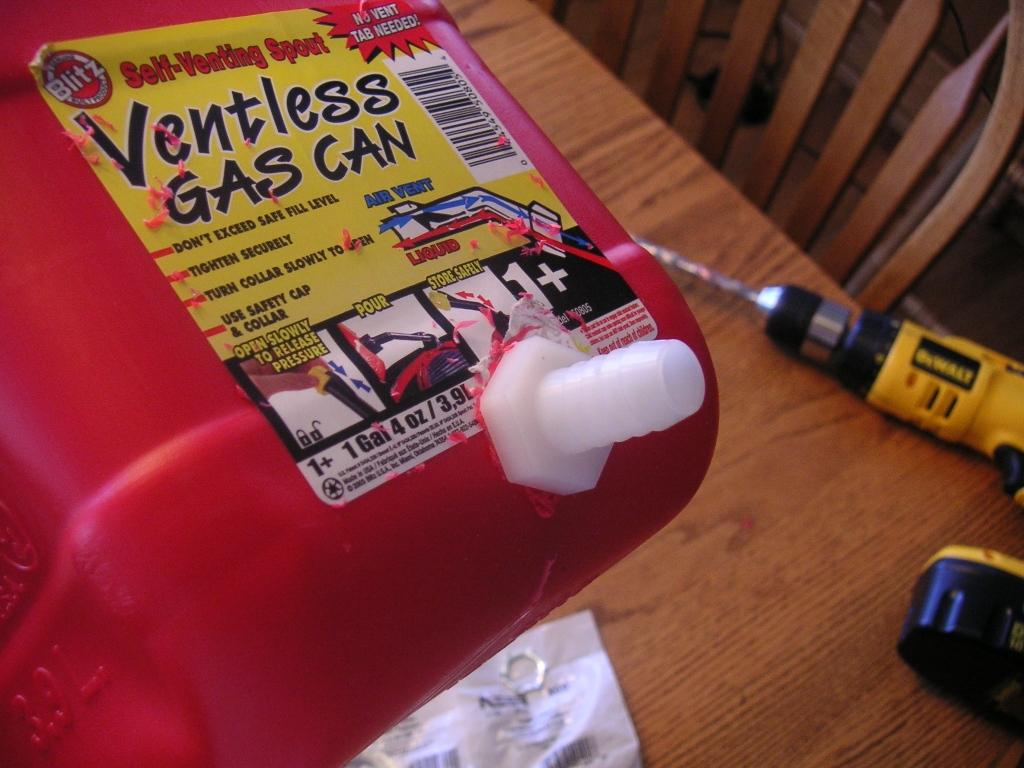
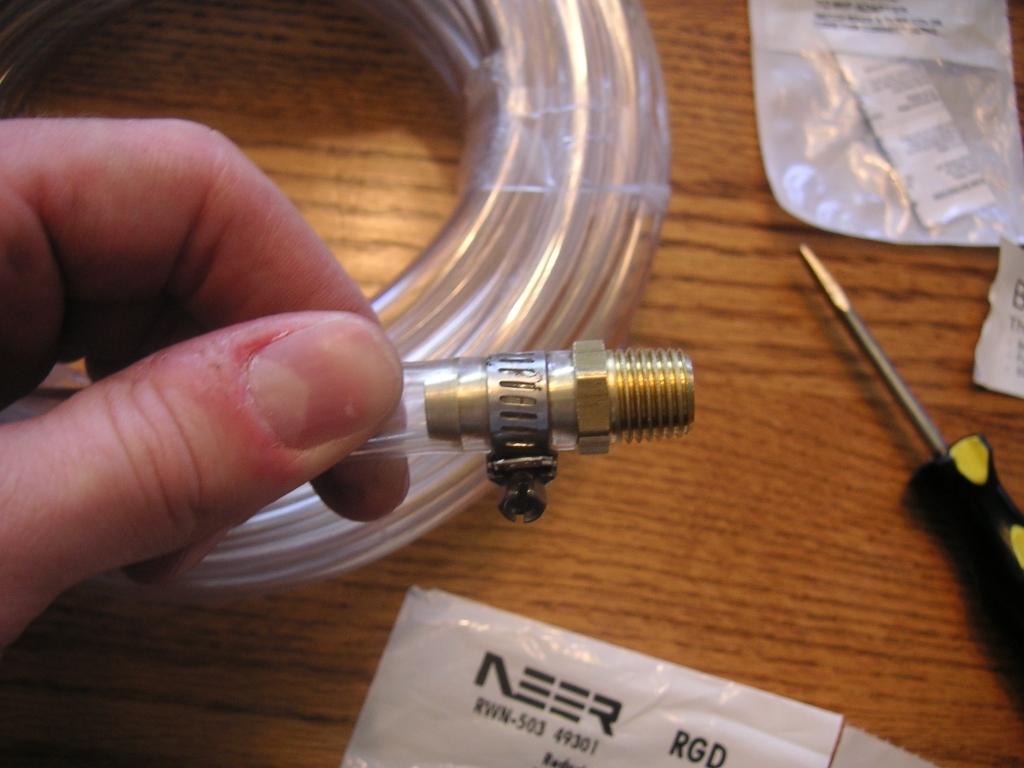
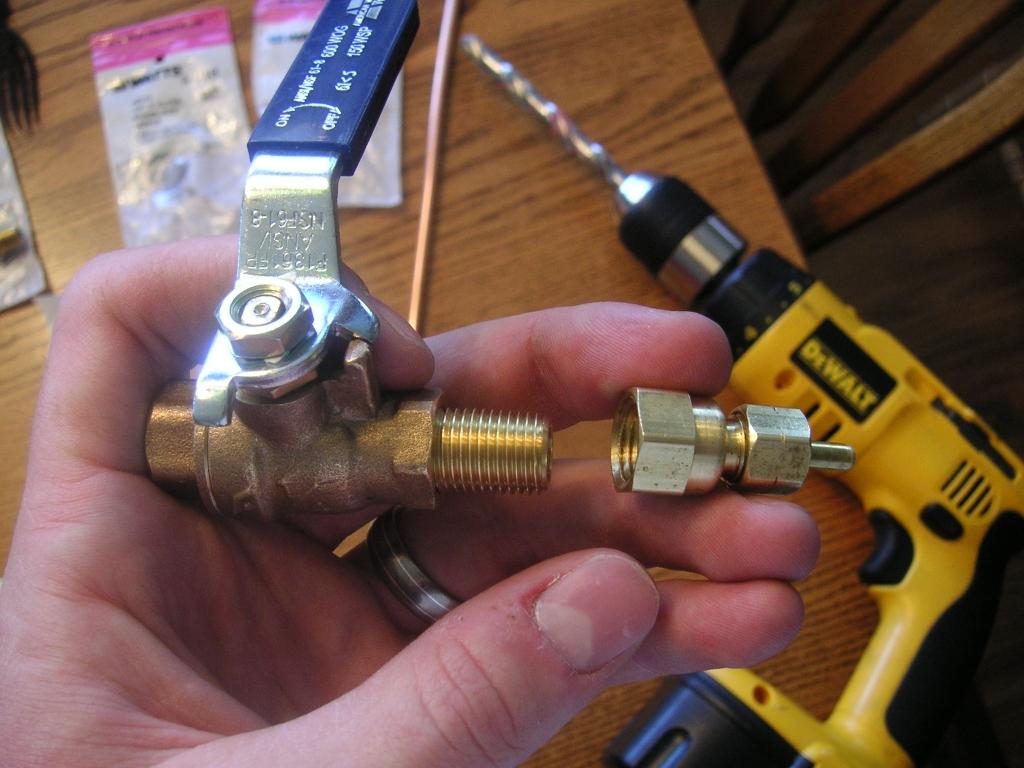
For changing the ATF, I came across this homemade version of the $289 tool or to avoid the $300 charge by the dealer. The link address is
http://tech.bentleypublishers.com/thread.j...=6641&tstart=75
Here are other pictures. I plan on making one in a couple of weeks, will include a part list and BOM. The ATF should be between 90-104 degrees F when installed. A hot summer day with the container in the sun should do it (an inexpensive pool thermometer will do to verify).
Other pics if anyone else is interested:
Enjoy the DIY
Izzy
-
Thank you Loren. I cancelled the first order and re-did it, it is downloading now. Will burn a couple of CD's to keep it safe. I have a MY99, good to now your comparison.
Izzy
-
I clicked on the download this morning, took me to a page for payment, picked paypal and payed. Then nothing. I contacted the customer service as to how to download, nothing. Good thing I used paypal, and can get my $$ back worst case. Did I miss something on the download?
Izzy
-
Thanks Ron, that clears the PCM question. Is the part number above PCM2?
-
I have a 1999 996, and wanted to know if the PCM part number 996.642.105.02 EFR is the correct one to install for the model year. I have read that the PCM2 will not work with the 1999. Does anyone know? Thank you
Izzy
-
Bavarian,
I haven't had much experience (AKA none what so ever) with the MOST bus radios, but I believe they do not accept the analog inputs that would normally be used on the older versions. (Anyone, if I'm wrong, please correct me) So you're probably looking at having to use the FM modulator until someone releases an analog to digital converter for the MOST bus.
The best FM modulator to use I think would be an inline unit. It would feed inbetween your antenna lead and the antenna in connection on the radio. An inline FM modulator will block out the actual antenna signal while its in use. Because of this, you'll have less 'bleed over' from any radio stations that might be broadcasting on the same FM channel you're using for the modulator.
With a setup using an FM modulator, I might recommend using both types of filters. You'd be using the inline audio filter from the IPod to the FM modulator. Then you'd also be using an inline power filter for the power connections on the FM modulator.
The whole point of both types of filters it to remove or damper certain frequencies of EMI (ElectroMagnetic Interference). Its possible you might lose some audio clarity from the filters, (mainly highs and sub 60Hz lows) but they should help to reduce the overall line noise.
If anyone else wants to add to this, please do as its been a while since I've even attempted to install any form of car audio. It use to be a big passion of mine back in the mid to late '90s so I might be a bit rusty on a few things here and there.
-
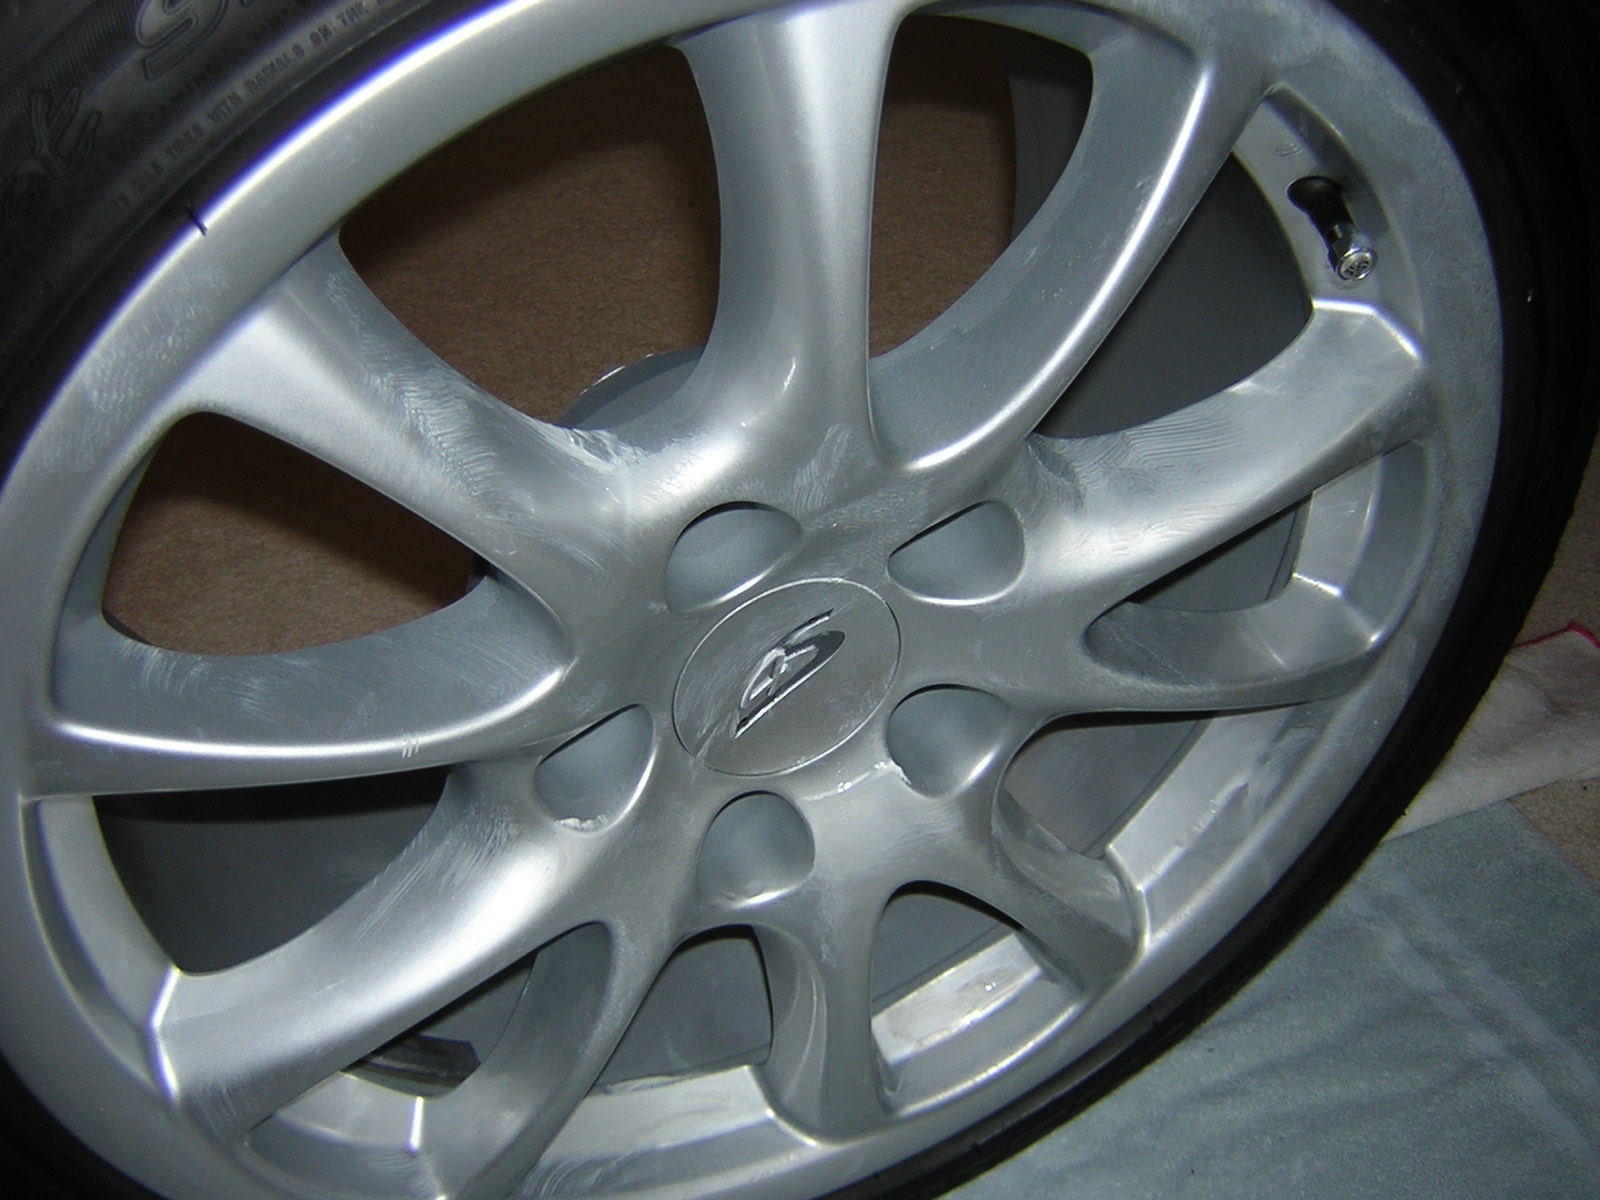
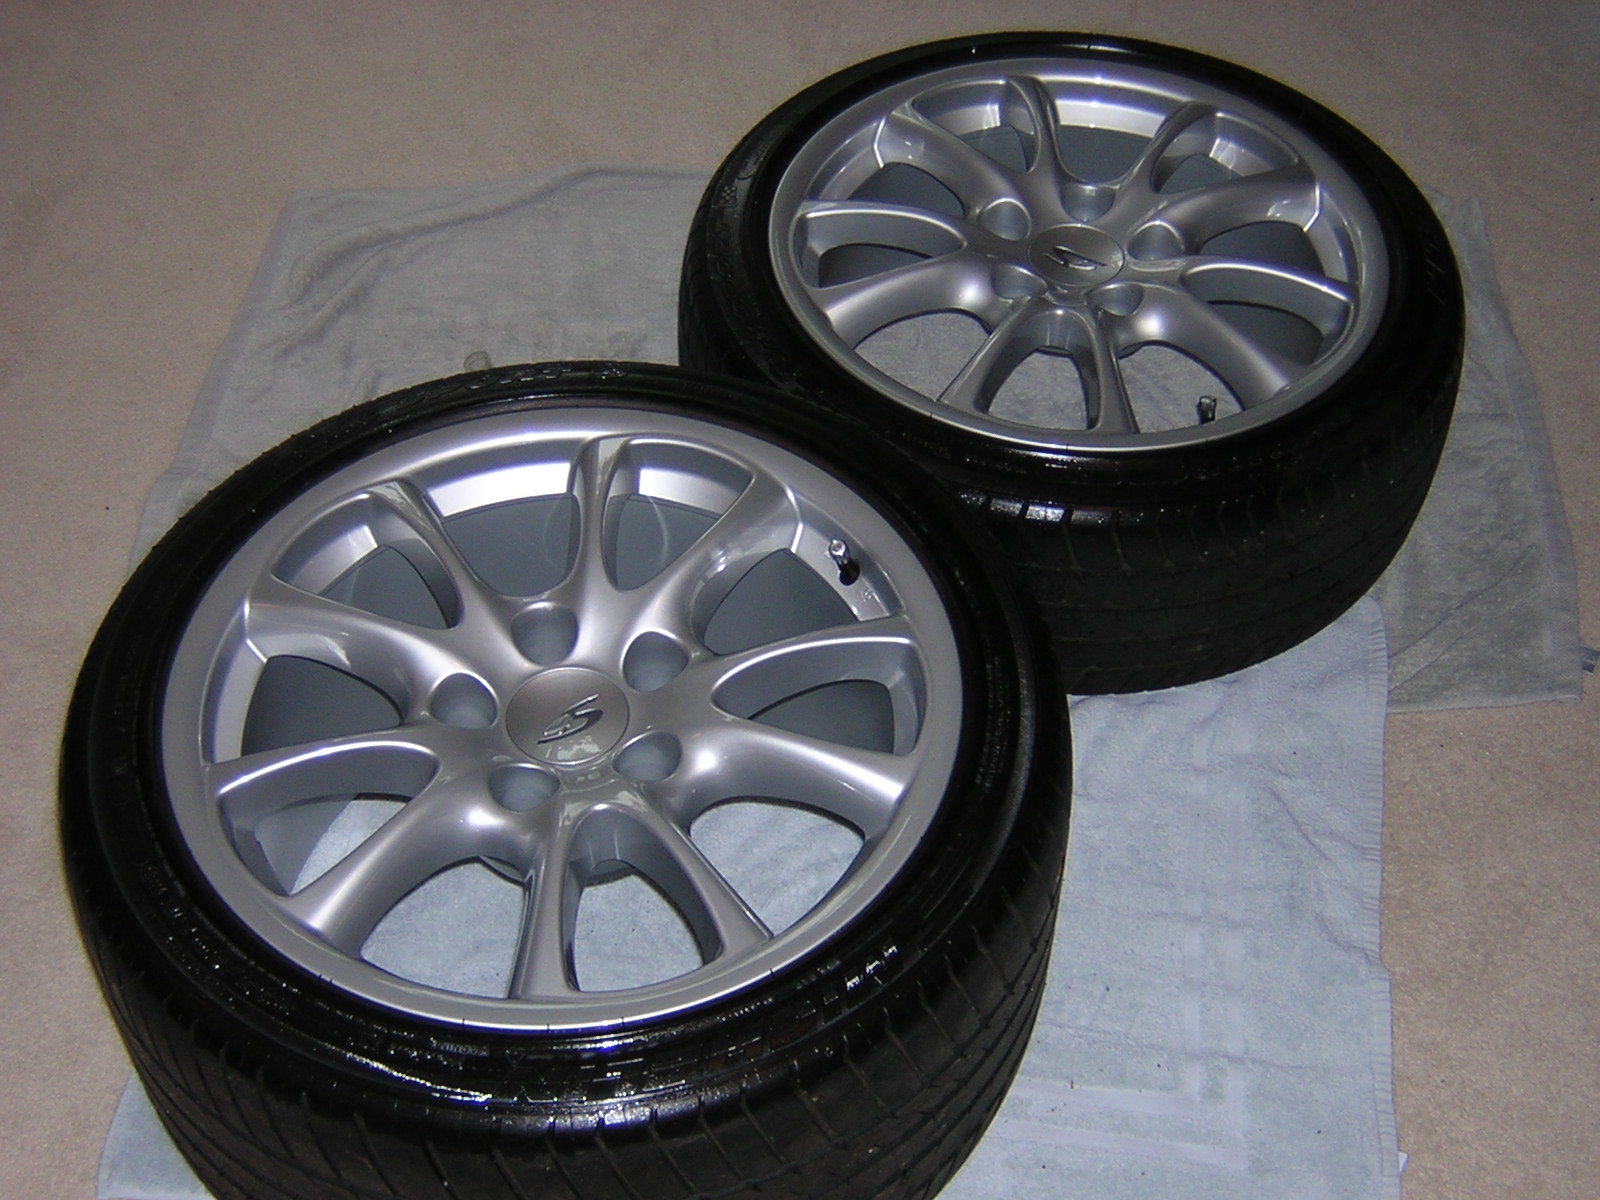
Rejex applied to the inside and outside of wheels...
Finished result, along with Griot's tire dressing.
Where do you buy either one (or both)? I am doing a brake fluid flush and will have the wheels off next week anyway.
By the way, love the way your car levitates in the pictures with no seen supports, would love to do that mod too, or is it just "The Force"?
Cheers
Izzy
-
Looks pretty good to me. Did you need any special tools to do this? Take any pictures through the procedure? I was thinking of doing the same, not sure of how hard it would be to do. How much lower is the car now? Wondering you got a reference point you measured before and after. Thank you, car looks more track ready too.
Izzy
-
Gang,
Just did my first Track Day with a 1999 996 at Kershaw Carolina Motorsport Park, SC. :drive: For those of you in the Carolinas and GA, a sweet spot you can get to from www.turn1motorsports.com. I was amazed at what this cars can do, and my instructor said I chicken out. I prefer the term "self preservation of skin and metal". But fun nonetheless. You should all try it if you havent.
Went in with fresh stock pads and Blue ATF racing fluid and fresh oil change. Afterwards, the brakes are much softer, so was wondering if there are any tried and true maintenance tidbits to do port Track Day. Should I flush the fluid, change the pads, anything else? The car runs otherwise perfectly. Thank you
Izzy
-
I have found switching between yellow and blue fluid every other bleed helps with a visual check to ensure the "old" fluid is completely gone. It helps foolproof the process.
-
Got a dealer suggestion to replace a part, leak from "left side cam solenoid seal". The part number is 99610522352. Could not find any info one replacing the seal. Has anyone done it or have instructions? Before I spend the cash, the part is $18, labor $130. Thank you!
Izzy
-
Got a basic question. What is the proper way to measure the oil level on a 1999 996? The manual has two methods, the instrument panel and the dip stick. For the instrument panel, once you turn the key and wait for the count down, the display shows the level.
The dipstick mentions the car at operating temp, then turn off and wait 10 minutes or so.
When my car is cold (like in the morning), the instrument panel shows only one bar on the bottom, like if it was low. After running at temp, and letting it drain for 30 minutes, both the dipstick and the instrument show perfect fill.
I am assuming to ignore the cold temp instrument, and go with the warm engine measure. The reason this just came up is that I only noticed the cold engine low oil level (instrument) after a dealer oil change (before I found this Forum)
Of course, the car on a flat surface for all measurements.
Thank you for your collective wisdom!
-
I just did it and used "GOOF OFF", which is available at Home Depot to remove the adhesive, did a great job too. Thank you, visors are perfect and clean.
:cheers:
-
Try Warranties4wheels. The are very professional and pay with credit card. Also, you can sear the www.bbbonline.org for con-artists. A lot of the warranty companies change names and State and con customers. A lot of them are under investigation by State Attorneys. The BBB keeps good track of them. I got a 1999 that I bought with 35K miles, 4 year 100K miles for about $2100. Good luck with it.
JC Dennis
Warranties 4 Wheels
Auto Warranty Specialists
1-877-844-7283
www.warranties4wheels.com
:drive:
-
Thank you Loren. I got more pics if needed for additional detail. My camera uses about 250Kb per frame on low resolution.
Glad to be of help, this forum has helped me whole lot, and saved me a lot of cash!
Izzy
-
In North America we use 315 MHz. If you look on the FCC sticker on your remote it has this number.
The frequency translates to a length of the anthena wire. For the US it is 130 mm long, about 5 inches. I will show that on the pics with a caliper I used to measure it off.
Look at the new post titled Insuficient Range..... It has the pics and steps to get this done in less than 1/2 hour. Easy job
-
Insuficient or Remote Control TSB 9662 Made Easy
Here are the pictures and instructions. This TSB is easy to do, and the range in my key remote went from 4 ft to 30 ft. 1999 996 Cabrio. Here are the tools you will need. The following steps: 1. Remove the sun visor. It simply pulls out 2. Use the small flat screw driver to pry of plastic cover on visor base. When removed, you will see the Hex bolt heads 3. Use the 4 mm Hex wrench key to remove both bolts. Hold on to the part, it has washers on the other side and can get fall off
-
Author
-
Category
-
Submitted04/29/2005 08:18 PM
-
-
In North America we use 315 MHz. If you look on the FCC sticker on your remote it has this number.
The frequency translates to a length of the anthena wire. For the US it is 130 mm long, about 5 inches. I will show that on the pics with a caliper I used to measure it off.
-
I think it is the left side A pillar as the antenna runs from the control unit under the drivers seat up the A pillar.
I do not know anyone who has done this TSB, which is a suprise because so many owners complain about the range of the remote. Take lots of pictures.
Remove the left visor then the trim just pulls away. Pic is a Boxster.
Thanks Toolpants. Will do the pics and will let you know how much (if any) the range increases. Right now it has a max of about 4 feet from the car. Pretty pathetic for this high end car.
I started to see how difficult it would be to do, and the more I got into it, the easier it got. So it took me 15 minutes to complete, and now I got a range of 30 ft!! I will get pictures and post them this weekend. It was too easy to do. I followed must of the TSB with a different twist at the end. Can't help being an engineer.
:cheers:
-
I think it is the left side A pillar as the antenna runs from the control unit under the drivers seat up the A pillar.
I do not know anyone who has done this TSB, which is a suprise because so many owners complain about the range of the remote. Take lots of pictures.
Remove the left visor then the trim just pulls away. Pic is a Boxster.
Thanks Toolpants. Will do the pics and will let you know how much (if any) the range increases. Right now it has a max of about 4 feet from the car. Pretty pathetic for this high end car.
Spark Plug Tubes Replacement
in 996 Series (Carrera, Carrera 4, Carrera 4S, Targa)
Posted
Tommy,
Got the parts from Sunset Imports (link on this site), lowest cost always. They where relatively cheap, tubes and rings come up to less than $6 each (from memory). As I am changing the plugs, saw some other write ups here where the Porsche mechanics change the tubes when they change the plugs. So I thought it was prudent to follow the leaders this time. I do have one tube that is leaking oil, the dealer quote to change it is $103 in Charlotte (for 1!)
I don't even have $40 in parts for all 6 plugs and tubes! I will take some pictures of the procedure.