Welcome to RennTech.org Community, Guest
There are many great features available to you once you register at RennTech.org
You are free to view posts here, but you must log in to reply to existing posts, or to start your own new topic. Like most online communities, there are costs involved to maintain a site like this - so we encourage our members to donate. All donations go to the costs operating and maintaining this site. We prefer that guests take part in our community and we offer a lot in return to those willing to join our corner of the Porsche world. This site is 99 percent member supported (less than 1 percent comes from advertising) - so please consider an annual donation to keep this site running.
Here are some of the features available - once you register at RennTech.org
- View Classified Ads
- DIY Tutorials
- Porsche TSB Listings (limited)
- VIN Decoder
- Special Offers
-
OBD II P-Codes - Paint Codes
- Registry
- Videos System
- View Reviews
- and get rid of this welcome message
It takes just a few minutes to register, and it's FREE
Contributing Members also get these additional benefits:
(you become a Contributing Member by donating money to the operation of this site)
- No ads - advertisements are removed
- Access the Contributors Only Forum
- Contributing Members Only Downloads
- Send attachments with PMs
- All image/file storage limits are substantially increased for all Contributing Members
- Option Codes Lookup
- VIN Option Lookups (limited)


wiggy
-
Posts
5 -
Joined
-
Last visited
Content Type
Profiles
Events
Forums
External Paint Colors
Downloads
Tutorials
Links Directory
Collections
Store
Posts posted by wiggy
-
-
Guys - thanks so much! This thread was invaluable. I am new to the forums and P-cars, I was able to add the parts (used - $135 total) and picked up an Arctic Silver top for my 996 TTS for an unbelievable $200! Only a small ding and some finish imperfections, I am pleased irrespective of the price I paid. Was a 250 mile drive to get it but a memorable overnight in Chi town ;-) Tested out the new Kumhos on the drive. The fit looks great and it seems to be on tight, except there is a bit of a noise , almost a rattle coming from the back passenger's side. I think it could be the Mount cover that accepts the cap, but need to take a ride and let soemone drive over a bump at 55 or so to see.
I didn't see this addressed in the thread but please reply if you know, are there any adjustments that can be made to tighten down the top at a particular corner? Also, do the springs that pull the pointed shafts down into the receiver parts wear, or do they ever need replacement?
I wonder if anyone here has tried to sell their plastic spacers as a "Hardtop delete kit" ? I thought there might be a call for them as anyone who lets their top go can probably remove the receiver parts easily using this thread and make a few extra bucks. May try to sell mine on eBay, will let you know....
thanks again for this thread!!!!
Samidad
I'm not sure the deal on the older mounts. But the 997 instruction manual says that the top should be secured at 37ft pounds of torque. I have heard that is very important. So perhaps you should do the same on your 996?
So I bought a 6MM socket with a Allen head on it (from Sears for $5) and tightened mine down at 37ftp on both sides. I installed the top over the weekend and after several hundred miles driving, I noticed 1) no rattles and 2) the car is much much quieter with the top on. Definitely feels like a coupe!
Good luck!
-
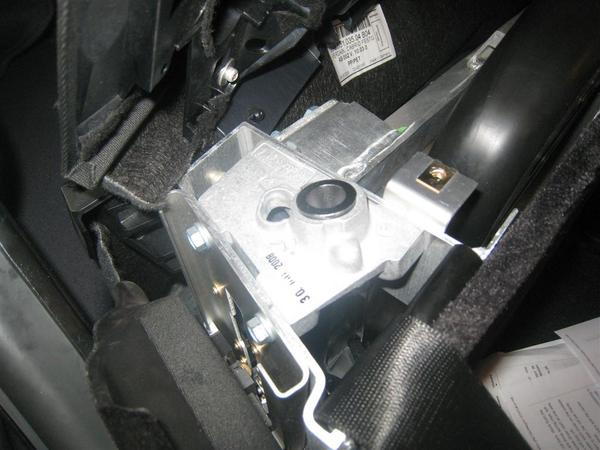
The parts you will need for the newer style mounts are :
996.561.653.04 (mount to attach to the car)
996.561.654.04 (mount to attach to the car)
900.378.173.09 (8 of these just to be safe)
I bought these mounts and hardware for a total of $245 from my local dealer.
I believe the '00 to '04 tops the parts numbers were 996-561-653-03 and 996-561-654-03. It is possible to retrofit your older hardtop for the better design.
This is a very easy job - it took me about 30 minutes to do.
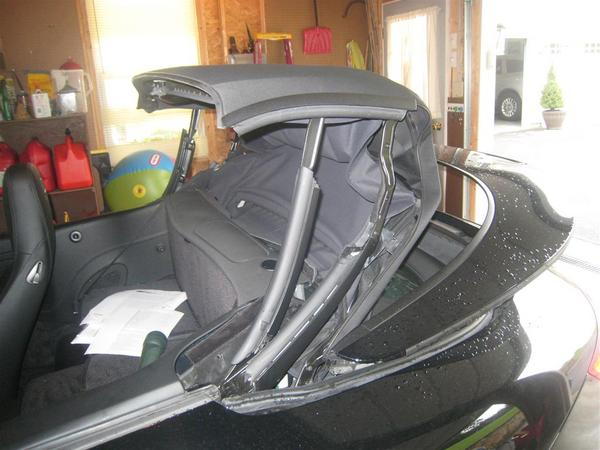
1. Place top in the service position ( almost closed with the rear top cover still in the open position as high as you can get it).

2. Pull back the thin molded carpet section at the center near the roll bar cover you'll notice a single screw that holds down the center of the roll bar cover. Remove the screw.
3. Pry off the top oblong covers directly over the roll bars. Work from the rearward side of the covers not the front side. There are three spring clips, left , center and right so if you work with a wide bladed screw driver start at one side, then the middle, then the other side and the covers will pop off.
4. Once the covers are off you'll see one screw under each cover on the outside edge. Remove them being carefull not to drop them in side the roll bar frame.
The entire cover will lift off now and exposing the roll bars and the carrier frame rails where the mounts bolt in.
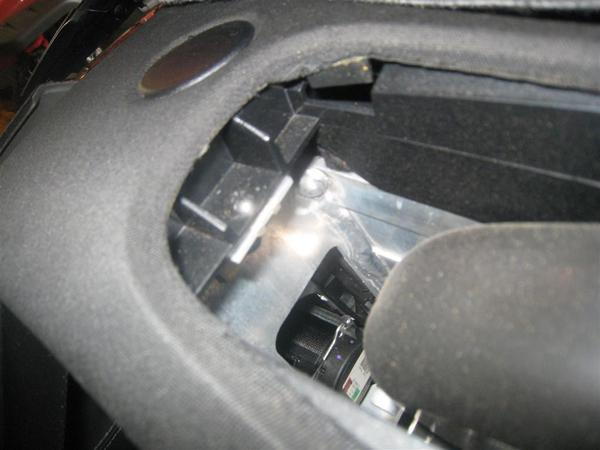
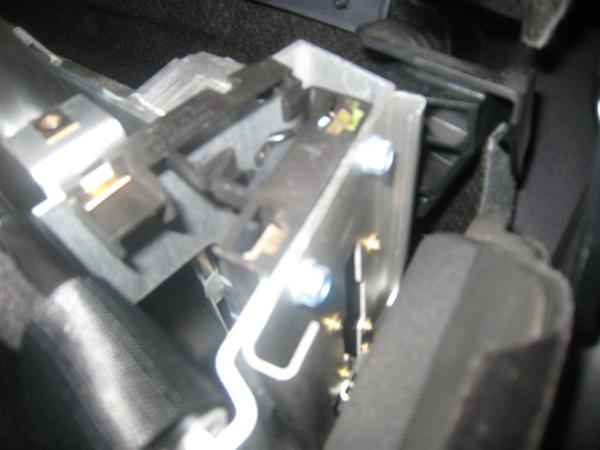
5. You'll notice once you have the cover off two plastic zig zag shaped spacers on either side of off the roll bar carrier frame. Each is held on with 3 threaded bolts despite the fact the mounting locks require four . Remove these. Be sure to note where the "L" shaped attachment points for the roll bar covers go as you'll need to re-attach them when you're bolting in the mounts as they hold the roll bar cover in place with the two screws you removed from either side of the cover.
6. Bolt in new mounts with 4 bolts for each side. The drivers side mount has an electrical connection for the defroster. You need to run the wire down into the car and plug it in. The wire plugs in about 4-6 inches below the mount on the back side of the frame rail it is attached too. You'll may need to pull back the molded carpet to see the plug. It's a little bit a reach but do able. Plug only goes in one way so you can't mess it up.
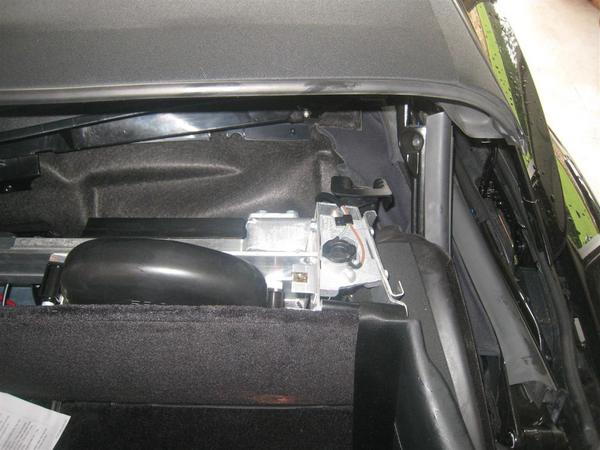
7. Reinstalling the roll bar cover is the reverse of the removal. The cover has a channel along the front side of it to receive the trim piece that goes across the back of the car's rear bulkhead. It's easy to line up just needs to be done before you start screwing the roll bar cover back in place. The smaller covers go in front first ( where the hard plastic positioning clips are) then push down on the backs to get them to seat in.
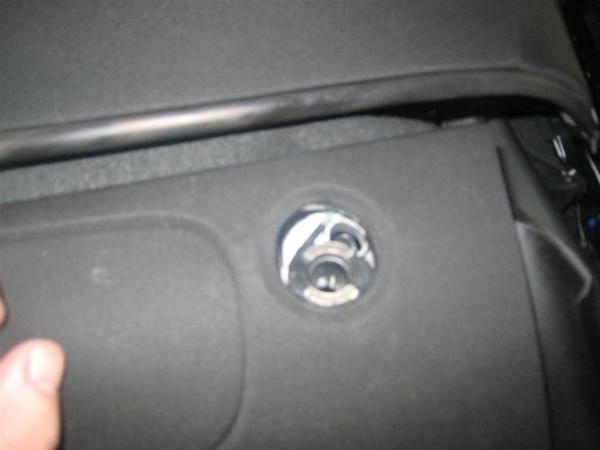
8. Pull off the small circular covers on the roll bar cover and check to see that your mounts line up.
9. With the help of a friend, lift the hardtop onto the car as per the owners manual. Torque down the bolts in the back to 37 ft lbs per the manual.
You're all set!
-
I just did this last weekend and it was very easy. I took a bunch of pictures following the instructions above. I'll post them up soon.
-
I read somewhere it was originally $10,000, but the price is closer to $6,000 now.


Child Booster Seat
in 997-1 Series (Carrera, Carrera 4, Carrera 2S, Carrera 4S)
Posted
+2 - fits perfect and cheap. Kids like it.