Welcome to RennTech.org Community, Guest
There are many great features available to you once you register at RennTech.org
You are free to view posts here, but you must log in to reply to existing posts, or to start your own new topic. Like most online communities, there are costs involved to maintain a site like this - so we encourage our members to donate. All donations go to the costs operating and maintaining this site. We prefer that guests take part in our community and we offer a lot in return to those willing to join our corner of the Porsche world. This site is 99 percent member supported (less than 1 percent comes from advertising) - so please consider an annual donation to keep this site running.
Here are some of the features available - once you register at RennTech.org
- View Classified Ads
- DIY Tutorials
- Porsche TSB Listings (limited)
- VIN Decoder
- Special Offers
-
OBD II P-Codes - Paint Codes
- Registry
- Videos System
- View Reviews
- and get rid of this welcome message
It takes just a few minutes to register, and it's FREE
Contributing Members also get these additional benefits:
(you become a Contributing Member by donating money to the operation of this site)
- No ads - advertisements are removed
- Access the Contributors Only Forum
- Contributing Members Only Downloads
- Send attachments with PMs
- All image/file storage limits are substantially increased for all Contributing Members
- Option Codes Lookup
- VIN Option Lookups (limited)


Q-Ship986
-
Posts
232 -
Joined
-
Last visited
-
Days Won
1
Content Type
Profiles
Events
Forums
External Paint Colors
Downloads
Tutorials
Links Directory
Collections
Store
Posts posted by Q-Ship986
-
-
I had to replace my muffler due to an annoying rattle after warm-up. I was curious about what might be rattling so I cut it apart to see what’s inside.
What is the thickness of the stainless outer shell? --Brian
-
I got mine from Tire rack...buy one get one free....way better than stock BTW.
Get the Valeo model...here is the link:
You don't have an issue with the passenger side? Is a portion of the windshield missed because the passenger side blade is straight, not curved? --Brian
I don't know what you mean by straight...the Valeo blade fits the windshield like a glove and has a built in wind spoiler.
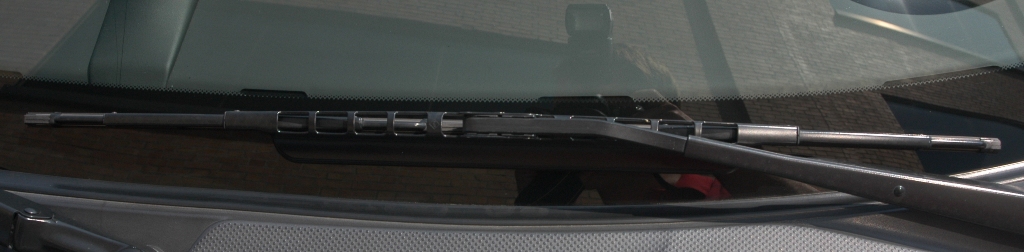
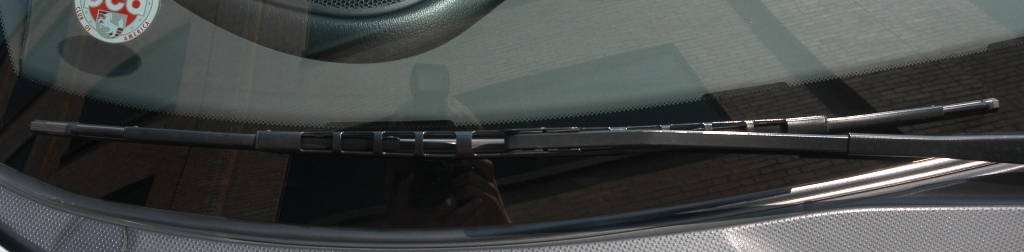
Well, that answers that question. But for academic purposes, this is what I meant by straight vs. curved:
Straight (driver's side):

Curved (passenger's side):
How much handling prowess do you think is lost in making the switch to a straight blade on the passenger side, and do you think it can be made up by installing a front strut tower brace?
In all seriousness, though, do you have to select a shorter passenger side blade to avoid it hitting the plastic trim at the base of the wideshield, on the lower right in the photo above?
The Valeo looks good. It isn't silicone though - shame.Not sure that silicone would be inherently the best material. Most of these expensive blades are multi-compounded, too. FWIW.
--Brian
-
I got mine from Tire rack...buy one get one free....way better than stock BTW.
Get the Valeo model...here is the link:
You don't have an issue with the passenger side? Is a portion of the windshield missed because the passenger side blade is straight, not curved? --Brian
-
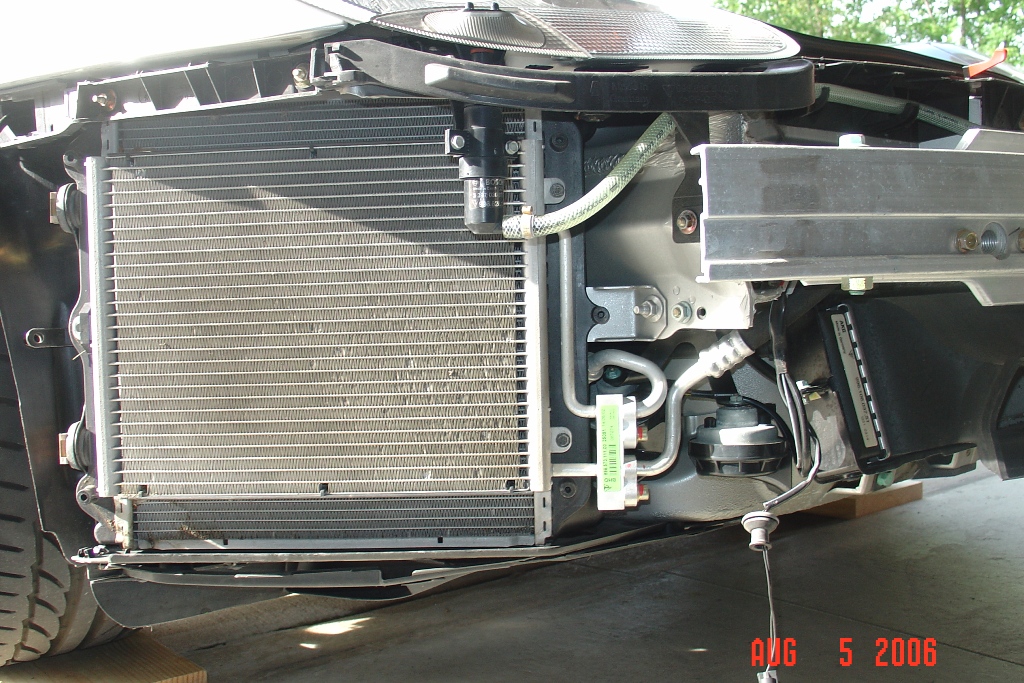
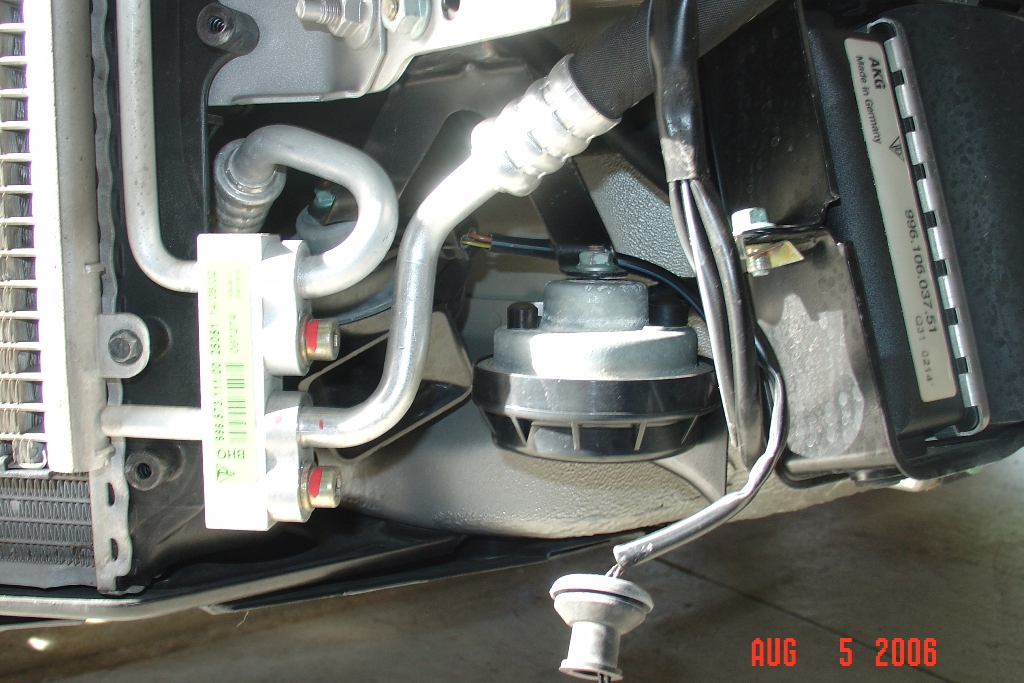
I did this exact thing on my '03 986S. The OE horns are here:
I took out both horns and bracket, clipped the wires and saved the connectors in case I ever wanted to put them back. Then I connected the new Hellas to the existing leads. I installed them right behind the center of the bumper, which frankly muffles them a little, but I didn't think the installation would work in the original location due to their size and mounting brackets. Here is my installation:
When you get in there for a look after removing the front bumper, you'll see how I used existing bolts to hold the horns.
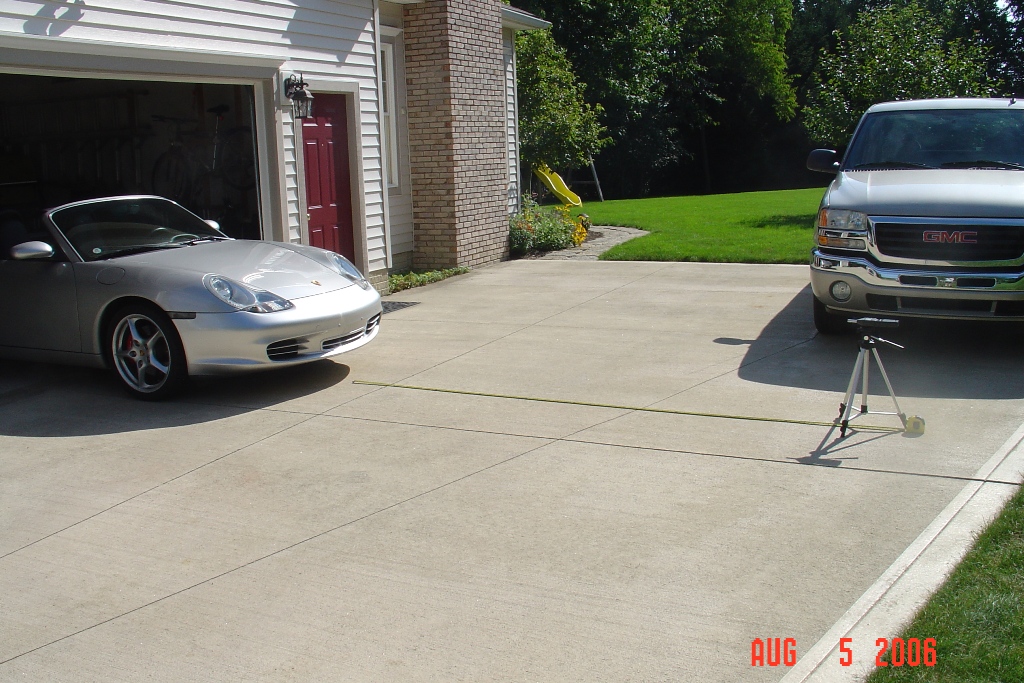
Before I did anything, I borrowed a basic sound pressure meter and set it up on a tripod 10 feet from the front bumper like this:
Here is the data:
BEFORE (OE Horns):
Ambient Noise:... 51 dBA peak
Hand Clap:......... 88 dBA peak
Horn:.................. 95 dBA peak
AFTER (Hella Supertones):
Ambient Noise:.... 50 dBA peak
Hand Clap:.......... 86 dBA peak
Horn:................. 100 dBA peak
I did multiple trials to make sure the results were consistent, which they were. The hand clap was me standing in front of the car, clapping my hands as loudly as I could. I also put the meter 10 feet in front of my GMC, too, just to see what it was....93 dBA. FWIW, the ambient noise measurements seemed right to me, but the hand clap data seemed too high. Since I used the same equipment, set-up, etc., I figured the before/after measurements would be good enough to determine the delta, rather than worry about the absolute values. The meter was a bit on the low-end scale, not a high$ Bruel & Kjaer, for instance.
Anyway, the Hellas do seem louder, and test out at about +5 dBA. But my one complaint is that they are still a little "tinny." Still more of a "beep," than the "honk" I was after.
YMMV.
--Brian
-
I noticed the same hesitation in the wipers on my car ('03 986S). I inadvertently discovered the solution: Pull the stalk back a little further. The wipers will cycle faster, too, if you do that.
--Brian
-
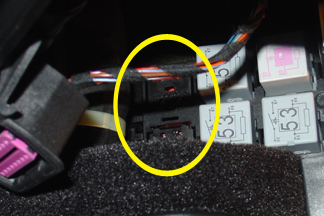
Those spots don't look empty....they look like they have shorting plugs in them. Empty relay sockets will have an actual hole. See my post in the DIY section regarding PSE wiring. When I installed that relay socket, the relay, and the wiring, I used one of the open "holes" on the relay carrier. If you remove the relay carrier, you'll see the shorting plugs have lots of similar-colored wires running to them. Things like speedometer output, grounds, and LED lighting share common shorting plugs. You definitely don't want to pop out one of the shorting plugs!
Did you get your footwell lighting issue sorted with the schematic? If not, I can take a look.
Thanks, Rodger.
So these spots (circled, below) have a shorting plug in them? There were some true blanks/holes in the relay block (that you can't see in any of my photos), so that makes sense to me now.
Still looking for the relay part numbers....
Thanks for your help.
--Brian
-
Sandy, I sent you a PM....thanks for any help. --Brian
-
(Loren, thanks again for your PM.)
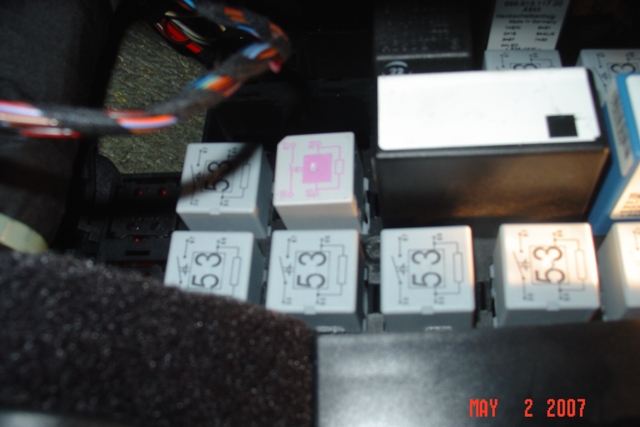
Another question, or two, for anyone who can help. I searched the forums for info regarding the two relays in this circuit, finding Sandy's excellent posts here and here, plus a couple other ones that come close, but none that identify the actual PAG relays.
The latest PET for 986 and 996 do not seem to identify these relays; if they do, I am totally missing it. So, I have a couple shots below of my relay block, under the left side (US driver's) dash. There are two blank spots (coincidence, perhaps) on the left side of the block--what is supposed to go there? More to the point, does anyone with a relay block diagram (for an '03 986, or thereabouts) have any footwell lighting circuitry that can shed some light (pun intended) on the part numbers and physical location for these relays?
Sometimes I want to light up the interior, and everytime I do, it is only after fumbling for the small, unlit, and awkwardly-oriented thumb switch in the overhead light assembly. I want to press the more conveniently placed, backlit dash switch instead, and have it fire up all the ambient/orientation lighting--overhead, footwell, and doors. These relays seem to be the key to that. Thanks for any help.
--Brian
-
Model Year? (it does make a difference)
Well, I have an '03 986S. But, I'd be interested in information for any year 986 or 996 if I couldn't get it for my specific model.
Thanks, Loren.
--Brian
-
Hello,
Looking for information on the footwell lighting circuit for either a 986 or a 996.
Would like to know if the factory-equipped switch activates the dome and/or door lights in addition to the footwell lights.
And, does anyone have a portion of the wiring diagram for either car that includes this circuit?
Thanks,
--Brian
-
A broken boot left unrepaired will not bode well for the longevity of the joint. This seems especially true if water got into the joint and/or if a lot of the grease exited. My personal experience with this, not on my Porsche, though, indicates that you can replace the boot now, cleaning and re-packing the joint, but you could end up replacing the whole thing in short order. That's what happened to me. Twice. FWIW. --Brian
-
The 986 PET from last August, update 203, lists three air cleaner intake parts that are 550SE-specific:
987 110 021 00 air cleaner $422.89 US MSRP
987 110 133 00 air cleaner cartridge (filter) $40.62 US MSRP
999 919 160 07 oval-head screw (4 required) $1.48 US MSRP each
When you are looking at PET, note that "M091" in the far right column denotes the 550SE.
--Brian
-
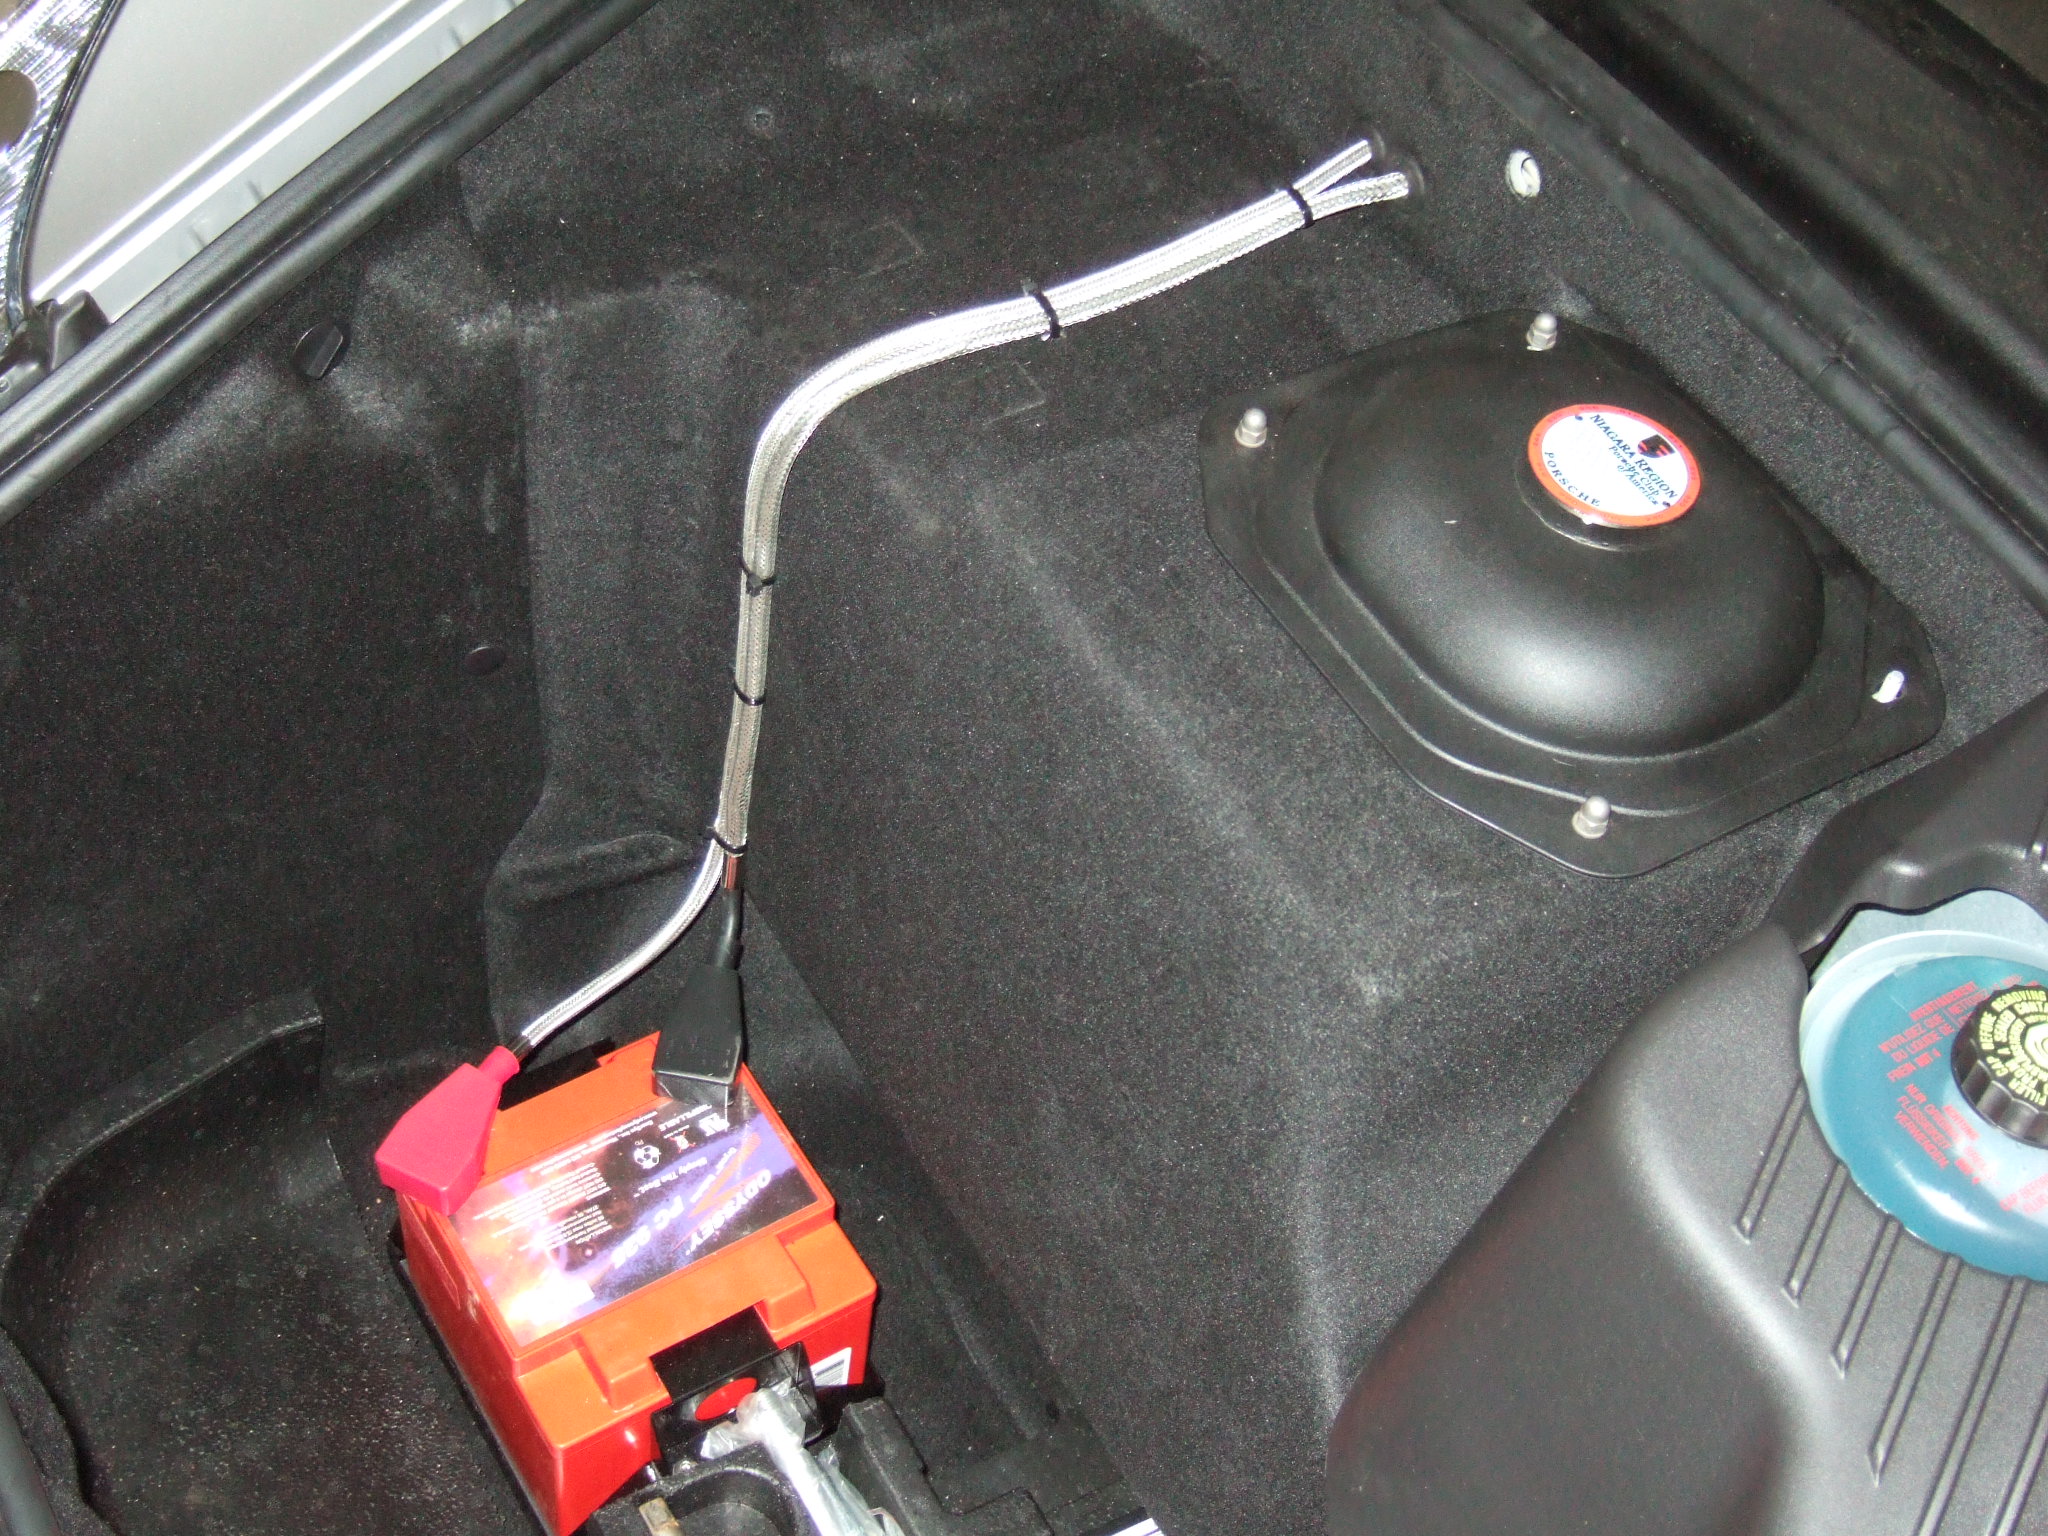
How about the Odessey battery? lightweight, no fluids or vent, better performance and 10 year guarantee. I've had one in my GT3 for 2 years. Pulled the anchor old type and mounted this on the front floor.
Why not keep it mounted in the factory battery tray? Just wondering. --Brian
-
seriously, if he skipped the trip to the installer and just plugged it into the radio, none of this would have happened.
If you have the a 2003 or 2004 with the M490 sound package, you get the 6-channel amp (noted above) and door speakers. If you then add the rear speaker kit, whether it is the PNA kit or the PNP kit, you connect to the amp (as noted above), taking advantage of the 2 unused channels. The PNP kit comes with the harness and pins necessary to connect to the amp (as long as you tell Harvey in advance that you have a 2003/04 with factory M490).
I am not sure why you would connect the rear speakers directly to the CDR-23 if you have the M490 system; the only reason I can think is if you did not want to route the wiring into the front trunk.
--Brian
-
q-ship, thanks for the photo, yes it is exactly what i have becker be6600 in my 2003 boxster. what if you are right, the installer pulled the pins from the door speakers and plugged the rear speakers into there, but why i can still hear the bass from the door?
Well, I was just offering a possibility...I didn't know you still have bass from the door speakers. I guess we really don't know what the installer did.
At this point, I would take the above information to your installer, or check into it yourself, and go from there.
--Brian
-
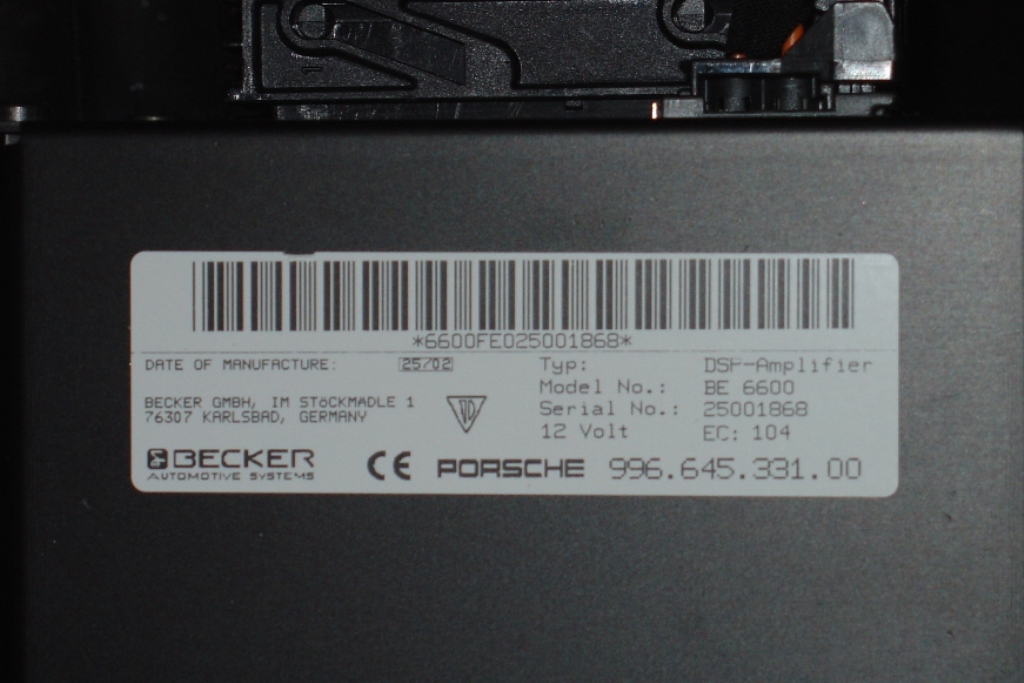
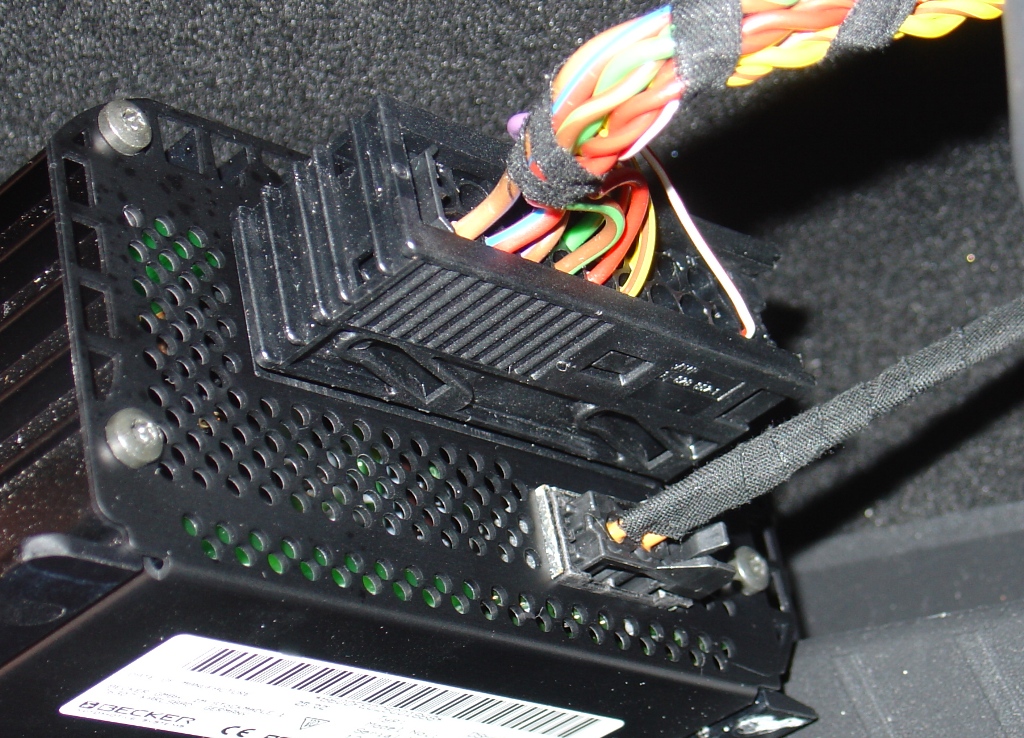
If you have a Becker BE6600, this is part number 996.645.331.##. It is a fibre optic, 6-channel amp. Like this:
(The above photo of the wiring harness is before I added the kit.)
Run the rear speaker wires into the wiring harness at the amp using these pin positions:
Left rear: (+)12 and (-)3
Right rear: (+)4 and (-)13
The pin positions for the rear speakers are unused from the factory.
If your installer thinks this is a 4-channel amp, perhaps they pulled the pins from the door speakers (positions 7/16 and 8/17) and plugged your rear speakers into there. (?)
--Brian
-
What is the option code for the 'sport package' that you have? --Brian
That's part of my question. The window sticker I have makes no mention of the package code, it simply says Sport Package $3,235 and then lists 5 N/C items under it! Those 5 items make no mention of hardware only tires, stereo, wind deflect, alarm and cruise control. So is this US spec sports package simply a convienence package?
It sure looks that way. I guess I thought the package code might be listed on the window sticker.
At the risk of mentioning something that you already know, M030 is the only optional factory installed suspension for Boxsters. The only way I can think you can easily check to see if you have M030, is to see if it is listed as an option code on the label affixed to your front hood/trunk--look for "030" in the codes listed at the bottom of the sticker. Another way is to look at the springs: Front springs marked blue and white are standard; front springs marked red and white are M030 (for your '97). Rear springs marked blue and yellow are standard; rear springs marked red and brown are M030 (for your '97 5-speed).
Dollars to donuts you can read a part number off of the shocks, too. Standard front shocks for your '97 are 986.343.041.02, which has been superseded by 986.343.041.04. M030 front shocks for your '97 are 986.343.041.13, which has been superseded by 986.343.041.17.
--Brian
-
What is the option code for the 'sport package' that you have? --Brian
-
There are three part numbers:
996.361.203.00 (up to and including 2000MY)
996.361.203.01 (2001MY to 2003MY)
996.361.203.02 (2004MY-on)
The above are the 'standard' bolts, not the +5mm GT3 bolts.
I think the .02 bolts are the shorter ones in Jeff's link above; they supersede the previous part numbers and are not to be mixed with the others, according to Porsche. You may only be able to get these ones over the counter at your dealer.
--Brian
-
My instrument cluster did the same thing to my dash when I had it out for something; I left it overnight that way. The indentation took a week or so to diminish noticeably, then maybe a few more weeks before it was gone. I don't have leather, though. The foam/vinyl/whatever-it-is creeps enough to leave the dent, but has enough elasticity 'memory' to rebound. As long as the leather isn't marred, maybe there's a chance your dash will bounce back--give it some time to see. --Brian
-
Emergency trunk release cable? --Brian
-
Jim,
I took a closer look at your race car pictures and I think you guys may have still left 15-20 hp on the table...but you are going to laugh!!
I'll bite... What is it?
Heat shield? ;) --Brian
-
When you get it, please post a picture or two.... Thanks, --Brian
-
Can anybody detail their knowledge about the "slides" for adjusting the Boxster's clamshell? The two front corners of my clamshell are equally lower (not completely flush) with the rest of the car's body. Any suggestions? I was thinking of just yanking on each side by hand to try to get the front of the clamshell flush with the rest of the car. Thanks for the help.
James
I think you may want to have a look here: http://www.renntech.org/forums/index.php?s...ost&p=41611
--Brian


Help! Need to open front trunk
in 996 Series (Carrera, Carrera 4, Carrera 4S, Targa)
Posted · Edited by Q-Ship986
FWIW, when I store my car for the winter, I remove the battery and fully shut the trunk.
In the spring, I follow the instructions in the vehicle owner's manual to open it back up, using my freshly charged battery.
--Brian
P.S. The manual states that "If the battery is discharged, the lids can be opened only with the aid of a donor battery." Not precisely, because my car also has the emergency release wire pull, at least for the front trunk. My car is a USA '03 986S.