Welcome to RennTech.org Community, Guest
There are many great features available to you once you register at RennTech.org
You are free to view posts here, but you must log in to reply to existing posts, or to start your own new topic. Like most online communities, there are costs involved to maintain a site like this - so we encourage our members to donate. All donations go to the costs operating and maintaining this site. We prefer that guests take part in our community and we offer a lot in return to those willing to join our corner of the Porsche world. This site is 99 percent member supported (less than 1 percent comes from advertising) - so please consider an annual donation to keep this site running.
Here are some of the features available - once you register at RennTech.org
- View Classified Ads
- DIY Tutorials
- Porsche TSB Listings (limited)
- VIN Decoder
- Special Offers
-
OBD II P-Codes - Paint Codes
- Registry
- Videos System
- View Reviews
- and get rid of this welcome message
It takes just a few minutes to register, and it's FREE
Contributing Members also get these additional benefits:
(you become a Contributing Member by donating money to the operation of this site)
- No ads - advertisements are removed
- Access the Contributors Only Forum
- Contributing Members Only Downloads
- Send attachments with PMs
- All image/file storage limits are substantially increased for all Contributing Members
- Option Codes Lookup
- VIN Option Lookups (limited)


KevinH90
-
Posts
254 -
Joined
-
Last visited
Content Type
Profiles
Events
Forums
External Paint Colors
Downloads
Tutorials
Links Directory
Collections
Store
Posts posted by KevinH90
-
-
According to this article on Pelican the change is in the Pin numbers, but not the wires.
You can click on a link in the project write up to access an order page for the parts. It appears to lump all the 97-04 cars together as far as the parts list is concerned.
http://www.pelicanparts.com/catalog/shopcart/101P/POR_101P_BOX091_pg1.htm
Good luck with your project.
-
Based on reviewing this thread, it can be done but it will take some skill.
-
I'm having the same problem with the 2004 "hood" and frame I installed on my 2000 Boxster. Which cables did you replace? I'm assuming you replaced the top drive cables, but if you could post the part number that you bought it would be helpful.
-
I'll have to preface this post by saying I don't have any experience with Cayennes. I know that North Hollywood Speedometer and Palo Alto Speedometer will program Carrera and Boxster clusters for about $200. I have not used the service myself, but I've seen posts from 986 owners who did.
Depending on the similarity between Cayenne and 986/996 clusters, you may also be able to do it yourself. In the process of swapping a Carrera cluster into my Boxster I gained quite a bit of knowledge about the EPROM programming in the 996/986 gauge clusters. You can read more about it in the link I pasted here.
http://986forum.com/forums/general-discussions/43017-carrera-gauge-swap.html
If you want more information, send me a PM with your e-mail address and I'll send you instructions for the Boxster/Carrera. If the Cayenne cluster design is similar, they may work as well.
-
-
This article: http://www.pelicanparts.com/techarticles/Boxster_Tech/90-ELEC-996_Cluster/90-ELEC-996_Cluster.htm states that when swapping a 996 cluster into a Boxster, that "For the 2001-04 Boxster, you can use any non-Turbo 996 cluster from the years 2002-04."
This eems to say that there are differences between the Turbo clusters and those in other 996s.
-
This addresses the issue, but it leaves a lot of unanswered questions.
-
They should bolt in fine, but the unknown factor is whether the electrical connections are compatible. I think you can answer this question by looking under the seat at the electrical connector. If the 8-way seats have more than one connector or it looks substantially different from the one in your car, you are probably going to need to figure out how to make a wiring harness. If upon close inspection the connectors appear identical, it may be plug and play.
I'm in the process of installing a set of 911 heated seats in my 2000 Boxster. The seats that I just removed from my car are unheated. Here's a link to the guide that I am using:
http://www.dennisvogel.com/heatedseats/index.html
Read through this a couple of time (unless you are an engineer it may be a little intimidating at first.) It gives a very good explanation of the wiring system and the mechanics of installing and removing the seats.
I'm selling my current seats. You could have an upholsterer remove the covers and install them on your car.
-
I just did this on Sunday and I agree with Karst. I have a 3 gallon Central Pneumatic brand compressor from Harbor Freight. It could just barely get to 90 psi even though the gauge on the tank reads 110. If you don't already have a compressor, I recommend that you buy something with a little more macho than what I have..
-
Thanks again JFP.
I checked the Pelican technical articles and it showed the talent level for replacing the water pump was 2 wrenches and the coolant tank was 3 wrenches. So, it looks like I'll the coolant tank is 50% more difficult than the water pump. I am always concerned about exceeding my talent level and biting off more than I can chew. I found the water pump challenging and time consuming, but I never felt like I was in over my head. I'll just take a systematic approach and make sure that I have all the information and tools that I need.
One thing that was odd about the water pump write ups was Pedro's suggestion that you loosen the front motor mount and lower the engine to access some of the bolts. This turned out not to be necessary, but it increased my concern about the complexity of the job..
-
My water pump started making a grinding noise about two weeks ago, so I ordered a water pump, gasket and 3 gallons of coolant from Sunset Porsche. The parts didn't arrive until last Tuesday so I had to wait until Saturday to start work. I finished the final touches tonight. The cost breakdown was:
Water pump: $268
Gasket: $7.71
Coolant: 3@$27.93 - $83.79
Shipping: $46.24
Total: $406.45
The shipping cost was high due to the weight of the coolant, but even with the shipping charge it was less expensive than the local dealer.
I'm still planning to replace the coolant tank in the spring. I thought about doing it now, but the car has been off the road for about two weeks and I've missed a few nice driving days already. Overall, the project was time consuming, but not as bad as I expected. If I had access to a lift it would have been much easier.
I would appreciate some feedback from folks who have done both the coolant tank and the water pump. Basically I want to know which project they consider the more difficult. I'm hoping they say the water pump.
Many thanks to all who provided comments and especially to Karst who was kind enough to lend me his Airlift tool.
-
Thanks for helping me think this through. It turns out that the light needed to be on both the BS7and BS5/2 circuits. Attaching one pin directly to the ground caused in to be in the constant on state.
Everything is now working as expected.
-
 1
1
-
-
Thanks Rick
I thought I had spliced into the same circuit I created for the garage door opener illumination. I had a sketch of the circuits in my records. That said, I did the garage door opener work about 18 months ago and I may have missed something.
I used QShip986's instructions for the garage door opener: http://www.renntech.org/forums/tutorials/article/153-yet-another-way-to-add-a-homelink-device/
This required that I tap into the relay carrier to create two circuits. One (BS7) is for consumer-switched-off and BS5/2 is for the instrument panel LED lighting with dimming. This way, the switch is back lit and dimmed the same as the other console switches. The consumer-switched-off circuit goes into standby mode about two hours after the car is turned off, so if I had tapped into the wrong one by accident, it would have switched off by now.
I also used the same ground that I used for the garage door opener installation, but I did not ground that under the seat as QShip recommended. I'm beginning to think the power is coming from there in some way. I think that I will try a different ground and see how that works.
Thanks again.
-
In installed the intermittent wiper control using these instructions:
http://dl.dropboxusercontent.com/u/32423110/BluBoxster/page30/page30.html
Everything is working fine except the switch illumination. It stays lit all the time and the brightness adjusts in the reverse of the rest of the panel. When I dim the panel, the intermittent wiper control brightens and when I brighten the panel, the intermittent wiper dims.
For the illumination, I tapped into a circuit that runs to the back of the relay carrier at BS 5/2. I used this circuit to power the illumination on a targa switch that I installed to control a Homelink garage door opener. The illumination for the targa switch works fine, so I'm wondering why the illumination for the variable intermittent wiper is acting strangely. It shouldn't even have power unless the dashboard is on.
Any suggestions for fixing this are appreciated.
-
Thanks for the reply. I appreciate the opportunity to double check my research with an experienced person.
At first I was a little confused by your statement that "the coolant is not that expensive." Based on my initial research It appears that Pelican is charging about $50 per gallon shipped. Since I thought I needed 5 gallons I estimated the total coolant bill to be about $250. So, for someone who is accustomed to using a gallon of Prestone for around $15 to perform a radiator flush, I have to admit to some sticker shock.
However, upon re-reading the instructions, it appears that the coolant capacity is 5 gallons and I would be filling with a 50/50 mix of coolant and distilled water. So, I would only need to buy 2.5 gallons of coolant. Even if I ended up buying 3 gallons of coolant, I would be spending a more wallet-friendly $150.
Although the coolant is not as expensive as I originally thought, do you know of a less expensive source for Porsche coolant? For example, would it be better to purchase from the local dealer and avoid shipping charges? The bottom line for me would be to do the job right and not jeopardize the success of the project. I noticed that Pedro appeared to use Prestone extended life coolant in his tutorial, but if that strategy introduces unnecessary risk I'll bite the bullet and purchase Porsche coolant.
-
I have several questions regarding the coolant tank/water pump replacement. I have done quite a bit of searching, so I thought I would combine my thoughts in one post and obtain some feedback from folks who have some experience with this.
My car is a 2000 base that I bought used about 7 years ago. Unless the car has a major mechanical problem or an accident, I intend to keep it for another 4-7 years. The original owner kept meticulous records on the car, so I’m confident that I have the full service history. I know the coolant tank, water pump and coolant are original.
I drive it about 8000 miles a year, and it has about 84,000 miles on it. I am planning to start using it on long trips, and while I normally do not fix things that are not broken I think the fact that the coolant tanks are a weak link seems to be widely accepted. I do not want to be stranded 1000 miles from home at the mercy of an unfamiliar repair shop.
Question 1: Is it prudent for me to replace the tank in the next year or so?
Question 2: Should I replace the water pump at the same time?
Question 3: Should I reuse the coolant? I noticed that Pedro Flush Coolant System stated that his coolant still looked good after 190,000 miles and the Porsche coolant is expensive.
Question 3a: Is there a less expensive alternative to Porsche coolant that won’t cause a problem in the system?
There are several good DIY tutorials on replacing cooling system. In addition to the one posted above, here are the ones I found:
Replace Coolant Reservoir
Replace Water Pump
Pelican Technical Article: Boxster Coolant Tank Replacement - 986 / 987
Pelican Technical Article: Boxster Water Pump & Boxster Thermostat Replacement - 986 / 987
Pelican Technical Article: Boxster Coolant Replacement / Boxster Coolant Flush - 986 / 987
http://www.renntech.org/forums/tutorials/article/133-water-pump-replacement-diy/
Question 4: Does anyone know of a better tutorial or have a preference for one technique or another?
I do not like to get under a car on jack stands. I have a set of Rhino ramps that I use to work under the car. This leads toQuestion 5: Can I do this job without going under the car or by putting it up on ramps?
It looks like I have all the tools I need except for the job except for:
(1) Cable operated spring clamp pliers Cable-operated Hose Clamp Pliers: Clamping Convenience with Sears and
(2) a pump to purge the cooling system Airlift
Question 6: Is it worthwhile to buy a purge tool? I hate to buy a fairly expensive tool for a one-time use, but I did see some posts from folks who overheated due to an airlock, so it seems inexpensive in that context.
Question 6a: Would it be fairly easy to re-sell the purge tool after I am finished with it?
Question 7: It looks like the coolant tank can be a difficult job. I have replaced my spark plugs and brake pads, installed a top and frame from a 2004, and replaced my gauge cluster. I have also done coolant system work on non-Porsches. Does this project seem like it is within my skill level?
Question 8: I am planning to do this job in the spring. Is there anyone in the Richmond, VA area who would like to participate in this project and take care of their Boxster at the same time?
Thanks in advance for any input or suggestions. -
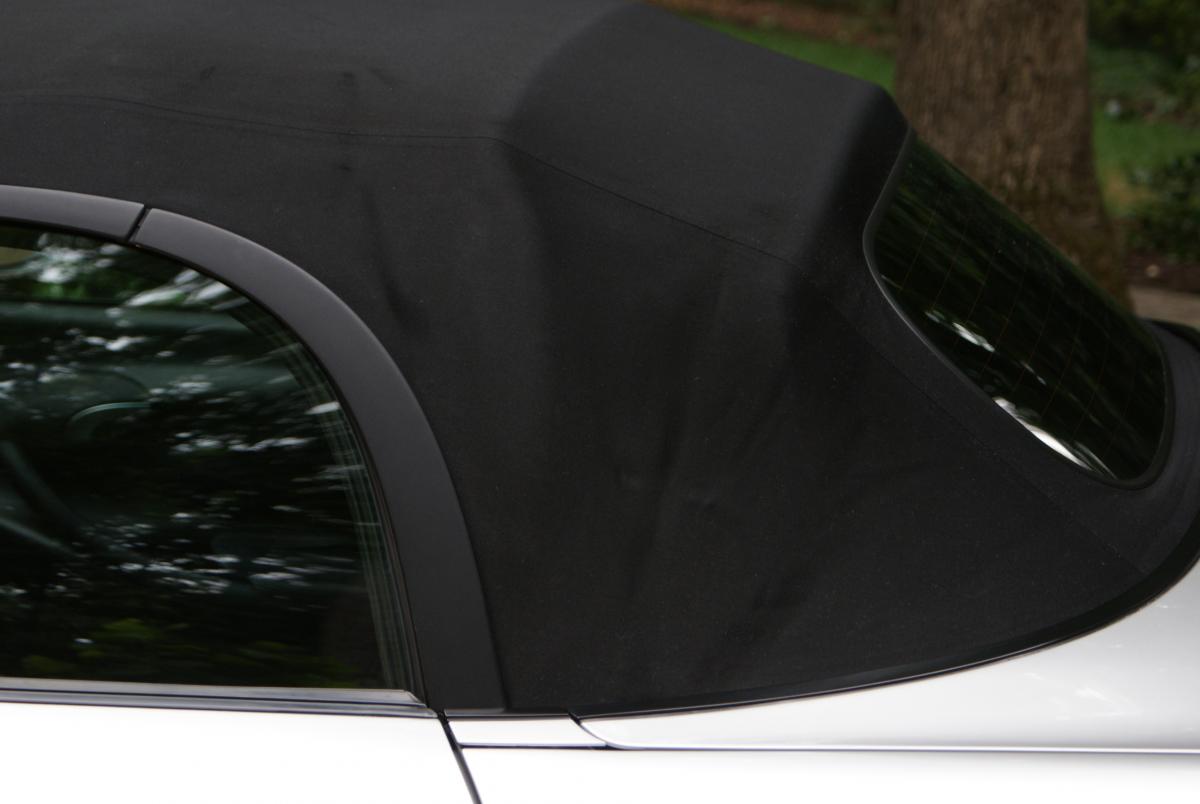
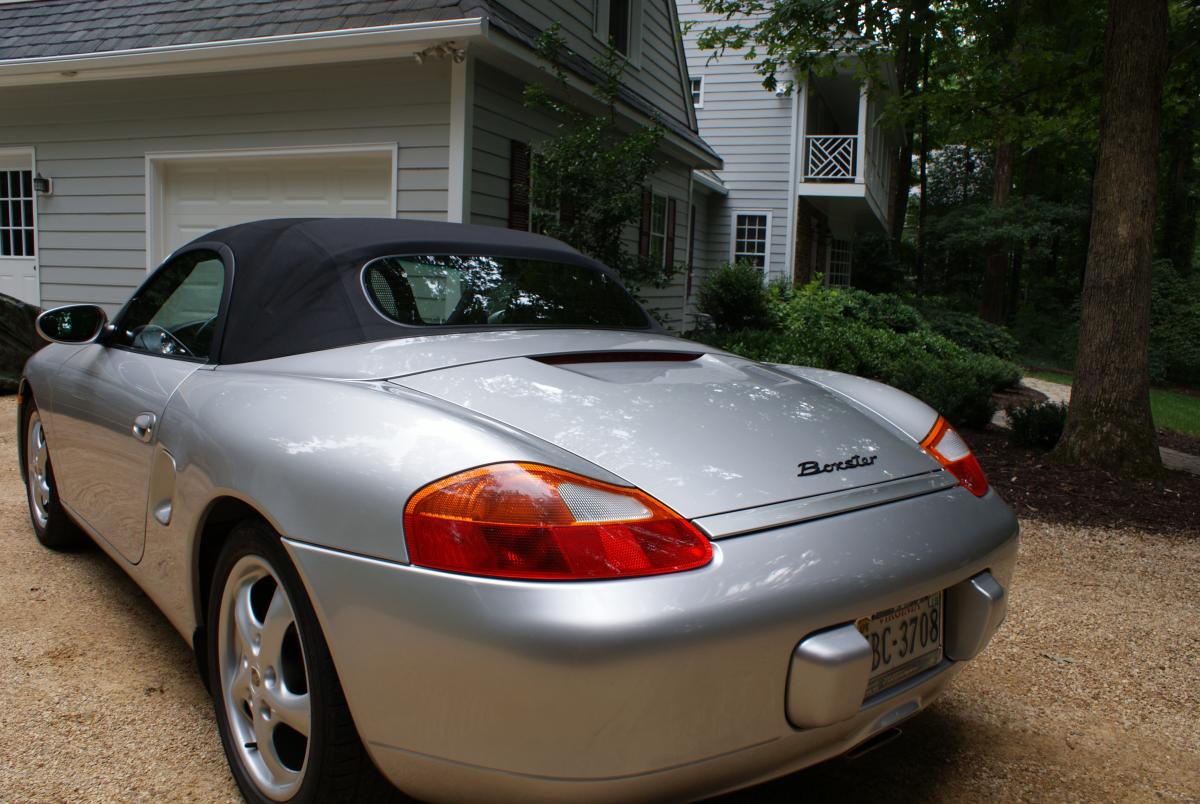
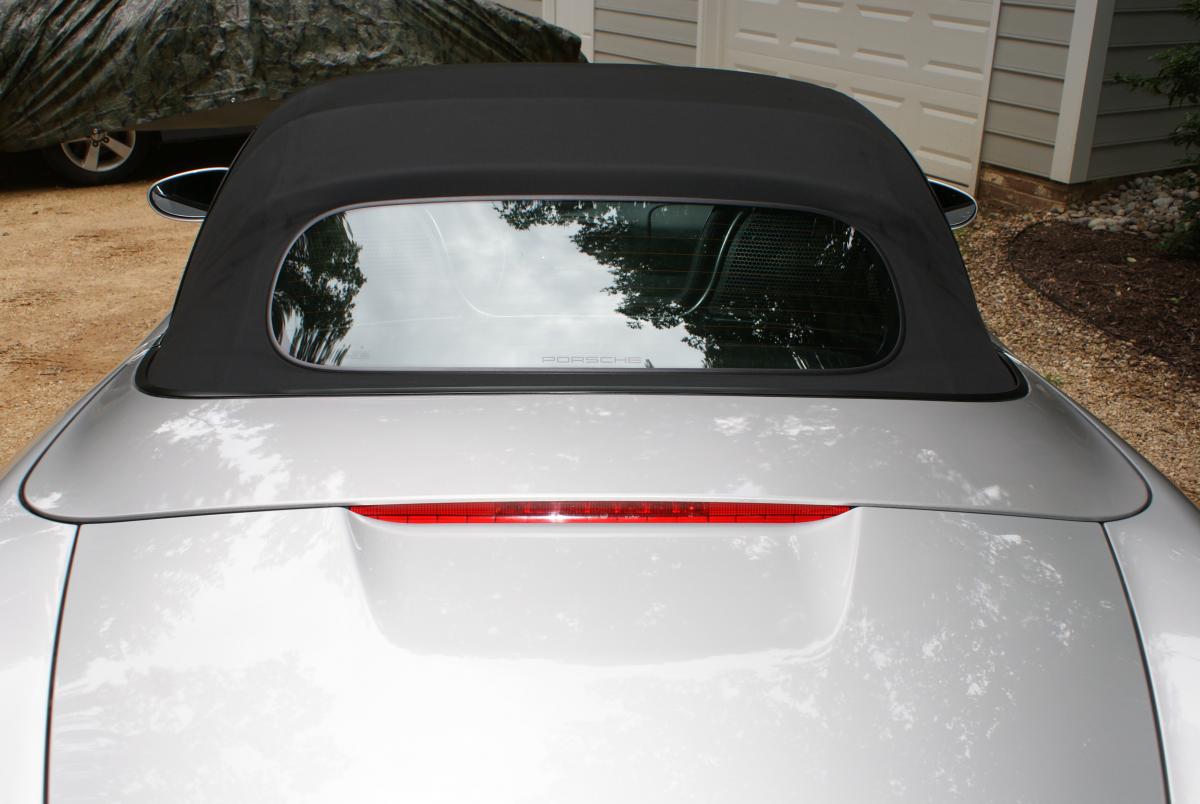
I installed an OEM glass-window top from an 04 Boxster on my 2000. I've been gradually adjusting it for several weeks and I have it just about sorted out. (Many thanks to Boxstaboy and Maurice for their tutorial and responses to my questions.)My last issue is the wrinkles in the top behind the windows. My plastic-window top had the same problem, as do most of the Boxsters I've seen with a top that is more than a few years old. Has anyone been able to address this condition? It seems like the material just stretches over time. Maybe there is some way to tighten the fabric.Overall, I'm very happy with the upgrade. The top fabric seems to have quite a bit of life remaining and the glass window and headliner make the car feel like it has a higher build quality. I had considered buying an aftermarket glass-window top since I would have had brand new material. However, even if I have to replace the fabric in 4 or 5 years, I think the larger window, easier engine access, and headliner are significant benefits of the OEM configuration when compared to an aftermarket product.

-
I've been working with a few folks on transplanting 996 instrument clusters into Boxsters. I've compiled a bit of information about them. I'm not sure it will help with your problem, but if you send me with a PM with your e-mail, I'll be happy to share it with you.
-
According to Sunset Porsche, the part # is 986-561-165-00-A09 and the description is 'folding top flap'
-
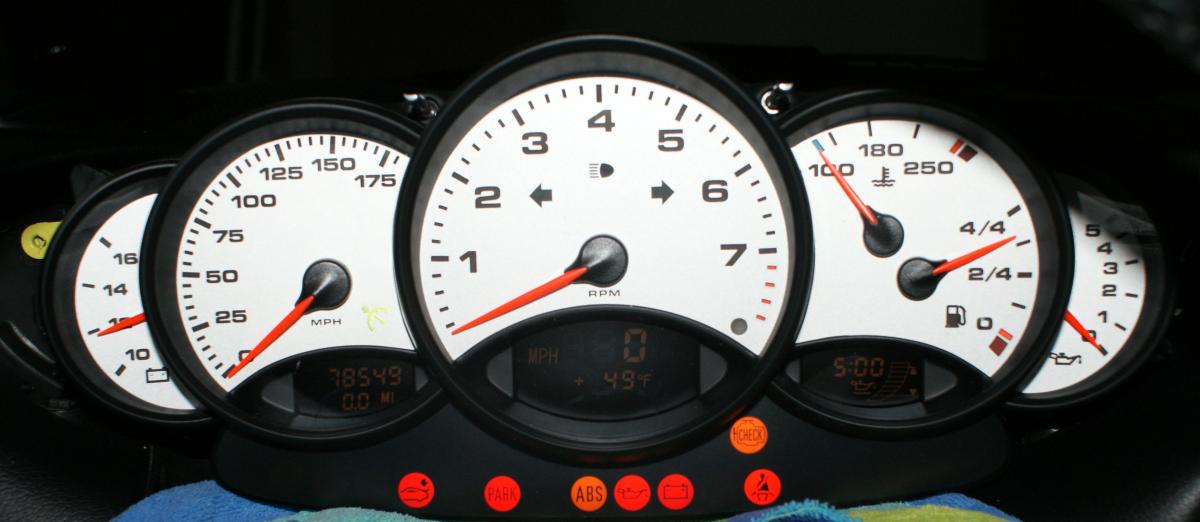
Here's information on how to program the clusters with mileage, VIN and model number.
-
I swapped a 2004 top into my 2000 Boxster today. It appears to be missing a piece of trim above the driver's window. Please see the picture.
Also, there is a spring in the area that looks like that is what held it in place. Any assistance in telling me how to attach the part is appreciated.
Thanks in advance.
-
Check out this post on the 986 Forum for more details on using the circuit board from a Boxster to replace a defective circuit board on a Carrera gauge cluster. This would allow you to use a Carrera cluster with one or more defective lcd's for a transplant and potentially save some money.
http://986forum.com/forums/general-discussions/43017-carrera-gauge-swap.html
-
It worked. I'll provide full write up later.
-
Thanks for the reply. Two of the Porsche independents in the area confirmed that a PIWIS or PST-2 could not activate the voltmeter. I emailed Palo Alto Speedometer and North Hollywood Speedometer and the best they could offer was to replace the circuit board - for $600.
Fortunately, I received some input from an electronics hobbyist who posts on the 986 Forum. He was able to reprogram the circuit board on his Boxster cluster so that it could operate the Carrera gauges. http://986forum.com/forums/general-discussions/43017-carrera-gauge-swap.html He is very helpful and gave me the following information.
There is a chip on the circuit board called an EPROM (Erasable Programmable Memory) that can be reprogrammed. I had to buy some equipment so I should be able to give it a try over the weekend. Here are the steps:
1. Read the programming from the Carrera board and save it.
2. Read the programming from the Boxster board and save it.
3. Copy the first two lines of code from the Boxster circuit board and write it over the first two lines of the Carrera Board programming and save it under a different name. This puts the mileage and the VIN from the Boxster into the Carrera code.
4. Write the updated Carerra code that you saved under a different name to the Boxster Circuit Board.
5. Attach the Carerra Gauges to the Boxster circuit board and install it in the car.
I'll let everyone know whether I'm successful by the end of the weekend. If it works I'll provide a full write up with photos.

R&R sparkplugs, how tough? pointers to how-to?
in 986 Series (Boxster, Boxster S)
Posted
I will be changing my plugs in about 600 miles. I did not use anti-seize the last time I installed them, but in deference to JFP and Kdbrasma I will do so this time.
JFP/KD - Do you use a specific brand of anti-seize compound? I might as well use what the pros use
I am also curious about one other fact related to Boxster spark plugs. My 2000 calls for changing the plugs at 30,000 mile intervals. My friend's 2002 calls for changes at 60,000 miles. Does anyone know the reason for the difference? I'm not aware of any major changes in the engines that would account for it.