Welcome to RennTech.org Community, Guest
There are many great features available to you once you register at RennTech.org
You are free to view posts here, but you must log in to reply to existing posts, or to start your own new topic. Like most online communities, there are costs involved to maintain a site like this - so we encourage our members to donate. All donations go to the costs operating and maintaining this site. We prefer that guests take part in our community and we offer a lot in return to those willing to join our corner of the Porsche world. This site is 99 percent member supported (less than 1 percent comes from advertising) - so please consider an annual donation to keep this site running.
Here are some of the features available - once you register at RennTech.org
- View Classified Ads
- DIY Tutorials
- Porsche TSB Listings (limited)
- VIN Decoder
- Special Offers
-
OBD II P-Codes - Paint Codes
- Registry
- Videos System
- View Reviews
- and get rid of this welcome message
It takes just a few minutes to register, and it's FREE
Contributing Members also get these additional benefits:
(you become a Contributing Member by donating money to the operation of this site)
- No ads - advertisements are removed
- Access the Contributors Only Forum
- Contributing Members Only Downloads
- Send attachments with PMs
- All image/file storage limits are substantially increased for all Contributing Members
- Option Codes Lookup
- VIN Option Lookups (limited)


KevinH90
-
Posts
254 -
Joined
-
Last visited
Content Type
Profiles
Events
Forums
External Paint Colors
Downloads
Tutorials
Links Directory
Collections
Store
Posts posted by KevinH90
-
-
-
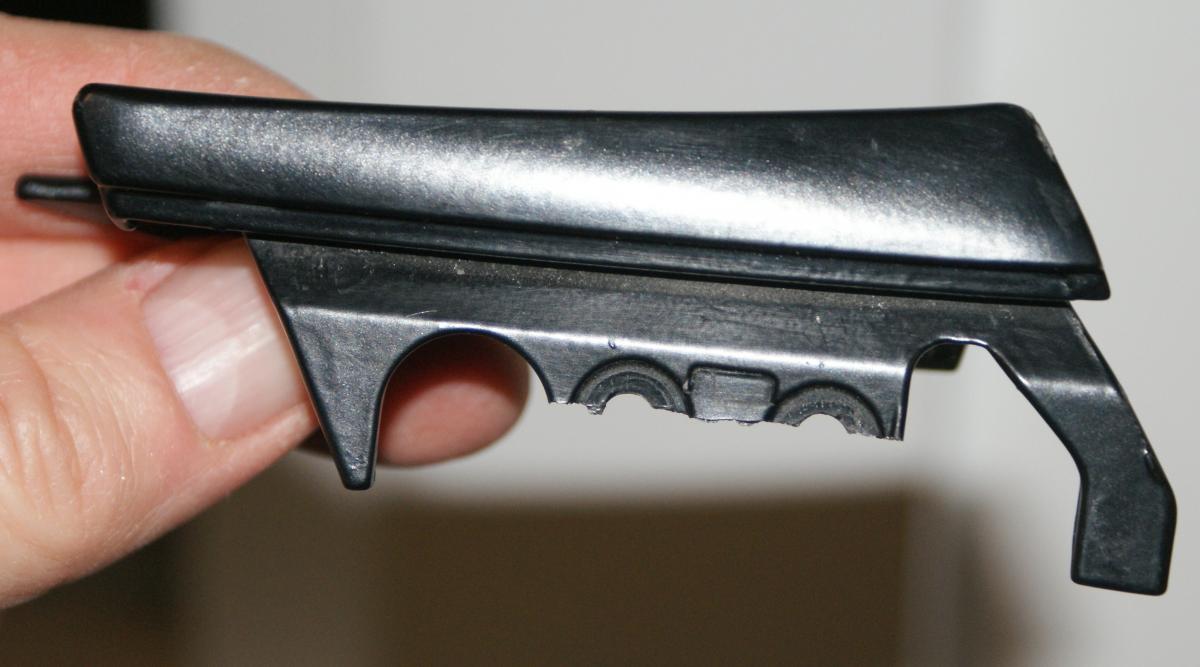
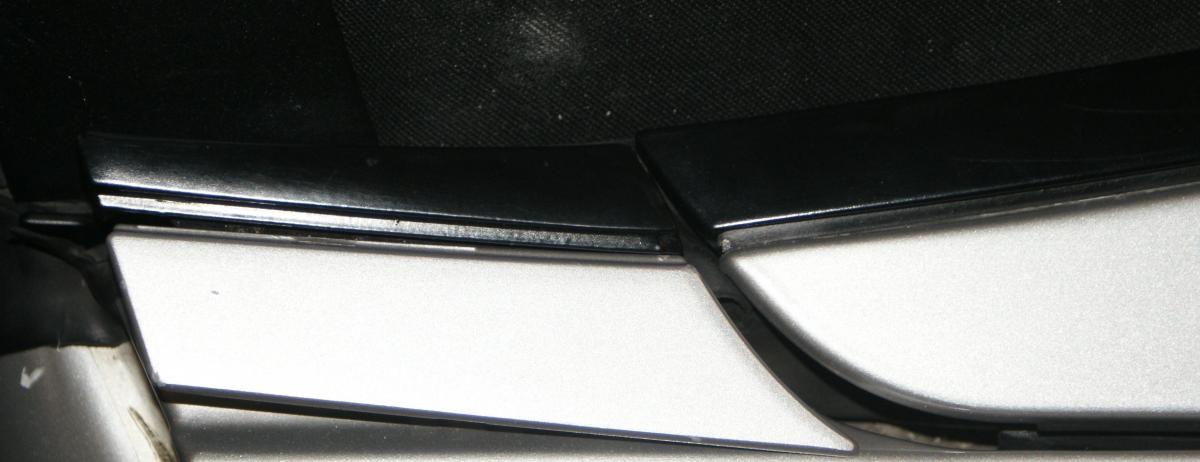
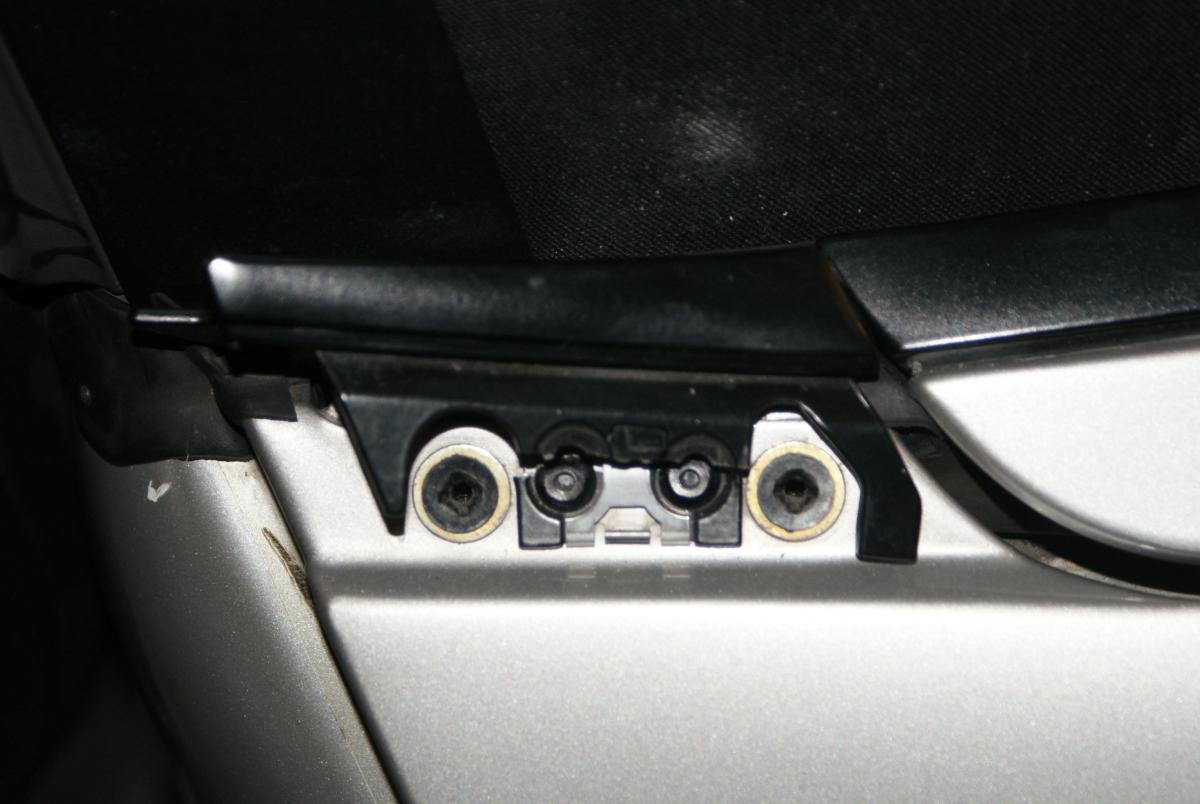
Does anyone know what this part is called and where I might obtain one?
It fits in the area directly behind the door and is covered by a piece of body-colored trim that presses into it.I'm thinking that a wrecking yard may be the best source, but I'll need to explain to the employee how to remove it by drilling out the rivets.

-
Thanks - I really appreciate your taking the time to look. This is a winter project and I'm not on any kind of timetable.
-
Thanks Duram. I'm definitely proceeding with caution and I haven't touched my Boxster cluster. This thread on the 986 Forum will give you an update on where I stand: http://986forum.com/forums/general-discussions/41883-gauge-cluster-repair.html
Right now, I'm trying to see if heating the clock/oil level lcd with a hair dryer will remove the flaw. It seems to be working a little. I'll give it a few more cycles to see how if it works.
Here's how it looks after 2 5-minute cycles with a blow dryer:
It may be slightly smaller than when I started, but you can look at the previous posts and judge for yourself.
I'm trying to be optimistic. However, if you happen to have a good clock/oil gauge lcd that may be helpful.
-
Right now, I'm considering removing the lcd from my Boxster cluster and using that. Of course, I need to have reasonable confidence that I won't end up with two broken units.
-
Based on some advice on the 986 forum and some research, it appears that swapping the clock/oil gauge lcd from my Boxster cluster is a possibility. Based on some posts there and some other information I found on the Internet, I have started the dissection process.
So far, I have managed to remove the plastic lens without damaging anything:
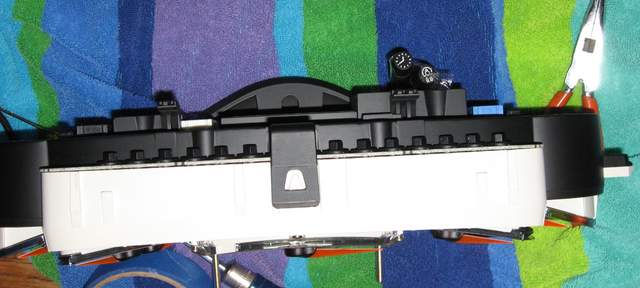
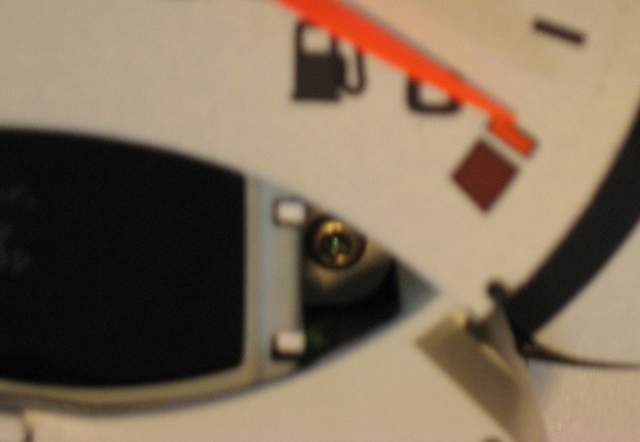
However, removal of the damaged clock/oil gauge lcd module is now blocked by the white plastic part that holds the gauges. Based on a review of Chris Zang's pictures from his "for sale" post on the 986 forum, it looks like I need to remove enough parts to get the cluster to this condition before I can remove the lcd: Before risking damage, does anyone have tips for removing the white plastic part? It appears to be held on by this clip:I also see two screws. One is near the bottom of the speedometer:The other is near the bottom of the fuel gauge:I would appreciate any tips on dissecting this without damaging anything. With the exception of the lcd, the cluster is in perfect condition and would make a nice upgrade to my car. -
Thanks for the suggestion. I sent Palo Alto Speedometer an e-mail and they responded that they could not obtain the parts for repairing the cluster. They offered to reprogram the mileage for $175 plus shipping.
I also received a response on the 986 forum. They seem to think that I could transplant the working LCD from my Boxster cluster. It looks like delicate work, so I would be risking damage to my cluster in the process. I'll search for someone selling a Boxster cluster to serve as an organ donor.
-
I have a gauge cluster from a 2001 Carrera that I would like to swap into my Boxster. I have reviewed the instructions and it appears to be within my capabilities. However, in looking at the cluster, it appears that one of the LCD's is damaged.
Can I swap the LCD from my Boxster cluster or is there a company that can repair this?
-
Thanks for the pointer. The TSB does not specify the use of grease, so I guess it is not necessary.
-
Wait - what are you going to put this grease on?
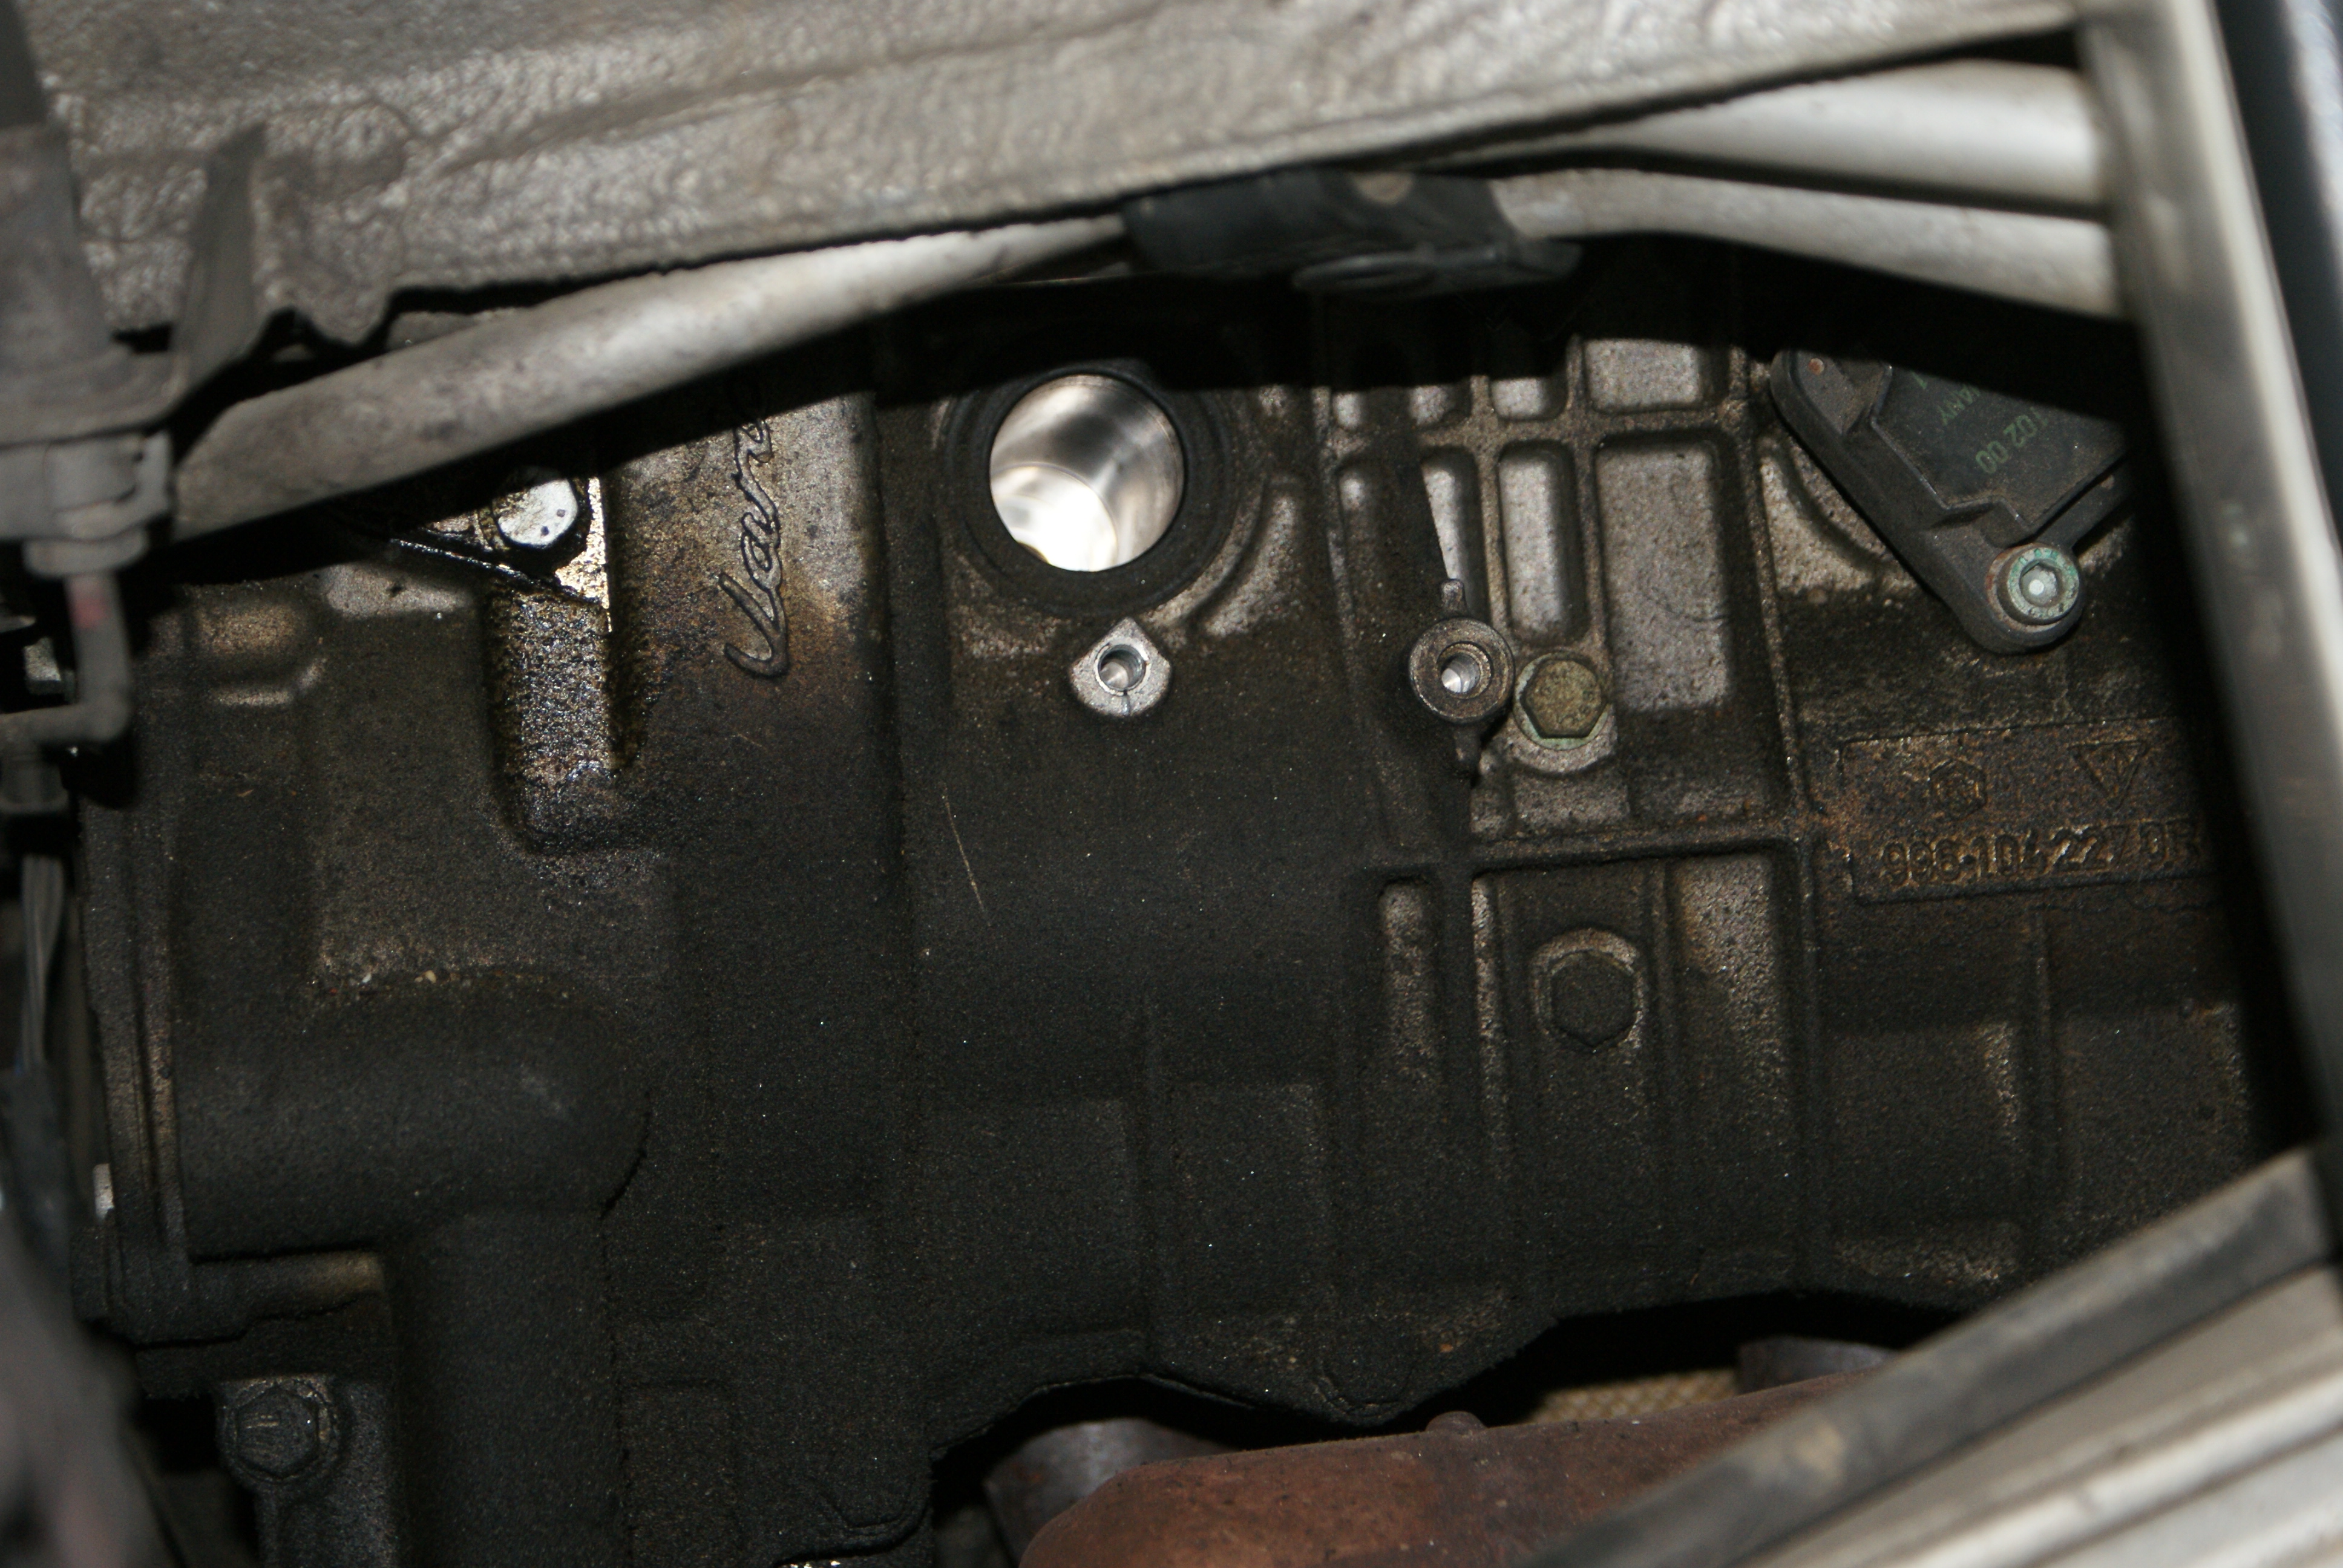
When I changed my spark plugs, one of my tubes had oil in it and there was oil on the side of the engine. I have attached a photo. I was planning to replace the leaking tube, but the instructions I've found on other boards said to just lightly oil the outside of the tube before inserting it. Can you confirm that the grease isn't necessary?
Thanks
-
I'm not familiar with the Becker Cascade so my experience may not be relevant to your situation.
When I installed the rear speakers on my 2000, I was able to wire the speakers to the head unit (Becker CDR-220) and avoid changing the wiring for the other speakers. I later purchased a used six-channel amplifier from a 996 cabriolet which permits me to power all six speakers from the amp. The M680 needs only minor modification when used to replace the M490.
The sound quality is slightly better using the amp instead of the head unit.
I believe that if you decide to use an after-market amp that the most convenient method would be to use the speaker wires that run to the existing amp. This post has the wiring diagram:
Good luck with your project.
-
 1
1
-
-
Here's a link to some useful information about OEM heated seats: http://www.dennisvogel.com/heatedseats/index.html
Good luck.
-
I changed the coil pack on cylinder #4 and cleared the fault codes. I took the car for a 5-mile drive and it is running smoothly with no sign of a misfire and no CEL. I'm going out for a longer drive in about an hour, so that should be the real test.
There was no sign of a crack or other damage to the coil pack I replaced.
Interestingly, the part number for the new coil pack is 997 602 107 00. The coil pack I replaced was 996 602 100 021. Both were manufactured by Beru.
Loren - Thanks for the input on the possible cause of the problem.
-
Thanks for the reply.
About 6 weeks ago I ran over a blue plastic tarp. It got trapped under the car on the passenger side. I stopped the car and pulled the tarp out. Some of it melted on the exhaust pipe. I wonder if some of it might have melted onto a coil pack or a plug wire. I'll check tonight when I get home. It is a beautiful day here and I would be driving the Boxster if it wasn't out of action. I feel like I've been cheated.
-
I have a 2000 Boxster with a 2.7 liter engine. I was leaving my neighborhood this morning and my CEL flashed 4 or 5 times and then stayed solid. I drove it home immediately.
I have a Durametric and the codes are:
P0300: Porsche fault code 62 - misfire damaging to cat converter
P0304: Porsche fault code 66 - Cylinder 4 misfire damaging to cat converter
I changed the spark plugs at 30,000 miles when I bought the car and now have almost 56,000 on the car. The spark plug change interval on the 2000 model year cars is 30,000 miles.
Based on some other posts, the problem could be a coil pack. Does anyone have suggestions for repair?
The CEL isn't flashing, but based on the description of the code, I would have it flat-bedded to a shop if I can't repair it myself. __________________
-
I had the same problem you describe. I ended up replacing the shut off valve (part number 996-605-201-01) and the charcoal canister (996-201-221-07).
I did not do the work, so I cannot discuss the procedure. My wife bought a used Durametric for me as a Christmas present. I'm hoping I will be able to diagnose and repair future problems of this type myself.
Good luck, I know this is an irritating problem. I still hold my breath every time I start the car after refueling and it has been two years since the repair.
-
Thanks for posting this. I now have a working light in my front trunk after living without one for about two years.
One note - If you disconnect the battery prior to installing the switch, the light won't come on immediately when you reconnect the battery. You will need to open the driver's door to re-power the circuit.
-
Have you checked this description of the process: http://sites.google.com/site/mikefocke2/replacingthetop-adiy
I've been studying it and trying to determine whether I have the skill and patience to complete the job.
-
Thanks for the update. If you haven't had a problem after three years, it sounds like it will hold up well.
Do you remember which brand you used and where you bought it?
-
I finished installing this modification on my 2000 base Boxster today. Here are a few notes for anyone who plans to do this.
1. This is a very good method for installing a garage door opener. I would call it an OEM garage door opener, but because Porsche didn't offer it as an option on the 2000 Boxster, that would be inaccurate. My brother-in-law helped me with the soldering. When he saw the Targa switch he said, "That's neat, it even has a picture of a garage door on it."
2. The 2000 Boxster (and I assume all 1997-2002 Boxsters) has a slightly different anatomy than the 2003-2004 cars. (The 97-02 cars have the "bat wing" center console. The 03-04's have the "horseshoe".) There is no room above the air conditioning vents for the transmitter in the 97-02 cars. I used velcro to attach it to the "front wall" of the space behind the radio and the HVAC controls. Also, the two "wings" of the "bat wing" on the center console just pull off. If you want to take the entire front off like the author of the original article you need to remove the bat wing by removing 4 T-15 Torx screws.
3. If you are not familiar with the relay carrier, here's an article that includes instructions for accessing it: http://www.renntech.org/forums/index.php?s...y+carrier\ Be sure to read the author's article on the foot well lighting mod. That has diagrams of the relay carrier including the exact points to tap into for power. The power points on my 2000 were the same as on his 2003.
4. I couldn't find a glossy black Targa switch. According to the sources I checked, it is only available in matte black. I have heard of some people coating the flat black switches with a glossy clear coat. I have not done that because I am concerned that it would wear off. I may coat mine later.
5. I have not been able to obtain this part: 996.650.111.40 -- plug socket, console switch (purple). It may not be absolutely necessary. I was able to wire the Homelink directly to the switch. I wrapped electrical tape around the individual contacts to avoid shorts. It is working, but I think I will retrofit the plug socket once I locate one.
We have about 10 inches of snow on the ground here and I did not take my Boxster out to check on the range of the transmitter. I'm hoping that it will be more powerful than the remote that came with my garage door opener.
-
It seems like many problems with the CDR 220 are caused by dirty electrical contacts between the removable faceplate and the main part of the unit. I would try removing the faceplate and cleaning the contacts first.
If that doesn't fix the problem, here's a link to the Becker web site: http://www.beckerautosound.com/ They may have some suggestions.
-
In addition to the features you mention, the 2004 will also have the factory glass rear window. The interior also has some minor upgrades like a glove compartment. Your post implies that the 2000 has a glass rear window too, but I suppose it is the after market version which is slightly smaller and may interfere with engine access from above.
$8000 is a significant difference in cost. I don't think I would pay the additional money for the 2004, but I would be tempted. How long are you planning to keep the car? What effect do you think depreciation and resale value will have on your decision? I would expect the 2004 to be worth more if you plan to sell in two or three years. The 2000 may depreciate less in dollar terms since the starting price is so much lower.
I have those humps in my 2000 non-S. I don't know why they are there, but I assumed they covered a suspension component.
-
I took a break from searching and cleaned up the leaves in my yard.
I searched after the break and found this: http://www.renntech.org/forums/index.php?s...y+carrier\
It looks like I'll have to remove a few screws, a nut and a clip to complete my installation.
-
I've searched for more information on this topic, but I think I'm missing some basic information. I have a 2000 base Boxster and I'm planning to install a Homelink device using these instructions:
http://www.renntech.org/forums/index.php?showtopic=23304
Some of the instructions are also in this post: http://www.renntech.org/forums/index.php?showtopic=23307 because the author was installing foot well lighting and the Homelink at the same time.
I have assembled and tested the device, but before I start taking apart the car to install it, I need to make sure I understand how to tap into the power at the relay carrier above the driver's foot well.
I connected my power for the Homelink and the dimmer switch to (2) -- 999.650.320.22 -- connectors. The are for contacting the bridge/bridge plug in the relay carrier.
Based on some other posts, it seems like I am going to have to loosen the relay carrier to do this. Can anyone provide instructions or links to other posts that show how this is done? I need step-by-step basic instructions if possible.
Thanks

Carrera Instrument Cluster Transplant To Boxster
in DIY Articles - Boxster (986) - Mods
Posted · Edited by KevinH90
I realize that it has been a long time since this thread has been updated. I guess I'm late to the party for installing the Carrera Gauges.
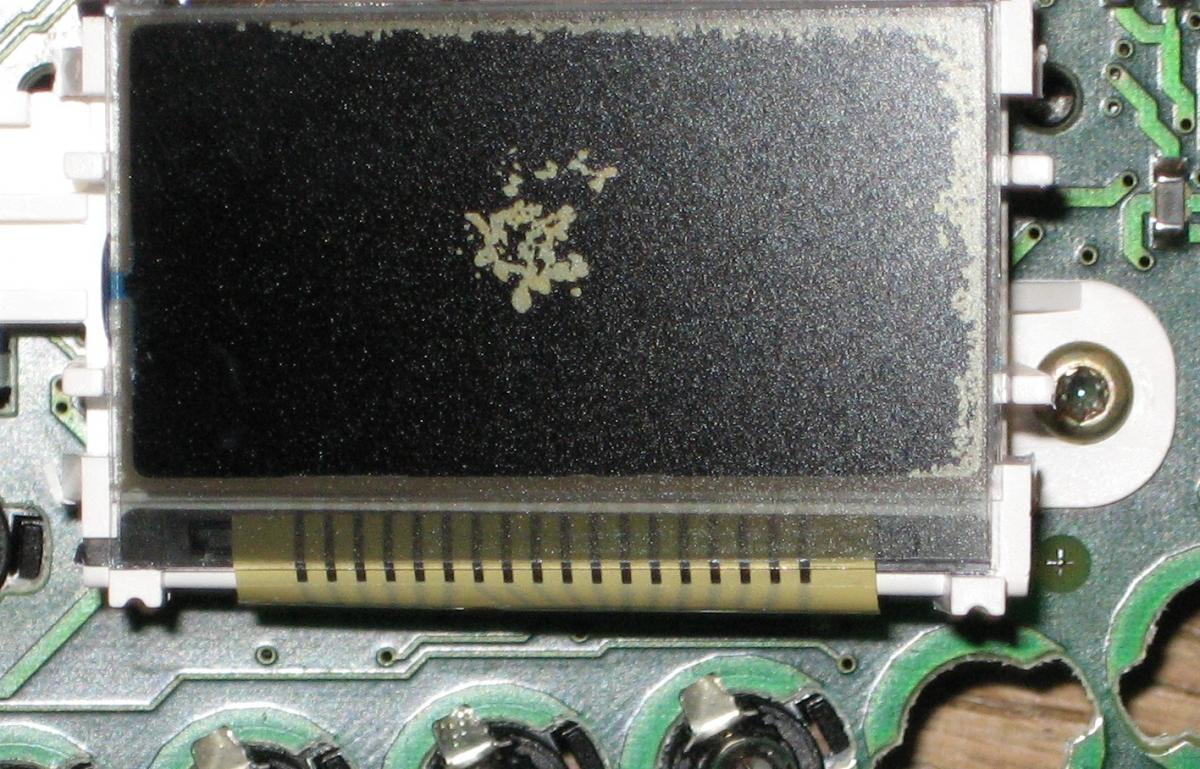
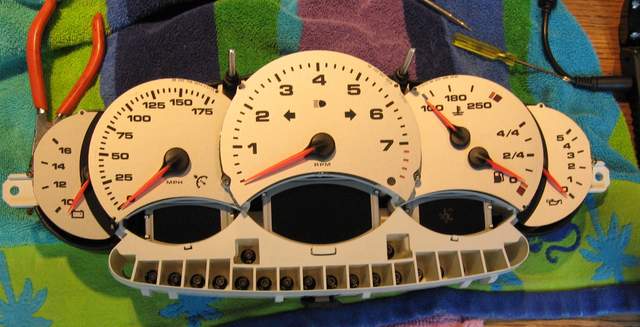
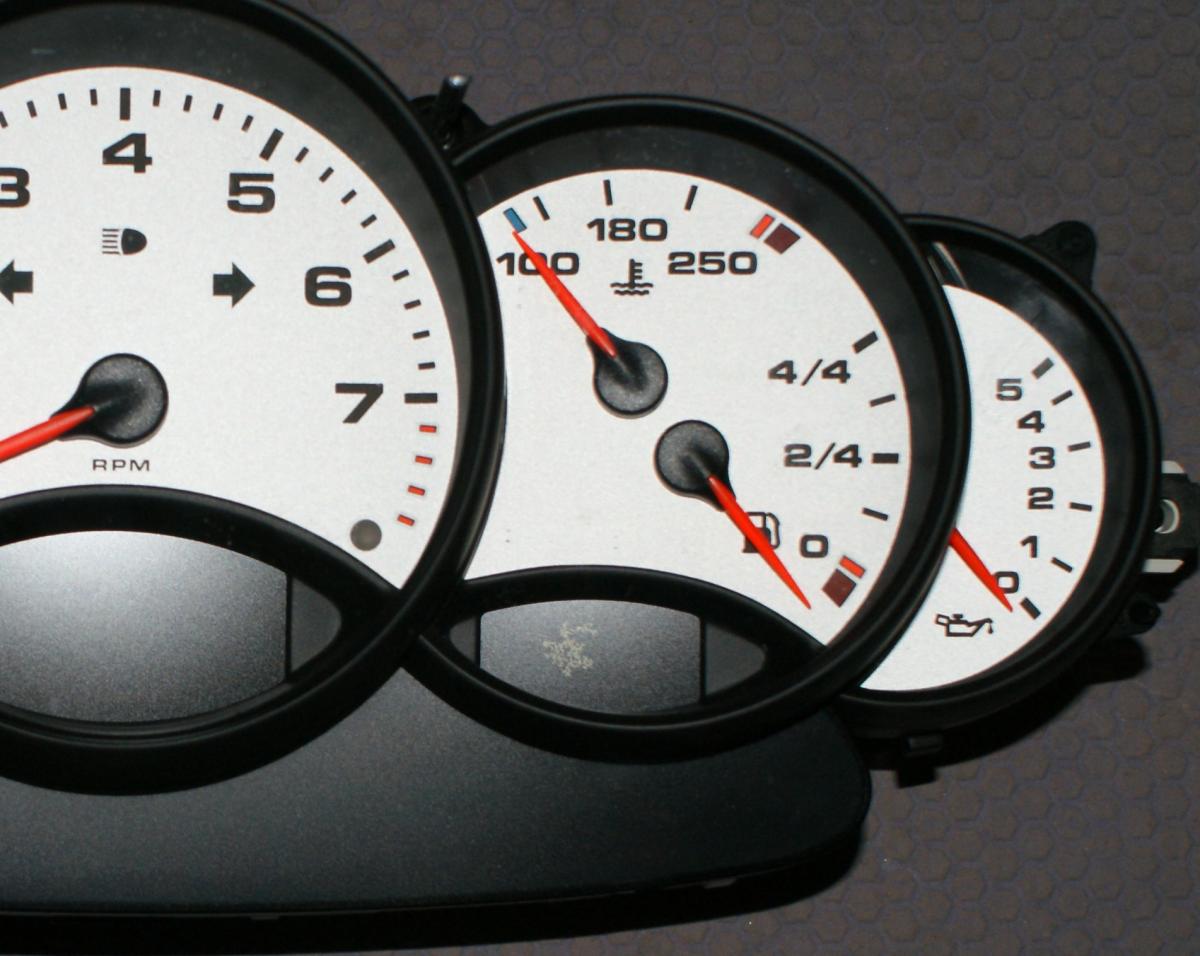
I purchased a used cluster - part number 996.641.980.26.70C fits a MY01 6 speed 2WD - US car for my 2000 Boxster. I installed it in my car and it works fine except for a damaged clock/oil gauge lcd. As you can see in this picture. The oil pressure gauge reads 0, but it rises to between 4 and 5 when I turn on the car.
The lcd was not a surprise - I paid $155 for the gauge cluster (including shipping) and I knew it was from a warranty repair. So, it was a moderate risk/high reward situation.
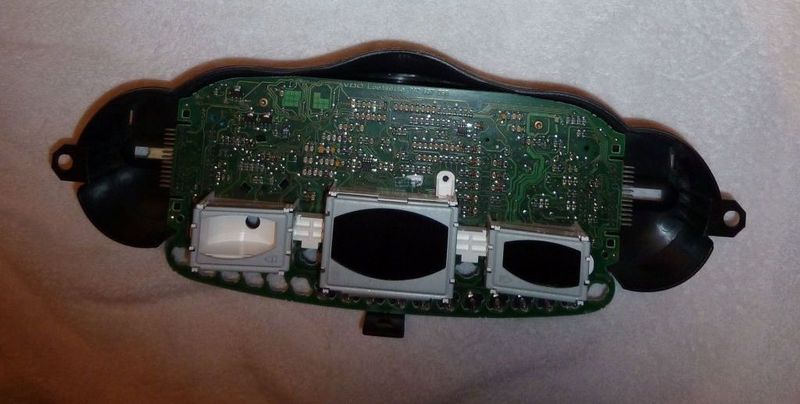
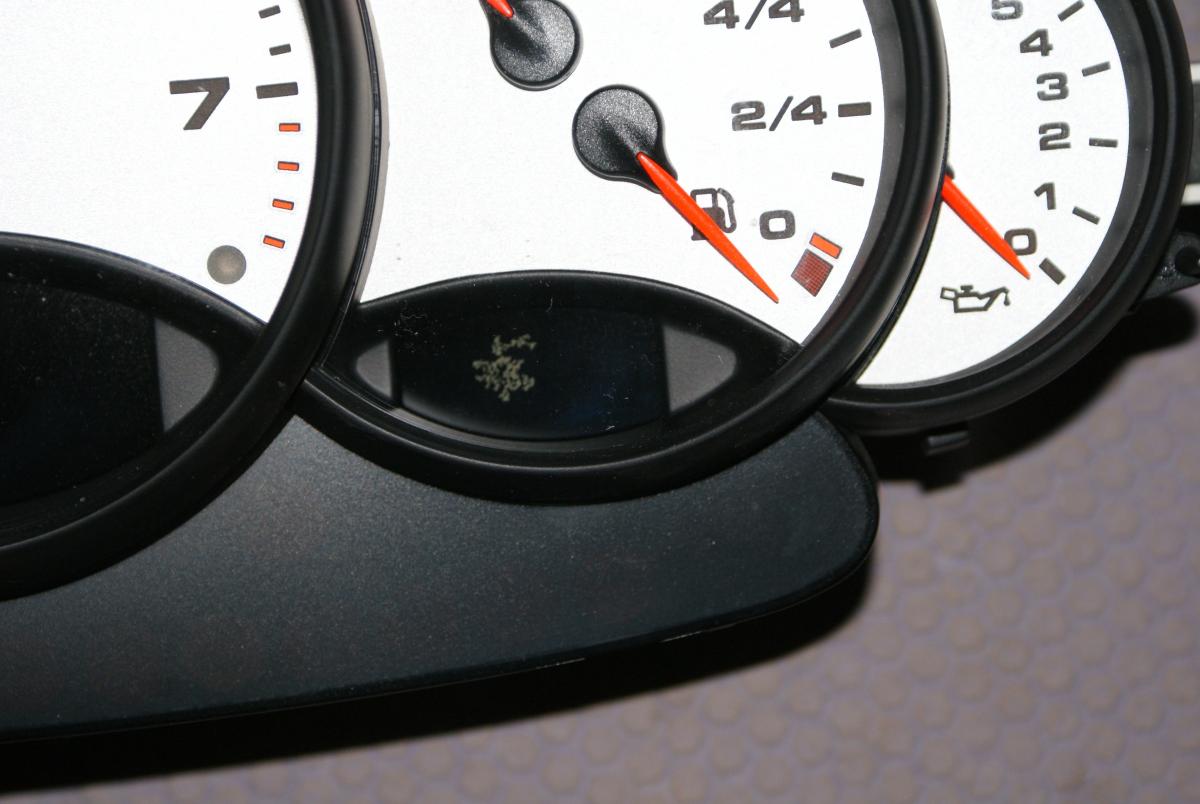
What I planned to do was place the gauges from the Carrera on my Boxster circuit board. The circuit boards have the same part number and they appear identical. When I did that, I had the result shown here:
Everything works fine except for the voltmeter. It stays at the bottom whether the car is off or on. I'm assuming that the car is sending a useable signal to the voltmeter since it works when I have the "pure" Carrera gauges in the car. Of course the circuit board could be similar in appearance but have differences.
Here's my question: If I had someone with a PIWIS or a PST2 run the following procedure is there a menu option to turn on the voltmeter? Specifically, does anyone know whether the menus that display in step 9 will have a choice for activating the voltmeter?
1. Get DME and Immobilizer codes for the car in question. You will need to contact a Porsche dealer, providing proof of ownership and the VIN number. Safe guard these codes and any other codes the dealer may furnish. They can be used to have keys made and/or re-program the car so that the real owner cannot access the car. Use these codes when asked to input the old codes and the new codes in the DME and immobilizer fields of the PST2 / PIWIS. If you have a battery that is suspect, i.e., old and/or weak, use a battery maintainer while doing the procedure. If the PST2 / PIWIS senses a voltage less than 12 volts, it may refuse to code the DME. Any power interruption during the reprogramming of the DME can complicate the situation substantially….possibly unrecoverably.2. Connect the PST2 / PIWIS, turn key ON, select 996 and DME. The only option will be to reprogram the DME.3. Reprogram DME as a 996 DME.4. Turn key OFF then back ON.5. Rescan all controllers for a 996.6. Change model type order code to 996310 – North American C2 Cabriolet (996311– RHD C2 Cabriolet)7. Turn key OFF then back ON.8. Rescan all controllers for a 996.9. Code instrument cluster. Step through every option, i. e., OBC, Cruise Control,Cabriolet, etc. (If you forget to code any of these options before you recode the DME back to 986 at the end of this procedure, you’ll have to start all over again at step 2!)10. Initialize the instrument cluster. This over writes the existing instrument cluster parameters.11. Turn key OFF then back ON.12. Program DME as a 986. North American 986’s are LEV vehicles when asked to input “emissions type”. There are three other emission types : RoW, EOBD andEOBD/Belg. These are used in other parts of the world. The type order code for a 986 is : 986310; a 986S is : 986320; a 986 (RHD) is : 986311; a 986S (RHD) is : 986321.13. After programming the DME follow the instructions to clear CAN bus fault codes in the controllers that have faults (usually the AC and PSM).14. Turn key OFF then back ON.15. Rescan all of the controllers for a 986.16. Turn key OFF, disconnect PST2 / PIWIS. Finished!