Welcome to RennTech.org Community, Guest
There are many great features available to you once you register at RennTech.org
You are free to view posts here, but you must log in to reply to existing posts, or to start your own new topic. Like most online communities, there are costs involved to maintain a site like this - so we encourage our members to donate. All donations go to the costs operating and maintaining this site. We prefer that guests take part in our community and we offer a lot in return to those willing to join our corner of the Porsche world. This site is 99 percent member supported (less than 1 percent comes from advertising) - so please consider an annual donation to keep this site running.
Here are some of the features available - once you register at RennTech.org
- View Classified Ads
- DIY Tutorials
- Porsche TSB Listings (limited)
- VIN Decoder
- Special Offers
-
OBD II P-Codes - Paint Codes
- Registry
- Videos System
- View Reviews
- and get rid of this welcome message
It takes just a few minutes to register, and it's FREE
Contributing Members also get these additional benefits:
(you become a Contributing Member by donating money to the operation of this site)
- No ads - advertisements are removed
- Access the Contributors Only Forum
- Contributing Members Only Downloads
- Send attachments with PMs
- All image/file storage limits are substantially increased for all Contributing Members
- Option Codes Lookup
- VIN Option Lookups (limited)


sswong98
-
Posts
19 -
Joined
-
Last visited
Content Type
Profiles
Events
Forums
External Paint Colors
Downloads
Tutorials
Links Directory
Collections
Store
Posts posted by sswong98
-
-
Thanks JFP in PA for your input :)
-
Hello All,
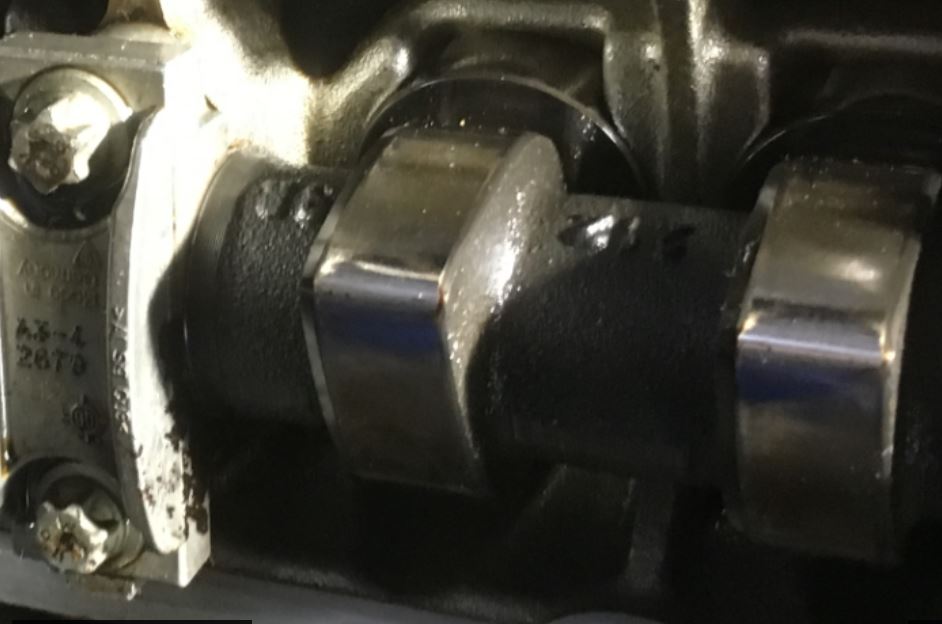
I changed out the old dried out valve cover gasket on my 2006 Cayenne S. I took some pictures of the cam, and noticed some interesting wear around the tip of the cam lobe. Would like some input or comments regarding the wear. Does this seem normal for a 2006 Cayenne with 195K miles?
Thanks in advanced...

-
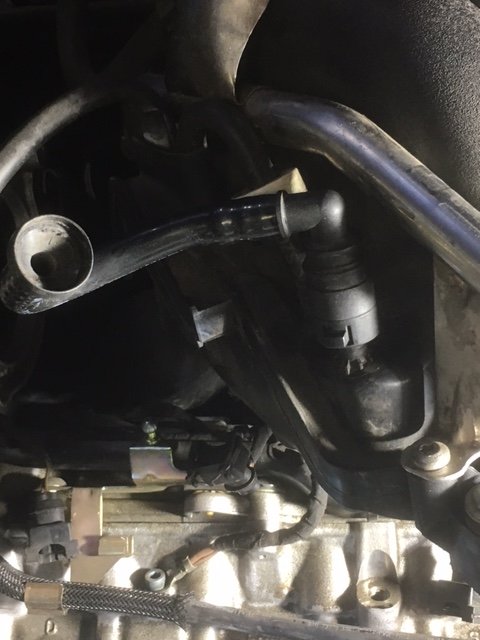
I think I found it. It looks like part of the venturi hose. I am gonna just patch for now, and order a new one. BTW. Getting the starter out and in wasn't too bad. I loosen the back plastic support for the three coolant pipes. I had my daughter pry up just a few mms which was just enough for the starter to clear.
-
Hello All,
I am in the process of changing the starter motor on 2006 Cayenne S. I tried to be really careful, but the rear vac line where you pinch, broke off. I can't seem to fine where the other end goes. I was hoping someone can tell me at where the other end is suppose to attach to.
-
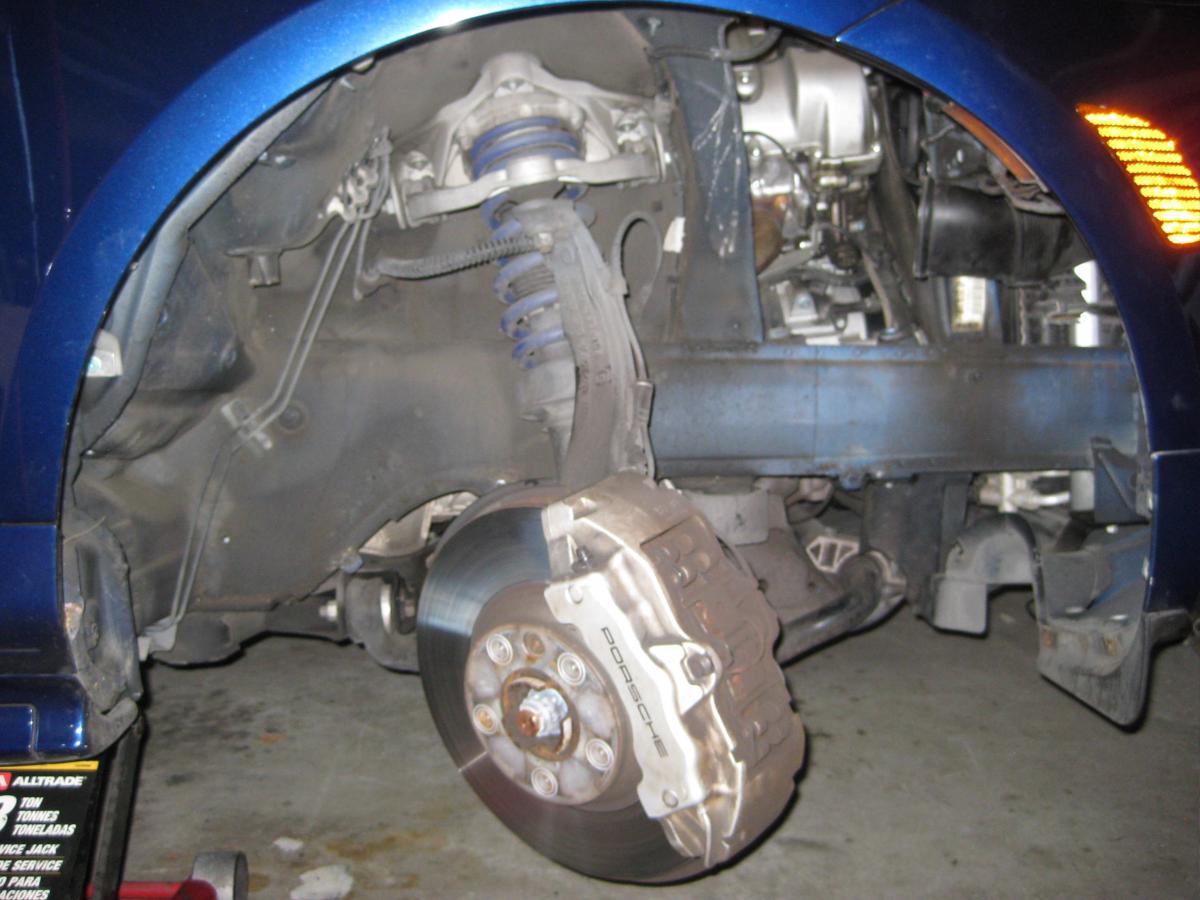
I have a 2006 Cayenne S and replaced both pre-cat 02 sensors a couple of years ago. The driver was was pretty straight forward from underneath the car. I did remove the wheel well cover for easier access to route the 02 sensor wire. The passenger side I access via the front wheel. Here is a link with a little detail:
-
Looks like the window frame is still in the door. The window frame/door subframe and door are actually two pieces and you have to remove the window frame out of the door. Once you have the subframe, out unscrew the window. You'll need to drill out the 4 rivets holding the regulator. See if you can access a heavy duty rivet gun like this one from Harbor freight http://www.harborfreight.com/hand-tools/hand-riveters/heavy-duty-17-1-2-half-inch-hand-riveter-with-collection-bottle-66422.html
-
Update... I decided to reboot and restart my diagnoses from the beginning. I discovered that the 40 amp fuse in fuse holder 56 had blown. It must have somehow blown while I was replacing the resistor pack. Once I replaced the fuse, everything was working
Thanks everyone for chiming in. Here is a link on information about the blower motor that I found interesting and helpful:
http://www.renntech.org/forums/topic/48293-no-air-conditioning-2005-cayenne-turbo/
-
Hello Lewisweller, Good point, I didn't test the input voltage going to the resistor. I didn't think the issue could be the A/C controller itself.
-
Hello All,
I have a 2006 Cayenne S, and last week the fan was blowing and all of the sudden quit working. I did smell something burning, but not sure if the source was outside of the car.
I naturally thought the issue was the blower resistor, so I ordered one and just replaced it. However, still have no fan. I checked for DC current going into the blower motor and no current. I also, checked the brown wire coming out of the resistor is no current as well. I don't have an external DC source, so I can't really check the blower motor. I checked all the fuses on both sides of the dash and in the engine compartment. The interesting thing is when I click on the front defrost, no blower. I've read that is separate from the blower motor, and should work.
Have anyone experienced this issue? Maybe suggestion on what the issue is? Maybe a relay?
-
Glad my post helped. My Cayenne S doesn't have turbos (I wish), there is a little more space :eek:
-
Hi All,
I've been meaning to post a similar procedure for 2006 Cayenne S. I guess this is a perfect time B)
Procedure replacing the o2 sensor for a 2006 Porsche Cayenne S.
Make sure the engine is cool.
Parts:
Driver-side O2 Sensor – Bosch 17157
Passenger-side O2 Sensor – Bosch 17158
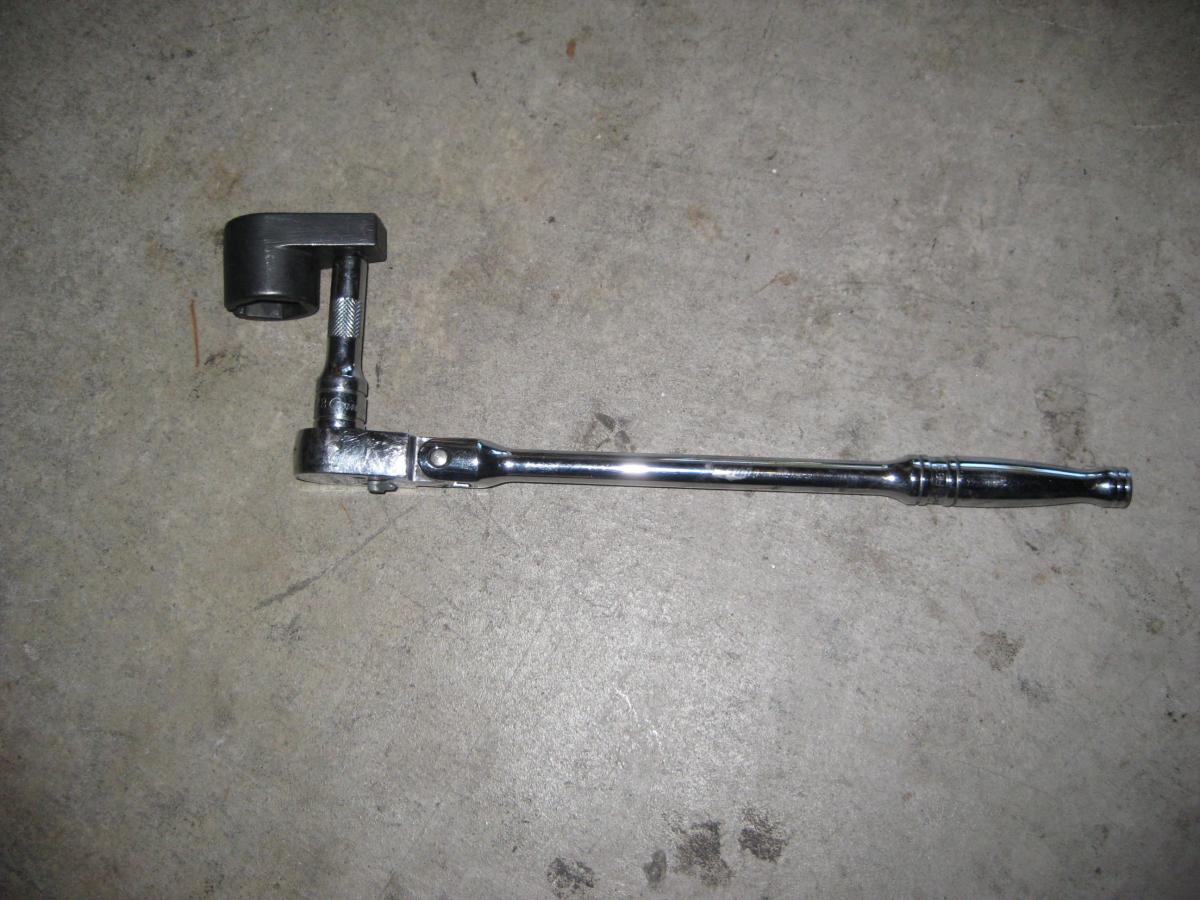
Tools:
O2 sensor 22mm socket
1” and 2” 3/4 inch extension
3/4 “ratchet
10 mm socket (passenger side air box and wheel well lining)
T25 Torx screws (wheel well lining)
Driver side O2 Sensor:
1. Disconnect electrical connector from the firewall. The brown connector
2. Jack up the car
3. Remove driver front tire
4. Remove wheel well lining (click here) for easier access to re-route the O2 sensor wiring
5. Remove Engine Under Tray
6. Access the driver side O2 sensor from underneath the car by the center hub. Use Pelican’s how to as reference.
7. Once the O2 sensor is loose, pull the wirings off the various harnesses.
8. Replace with the new O2 sensor
9. Re-route the wiring like the old sensor. Easier with the wheel lining off
10. Re-connect by the firewall
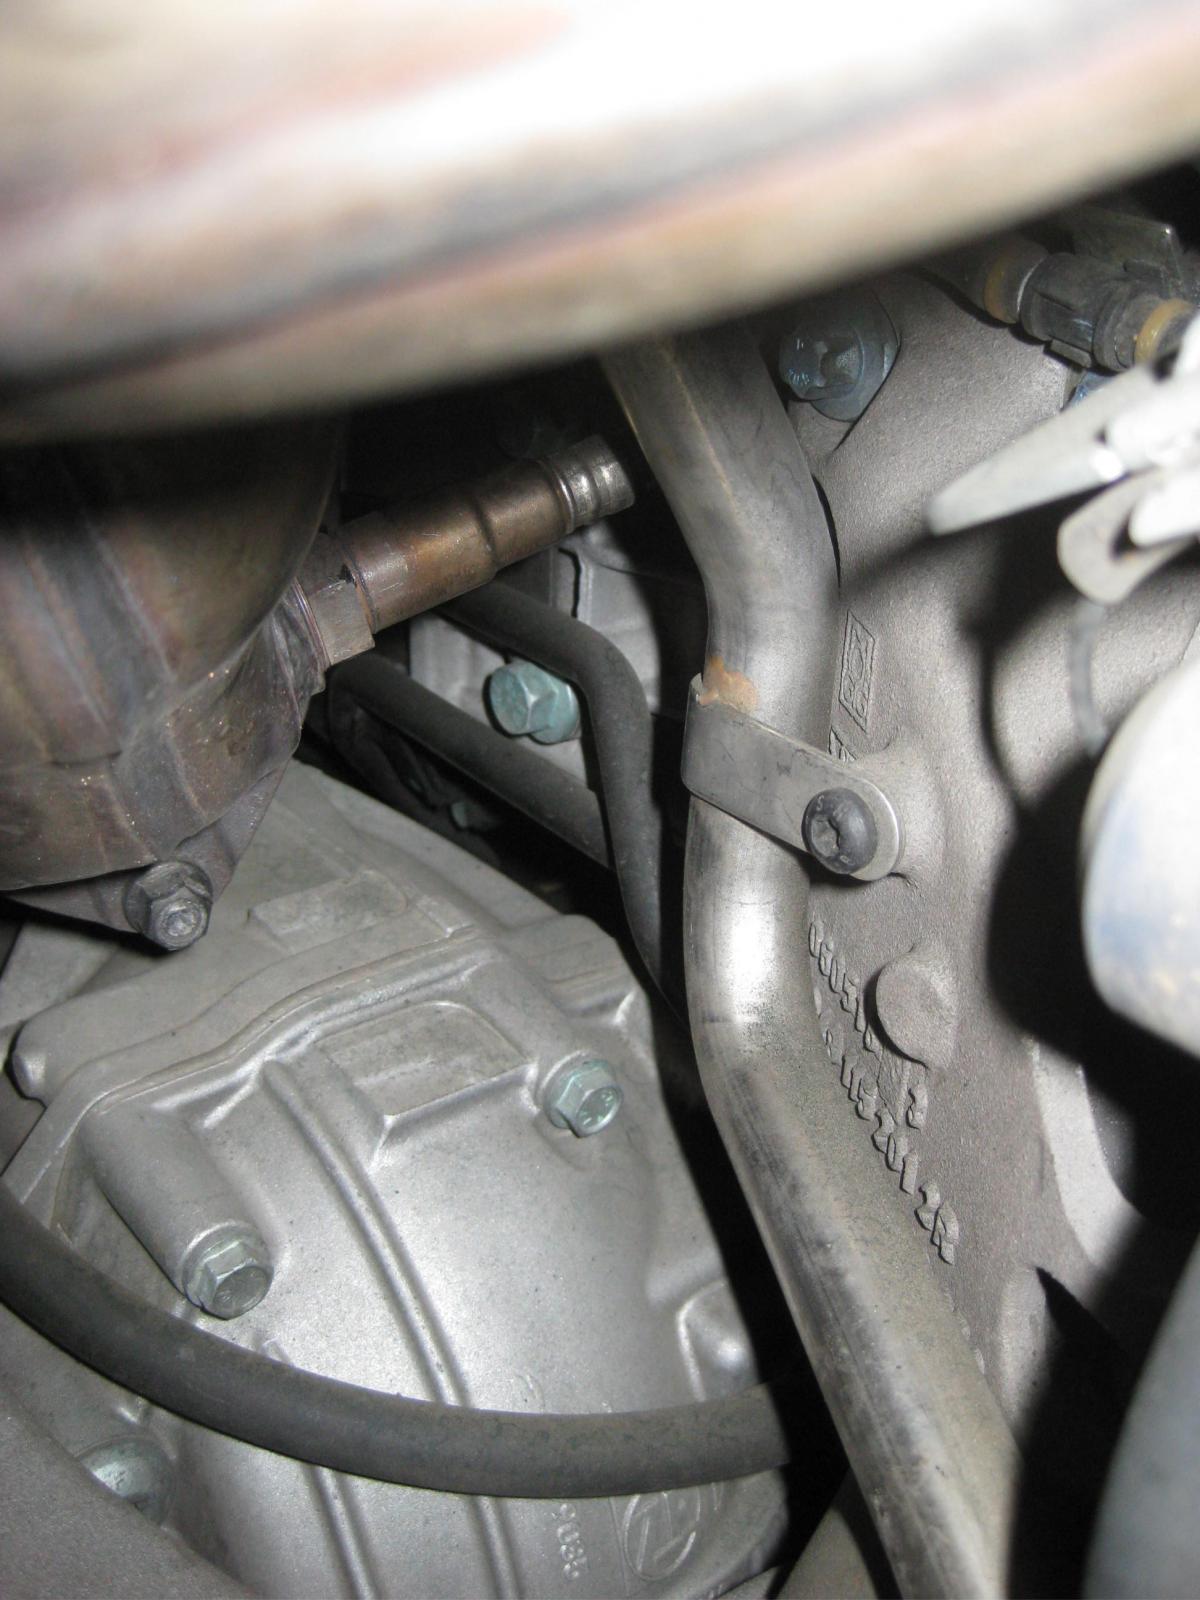
Passenger side O2 Sensor:
1. Disconnect electrical connector from the firewall. The pre and post cat sensors are the same color connector or black. The inner or closest to the engine is the pre-cat sensor
2. Jack up the car
3. Remove passenger side front tire
1. Turn wheel full lock to one side in order to gain better access to the O2 sensor
2. Remove wheel well lining (click). Access to the passenger side O2 sensor
3. Remove the air filter box
a. Remove 10mm bolt
b. Pull out from the engine compartment side
4. You should be able to see the passenger side O2 sensor from where the airbox was sitting
5. Snake the O2 sensor socket over the wires. Hint: remove the wire from the fastener to add slack in order to tread the socket through the wire
6. Connect the 2 inch extension and ¾” ratchet, but in a reverse configuration
7. Break the O2 sensor loose. Remember, the sensor is facing in the opposite direction, so push the ratchet down or turn clockwise
8. Re-route the wiring like the old sensor. Easier with the wheel lining off
9. Re-connect by the firewall
-
I have a 2006 Cayenne S titanium with 178,000 K miles with no issues. This is a California car, and always ensure a warm up before taking off. No oil consumption, and she runs amazing. I also had concerns about scoring, so I ran a borescope through a both sides and did not see any scoring.
-
Thanks for the reply :thumbup:
-
Hi All,
I was wondering if anyone installed Hella Supertone via straight connect to existing horn wiring, or used a relay and the existing horn wiring as the switch. If a relay was used, where did you run the wiring? Straight to the battery?
Thanks,
-
Can you read the code? Another possibility is the coils packs. Happened to me. About 20 mins of driving, my Cayenne started driving rough. I can't recall the code number, but it was misfire in cyl 2.
-
The fuel pump has nothing to do with your Cayenne not cranking. Sounds like an electrical problem. It could be the alternator not recharging your new battery. You should see more than 12.9 volts on your volt meter. Try charging your battery over night directly. Meaning, placing your charger directly onto the battery terminals and removing the cable to the car. Just wanted to see if the car will crank. While you have access to the battery from under the seat, check the fuse link blocks which is located next to the battery. As for the fault codes, they occur when there is low voltage.
-
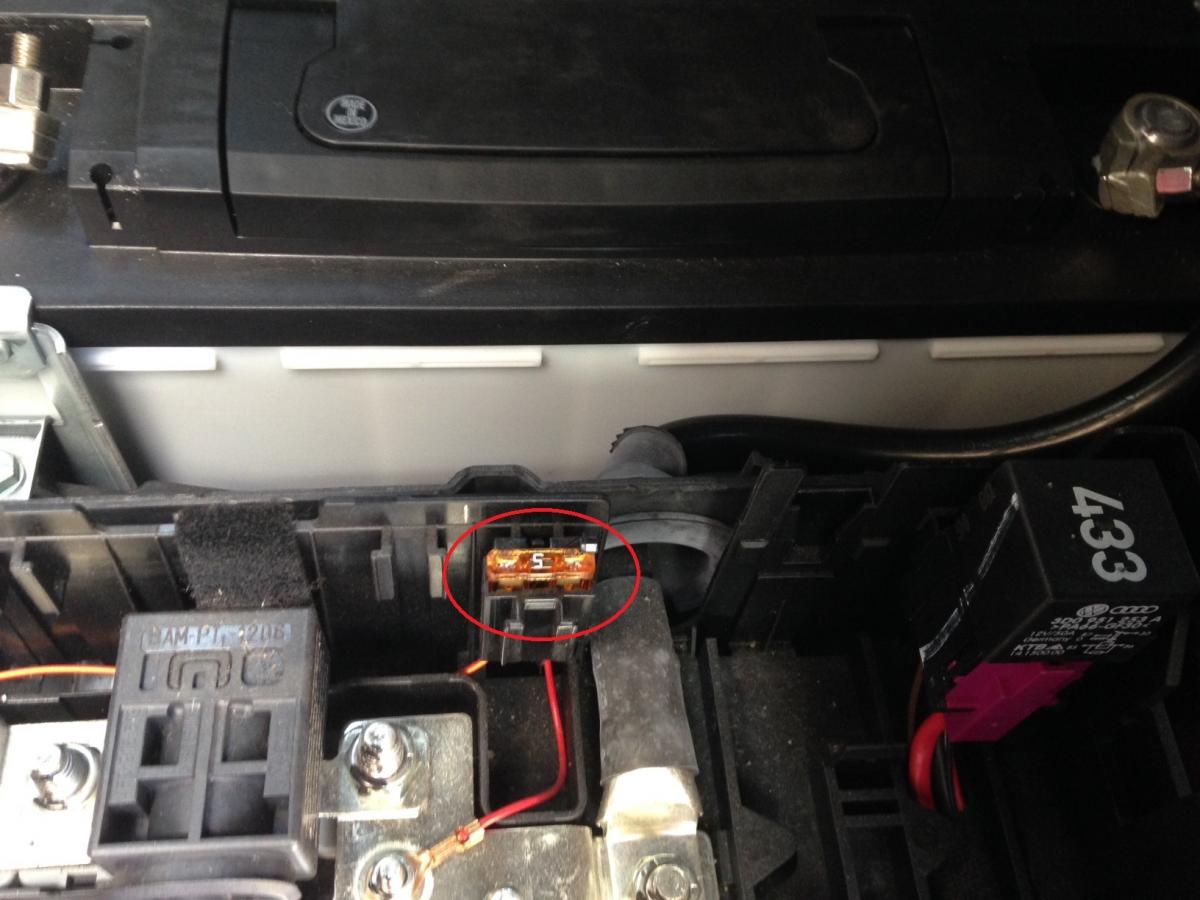
I wanted to share a resolution I had for the following fault codes on my 2006 Cayenne S:
457- Vehicle electrical system control module (CAN comfort) - Please read out fault memory, test conditions are not-completed, fault is currently active and is not causing a DTC light
956 - Key 2 Value below lower limit value
668 - Vehicle voltage terminal 30 - Implausible signal, test conditions are not-completed, fault is currently active and is not causing a DTC light
Voltmeter started to work
The simple fix was replacing a burnt out 5 amp fuse located by the main battery underneath the driver seat. The fuse is part of the power distribution panel. Does anyone know what is this fuse is used for?
-
I experiencing an intermittent problem with the rear hatch on my ’06 Cayenne S where pressing the rear hatch handle does not unlock/open the hatch. Either clicking on the unlock button on the driver side door or pressing the remote multiple times does not open the hatch. However, if I press lock, then unlock buttons on the remote, the hatch will open. Has anyone experienced this intermittent problem before or have a suggestion part would be the issue? No codes from my Durametric. Thanks for any help.


starter solenoid 955 cayenne turbo
in 9PA, 9PA1 (Cayenne, Cayenne S, Cayenne Turbo, Cayenne Turbo S)
Posted
I recently replaced my starter on 2006 Cayenne S. The starter was turning slow. PM if you want the starter for parts. I am in Santa Clara.