Welcome to RennTech.org Community, Guest
There are many great features available to you once you register at RennTech.org
You are free to view posts here, but you must log in to reply to existing posts, or to start your own new topic. Like most online communities, there are costs involved to maintain a site like this - so we encourage our members to subscribe or donate. All subscriptions and donations go to the costs operating and maintaining this site. We prefer that guests take part in our community and we offer a lot in return to those willing to join our corner of the Porsche world. This site is 99 percent member supported (less than 1 percent comes from advertising) - so please consider an annual subscription or donation to keep this site running.
Here are some of the features available - once you subscribe RennTech.org
- View Classified Ads
- DIY Tutorials
- Porsche TSB Listings (limited)
- VIN Decoder
- Special Offers
- Paint Codes
- Registry
- Videos System
- View Reviews
- and get rid of this welcome message
It takes just a few minutes to register, and it's quality Porsche information at a low cost.
Contributing Members also get these additional benefits:
(you become a Contributing Member by subscribing or donating money to the operation of this site)
- No ads - advertisements are removed
- Access the Contributors Only Forum
- Contributing Members Only Downloads
- Send attachments with PMs
- All image/file storage limits are substantially increased for all Contributing Members
- Option Codes Lookup
- VIN Option Lookups (limited)


mivey
-
Posts
11 -
Joined
-
Last visited
Content Type
Profiles
Events
Forums
Exterior Paint Colors
Downloads
Tutorials
Links Directory
Collections
Classifieds
Store
Everything posted by mivey
-
SoCalTurbo, Thanks. It is pretty fun to DIY once you get into it. Great looking car. Yes, please do post pictures when you can. MIVEY
-
Juankimalo, Thanks. The main reason I went with the Pioneer unit was the wireless Bluetooth Telephone and wired iPod connection capability. I like the fact that the Pioneer lets you store your music on its built in Hard Drive but with my iPod integrated to the unit I don't really use this feature much. I am in the process of getting new speakers. I installed a JL e6450 amp and think I may have blown my factory speakers :).
-
thebairdybunch, If you visit AVIC411.com you can download my background. There is a section dedicated to custom backgrounds (you can search the forum for Porsche and it will be among the few hits). rychone, I ran my mic along the top of the windsheild on the passenger side and secured it to the left of the little pod that holds the infrared sensors. I had read somewhere a year ago that the factory location was not the best spot (not sure if true) but I didn't want to go through the trouble to find out it would need to be moved. I get good response in its curent location (I have a cab and it is still OK with the top down). MIVEY.
-
Pioneer AVIC-Z1 on a '04 C4S
mivey replied to Michael_N's topic in 996 Series (Carrera, Carrera 4, Carrera 4S, Targa)
Michael, Unfortunatly you may be out of luck. The AVIC-Z1 has an optical out connection but it is not likely to work with the MOST Bus System. You should contact Pioneer directly through their website. They are normally responsive to questions. They may have a solution. MIVEY. -
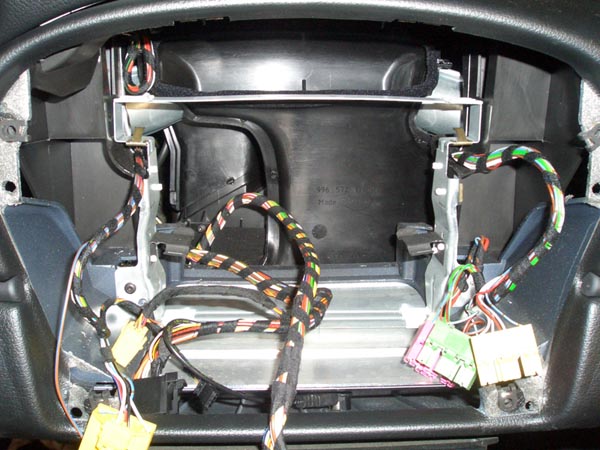
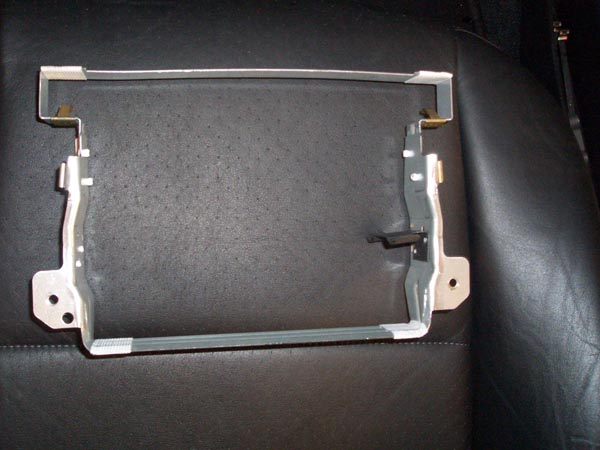
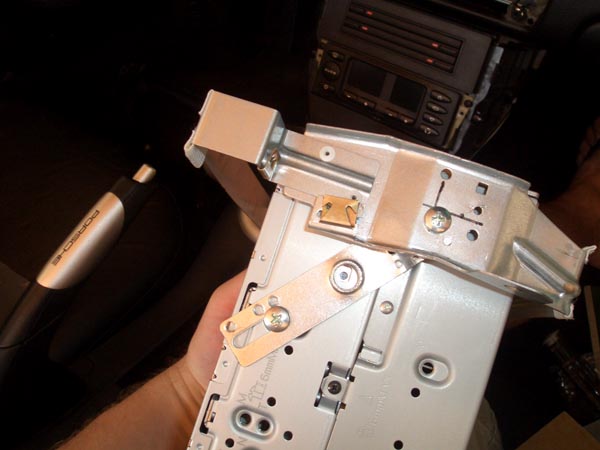
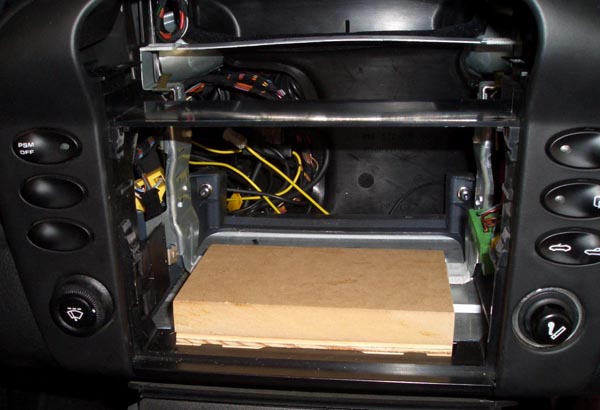
thebairdybunch, I was happily surprised to find a metal bracket that roughly frames a double DIN area behind the dash trim. This piece easily removes with two torx screws. I secured the unit to this using two brackets (one on each side) that I had left over from another project. To get the stereo head unit to sit at the right height I cut a small piece of MDF board / plywood for it to rest on (roughly 3/4 inch). There is an area that this piece just sits in perfectly without moving around so there is no need to fasten it in. The attached pictures will give you an idea of what to expect behind the trim. Using this method, I was able to make minor adjustments (front to back) to the placement of the head unit. Once I got it right, I used a small right angle screw driver to tighten the brackets. If I need to pull the unit, all that is required is to remove the trim and the two original torx screws and the whole thing (unit and frame) slides out. James, Per your question regarding a single DIN install, If it is a standard single DIN head unit, it will likely slide right in without issue with a snug fit. Others who have changed the Becker for a single head unit may be able to tell you if a non-german unit will CLIP in as easily as the Becker. There are several Harmon-Kardon (now owns Becker) units that appear to fit perectly. MIVEY

-
Loren, I will try to work on a DIY for the entire install. In the mean time, here is the technique I used to create the custom faceplate. How to Make Custom Faceplates Like the Pros. This is the method I used and can be adapted for many types of faceplates (i.e. the piece of material that surrounds your stereo to fill in any gaps). This really applies when no dash kit / adapter is available for your make of car. I hope this is helpful to the do-it-yourself people out there. NOTE: this is not intended to serve as a means to mount your stereo head unit. This is intended to help you finish the job with a clean look. Porsche 996 Specific Parts: A/C Panel Trim Piece - 996.552.339.00.01C (used when moving the A/C control to the bottom shelf in the 996) Supplies: Metra ABS Blank Gridplate (12" / 12") - Has a grooved grid on the back to make cutting straight lines very easy Rust-Oleum Textured Paint for Plastic (Black) or alternate color / texture Super Glue Tools: Razor Blade Knife / Utility Knife Very Fine-toothed saw / Japanese Dovetail saw (optional for faster cutting of the ABS plastic. Available at most home improvement stores) Medium and Fine Sandpaper sheets Orbital Sander with medium and fine sanding disks Mini Blowtorch (Only needed if you need to create a curved faceplate. Available at most home improvement stores) Procedures: If you need a flat faceplate (Applies to the 996): 1. Take horizontal and vertical measurements of the opening in your dash where your factory radio is currently installed (it may be easier if you have already removed your factory radio). 2. Lay the Metra ABS Blank Gridplate face down on a hard surface (use an old towel to keep it from sliding around). 3. Using the utility knife or Japanese Dovetail saw, cut the Metra ABS Blank Gridplate to size (or just slightly LARGER than the opening in your dash) 4. Position the newly cut piece in the dash using the sandpaper to sand it down to a perfect fit. 5. Measure the exact width and height of the part of your new stereo that will extend from the dash beyond the faceplate. 6. Using the utility knife or Japanese Dovetail saw, cut out the opening (or just slightly SMALLER than the size of your new stereo). The grid on the back of the ABS blank makes it easy to cut to any shape. 7. Position the newly cut piece around your new stereo using the sandpaper to sand it to a perfect fit. 8. If the Metra ABS Blank Gridplate finish does not already match your dash color or you want it to be a flatter black or other color, use the orbital sander to sand the glossy texture from the front of your new faceplate (again using an old towel to keep it from sliding around). 9. After you have sanded the faceplate, wash it in tap water to rinse off any dust and dry it thoroughly with a paper towel. 10. Using the Rust-Oleum Textured Paint for Plastic, paint the front of your new faceplate following the directions on the spray can. This will add a lightly textured finish to your faceplate (if your dash has a smooth finish, you can use non-textured paint for an exact match). 11. In addition to the snug fit around your stereo that will hold your face plate in place, you can use small strips of the leftover ABS material to build up the backside edges of the faceplate to enable it to 'seat' firmly against the area beside the radio. Use the super glue to join the pieces where necessary. 'Clips' can also be easily fashioned out of the ABS material if needed. NEVER permanently fasten the faceplate to the dash. If you need a curved faceplate: Follow the directions above but use a flexible sewing measuring tape to measure over the curves of your dash to get the width and length of the dash opening. After you have cut the ABS plastic to size and sanded it (before painting), carefully use the mini blowtorch to lightly heat the ABS plastic where necessary to enable you to bend it to match the contour of your dash. Large round PVC pipes / tubes, a drinking glass or other round surfaces can be used to achieve a good curve. The key is to be patient and test your technique on scrap pieces before doing your final bending work. Once cooled, the ABS plastic will keep its curve for the life of the car. Finish your faceplate by washing it in cool water and painting it to match your dash color / texture.
-
Loren, good catch.... The only wire that was not readily available was the reverse sensing wire. I opted to not connect this wire as I do not use a back-up camera and from my research, no one has seen any negative performance with the navigation system when the reverse senseing wire is not connected. Thus far, I have not seen any negative side effects. I think I recall seeing a post where you guided someone to the point of connection for this.
-
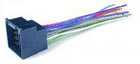
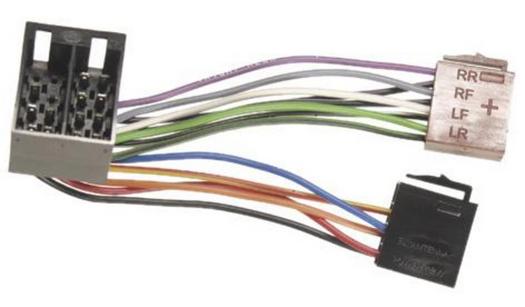
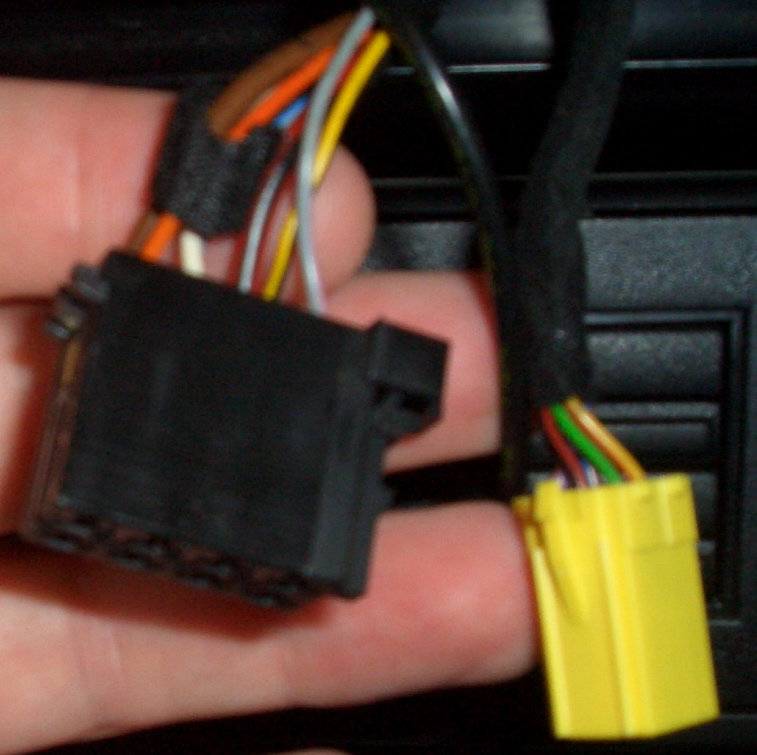
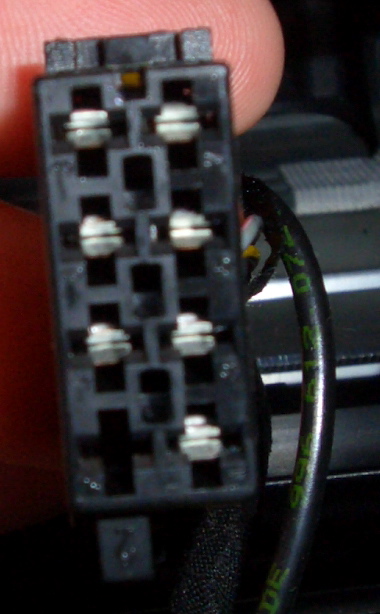
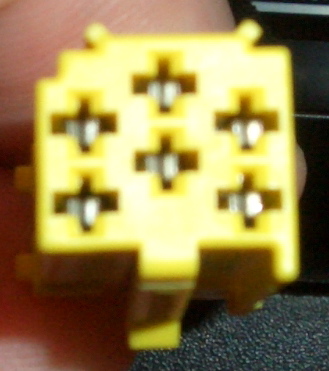
James, With the AVN7000 (or Japanese equivalent) being a 1 din unit, the install should be very easy. The Becker just slides out (using two small removal keys available for $2 from Becker, etc that go into the two tiny slots at the bottom right an left of the radio). You probably won't even have to disasemble the dash. With some modification, a Wiring Harness for VW/Audi might work (See picture attached). I also found reference to these guys www.nexxia.co.uk with regard to finding a plug-and-play adapter for the ISO plug. It is in the UK, but people have reported decent delivery times. The cost is going to be around $20 - $50US. I have added some pictures of the stock Porsche plugs that connect to the Becker. I had the HiFi upgrade in my 996 so the yellow plug goes to the amp. For my stereo install, every (almost, see below) wire I needed was included on one of the two standard plugs (continuous power, switched power, ground, illumination, speed senser, etc on the black plug and speaker / ground on the yellow plug). Many navigation head units also want to connect up to the Emergency Brake sensing wire. Because I used a 'bypass' to allow me to use the telephone and navigation function without pulling over, I did not need to hook this wire up (or look for it). Edited in after Loren's question: The only wire that was not readily available was the reverse sensing wire. I opted to not connect this wire as I do not use a back-up camera and from my research, no one has seen any negative performance with the navigation system when the reverse senseing wire is not connected. Thus far, I have not seen any negative side effects. MIVEY
-
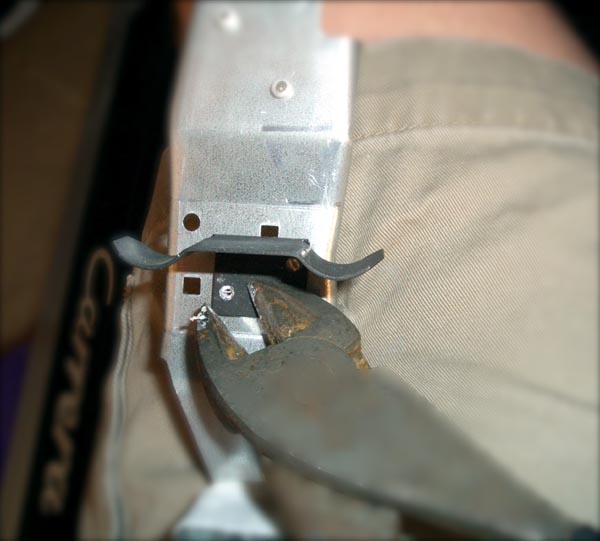
James, I am not saying a wiring harness is not available, but I searched the world over (via the web) for a few weeks and never found one. I even started creating my own with parts from a Honda wiring harness I bought and epoxy. Ultimatly, I just bit the bullet and cut the wires (leaving enough wire with the plug so I could reattach it in case for some absolutly crazy reason I ever wanted to put the Becker back in (I had the same thought you have about putting it back to stock, but I will never do it, it looks so much better to me with the new system). I think the plug is a standard ISO plug so I am sure it is available somewhere, but I could not find it and from what I found during my search, many others have had no luck either. I will tell you though, If you go with a double din head unit like I did, you will need to cut the thin piece of plastic that separates the area between the climate controls and the Becker unit (if you go back to the Becker, this entire piece is easily replacable from your local Porsche parts department and probably not very expensive). Once you get past this, cutting the wires becomes less of a concern. There is plenty of space behind the trim work so just about any double din unit will fit. If you do decide to move forward with your Navi System, I am happy to help with any questions you may have. MIVEY.
-
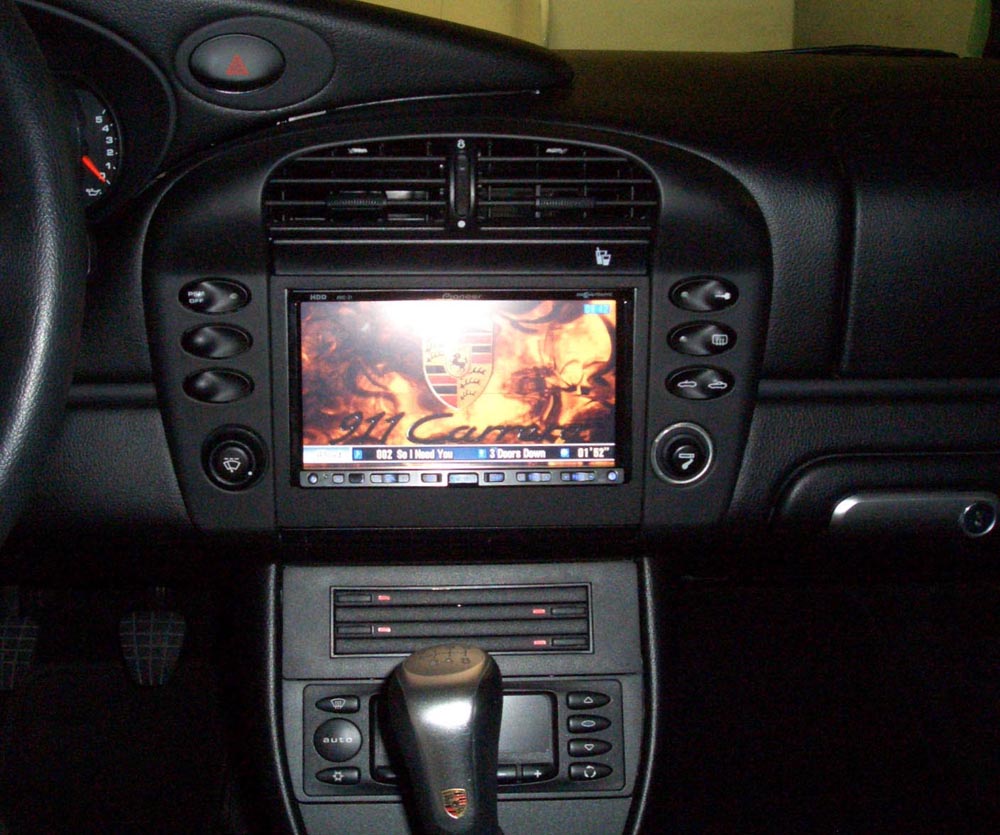
Izzy, Thank you. The custom trim around the stereo is flush and color/texture matched. The stereo itself sticks out only slightly, but by design. In person, it really looks like it came from the factory (if the little 'Pioneer' logo said 'Porsche' it would not even be questionsed). Complexity: Reasonably straight forward if you are comfortable with this type of stuff and have the wiring diagrams, etc (the stock radio (CDR220) wiring schematics are detailed in the back of the Radio owners manual that came with the car). Estimated Install Time: 5 hours (going slow and being very careful) Cost (all figures approxamate): Pioneer AVIC-Z1: $1,500 Pioneer iPod Module: $50 Pioneer Bluetooth Module: $136 Antenna Adapter: $20 Climate Control Trim Piece (from Porsche to move Climate control to bottom shelf): $6 Metra ABS Blank Gridplate (for custom trim): $10 Wiring: $20 Rust-oleum Textured Paint for Plastic (Black): $4 Misc: $10
-
I recently installed a new Pioneer AVIC-Z1 navigation system in my 2002 996. I took several pictures along the way in case others were interested in doing a simular project and can post them as needed. If you need help with your install of the AVIC-Z1, please go to AVIC411 and search the keyword: mivey911. If you post a message at AVIC411.com, I will be happy to try to help.