Welcome to RennTech.org Community, Guest
There are many great features available to you once you register at RennTech.org
You are free to view posts here, but you must log in to reply to existing posts, or to start your own new topic. Like most online communities, there are costs involved to maintain a site like this - so we encourage our members to donate. All donations go to the costs operating and maintaining this site. We prefer that guests take part in our community and we offer a lot in return to those willing to join our corner of the Porsche world. This site is 99 percent member supported (less than 1 percent comes from advertising) - so please consider an annual donation to keep this site running.
Here are some of the features available - once you register at RennTech.org
- View Classified Ads
- DIY Tutorials
- Porsche TSB Listings (limited)
- VIN Decoder
- Special Offers
-
OBD II P-Codes - Paint Codes
- Registry
- Videos System
- View Reviews
- and get rid of this welcome message
It takes just a few minutes to register, and it's FREE
Contributing Members also get these additional benefits:
(you become a Contributing Member by donating money to the operation of this site)
- No ads - advertisements are removed
- Access the Contributors Only Forum
- Contributing Members Only Downloads
- Send attachments with PMs
- All image/file storage limits are substantially increased for all Contributing Members
- Option Codes Lookup
- VIN Option Lookups (limited)


kbrandsma
-
Posts
1,103 -
Joined
-
Last visited
-
Days Won
8
Content Type
Profiles
Events
Forums
External Paint Colors
Downloads
Tutorials
Links Directory
Collections
Classifieds
Store
Posts posted by kbrandsma
-
-
If you have swirls on the paint. You can remove them with the Zaino Brothers System. I've used them for 10 years or so!
More information can be found at their website here:
YouTube Here:
-
It is my understanding that the yellow are Alarm Fault Codes that are currently not present (STATUS - not present) and the red are fault codes that are currently present. (STATUS - present)
Both yellow and red have the number of times they have occurred (occurance). You fix the red ones to turn them to yellow and the yellow cannot be cleared/erased.
Fault Code 33 and Code 34 passenger side are the interior infrared sensor located above rear view mirror.
Fault code 34 - Passenger compartment monitoring sensor, short circuit to B+ or faulty
Possible cause of fault
- Short circuit to voltage in the wiring between the alarm system control module and the passenger compartment monitoring sensor
- Passenger compartment monitoring sensor faulty
Fault code 46 - Central locking synchronization
Possible cause of fault
- Short circuit to ground/open circuit between alarm system control module and door locks
- Door lock faultyFault code 60 - Central locking limit position - locked not reached
Possible cause of fault
- Switch for central locking faulty
- Short circuit to ground/open circuit in the wiring between the alarm system control module, switch for central locking or door locks
- Driver’s/passenger’s door lock faulty
- Control module faulty
-
Does the light on the dash come on when the emergency brake is set?
-
Perhaps it was stolen?
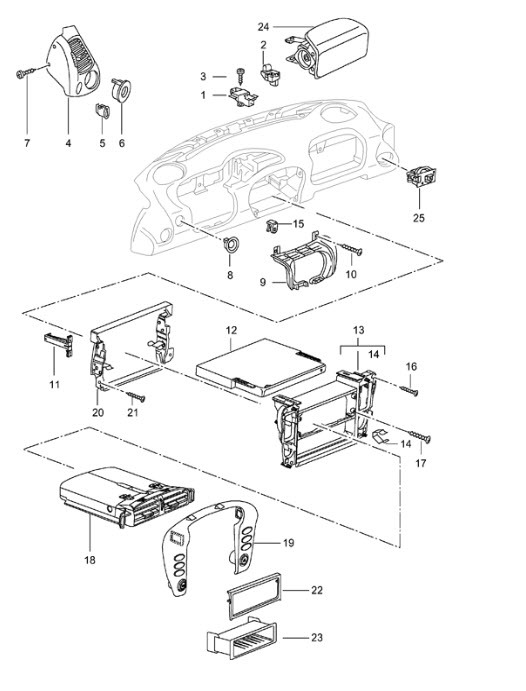
I couldn't find just the face plate.
Part #12 in Diagram below:
Replacement Part 996.552.183.02.01C - Satin Black - List price $387.50
Check with the good folks and also a Board Sponsor - Sunset Porsche in Portland, Oregon

-
After the double beep does the red LED on the rocker then go back on?
I replaced the door handle mechanism (which contains/includes one of the microswitches) and that did the trick.
Here is an excellent DIY Tutorial by Board Member Richard Hamilton on Carrera microswitches, that are identical for the Boxster, that should be helpful to you!
http://www.renntech.org/forums/tutorials/article/217-door-microswitches/
-
Were you able to check for any fault codes with a Durametric?
Are you having any problems with the passenger door window not dropping properly?
Or the Central Locking Switch? (The central Locking switch is the top right black rocker switch on the dash center console)
Or just a double beep when locking the car?
-
Hi Pete03S,
Did you realize you activated a 3 year old thread?
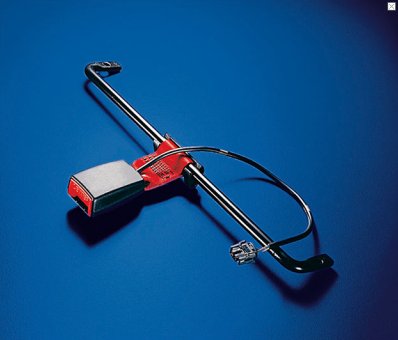
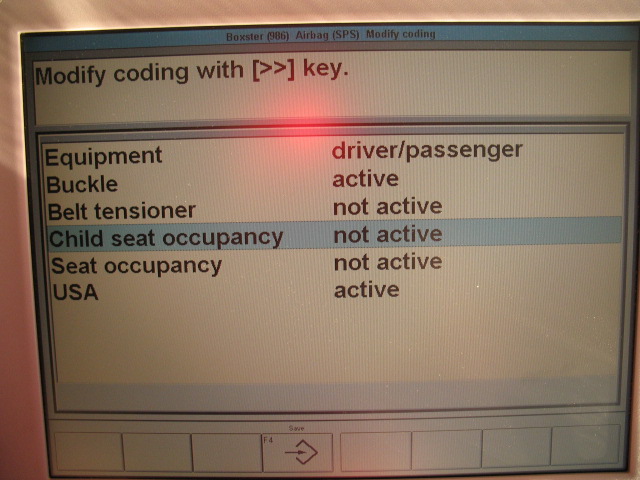
The system is designed to deactivate the front air bag on the passenger side. It consists of a bar attached in front of the seat and between the seat rails on the passengers side. Longer bolts replace the original bolts to be able to hold the seat and bar to the chassis. The bar has a female receptacle buckle with an electrical harness attached. There is a receptacle under the passenger seat to plug this harness into. A Porsche System Tester 2 (PST2), usually a Porsche Dealer will need to activate the system.
A Porsche child seat has a male portion that when inserted into the middle front buckle deactivates the passenger airbag. Any approved child restraint seat will work, but only a buckle in that front receptacle deactivates the airbag. Some get their own buckle from a salvage yard and then just insert it into the front receptacle so they can use their own non-Porsche child seats.
Child restraint activation bar with buckle receptacle and electrical harness.
System Tester 2
You can find more information here:
http://www.pelicanparts.com/techarticles/Boxster_Tech/96-MISC-Child_Seat/96-MISC-Child_Seat.htm
and also here:
http://www.renntech.org/forums/topic/19679-passenger-air-bag-and-non-porsche-child-seat/
and here:
http://www.renntech.org/forums/topic/9658-air-bag-deactivation/
-
What alarm problems are you having?
-
Hopefully it will hold!
-
Part Number 986.580.311.16.XXX (XXX=color) - $1,600 USD - New
These are pricey new, I would:
1. Go to a auto or boat upholstery shop and check on a solution/recommendation
2. Contact cement it on and worry about it next time you have to remove it
3. or check for used ones at a Porsche Dismantler shop like
Oklahoma Foreign - http://www.oklahomaforeign.com/
LA Dismantler - http://www.ladismantler.com/
-
I think a good rule of thumb has been Halogen $250 each and Litronic Xenon $500 each ($1,000 USD both sides) with price adjustments up or down slightly depending on the condition.
-
In 2003 the Boxster's rear plastic window was replaced with a smaller glass one. Definitely a big improvement, but If the top has been closed in a while it will take a few openings and closings to get the ragg top to lay down completely.
Welcome to Renntech!
:welcome:
-
You might want to check and rule out your oil filler cap. You can also check your AOS by following this link. PRESS HERE
-
Crossover provided by AMP. The door speakers provide low tones or the bass in your case. All speakers should be replaced and will provide an immediate improvement in sound quality.
-
I've have replaced the valve without an issue. I also replaced the screws as they are typically for one time use as Ahsai suggests. Don't over tighten the new screws as they can strip easy. I figured if that didn't work I could always replace the tank. A new tank comes with a new valve already installed.
-
Check eBay. I also got one at the dealer a year or two ago at a reasonable price!
-
Hello and Welcome to Renntech!
:welcome:
The key fob on the 986 is a fairly common problem with a few fixes to try. Replacing the battery is the first thing to try.
Here are a few postings for you to go through and try after that.
-
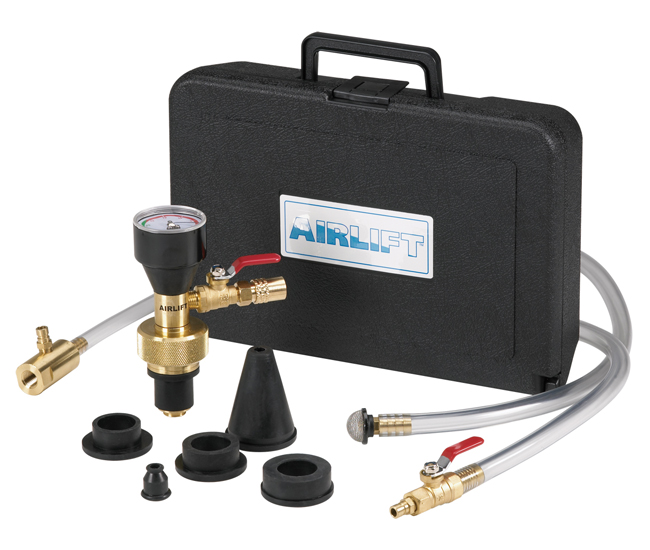
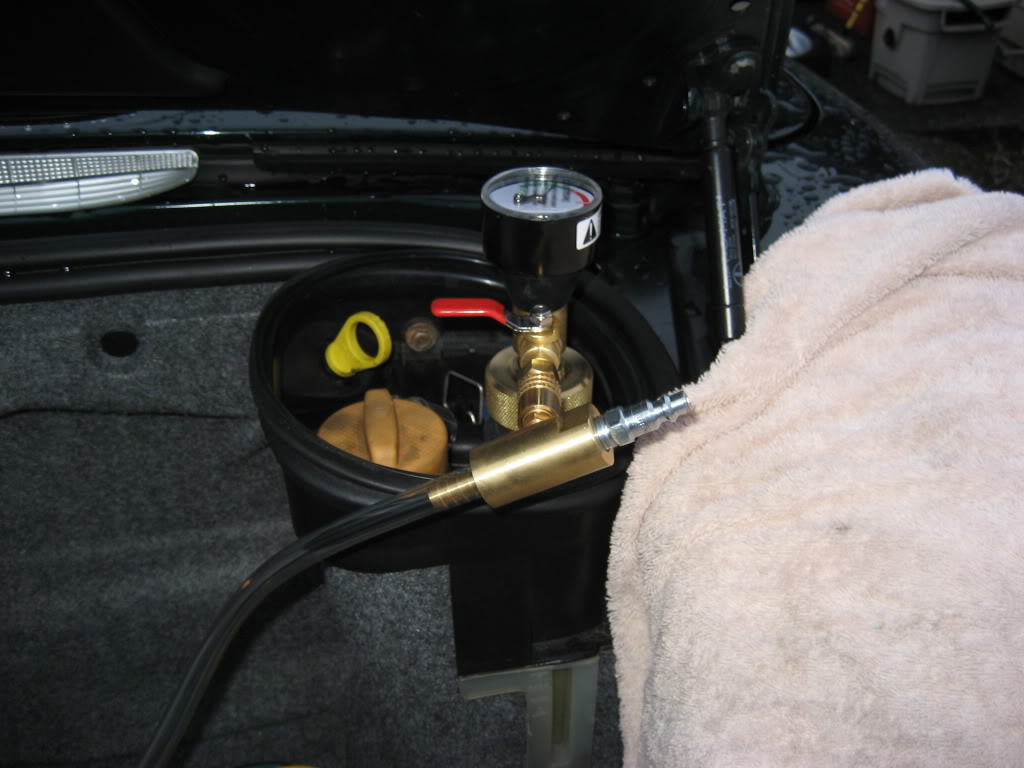
Yes, you'll be fine. I use the UView Airlift system and have a small compressor of 3 gallons. The key is it must be able to reach about 100 or so psi. I run the compressor until the pressure starts to drop, then turn off the venturi vacuum valve and allow the compressor to recharge. I repeat several times until my UView gauge is in the green or about 24-26 inches. Then once charged make the switch to add the coolant. I've filled about 10 cars with my small compressor.
I pre-mix the anti-freeze in a five gallon bucket. I agree with JP and only mix 4 gallons. 2 of antifreeze and 2 of distilled water. The plastic tubing used as the fill tube will want to curl up so I zip tie it to something to hold it down in the bucket. And depending on how much old coolant you where able to remove, you may have to tip the bucket and place the fill tube correctly to get only new coolant out of the bucket and no air.
You can find more about UView via YouTube by pressing HERE: or on Amazon by pressing HERE:
___________________________________________________________________________________________
Using the ULead Airlift 5500 on MY98
-
It's a fairly straight forward DIY to re-route the trunk pull cable to the Tow Hook plug in the front bumper. DIY HERE
-
Renntech is almost halfway to their $6749 Goal!
**********************************
Server Lease Renewal/Software Licenses
Our yearly server lease, software licenses, as well as hardware operating costs are due Dec 12th, 2015. Our current donations have fallen far short of the funds we need to renew. Please consider a donation to help keep this site operating - Thank You.
49% complete - $3286.85 of this $6749.00 goal reached.
-
Happy Holidays!
I just made my annual contribution! It pays to use Renntech!
Donate Today!
-
That happened to me in a middle of my winter tire change several years ago. Took it to a dealer and they tried 20 some keys and found the one I needed. They then ordered it and several days later I was back in business. Set your air gun down a few notches and always finish with a manual torque wrench at 96 fts/lbs for dry bolts (no anti-seize, a little less if you use it), tighten in a star pattern with the key lug being the last one tightened and the first on loosened.
-
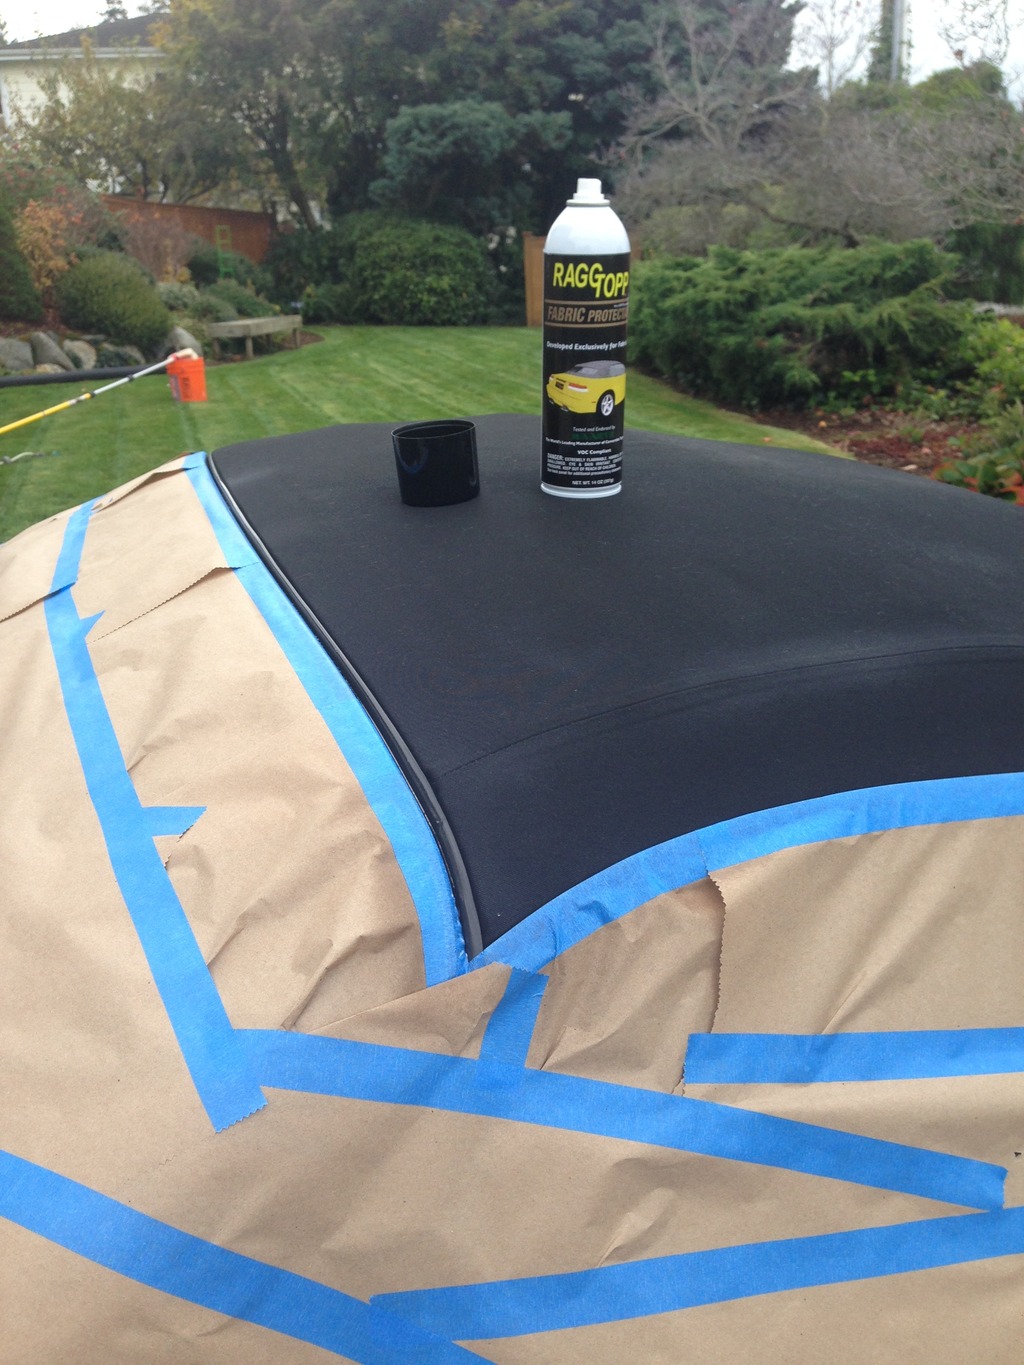
Winter is fast approaching! Time to treat the top in case it rains in Seattle!
Here is a more detailed DIY PRESS HERE
-
Great tips everyone. Does Dawn also work for cleaning under the car? My Boxster 986 has a small oil leak, and I'd like to clean under the car to make it easier to locate the source.
+1 for Simple Green

Door Lock Mechanism question
in 986 Series (Boxster, Boxster S)
Posted · Edited by kbrandsma
It sounds like it.
I've read on some boards that the Jetta (2006-2010) MK5 door lock mechanism is the same part. OEM VW parts are less than $50 USD shipped. Part number 3D1 837 016 AC or 1TD 837 016 A.
Perhaps someone else has seen or tried this and can chime in.
Good luck and keep us posted.