Welcome to RennTech.org Community, Guest
There are many great features available to you once you register at RennTech.org
You are free to view posts here, but you must log in to reply to existing posts, or to start your own new topic. Like most online communities, there are costs involved to maintain a site like this - so we encourage our members to donate. All donations go to the costs operating and maintaining this site. We prefer that guests take part in our community and we offer a lot in return to those willing to join our corner of the Porsche world. This site is 99 percent member supported (less than 1 percent comes from advertising) - so please consider an annual donation to keep this site running.
Here are some of the features available - once you register at RennTech.org
- View Classified Ads
- DIY Tutorials
- Porsche TSB Listings (limited)
- VIN Decoder
- Special Offers
-
OBD II P-Codes - Paint Codes
- Registry
- Videos System
- View Reviews
- and get rid of this welcome message
It takes just a few minutes to register, and it's FREE
Contributing Members also get these additional benefits:
(you become a Contributing Member by donating money to the operation of this site)
- No ads - advertisements are removed
- Access the Contributors Only Forum
- Contributing Members Only Downloads
- Send attachments with PMs
- All image/file storage limits are substantially increased for all Contributing Members
- Option Codes Lookup
- VIN Option Lookups (limited)


drem914
-
Posts
85 -
Joined
-
Last visited
Content Type
Profiles
Events
Forums
External Paint Colors
Downloads
Tutorials
Links Directory
Collections
Store
Posts posted by drem914
-
-
Could someone please explain the "drone" a bit more clearly. I have seen this mentioned many times.
I am having some issues with the sound my exhaust is making and want to see if this is the same thing.
-
I checked in out on line and it seems like a great concept. Somehow, $80 seems like a bit much for it, but that depends on how badly you need it. I went through a bit of trouble finding a transmitter that would fit inside my ask tray but it works. If this was available at the time, I may have bought it instead.
One concern: I have heard that flashing HID lights will reduce their lifespan. If this is true, this device may not be such a good idea for stock or conversion HID equipped cars. Can always be connected to some other lights such as parking that would require manually flipping the lights on and off.
Please note, for anyone looking for a unit that will fit inside the ashtray/handbrake area, the small genie controllers fit quit well and you can get them with one two or three activator buttons.
-
Thanks to all. The last ones I want to touch are the doors. I want to do the fronts dash speakers first. I then will either replace the rear OEM speakers with new ones or just add a tweeter. I need to connect up an ipod cable to the aux out in the back of the becker radio and maybe I will change out the amp also.
-
Is there anyway to remove the speaker grilles without removing the door panels? i have seen some photos of the backside of the door panel and it looks like the speaker grill is held in place with a couple of screws. I would like to upgrade my door speakers but, would prefer not to take off the door panels if possible. I don't want to damage the door panel removing it. any suggestions or do I just have to bite the bullet?
-
Hey drem914, what kind of city light bulbs were these? We all need to avoid buying these things. 100,000 hours is like driving 8 hours per day, every day for 34 yrs. You must have a hell of a commute to burn these out.........LOL.
Perhaps some of these guys can recommend a quality substitute. If your voltage reg was truble, you would have other bulbs burning out all the time.
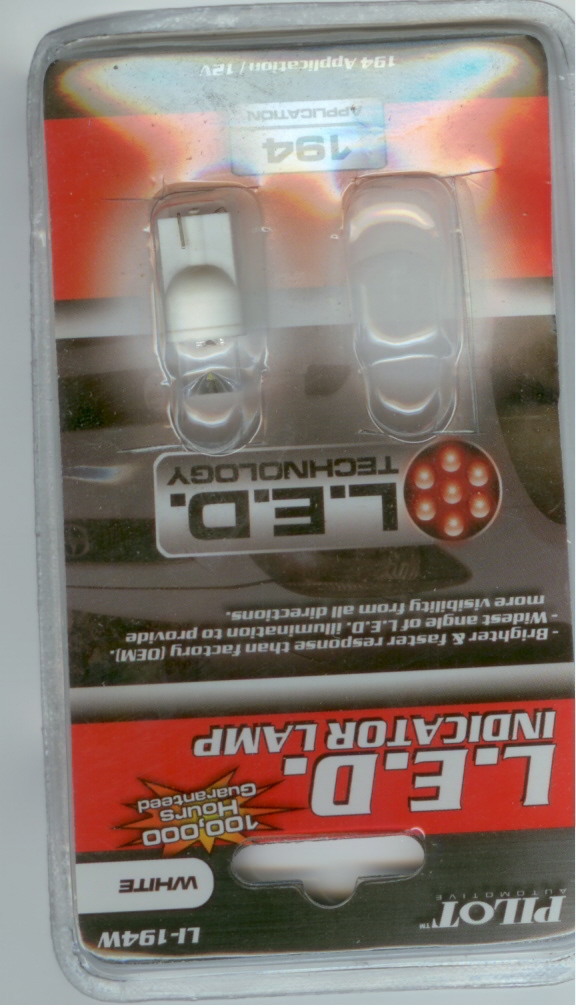
The LEDs were from Pep Boys, brand name "Pilot." I recommend staying away.
I don't think i have a voltage problem. I have no other issues with any electrical in the car as far as I know. I used the same type to replace my interior door bulbs and they are just fine.
I asked PB about the warranty on the bulbs and they said contact the manuf., it is not their problem. I contacted the manuf. and they say take it back to PB and they will resolve the issue within 60-90 days - yea right.

-
nice match! azzaro. what was the temperature rating on your HID?
1 x H7 6000K Automobile HID Kit from CQLights
Are you experiencing any problems when the lights are turned on...such as idiot lights on your instrument panel coming on when hjeadlights are switched on??? I have the same kit. Trouble since day one.
Bob
No problems with the instrument panel, idiot lights never came on before or after I installed the kit.
I have just gone through 2 pairs of LED "city" or "parking" lights in just the last 3 months. They are supposed to be rated for 100,000 hrs. I like driving my car but i haven't been it it that long. Is this normal? I am going back to the standard long life sylvanias and see if they last any better. When I bought my car used it had one driving bulb burned out at the time. Is there something about the environment of housing? I can't imagine replacing these bulbs every couple of months. That seems absurd.
-
Here is the interior after much extensive interior mods.
Gorgeous interior. What is the finish on the seats?
Also, what kind of rims are those?
-
So I called JL audio today and spoke to a tech support rep concerning good mounting locations for the subs they currently offer. He ended up calling one of his reps who had a 2000 Boxster S in which he said he mounted 2 6w3v3 subs (one under the passenger side dash, and one under the driver's side dash).
He said this is an ideal location because #1, it doesn't infringe upon foot space, and #2 they're out of sight which is ideal for the setup I'd like.
Curiously enough, I can't find any information where anyone has actually done this, and I'm wondering if anyone out there has attempted this or has any other info or pics so I can get an idea of where and how exactly these would be mounted. The rep on the phone indicated that small enclosures were also made to fit these subs. He said the sound produced from them in the boxster with this location setup was superb.
If you go on to the Crutchfield website they list an enclosure volume of 0.15 cubic feet which is equivalent to a a 9" x 9" x 6" (3/4" mdf) enclosure. Not sure how you fit that kind of cube under the drivers side or passenger side dash. even if you flatten it out out the driver is over 4" deep. Sounds like a custom fiberglass enclosure to tuck in there. Seems like this storage tray sub-box might be a better way to go, if it ever moves forward.
-
Thanks, that is what I assumed. To bad, I wanted to avoid taking of the steering wheel if possible.
FYI. Search in the forum under the "OBC hack" pages. You don't need to take the wheel off to replace the individual stalks, only if you replace the entire assembly. You can turn the wheel 90 deg in each direction to access the screws necessary to remove the shroud around the stalks.
-
hahahahaa that has got to be the coolest thing i have seen, where can i buy the decal from ? THANKS!!!
several are listed on ebay and some of the other porsche forum sites.
-
Drem, I like Sunset too and have ordered from them often. THe problem is waiting a whole week to get a part because of my being in Delaware. Suncoast can get things to me faster from Florida.
I thought that might be the case. I'm on the west coast so things get here a bit sooner.
-
Congrats on your new ride!
I checked Suncoast Porsche and they appear to have what you need as far as a new key parts.
Click here for the link to the Boxter key page.
Sorry I can't help with the speaker. I'll let the experts help you with that.
:welcome:
I ordered the same part a few weeks ago from Sunset Imports listed at the top of this page. It was less expensive than Suncoast. So far they have had the best pricing on any accessories, mod parts and maint. items that I have ordered. Jeff is also very knowledgeable and very responsive.
-
Hi there,
Water may be leaking through the plastic window seal. Check carefully to see if your plastic window may have been changed in the past. Some repairs are done very well and are hardly noticeable. If the window has been replaced then the seam between the clear plastic window and your top may not be watertight. If this is the case then you should be able to see water leaking from the bottom of the rear window.
Try spraying the rear window with some water then look back from the passenger compartment at the inside of the rear window. You may be able to see or feel if water is leaking from somewhere on the bottom edge of the rear window.
Good luck!
-Hinge
Okay, mine does leak, as I found out yesterday in the rain. :angry:
Can I use a seam sealer on the sewn part or do I need to get something in between the edge of the plastic and the fabric?
Oh, and the plastic was replaced several years ago, but is in great shape, no crack, tears or punched holes other than where it was sewn to the canvas.
-
I can't for the life of me understand what the map tray is good for under the steering wheel. :huh:
It is not convenient to access it, it doesn't hold much and it takes away some knee room. Anyone know how to remove it?
The screws holding it in place do not look like they are screws, rather plugs or caps.
I didn't want to just "rip it off" from under the dash.
Is there a description on removal available or has anyone done this recently?
Update - Did a search and found the rivet removal in another thread. Sorry, I should have searched first. My original question, though, still holds.
Thanks,
-
Sorry for the overzealous reply, I had been looking into replacing my entire assembly as part my amber removal program. :huh:
-
Hey gentlemen,
it was brought to my attention that my driver's side brake light is out (all other bulbs work) (MY00)
i pulled back the carpet in front of it, but wasn't sure how to continue. looks like there's a fuse panel in the way.
manual won't be here till Christmas so I'm asking for help on how to change the brake light bulb.
any pictures? i dont see any screws or anything to undo.
thanks in advance,
steve
see this post for a description
http://www.renntech.org/forums/index.php?s...ost&p=88973
Hope it helps. It is not specific for replacing bulbs but I am sure you can figure out which one to remove after getting the fixture out.
-
Here is a pretty good tutorial: http://www.whiteson.org/boxster/mods/obc/obc.stalk.pdf
and another: http://www.whiteson.org/boxster/mods/obc/OBC.pdf
1. I've got the harness assembly.
2. I've got the connections portion.
3. I think I will be following the "non removal of steering wheel" version from LowFlyR though.
Thanks, I think I am finally piecing the process all together.
-
either one would work - the bulb isn't drawing much on either. For simplicity sake, I'd just take it from the ash tray light. Otherwise, use a multimeter on the window switch and figure out which one kicks on the w/ the other interior lights.
Don't cut and patch, the easiest would be to use a 3M vampire or splice tap. I'm not the biggest fan of them (for real electrical jobs) but in this case, it'll fit your bill nicely.
Worked like charm, hooking into the ashtray light power.
Thanks.
Hope these little tweeks all go as smoothly.
-
I have recently completed a garage door opener install into the center console with the targa switch.
I used one of the blank switch locations where there would normally be the heated seat switch.
It now controls both garage doors.One side of the rocker for one door and the other side controls the other door.
I was wondering which wires would be easier to connect to for the illumination of the switch.
Should I connect to the light that is at the ashtray (is there enough power to illuminate the switch and the ashtray) or to the light for the window switches?
If it is the window switches which wires are they and do you just patch to those wires or cut and reroute?
I worry about cutting into a perfectly good harness and messing things up.
Thanks again, in advance, for your advice.
-
I was provided a 4th stalk by my mechanic to use for an OBC hack.
It has the factory wires and plug still connected to it.
I wanted to know if there is a thread on this board that shows the parts and wiring required to continue the patch into the OBC.
I have already had the OBC turned on in the car but until I hook in the stalk or a switch it will not display.
I would like to do the final connect over the Christmas holiday so I want to get all the parts lined up before hand.
A couple of other questions:
1. Can the 4th stalk just be bolted into place or do I need to replace the entire stalk cluster?
2. It seem like the switch version of the hack has one less connection (4) than the stalk connection (5) is that correct?
Any guidance would be appreciated.
-
I used "Crystal Clear Enamel" from Rust-oleum. Several light coats and looks like the other switches.
Thanks, I assume you have not had any flaking problems or need to reapply on a constant basis.
-
I am doing a garage door opener install using the targa switch with a matte finish.
All of my other switches in the car are glossy (MY '01).
Can i just spray over with a regular clearcoat from rustoleum or similar product from the hardware store.
Do I need to apply a special clear primer and automotive clear paint instead?
I don't want to ruin the switch and have to get another.
Thanks for any advice.
After this one comes the OBC install - Its turned on I just haven't install the stalk yet
BTW I got a free one from my mech. They tear them out of the cars all the time when they are changing them over for race vehicles.
-
....
Thanks also
Again, also, thank you
+1
-
Where do you plan on locating the sub-woofer listed in your diagram?

Is There Such A Thing As NO DRONE Aftermarket Boxster S Exhaust Muffle
in 986 Series (Boxster, Boxster S)
Posted
Thanks Brad, I'll give it a try.
I am so used to the sounds and noise from my 914 that compared to the Boxster it seems like pure luxury.
Everything seems to feel okay
I don't expect it to be Lexus quiet, after all it is a soft-top sports car.
Sometimes I am not sure if what I am hearing is right or wrong.
You seem to go a lot of places to "take care" of peoples cars.
Are you down in Mission Viejo much?
Next time you are in the area I'd like to meet up with you.
Franz