Welcome to RennTech.org Community, Guest
There are many great features available to you once you register at RennTech.org
You are free to view posts here, but you must log in to reply to existing posts, or to start your own new topic. Like most online communities, there are costs involved to maintain a site like this - so we encourage our members to donate. All donations go to the costs operating and maintaining this site. We prefer that guests take part in our community and we offer a lot in return to those willing to join our corner of the Porsche world. This site is 99 percent member supported (less than 1 percent comes from advertising) - so please consider an annual donation to keep this site running.
Here are some of the features available - once you register at RennTech.org
- View Classified Ads
- DIY Tutorials
- Porsche TSB Listings (limited)
- VIN Decoder
- Special Offers
-
OBD II P-Codes - Paint Codes
- Registry
- Videos System
- View Reviews
- and get rid of this welcome message
It takes just a few minutes to register, and it's FREE
Contributing Members also get these additional benefits:
(you become a Contributing Member by donating money to the operation of this site)
- No ads - advertisements are removed
- Access the Contributors Only Forum
- Contributing Members Only Downloads
- Send attachments with PMs
- All image/file storage limits are substantially increased for all Contributing Members
- Option Codes Lookup
- VIN Option Lookups (limited)


splitwindow
-
Posts
33 -
Joined
-
Last visited
Content Type
Profiles
Events
Forums
External Paint Colors
Downloads
Tutorials
Links Directory
Collections
Store
Posts posted by splitwindow
-
-
Has anyone done something similar:
These are done out of original ones. How labour intensive this is?
-
Hi,
My vehicle does not have self leveling headlights, but if I would buy a set what parts would I need? The headlights also have the washer nozzles.
Is the wiring in place already?
The car is an early 99 996.
Thanks in advance.
ps.
I tried the search but didn't find an answer..if it's there sorry in advance :)
-
The slats are not glued into the housing. There are two long pieces with small nooks where the slats attach into. Pull these out and then You can take the slats out easier. The slats are numbered so You know in which order they go back in. That's they way I did it, might be wrong but worked for me anyhow.
I don't know how the wheel comes out though.
-
As far I haven't had any problems with bubbling or the material coming loose. I will keep my fingers crossed though ;)
I used a hairdryer to heat up the old material and then carefully / progressively pry it out. I left the old foam in its place, as it should be.
I used PPG paint and clear coat and the color is porsche polar silver. As is in og. alu-look kits I guess?
-
I didn't even know that one could source a black bonnet badge? Where?
Sorry, I was just being flippant.
That makes two of us :)
-
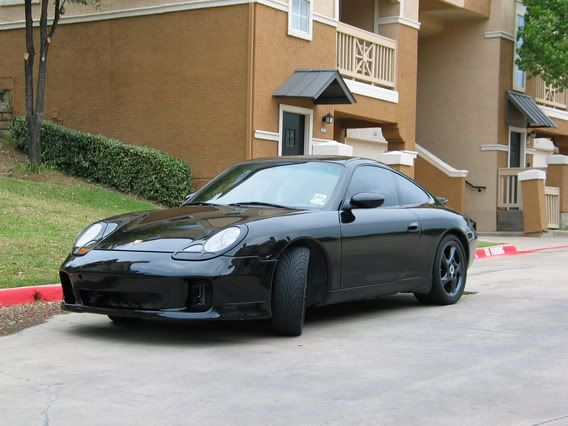
Now that's what I call black! Very "stealth". Did you paint the wheels? Looks like you need black wheel centres and bonnet badge and it's complete.
The wheels are powdercoated and I'm having hard time finding a suitable paint for the wheel centres to match the wheels..but working on it..
I didn't even know that one could source a black bonnet badge? Where?
-
Here's a pic of my RUF bumper installed. Don't have the grilles in place yet nor the side markers and I'll be destroying the headlights by painting the blinkers black :) (these will be changed anyhow as these are the old orange style which can't be converted..and the resale value of such headlights is about 10 bucks..)
from:

to:
-
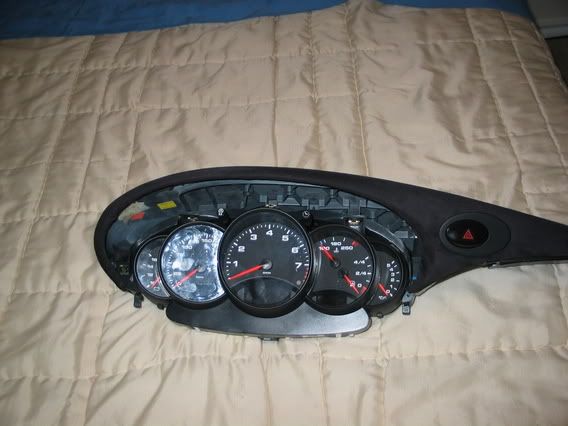
Your picture show the tab at the bottom of the cluster released.
You still need to release the top tab inside the cluster like I described before.
It is easier if you release the top one first.
To get to the internal tab you need to put a flat bade at an angel inside the cluster like in this picture.
If You referring into the white tab which is in the top middle, that was released but the cluster still does not come apart?
-
You do need to separate the cluster to got to those bulbs. If you look inside you will see a black plastic tab which keeps it together. I reach in there with a thin bladed tool and release the tab.
Look at the back of the cluster and you will see a white paper sticker with a bar code. To the top left and right there is an opening shaped like a triangle. Get a good light and look for the internal tab. You stick your thin flat bladed tool in one of the openings and release the interior tab that is keeping the top of the cluster together.
Then release the 2 black tabs at the bottom of the cluster.
Once the cluster is open you will see various bulb holders. The illumination bulbs are in the green holders. They are standard bulbs you should be able to find at a parts place.
Bad design.
How tight of a fit is this? I've got everything out (as far as I know) but the pieces just don't come separate. It seems that the gauges are not willing to separate from the rear piece of the cluster. The front is already out of the way.
This is how far open I can get it and I just don't have the guts to pry it more open. Any ideas which are still holding it in place?
Do I need to unplug the white, blue and black connectors from the back of the cluster as well?
It seems that these are the onlyones keeping the cluster together but they are a real pain in the xxx to get out!
-
You do need to separate the cluster to got to those bulbs. If you look inside you will see a black plastic tab which keeps it together. I reach in there with a thin bladed tool and release the tab.
Look at the back of the cluster and you will see a white paper sticker with a bar code. To the top left and right there is an opening shaped like a triangle. Get a good light and look for the internal tab. You stick your thin flat bladed tool in one of the openings and release the interior tab that is keeping the top of the cluster together.
Then release the 2 black tabs at the bottom of the cluster.
Once the cluster is open you will see various bulb holders. The illumination bulbs are in the green holders. They are standard bulbs you should be able to find at a parts place.
Bad design.
How tight of a fit is this? I've got everything out (as far as I know) but the pieces just don't come separate. It seems that the gauges are not willing to separate from the rear piece of the cluster. The front is already out of the way.
This is how far open I can get it and I just don't have the guts to pry it more open. Any ideas which are still holding it in place?
-
There are plenty of topics about changing gauge faces etc. but I didn't come across into instructions how to take the whole cluster apart in order to access the bulbs which illuminate the analog gauges.
Anyone?
-
Does someone know if the bulbs available from http://www.led.net would suit into analog / digital gauges?
I'm looking for green bulbs...
Car is a '99 996.
-
I wouldn't trust Costco with my porsche, I pay about $20 bucks per wheel for either the dealer or a local shop that advertises in the local PCA club magazine.
If $tealer takes $20 per wheel, that should be a pretty good benchmark IMHO?
If the price would have been $250 which that Discount Tire shop said was their normal price, that'd be more than 200% more...which is a helluva margin I'd say :)
Oh well, live and learn the one to blame might be looking back from the mirror in this case ;)
-
Oh God no! $40-60 for the set maybe, but per wheel? Do they serve champagne in the wait room as well? :)
Welcome to the world of Discount Tire then :)
I've asked from their customer care department WTF is going on as I was charged $40 per wheel for mounting and balancing. When I paid this I asked from the manager isn't this a bit high...he said that normally he charges $250 for set of 4.
Btw. this is the same place which marred two of my wheels upon dismounting of the tires. These were repaired but the car was crippled for 5 days as one of the wheels was not repaired up to satisfactory standards in the first time.
-
At Costco they will do it for $10 a tire. Mount, valve stem, nitrogen fill, balance, the whole shootin match.
Thanks, so basically no-one should be charging say $40 per wheel or say $60 per wheel.
-
mounting of 18" inch tires. How much does this usually cost.
-
Let me get to work on this and see what I can do for you guys.
I'll post back here as soon as I have info, and for those interested, we'll get started.
Thanks.
Count me in on a set for a 1999 C2! Let us know what colors are available!
Is there any estimate on the price?
-
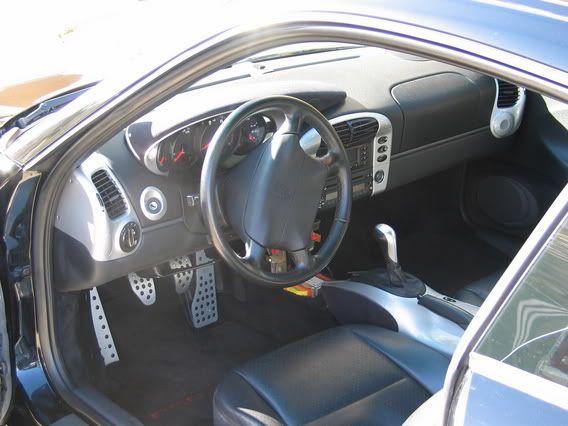
GT-3 console delete still missing.
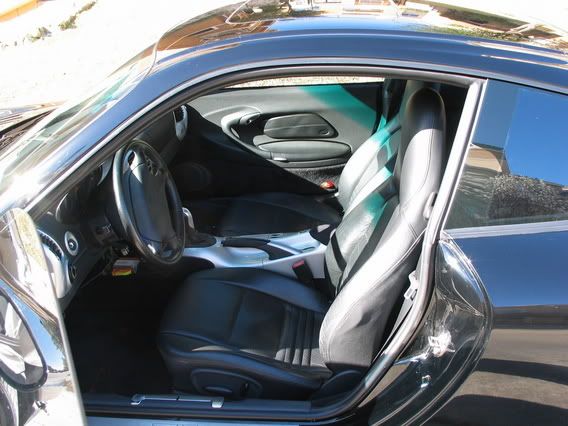
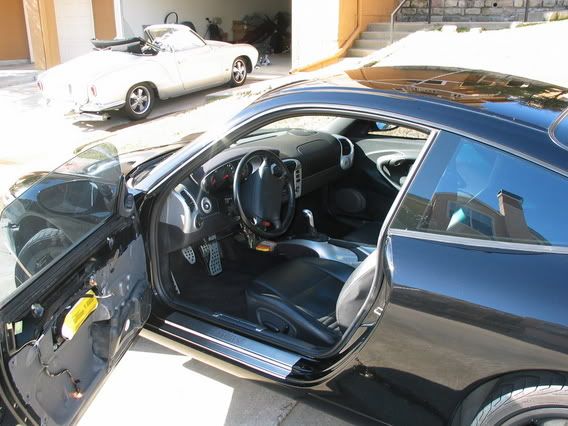
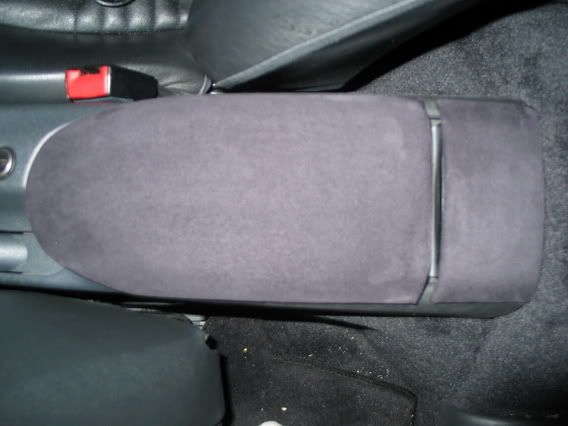
This is how my interior turned out:
Total cost for the interior stuff ~$250.
Edit: including the DIY aluminium look interior bits.
Twists powdercoated in gunmetal:
Cost $340.
-
OK - I got a reply from Weissach into this - the reinforcement bar needs to be cut down about 1" on either side.
Does someone have instructions how to cut the bar properly? As 1" on either side is a tad ambiguous?
-
Hey,
do I need to cut the center reinforcement if I am going to fit a RUF bumper into my car (A '99 996)?
The bumper is of this style:
-
No, I meant your alcantara compared with porsche oem alcantara like used on the headliner.
Well, evidently I don't have such comparison as I don't have an alcantara interior to begin with :) sorry...
-
I just gutted the center console, air vents etc. to get them painted by a friend of mine. The colour is going to be arctic silver. I'll post some pics when all has been said and done.Do a search on this topic. Both here and over at rennlist.comIt has been covered extensively. Basically the peel and stick kits are a basic "you get what you pay for" deals. Trashy, cheap, and should not be in a Porsche. If there are specific parts you are after you have several options available. eBay is one place to get parts, another is have them painted to match. For example, the alum look pieces are artic silver painted from the factory. If that is the route you are going to go, check with Eric (bumperplugs) since this is something he specializes in and offers for a good bit cheaper than the dealer. Also, check with the guys up at Sunset Porsche (board sponsor--Parts at Dealer Cost). I have spent thousands with them over the years and they have some of the best prices and GREAT customer service.
Edit:
how much it would cost @ bumperplugs to get the center trim in dashboard and the side vents painted? There was a price of $429.95 for the center console.
Of course I could get the info from bumperplugs directly but I was just wondering if someone over here would know?
So the idea would be compare the DIY results and price with the ones of bumperplugs - if my parts will be nice (let's hope so :) ) At this point cost estimate is around $100. So let's see if such a thing as cheap and good does in deed exist or not...
-
where did you get the parts do you have a picture of the material next to the oem material? I wonder how well it matches to existing. Cool though.
I just gutted the originals, if that's what You are referring into with parts? If You are referring into the material, www.gulffabrics.com .
Of course not all of the interior is going to be made of that material so there's some variation but I plan in doing it 'with taste' (hopefully my taste is good enough) so I wish that the end result is good (at least I do hope that I am happy myself if nothing else).
Unfortunately I don't have a picture of the alcantara ones and the original ones. I could take one before I am gutting the whole of the center console though...
Edit:
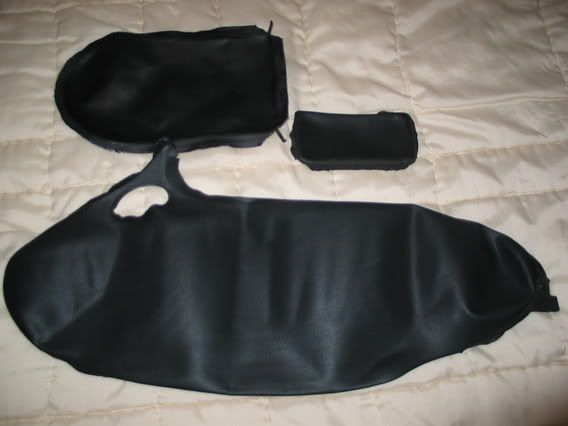
Here's a a pics of the cluster cover and one center console side pod...o.g. ones are a tad lighter but I am fine with that.
-
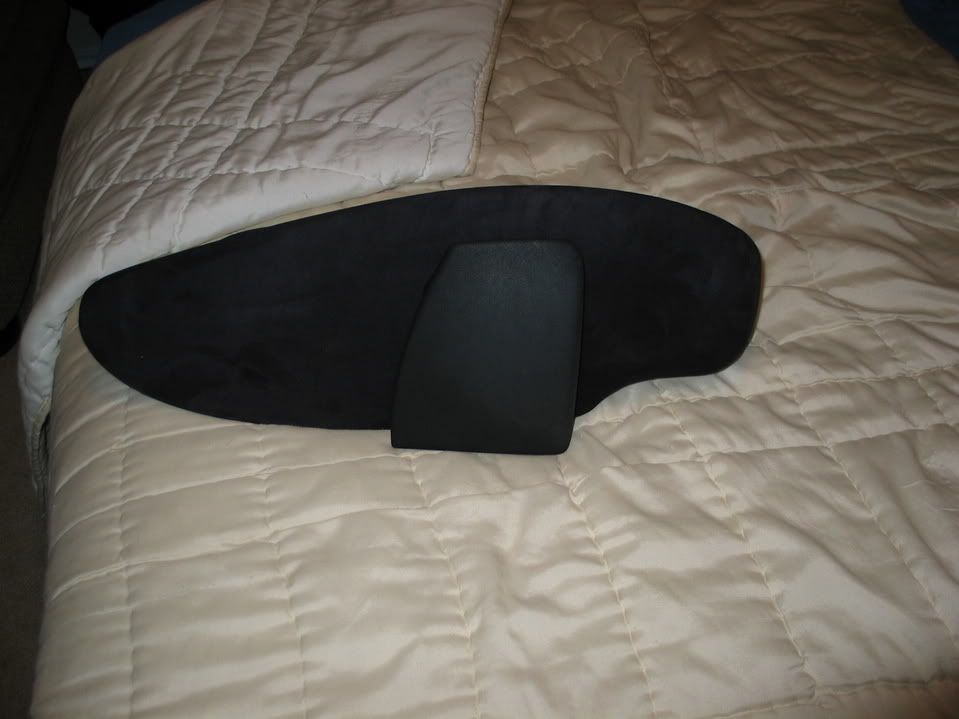
Here's what I did during sunday afternoon - I am going to continue a bit more but this is a good beginning IMO.
Plans are to replace the 80's 'fur' from the lower side of the doors with alcantara and the rest of fake leather bits of the center console as well
Due to my nonexisting skills in photography the console bits seem gray even though they are the same shade of black as the cluster cover.
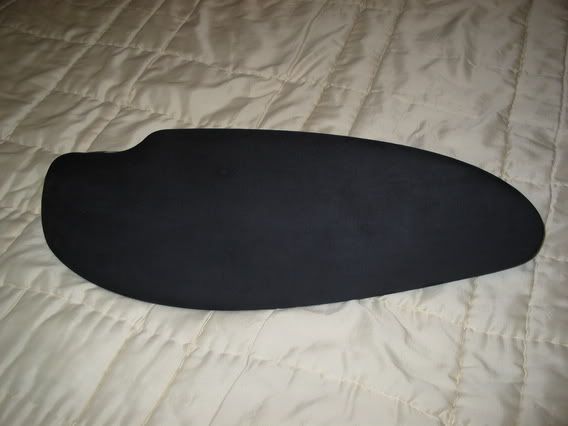
Originals as templates:
Center console:
gauge cluste cover (or whatever that's called :) )


DIY Sport Mufflers?
in 996 Series (Carrera, Carrera 4, Carrera 4S, Targa)
Posted · Edited by splitwindow
Richard,
thanks for a prompt reply. Is that all there is to it? I.e. couple of holes and the a piece of tubing welded in place?
If You could post some pictures of the process that would be appreciated. I plan on doing this as well...if it is that simple.
The link You attached is the one I meant - same company.