Jump to content

Welcome to RennTech.org Community, Guest

There are many great features available to you once you register at RennTech.org
You are free to view posts here, but you must log in to reply to existing posts, or to start your own new topic. Like most online communities, there are costs involved to maintain a site like this - so we encourage our members to donate. All donations go to the costs operating and maintaining this site. We prefer that guests take part in our community and we offer a lot in return to those willing to join our corner of the Porsche world. This site is 99 percent member supported (less than 1 percent comes from advertising) - so please consider an annual donation to keep this site running.

Here are some of the features available - once you register at RennTech.org

  • View Classified Ads
  • DIY Tutorials
  • Porsche TSB Listings (limited)
  • VIN Decoder
  • Special Offers
  • OBD II P-Codes
  • Paint Codes
  • Registry
  • Videos System
  • View Reviews
  • and get rid of this welcome message

It takes just a few minutes to register, and it's FREE

Contributing Members also get these additional benefits:
(you become a Contributing Member by donating money to the operation of this site)

  • No ads - advertisements are removed
  • Access the Contributors Only Forum
  • Contributing Members Only Downloads
  • Send attachments with PMs
  • All image/file storage limits are substantially increased for all Contributing Members
  • Option Codes Lookup
  • VIN Option Lookups (limited)

my996

Members
  • Posts

    261
  • Joined

  • Last visited

Everything posted by my996

  1. Gary, from the picture attached, could you insert an arrow where the jack should contact the part on the car? - Thanks - I plan on doing this tomorrow and do not want to make any mistakes. Tony
  2. Sorry Loren - I meant I wanted to replace the calipers as well. - Have any instructions for that?
  3. I want to replace the brake rotors on my 1999 C4 996 Cab. Any info on how to do this properly. LVDell, did you ever make a video of the rotors you were replacing? Thanks
  4. Loren, I want to put my car on Jacks for the Winter. Where would you suggest placing the four lift stands under a 99 C4 Cab with Type II side skirts (the skirts are from the new GT3 look)? Thanks again for your help.
  5. I have 18" and have it set to what it says on the inside of the gas cover. I think 35 on the front and 42 ish on the back? Cannot remember of hand but what ever the label says, I have stuck with.
  6. From the descriptions of the 3rd radiator install ... "Be careful not to overfill (it will get pushed out on the floor). Lift the bleed valve. Start the engine and allow it to get to full operating temperature (I also ran the air conditioning to force circulation). The coolant warning light will likely start to flash. Shut the engine off and WAIT until the engine and coolant has cooled enough to remove the coolant tank cap. Then add coolant to the tank and repeat the process. You made need to do this 2-3 times. When the coolant level fails to fall then the system is bled and you can close the bleeder valve." Where is the bleed valve? - Do you have pic with arrow pointing to this? Thanks
  7. thanks Loren. I just wanted to know how hard it might be for novices such as me to install the 3rd radiator as a DIY. Your descriptions are excellent but just wanted to hear what others are saying. :)
  8. In my ongoing quest to make the task of washing my 996 easier, I came across this ... http://www.homemadesimple.com/mrcleanautodry/index.shtml . I was a little reluctant considering the claim that I would not have to dry the car after I rinsed the soap off. I bought the kit for $20. As per instructions, washed the car, rinsed, let it sit in shade. Well I'll be D*a*m*m*e*d!! - It worked. I do not have a water spot on the car except for a few places I missed when I was rinsing. Whats better - no more soap bucket - just a lamp's wool mit and the kit. - Easy. :D
  9. Dell, I found the article. I think this might have the answers you are looking for with great detail. All I have to do now is find a scanner so I can E-mail it as a .pdf file. hmmm - I could just zerox it and snail mail it to you (might be quicker because I don't have ready access to a scanner this week). Let me know what you want me to do. Remember, whatever work you do, please take detailed pictures. I plan on doing the same thing over winter when the car is in the garage for the season. :D Tony
  10. mdillian3690, what car do you have? year, C4, C2, 6-speed or Trip? etc.
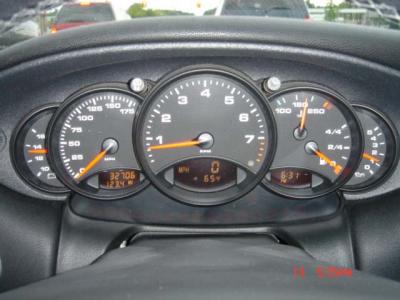
  11. thanks - had me a little worried. I thought mine use to run at 180 or so. But as long as that is within an acceptable range, so be it.
  12. Just got my '99 996 C4 back after I had the front bumper replaced with a turbo bumper from www.nrauto.com. Does the temp seem to be running a little hot? - I am driving around in regular traffic in cool Michigan weather.
  13. Dell, to make this thread even more informative for the rest of us first-timers, could you please take pictures as you go and write about your experience? I know this will help me when I finally take the plunge. I would just like to see it done once so I know what I am doing. thanks - and BTW, great topic. One last thing, a while ago I clipped an aritcle out of a Porsche magazine that described what is being discussed here. I think it was for a Boxter but the principle should be the same. When I find the article again, I will scan it and try to post it so it might be of assistance. :D Tony
  14. Thanks - so much for getting a tip from Boothe Designs.
  15. On the older cars (MY99-01) they used a silicon spray right at the shaft that enters the master cylinder. Do not use oil based lubricants that can damage the master cylinder seals. Loren, do you have a pic and/or diagram that shows the area you are describing? I don't know what the parts are you named. :huh:
  16. I know this is an exhaust tip, but which one is it? Stock? Sport?? Will this fit a 1999 996 Cab 4? Thanks
  17. Way to go Jenner!!! I can't wait to find out more on these wheels. They do look good
×
×
  • Create New...

Important Information

We have placed cookies on your device to help make this website better. You can adjust your cookie settings, otherwise we'll assume you're okay to continue.