Welcome to RennTech.org Community, Guest
There are many great features available to you once you register at RennTech.org
You are free to view posts here, but you must log in to reply to existing posts, or to start your own new topic. Like most online communities, there are costs involved to maintain a site like this - so we encourage our members to subscribe or donate. All subscriptions and donations go to the costs operating and maintaining this site. We prefer that guests take part in our community and we offer a lot in return to those willing to join our corner of the Porsche world. This site is 99 percent member supported (less than 1 percent comes from advertising) - so please consider an annual subscription or donation to keep this site running.
Here are some of the features available - once you subscribe RennTech.org
- View Classified Ads
- DIY Tutorials
- Porsche TSB Listings (limited)
- VIN Decoder
- Special Offers
- Paint Codes
- Registry
- Videos System
- View Reviews
- and get rid of this welcome message
It takes just a few minutes to register, and it's quality Porsche information at a low cost.
Contributing Members also get these additional benefits:
(you become a Contributing Member by subscribing or donating money to the operation of this site)
- No ads - advertisements are removed
- Access the Contributors Only Forum
- Contributing Members Only Downloads
- Send attachments with PMs
- All image/file storage limits are substantially increased for all Contributing Members
- Option Codes Lookup
- VIN Option Lookups (limited)


RandalJ
-
Posts
52 -
Joined
-
Last visited
-
Days Won
1
Content Type
Profiles
Events
Forums
Exterior Paint Colors
Downloads
Tutorials
Links Directory
Collections
Classifieds
Store
Everything posted by RandalJ
-
Daytime Running Lights on U.S. Spec?
RandalJ replied to RandalJ's topic in 996 Series (Carrera, Carrera 4, Carrera 4S, Targa)
I'm out of town, so I cannot look at the car now, but I'm almost certain that it is not Canadian spec car (among other reasons, I would have noticed the maple leaf sticker when I was looking at the options sticker). Will look for a jumper between fuses when I get back and let you know. Thanks -
Daytime Running Lights on U.S. Spec?
RandalJ replied to RandalJ's topic in 996 Series (Carrera, Carrera 4, Carrera 4S, Targa)
Just the fog lights. All other light functions are fine. I'm fairly certain it is a U.S. model due to the VIN and speedo/odo gauges being in miles rather than km. -
I recently bought a 1999 with non-litronic, and thought that daytime running lights were just a standard thing. By this I mean that the fog lights are on any time the car is running, and there is no apparent way to turn them off other than to shut the car down. But I have since seen a few oncoming Boxters with the same headlights, with their lights off, and that got me wondering. I have read and re-read the owner's manual, and have tried all switch positions, including the whole range in the pulled-out position. And this is definitely a U.S. spec car (based on the VIN, and the fact that the speedo and odometer in miles not km). Have also searched here and on Rennlist, but to no avail. I'm thinking more and more that either my headlight control switch is broken, a previous owner had a dealership "program" the lights for full time DRL, or that someone hacked the wiring to provide this. Car was originally sold in NY and registered in PA. Not sure if those states might have specific DRL laws. Not a big deal, but I think I'd prefer them off unless needed. Can anyone tell me whether the fogs as full-time DRLs are indeed standard on the 1999 996, or, if not, if it is something that a dealer may have set at the customer's request or by state law? Or should I suspect the light switch? Something else? Thanks
-
I have it on my 1999 C2 coupe (3.4 liter), along with option # 222 "traction control". I seem to remember reading that 220 requires 222 and vice versa. Thought PSM replaced this system in the 3.6 cars.
-
My "New" 996
RandalJ replied to RandalJ's topic in 996 Series (Carrera, Carrera 4, Carrera 4S, Targa)
Scott, thanks for posting. Send me a PM if you ever need assitance - I'll do likewise. Will tackle the PSE mufflers this weekend if I can find the time (I think I can handle these on my own). Plumbling and electronics will have to wait, if I do them at all. Will plumb and zip tie the hoses and live with the PSEs open full time for a while and decide. I agree that Renntech has been invaluable. Especially since there isn't much in the way of repair books like the Bentley manual that exists for the 3.2 Carrera. -
My "New" 996
RandalJ replied to RandalJ's topic in 996 Series (Carrera, Carrera 4, Carrera 4S, Targa)
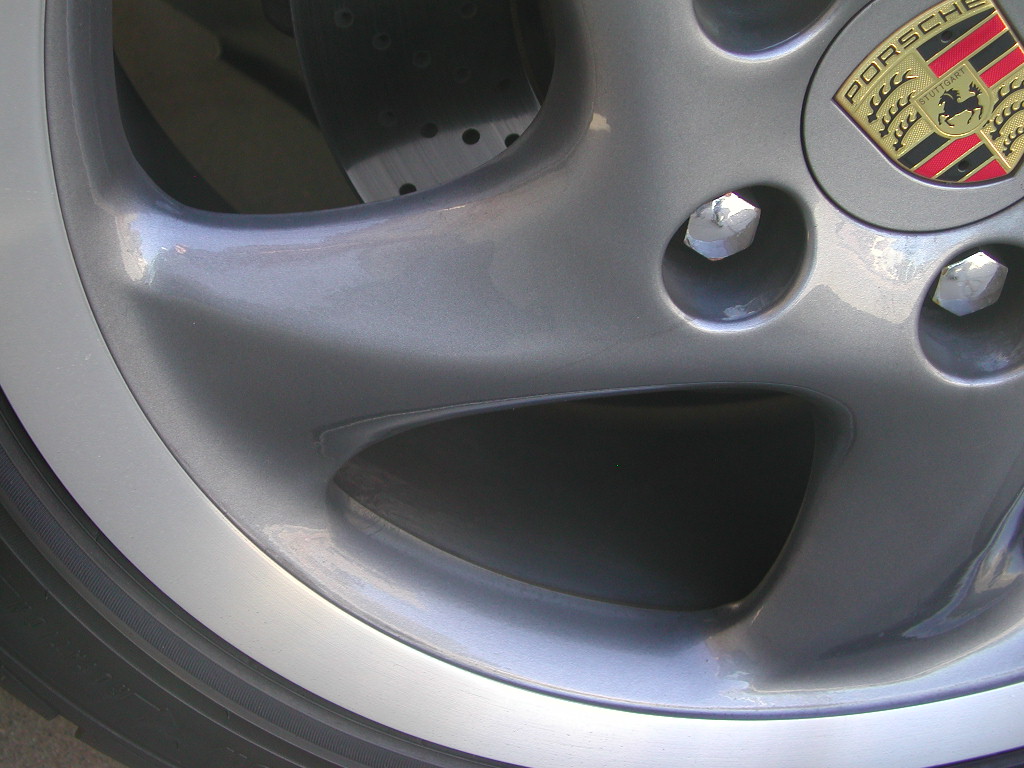
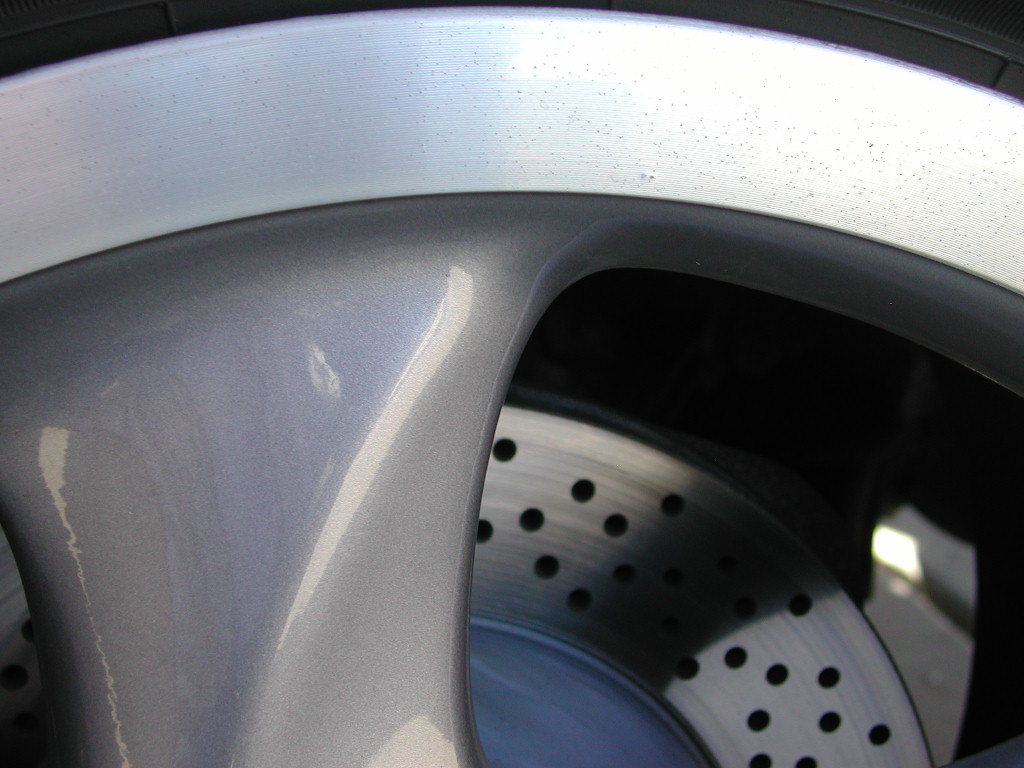
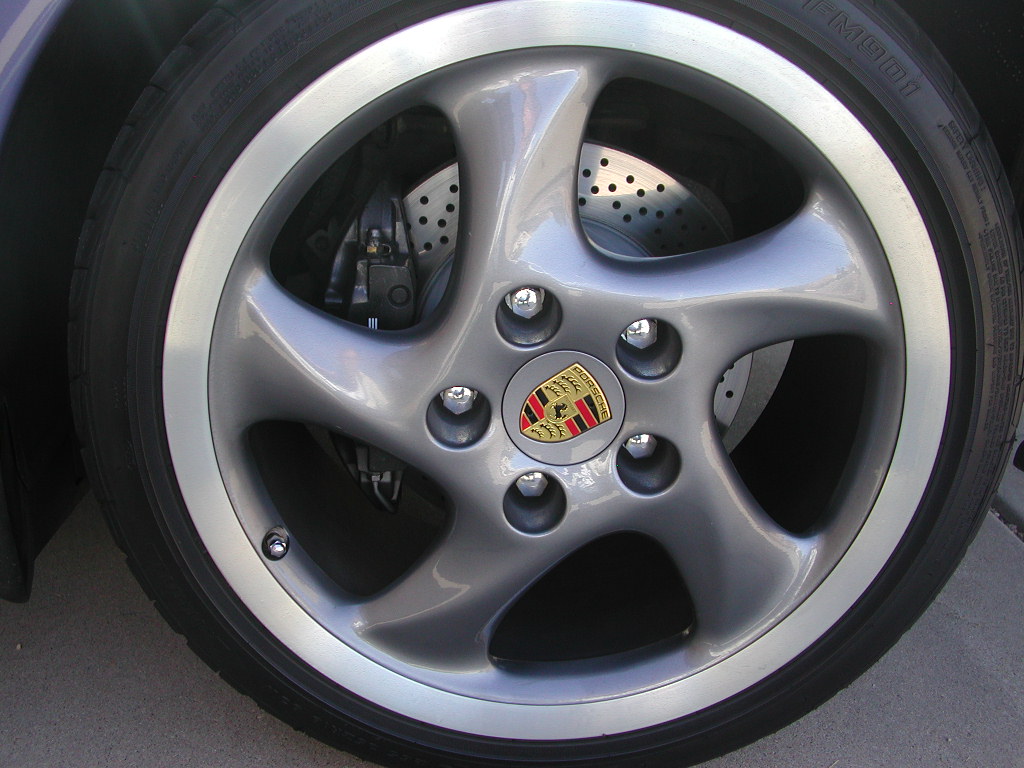
Here are some wheel photos. One of the fronts: One of the rears (you can see the pitting on the lip): And the same rear wheel: It appears that the masking was expertly done. Really the only flaw in the process was in not cleaning the rear wheel lips completely of corrosion. I'm not complaining though. All in all they look great, and really add to the car, I think.
-
My "New" 996
RandalJ replied to RandalJ's topic in 996 Series (Carrera, Carrera 4, Carrera 4S, Targa)
I'll try to post a photo in the next day or so. Yes, they apparently cleaned the wheels, masked off the lips, and painted the centers (and the concave center caps w/o disturbing the colored crests). Looks as though they were clearcoated as well. On closer examination I do see some very tiny pitting that should have been buffed from the lips before the clearcoating process, probably due to past use in the snow and salt of the East Coast. But all in all they look very good. The guy doing the PPI thought these were Boxster S wheels, that came off a limited edition (I forget which specific model - 550?). When I looked it up, I could see how he would have thought that. But the Boxster S had the identical paint scheme on different style wheels. The p.o. may have been inspired by this. -
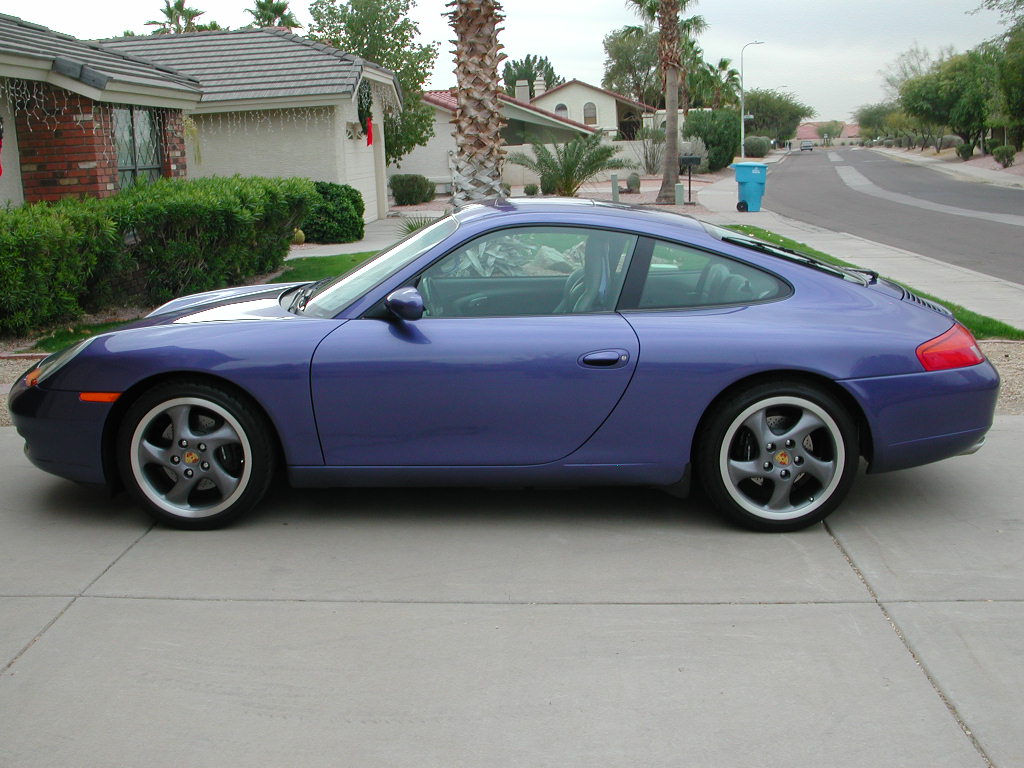
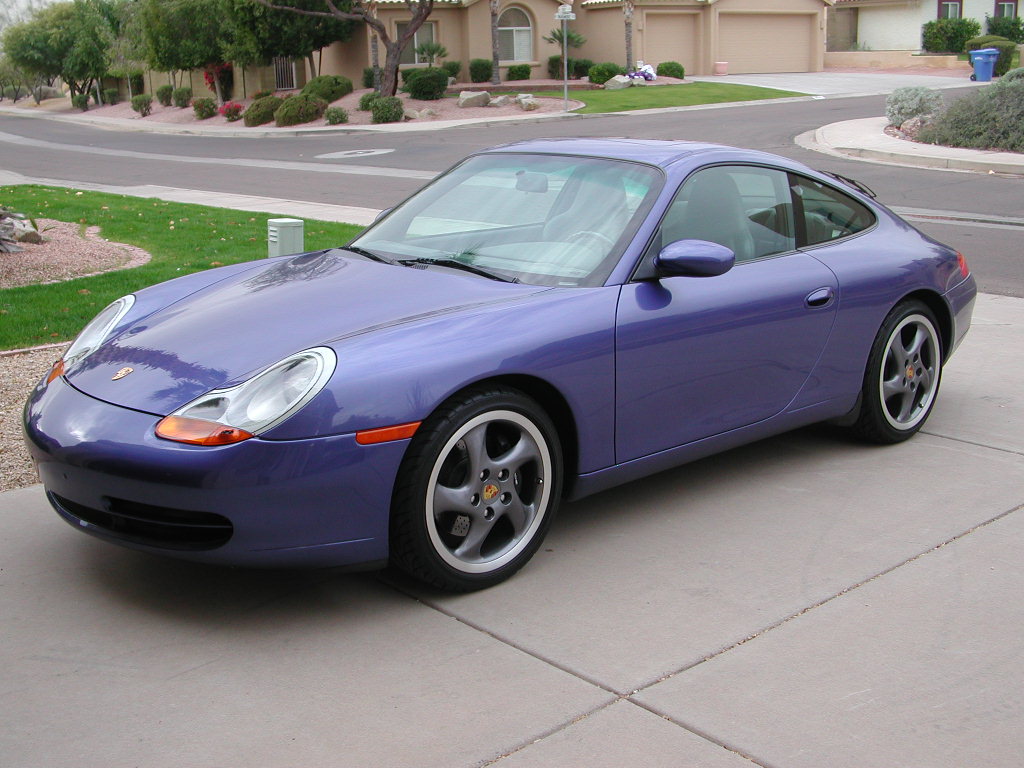
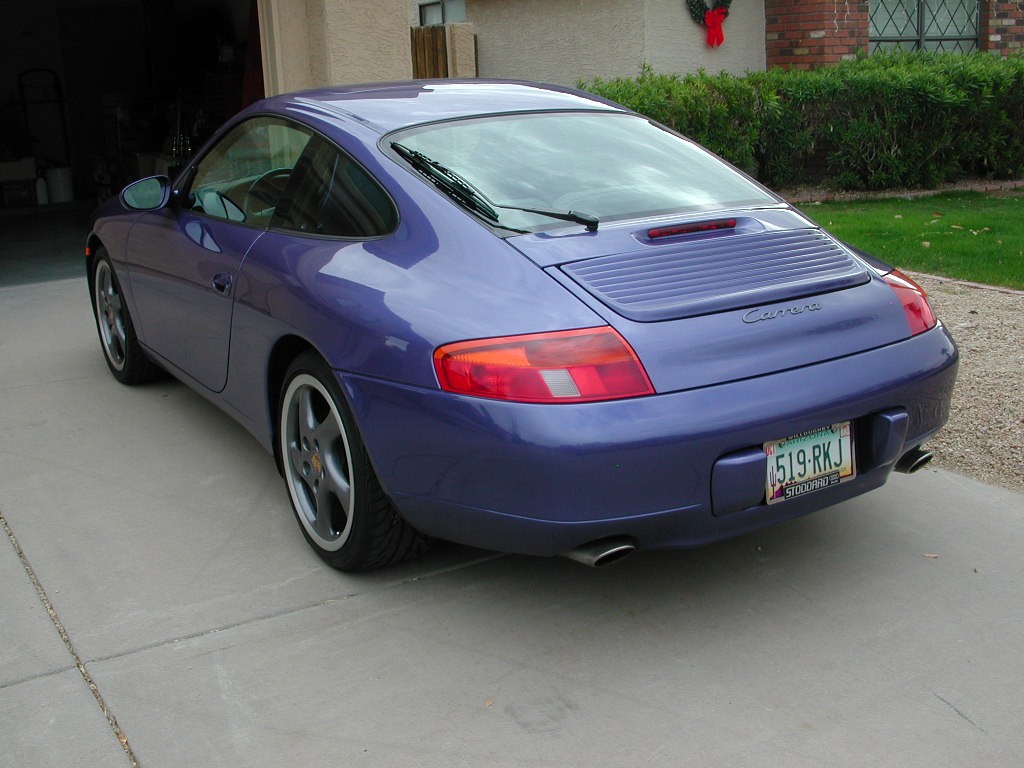
In addition to being a convenient excuse for not exerting myself on Christmas Eve, I thought introductions were overdue. I haven't posted a lot, but expect to more often now that I have this: It's a '99 in zenith blue with grey interior. Seat backs and center console are body color, and among the options are the U.S. 030 running gear, limited slip (option # 224), 222 traction control, 220 locking differential, 18 in turbo twists, which the previous owner (a past participant here and on Rennlist) had painted Porsche seal grey. Also has 490 10 speaker sound system, and 375/376 sport seats. There are a number of other options listed under the trunk lid which I cannot identify from any lists that I have seen - XSR, X47, X58, 888, X77, 014, 923, and 234. Was pleasantly surprised to find a good clear bra up front, and a B&M shift kit installed. Puzzled to find a CD holder, but CD-220 cassette player. I bought the car from Stoddard Porsche in Ohio, after a PPI at Steinel's, and had it shipped here in late October. Looks like it was originally sold in the Philadelphia area, did some time in Delaware. It had about 33k miles. It drives like a dream. Has a really cool turbine sound (aux air pump?) when cold, and sounds great even with the stock exhaust. Haven't really wound it out yet, but looking forward to a few DEs next year. Or that next vacant stretch of highway, heh, heh, heh... I have the PSE cans, which I'll be installing during the holidays. Haven't decided on whether I'll do the plumbing and electricals for the switch yet, but I'm leaning that way. The only things I've had to address are a worn driver's window regulator (motor turned but window did not drop a crack when opening the door, as it is supposed to), and a cracked accordian under the rear wing, both fairly easy to replace. Also have an airbag light on, which I understand may require new seatbelt recepticles and/or a new harness under the driver or passenger seat. Will address whenever I need to make my first warranty claim. Changed the oil two weeks ago, but couldn't get the filter case off with Autozone or Checker caps, so bit the bullet and bought the Porsche tool from Suncoast, and will change the oil again. The car is exactly what I wanted. The only other mods I might do are the aero front and rocker panels. I can't quite stomach the taco wing and rear skirts, so I would have to find some other wing or just make do with the stock automatic spoiler. Holding me back is the possibility that these components would have to have their paint blended in to the main body. Not sure of the Porsche paint is consistent enough to get away with painting just the add-ons. A better amp, an iPod connector, and spacers to bring the wheels out a bit more might be in the offing too. I'll keep the amber lights. I've seen the same car/color with the clear lights, and it seemed a a bit bland. In fact, I think the amber has a decidedly more 80s-90s Euro look, the clear, more American/Asian. Happy holidays...
-
Aiming Daytime Running Lights?
RandalJ replied to RandalJ's topic in 996 Series (Carrera, Carrera 4, Carrera 4S, Targa)
You were right. The bulb assembly was seated a little low. It was necessary to pull the headlight assembly, open the circular door on it to access the fog light bulb, undo the holddown spring, reorient the bulb assembly, and reverse. There is also a vertical adjustment for the fog light. Under the rubber flap, forward of the two flaps for the headlight, is the same type of 5mm hex head adjustment screw. I'm not sure why the owner's manual says that this should only be adjusted by a dealer. Just a few things I learned that I thought I'd pass on... When securing the fog light bulb assembly with the spring, insert the tips of the spring in their holes first, then push down and secure the loop end. The loop end will move around and drive you crazy if you try to secure it first and then put the tips in. I had trouble at first getting the headlight assembly back in, untill I found the dowels, molded into the housing, one on either side, toward the rear and on the bottom of the headlight assembly. Look for the tracks in the car that are supposed to receive them, and start to slide it in. Then look for the "runners" toward the front of the assembly, and make sure they are inserted into the same tracks. As you tighten the lever from the trunk, it will pull the assembly in and will connect the assembly's electrical pins to the receptical at the back of the assembly. You should hear a good snap when the assembly is locked back into place. Don't try to force the light in. It may take a bit of jiggling, but it should slide in as designed and fit snugly when locked in. -
Aiming Daytime Running Lights?
RandalJ replied to RandalJ's topic in 996 Series (Carrera, Carrera 4, Carrera 4S, Targa)
I will check at first opportunity and reply back. -
Aiming Daytime Running Lights?
RandalJ replied to RandalJ's topic in 996 Series (Carrera, Carrera 4, Carrera 4S, Targa)
On mine the daytime running lights are the small lights, inboard from the low beams, sort of like where your tear ducts would be. I assume all U.S. versions have these daytimers, but I have not really paid attention in the past. I've only had my 996 since early November, and am still becoming familiar with it. -
Transportation of a lowered car
RandalJ replied to Vman's topic in 996 Series (Carrera, Carrera 4, Carrera 4S, Targa)
I shopped around and ended up using: Bill DeMoise DeMoise Trk-ing, Inc Email: dispatch@demoise.com http://www.demoise.com/index.html Phone: 864-609-9390 Eastern Fax: 864-609-5476 I used them to move a 996 from the Cleveland area to Phoenix. Fully enclosed, door-to-door service, with fabric straps (as opposed to chains). Very good about calling with progress reports. Cost me $1,425 insured, vs. $1,800 quote from Intercity, who also have a great reputation. The truck was also carrying two Ford F40s to SEMA when they delivered my car. -
Aiming Daytime Running Lights?
RandalJ replied to RandalJ's topic in 996 Series (Carrera, Carrera 4, Carrera 4S, Targa)
Sorry, forgot to mention this is a 1999 C2 with the U.S. stock halogen, not litronic headlights -
My passenger side daytime running light appears to be aimed OK, but driver's side is cocked up, so that it is beaming at eye level from 20 feet away. Is there a way to aim just this light without affecting the aim of the lowbeam? Thanks in advance.
-
These rubber "accordians" can crack over time. Fortunately the rubber piece is only around $60, and can be replaced easily. You'll need to set aside about an hour and a half if you haven't done this before. Tools needed: Flat-bladed screwdriver 4mm allen wrench Ratchet with short extension and 10mm socket Parts needed: The bellows Two plastic expanding fasteners (might come with the bellows) First, deploy your spoiler manually, and shut off the ingnition. No need to disconnect the battery. You will see, along the rear edge, four caps, as seen below. These pry out easily with your fingers or with a flat bladed screwdriver. No paint to worry about, just try not to mar the plastic. With the caps off you can access the 4mm allen head bolts: I found these to be a bit tight due to exposure to the elements, but I was able to get them off with an allen key. A long allen socket would work better. Once the bolts are out, the top tray (painted part) of the spoiler can be slid toward the rear and off. Put it somewhere where it won't be scratched. Now you can see the fasteners holding the top of the bellows to the spoiler. There are two explanding plastic fasteners, one on each corner, and several sliding hooks. I destroyed my plastic fasteners since my new bellows came with new ones. Just nipped them off with wire cutters. With the two plastic fasteners off you can disengage the hooks and detach the top of the bellows by sliding it to the right, and down. The top edge of the bellows is actually sandwiched between a long metal strip and the spoiler. The metal strip has the hooks that go through pre-cut holes in the bellows. View from below: With top of bellows detached: With the top of the bellows detached, open the engine lid. You will see several circular clips holding the bottom of the bellows to the engine lid: There is one under the fan, so you will have to detach the fan. Just three 10mm bolts. Just let it hang by the cable, out of your way. Be careful not to scratch your paint while removing the clips. In my case, the clips themselves had scratched the paint a bit. Fortunately this is one of the body areas that receives only a "rough" paint job from the factory anyway. Save those clips. It is not necessary to replace them. With the clips removed, you can pull the bellows out. As with the top, there is another frame piece running the length of the bottom of the bellows. This sandwiches the bottom of the bellows to the engine lid. The bellows has pre-cut holes for the nubs on the metal strip: Lay your old bellows alongside you new one, so that you can see how the top and bottom frame strips fit. Reassembly: Transfer your frame pieces to your new bellows. Then attach bottom of bellows to engine lid with the circular clips. Push those numbs through and get those clips up as tight as possible. The idea is to clamp onto the lower bellows edge. Re-attach the fan. Close engine lid Make sure the top frame piece hooks are threaded through the top of the bellows, push up through the corresponding holes in the spoiler, and slide to the left to secure. Make sure all of the hooks are engaged and snug. Then insert and secure the two plastic expanding fasteners in the corners. This step will confirm that you have the bellows and the spoiler snug and aligned properly. Now grab your painted spoiler top, and look under it to make sure the locking tabs are lined up. Push down, and slide toward the front of the car to lock the tabs. The top and bottom of the spoiler should mate very well. If you feel gaps around any edges, check and adjust. Finally, secure the top of the spoiler with the four allen screws. Put the plastic caps on, and manually raise and lower the spoiler to make sure you haven't left any tools in there...
-
Replacing Rubber Bellows Under 996 Rear Spoiler These rubber "accordians" can crack over time. Fortunately the rubber piece is only around $60, and can be replaced easily. You'll need to set aside about an hour and a half if you haven't done this before. Tools needed: Flat-bladed screwdriver 4mm allen wrench Ratchet with short extension and 10mm socket Parts needed: The bellows Two plastic expanding fasteners (might come with the bellows) First, deploy your spoiler manually, and shut off the ingnition. Author RandalJ Category Carrera (996) - Common Fixes and Repairs Submitted 11/27/2006 07:51 PM Updated 03/10/2017 02:10 PM
-
There appear to be two versions of the CDR-220, a model 4462 which was available for 99-01 MY 996 and Boxter, and a model 6625 which was for the 2002 model year. My question is whether the latter will also work on the 99-01 MYs or whether you must use the 4462. In looking on the Becker site, you can download the manuals, but the 4462 manual is what downloads for both the 4462 and the 6625. My 1999 came with the CR-220 (cassette only) version, which I'd like to replace with the CD version. I know that there are better head units out there, but I like the original look of the Becker systems. Thanks in advance. Randy
-
Latest P/Ns for 996 PSE, Mufflers Only?
RandalJ replied to RandalJ's topic in 996 Series Part Number Requests
Thank you kindly. -
Loren, can you provide the part numbers for the U.S version 996 PSE mufflers only (not full kit)? I am getting a MY 99 and understand that the latest version with the larger bypass pipe and cut-off valve will fit 99-04, and may be the only version available these days. I've done a search and have seen just the full kit part number(s), and a p/n for one side only: 996.111.985.04 Not sure if this is left or right or wrong entirely. Also, in my searches, someone commented that to install the new version mufflers on a 3.4, it requires some different mounting brackets (and maybe different fasteners?). If this is true, do you have part numbers for these? Getting these as part of a car purchase deal from an out of town Porsche dealer, and he wanted me to be sure about the part numbers, and confirm with the numbers with what their parts dept comes up with to reduce the likelyhood of error (will be shipping the boxes with car for me to install). Thanks very much.
-
Had PPI Done Today -Opinions?
RandalJ replied to RandalJ's topic in 996 Series (Carrera, Carrera 4, Carrera 4S, Targa)
Yeah it does, coupe with S030 suspension and limited slip, and the right color combo. -
Had PPI Done Today -Opinions?
RandalJ replied to RandalJ's topic in 996 Series (Carrera, Carrera 4, Carrera 4S, Targa)
OK - here's what I've confirmed through a couple of dealers - the range two number denotes the number of missed ignition/spark events. NOT incidents of missed shifts. They said 200 or so is quite common in cars they have through for routine maintenance, but some have none. 449 represents about 150 crankshaft revolutions, or just over one second duration at 8000 avg RPM (figuring starting at 9k, going down to 7k). I can see an engine surviving a singe case or maybe a few cases of shorter duration, hence the PPI tech's opinion that the engine was fine. Still, my concern would then become whether after market warranty companies would see this, and blame it for ANYTHING that might go wrong with the engine, and not cover any engine work or replacement. Crap. -
Had PPI Done Today -Opinions?
RandalJ replied to RandalJ's topic in 996 Series (Carrera, Carrera 4, Carrera 4S, Targa)
Well, we're no closer to what the numbers actually mean, but I will try to find out definitively tomorrow. -
Had PPI Done Today -Opinions?
RandalJ replied to RandalJ's topic in 996 Series (Carrera, Carrera 4, Carrera 4S, Targa)
Understand the general meaning of range 2. The 449 sounds huge, but what does this really represent? In order of best case scenario to worst case, it could be: 1. The number of ignition events, which could simply mean 1 misshift, sending the revs too high for about a second - or two misshifts for an average of half a second each, etc. That might be OK, especially if the engine has gone on strong for another 700 hours. 2 The number of revs under which the overreving occurred. Equates to a longer total time. 3. Most unlikely, the number of mechnical over-revving incidents. I said before that the engine would probably not survive 20. 4. Something else? Thanks. -
Had PPI Done Today -Opinions?
RandalJ replied to RandalJ's topic in 996 Series (Carrera, Carrera 4, Carrera 4S, Targa)
On the 449 hits, I'm inclined to think that means 449 ignitions, not 449 separate mechanical over-rev events or miss-downshifts. Anyone know for sure? I'll call a few shops too to confirm. If that is the case, then this number COULD represent just one mechanical over-rev event. Figure one revolution has 3 ignitions, so 449/3 = about 150 revolutions. If the RPMs at the time were, say 8000, the duration of the overrev would have been 150/8000 minutes, or about 1.13 seconds. It would have to have been shorter lengths of time if it happened on two or more occasions. That seems more likely than 449 actual miss-downshifts. I don't think the engine could take twenty of those. Though certainly just one event could be enough to break the engine, I am reassured by the fact that the engine has gone for 700 hours since the last (and maybe only) incident (out of 1000+ hours total). I'm inclined to think no harm done. The shop was looking for timing chain noises as an indicator of bigger problems, but they said it was quiet. And the engine was strong with no unusual sounds. Thanks -
Hi - going from a 1986 Targa to a 1999 coupe. I'm seriously considering one from out-of-town with about 35k miles for $36k, and the PPI today lists several things: Original engine, but transmission was replaced at about 18k, reasons unknown (per Carfax). RMS OK now, but was replaced at 12k miles (found on dealer maintenance network). 449 hits of "range two counter". My understanding is that this is how many times it's gone over redline. More than the tech has ever seen on one of these, but not necessarily bad. Should I worry? Rear brakes need pads and rotors. Brake flush needed. Fronts good. Both variocam seals leaking. Does anyone have a picture of where these are on the engine? No compression or leakdown performed (shop said not needed unless anything came up on the diagnostic check or any unusual engine noises were evident). Otherwise excellent shape. Engine, tranny, clutch all good, but evidence it was tracked (ties on the tranny cables, the redline counts - doesn't bother me necessarily). Carfax looked OK. Car is 1700 miles from me at a Porsche dealer, and PPI was done at a highly regarded independent shop. I believe the dealer will make these items right at no charge. I anything I MUST look at before I commit? This car is the color combo and the S030 I've been looking for. Thanks in advance.