Welcome to RennTech.org Community, Guest
There are many great features available to you once you register at RennTech.org
You are free to view posts here, but you must log in to reply to existing posts, or to start your own new topic. Like most online communities, there are costs involved to maintain a site like this - so we encourage our members to subscribe or donate. All subscriptions and donations go to the costs operating and maintaining this site. We prefer that guests take part in our community and we offer a lot in return to those willing to join our corner of the Porsche world. This site is 99 percent member supported (less than 1 percent comes from advertising) - so please consider an annual subscription or donation to keep this site running.
Here are some of the features available - once you subscribe RennTech.org
- View Classified Ads
- DIY Tutorials
- Porsche TSB Listings (limited)
- VIN Decoder
- Special Offers
- Paint Codes
- Registry
- Videos System
- View Reviews
- and get rid of this welcome message
It takes just a few minutes to register, and it's quality Porsche information at a low cost.
Contributing Members also get these additional benefits:
(you become a Contributing Member by subscribing or donating money to the operation of this site)
- No ads - advertisements are removed
- Access the Contributors Only Forum
- Contributing Members Only Downloads
- Send attachments with PMs
- All image/file storage limits are substantially increased for all Contributing Members
- Option Codes Lookup
- VIN Option Lookups (limited)


davidjt
-
Posts
7 -
Joined
-
Last visited
davidjt's Achievements
Member (1/1)
0
Reputation
-
986 Window mechanism is damaged
davidjt replied to davidjt's topic in 986 Series (Boxster, Boxster S)
Many thanks for your quick responses. Ok, I see that a replacement is needed. I will check out Woody's Parts LLC. I have a friend in Houston, who can ship to Australia. (Parts in Australia are prohibitively expensive, even some second hand stuff), regards -
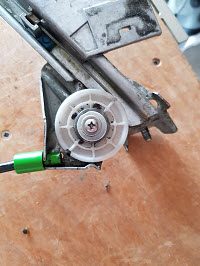
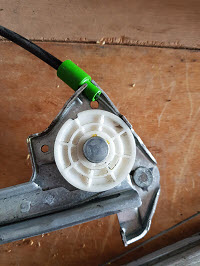
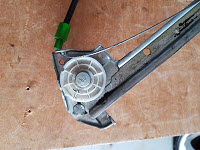
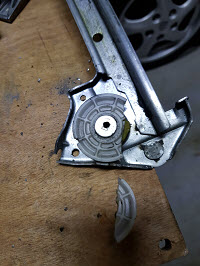
I live in Australia, so my right door window is the most used. Recently I have had a couple of squeaks, then went away. Not for long. After the roof goes down, I tried to get the window up again. It travelled about half way, then gets stuck. and would not move under power, up or down. So I removed all of the door trim, and still the window was stuck fast. So, removed the mechanism. Found one plastic wheel had worn of its mount, and another one cracked. Can I repair this mechanism? or is it a new part.? I have remounted the wheel that came off, tapped a 4mm screw and washer, is Ok. But the broken one, I do not know where to go with this one, any help appreciated. I have attached some photos Photo 01: this is the repaired wheel. Photo 02: this is what the wheel should look like Photo 03 The wire appears to be short, and I cannot get any more length, this I need help. Photo 04: This is the broken wheel. I do not think I can repair this wheel. Regards, David

-
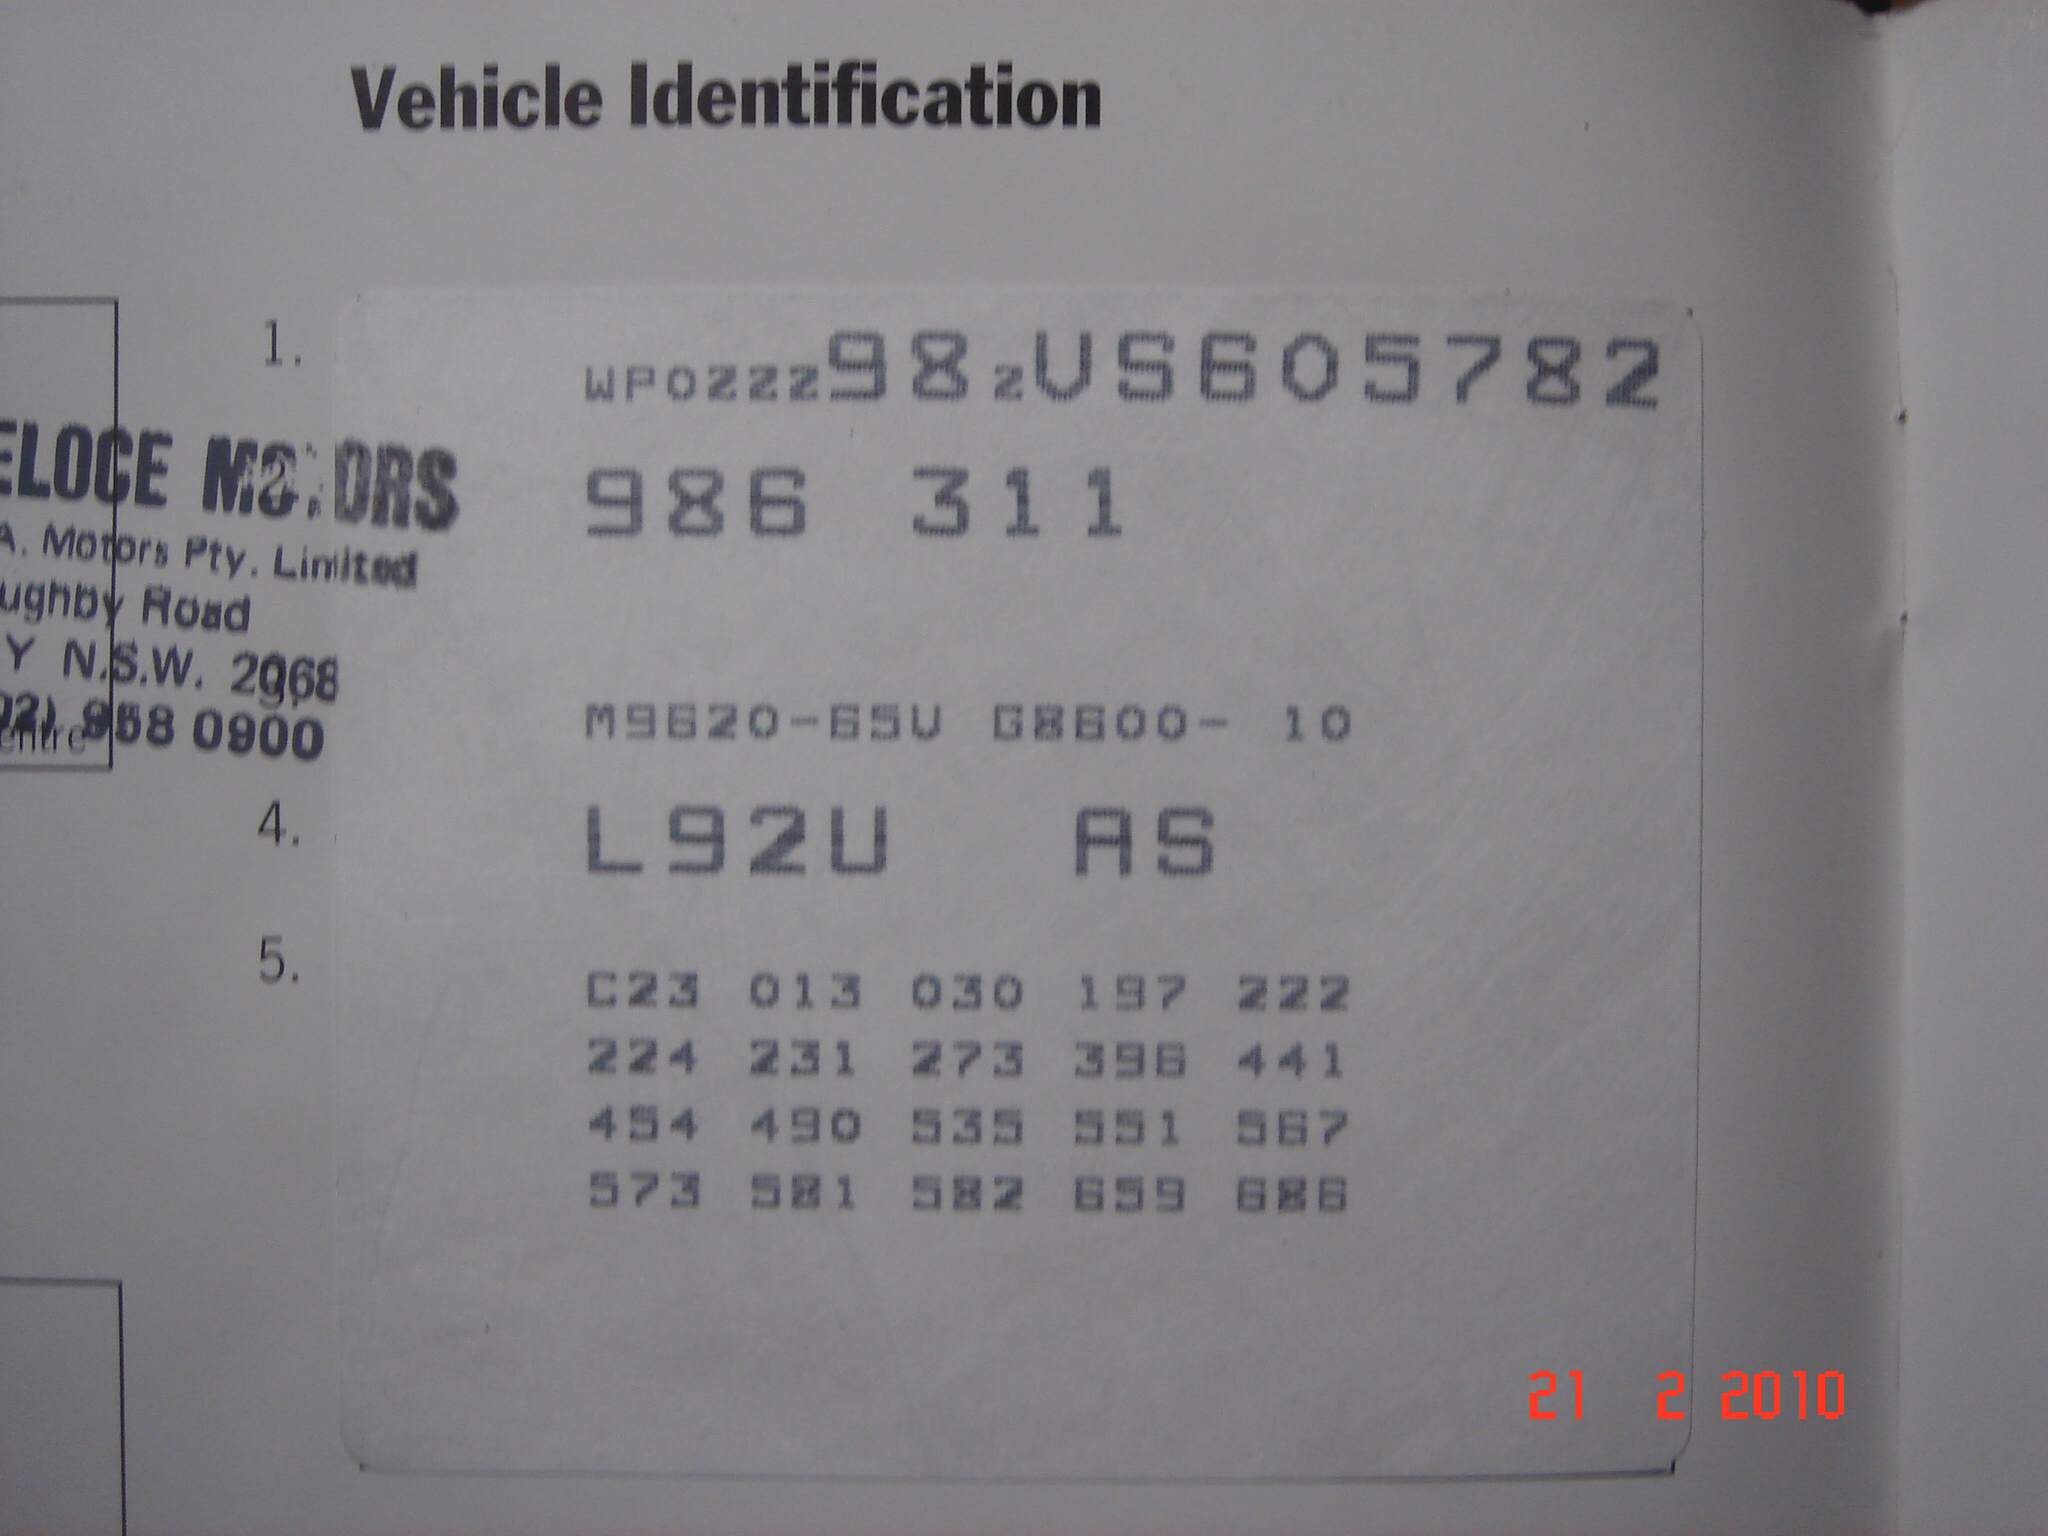
Boxster 986 1997 living down under. From these forums it appears that I would need a 40 digit code to be able to get new keys. I have attached a picture of a code in the maintenance book, but do not know if this number is something to do with the 40 digit code. I would appreciate any help here, as documentation for this car is a bit scarce. Regards, David
-
Just following these posts. The bulbs get very hot, and the connectors would then suffer as well. When you have solved your problem, use some silicon grease in the bulb connector, to reduce the corrosion created from the heat. or, make an LED replacement, then you have no corrosion problems.
-
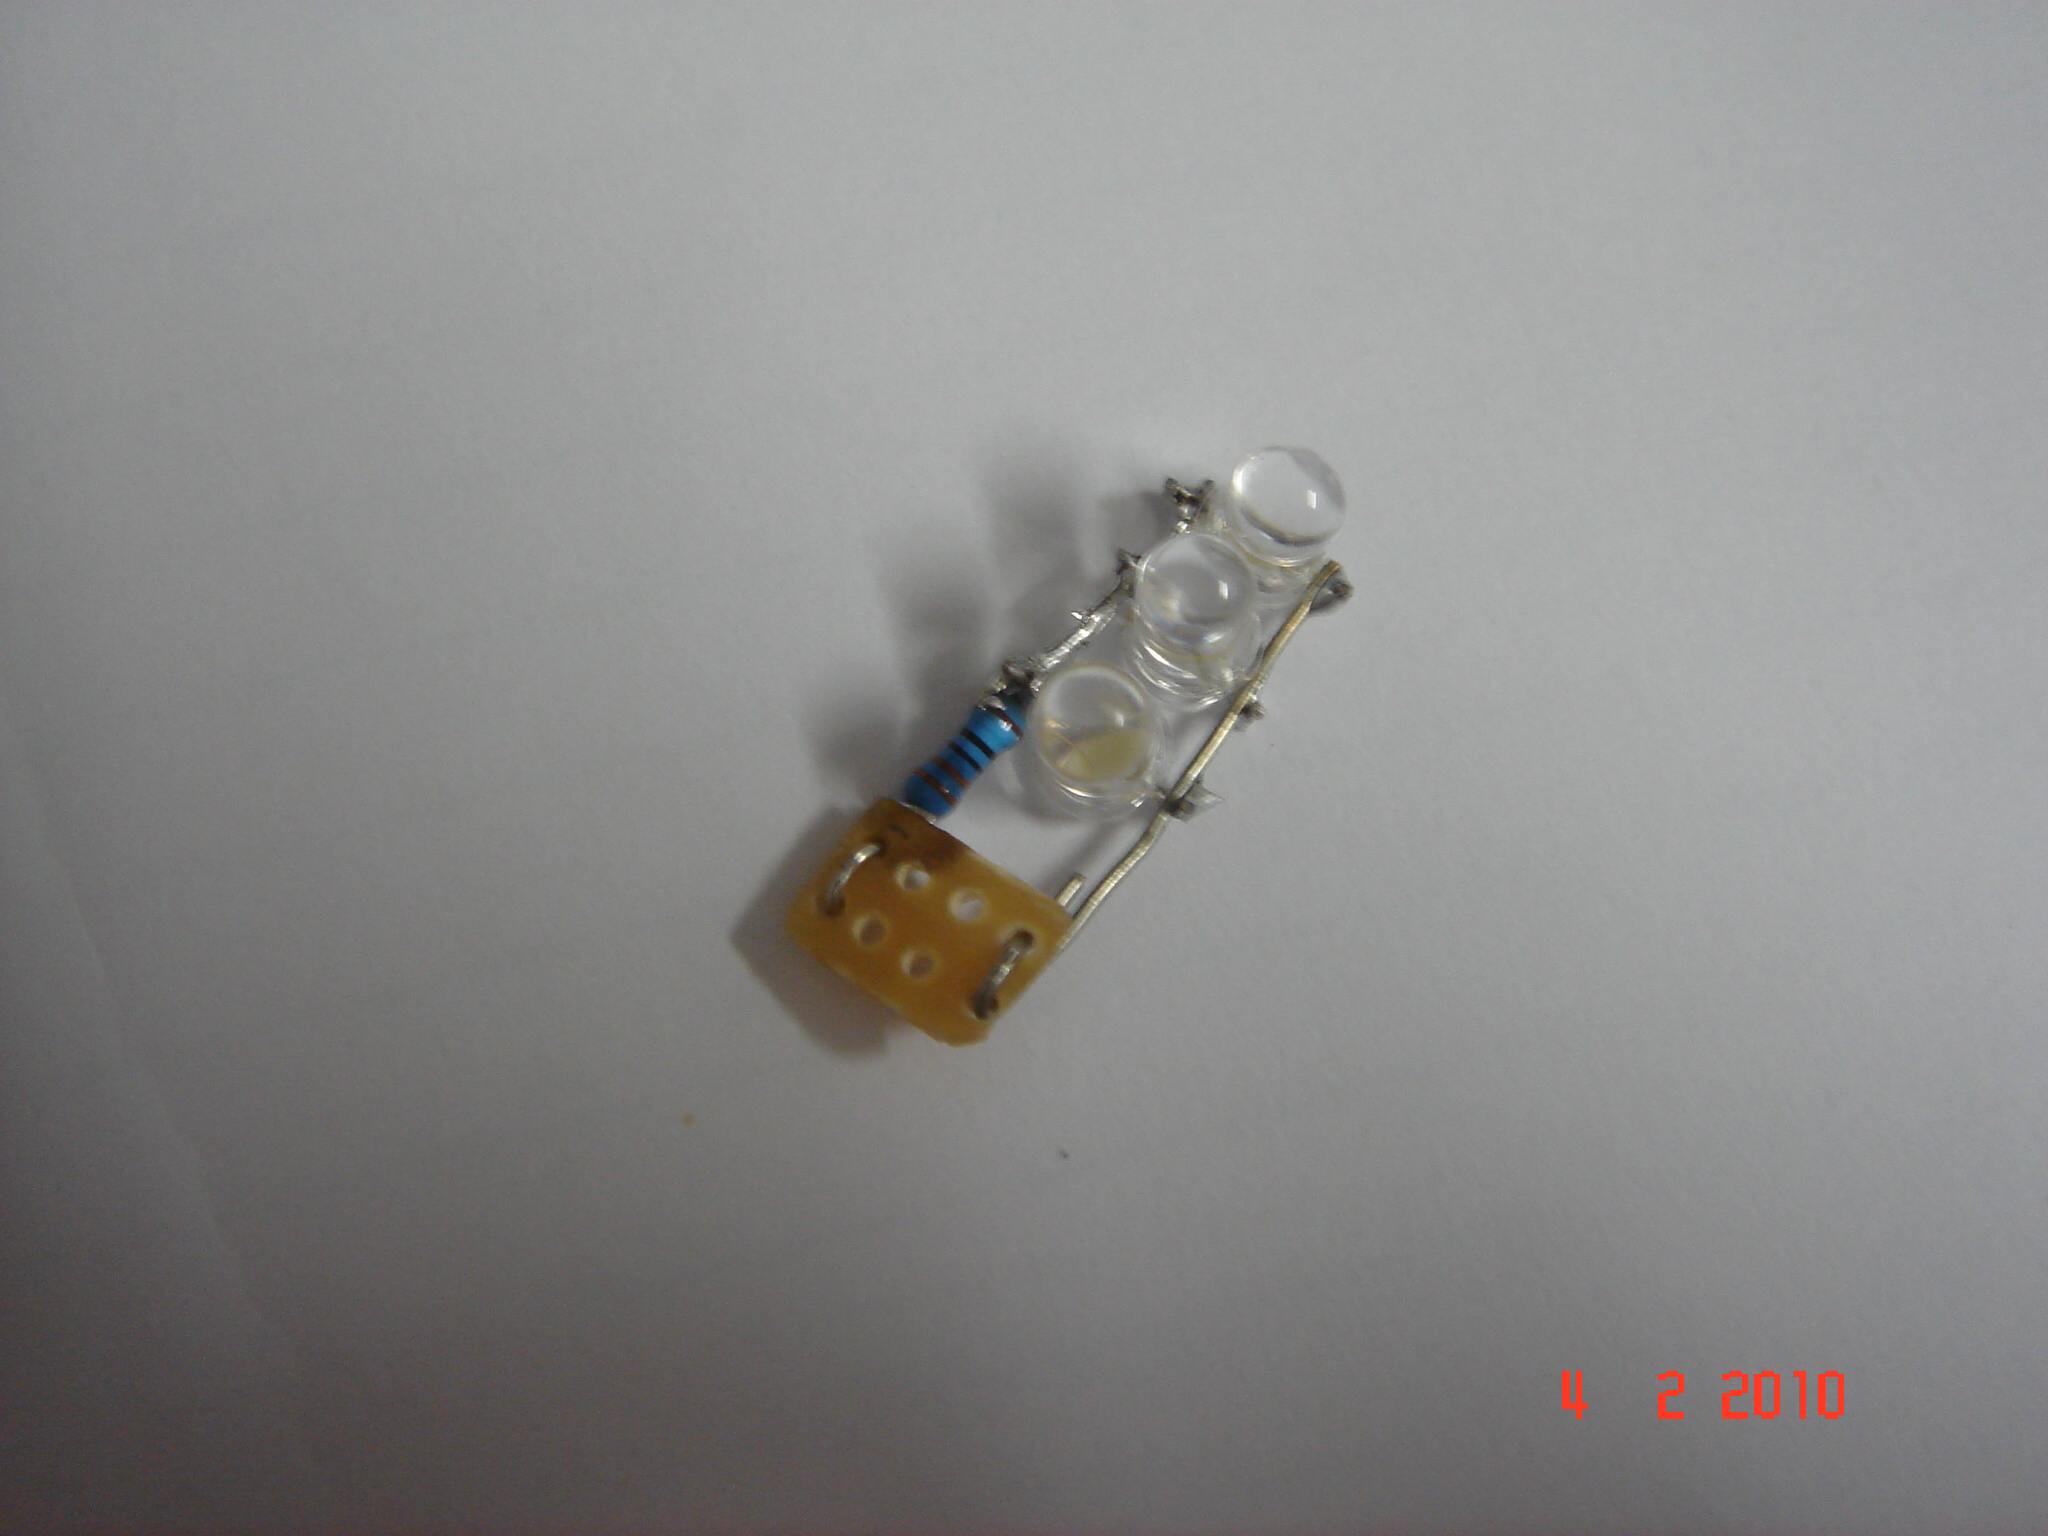
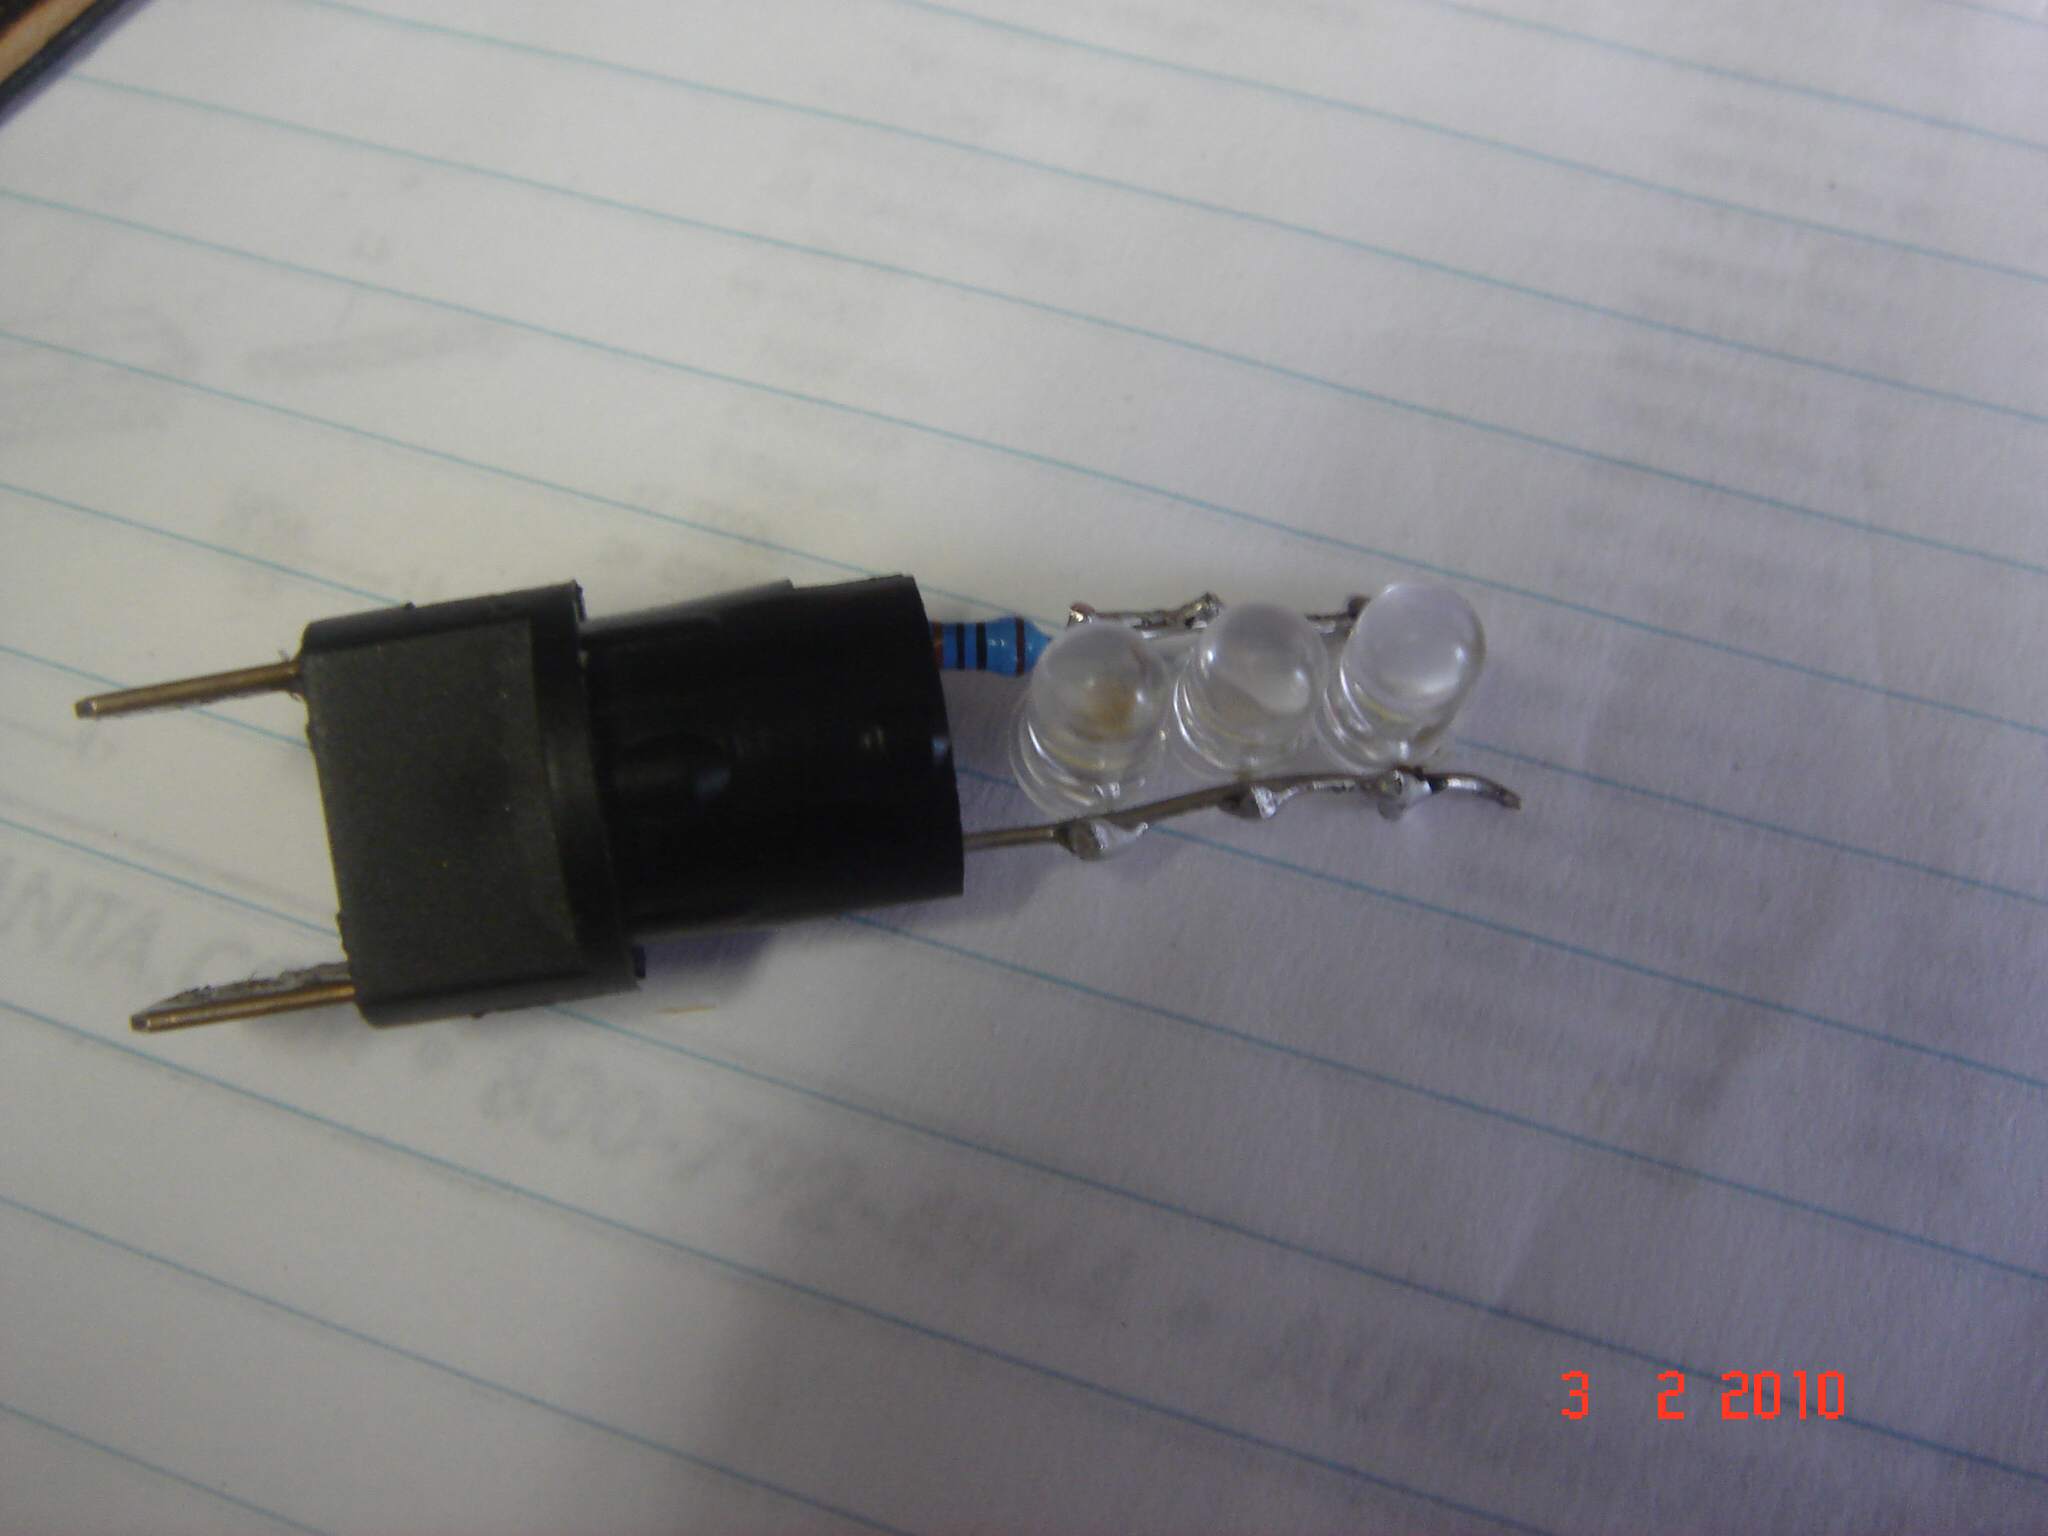
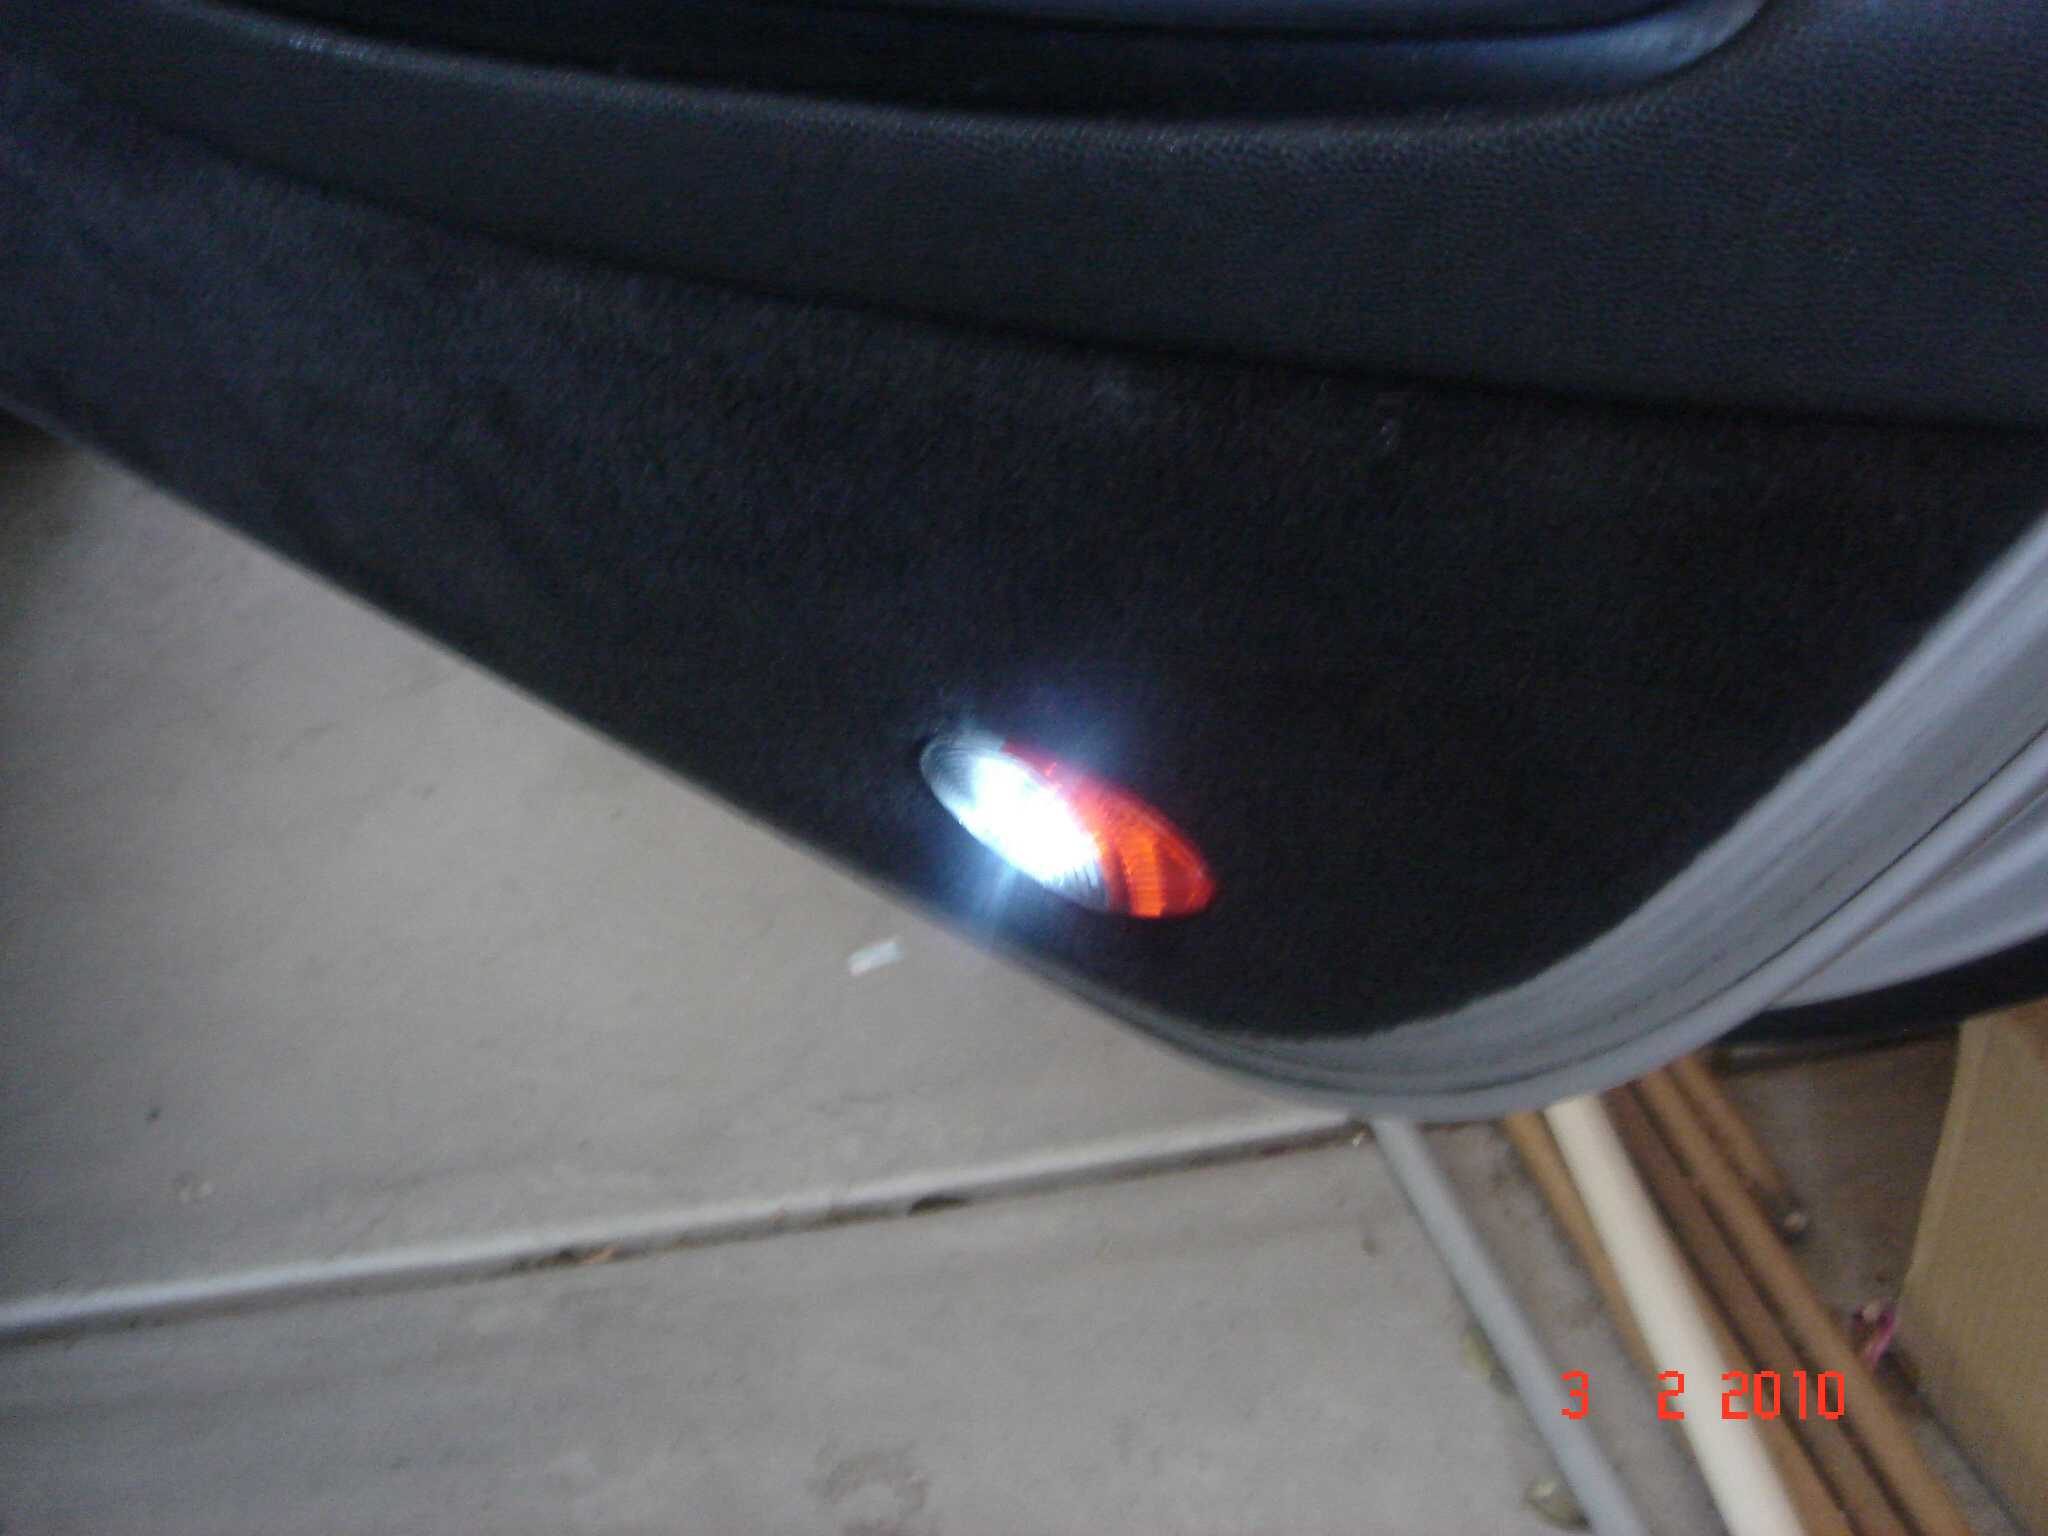
Boxster 1997. Both of these lights were not working. Removed the light fitting (they just pop out with a small screwdriver). The connections to both of these light fittings were corroded. Strange, as the interior of the doors did not show any signs of moisture (like there was no residue). Cleaned up the fittings, and, presto, lights ON. After a few minutes, I found that the whole fitting was getting somewhat quite hot. No wonder, these are 5watt bulbs, and if you leave just one door open, both door lights are on, and for an extended period, I could see that the battery could suffer. Also, with this amount of heat, and trapped on the door panel, I can also understand why the connectors were corroded. So, I built LED fittings for each door. I used 24000 mcd LEDs at 30mA. A few photos to show the part I had made, and then fitted to the door. No1, shows the construction. The original bulb thickness in the socket is about 2mm, so I used some perf board, which is also about 2mm. This just thick enough to allow the wiring (which is wrapped on the ends) to spread the prongs in the socket for a good, firm fit. No2, shows the assy fitted to the socket. No3, shows the outcome.
-
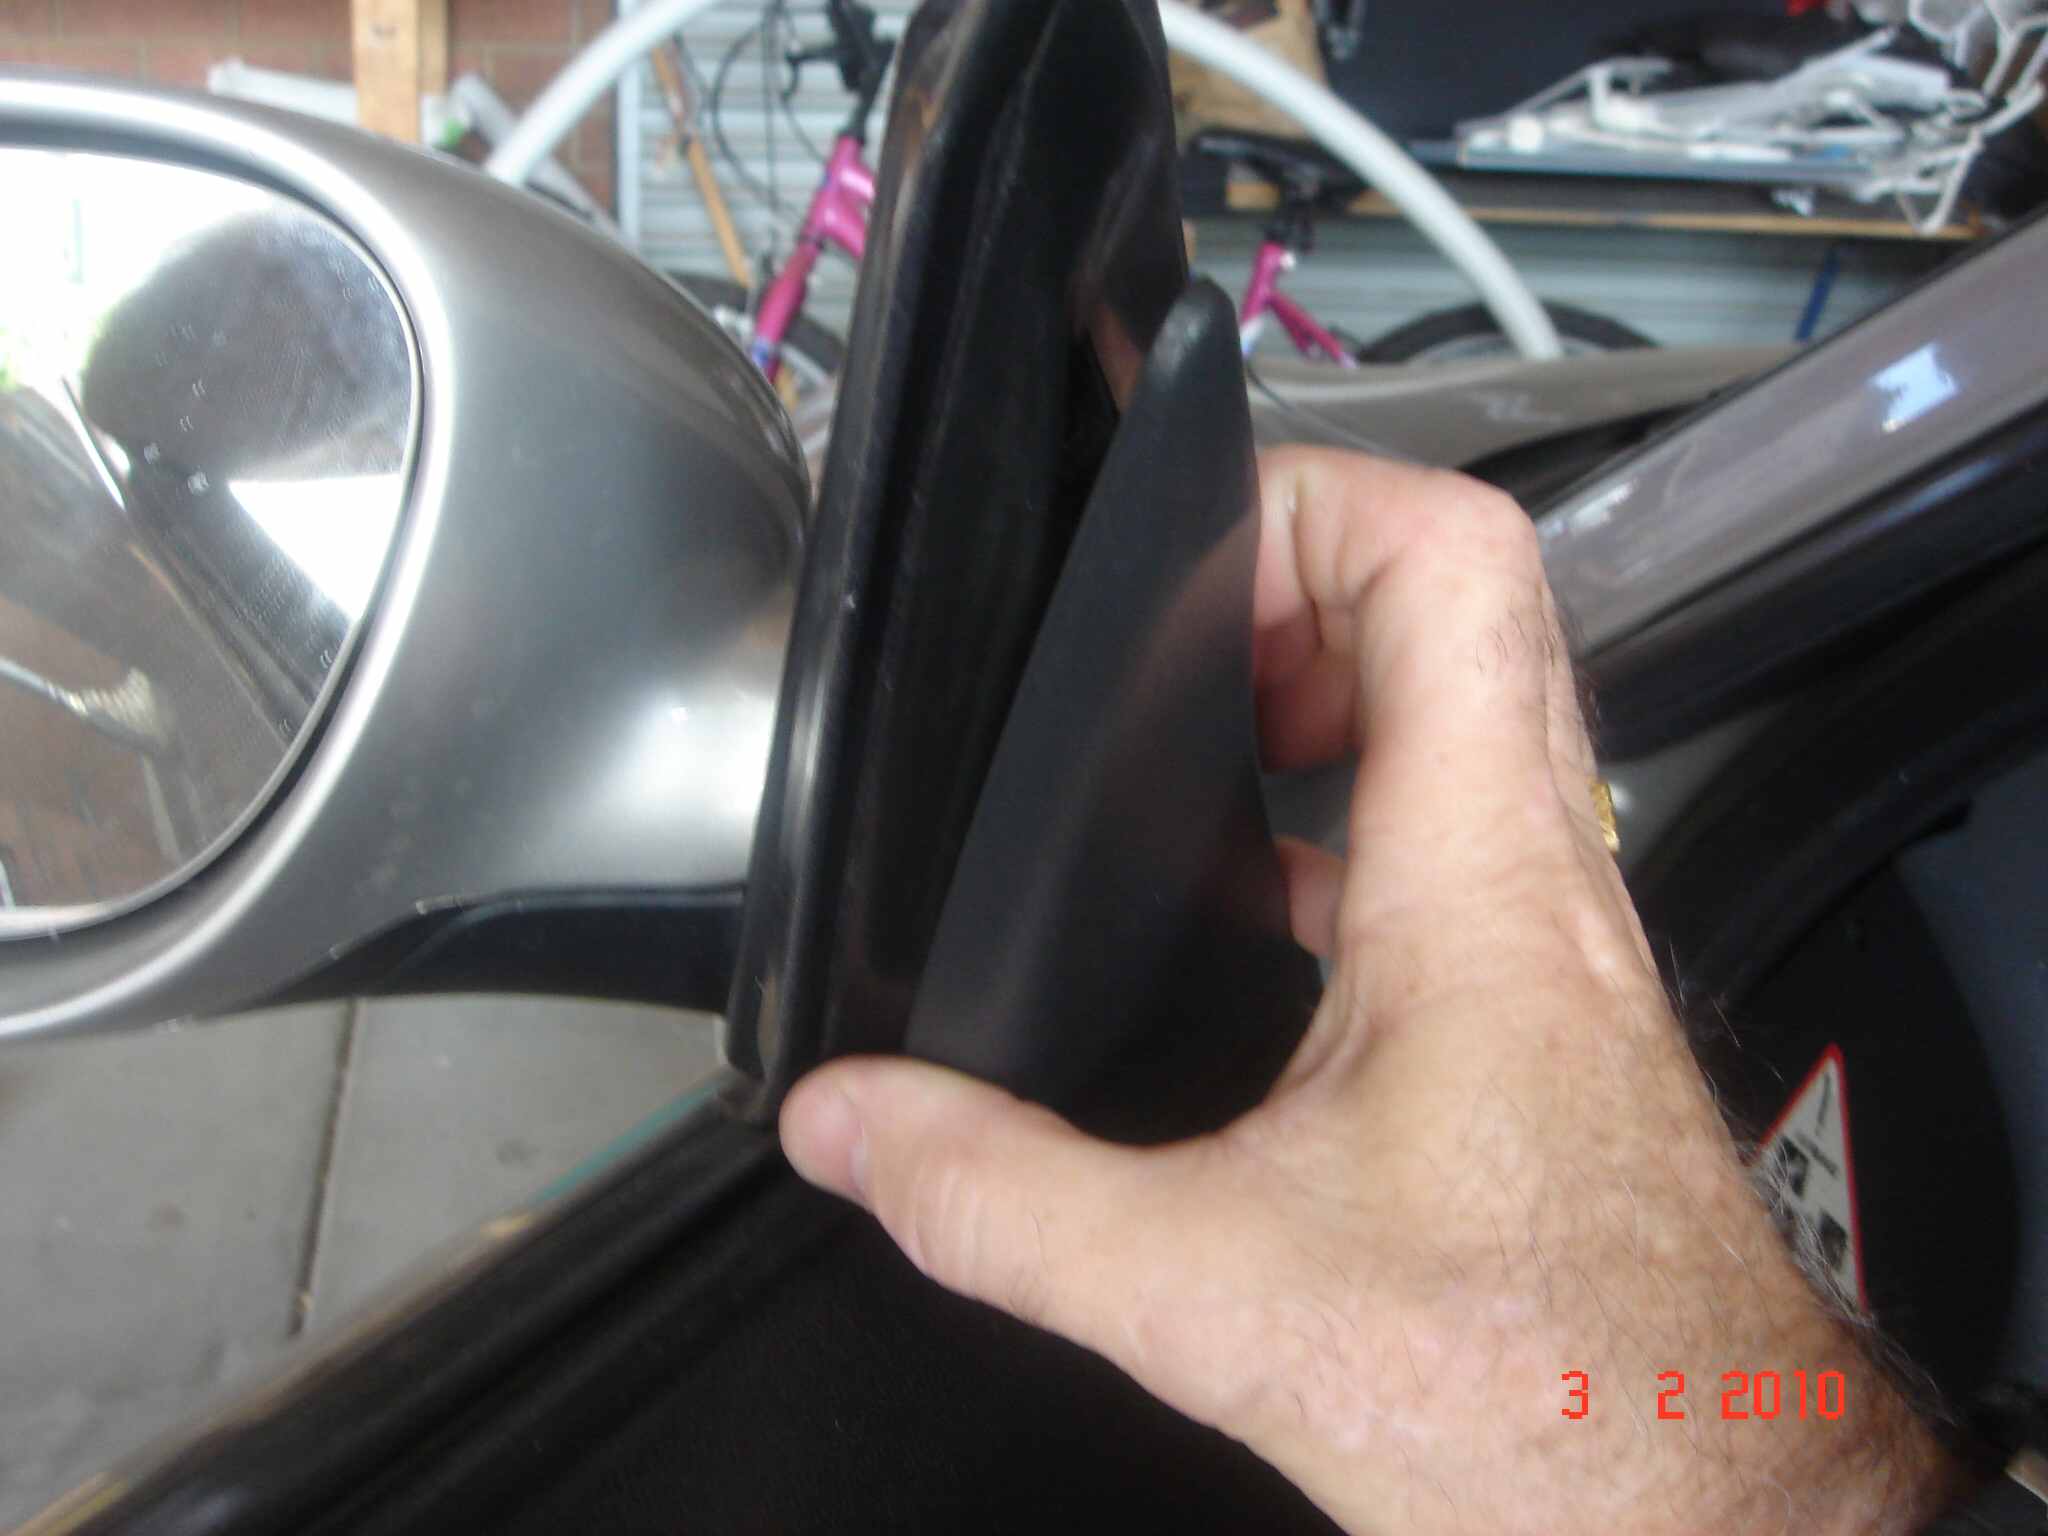
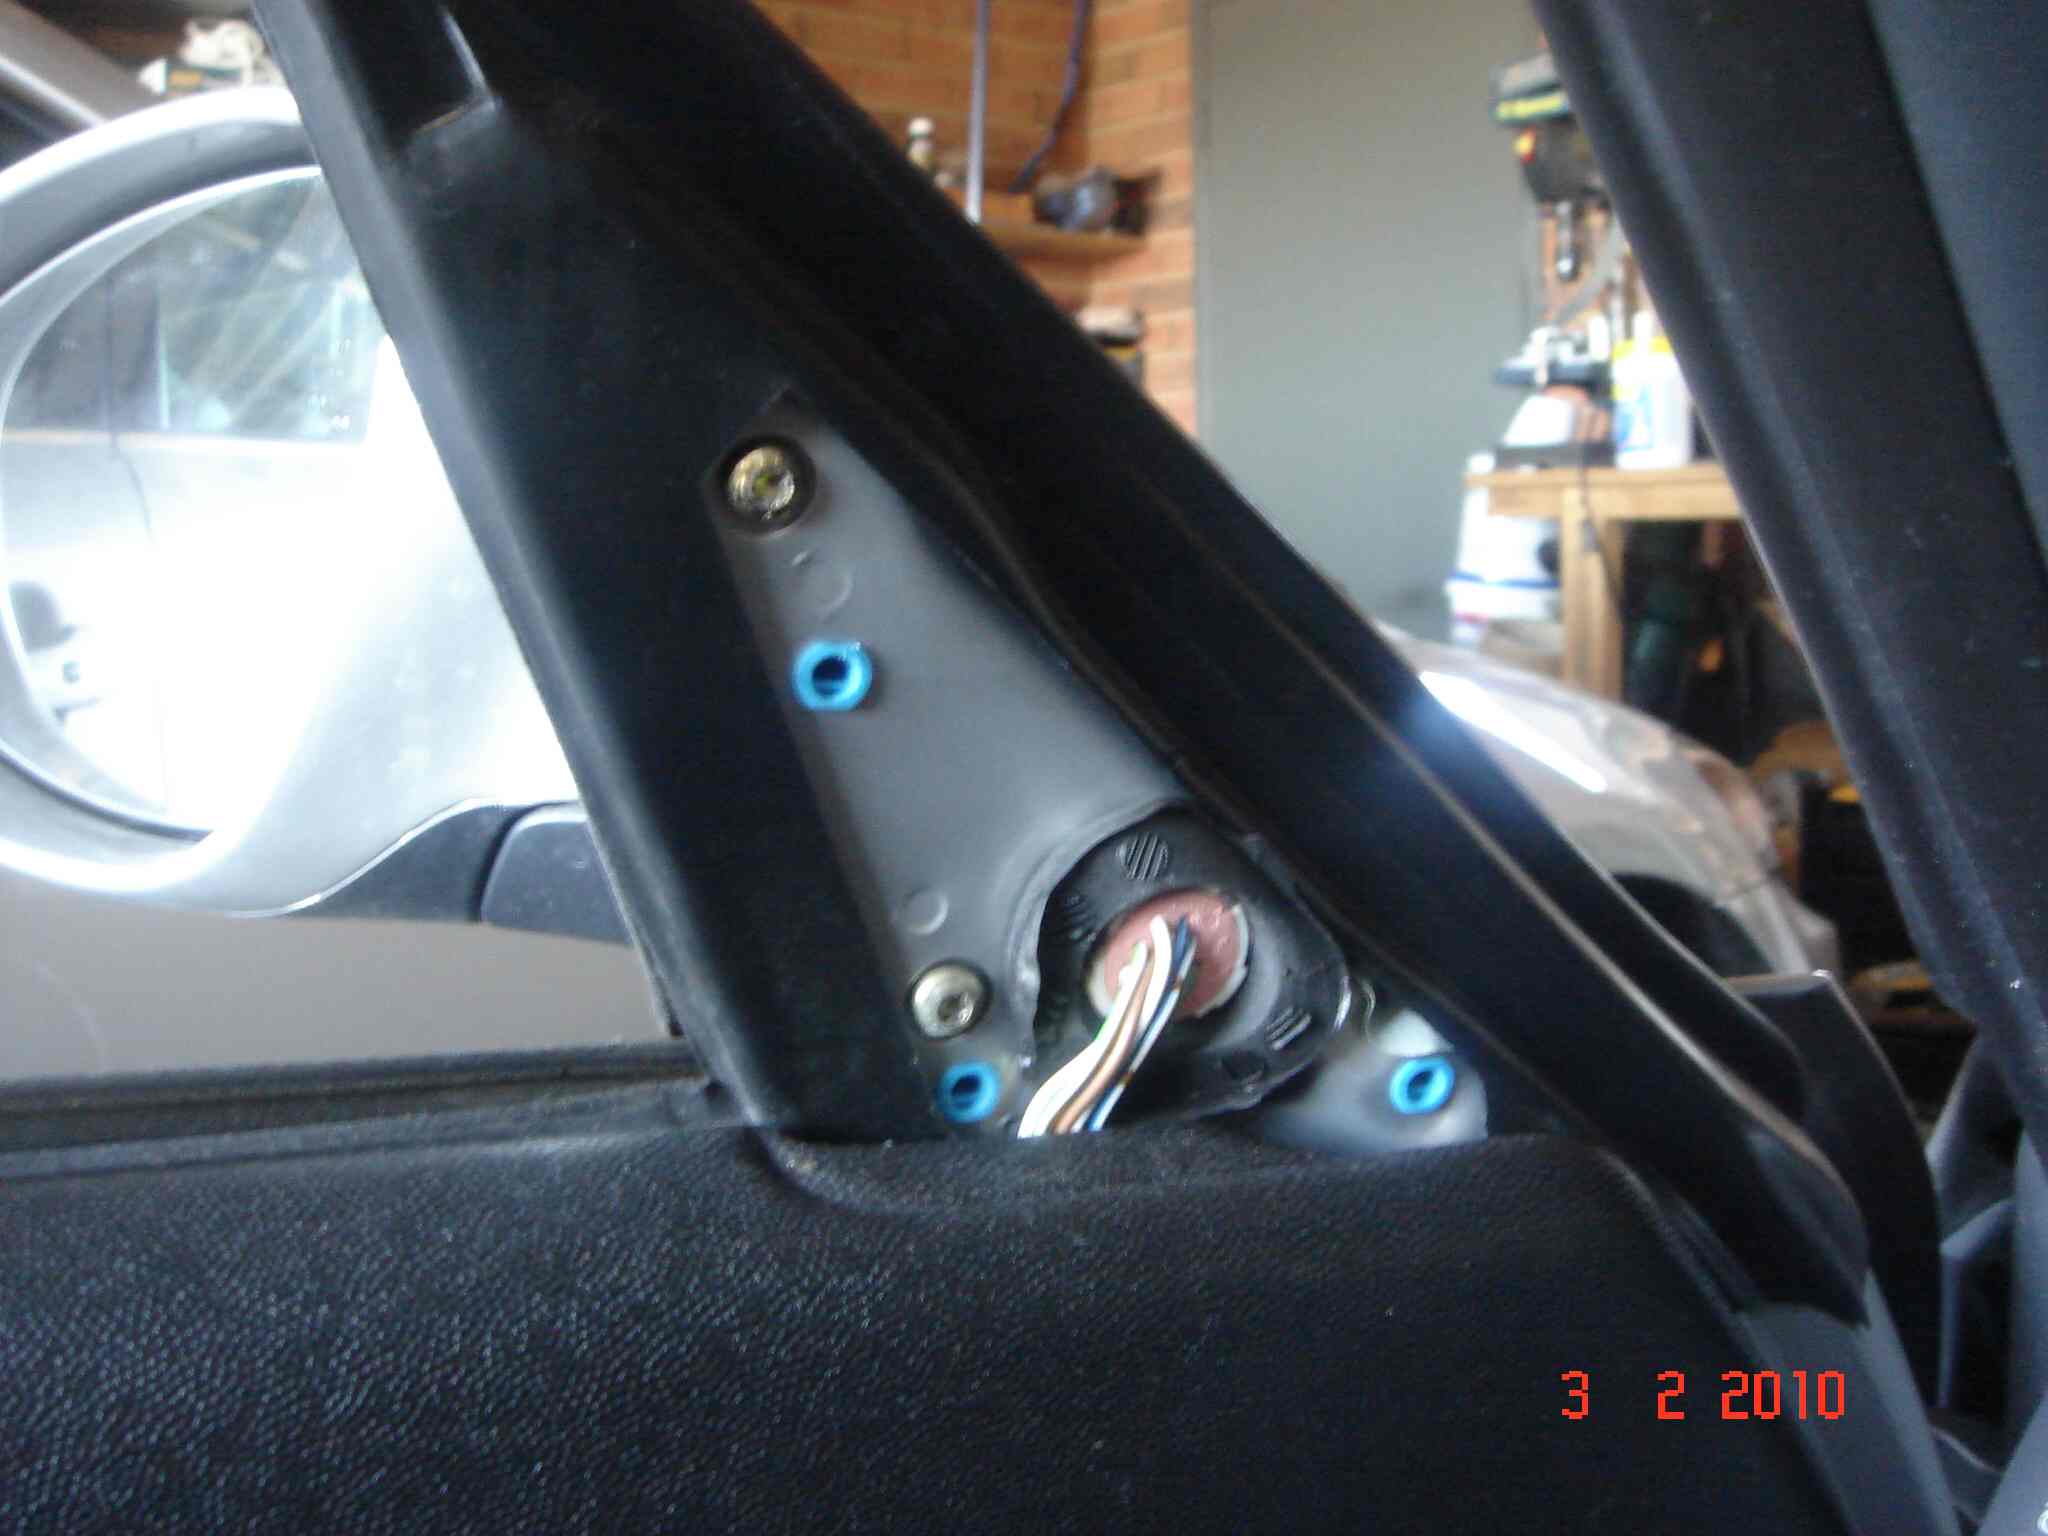
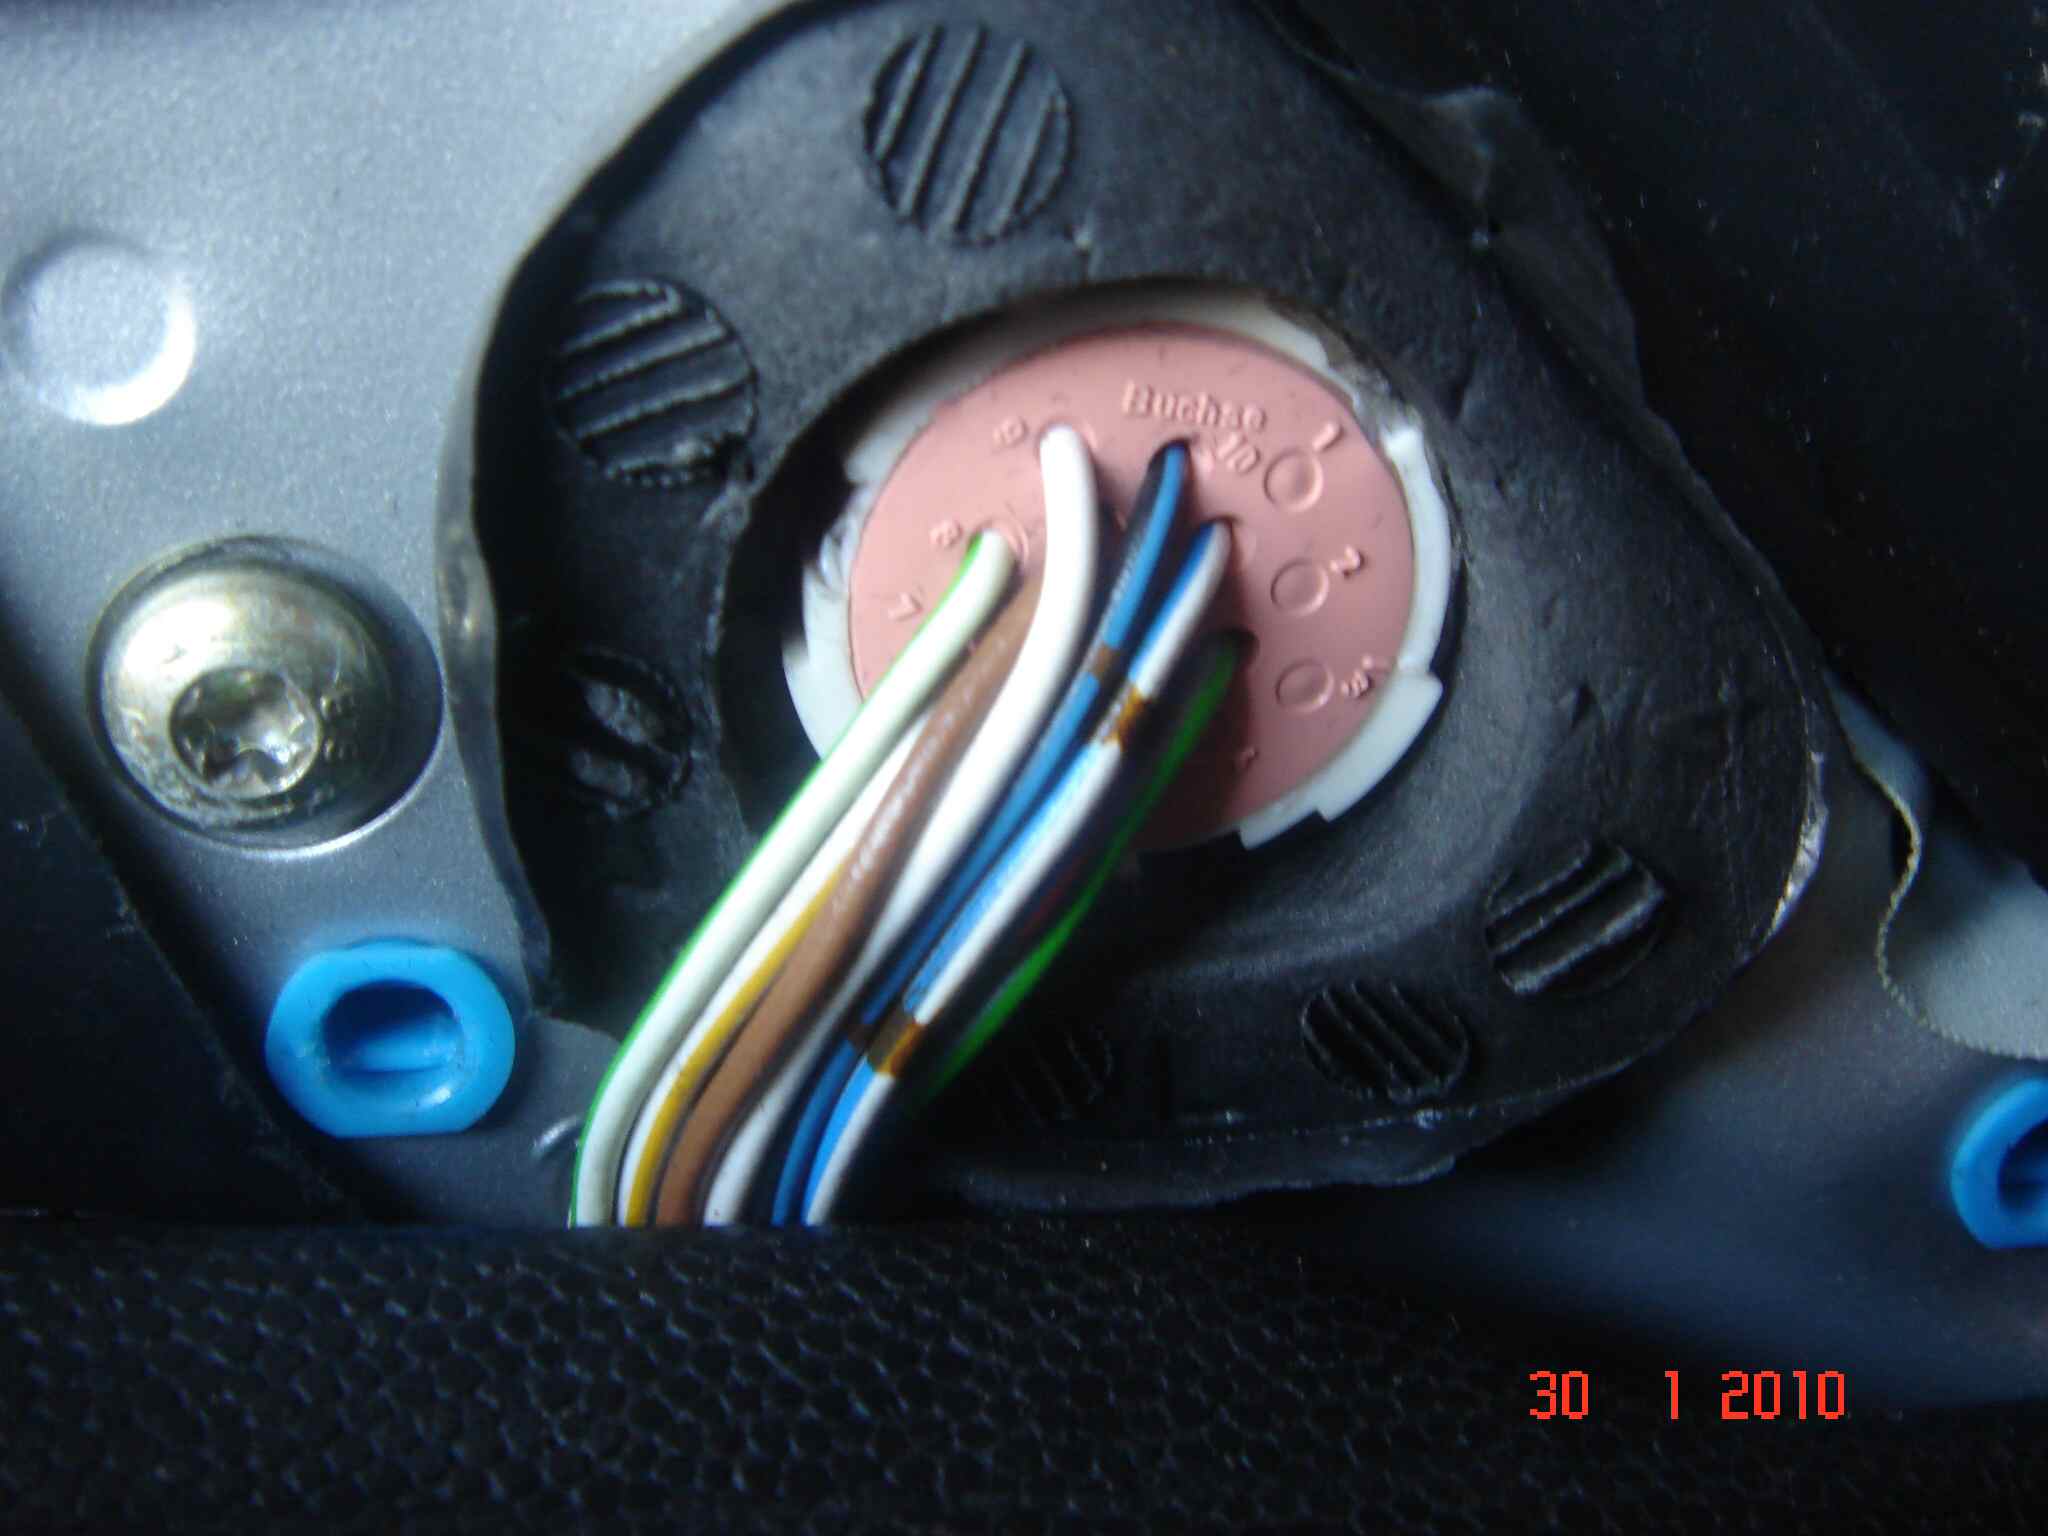
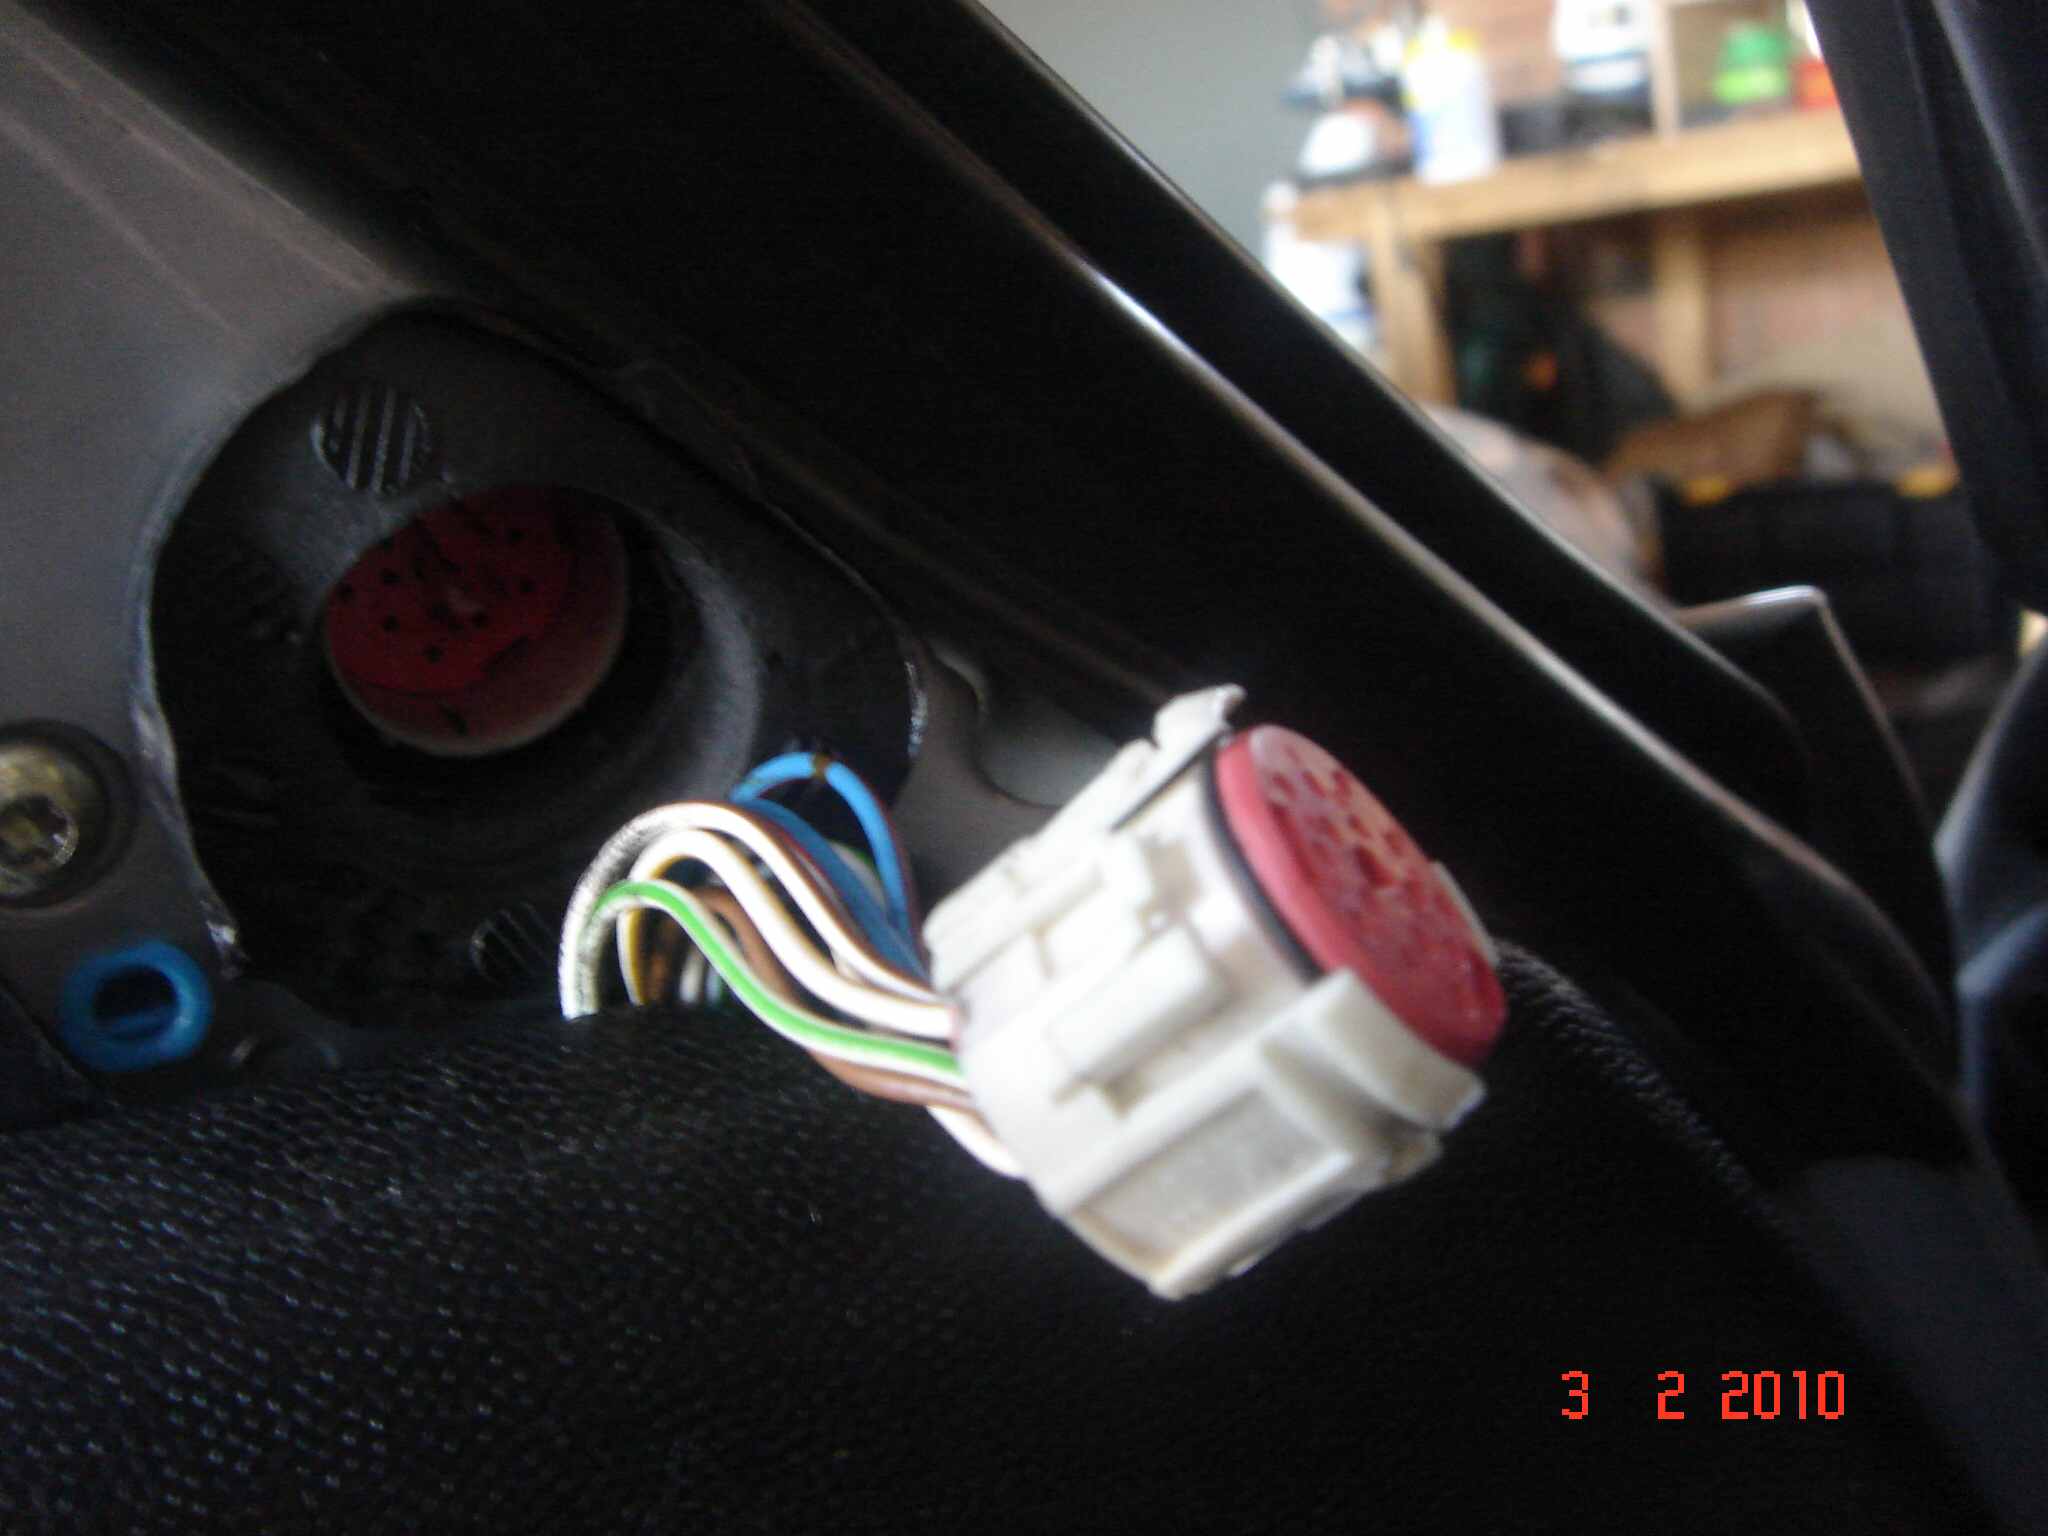
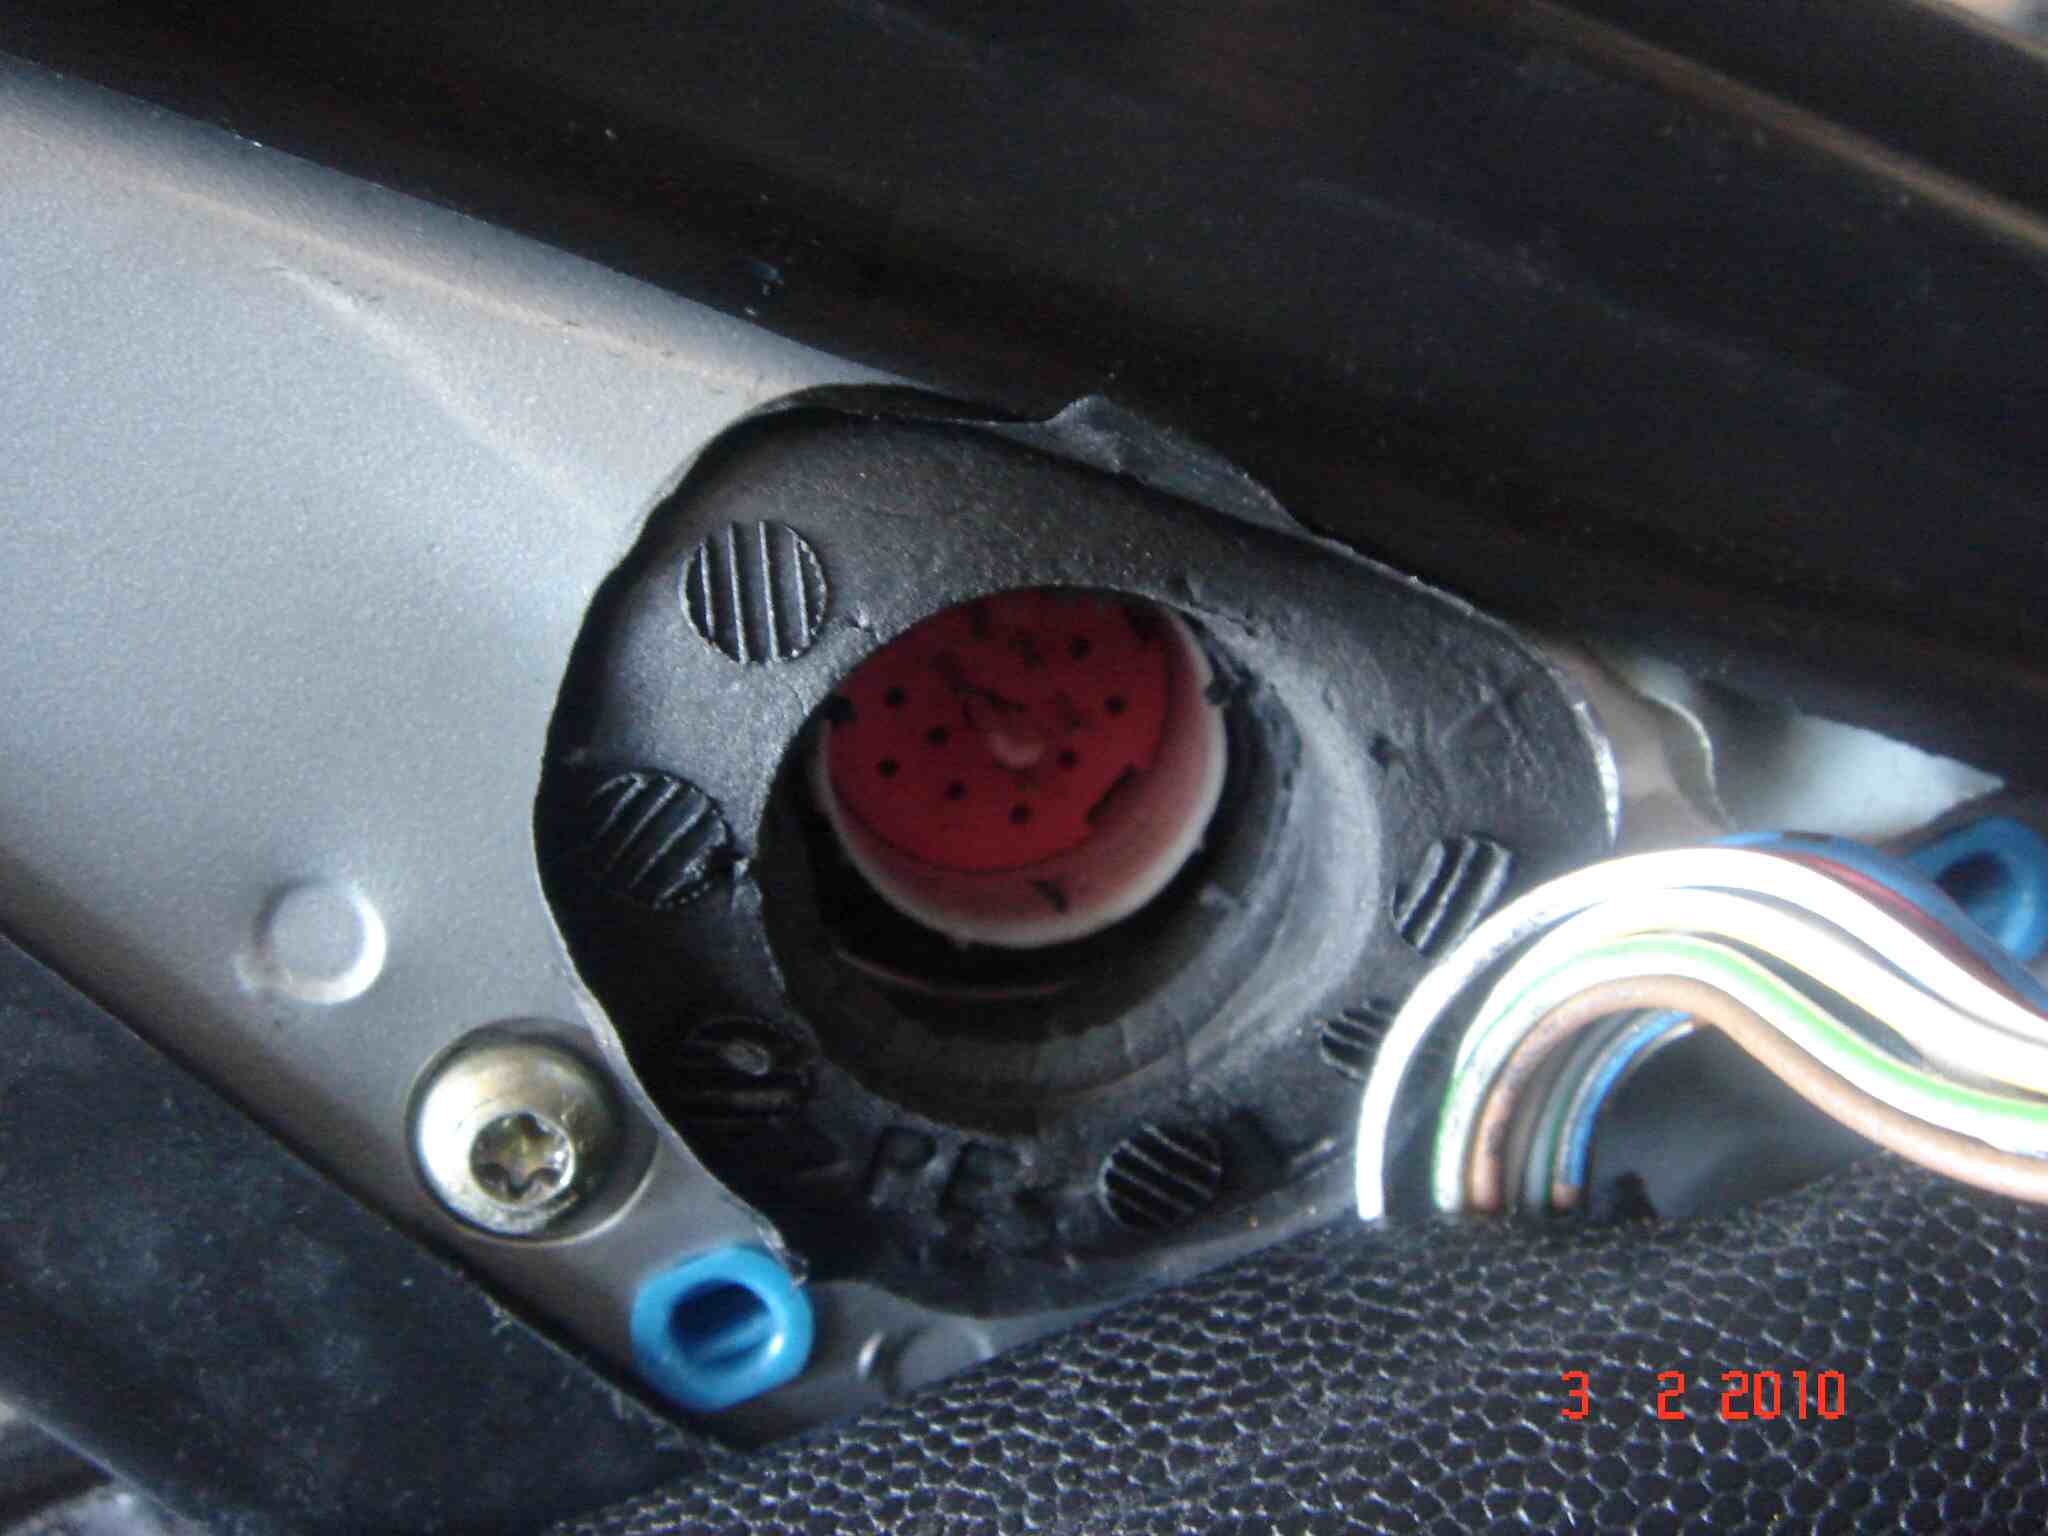
I had recently purchased the 1997 986, and it came with a few electric issues. The wing mirrors did not work. After reading many of the posts in this forum, I decided that the problem may just be in the connections. Albeit, the car is 13 years old. I have found that the connectors in each door had worked loose. I have described the process here. Photo No1, shows how to just pinch off the cover on the door (also, good idea to put down the window) Photo No2, shows the cover off, and the mounting points. The blue inserts are the mounts, and maybe damaged. Also the pic shows the plug. Photo No3, shows a closeup pf the plug. Photo No4, shows the plug detached. Notice the snap in clips on this plug. They will snap into the receptacle on the door. The receptacle has the female part, and these were broken. So I used double sided tape, wrapped around the where the clips are on the plug, and pushed the plug back into the receptacle. Photo No5, just shows the receptacle.
-