Welcome to RennTech.org Community, Guest
There are many great features available to you once you register at RennTech.org
You are free to view posts here, but you must log in to reply to existing posts, or to start your own new topic. Like most online communities, there are costs involved to maintain a site like this - so we encourage our members to donate. All donations go to the costs operating and maintaining this site. We prefer that guests take part in our community and we offer a lot in return to those willing to join our corner of the Porsche world. This site is 99 percent member supported (less than 1 percent comes from advertising) - so please consider an annual donation to keep this site running.
Here are some of the features available - once you register at RennTech.org
- View Classified Ads
- DIY Tutorials
- Porsche TSB Listings (limited)
- VIN Decoder
- Special Offers
-
OBD II P-Codes - Paint Codes
- Registry
- Videos System
- View Reviews
- and get rid of this welcome message
It takes just a few minutes to register, and it's FREE
Contributing Members also get these additional benefits:
(you become a Contributing Member by donating money to the operation of this site)
- No ads - advertisements are removed
- Access the Contributors Only Forum
- Contributing Members Only Downloads
- Send attachments with PMs
- All image/file storage limits are substantially increased for all Contributing Members
- Option Codes Lookup
- VIN Option Lookups (limited)


spyrwebs
-
Posts
25 -
Joined
-
Last visited
Content Type
Profiles
Events
Forums
External Paint Colors
Downloads
Tutorials
Links Directory
Collections
Store
Posts posted by spyrwebs
-
-
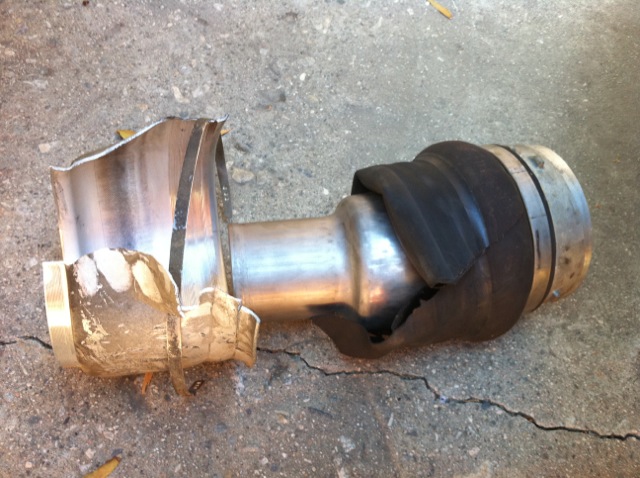
this same thing happened to me 4months ago 04TT. Drivers side blew. drove it home Carona to Long Beach 40miles, A little bouncy but it had enough support from the pass side to support it. the air pump shut off after a few mins. That sucks others are having the same issue. And see the second pic, I did not cut that metal casing. It blew and just with the air pressure, it totally shredded it in half like a tin can
Were you able to get a used part or did you have to buy a new one? Do you mind if I ask the price, parts & labor to replace?
Tim in Ft Worth
'04 TT
I bought new parts from sunset. Used is not worth it to me becasue its still expensive and the air bag might fail the same way. I did not buy the whole strut, just the air bag portion. I actually did the install myself took me six hours. I had no knowledge of Porsches but I have taken apart previous struts. this one is very hard tho. Got stuck about 5 times trying to figure out how to take things apart. Im not sure, dealer might charge 4 hours? 4 x $120= $580+ for labor maybe. I think a brand new strut+bag assembly was like $900 from Sunset. This is all you really need. This is what i bought from Sunset for an '04 turbo:
955 358 403 31 Air Springs$341.23955 358 725 00 Clamp$3.83955 343 505 10 Bellows$9.86N 910 956 01 Top O ring seal$1.64N 904 324 02 Bottom O ring$5.30Shipping $14.60
Total $376.46

-
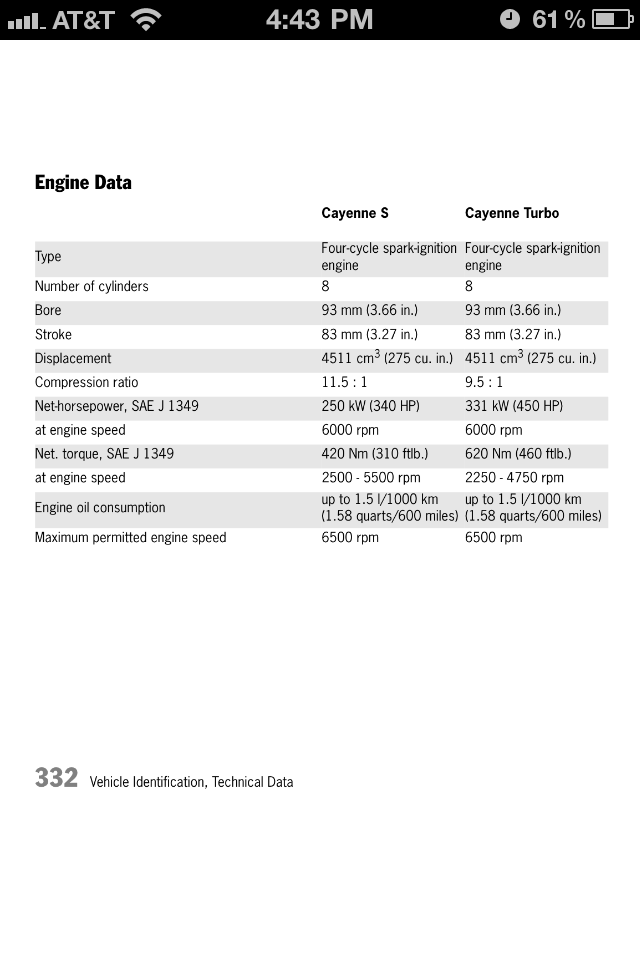
I use up about a quart every 1000Miles or so. I add one quart a month. This is what the owners manual say:
-
this same thing happened to me 4months ago 04TT. Drivers side blew. drove it home Carona to Long Beach 40miles, A little bouncy but it had enough support from the pass side to support it. the air pump shut off after a few mins. That sucks others are having the same issue. And see the second pic, I did not cut that metal casing. It blew and just with the air pressure, it totally shredded it in half like a tin can
-
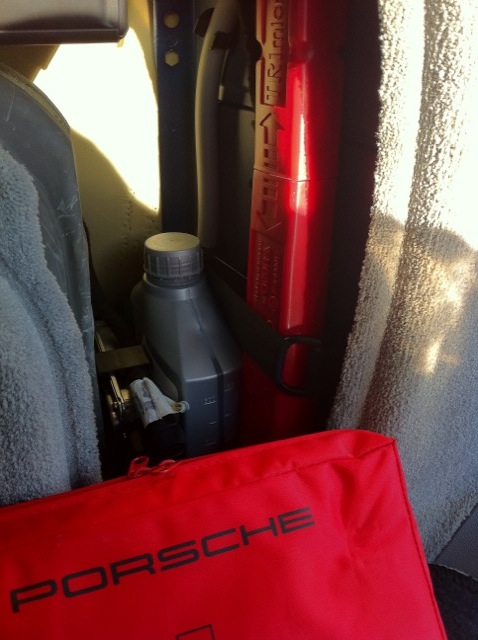
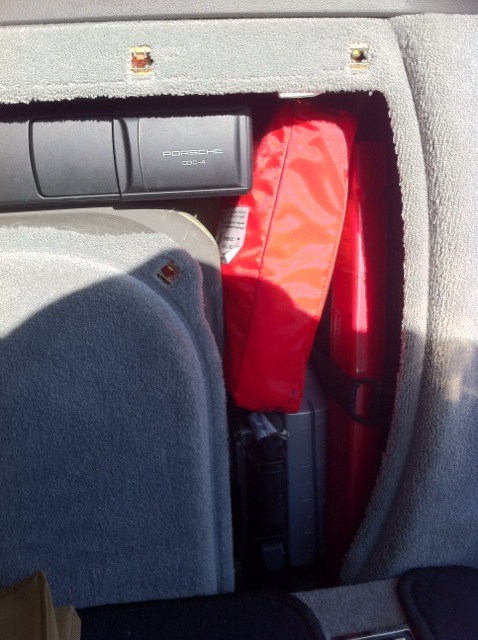
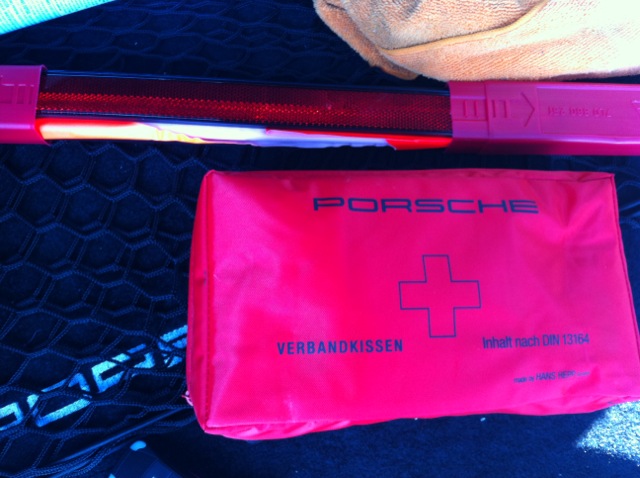
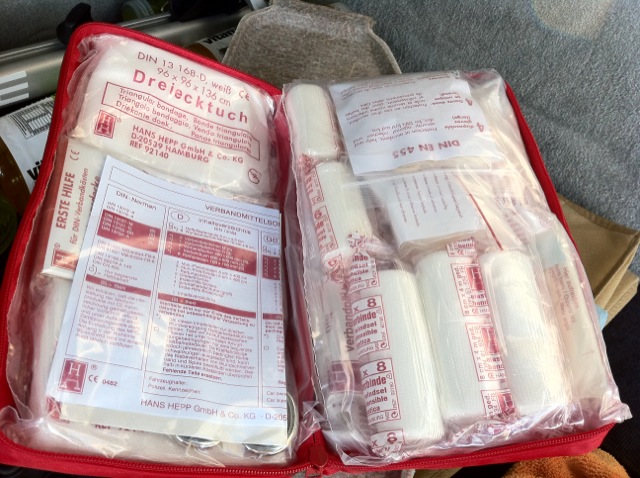
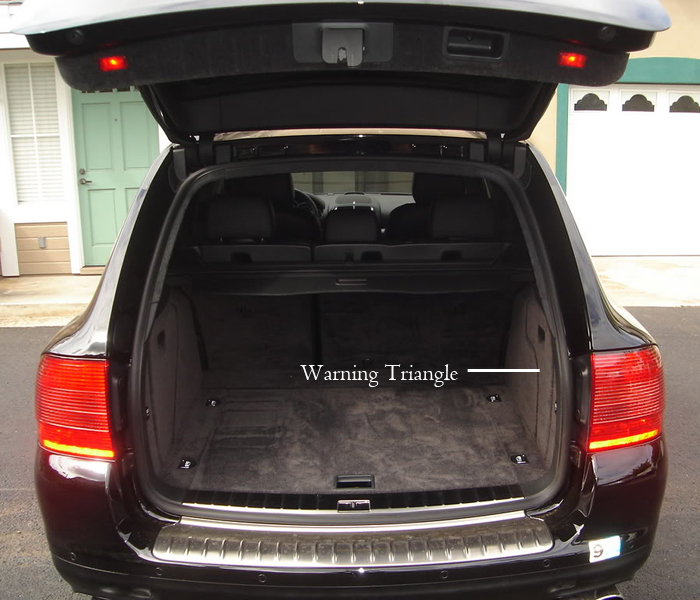
[Yea thats the location for the triangle and first aide kit. the holding bracket mounts in those two holes with a metal/velcro bracket. I put the Mobile1 where the first aide is suppose to be sitting at. The bottom support is just a foam piece that sits in place. I dont think the first aide kit is worth it, its just a bunch of gauze, tape, gloves, scissors, arm sprints. I didnt see anything I would use, no bandages or for small wound things.
Oh Yea, we have the same color Cayenne, Lapis Blue Metallic!
-
The one that is pictured above is part # 955-355-579-51 for the piece that included the check valve. from the pump to the "Y" split and to the engine and firewall" I paid $133.34 probably cheaper online tho, if u dont mind waiting.
-
-
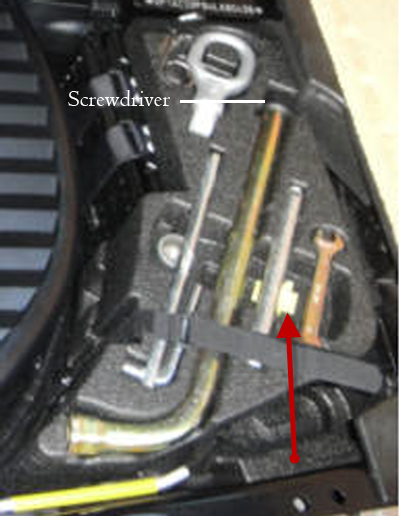
The triangle should be located in the trunk right panel compartment where the CD changer is along with the first aid kit. The screwdriver is in the end of that lug wrench, it just pulls out. Phillips and flips to a slotted screwdriver also.
-
Oh that number 6 shape tool thing is the hub cap extractor, thanx Loren
-
lol, your post made me run out and look since I do not remember seeing tools in those areas. I do not have tools in those areas too, so I doubt you are missing anything except for the slime tire repair kit. I cant find anything in the parts diagram for the tool kit area.
Parts usage from left to right in first pic:
1: that mobile1 bag is in the place the tire repair kit
2: rear tire chuck or tire stopper thingie
3: that number 6 thing, i have no idea, maybe an ear wax pick or a tool for some pick for the shifter or door lock
4: tow screw for front rear bumper
5: headlight removal tool
6: lug nut wrench
7: rim rest to install wheel
8: wrench for wrenching
2nd pic:
1: jack for jacking
-
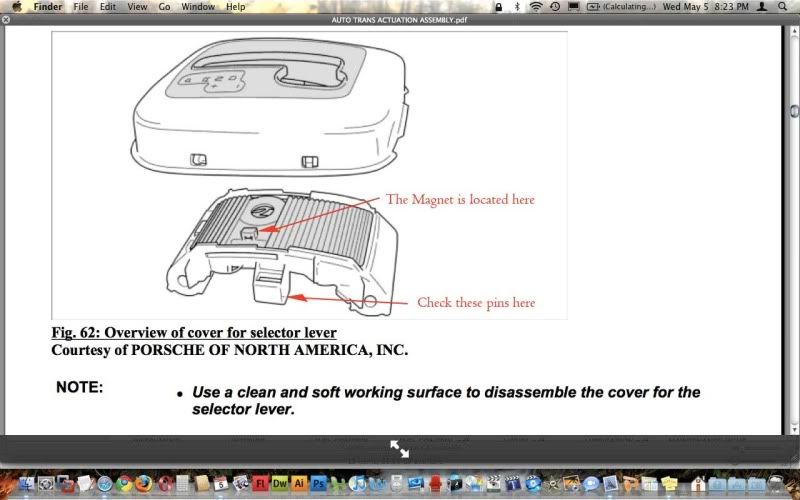
read this post http://www.renntech.org/forums/index.php?/topic/17657-switch-selector-lever-to-position-p-message/ It might be the same issue. Check that little magnet. I think its a common thing. probably keeps falling off.
-
-
AVIA8R - so I ended up replacing the parts listed and it worked about 1 in 5 starts, now doesn't work at all... can you describe where the extra grounds are that were put in your car? Not sure if you have access to some pictures, but that would be great if you could help... this is driving me crazy!!!
When I reinstalled the shift gate plug I must bent one of the Pins and wasn't working either. I took it back out and used pliers to bend it straight. They're really tiny pins so you have to be careful. Its been like 3 months and I never got that weird indicator again.
Theres actually a little magnet on the plastic part of the shift gate that tells the computer indicator what position its in, I bet that fell off. Check that first. If i find a photo ill post it.
-
FAULT CODE 1772
PRESSURE TRANSMITTER SIGNAL LEAD
Possible cause of fault
Leak in the compressed air lines
Short circuit to B+ in the wiring of pin 84 of the level adjustment control unit
Short circuit to ground in the wiring of pin 84 of the level adjustment control unit
Open circuit in the wiring of pin 84 of the level adjustment control unit
Level adjustment control unit receives implausible signal from pressure transmitter
Pressure transmitter faulty
Level adjustment control unit faulty
Easiest thing to do first without spending money is to check all air lines for cracks/ leaks. Then hook up the air hose underneath the passenger seat to bleed off some air and listen if the compressor activates.
-
Yea theres a slight noise from the flaps moving for a few seconds but if its a continuous click for a long time then you have a problem. theres a typical problem on the servo motors where it just continuously clicks.
The motors only like $100 but the labors like $700.
-
Just click the remote lock button twice quickly. Once to lock and arm, second time to disable the interior motion sensors.
-
 1
1
-
-
At my local dealer they are like $225 but online like eBay or an online Porsche store they are around $170. That's the only size they make now.
-
Does anybody have the Rear Cooler box? this one : Porsche What temp does it go down to and does it take up a lot of battery juice? It doesn't seem worth it to me but I kinda want it to keep things cold when Im on trips and at work. I don't want to risk buying it if it doesn't do a decent job at cooling.
-
That looks like the trim cover for the back liftgate cover where it latches.
I would take a picture to show you but i'm too lazy, Its part #6 http://www.autoatlan...3-06/807-35.php
I think you are correct - good find!
The only reason why I recognize that part is because mine fell off just this past weekend during camping when I overstuffed the trunk. :)
-
That looks like the trim cover for the back liftgate cover where it latches.
I would take a picture to show you but i'm too lazy, Its part #6 http://www.autoatlan...3-06/807-35.php
-
1
-
-
Yea my 04 TT is drinking a little less than one quart per month. Cars go through synthetic oil like water.
-
I heard from someone that the bars have to be pushed close together twards the back when not in use. It looks kinda ugly like that tho.
-
I wanted those too but they are too pricey. I would buy them for less than $200.
-
My 04 Cayenne turbo does the same thing but the RPM does not fall so low that it shudders. I only noticed it when I look at the RPM gauge. The RPM drops below to a certain point but I doubt its normal to feel the car shudder.
Also, from experience, I had another turbocharged car that shuddered when I came to a stop that it felt like the engine was gonna die. It turned out to be a leaking blow off valve. It could have different names such as air return valve, intake release valve, etc. But check that, its kinda hard to get too. Its located right above the Intercoolers in the wheel well covers, one on each side.
-
I had the same problem with my '04 Turbo. It turned out to be a broken vacuum hose on the passenger side, underneath the plastic cover, next to the windshield fluid filler tube. Start the car and listen for vacuum suction noises. The Porsche dealer said its a very common problem at that location cuz of the heat from the turbo.
Also the code was still there after I replaced the hoses and when I took it to them they said when the hose broke it sucked a bunch of dirt in the vacumm pump. They blew out the pump and everything is fine now.
drivability with Blown airspring/strut
in 9PA, 9PA1 (Cayenne, Cayenne S, Cayenne Turbo, Cayenne Turbo S)
Posted · Edited by spyrwebs
I'll try to do my best with the photos i have. I do not have any more with the strut apart. Sorry if I forget a step but i'll try to remember as much as i can. It is the same for either passenger or drivers side air bags. I'll try to do my best not to make it seem too confusing.
1. With the wheels removed, disconnect all the wires leading to the strut and the air line with an open wrench as seen in Photo labeled 2
2. Place a jack underneath the lower control arm/bottom strut so the strut will not fall out.
3. remove the bolt holding the stabilizer bar to the strut as seen in photo labeled 4
4. Remove the long 3" bolt connecting the lower control arm to the bottom of the strut fork.
5. In the engine bay, In photo labeled 1 remove the plastic side covers and the other plastic covering the air pumps.
6. DO NOT do what i did and take apart that fuse box and everything there looking for the bolt . lol. its not there. instead, there should be about three small screws holding the first layer firewall, about two feet long, in front of the brake booster. the screws are behind the fiberglass heat shield. Also, remove any connectors attached to that two foot section of firewall. This is the first firewall closest to the engine.
7. you should then see the last nut underneath the brake booster. in photo 1, unbolt all three bolts seen in the approximate location marked in red dots.
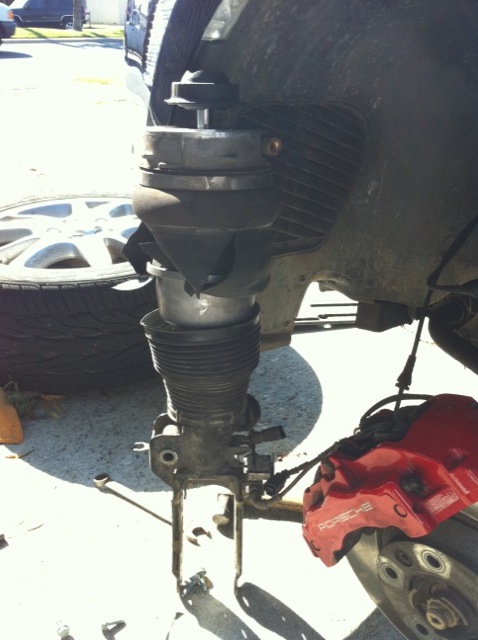
8. lower the jack placed in step 2 to slowly lower the strut. swing out the upper control arm twards the rear of the car so it looks like photo 4.
9. theres three more small nuts holding the top of the aluminum casing/upper control arm to the top of the strut. The strut should come out at this point.
10. in photo 5, remove the top nut of the main strut shaft. The shaft is gonna spin so you need to hold the upper rubber portion with vice grips. (theres actually a special tool for this its an open socket and something that slides into the socket)
11.the air bag and everything else should slide out in one piece. IMPORTANT: Replace BOTH the upper and lower O-rings with brand new ones, then grease the o-rings!! make sure the entire circle is greased up.
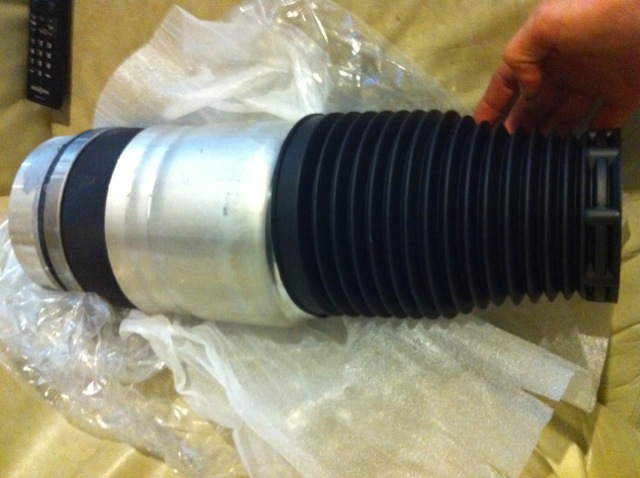
12. in Photo 6, slide the new air bags over the strut and one person needs to hold the upper portion of the air bag up while another person slides just the bottom portion of the metal down into the corrugated bellows. the upper portion needs to be as high as possible. Stretch out the Air bags as much as u can. You really need two people for this, I tried to do it myself and it would not go in no matter how hard I tried to force it in. Make sure the air bag snaps in and touches the bottom strut ring.
13. lower the top air bag into the strut and place the bolt back on top of the strut's shaft. you need something to hold the shaft from spinning. be carful not to mark up/damage the chrome shaft too much or else your strut will start leaking and will be useless. I just used a bunch of masking tape on the chrome shaft and used vice grips as close to the very top as possible, i would say dont use vice grips lower than one inch from the very top of the shaft. . then torque up that top nut. Do not use vise grips on any other portion of the strut's shaft. You will cause all the hydraulic pressure in the shaft to shoot out. If you have an impact gun, use that and it will tighten up nut and wont need the vice grips.
14. instal lreverse order.