Welcome to RennTech.org Community, Guest
There are many great features available to you once you register at RennTech.org
You are free to view posts here, but you must log in to reply to existing posts, or to start your own new topic. Like most online communities, there are costs involved to maintain a site like this - so we encourage our members to subscribe or donate. All subscriptions and donations go to the costs operating and maintaining this site. We prefer that guests take part in our community and we offer a lot in return to those willing to join our corner of the Porsche world. This site is 99 percent member supported (less than 1 percent comes from advertising) - so please consider an annual subscription or donation to keep this site running.
Here are some of the features available - once you subscribe RennTech.org
- View Classified Ads
- DIY Tutorials
- Porsche TSB Listings (limited)
- VIN Decoder
- Special Offers
- Paint Codes
- Registry
- Videos System
- View Reviews
- and get rid of this welcome message
It takes just a few minutes to register, and it's quality Porsche information at a low cost.
Contributing Members also get these additional benefits:
(you become a Contributing Member by subscribing or donating money to the operation of this site)
- No ads - advertisements are removed
- Access the Contributors Only Forum
- Contributing Members Only Downloads
- Send attachments with PMs
- All image/file storage limits are substantially increased for all Contributing Members
- Option Codes Lookup
- VIN Option Lookups (limited)


srfrdrew
-
Posts
163 -
Joined
-
Last visited
-
Days Won
1
Content Type
Profiles
Events
Forums
Exterior Paint Colors
Downloads
Tutorials
Links Directory
Collections
Classifieds
Store
Everything posted by srfrdrew
-
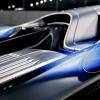 Just an update.. The spoiler DOES deploy at the 74MPH mark. However, it does not retract at the stop... Still have to manually close it. And Spoiler "Red Warning Spoiler Light" on dash still remains on.
 -
Wet passenger footwell
srfrdrew replied to kptc's topic in 9PA, 9PA1 (Cayenne, Cayenne S, Cayenne Turbo, Cayenne Turbo S)
Hey All, I got a very wet passenger foot well and a stinky mildewy Pig. We just had a good amount of rain here in So Cal and not sure if this is due to AC drainage issue or part of it. Does anyone have actual Pics and diagrams for the top of cowel drainage in the engine compartment, the AC filter area drainage area and wheel well drainage area. From what it sound it should be obvious but would like actual pics and locations for reference. It sounds like there are three places to check and to clear... Hey Loren! do you have an exploded view of these draininage pipes/areas that get clogged up where you can clear out the debris . This may also be due to rain/water intrusion from another place as well.. -
My issue was the driver's side plastic piston that goes up and down broke and was not raising it's side of the spoiler fully. I changed out the piston along with doing the recommended cleanup and re-lube service DIY by Insomnic When I turn key on to ACC, I'm currently able to manually raise the spoiler to the up fully extended position on both sides now equally (mind you its sill a bit noisy and I did lubricate both the piston tube the goes up and down as well as the service hole in it, per the DIY service However, the noise is not my current concern/ issue. When I try to close the spoiler manually, it does not close.. If I turn the car off and then back on again, I can then manually close the spoiler. When I do go for a drive the Spoiler " red warning light on dash" remains on so my concern is that the spoiler is malfunctioning and won't deploy at 74mph (or retract at stop) My thought is the TWO sensors that needed to be disconnected during service/fix may have either gone bad? or may have not been installed back into the drive assembly housing properly OR do I need a Durametric to just reset spoiler settings? This job was a bit of a challenge but fun at the same time. I would hate walk away now from doing all this work with it still not functioning correctly As an added note, Just After the piston spoiler fix... I was able to open and close the spoiler manually without turning on and off the ACC. But after a few times of testing it manually, to get everything internally lubed up, it stopped going down unless I turned ACC off and then on again. Maybe some of the lube has made contact to sensors? I have attached a photo of sensors (in question?) The warning light wasn't an issue prior to this fix/service, so its obviously something that went awry during the service. Any ideas or suggestions much appreciated... Loren, if you are out there... Any thoughts?! Hope you can help, thanks for your prompt response, it is greatly appreciated!

-
So an update to this issue... So, my issue was the driver's side plastic piston that goes up and down broke and was not raising it's side of the spoiler fully. I changed out the piston along with doing the recommended cleanup and re-lube service DIY by Insomnic When I turn key on to ACC, I'm currently able to manually raise the spoiler to the up fully extended position on both sides now equally (mind you its sill a bit noisy and I did lubricate both the piston tube the goes up and down as well as the service hole in it, per the DIY service However, the noise is not my current concern/ issue. When I try to close the spoiler manually, it does not close.. If I turn the car off and then back on again, I can then manually close the spoiler. When I do go for a drive the Spoiler " red warning light on dash" remains on so my concern is that the spoiler is malfunctioning and won't deploy at 74mph (or retract at stop) My thought is the TWO sensors that needed to be disconnected during service/fix may have either gone bad? or may have not been installed back into the drive assembly housing properly OR do I need a Durametric to just reset spoiler settings? This job was a bit of a challenge but fun at the same time. I would hate walk away now from doing all this work with it still not functioning correctly:banghead::banghead: As an added note, Just After the fix... I was able to open and close the spoiler manually without turning on and off the ACC. But after a few times of testing it manually, to get everything internally lubed up, it stopped going down unless I turned ACC of and then on again. Maybe some of the lube has made contact to sensors? Hope you can help, thanks for your prompt response, it is greatly appreciated!
-
horn problem cayenne
srfrdrew replied to porsche356's topic in 9PA, 9PA1 (Cayenne, Cayenne S, Cayenne Turbo, Cayenne Turbo S)
Sprocket, Go with the OEM Porsche stock horns, not sure year and model you have but these are the horns for my year and model. You have to get the Low and High Pitch. Low pitched horn is on the left side (from the drivers perspective). High pitched horn is on the right side (from the drivers perspective). http://www.pelicanparts.com/catalog/SuperCat/1074/POR_1074_ELGAGE_pg1.htm#item0 -
Hi hahnmgh63... I used the IR temp gauge. I believe I got in approximately 8 Liters.. Maybe a little more or less but somewhere in that neighborhood. You suggest trying to add more.. I heard that overfilling can cause excessive "foaming" which is not a good thing. I believe. What would be the procedure to add additional? Can I do it at cold? Do I wait till a certain temperature, etc etc?
-
04 Cayenne Build
srfrdrew replied to rabbit7's topic in 9PA, 9PA1 (Cayenne, Cayenne S, Cayenne Turbo, Cayenne Turbo S)
Hey Rabbit7, Did you ever resolve the shaky idle? -
Well, it was a fun project either way :D
-
Hi rik881, Yes, I'm aware of Transgo kit. I think I'm good with the RevMax solution. There is definitively an improvement in shifting. Again, I may need to reset the transmission adaptation ala Duramentric. Otherwise as long as it drives now and stays that way, I'm good.
-
So just an update to my recent post above and for those who upgrade their VB with RevMax Spoke to RevMax to get their explaination why some parts are missing on their VB... There was never discussion on their website nor heads up from them about missing or items needed to be transfer from old to new VB. Something I think they need to include as it was kind of a bummer when you are in the process of the VB swap out and discover this on your own and not sure what to do. Per RevMax .... "The two gold switches are not sent with the valve body and never have been. It is always required to swap them from the original. As for the two smaller solenoids are normally not sent with the valve body as there are 3 different connector style. Customers were getting confused, so we simply omitted them and had the customer swap the originals over. Neither of these two items are failure prone or able to be updated..."
-
So I did the VB swap out... +1 on the fact that this a messy job... Observations during and after VB replacement 1.) The drained old Transmission fluid was a bit "gritty" in appearance and feel. Smelled a bit "varnishy" as well. Magnets has some metal "paste" build up but wasn't overly excessive based on my observation. 2.) The RevMax replacement VB did not include (were missing?!) a couple of small solenoids and a couple of gold screw in nut buttons (sensors?ground?) that I had to transfer over the OLD ones to the RevMax VB to make it usable. See Pic attached. I have contacted RevMax on why I'm missing parts on the replacement VB (not happy) 3.) First impressions when driving it after replacement was the gear changes were very smooth and buttery 4.) However, Still noticing (at times randomly) slight hard down shift from 3rd to 2nd when coming slowly to a stop. It's less than before but still noticeable. I hope its not due to the fact I had to move over those two small solenoids and gold sensors/ground from my old VB. I have not reset transmission adaptation, ordering (finally) a Durametric, for the price of Porsche to do it I can get the cable and do it myself :thumbup: Hopefully resetting tranny adaptation will smooth out the "rough edges" 5.) Have not experienced (yet) the hard shift from 4th to 5th during acceleration while going around a turn, so that is good news so far. Ill will need at least a few more days of driving to confirm that the issue is no more.
-
Hi Judibake, Yes, found your thread for this http://www.renntech.org/forums/topic/46137-replacement-of-spoiler-riser-mechanism/ Thanks! dgjks6 I have PM'd you. Yes, interested in the complete drive mechanism if you have one in good working order
-
Since I now have some good understanding on how the Spoiler system works.. It looks like visual observation that the left "Hinge" 996 512 911 00 that contains the curved piston is somehow broken/compromised. Again it barely extends and I can pull up and down on the left side of the spoiler with little or no tension from the hinge/piston. I spoke with AutoAtlanta parts and they said they sell ALOT of this part 996 512 911 00, which they confirmed includes the piston, and they said that this was most likely the culprit. Loren, anyone else concur? Just trying to avoid having to do exploratory surgery and just change out the part that's needed.
-
Is there a part number for the whole assembly.. Curved plastic pistons connected to the flex rods that are connected to the driveline assembly/motor? I suspect I will need to replace this whole unit then? Loren, do you have a exploded view showing this assembly with the rear hatch/wing and the part numbers to the parts or whole assembly I'm looking at?
-
Well here is the part.. http://www.ecstuning.com/Porsche-2004-Cayenne-955-Turbo-Sport_Utility-V8_4.5L/ES1441980/ Steps to change them out (factory way) - http://www.renntech.org/forums/topic/34911-cayenne-s-motor-mounts/ I read somewhere that there is a "easier" way (non-turbo) to change them out, maybe someone else can chime in on that
-
Ahsai, thanks for the links, after looking though the process, there is definitely something a miss with the left side "drive line" (you call flex rod) which is connected to the "drive line assembly" My question is does anyone off hand have any idea where the breakdown is.... My guess is some component in the "drive line assembly" either the blue plastic teeth and/or the drive line "tension springs" Anyone have part numbers for these components mentioned? as I suspect there will be more than cleaning Ill have to do with this.
-
I've had a bit more time to take a look at the spoiler. When I deploy the spoiler in the UP position, the left side of the wing lags and does not deploy fully, I can pull it up and down with free play on that side along the 1 inch diameter plastic curved pipe that slides the wings on both sides, the left side (in question) tries to go up but mininally and has play in it.. The right side of the wing is solid will go up fully and down fully and holds solid in up position
-
Just to keep this post resurrected, I recently cleaned my throttle body (you could eat off it now) as well as cleaned both of the MAF sensors and still have the idle dip and then vibration when coming to a stop. Also replaced sparks, coils, both fuel pumps and flange, none has resolved. at 125K on the OD. Loren suspects possible vacuum leak, need to do a smoke test to rule out leak. Interesting that the idle is a bit below, is there a way to adjust the idle up a notch? just a thought
-
Hello, hope you can help 2001 996 Cabriolet... Today just noticed the rear wing not lying as flush against the body as I remember it sitting when in parked position. Went ahead and activated the manual switch to pop it into the Wing up position. Heard clunking and kind of grinding sound from back, freaked me out a bit and saw half of the wing up and the other half down. activated swith to drop it back to the flat position, clunking and cracking sounds (not good I suspect) it went down on one side and other stayed up. Gently pushed wing back to flat position but now what?! Did not see any rear spoiler light warning while driving... Obviously something is broken, any ideas on the fix... Looked at some other posts but didn't seem to fit my issue. Your timely response is greatly appreciated!
-
They had me at "Hand Assembled by Qualified and Caring Professionals!!" :thumbup:
-
Krunky, not sure if your last message was to me or not but with the RevMax VB replacement, it is my understanding that ALL said components on the core of the VB are replaced. BTW, RevMax uses Sonnax rebuild kits (may be better than TransGo?) http://www.sonnax.com/categories/3-Transmission Also, details of what RevMax does to rebuild the VB before it sends it out: Quite a comprehensive rebuild that gives you that extra sense of confidence that its done right. These are expensive transmissions as Im sure you are aware. RevMax transmission valve body assembly fixes and cures the many shifting complaints with a worn out valve body. The most common of which are: delayed engagements, harsh engagements, flair shifts, delayed shifts, harsh upshifts, harsh downshifts, slippage in gear while driving and trouble Codes associate with gear ratio errors. Our transmission valve bodies are designed to be installed by a professional automotive technician. Complete Disassembly. Thorough Hand Washed Cleansing Process Removes all metal and clutch particles. Hand Assembled by Qualified and Caring Professionals!! Aqueous Solvent Cleaning. Mounting Surface Verified and Flat Filed If Needed. Threads Checked and Repaired if Needed. All wear areas are individually vacuum tested for leakage. Sonnax Updated Shift Valves (where applicable) Sonnax Updated Regulator Valves (where applicable) Sonnax Updated TCC Valves (where applicable) Sonnax Updated Solenoid Modulator Valves (where applicable) Rebuilt New Design Shift Solenoids (where applicable) New Custom Machined Solenoid Bushings (where applicable) Solenoids Graphically Tested on our Zoom SolX Solenoid Tester. Computer Matched and Flow Tested Shift Solenoids. Complete Computerized Testing Of Valve Body on Our Zoom Superflow Valve Body Dyno. Pan Gasket and Filter NOT INCLUDED. Relearning / Clearing of Transmission Adaptation Tables Is Necessary on most valve bodies.
-
Yes, after reading though this again I realized this kit is questionable not the RevMax rebuild... I guess yes if you want to do it on your own you can rebuild it with the transgo kit. Yes, I can't wait to replace the VB on my Cayenne, tired of the harsh shifts
-
You guys got me a bit concerned now... I just got the RevMax?! Am i just throwing my money away?! I have spoken to others who have installed the RevMax and they said resolved all issues with shifting! What am I missing here in this conversation?!
-
Hey bmats, relatively easy job. Just taking your time when removing all the parts when getting to the Throttle Body... I would suggest replacing the air filters (X2) as well as clean the MAF sensors (X2) (ONLY CNC MAF clearner NOT THROTTLEY BODY CLEANER ON MAF!) Once I removed throttle body from engine, I just sat down with rag, old soft toothbrush and CNC Throttle body cleaner and started SLOWLY spraying TB cleaning fluid both outside housing and inside the chamber. (stay away from spraying the plastic electric housing on the outside). You will find the chamber and butterfly valve facing engine side will be the the worse for wear and will need the most cleaning and effort. You can (gently) move the butterfly open with your finger(s) to clean in the center of the chamber (very shiny center area with a special coating, I did not use toothbrush in that area) and around the edges of the butterfly.. Mostly just take your time and be in no rush to do the work. I did also replace the throttle body "green" rubber seal/gasket as my pig has 123K miles on it and thought had never been replaced and it made good maintenace sense to do it cause it will be a while when I do it again. I went by this DIY over at pelican parts.. it was a good reference http://www.pelicanparts.com/techarticles/Porsche-Cayenne/24-ENGINE-Throttle_Body_Cleaning_and_Replacement/24-ENGINE-Throttle_Body_Cleaning_and_Replacement.htm
-
Loren or anyone, I'm in middle of cleaning my 2004 S throttle body.. What are the torque specs for the FOUR bolts that hold the throttle body on? They were fairly tight when getting them off but cannot locate torque specs for the bolts Need the specs ASAP if anyone can assist would be most grateful! Thanks!
