Welcome to RennTech.org Community, Guest
There are many great features available to you once you register at RennTech.org
You are free to view posts here, but you must log in to reply to existing posts, or to start your own new topic. Like most online communities, there are costs involved to maintain a site like this - so we encourage our members to subscribe or donate. All subscriptions and donations go to the costs operating and maintaining this site. We prefer that guests take part in our community and we offer a lot in return to those willing to join our corner of the Porsche world. This site is 99 percent member supported (less than 1 percent comes from advertising) - so please consider an annual subscription or donation to keep this site running.
Here are some of the features available - once you subscribe RennTech.org
- View Classified Ads
- DIY Tutorials
- Porsche TSB Listings (limited)
- VIN Decoder
- Special Offers
- Paint Codes
- Registry
- Videos System
- View Reviews
- and get rid of this welcome message
It takes just a few minutes to register, and it's quality Porsche information at a low cost.
Contributing Members also get these additional benefits:
(you become a Contributing Member by subscribing or donating money to the operation of this site)
- No ads - advertisements are removed
- Access the Contributors Only Forum
- Contributing Members Only Downloads
- Send attachments with PMs
- All image/file storage limits are substantially increased for all Contributing Members
- Option Codes Lookup
- VIN Option Lookups (limited)


brucey
-
Posts
30 -
Joined
-
Last visited
About brucey

Recent Profile Visitors

.thumb.jpg.b384de407b95def077c2b3bf2bd809d6.jpg)

brucey's Achievements
Member (1/1)
0
Reputation
-
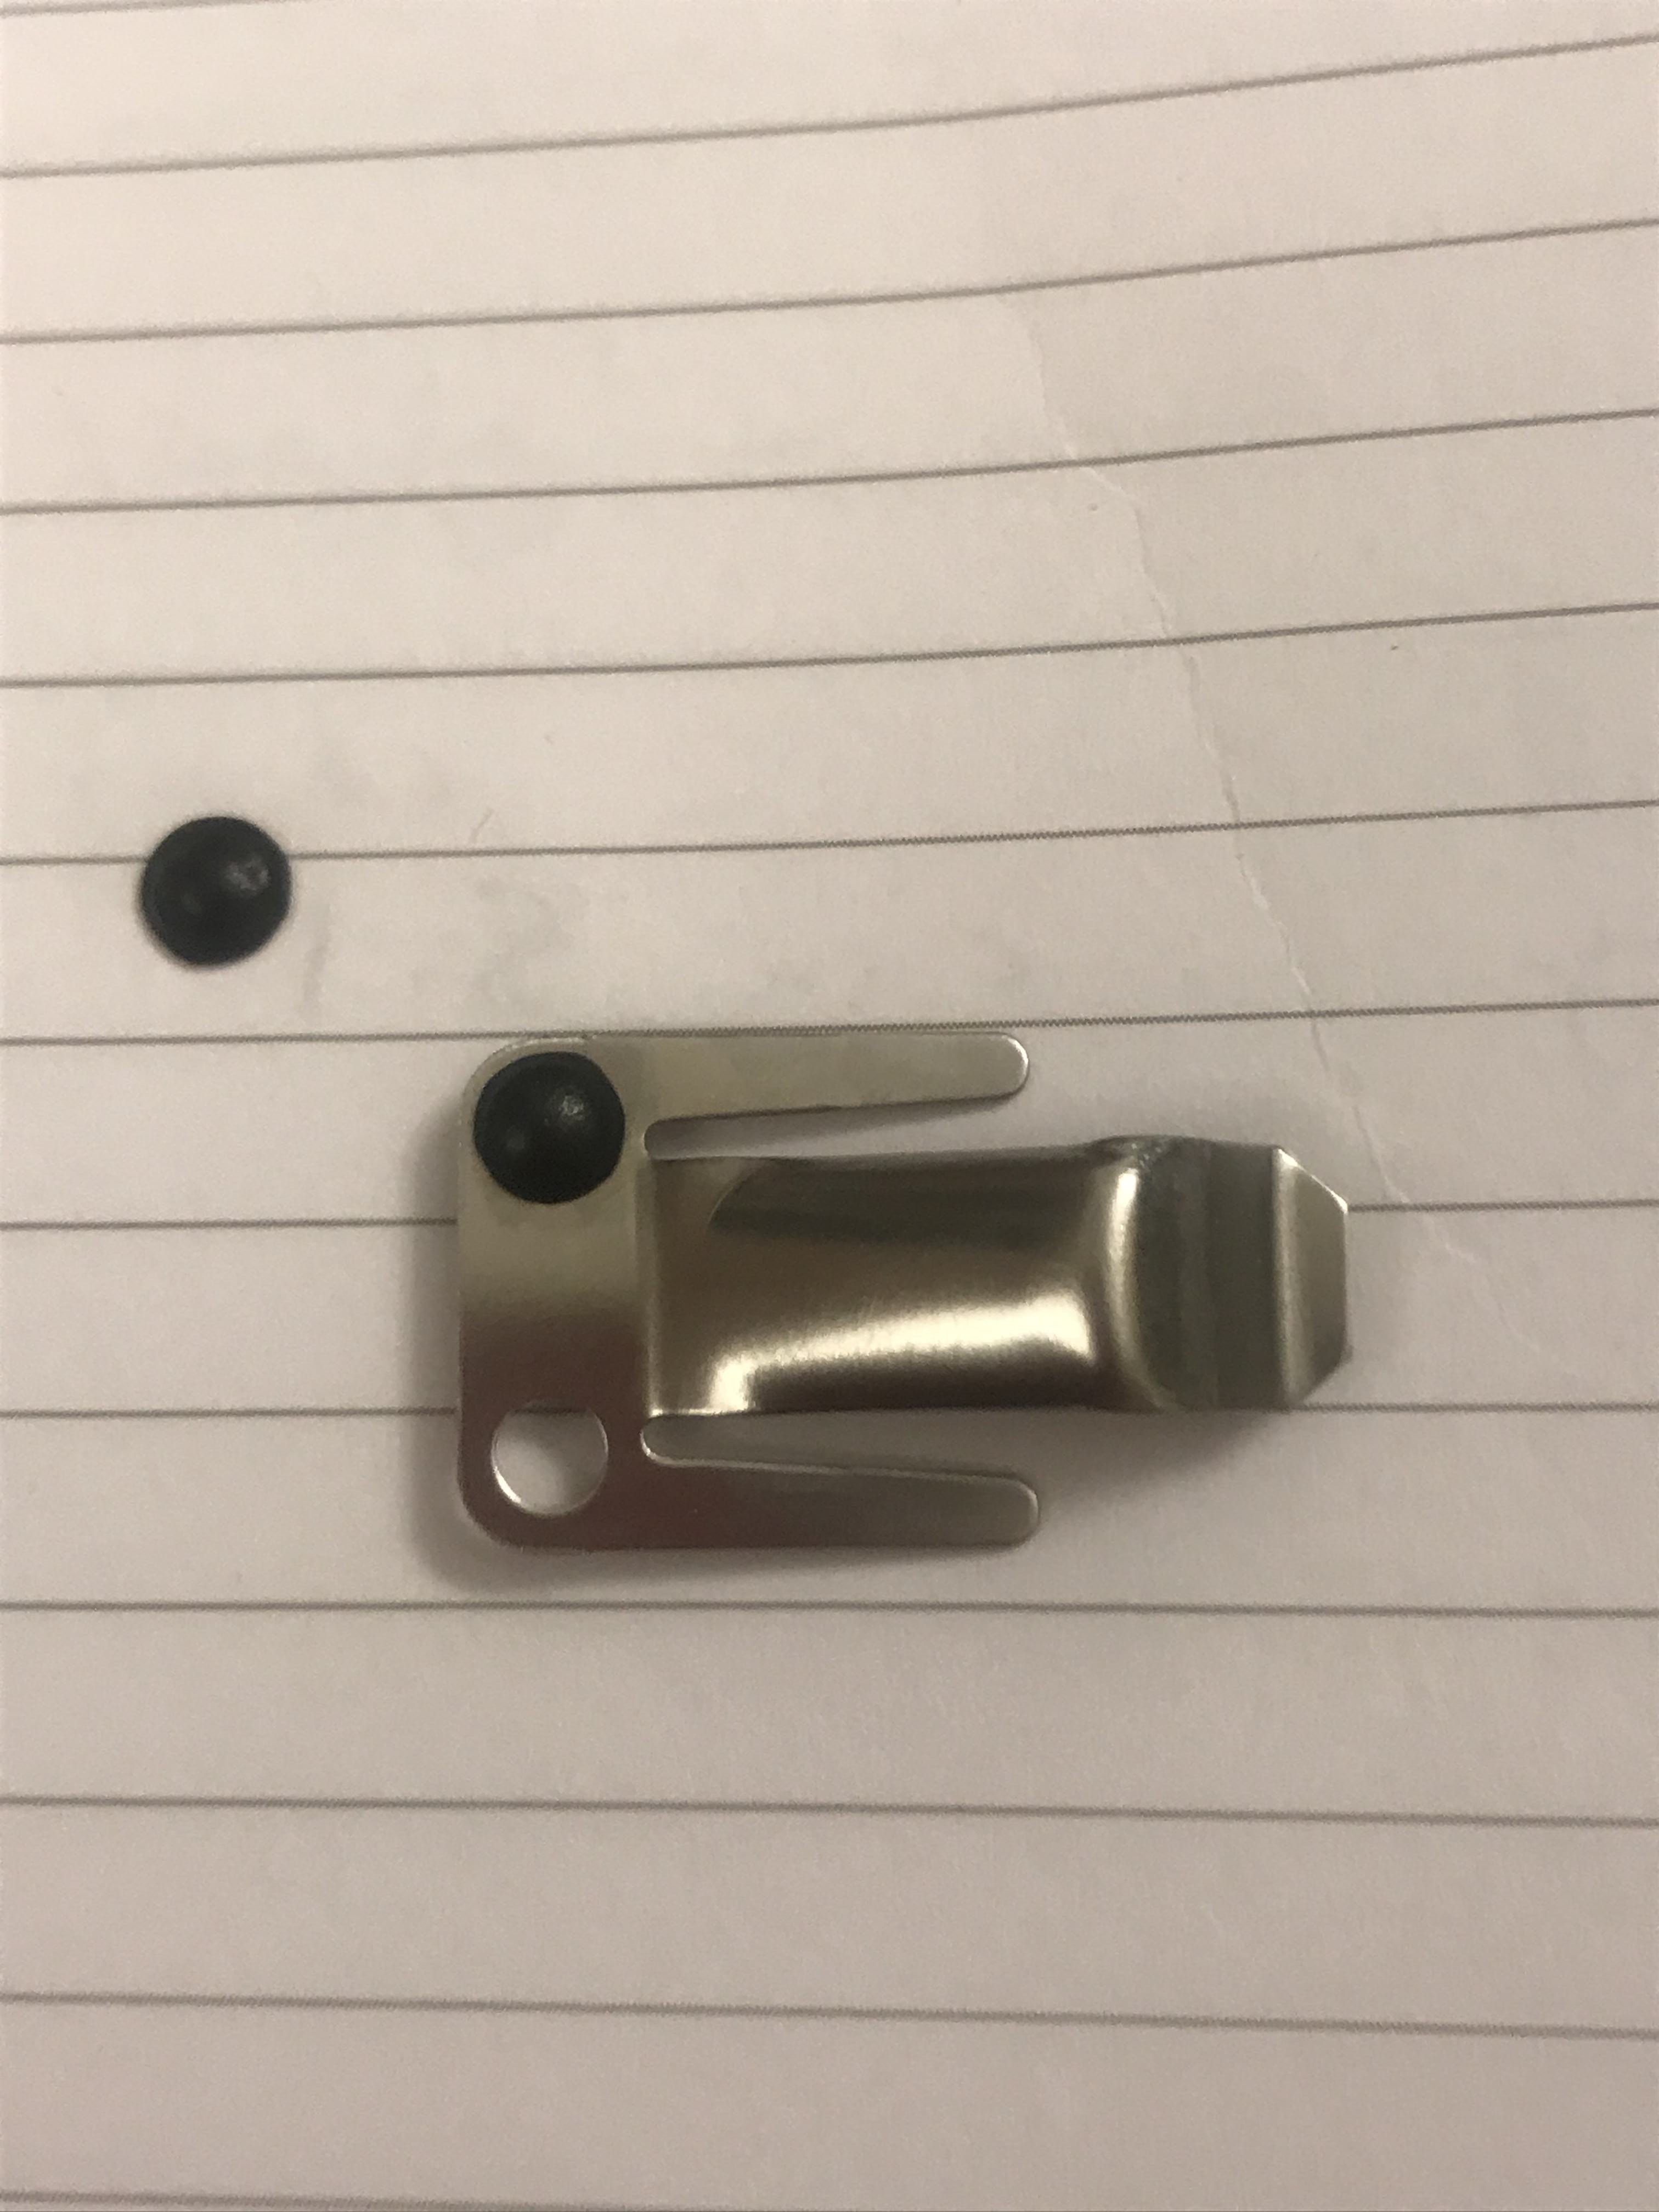
Hi all, I have a 2018 Carrera T which I love. It's only done around 2k miles and is pampered. I haven't driven it for some time, and yesterday when I went to get in, the clip shown was sat on the drivers mat in the footwell, by the accelerator pedal. It's clearly broken off from it's 2 small mountings. I've had no work done on the car and no panels etc. removed, and the car hasn't moved - so i really don't understand this. The only thing I did recently was to recharge the battery, so had the front battery cover off - but I can't believe there's any access from the front compartment to the footwell or chance of anything falling into the well from there?? Anyone recognise this? It's really frustrating as it looks kinda important. Thanks! BE1C5CF0-2260-4A97-B025-F746AD0FA12E.heic

-
Thanks Loren THere may be a lnguage thing here - sorry! I mean front BUMPER. This is what I wanting to fit to my 2 from a GT3 II. The one I have sen has a central air dam - and I'm wondering how this is 'closed off' when fitted to a C2. When you say 'leave the plug in place' do you mean this is on the car at present or that it's parts of the GT3 front PU? The pictures of the one I am byong just show a big gap in the centre. Thanks again.
-
Hi all. I am thinking about fitting the front fender from a MkII GT3 to my facelift 2002 C2. I believe this is the same one from the aerokit II. I have done a search and read the TB for the aerokit II but still have a query. Pictures of the GT3 bumper I am looking at show a large central ari intake (not filled in). On the C2 normal bumper there's a panel in there as there is no central cooler. Does this central intake matter and is it simply covered by a panel than comes off the standard bumper....or is the one for the C2 in the aerokit different, without a central hole? Thanks for any advice :) Oh - also in the TBS - what does 'convert' in the context of the bumper panels mean? Perhap this is the bit that suggests something gets transferred from the existing bumper to the GT3 one?? CHeers Bruce
-
Side skirts- how do they mount?
brucey replied to sfarris's topic in 996 Series (Carrera, Carrera 4, Carrera 4S, Targa)
If you do a search there are lots of really useful topics on this. Well worth reading about all the experiences I think. I recently refitted mine and I think this is the optimal way: http://www.renntech.org/forums/index.php?showtopic=15938 I also thoroughly resprayed and wax coated all the fixings for the sill bottom and coated all the screws with POR15. They're just how I want them now! Takes time though. -
hi all Have a 2002 996 C2 and you may recall I posted a few pics of the sideskirts where the infamouns tape had come loose and the skirts had got grit and stones caught between them and the car... Anyway - I sorted out the small corrosion spots by carefully sanding them back in little circles, prepping the surface with POR15 Metal Ready and painting them with blobs of POR15 in silver. Fortunately I knew the marks would be beneath the side skirts when refitted. I hate the way the skirts fit normally - the kit is cheap and rusts, the tape is hopeless and they sit too tight against the car, damaging the paint. So - first things first. Bought a whole new fitting kit, enamelled every part, then gave it all two coats of Dinitrol body wax. Then, I put a strip of 3M antiabrassive film down each sill where the tape attaches to the car on the sideskirts. I used a single strip about 20mm wide, and applied it so that it would be just above the sideskirts when refitted. This will serve two purposes - 1) It makes removal a lot easier as the 3M tape will come off cleanly, taking the adhesive with it. 2) It will protect the paintwork from the side skirts. So - once they were all prepped I applied 2 strips of very high bond adhesive tape on the side skirts (after spending a long time with a very sharp chisel and a bottle of white spirit!). I put two strip on to widen the gap between the car and the sideskirts - something I have heard people try and avoid, but I wanted the skirts not to rub up against the car. Once applied they sat about 1-2mm away from the car - lovely. Re-did all the fittings properly, even waxed all the screws and replaced every speed nut / screw with original parts (but rust proofed them all). Then comes the clever bit. So as to seal the sideskirts to the car I ran a bead of Sikaflex in the gap, the length of the skirts. Wiping this clean with white spirit I got a good finish - polyurethane adhesive is virtually impossible to remove, so I ensured the whole area was clean and the bead smooth. The beauty is that becasue the 3M tape sits just proud of the skirts, the bead just sits on that part, and hence will not be a problem to remove from the paintwork should I need to remove the skirts. So - I'd recommend using the 3M stonechip tape beneath the side skirts. As you can see in the picture the stonechip tape line is just above the sealant, so no adhesive is actually on the car :) Cheers
-
Screw - part number
brucey replied to brucey's topic in 996 Series (Carrera, Carrera 4, Carrera 4S, Targa)
Thanks Loren - Hmmm - I thought so too, but I think that's the one without the collar that comes with the fitting kit. (hence the quantity of 20). It's odd though, because in that diagram it does indeed look as though part number'6' also has a variant of which there are 2 - which would be right - BUT it has the part number oyu have already quoted!! 999.073.061.02 How frustrating! -
Screw - part number
brucey replied to brucey's topic in 996 Series (Carrera, Carrera 4, Carrera 4S, Targa)
Thanks Loren - but nope - that's a cross head nornal small headed self tapper. I have a bag load of those. It's very similar in size and shape to the ones that come with the aerokit fitting kit, but it's longer and has the collar. Thanks -
hi there. This screw holds the underneath rear of the sideskirt to the plastic engine undertray by screwing into a spire nut (quick nut). It has a collar on it, which is important given how it fits. On the electronic parts list I see this is down as being one of the expandable plastic rivets - perhaps this is what is used on the standard car? The fitting kit for the sideskirts only comes with 10 screws - 9 for underneath and 1 for the front - which makes me think the rear is a screw on all cars... Here's a pic - does anyone know the part number please? Thanks
-
Kare Here's what he said: "they weld a rod onto the body, and then use a dent puller to yank the dent out, and then set it flush again, cut off the rod, grind down the area, primer, paint, and clear." That is indeed what a decent panel beater will do. Just a thought - it MAY even be a PDR repair if you get the right repairer. That area isn't that noticeable and it's not like the rest of the paint (it has a textured rubberised stone chip coat), so you may get away with it. I did have another thought today when playing with my 996 though - why don't you bite the bullet and fit aerokit sideskirts? They would completely cover that, and you could always just pop a coat of paint on the scratch to stop any corrosion. regards
-
Thanks for the reply. I have a lump in it - as per the other poster. I have seen this before on cars where water gets under the seal and the steel core (if it has one) rusts and blisters. I have tried pushing it down, but it's a hard lump about 5-10mm across. It has also gone a little dull due to me messing with it, so it stands out even more - usual sort of thing! So - it's just me being VERY picky about the car to be honest. I guess I will replace it though, as there doesn't seem to be anything non-replaceable that could get broken - just plastic clips and the like. I might even fit the carbon fibre side pod lid and C handles at the same time :) Cheers
-
MY02, so I guess it's a maybe!! thanks ps - found this http://www.renntech.org/forums/index.php?s...amp;#entry28421 thanks
-
MY02, so I guess it's a maybe!! thanks
-
Thanks Loren. Have had a good look through all the guides for taking the inner door out - what's the chance I'll snap a fastener or something in the process!!?? Thanks again.
-
Hi all. I have an unslightly bump in the outer rubber on the top of the door and would like to replace it. It's part number 996 537 086 07. Do I have to remove the inner door panel to replace this? has anyone done one? Any advice welcome. regards
-
I have recently purchased an 02 C2 in polar silver. Tonight I was detailing the car, and noticed 3 really odd patches on the drivers door. Each is an oval, about 1cm max size, and looks like a very thin splodge under the lacquer. You can just feel them if you run a finger over them, they have undulated edges, but only distort the light slightly from certain angles - hence why I never noticed them before now. I have 2 theories: 1) They are very poor PDR repairs, where the repairer has made an oval set of microhighs (unlikely as I cannot see any marks to the back face of the door panel). 2) They are sone sort of paint flaw - I guess they could be splodges of primer, colour coat or lacquer - it's hard to say. I'm really not sure what to do with them. Anyone else ever seen anything like this or know what to do? I will check with my paint meter tomorrow for thickness, but am loathed to wet sand or flat them back as the splodge may not be in the clear coat! Thanks