Welcome to RennTech.org Community, Guest
There are many great features available to you once you register at RennTech.org
You are free to view posts here, but you must log in to reply to existing posts, or to start your own new topic. Like most online communities, there are costs involved to maintain a site like this - so we encourage our members to donate. All donations go to the costs operating and maintaining this site. We prefer that guests take part in our community and we offer a lot in return to those willing to join our corner of the Porsche world. This site is 99 percent member supported (less than 1 percent comes from advertising) - so please consider an annual donation to keep this site running.
Here are some of the features available - once you register at RennTech.org
- View Classified Ads
- DIY Tutorials
- Porsche TSB Listings (limited)
- VIN Decoder
- Special Offers
-
OBD II P-Codes - Paint Codes
- Registry
- Videos System
- View Reviews
- and get rid of this welcome message
It takes just a few minutes to register, and it's FREE
Contributing Members also get these additional benefits:
(you become a Contributing Member by donating money to the operation of this site)
- No ads - advertisements are removed
- Access the Contributors Only Forum
- Contributing Members Only Downloads
- Send attachments with PMs
- All image/file storage limits are substantially increased for all Contributing Members
- Option Codes Lookup
- VIN Option Lookups (limited)


Doug_B_928
-
Posts
148 -
Joined
-
Last visited
-
Days Won
2
Content Type
Profiles
Events
Forums
External Paint Colors
Downloads
Tutorials
Links Directory
Collections
Classifieds
Store
Everything posted by Doug_B_928
-
I have one those little thingies where you suck up some coolant and if the arrow points to the right place the coolant is "good." Is that an indicator of PH, or do I need to get something else to measure that? My car as just under 15,000 kms, so I guess in the miles + age equation I should be good for a while. Is there any negative to removing the water pump to inspect it if doing coolant anyway? I.e., it doesn't look to be too difficult but, if one is diligent, is it a very low risk procedure? While I'm at it, where do you stand on the "put the gasket on dry" or "use RTV" debate? Thank you!!
-
Okay, good to know. What about the wisdom of changing the water pump as a preventative measure, along with the coolant, in say 6 year intervals? Good idea or bad idea?
-
I read somewhere, some time ago so not sure where, that it is recommended to change the water pump every 3-4 years because the plastic impeller blades go bad, chip off and mess up the engine. Thoughts on this? Is there a DIY for the water pump for the 997.1? If not, how close is the job to the 996. There's a YouTube video for the 996 procedure.
-
Thanks very much wvicary and Loren!
-
I put my Durametric (software version 5) on this vehicle. I haven't used it much so I'm not sure what to make of the codes it gave for the components below. I'd appreciate it if anyone can shed some light on them. Categories not reported showed no faults. I didn't look at the live data or whatever it's called because I didn't want to mess with anything. But the motor was running when I took the readings so that the battery wouldn't go dead. Here's the output summary: PSM 77B Steering Angle Sensor Kessy 955 Key1 A/C 353 Feedback from Blower Regulator Front Short to ground or positive Electrical System 907 Load management operat. on vehicle Electrical sys./DME control module Present
-
Good to know about the compressor, thanks! I thought that this tool also drained the system fully, doesn't it?
-
Yeah, I found that out subsequently. I've e-mailed the company directly. We'll see what they say.
-
I checked it out, but it looks like amazon.com (as opposed to amazon.ca) doesn't ship these kinds of items to Canada :(. Yup ... UView Airlift 55000o Buy through this link and RennTech.org gets a small contribution: http://astore.amazon...tail/B0002SRH5G
-
Thanks very much, gentlemen, for your input. My car is 6 years old (15K Kms) and the coolant has never been flushed. No signs and any coolant system problems (e.g., water pump appears fine). When you flush the coolant what do you use for the job? I saw another thread here that talked about the UView Airlift 550000??
-
I've read that the coolant is considered to be good for the liftime of the car (06 C2S). I've also read opinions saying that it should be changed every 4-6 years, or wait until it needs to be changed as part of some other fix. What is the prevailing wisdom on this?
-
Wow, impressive! Thanks for posting the pics.
-
Looking forward to seeing pics.....
-
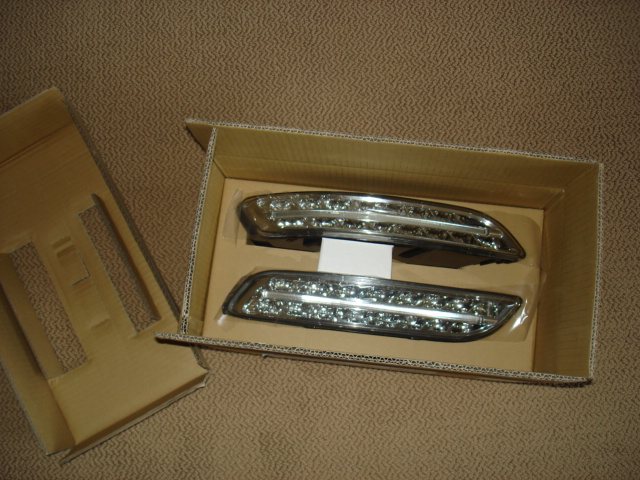
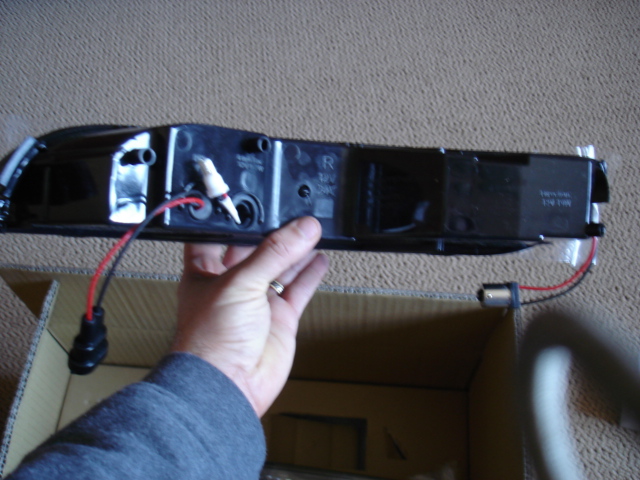
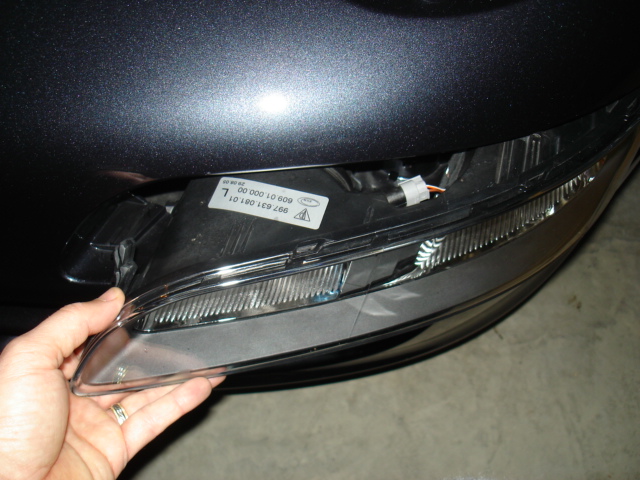
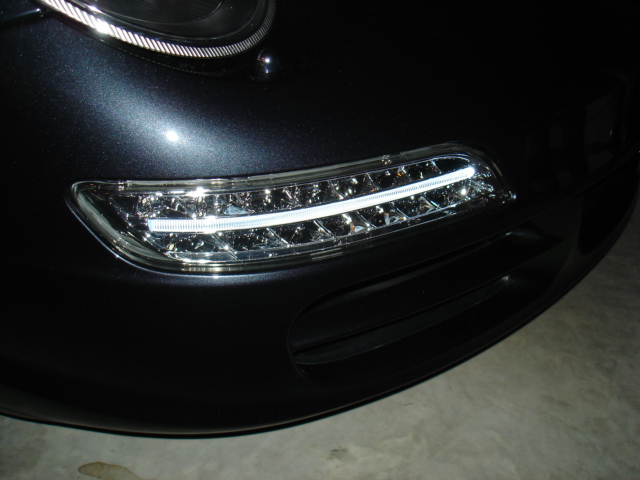
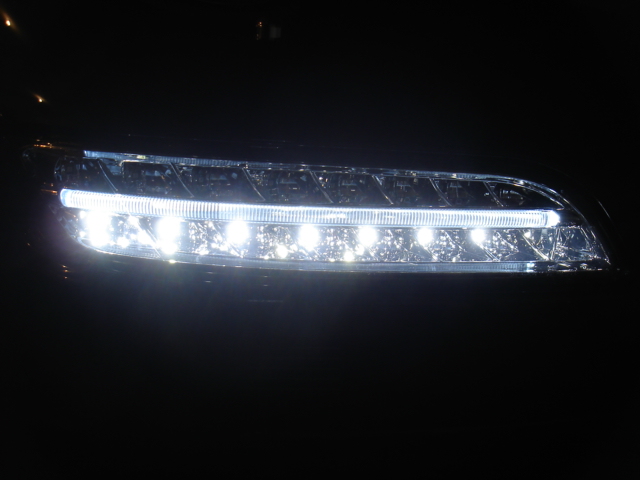
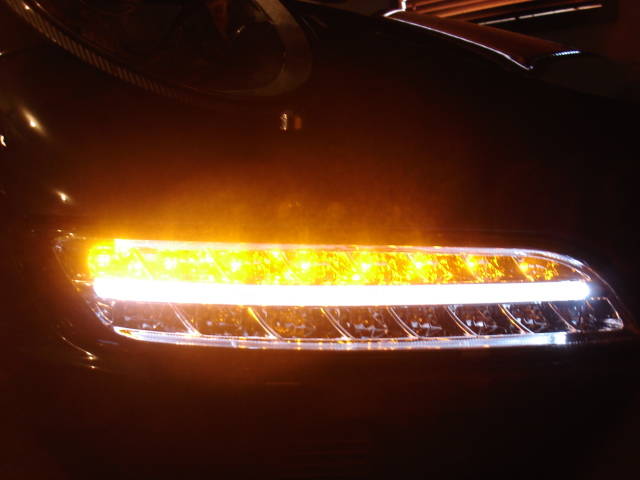
You're most welcome. The quality looks very good from the front. The connections on the back of the assembly are not as good, IMHO, as the OE, but still very good. Based on what I've seen so far, I'd recommend them. But I'm far from an expert. I can say that Ray at Rottec has been great to deal with so far.
-
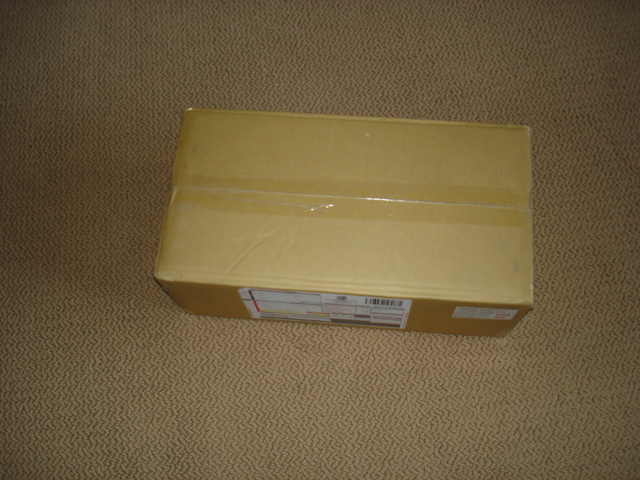
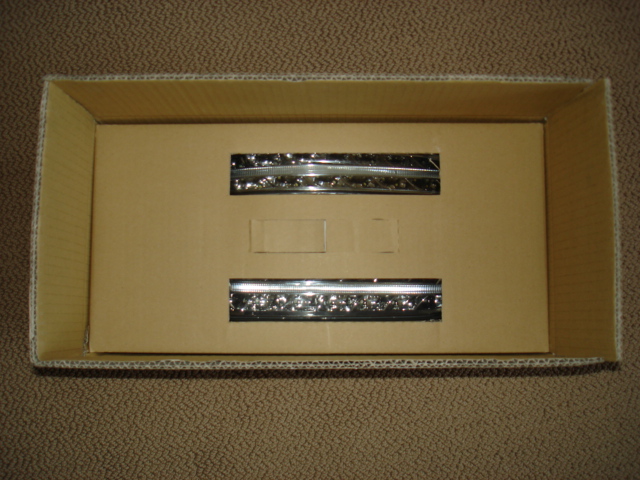
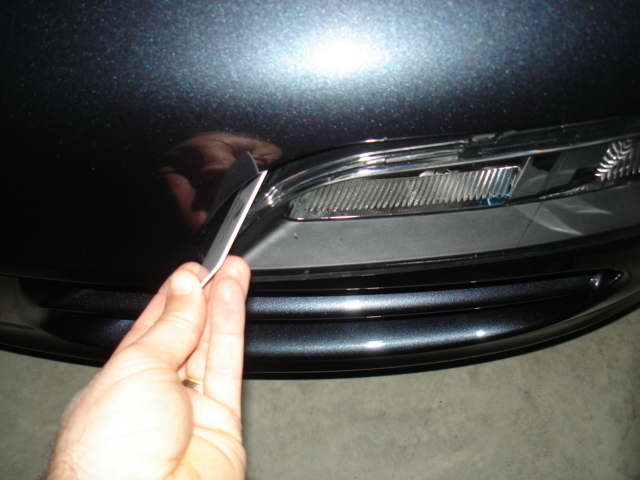
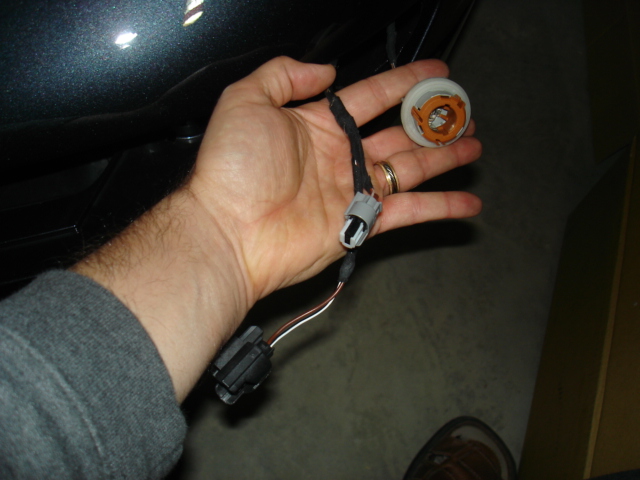
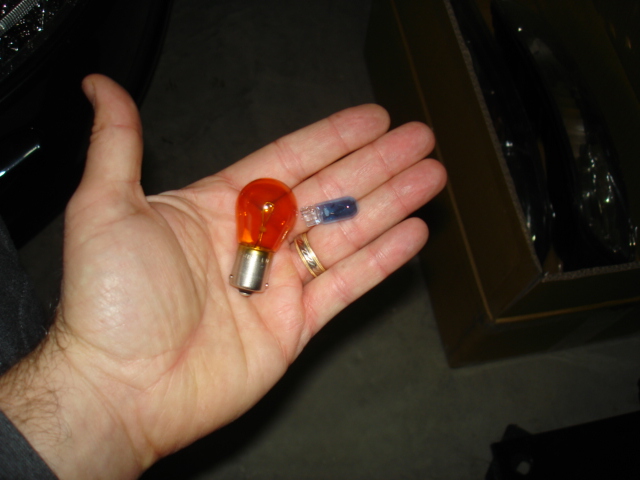
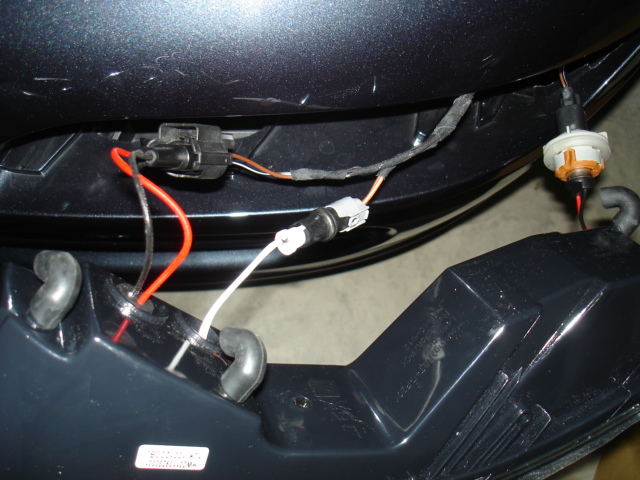
I received my Rottec DRLs yesterday. I'm very pleased with the lights. As promised, here are some pics of the install. Basically, to remove them all you do is insert the card tool as per the owner's manual. Push in once and pull out the assembly a bit, then push in again and it will release. Pull it out and disconnect as per the manual. The only trick is that the fog light bulb and connector need to be removed from the original housing after the wiring has been disconnected. Then you re-use the black connector that the little blue bulb was in. It really couldn't be easier.

-
There are at least two different LED taillight aftermarket manufacturers: Rottec and Dectane. I have the Dectane's (see my avatar pic). Rottec's are also very nice, just look a bit less OEM and I preferred the OEM look. If you search the forums using these as search terms you'll find plenty of pics and discussion about quality, suppliers etc.
-
Part of the 6speedonline group buy: $500USD including shipping. Retail said to be $580USD plus $40 shipping in NA. See here: http://www.6speedonline.com/forums/automotive-parts-accessories-sale-wanted/258220-rottec-997-1-front-drl-led-group-buy-2011-oct.html
-
HID Headlights
Doug_B_928 replied to Doug_B_928's topic in 997-1 Series (Carrera, Carrera 4, Carrera 2S, Carrera 4S)
Thanks, Loren. I didn't know Xenon and HID are the same thing. Hadn't heard of this HID term before. -
How do I know if my headlights on my 06 C2S are HID?
-
I have a set of the Rottecs on order. They should be delivered next week. I will report back once they're installed. Personally, I like the shape of the 997.1 fogs better than those on the 997.2, but I prefer the look of LEDs. The Rottec should be the best of both worlds.
-
Service Covers
Doug_B_928 replied to Doug_B_928's topic in 997-1 Series (Carrera, Carrera 4, Carrera 2S, Carrera 4S)
My service cover arrived. I ordered it through Pelican Parts. Perfect fit!
-
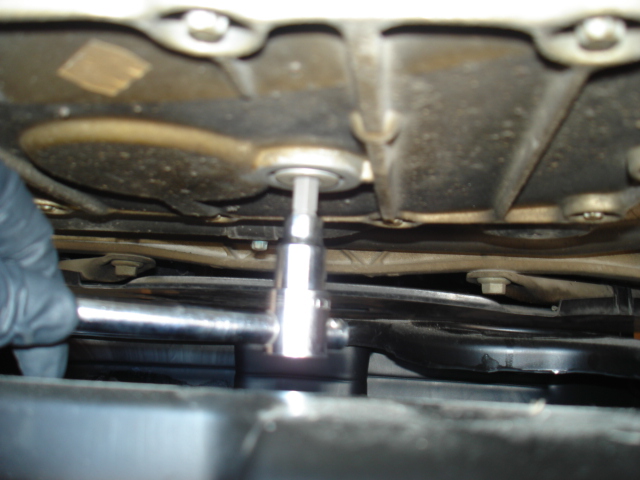
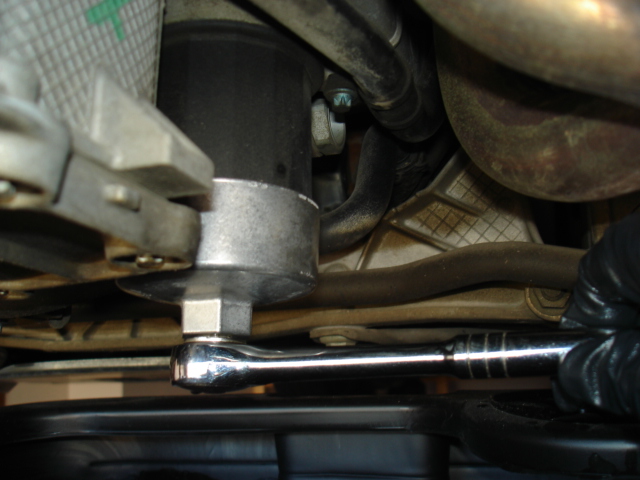
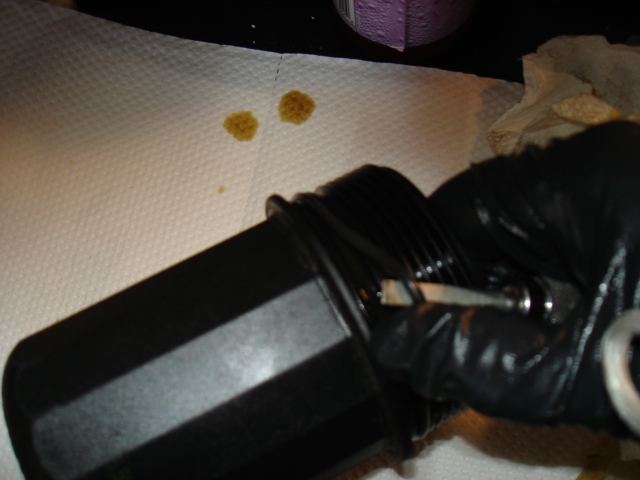
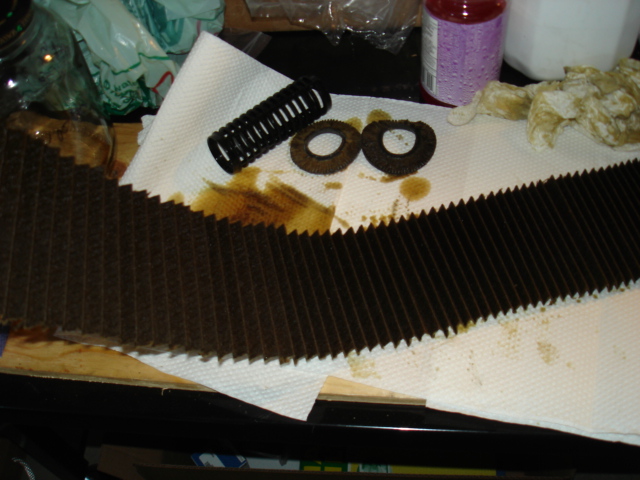
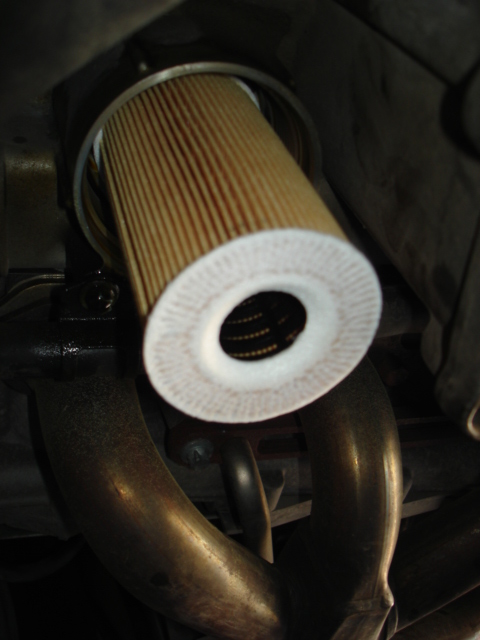
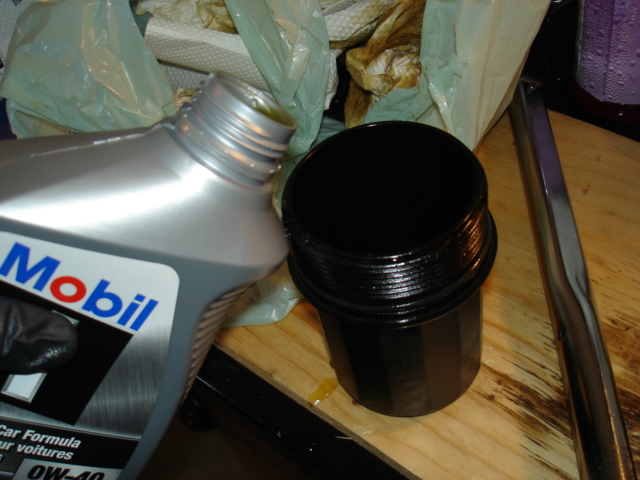
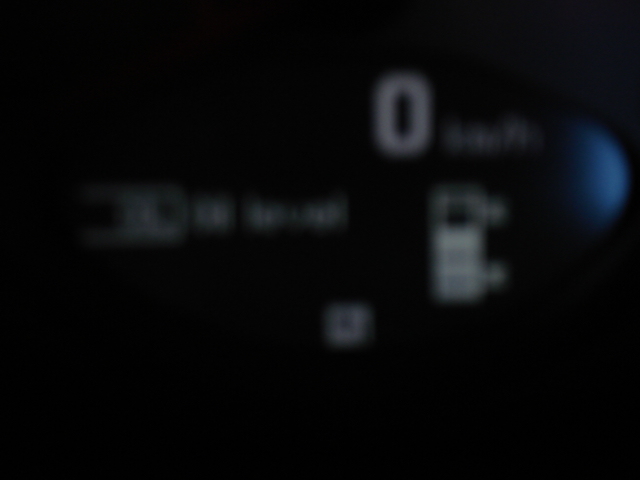
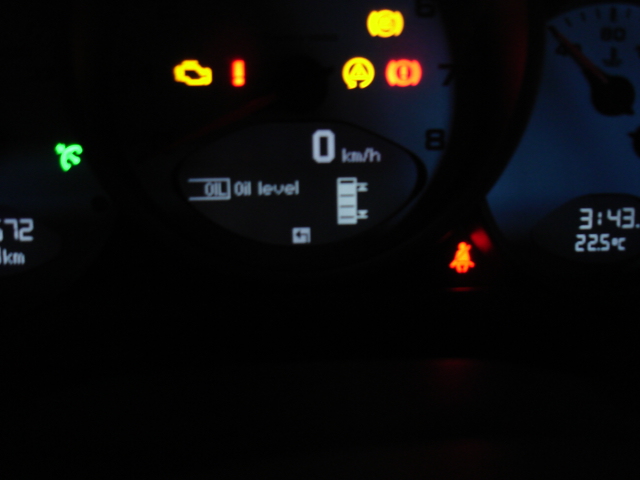
I did the oil change yesterday and it went perfectly. I thought I'd provide the information in this post that I consolidated from this and other forums for any others who are interested. Pics attached. Thanks to all those who provided this information. 1. I changed the oil with a warm engine so that the oil would drain more easily. 2. I didn't unscrew the cap on the filler neck until midway through the draining process so that the oil wouldn't come out too quickly. 3. Unscrew the drain plug using an 8mm hex bit and let drain into a collecting basin. Next time I'll also place a tarp on the floor to catch any splatter that comes from the collecting basin. 4. While the oil was still dribbling, I loosened the oil filter housing using the special tool Oil Filter Spanner 92040. 5. While waiting for the oil filter element to completely drain, I removed the old O-ring from the oil filter housing. I used a flat head screw driver to get under it and to pry it off. Ensure not to scratch/damage the oil filter housing. The O-ring comes off very easily. 6. I then cleaned the oil filter housing, and placed a new O-ring on the oil filter housing. In the latter regard, I dipped the O-ring in some of the oil that was still inside the housing, distributed it all over the O-ring, and then gently rolled the O-ring over the housing until it rolled into place. Rolling it on evenly ensures that it doesn't get twisted, which would hamper making a good seal. 7. I then removed the old oil filter and cut it open to inspect it for metal fragments. Apparently small pepper sized metal fragments are okay, but cracked pepper sized fragments are a sign of potential problems. Mine looked great, with only a few little metal fragments in the entire filter. 8. Then I replaced the drain plug. I changed from the original to a magnetic one from LN Engineering (via Pelican Parts). It uses a 10mm hex. When putting the new aluminum sealing ring on the drain plug, ensure the smooth side is toward the engine block and the sharp edged side is toward the plug. I turned it counter clockwise until if felt it seat, then turned it clockwise by hand to ensure no cross-threading. Then use a torque wrench to tighten to 37 ftlb torque. 9. Then I inserted a new filter element. Place a little pressure on it and it pops right in place. 10. I prefilled the oil filter housing to somewhere between 1/3 and just under 1/2 full. Then screw it on by hand and finish with a torque wrench tightening to 19 ftlb torque (my 1/4" torque wrench only goes to 200 inlb which is a bit less than 19 ftlb--228inlb, and my 1/2" starts at 20ftlb; so I put it on with the 1/4 at 200 inlb and then checked with the 1/4" at 20 ftlb and got the click right away, so it should be about right). 11. I then began filling oil, having placed some paper towel to catch some drips under the filler neck. I put in the rest of the container that I started for the oil filter housing, as well as 7 more litres (i.e., 8 litres). 12. Check oil level. It gave an overfull indication, which apparently is normal. I started the car and let it run for about 15 seconds (Despite having prefilled the oil filter housing, I did get a low pressure warning that lasted only a second). Then started the check oil procedure again. This time it takes about 30 minutes. It tested one segment short (sorry for the poor pic but you'll get the idea). One segment corresponds to 0.4 litres, so I put in 400ml more, checked again with ignition only, and the oil level was perfect. So, the total oil used was 8.4 litres. 13. Then start the motor again and let run for a few minutes. Check for leaks. 14. Take it for a spin, and check for leaks.
-
Oil Change I did the oil change yesterday and it went perfectly. I thought I'd provide the information in this post that I consolidated from this and other forums for any others who are interested. Pics attached. Thanks to all those who provided this information. 1. I changed the oil with a warm engine so that the oil would drain more easily. 2. I didn't unscrew the cap on the filler neck until midway through the draining process so that the oil wouldn't come out too quickly. 3. Unscrew the drain Author Doug_B_928 Category Carrera (997-1) - Maintenance Submitted 09/28/2011 10:45 AM
-
Oil Change
Doug_B_928 replied to andyjoshi's topic in 997-1 Series (Carrera, Carrera 4, Carrera 2S, Carrera 4S)
I did the oil change yesterday and it went perfectly. I thought I'd provide the information in this post that I consolidated from this and other forums for any others who are interested. Pics attached. Thanks to all those who provided this information. 1. I changed the oil with a warm engine so that the oil would drain more easily. 2. I didn't unscrew the cap on the filler neck until midway through the draining process so that the oil wouldn't come out too quickly. 3. Unscrew the drain plug using an 8mm hex bit and let drain into a collecting basin. Next time I'll also place a tarp on the floor to catch any splatter that comes from the collecting basin. 4. While the oil was still dribbling, I loosened the oil filter housing using the special tool Oil Filter Spanner 92040. 5. While waiting for the oil filter element to completely drain, I removed the old O-ring from the oil filter housing. I used a flat head screw driver to get under it and to pry it off. Ensure not to scratch/damage the oil filter housing. The O-ring comes off very easily. 6. I then cleaned the oil filter housing, and placed a new O-ring on the oil filter housing. In the latter regard, I dipped the O-ring in some of the oil that was still inside the housing, distributed it all over the O-ring, and then gently rolled the O-ring over the housing until it rolled into place. Rolling it on evenly ensures that it doesn't get twisted, which would hamper making a good seal. 7. I then removed the old oil filter and cut it open to inspect it for metal fragments. Apparently small pepper sized metal fragments are okay, but cracked pepper sized fragments are a sign of potential problems. Mine looked great, with only a few little metal fragments in the entire filter. 8. Then I replaced the drain plug. I changed from the original to a magnetic one from LN Engineering (via Pelican Parts). It uses a 10mm hex. When putting the new aluminum sealing ring on the drain plug, ensure the smooth side is toward the engine block and the sharp edged side is toward the plug. I turned it counter clockwise until if felt it seat, then turned it clockwise by hand to ensure no cross-threading. Then use a torque wrench to tighten to 37 ftlb torque. 9. Then I inserted a new filter element. Place a little pressure on it and it pops right in place. 10. I prefilled the oil filter housing to somewhere between 1/3 and just under 1/2 full. Then screw it on by hand and finish with a torque wrench tightening to 19 ftlb torque (my 1/4" torque wrench only goes to 200 inlb which is a bit less than 19 ftlb--228inlb, and my 1/2" starts at 20ftlb; so I put it on with the 1/4 at 200 inlb and then checked with the 1/4" at 20 ftlb and got the click right away, so it should be about right). 11. I then began filling oil, having placed some paper towel to catch some drips under the filler neck. I put in the rest of the container that I started for the oil filter housing, as well as 7 more litres (i.e., 8 litres). 12. Check oil level. It gave an overfull indication, which apparently is normal. I started the car and let it run for about 15 seconds (Despite having prefilled the oil filter housing, I did get a low pressure warning that lasted only a second). Then started the check oil procedure again. This time it takes about 30 minutes. It tested one segment short (sorry for the poor pic but you'll get the idea). One segment corresponds to 0.4 litres, so I put in 400ml more, checked again with ignition only, and the oil level was perfect. So, the total oil used was 8.4 litres. 13. Then start the motor again and let run for a few minutes. Check for leaks. 14. Take it for a spin, and check for leaks.
-
Oil Change
Doug_B_928 replied to andyjoshi's topic in 997-1 Series (Carrera, Carrera 4, Carrera 2S, Carrera 4S)
I got the oil today (Mobil 1 0W40 is expensive here, $11/litre before environmental and sales taxes). I was looking through the forums one last time and making notes. I saw some differences of opinion about adding oil to the filter housing before screwing it on. It makes sense to me to pre-fill it, but the WSM doesn't call for it. Does anyone know if Porsche mechanics do this? If not, I'll defer to the WSM. -
Oil Change
Doug_B_928 replied to andyjoshi's topic in 997-1 Series (Carrera, Carrera 4, Carrera 2S, Carrera 4S)
Okay, will do.