Welcome to RennTech.org Community, Guest
There are many great features available to you once you register at RennTech.org
You are free to view posts here, but you must log in to reply to existing posts, or to start your own new topic. Like most online communities, there are costs involved to maintain a site like this - so we encourage our members to subscribe or donate. All subscriptions and donations go to the costs operating and maintaining this site. We prefer that guests take part in our community and we offer a lot in return to those willing to join our corner of the Porsche world. This site is 99 percent member supported (less than 1 percent comes from advertising) - so please consider an annual subscription or donation to keep this site running.
Here are some of the features available - once you subscribe RennTech.org
- View Classified Ads
- DIY Tutorials
- Porsche TSB Listings (limited)
- VIN Decoder
- Special Offers
- Paint Codes
- Registry
- Videos System
- View Reviews
- and get rid of this welcome message
It takes just a few minutes to register, and it's quality Porsche information at a low cost.
Contributing Members also get these additional benefits:
(you become a Contributing Member by subscribing or donating money to the operation of this site)
- No ads - advertisements are removed
- Access the Contributors Only Forum
- Contributing Members Only Downloads
- Send attachments with PMs
- All image/file storage limits are substantially increased for all Contributing Members
- Option Codes Lookup
- VIN Option Lookups (limited)

1dmurrray
-
Posts
82 -
Joined
-
Last visited
-
Days Won
4
Content Type
Profiles
Events
Forums
External Paint Colors
Downloads
Tutorials
Links Directory
Collections
Classifieds
Store
Everything posted by 1dmurrray
-
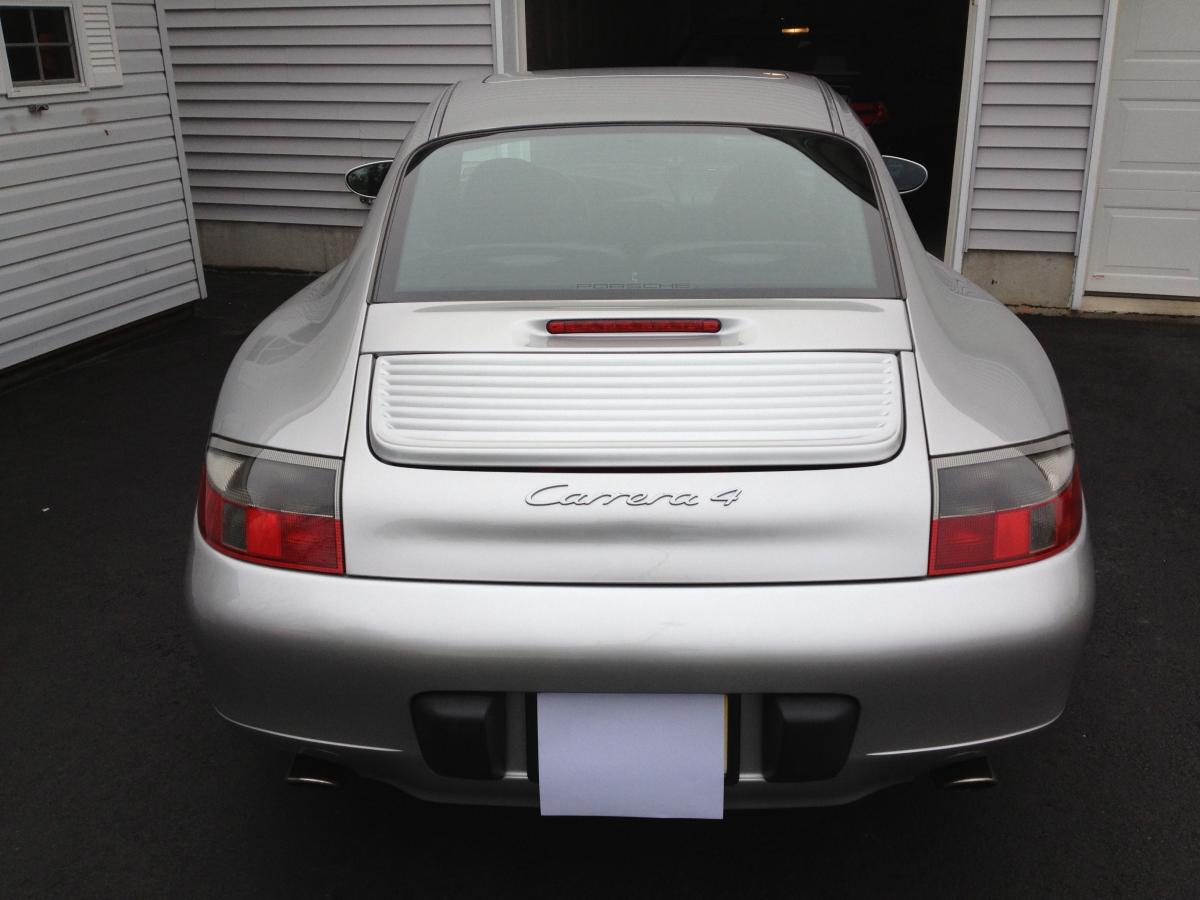
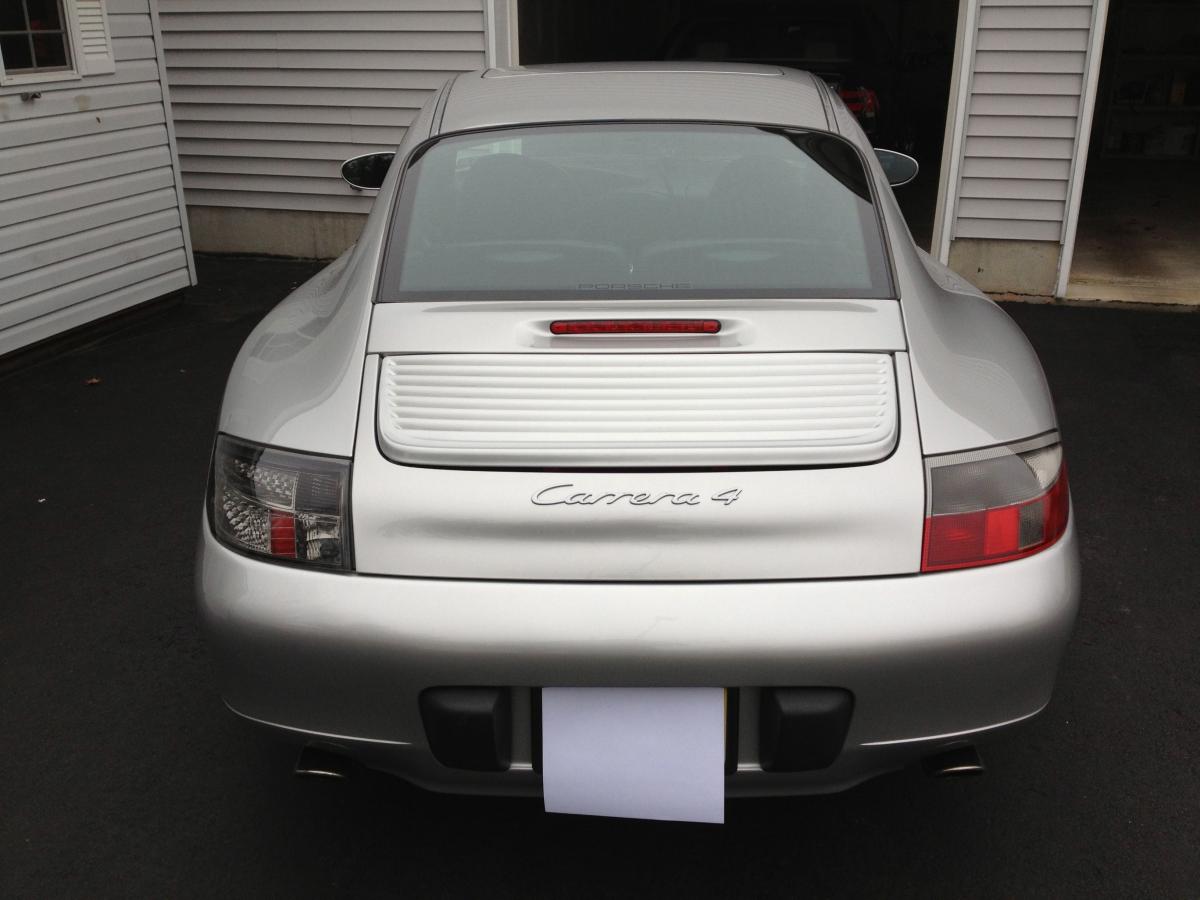
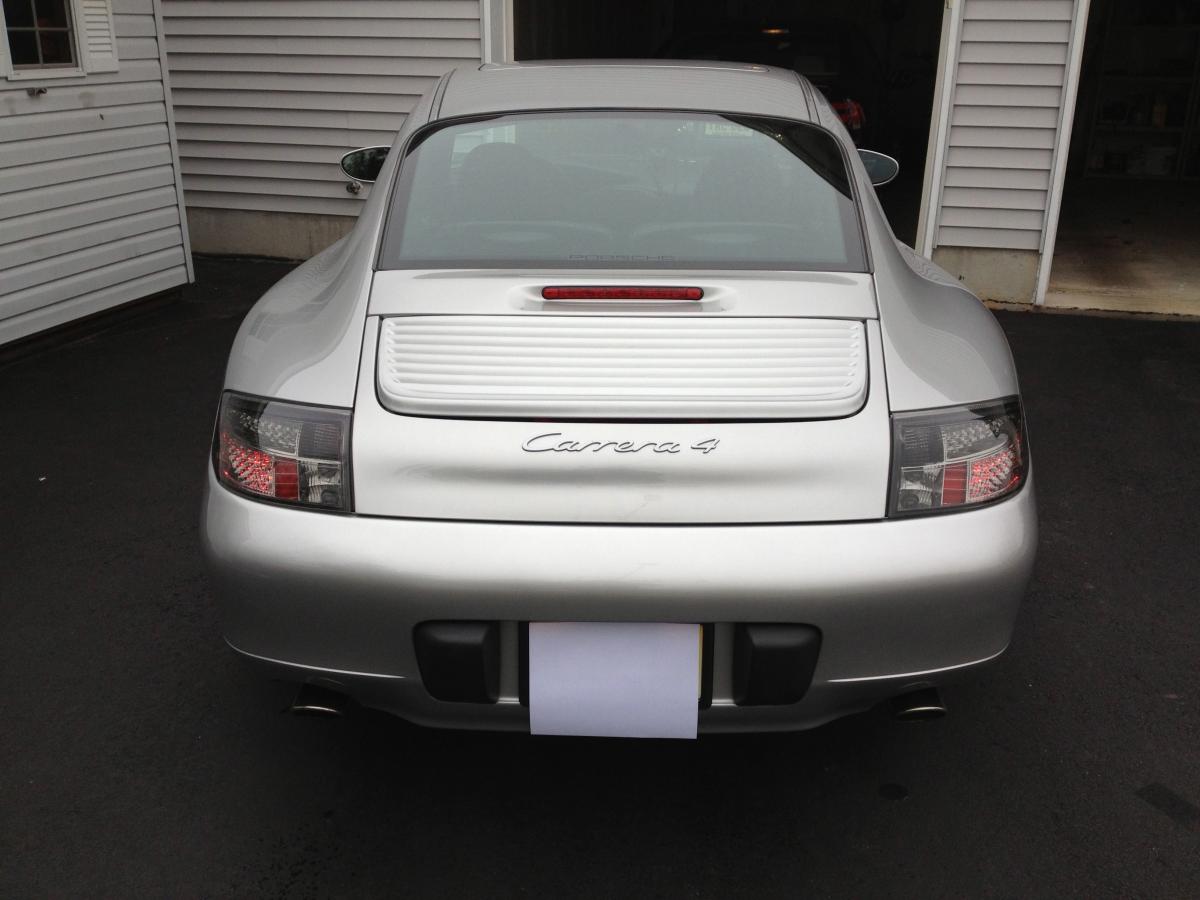
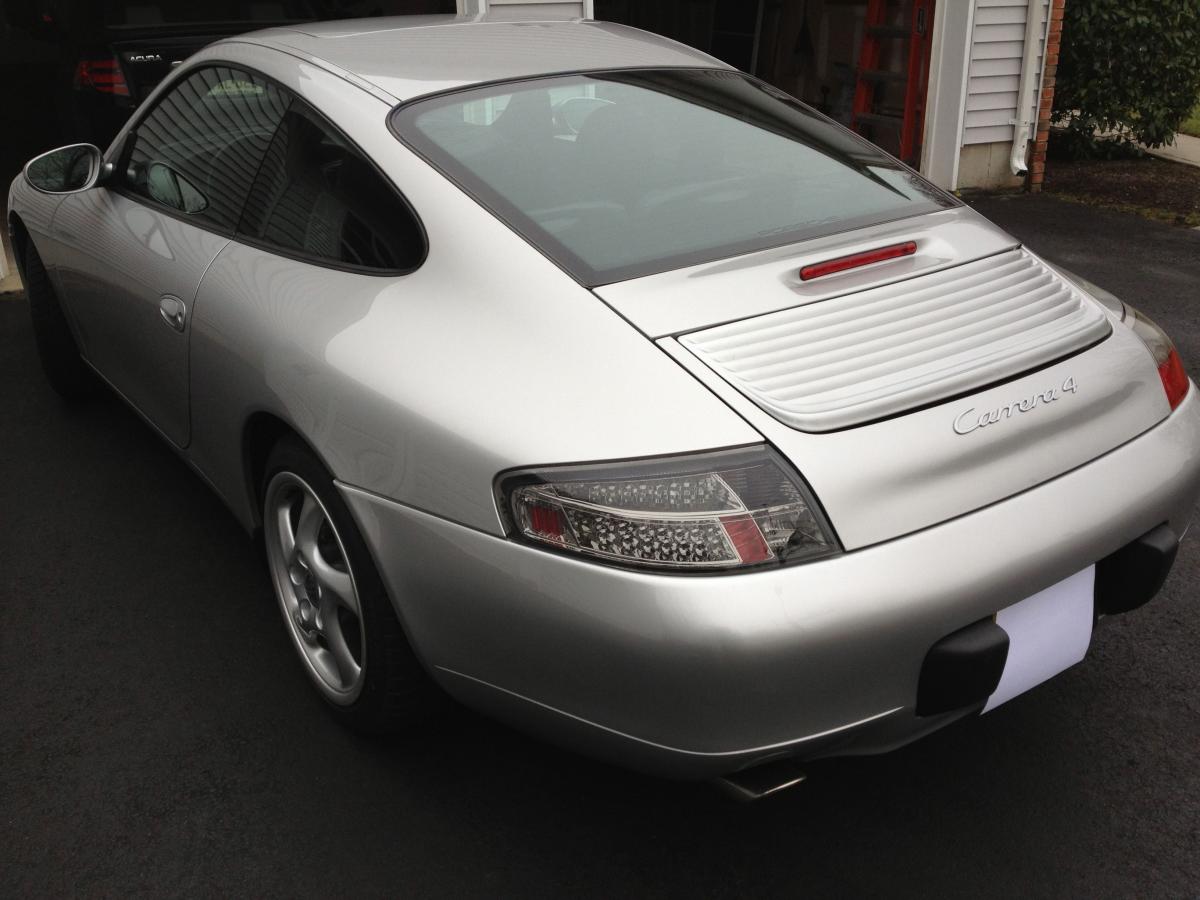
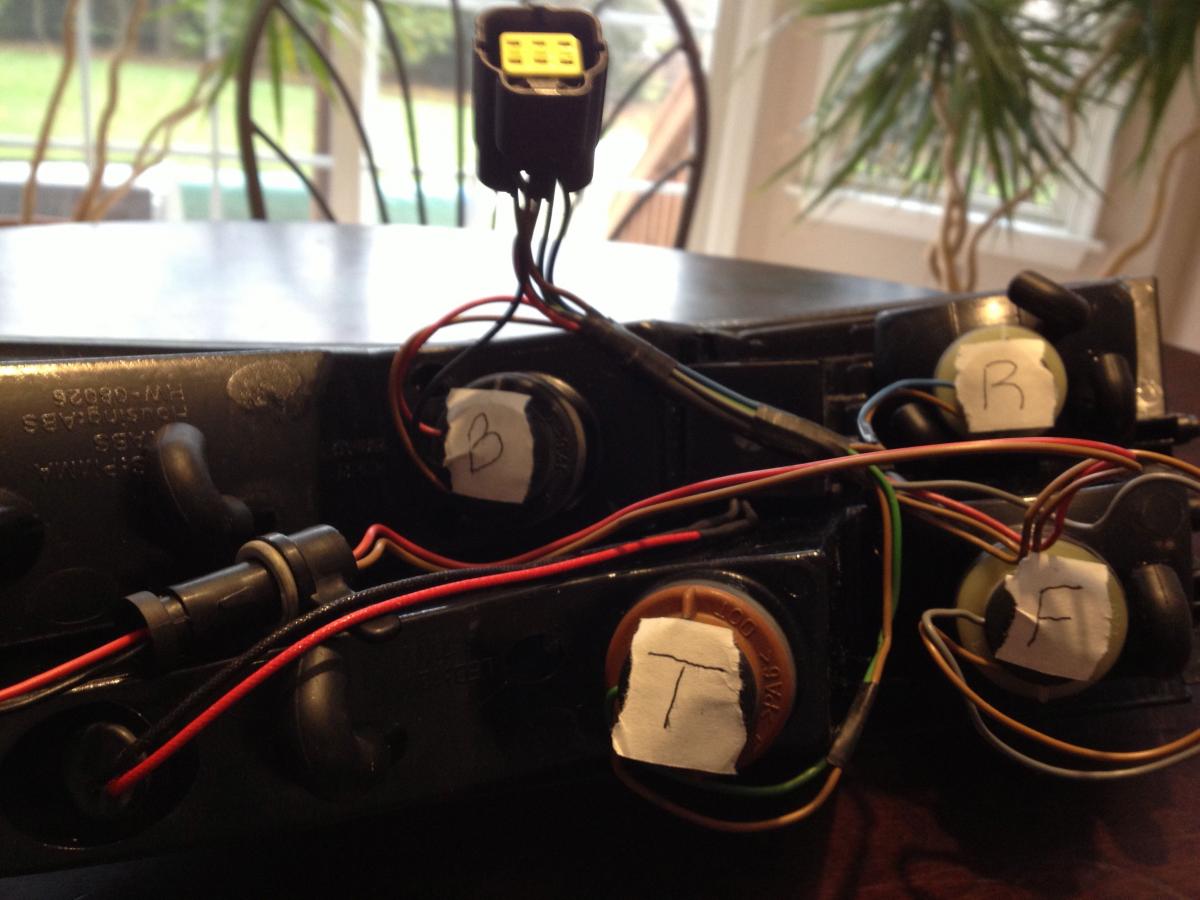
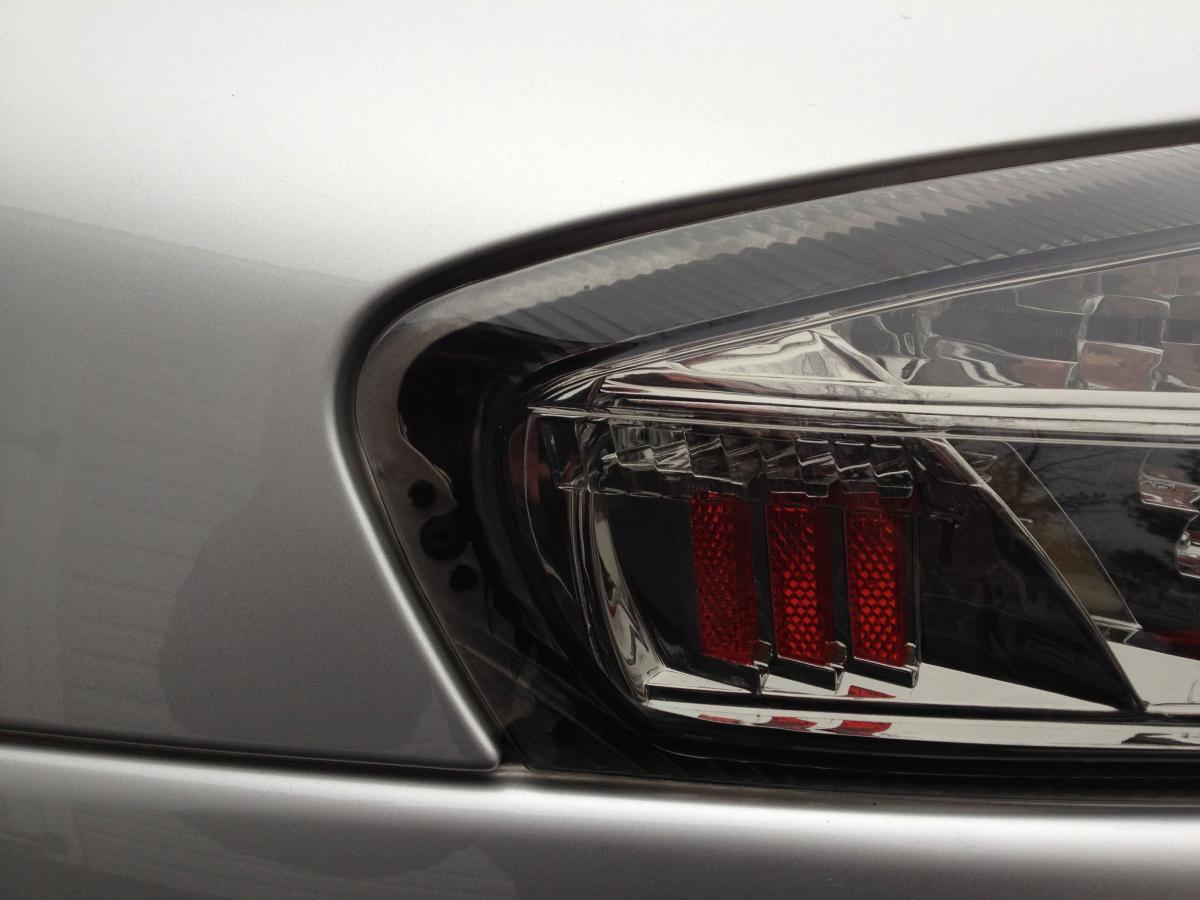
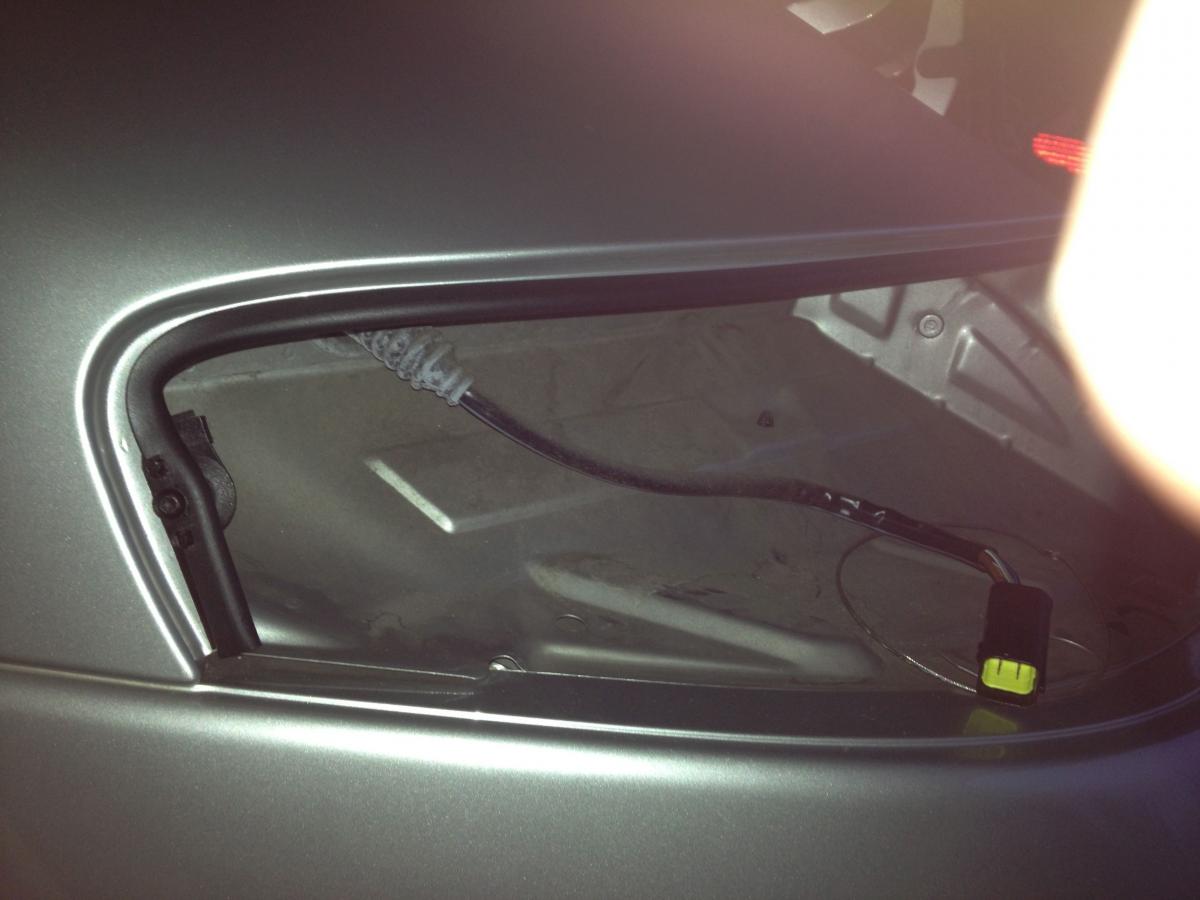
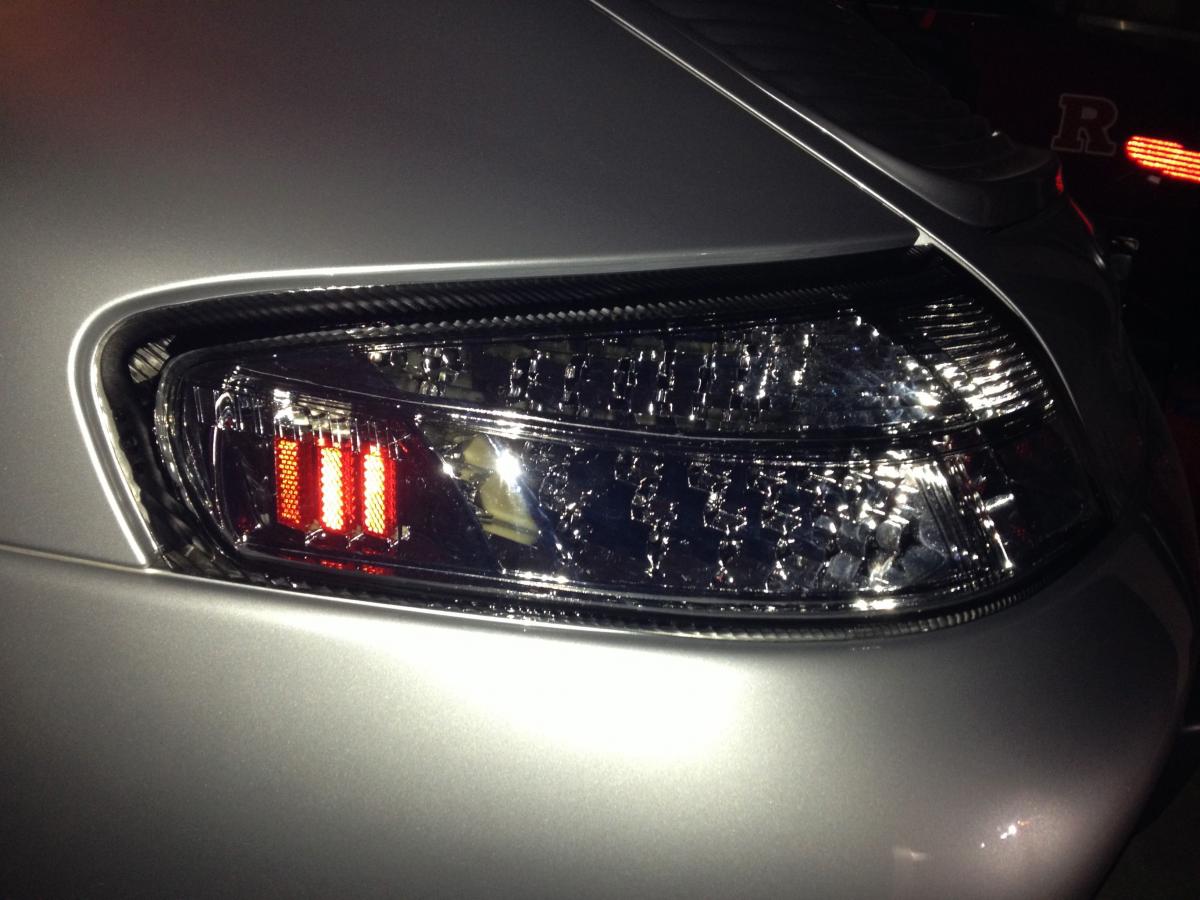
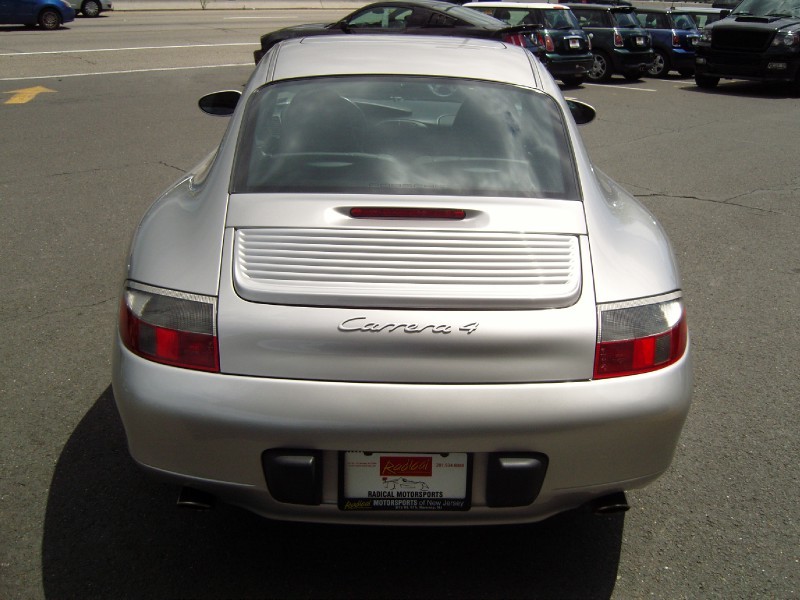
 I just completed installation of the made in Taiwan smoke led tail lights on my MY01 C4, and I wanted to share some information I hadn't seen elsewhere. I have also attached some photos: (1) before; (2) half and half; (3) & (4) after; (5) connection diagram for new tail light housing; (6) transparency problem; (7) - (9) truck door edge guard solution. With respect to the small side marker bulb wire that has caused some to blow fuses, I just lined up the red wires on the male and female ends and plugged them together (photo 5). No blown fuses, hyperflash or ABS/PSM warning lights. I had not seen a good diagram of how to hook up the the lights on the new tail light housing, so I have labelled how I hooked them up in photo 5 (note: top of photo is bottom of tail light housing). In a nutshell: (1) small side marker bulb wires (far left) plug into the corresponding wiring harness connectors (as others have commented, this does not get plugged back into the socket); (2) double light led leads connect to black brake/tail light harness sockets; (3) single light led leads connect to orange turn signal harness sockets; (4) existing reverse light sockets and bulbs are connected to the lower (top of photo) clear chamber; and (5) fog light sockets are connected to the upper (bottom of photo) clear chamber (I used the amber turn signal bulb for the fog light on the driver's side so it would not be confused with a reverse light). After installing the new tail light housings, I discovered a design flaw: unlike the stock lenses, the aftermarket lenses (at least the smoke ones) are transparent at the edge. As a result you can see the unfinished edge of rear quarter panel and the tail light connecting grommet through the lenses (photo 6). After my initial disappointment, I started to think about a solution since I really liked the lenses otherwise. Initially, I thought about using lens tint spray to darken the edges. Given the limited space to work for proper taping, the fact that the surface is grooved, and that this solution would be non-reversible, I decided to use a different approach. Door edge molding to the rescue (photos 7-9). Applying black rubber door edge molding to the unfinished edge under the lenses provides a finished look and hides the transition from the body to the lenses. This was a relatively easy fix, and I am pleased with the result. Overall, I really like the look and functionality of the new tail lights.
-
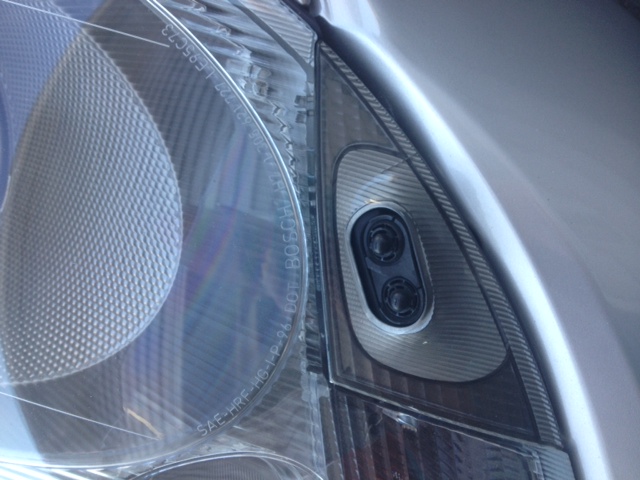
Does this piece just pry off from the outside, or do I need to remove the headlight to replace it? Thanks.
-
Installed aluminum pedals
1dmurrray replied to perucho's topic in 996 Series (Carrera, Carrera 4, Carrera 4S, Targa)
I got the same pedals from Suncoast and found the clutch pedal pulled the floor mat when released after shifting. So I removed the aluminum covers from the clutch and brake, and replaced with new rubbers. Gas and dead pedal still look nice, and clutch and brake are functional. -
Help! Speakers for 1999 996
1dmurrray replied to nene503's topic in 996 Series (Carrera, Carrera 4, Carrera 4S, Targa)
When looking to upgrade my 2001 C4, I quickly discovered that getting aftermarket speakers to fit the stock dash and rear seat grills was non trivial due to the non standard mounting points. I didn't want a solution that involved butchering the old speakers and copious amounts of glue. I addition, I didn't want to invest the time required to fabricate my own mounting adaptors. No need to reinvent the wheel here: I found a vendor in the UK that makes an adaptor kit for certain aftermarket speakers, JM Garage. They also list these adaptors on ebay from time to time. The adaptor kit works for the dash and rear seat covers. The kits are a bit (i.e., very) pricey (about $90 per pair of speakers); but for me it was well worth the savings in time and effort. I decided to go with the kits for US Alpine speakers (SPS-410 - less than $50/pair on Amazon). Installation with the adaptor kits was a breeze. The Alpine speakers are a tremendous bargain. For mids and highs, they sound fantastic in the 996. A huge upgrade over the stock speakers. As 4 inch speakers, however, they do not reproduce lower frequencies. Moreover, the hifi amp sends the lower frequencies to the 5.25 inch door speakers anyway. Replacing the door speakers was, therefore, next. The good news: almost any standard 5.25 inch speaker will fit. The bad news, you have to take the door panels off to get to the speakers. There are good online tutorials here and elsewhere to get the door panels off. It turns out to be a relatively easy task. Speaker selection for the doors is a matter of price and functionality. If you use the stock amp, you want a component speaker since the stock amp sends only lower frequencies to the door speakers. A lot of folks seem to like focal speakers. Given the high price, I'm sure they are great; but most installations that I saw online a used a lot of glue. I prefer to avoid glue. After looking around for something with stock amp compatible power and the best low end frequency response, I decided to try the 5.25 inch speakers that come in the Pioneer TS-D1320C component set. The set runs about $90 and includes component tweeters and bulky crossovers, which I did not plan to use (unfortunately, I couldn't find the 5.25 inch speakers for sale by themselves). Selling points for me: "deep basket for better bass reproduction" and frequency response down to 35 Hz. Of course, the proof is in the pudding, and these speakers sound great. Very nice base response for a 5.25 inch speaker. They are not 10 inch subwoofers by any means, but you can definitely feel the base in the car, and it rounds out nicely the excellent sound produced by the Alpine speakers. -
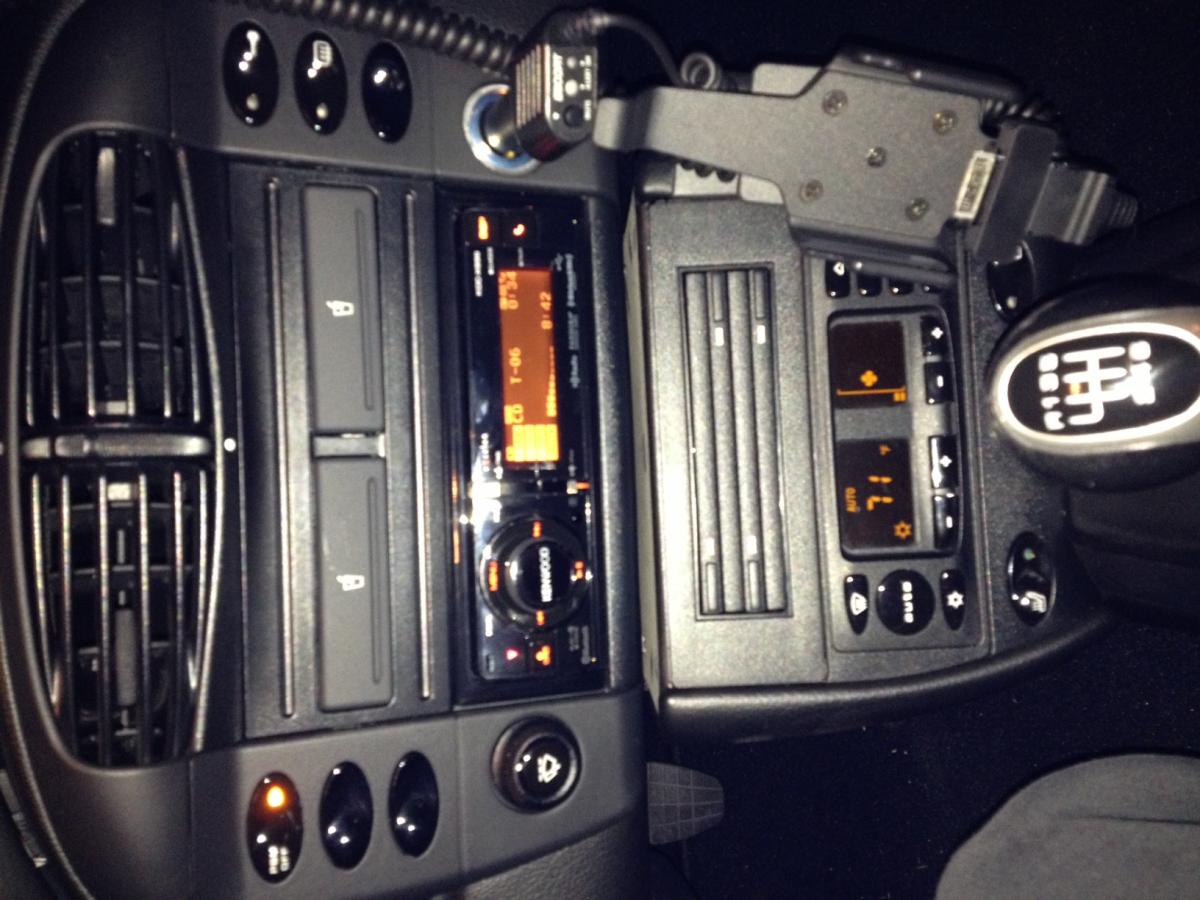
I recently acquired a 2001 C4 that came with the CDR-220 and hifi system with door speakers along with the stock 6x40 watt amp. As others have noted elsewhere, the system sounded like a cheap AM radio. In addition, I had gotten used to having a nav system and bluetooth hands free link in my cars, so an upgrade was inevitable. Given that the 996 cabin is not the ideal acoustic chamber, however, I didn't want to overdo it. I also wanted to do it myself, so I wanted to keep it simple. Originally, I was planning to go with a Pioneer double din head unit with nav and bluetooth, along with new speakers. Realizing that my iphone 4s had nav, bluetooth and a multitude of other apps such as Pandora, I ultimately decided to go with a single din head unit that could take advantage of the tech in the phone. I had previously purchased products from Crutchfield, which include installation instructions and the necessary wiring harness adaptors, so I started my search there. The Kenwood Excelon KDC-X996 had the features I was looking for (iphone integration, bluetooth hands free link, Pandora, HD radio, Sat radio etc.), and the model number matched the Porsche's, so I went with that one for $299. Installation with Crutchfield's instructions and wiring harnesses was straight forward. Based on others' advice, I ended up mounting the hands free mic in the top front corner of the driver's side headliner, routing the wire down the A pillar and under the dash. It looks and works great there. I found a great way to mount the iphone itself at www.proclipusa.com. The mount attaches securely and unobtrusively to the passenger side of the front center console without having to drill any holes, and puts the iphone within easy reach to the right of the stick. Costs about $100 with tilt, swivel and pass through cable connector. The head unit works great with the iphone. I now have the features I really wanted (nav and bluetooth), plus a lot of other nice features (including the ability to match the interior lighting colors) and extensive audio adjustments. The new head unit resulted in a significant improvement in the sound, but the stock paper cone speakers still left much to be desired. I quickly discovered that getting aftermarket speakers to fit the stock dash and rear seat covers was non trivial due to the non standard mounting points. I didn't want a solution that involved butchering the old speakers and copious amounts of glue. I addition, I didn't want to invest the time required to fabricate my own mounting adaptors. No need to reinvent the wheel here: I found a vendor in the UK that makes an adaptor kit for certain aftermarket speakers, JM Garage. They also list these adaptors on ebay from time to time. The adaptor kit works for the dash and rear seat covers. The kits are a bit (i.e., very) pricey (about $90 per pair of speakers); but for me it was well worth the savings in time and effort. I decided to go with the kits for US Alpine speakers (SPS-410 - less than $50/pair on Amazon). Installation with the adaptor kits was a breeze. The Alpine speakers are a tremendous bargain. For mids and highs, they sound fantastic in the 996. A huge upgrade over the stock speakers. As 4 inch speakers, however, they do not reproduce lower frequencies. Moreover, the hifi amp sends the lower frequencies to the 5.25 inch door speakers anyway. Replacing the door speakers was, therefore, next. The good news: almost any standard 5.25 inch speaker will fit. The bad news, you have to take the door panels off to get to the speakers. There are good online tutorials here and elsewhere to get the door panels off. It turns out to be a relatively easy task. Speaker selection for the doors is a matter of price and functionality. If you use the stock amp, you want a component speaker since the stock amp sends only lower frequencies to the door speakers. A lot of folks seem to like focal speakers. Given the high price, I'm sure they are great; but most installations that I saw online a used a lot of glue. I prefer to avoid glue. After looking around for something with stock amp compatible power and the best low end frequency response, I decided to try the 5.25 inch speakers that come in the Pioneer TS-D1320C component set. The set runs about $90 and includes component tweeters and bulky crossovers, which I did not plan to use (unfortunately, I couldn't find the 5.25 inch speakers for sale by themselves). Selling points for me: "deep basket for better bass reproduction" and frequency response down to 35 Hz. Of course, the proof is in the pudding, and these speakers sound great. Very nice base response for a 5.25 inch speaker. They are not 10 inch subwoofers by any means, but you can definitely feel the base in the car, and it rounds out nicely the excellent sound produced by the Alpine speakers. All told, I have a very respectable sound system with the technology add ons that I was looking for at a cost of $770 and a few hours of installation time. I wish the Kenwood had the speedometer based automatic volume control like the Becker, but nothing's perfect so I adjust the volume manually at highway speeds. I love my 996, and now I love its sound system too.
-
So is it posible to identify the correct way to insert the small connector without blowing the fuse, or is it just a matter of luck on each side? I just ordered a euro smoke set that should look great on my '01 C4.
-