Welcome to RennTech.org Community, Guest
There are many great features available to you once you register at RennTech.org
You are free to view posts here, but you must log in to reply to existing posts, or to start your own new topic. Like most online communities, there are costs involved to maintain a site like this - so we encourage our members to donate. All donations go to the costs operating and maintaining this site. We prefer that guests take part in our community and we offer a lot in return to those willing to join our corner of the Porsche world. This site is 99 percent member supported (less than 1 percent comes from advertising) - so please consider an annual donation to keep this site running.
Here are some of the features available - once you register at RennTech.org
- View Classified Ads
- DIY Tutorials
- Porsche TSB Listings (limited)
- VIN Decoder
- Special Offers
-
OBD II P-Codes - Paint Codes
- Registry
- Videos System
- View Reviews
- and get rid of this welcome message
It takes just a few minutes to register, and it's FREE
Contributing Members also get these additional benefits:
(you become a Contributing Member by donating money to the operation of this site)
- No ads - advertisements are removed
- Access the Contributors Only Forum
- Contributing Members Only Downloads
- Send attachments with PMs
- All image/file storage limits are substantially increased for all Contributing Members
- Option Codes Lookup
- VIN Option Lookups (limited)

1dmurrray
-
Posts
82 -
Joined
-
Last visited
-
Days Won
3
Content Type
Profiles
Events
Forums
External Paint Colors
Downloads
Tutorials
Links Directory
Collections
Store
Posts posted by 1dmurrray
-
-
For MY 2001 6 Speed C4 Coupe, is the part number 000 044 500 08? Thanks.
-
-----
|
|
|
|
|
Torx Key
-
It's probably similar to the 996: http://www.renntech.org/forums/tutorials/article/50-996-jackstand-placement. There is some controversy over using the engine case to jack the rear. After I jack each side from the rear jack point, I put stands in the front and tire ramps under the rear tires. This gives me plenty of clearance to reach the suspension cross member (Bentley manual recommended jack point) with the jack from the rear. Then, I can insert the rear jack stands under the rear jack points, and remove the ramps, if necessary. It doesn't take any longer with the ramps, which I got on sale for $40.
-
Shenanogains perhaps?
-
It shouldn't take 4 hours to do that job. I put a new shifter in my 996 in less than an hour. If it's a Porsche part, it shouldn't have any impact on the warranty. See what an indy would charge. I suspect a lot less.
-
Nothing's perfect; but for $6K, I don't see how you could go wrong with that one. Although it is heresy, I actually like the headlights from that era. A Honda S2000 impressed me the other day; kept up with my 996 until 3rd gear.
-
 1
1
-
-
I haven't seen any LED tail lights for the wide bodies. Check out http://www.6speedonline.com/forums/996/286020-996-wide-body-led-tail-lights.html.
-
This was the first mod I did on my 996 (needed to hook up an escort detector). On the 996, it was a bit tricky getting the existing socket out of the dash trim. There are DIYs out there. The replacement was plug and play.
-
jimmy3530: I don't have the part number handy, but I got mine at suncoast. Here's the link: http://www.suncoastparts.com/product/997SCU.html. I also used the B&M instructions as a guide. Easy upgrade. Big difference.
-
I just installed the 997 stock shifter in my 2001 C4, and fine tuned the linkage adjustment. IMO, the 997 shifter is a huge improvement over 996 shifter. For about $200 and a leisurely couple of hours to install and tune, this mod is a no brainer.
-
The new tail lights look great. As I understand it, there is only one rear fog light. In the US, it is on the driver's side. When I changed my tail lights, there was no bulb in the stock fog light socket on the passenger side.
-
I also clean the blades from time to time with RainX and a microfiber cloth.
-
I did it myself. Remove rear bumper cover and heat shields. Muffler bolts may be rusted, so either spray with liquid wrench or heat with torch. Do one or the other. There might be a DIY on here. I replaced all the bolts while I had them off. Fister does a fast turn around and quality work. I bought my bolts and couplings from Fister. He was cheaper than most places. If you haven't done it, replace your spark plugs while your mufflers are off. It makes that job easier.http://www.renntech.org/forums/topic/42727-muffler-clamp-replacement/?hl=%2Bremoving+%2Bmufflers
It looks like I have a new project. Thanks.
-
Valley996: Did you install the Fisters yourself? Any tips on getting the stock mufflers out? I've seen the diagrams, but the 3 bracket bolts appear to be difficult to reach.
-
I just put the Schnell kit on my '01 C4. I am using a stock paper air filter, and I like the throatier intake sound.
I cleaned the throttle body at the same time. There is a DIY tutorial for this. Highly recommended. Engine purrs like a kitten now. Idle, acceleration and deceleration are much smoother.
I would like to try the Fister modified mufflers for the 996. $265 with core exchange. http://fdmotorsports.net/fister-exhaust-996
-
I just cleaned the throttle body on my '01 C4 with CRC throttle body cleaner. I sprayed the cleaner on a microfiber rag, and wiped out all the dirt. The engine now purrs like a kitten, and idle, acceleration and deceleration are much smother. Great DIY. Thanks.
While I was at it, I put on a Schnell air intake kit. I prefer the throatier intake sound to the stock set up.
-
I added arctic silver painted bumperettes from bumperplugs.com to complete the rear end remodel. Love the color on this car; it's filthy and still looks great.

-
Gentex Auto-Dimming Mirror with Homelink Install
While looking for a good garage door opening solution for my MY01 996 C4, I came across some posts referring to the Gentex auto-dimming mirror with Homelink. Some posts suggested that there was a VW/Audi adapter that would allow this universal fit mirror to be installed on a 996 windshield. Other posts suggested that it was easy to tap into the existing dome light and sunroof switch wiring. So I decided to give it a go. It was a relatively easy install, and one of my best mods yet. Step 1:
-
Author
-
Category
-
Submitted12/16/2012 05:28 AM
-
Updated03/11/2017 06:20 AM
-
-
No replacement tips. I just replaced my passenger side nozzle. I paid $144 and change shipped from Sonnen Porsche. Replacement is fairly easy. You remove the headlight to access the nozzle, The hardest part was getting the original hose clamp off. Since I never use these washers, I seriously considered removing the nozzles, plugging the hoses, and replacing the headlight triangles with the ones that don't have holes. At http://www.suncoastparts.com/ the triangles will run you $52 a piece.
-
I'm not saying it wasn't nasty, but the one on the left looks like a charcoal impregnated filter.
-
Update: I found a red bulb online to use for the rear fog light.
-
I used 4 ohm speakers in the doors, and they work just fine. See post #14. Factory amp sends only low frequencies to doors so you don't really want a 2-way speaker there.
-
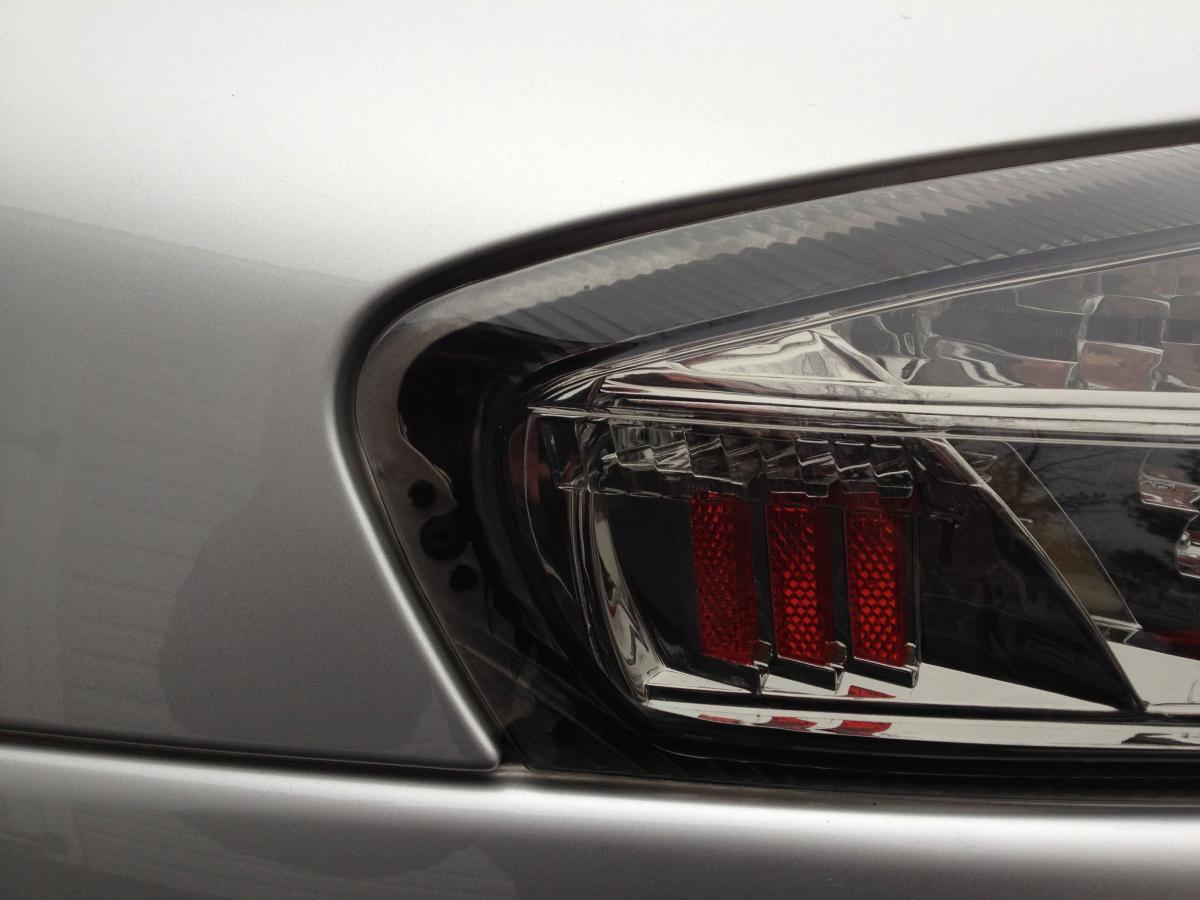
I just completed installation of the made in Taiwan smoke lenses on my MY01 C4. Details and more pictures are posted in the DIY 996 C2 Tail Light Tutorial Support Topic.
-
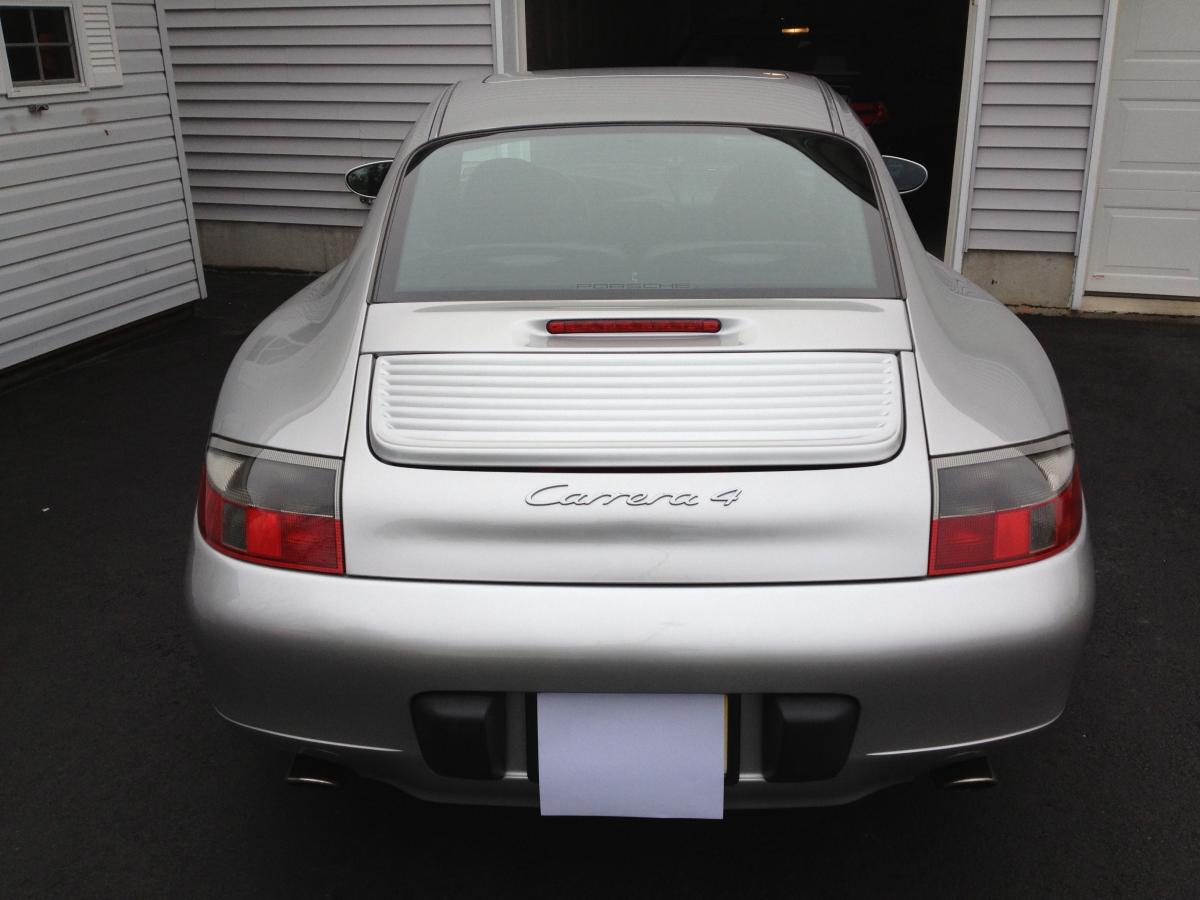
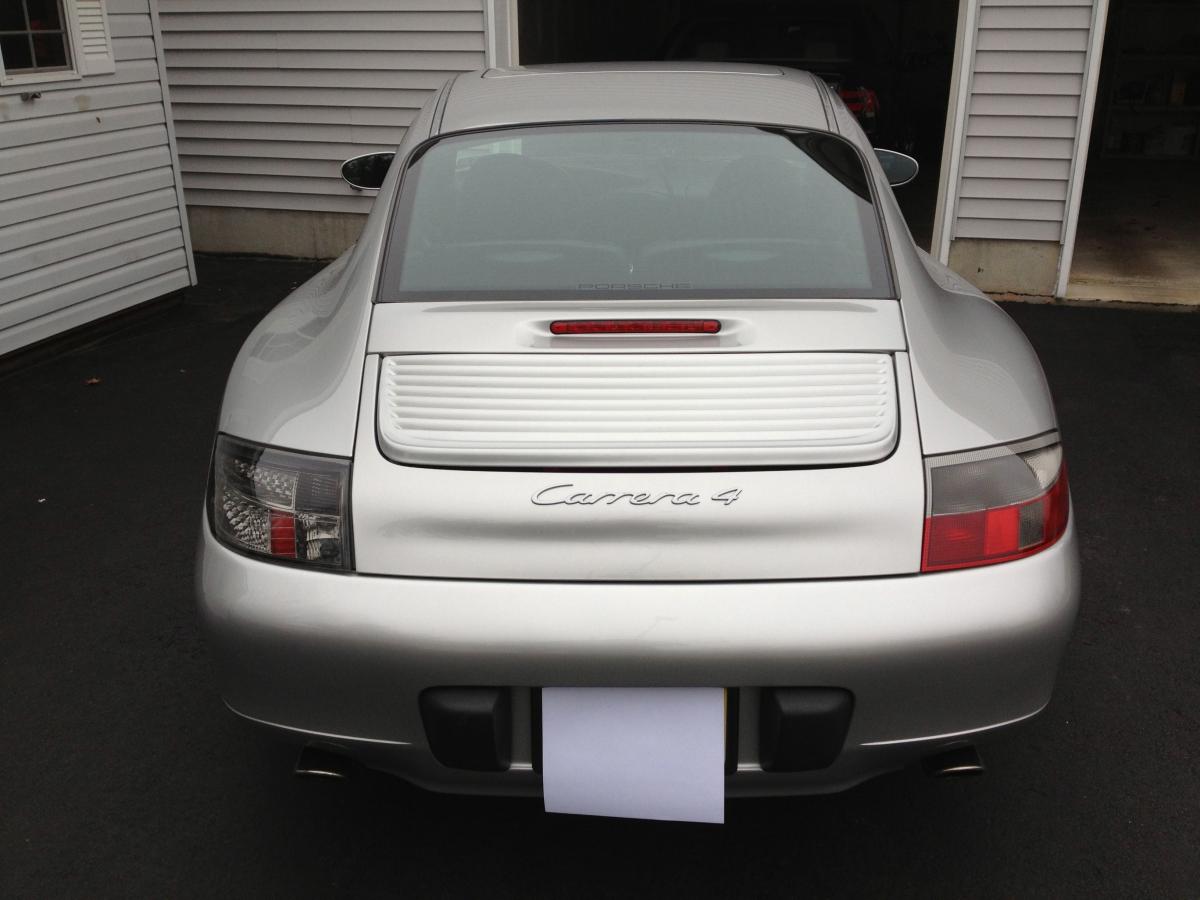
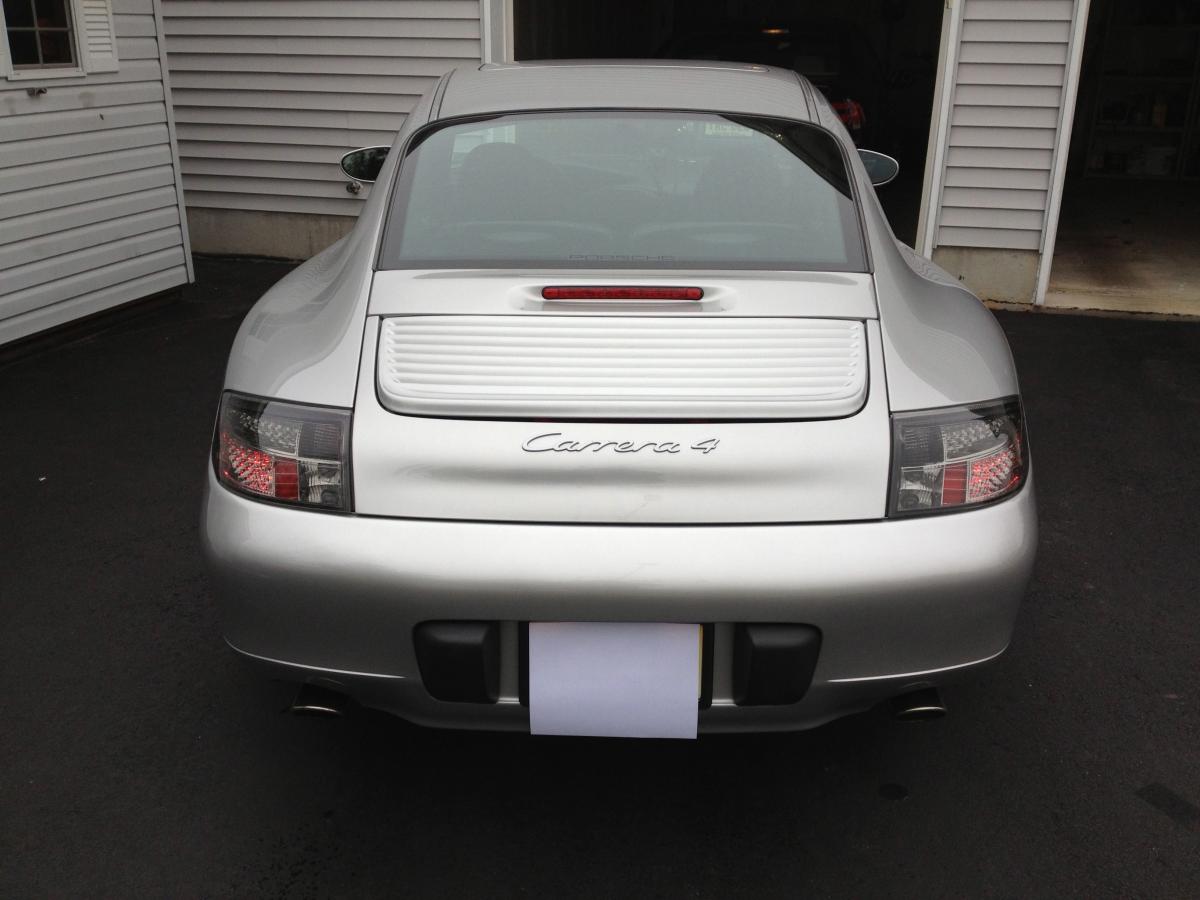
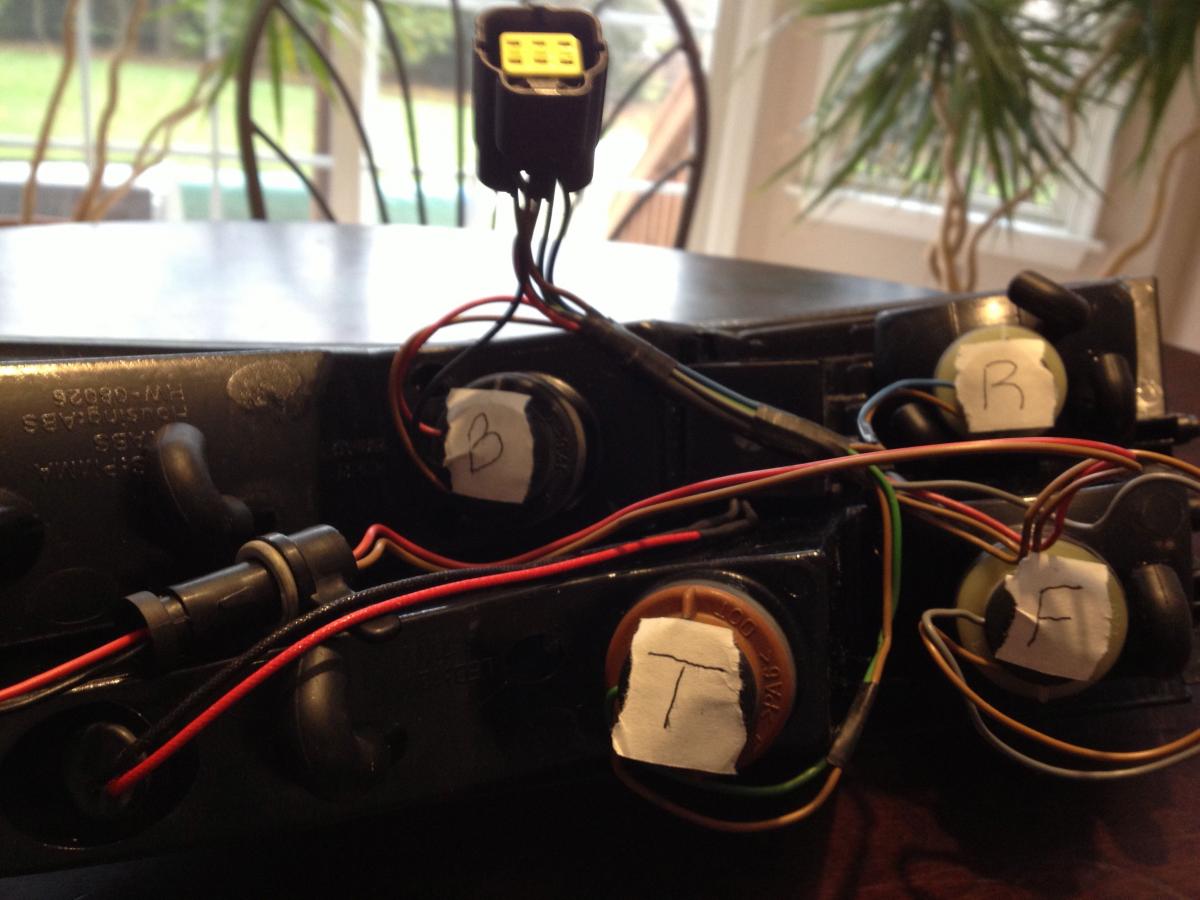
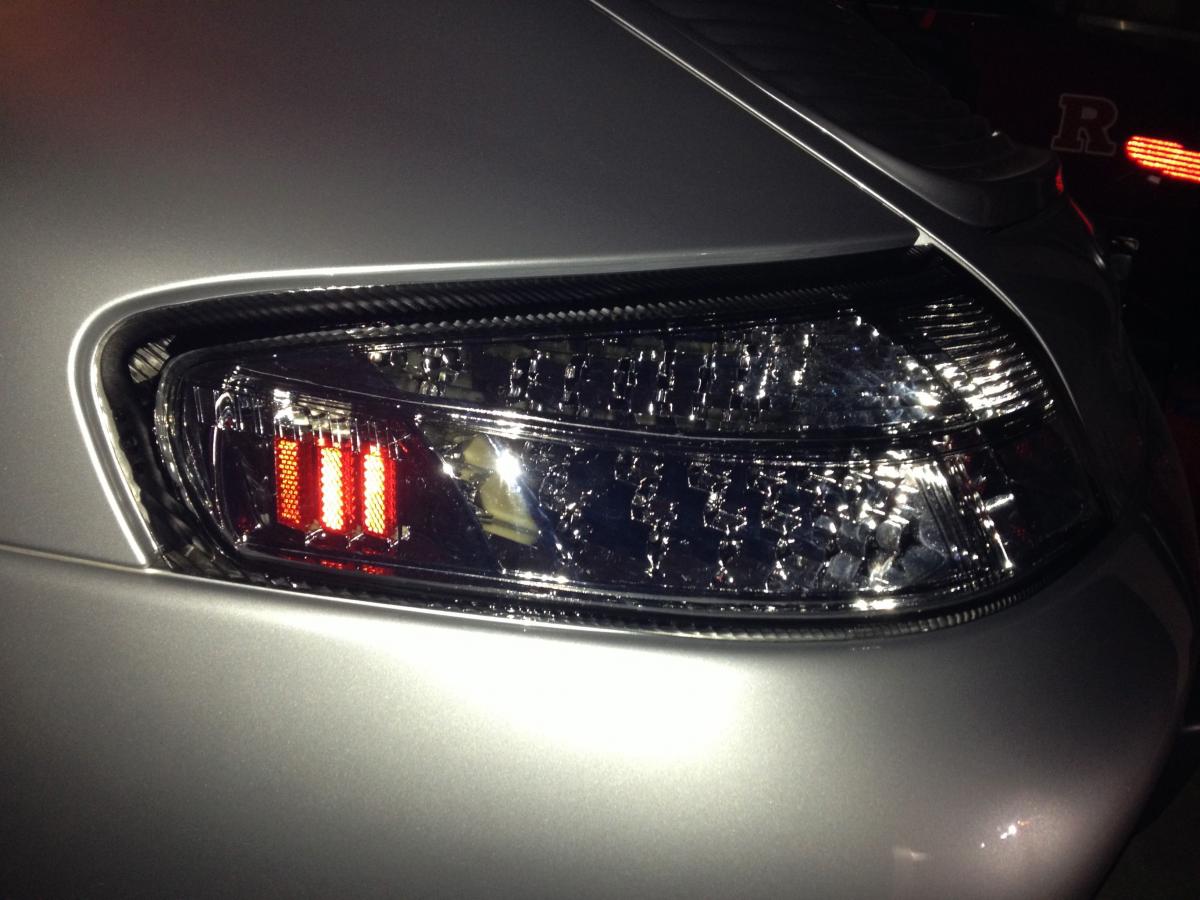
I just completed installation of the made in Taiwan smoke led tail lights on my MY01 C4, and I wanted to share some information I hadn't seen elsewhere. I have also attached some photos: (1) before; (2) half and half; (3) & (4) after; (5) connection diagram for new tail light housing; (6) transparency problem; (7) - (9) truck door edge guard solution.
With respect to the small side marker bulb wire that has caused some to blow fuses, I just lined up the red wires on the male and female ends and plugged them together (photo 5). No blown fuses, hyperflash or ABS/PSM warning lights.
I had not seen a good diagram of how to hook up the the lights on the new tail light housing, so I have labelled how I hooked them up in photo 5 (note: top of photo is bottom of tail light housing). In a nutshell: (1) small side marker bulb wires (far left) plug into the corresponding wiring harness connectors (as others have commented, this does not get plugged back into the socket); (2) double light led leads connect to black brake/tail light harness sockets; (3) single light led leads connect to orange turn signal harness sockets; (4) existing reverse light sockets and bulbs are connected to the lower (top of photo) clear chamber; and (5) fog light sockets are connected to the upper (bottom of photo) clear chamber (I used the amber turn signal bulb for the fog light on the driver's side so it would not be confused with a reverse light).
After installing the new tail light housings, I discovered a design flaw: unlike the stock lenses, the aftermarket lenses (at least the smoke ones) are transparent at the edge. As a result you can see the unfinished edge of rear quarter panel and the tail light connecting grommet through the lenses (photo 6). After my initial disappointment, I started to think about a solution since I really liked the lenses otherwise. Initially, I thought about using lens tint spray to darken the edges. Given the limited space to work for proper taping, the fact that the surface is grooved, and that this solution would be non-reversible, I decided to use a different approach.
Door edge molding to the rescue (photos 7-9). Applying black rubber door edge molding to the unfinished edge under the lenses provides a finished look and hides the transition from the body to the lenses. This was a relatively easy fix, and I am pleased with the result.
Overall, I really like the look and functionality of the new tail lights.


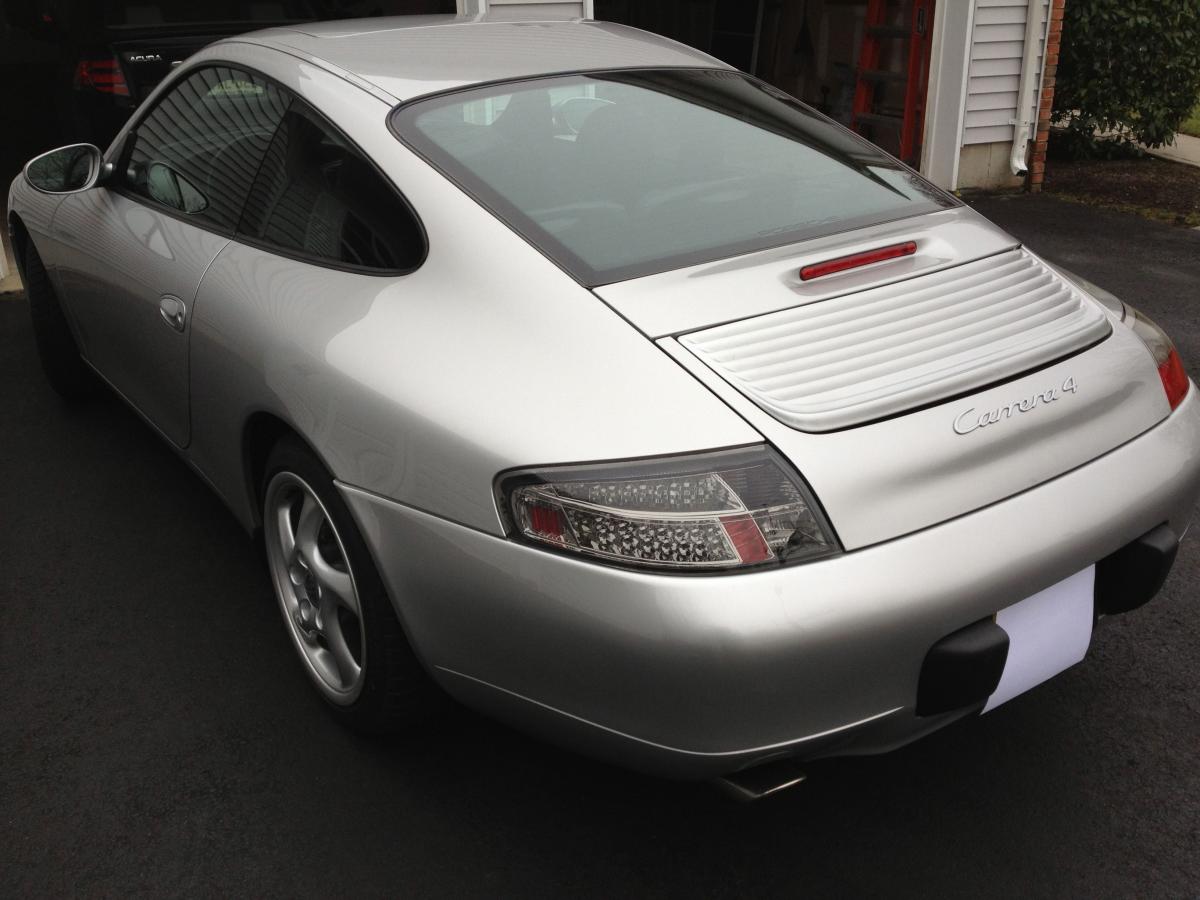

Buying a new 996 911!
in 996 Series (Carrera, Carrera 4, Carrera 4S, Targa)
Posted
Drive it first to see if you like it. I would suggest driving a few before making a final decision. There are lots of 996s out there. If you like the way it drives, get a PPI as recommended by Logray. The PPI will pay for itself in negotiating the final price.
If the seller won't agree to a PPI, walk away. Also, make sure the PPI includes overrev and cam displacement readings.
At 86K, you may need engine mounts, clutch, brakes/rotors, water pump, fluid changes, struts, spark plugs (it adds up quick). Factor all of that into your purchase price. A good PPI should let you know what needs fixin.
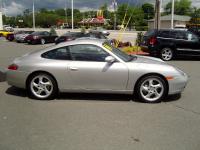
BTW, I have an '01 C4. Love it. Makes me smile every time I drive it.