Welcome to RennTech.org Community, Guest
There are many great features available to you once you register at RennTech.org
You are free to view posts here, but you must log in to reply to existing posts, or to start your own new topic. Like most online communities, there are costs involved to maintain a site like this - so we encourage our members to subscribe or donate. All subscriptions and donations go to the costs operating and maintaining this site. We prefer that guests take part in our community and we offer a lot in return to those willing to join our corner of the Porsche world. This site is 99 percent member supported (less than 1 percent comes from advertising) - so please consider an annual subscription or donation to keep this site running.
Here are some of the features available - once you subscribe RennTech.org
- View Classified Ads
- DIY Tutorials
- Porsche TSB Listings (limited)
- VIN Decoder
- Special Offers
- Paint Codes
- Registry
- Videos System
- View Reviews
- and get rid of this welcome message
It takes just a few minutes to register, and it's quality Porsche information at a low cost.
Contributing Members also get these additional benefits:
(you become a Contributing Member by subscribing or donating money to the operation of this site)
- No ads - advertisements are removed
- Access the Contributors Only Forum
- Contributing Members Only Downloads
- Send attachments with PMs
- All image/file storage limits are substantially increased for all Contributing Members
- Option Codes Lookup
- VIN Option Lookups (limited)


Natty
-
Posts
26 -
Joined
-
Last visited
Natty's Achievements
Member (1/1)
0
Reputation
-
I don't support paying exorbitant shipping fees so instead I went and paid exorbitant parts prices. Ordered from dealer for 1.50 each. 2 and 2 totalling 6 bucks plus tax. Oh well, I'll skip my Starbucks today
-
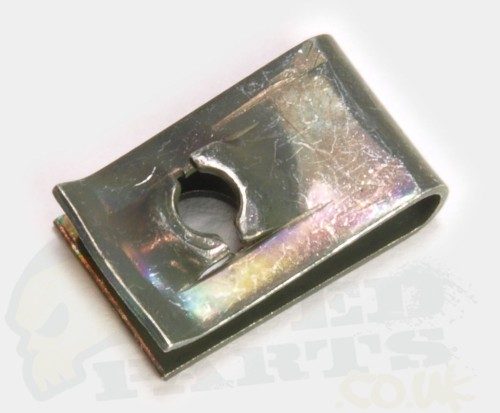
Very nice. Thank you. Too bad the shipping is almost 10 bucks for such small items. I might take a look at the parts store first. The speed nut is a pretty common item and the screw threads look to be in good shape
-
Been searching around and I'm surprised I can't find any info on this problem, because with an early Cayenne, if you've had it happen... I noticed the right sun visor clip was kind of loose then it just fell off the ceiling. When I tried to screw it back in, I couldn't get it tight because i the threads would slip. Looking at the left side, it had the same problem but hadn't fallen yet Upon closer inspection, it appears the female side on the ceiling is one of those body clips made out of thin metal with a single thread for the screw to grip onto (mind you, this holds up two visors and resist the force of pulling the visor out of the clip a million times) It's hard to tell how easy it is to get that clip out as it's buried in the headliner. My options: - try and dig that clip out and replace it with something similar, can't seem to find the part on a diagram (difficulty - ?) - see if a larger screw will work, unless the entrance side hole is too small (difficulty - what could go wrong?) - try and put a couple of rolled up steel wool 'toothpicks' in the hole and then see if that gives the screw grip (difficulty - easy, but will it work?) Anyone else run across this issue?

-
Nice write-up! This thread fills in some missing gaps regarding this specific application. BTW, the bulbs I got do not exhibit the "after-glow" effect.
-
So I measured the temp as best I could and here are the highest readings I could come up with. Held the instrument close to, and aimed near the socket/base of each bulb with all others turned off: LED: 140 f Incandescent: 200 f So while there is still some heat, it's quite a bit less. I have a digital multimeter. How do I do run that test?
-
Update: The bulbs fit perfectly! Love the nice white light, especially compared to the one incandescent bulb I have left to replace (I only bought one set of two in case they didn't fit). Makes me want to do the whole car but I'm a little leery due to the battery drain issue mentioned above. At any rate, I ordered one more set to replace the remaining bulb in the overhead console. As to heat, there is some present at the top of the LED bulb where the resistors are---the worst place, of course, if you're trying to eliminate the melting problem. I was able to touch the area but I can't hold my finger on it indefinitely---too hot. If I can find my infrared thermometer, maybe I'll try to get some readings for comparison. Will update if I get any more info.
-
Will be sure to update when I get them. (Heh--it'll be a while as they come from China.) The bulb you linked to is pretty dim. The one I'm getting also has the same "canbus" error this-and-that technology. Don't know how/if that relates to any of the issues being brought up. From the listing: "Built-In Canbus Load Resistors to Avoid Error Codes on European Vehicles "
-
Veeery interesting. Haven't seen this issue mentioned elsewhere. I started a thread about the interior light LED in order to avoid the switch melting again. http://www.renntech.org/forums/topic/43897-need-led-info-for-main-interior-lights-only/?p=236072
-
Thanks for the info. Did you look at the one I linked to? It doesn't show the lumens but it has 8 LEDs---only one less than the ones you tried. Oktay had their battery drained by LED's. Haven't seen this problem mentioned anywhere else in my search for LED info. http://www.renntech.org/forums/topic/42695-interior-light-switch-failure-plus-sunglass-holder/?p=236092 I would take a slightly dimmer light to be able to use LEDs because when the switch melts again, the lumens become 0. I went ahead and bought a pair of the ones in my first post. Will report back when I get them.
-
Getting a headache from trying to find this info. I just fixed the common, melting switch problem in the main interior light console. Since LEDs burn much cooler, in order to keep this from happening again, I'd like to just replace the main interior light, and possibly the map lights as well. I don't really want to go through the trouble or expense of replacing every bulb with LED so I don't need the kit. Does anyone know what LED light to buy for the front, upper center console light? Is this the right one? http://www.ebay.com/itm/120985112262?ru=http%3A%2F%2Fwww.ebay.com%2Fsch%2Fi.html%3F_from%3DR40%26_sacat%3D0%26_nkw%3D120985112262%26_rdc%3D1 Thanks! 04 Cayenne S
-
So I FINALLY got this project completed. It was the last on a list of annoyances. As to the sunglass holder: Once I got the assembly removed, it seemed to be functioning OK...of course. But I already had the frame and latch assemblies on hand so I went ahead and changed those parts out. The only thing that was a little tricky was getting the sunglass holder springs back in place. They have kind of a weird bend on the end which made them tough to get inserted into position. Everything operates good now. My observation: I don't think I needed the frame assembly for this problem because the only way it interacts with the latching mechanism is to accept the two tiny screws which hold the latch in place. I'm not sure whether the latch needed to be replaced or not because it seemed to be working after I removed the console. Oh well...works now. As to the light switch: After replacing the frame, all of the buttons and the switch mechanism, I put the console back in place and the same problem persisted. Aaaaggghhh! Next I ordered the chassis which the switch mechanism slides in. After replacing that part, everything works great! My observation: After taking a closer look at all of the removed parts, I found that there was some melting in the switch chassis---the only part I really needed and the last part I replaced, of course. The plastic had raised a little bit around one of the metal terminals so it was holding the switch contact a little high, breaking contact. What I think would have worked, without buying any new parts, would have been to file or sand down the little high blobs that were holding the contact away. Not too hard of a job but definitely a design flaw. Oh, one more thing, be careful with the screws, I broke one. They are a little resistant when threading them fresh into untapped holes.
-
No hold-down for spare
Natty replied to Natty's topic in 9PA, 9PA1 (Cayenne, Cayenne S, Cayenne Turbo, Cayenne Turbo S)
Thanks for updating your tutorial pictures. Makes the job crystal clear. -
No hold-down for spare
Natty replied to Natty's topic in 9PA, 9PA1 (Cayenne, Cayenne S, Cayenne Turbo, Cayenne Turbo S)
Update: For anyone else who might think there's not enough room to get the blind rivet nut inserted---there is enough room. Once I took the sub-woofer out it provided better access. Only problem is, the nut does not fit very snug so it's liable to fall out or be pushed out when trying to thread the rod into it. Since it's not frequently accessed I didn't worry about it but in the future I might figure out some way to retain the nut in there. Probably just mark it on the side with a punch or something. -
No hold-down for spare
Natty replied to Natty's topic in 9PA, 9PA1 (Cayenne, Cayenne S, Cayenne Turbo, Cayenne Turbo S)
I appreciate you posting that odix but I must be doing something wrong because when I download or expand the thumbnail images, they're too small to read the print. I'm good with computers but I can't figure it out. One thing I did notice right away is that on mine, the bracket where the blind rivet nut goes is totally different. There's not enough room to get underneath it plus it's buried in the sub housing. See my pic above. I'm going to take the sub housing off to get a better look. Gonna be a few days though. -
No hold-down for spare
Natty replied to Natty's topic in 9PA, 9PA1 (Cayenne, Cayenne S, Cayenne Turbo, Cayenne Turbo S)
Awesome, thanks. The stuff is in the mail now. Will update when I get it installed.