Welcome to RennTech.org Community, Guest
There are many great features available to you once you register at RennTech.org
You are free to view posts here, but you must log in to reply to existing posts, or to start your own new topic. Like most online communities, there are costs involved to maintain a site like this - so we encourage our members to subscribe or donate. All subscriptions and donations go to the costs operating and maintaining this site. We prefer that guests take part in our community and we offer a lot in return to those willing to join our corner of the Porsche world. This site is 99 percent member supported (less than 1 percent comes from advertising) - so please consider an annual subscription or donation to keep this site running.
Here are some of the features available - once you subscribe RennTech.org
- View Classified Ads
- DIY Tutorials
- Porsche TSB Listings (limited)
- VIN Decoder
- Special Offers
- Paint Codes
- Registry
- Videos System
- View Reviews
- and get rid of this welcome message
It takes just a few minutes to register, and it's quality Porsche information at a low cost.
Contributing Members also get these additional benefits:
(you become a Contributing Member by subscribing or donating money to the operation of this site)
- No ads - advertisements are removed
- Access the Contributors Only Forum
- Contributing Members Only Downloads
- Send attachments with PMs
- All image/file storage limits are substantially increased for all Contributing Members
- Option Codes Lookup
- VIN Option Lookups (limited)

talkenrain
-
Posts
78 -
Joined
-
Last visited
Content Type
Profiles
Events
Forums
External Paint Colors
Downloads
Tutorials
Links Directory
Collections
Classifieds
Store
Everything posted by talkenrain
-
 Thanks, here are A few more pictures. A little delay today so moving the finish line to Saturday or maybe Monday. Going to get a few supplies (including longer saddle bolts)...
-
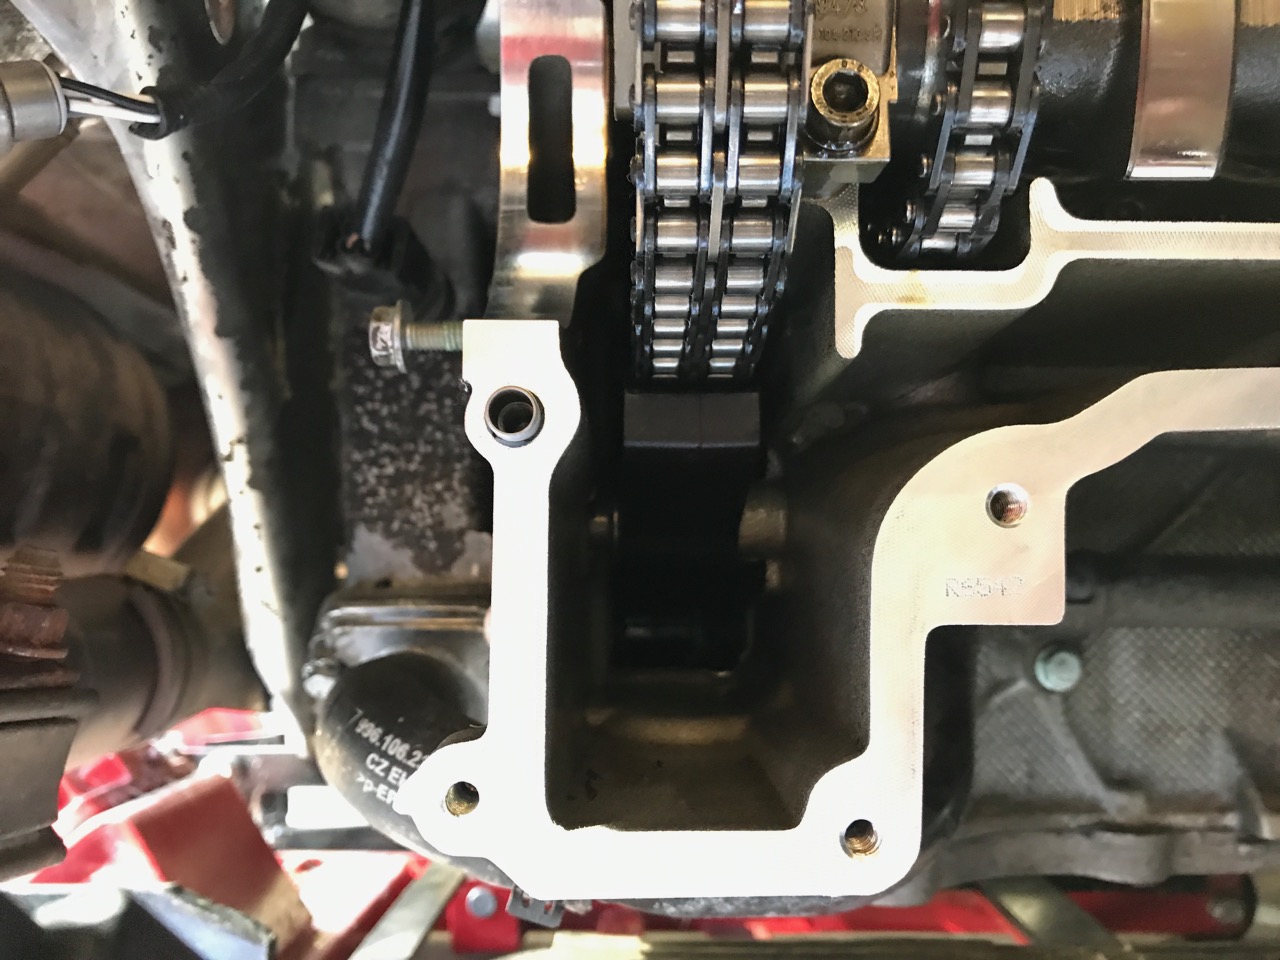
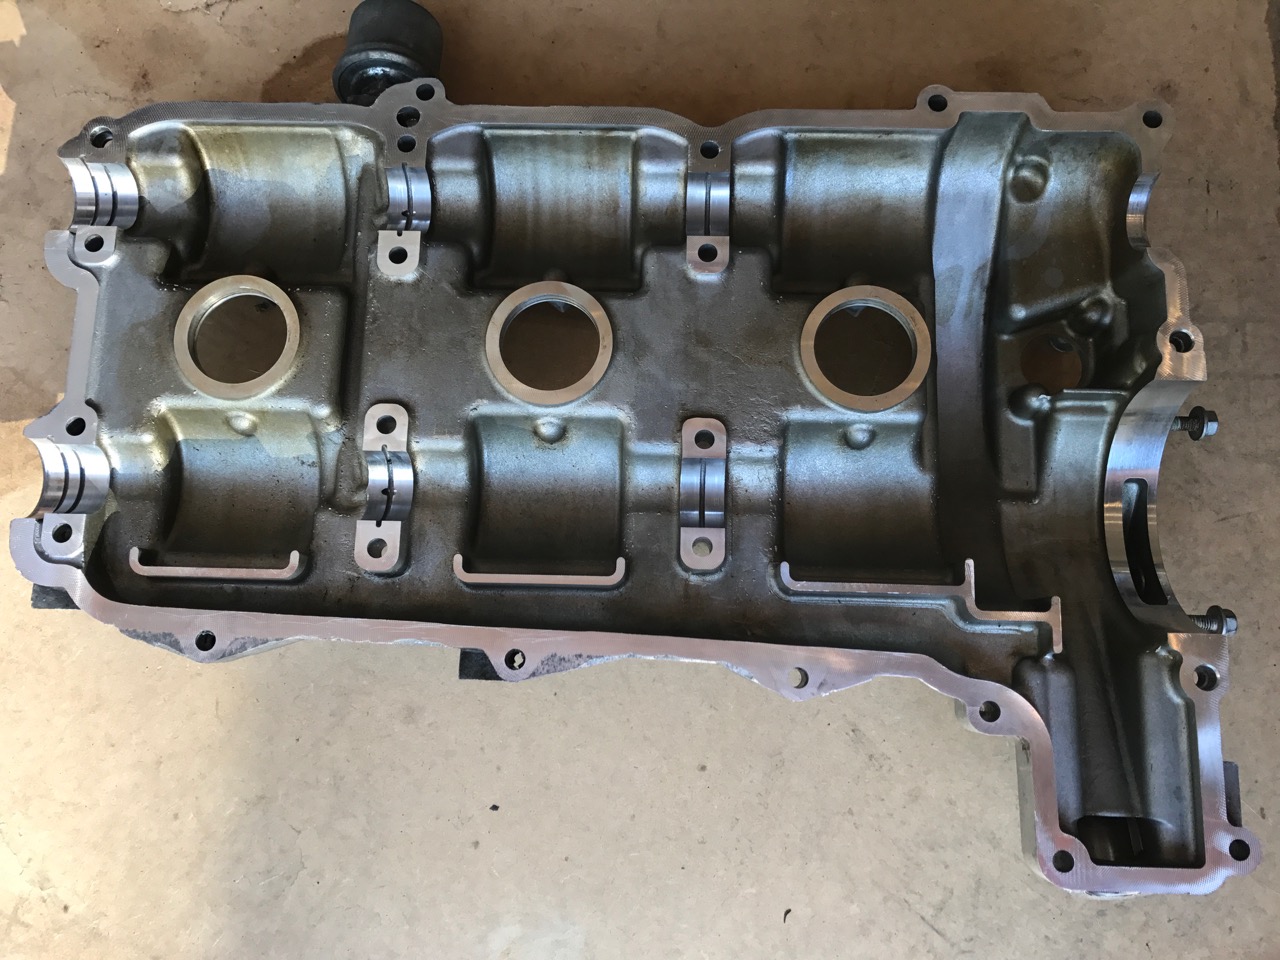
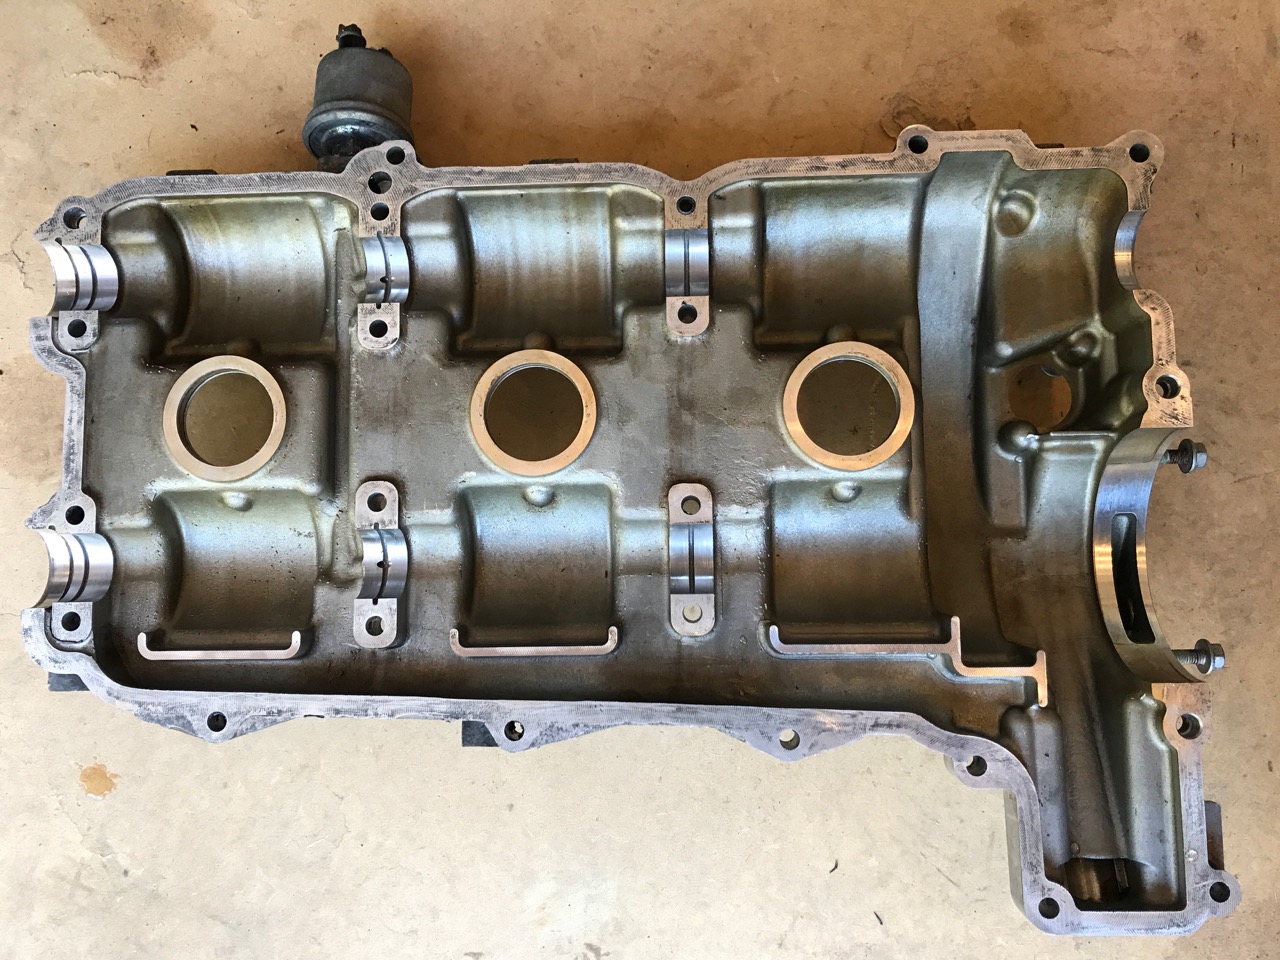
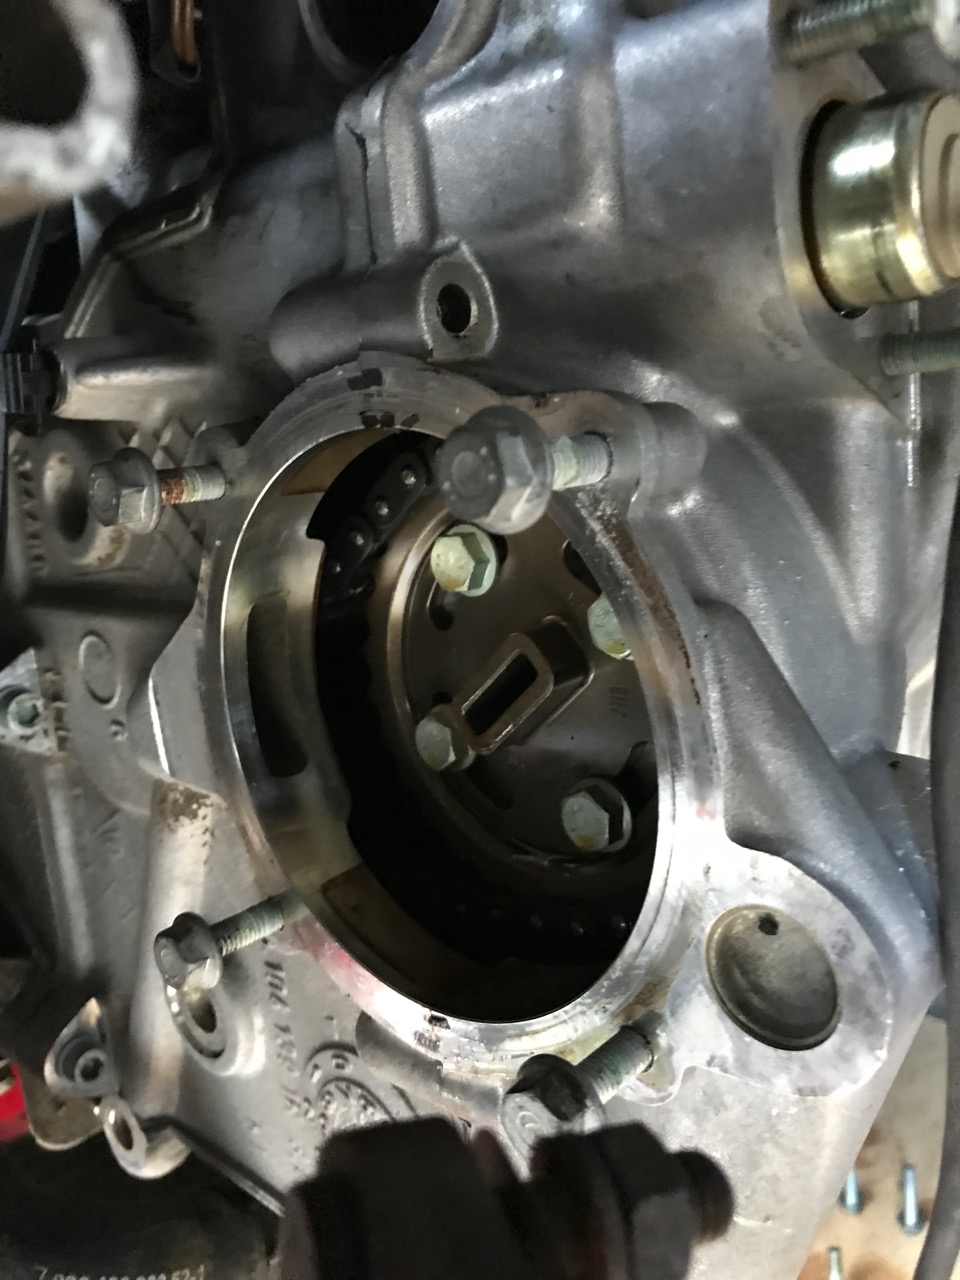
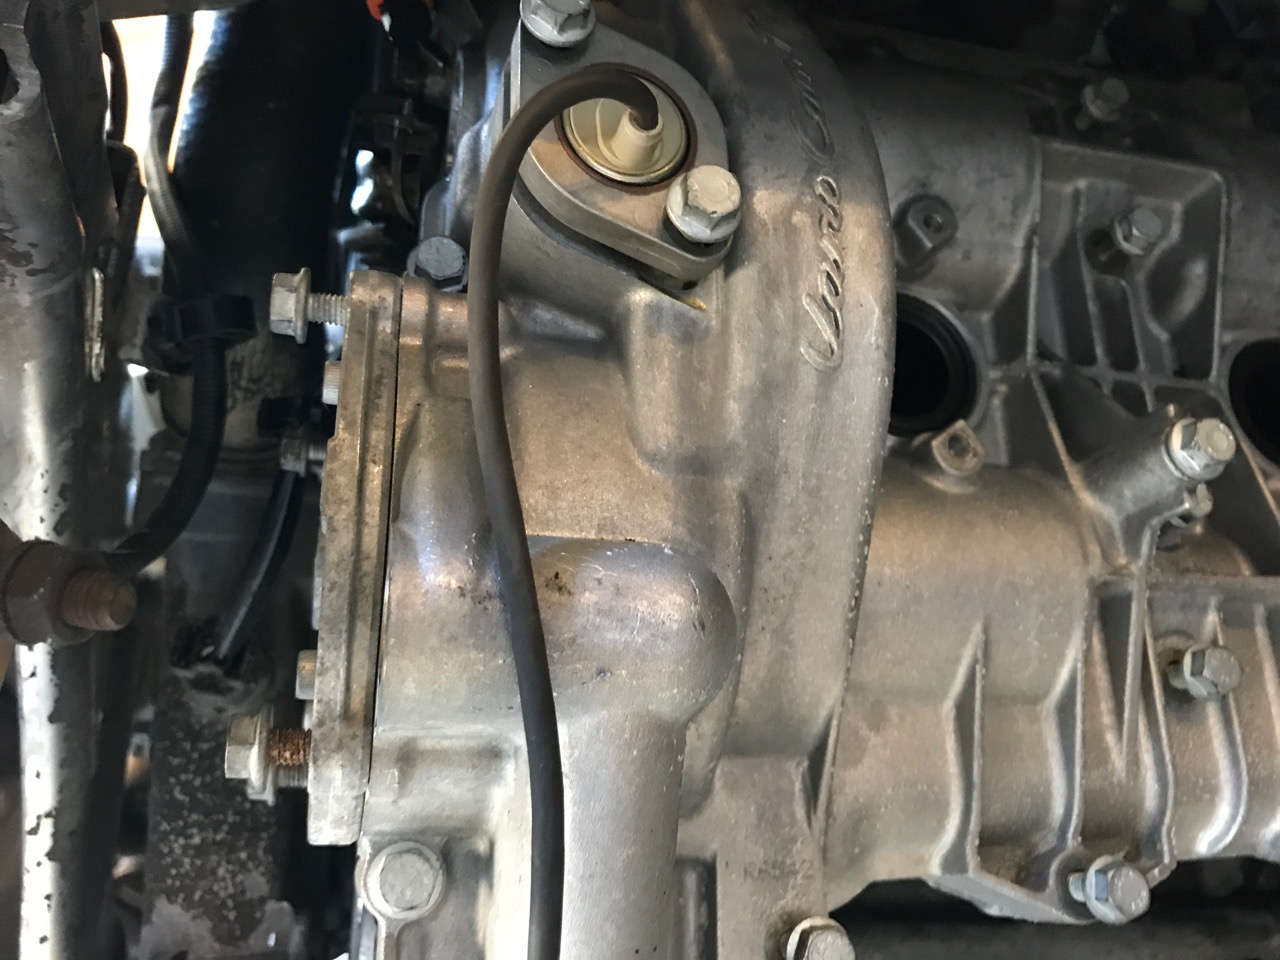
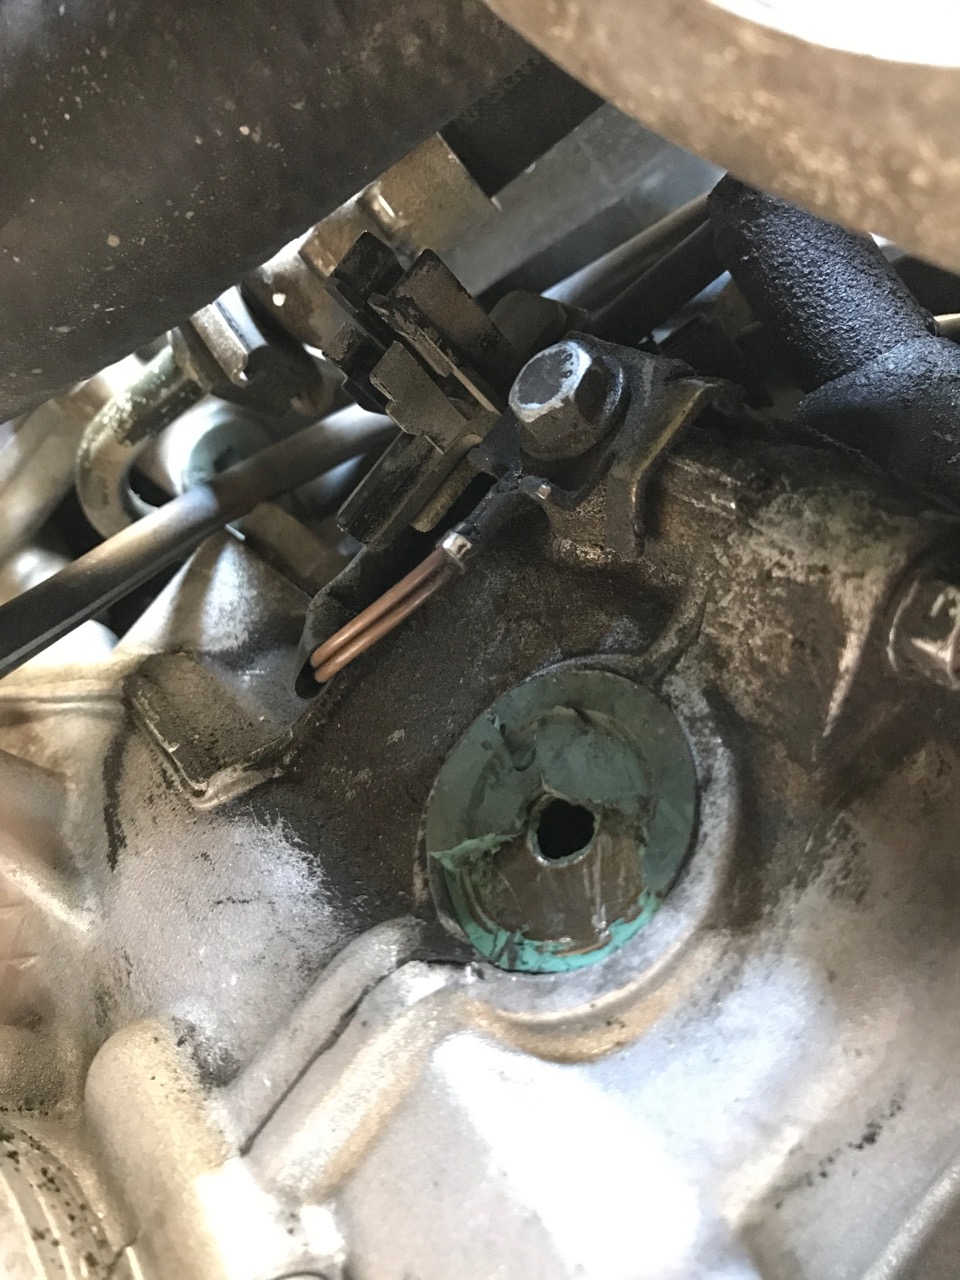
Todays update. Lots of cleaning and I think it's ready to go back together. I picked up an new o ring for the oil pump. Just doing final fitment before applying the glue... I hope the contact points look clean enough. I've used the gasket cleaner on both sides at least 5 times so there is absolutely no residue and I just now rubbed down all contact points with alcohol.
-
I found it. I'll be cleaning for a while...
-
Ok, Thanks again. As I've said, I'm a rookie at all this so I really appreciate all the help, patience and encouragement. I'm not sure I would have tried this without your support so thanks again "This forum is the best!!!" I'll see if I can find the gasket remover locally to speed up the process.
-
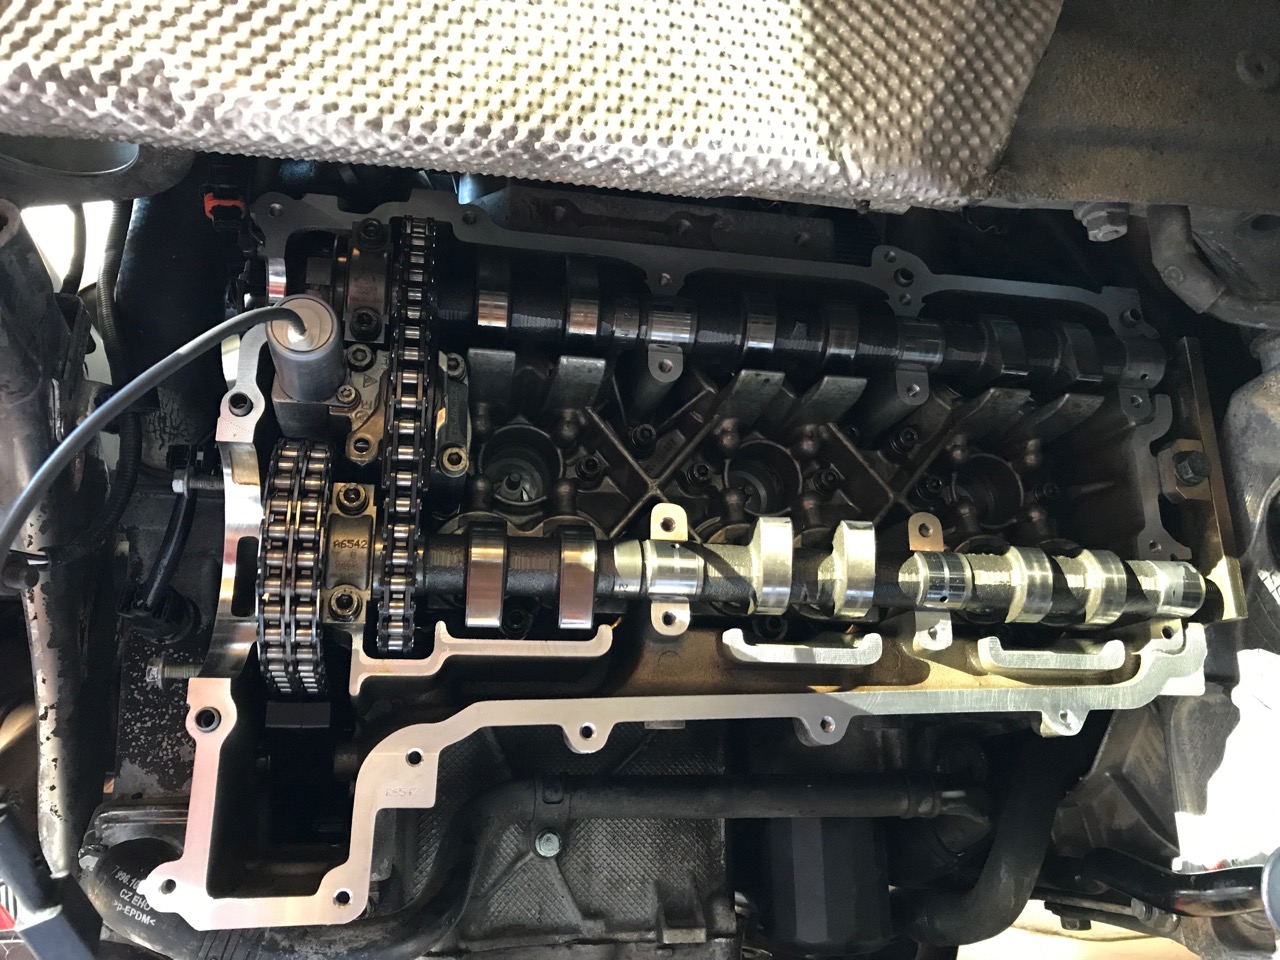
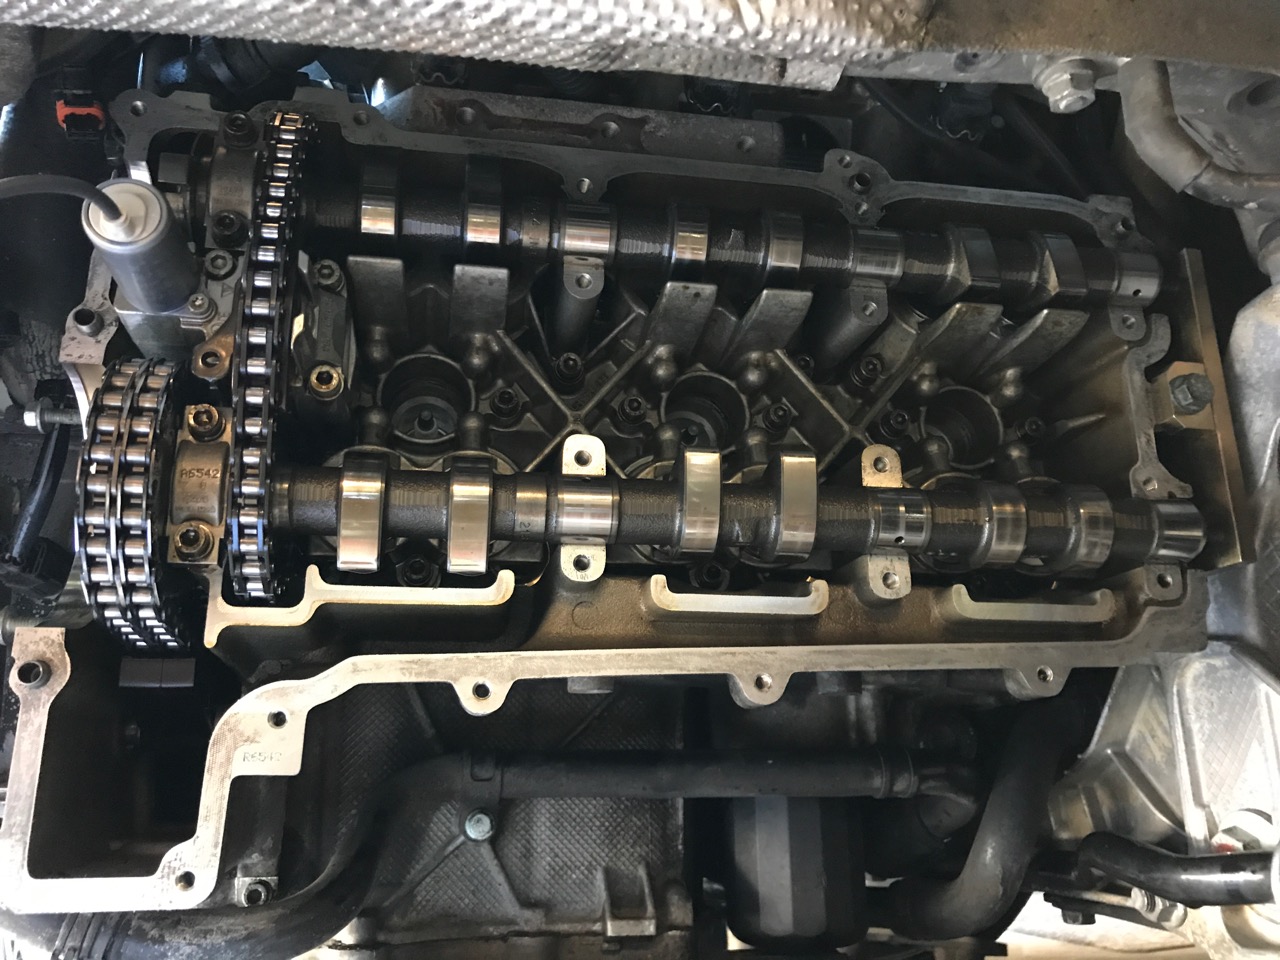
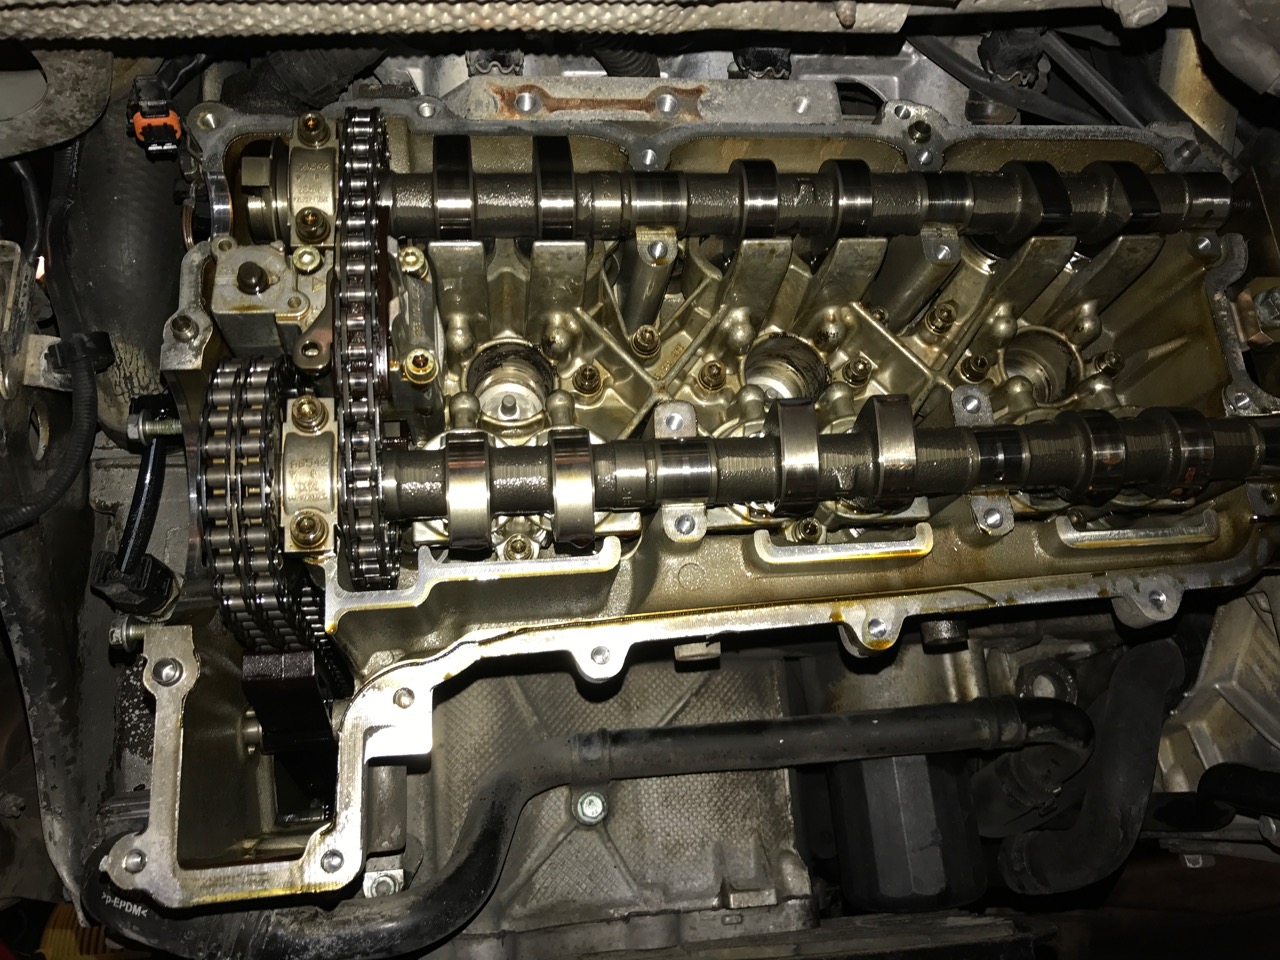
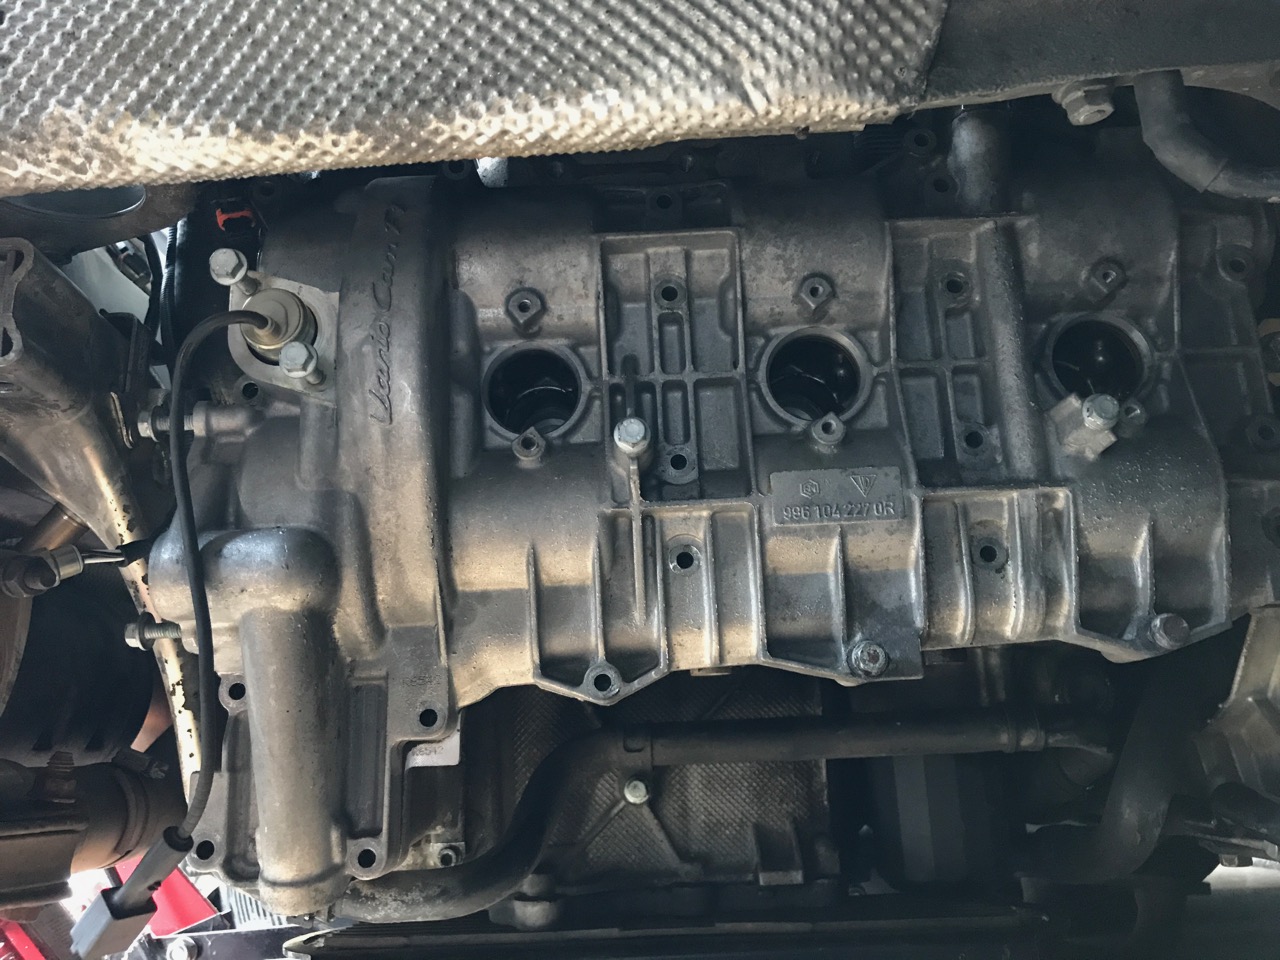
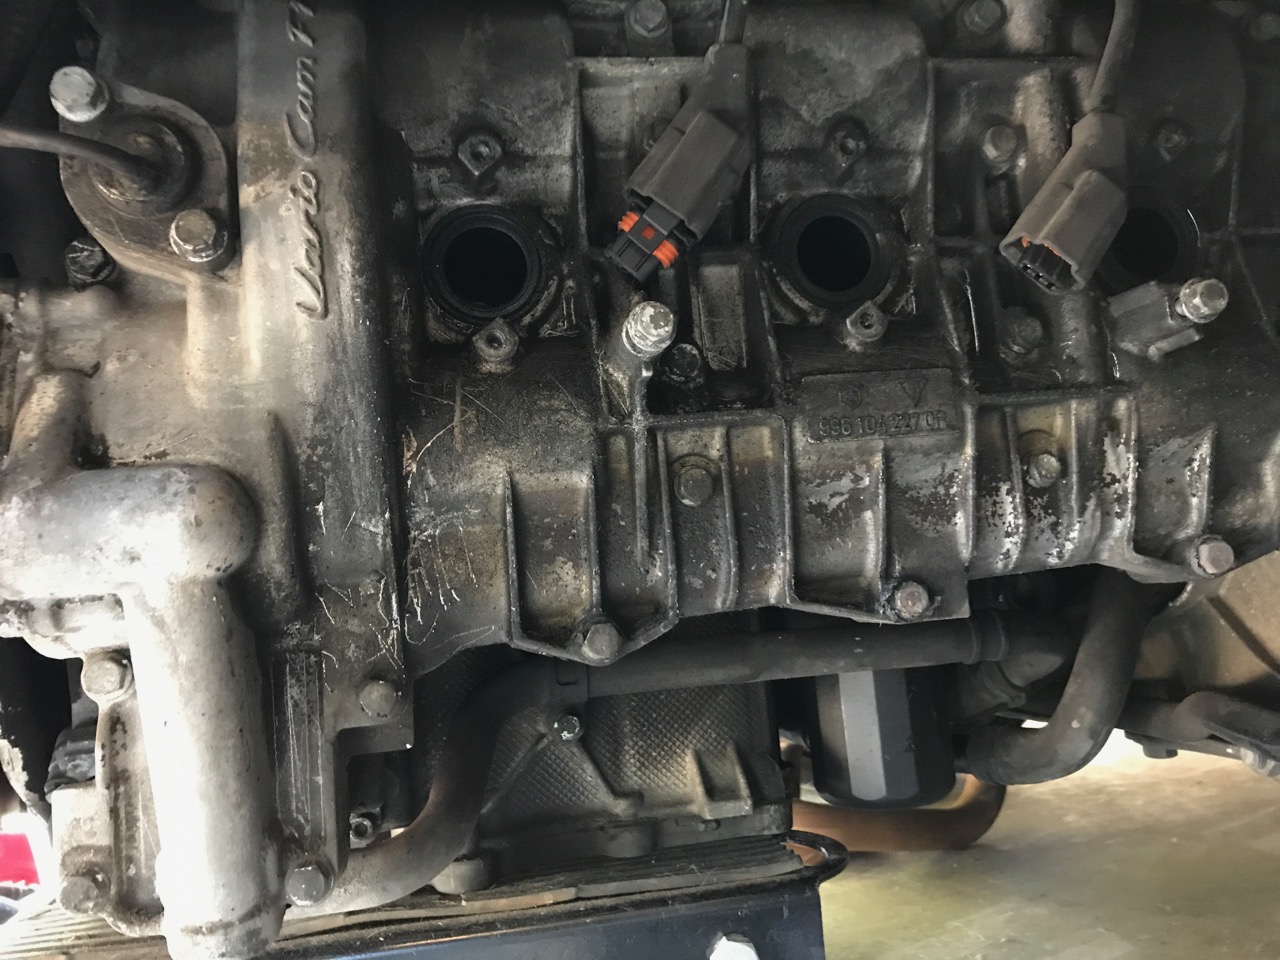
Thanks, So I don't need to clean with any kind of strong solvent (permatex gasket remover or acetone)? This morning I pulled the cover again and with my fingernail removed all excess glue as well as the entire cover. I then went over all the glued surfaces with alcohol to get any oils off (pictures are after cleaning surfaces with alcohol). I can still feel some residue, Should I remove with something stronger or am i wasting time trying to get it perfectly clean? I was wondering if I had the correct TDC. Looking at the picture, the intake is open on cylinder 5 and the exhaust is open on cylinder 6. The others don't appear to be making contact. I need to get a new scavenge pump o-ring then it's all going back together (today I hope). I still need to deal with those broken exhaust bolts - I sprayed with Kroil yesterday, again last night and again this morning. New motor mounts arrive tomorrow along with a serpentine belt and a few other maintains items, I hope to have it all back together and running Thursday, or Friday. Maybe the broken bolts will come out easy? I'll give it a try tomorrow. I don't want to do any banging around with the cam cover not secured so the broken bolts will have to wait...
-
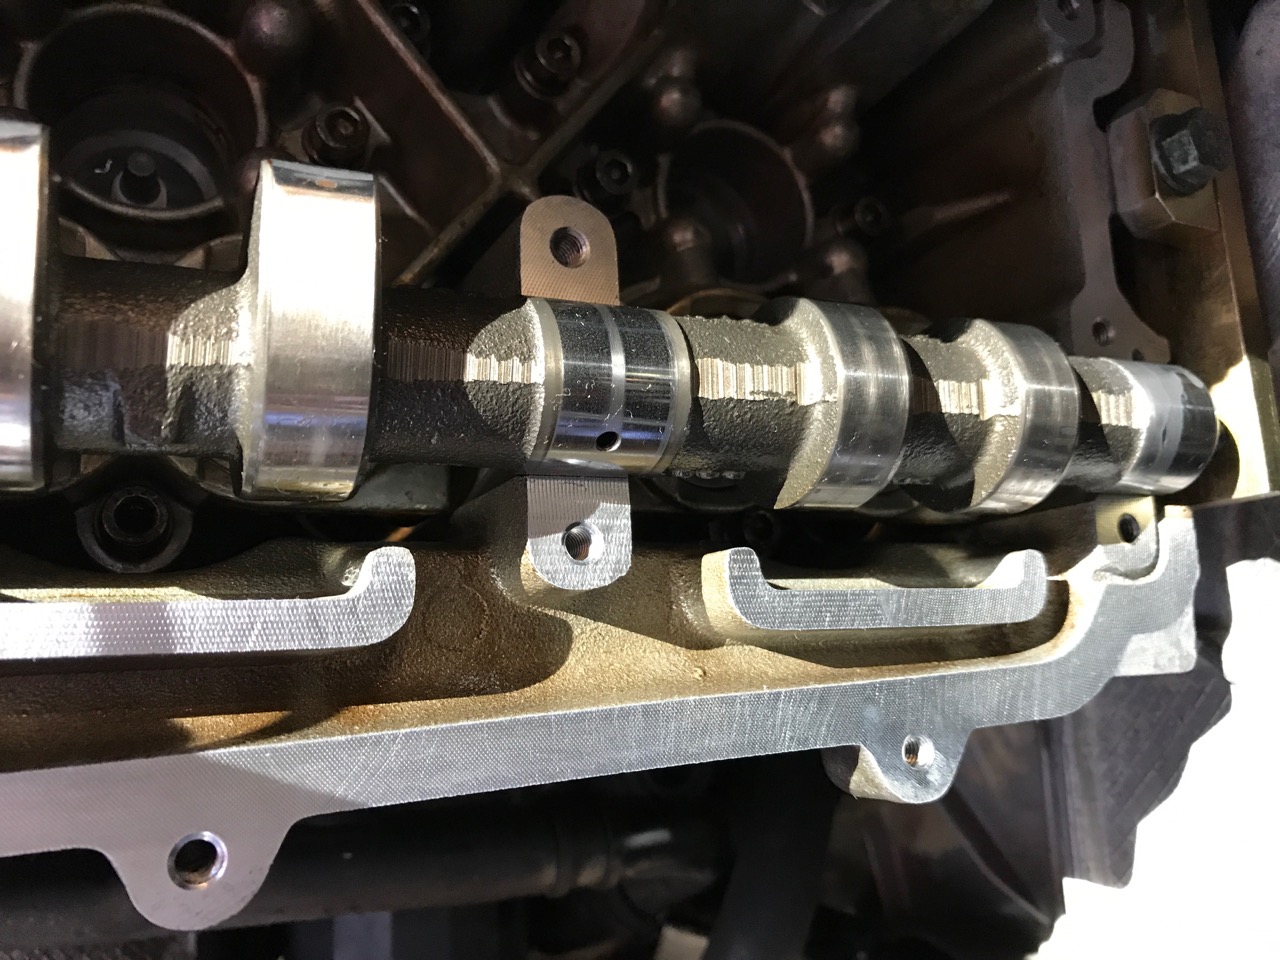
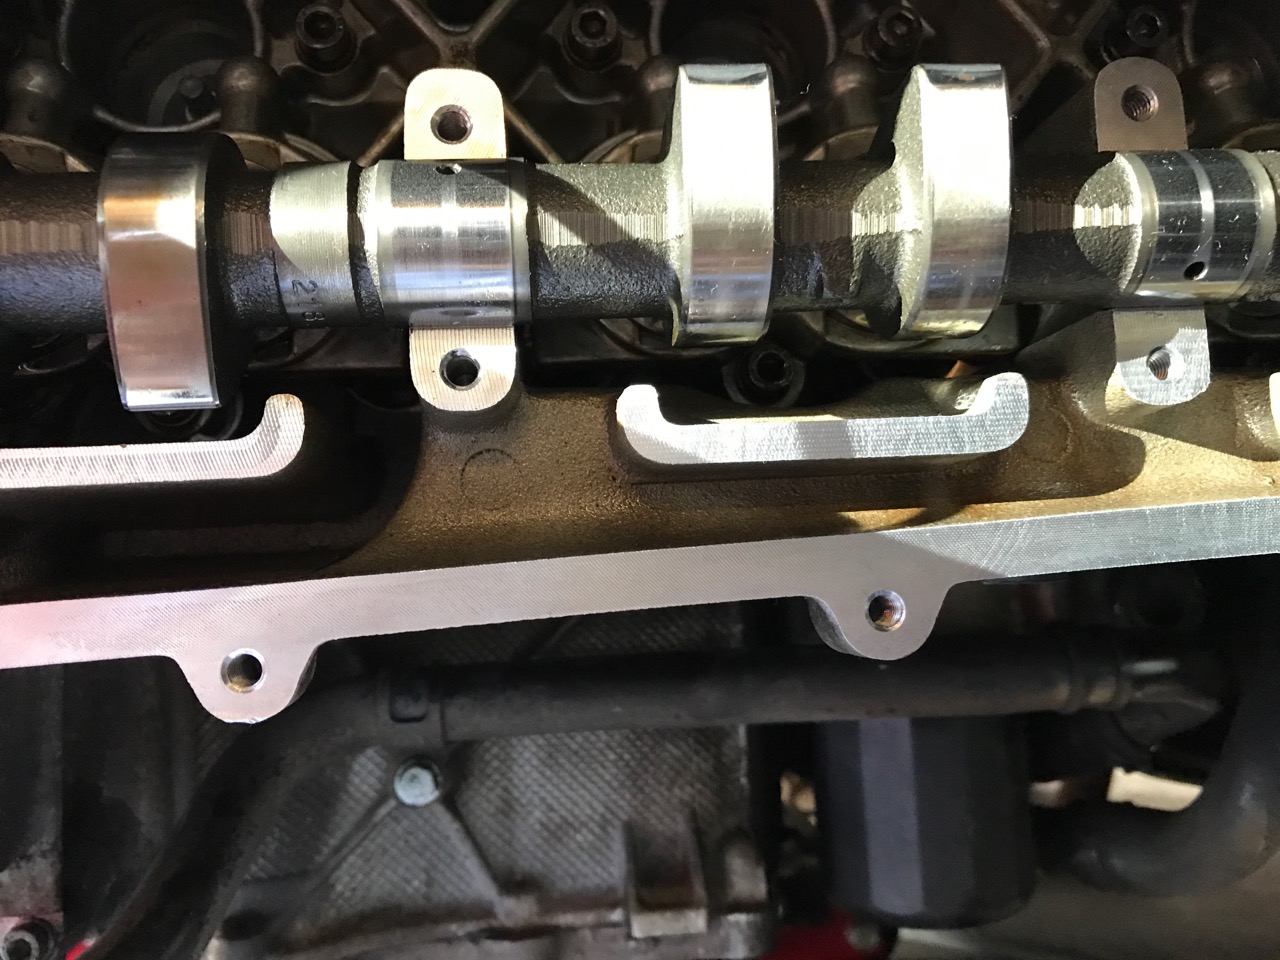
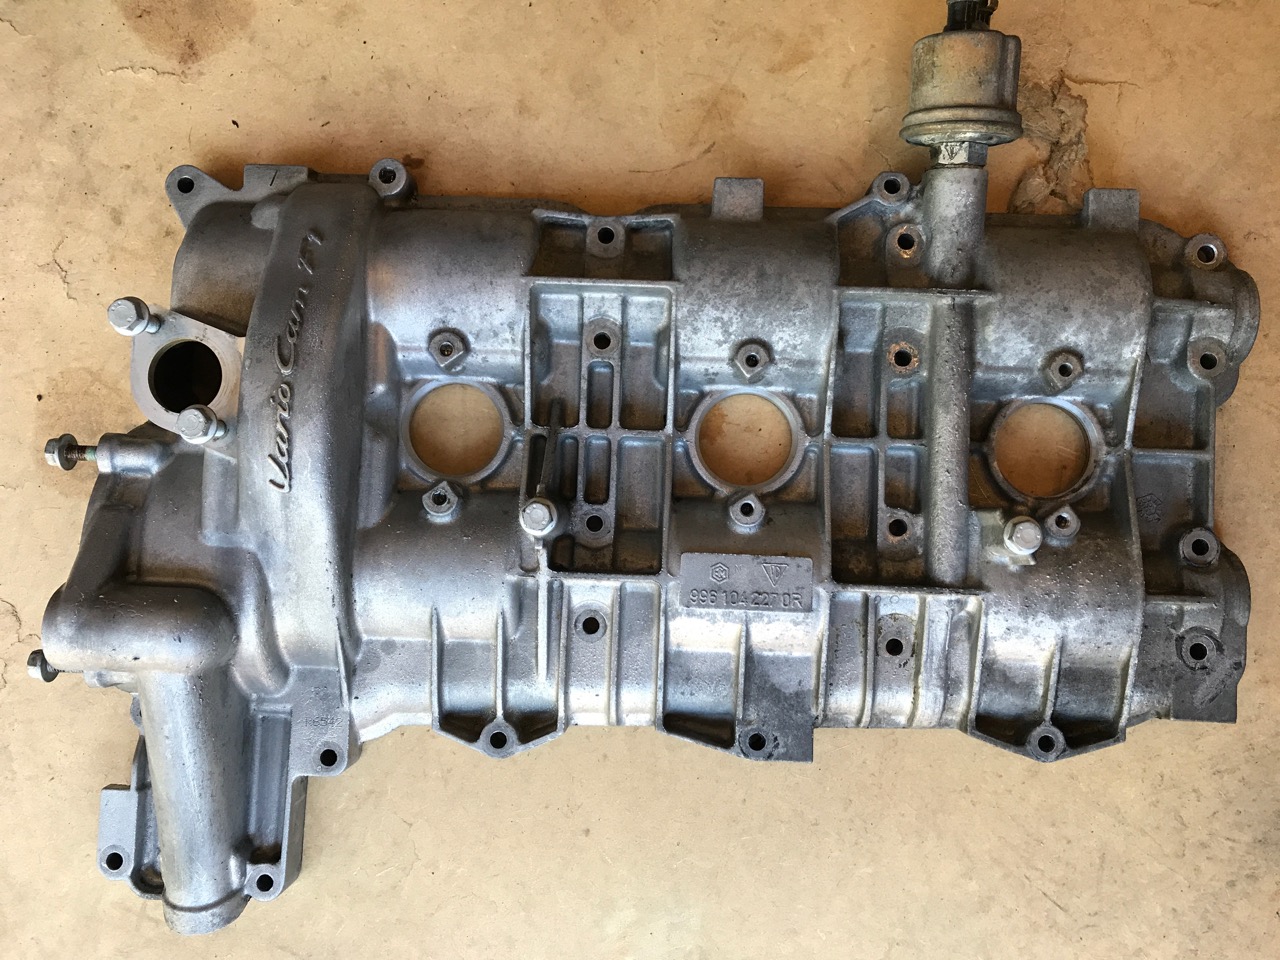
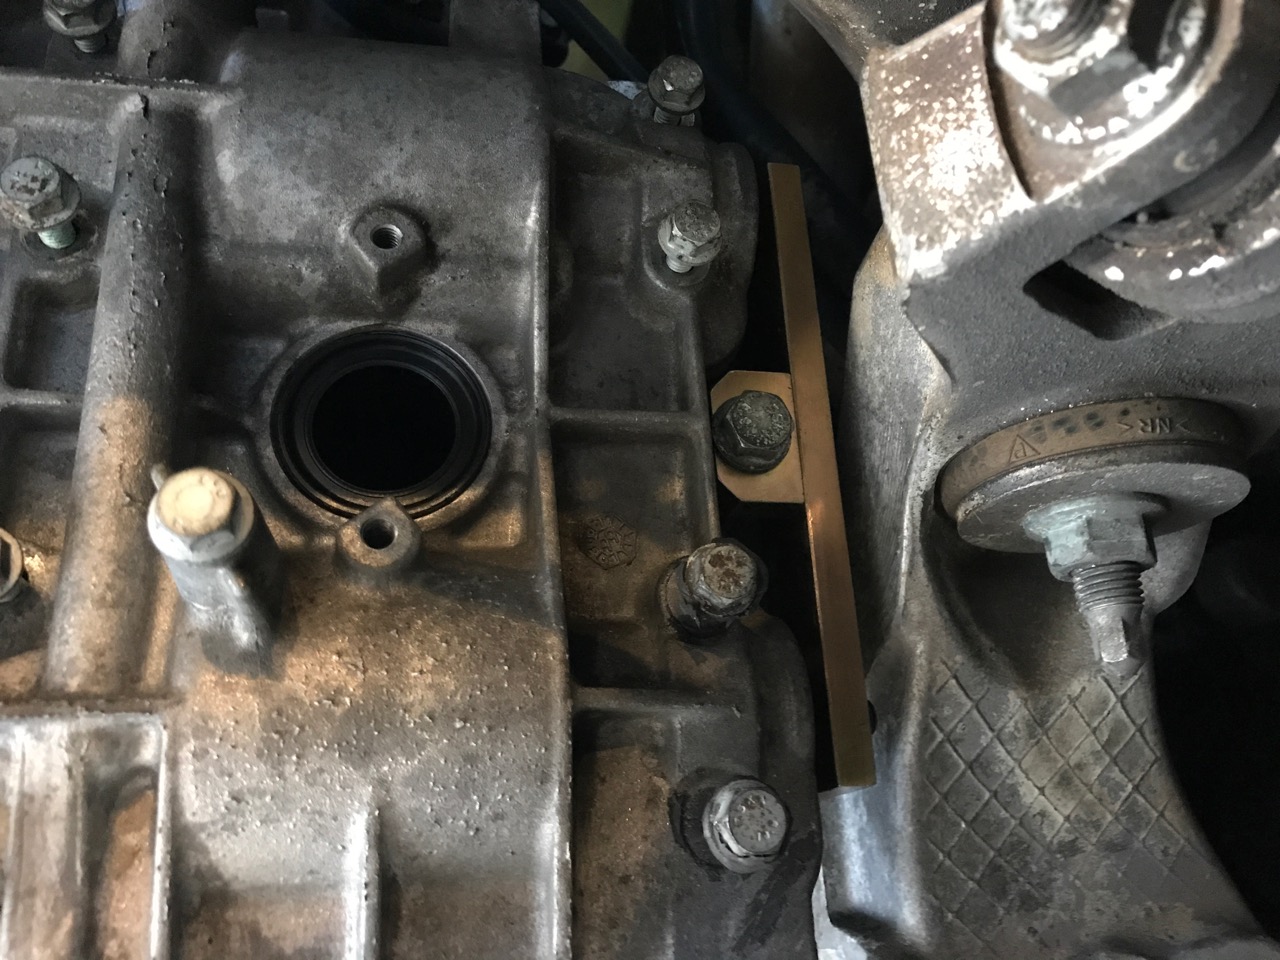
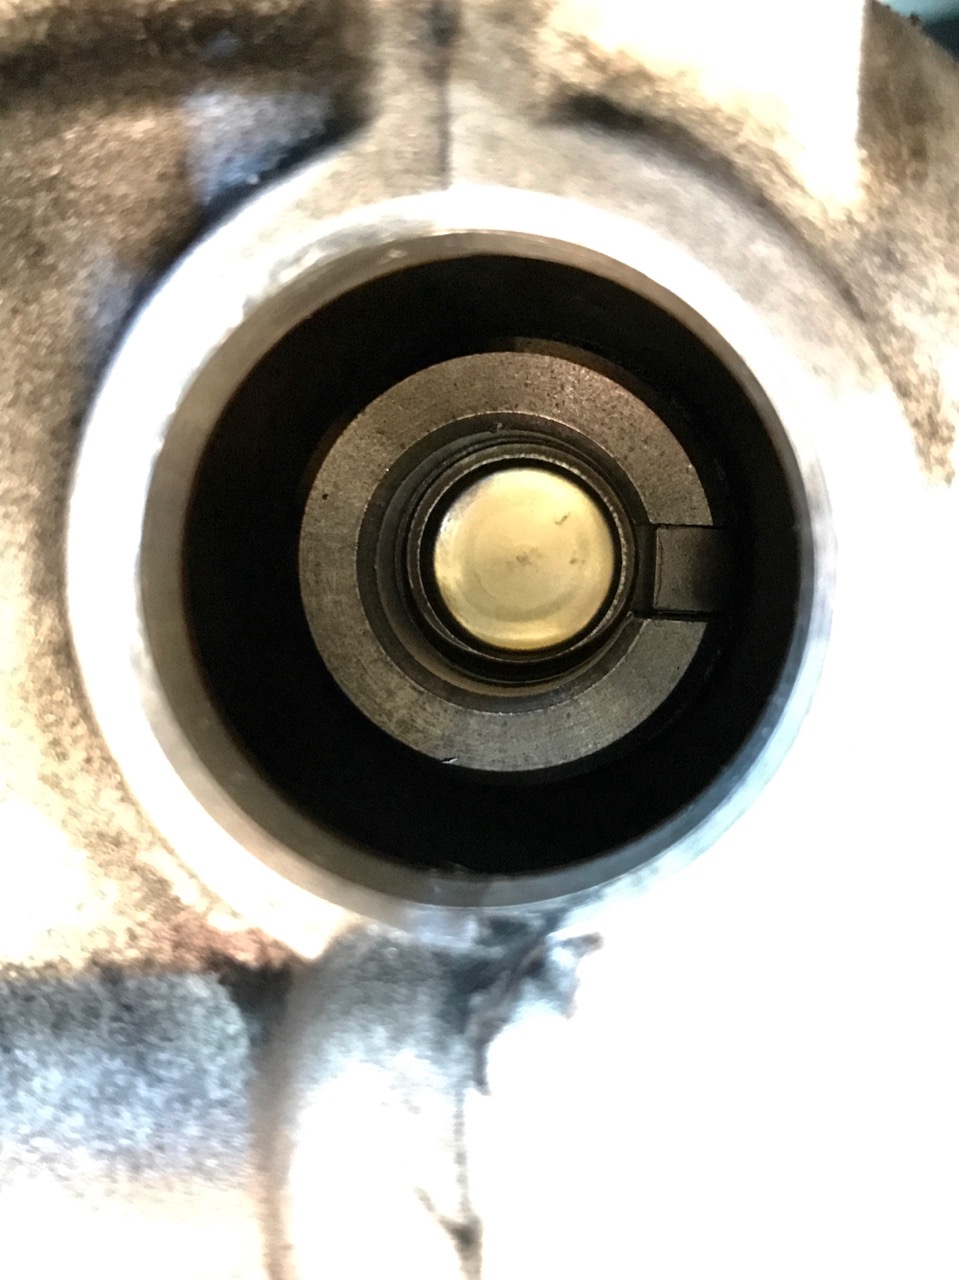
I can't see the position of the exhaust cam with the hold down tool in place but no matter because after my last entry I went back to the garage, I notice oil dripping from the cover. As I wiped I noticed the cover was already loose. no pry points needed, it was already loose. I carefully removed the cover without touching any internal components. I couldn't wait so I snapped a few pictures, removed the old solenoid snapped a few more pictures, and installed the new one (very easy). I first tried to attach the saddles, thats when I discovered the kit did not come with bolts long enough to reach the head and the normal bolts are too short. No matter as the solenoid was replaced in the amount of time it would have taken to attach the saddles. I replaced the cover just to keep things clean and in place. I was surprised how clean the contact surfaces are between the head and cover, almost as if there was no sealant used before. Is this normal? I expected a tuff pry job followed by a messy cleanup in preparation for reassembly but it's remarkably clean. My questions follow, 1) Now that the repair is done, how do I prep the head and cover for sealing (Remember, I'm a technologist, I've never done anything like this before so I need a step by step). I purchased a tube of Drei Bond Sealant. What is the correct way to clean the surface? prep and reattach? 2) Do you know the correct torque spec for the cover bolts? 3) How long should I wait before I can replace Oil?
-
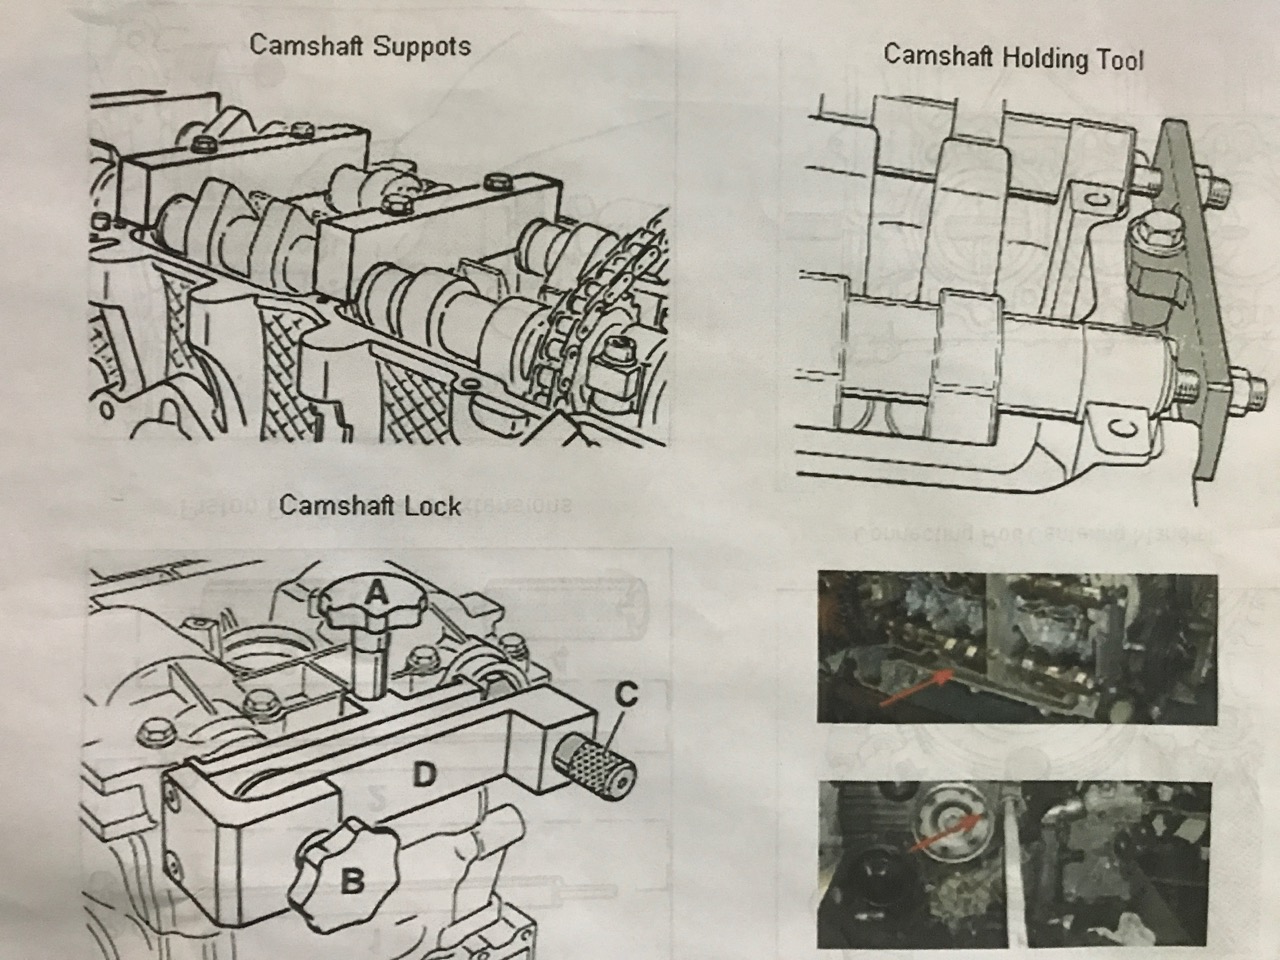
I'm done for today but i'm pretty sure I've removed all the bolts (last picture showed 2 still in the cover). My count is 23 bolts total (not counting the scavenge pump bolts). I'll check again in the morning to see if I've missed any. I will take care using the pry points, thanks. Can you provide a picture to illustrate the tensioner exact location and how to access it? Also, what tool is needed to remove it? Will I need to re-time the cams if nothing is moved? again, I'm only replacing the bank 2 VarioCam solenoid. Referring back to my latest pictures (from today). Besides the tensioner, is there anything else needed before removing the cover? Any lock or hold down for the cam at the front of the engine? Does the "cam hold down tool" at the rear of the engine look it's installed correctly? I just want to be sure before pulling the cover. Thanks everyone for all your help and advice.
-
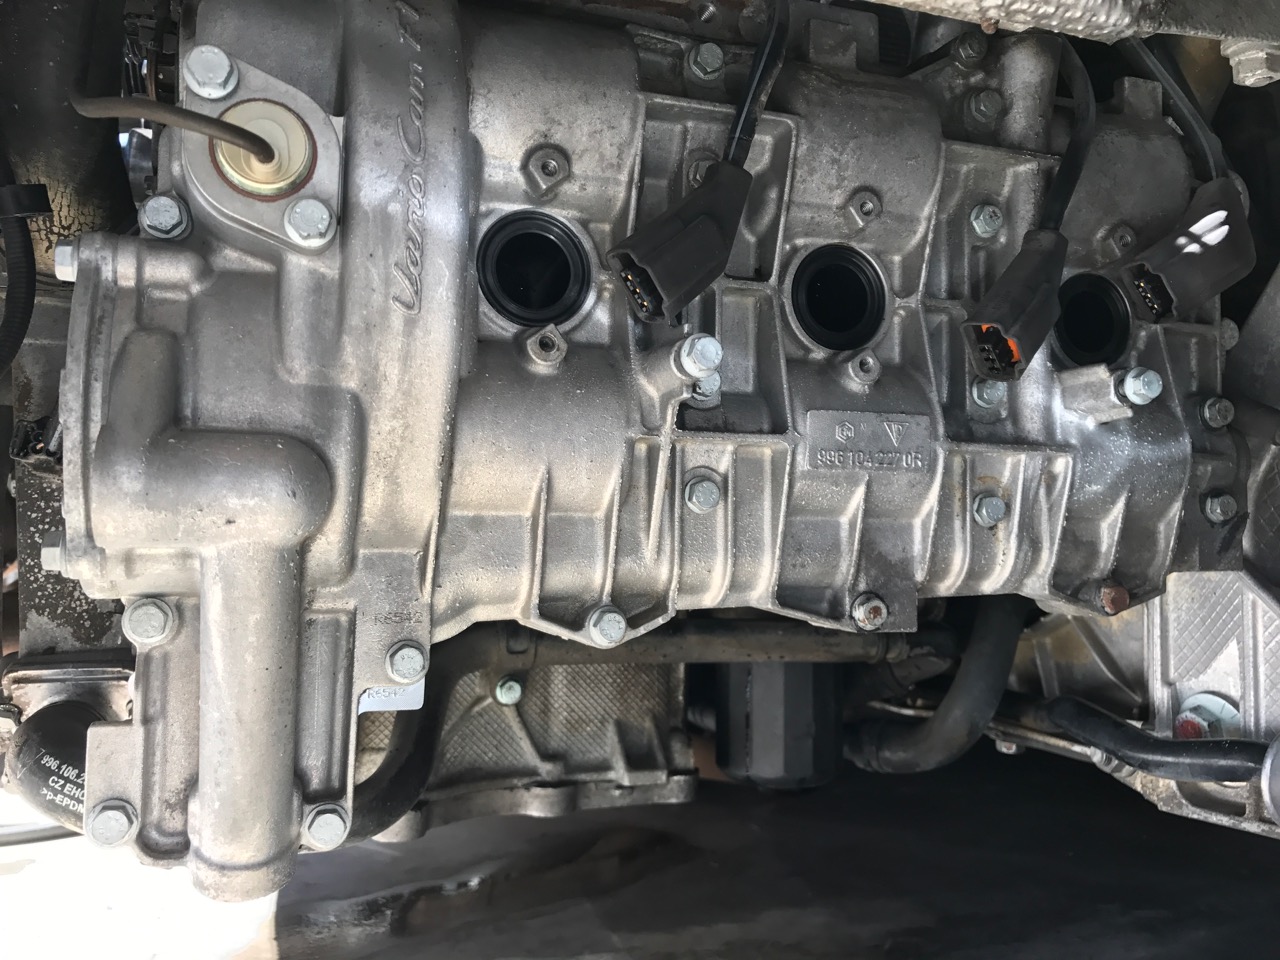
There is not a lot of room between the scavenge pump and chassis (assuming you adjust timing from the front of the engine)... What exactly does the timing tool look like? Is it in my kit? The spark plug tubes are now removed, as well as the scavenge pump and O-ring along with all the cam cover bolts. The oil pressure sensor is disconnected and the cap to the solenoid is removed. I think It's ready to come off... Here is where I'm going to sound stupid.... Going back to the tensioner. The link i've been reading talked about bank 1 cam tensioner needing to be removed but in this thread an IMS tensioner was mentioned? Now I'm confused. If I need to remove a tensioner, where exactly is it? and how do I remove it (what tool is needed)?
-
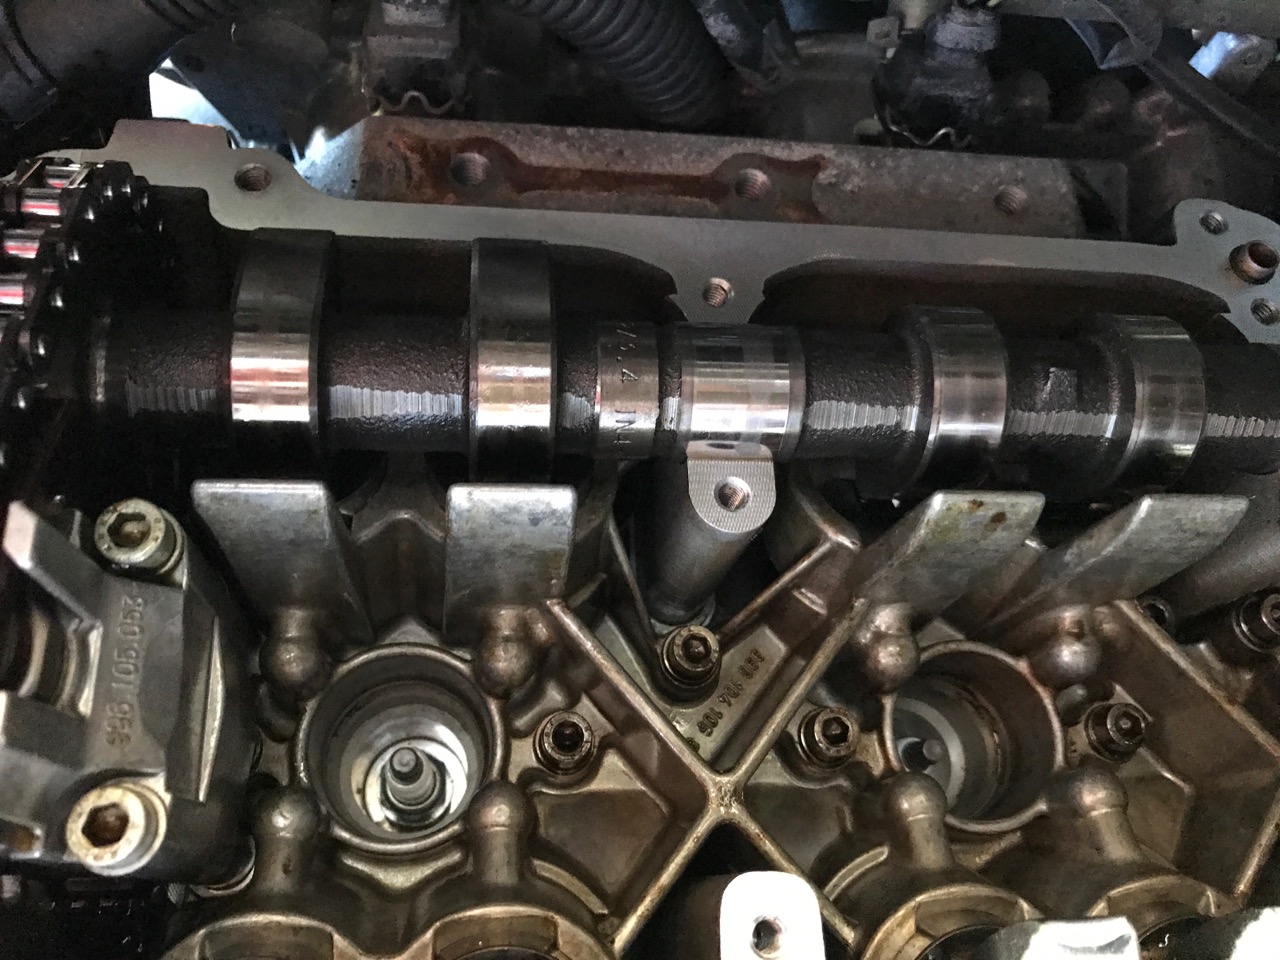
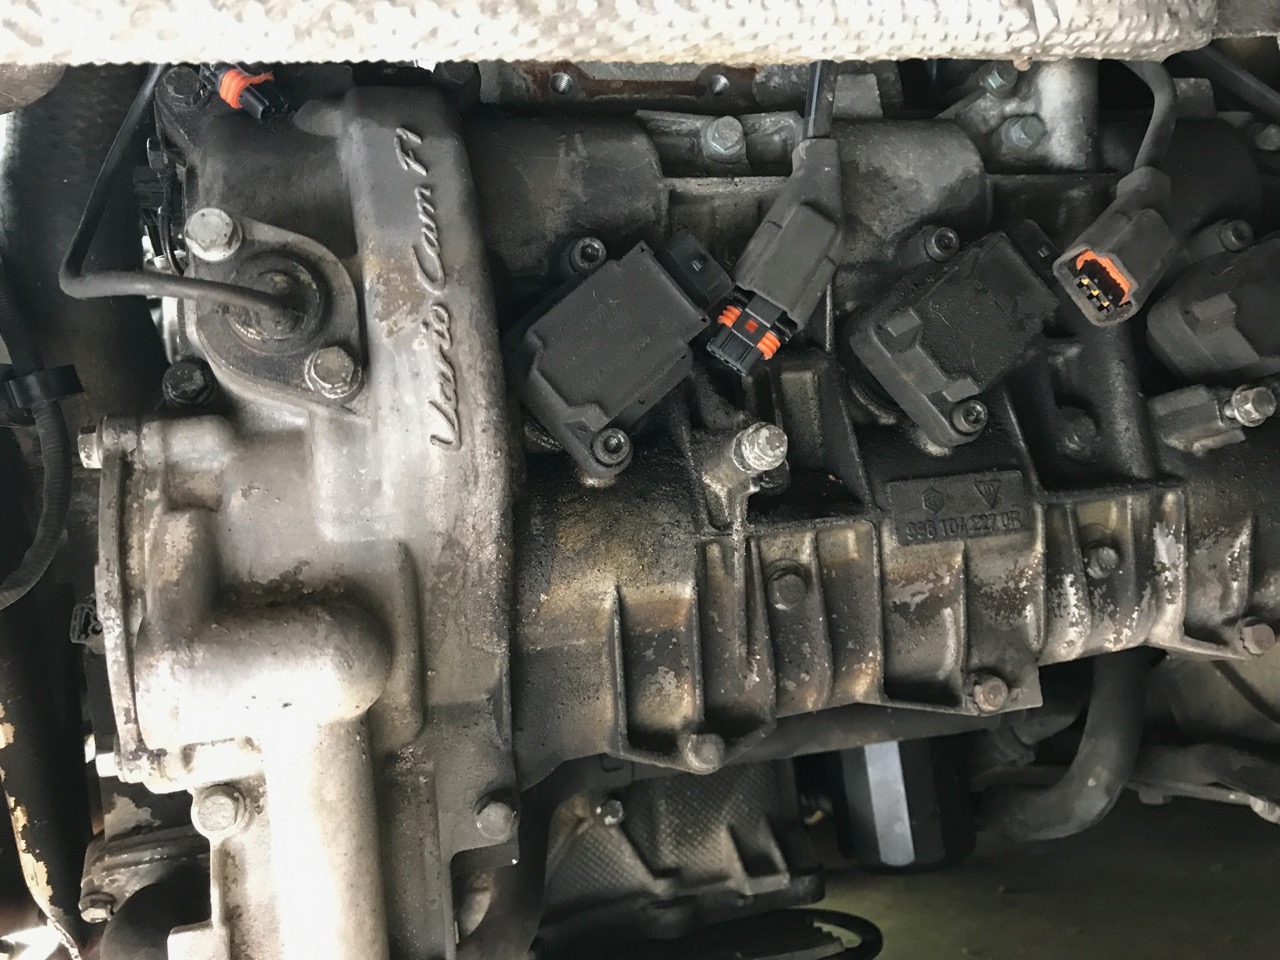
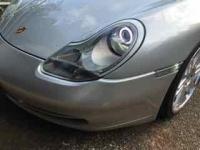
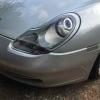
The title of this thread is somewhat misleading as the error message reported was bank 1 but it's incorrect. The problem is actually the bank 2 VarioCam solenoid. This is a 996 but I'm not sure that matters much. I just want to be sure I've got things in the correct position before I open the cover. I'm with you on the hour hand position, I just got concerned when you brought up a 2.45 position as mine was clearly at 3 or maybe even 3.15 position. So just to be clear, in every instance, I'm only talking about (and all my pictures have been of) bank 2. So is my cam in the correct position? Am I safe to proceed?
-
Ok, I will remove bank 2 tensioner before I proceeding. Please confirm my intake cam on bank 2 is in the correct position. It looks like mine is at the "3.00" or "3.15" position. Is this correct? What does this mean if it's off a bit? The only known issue with this engine is the bank 2 VarioCam solenoid that I'm trying to replace. There are no other issues.
-
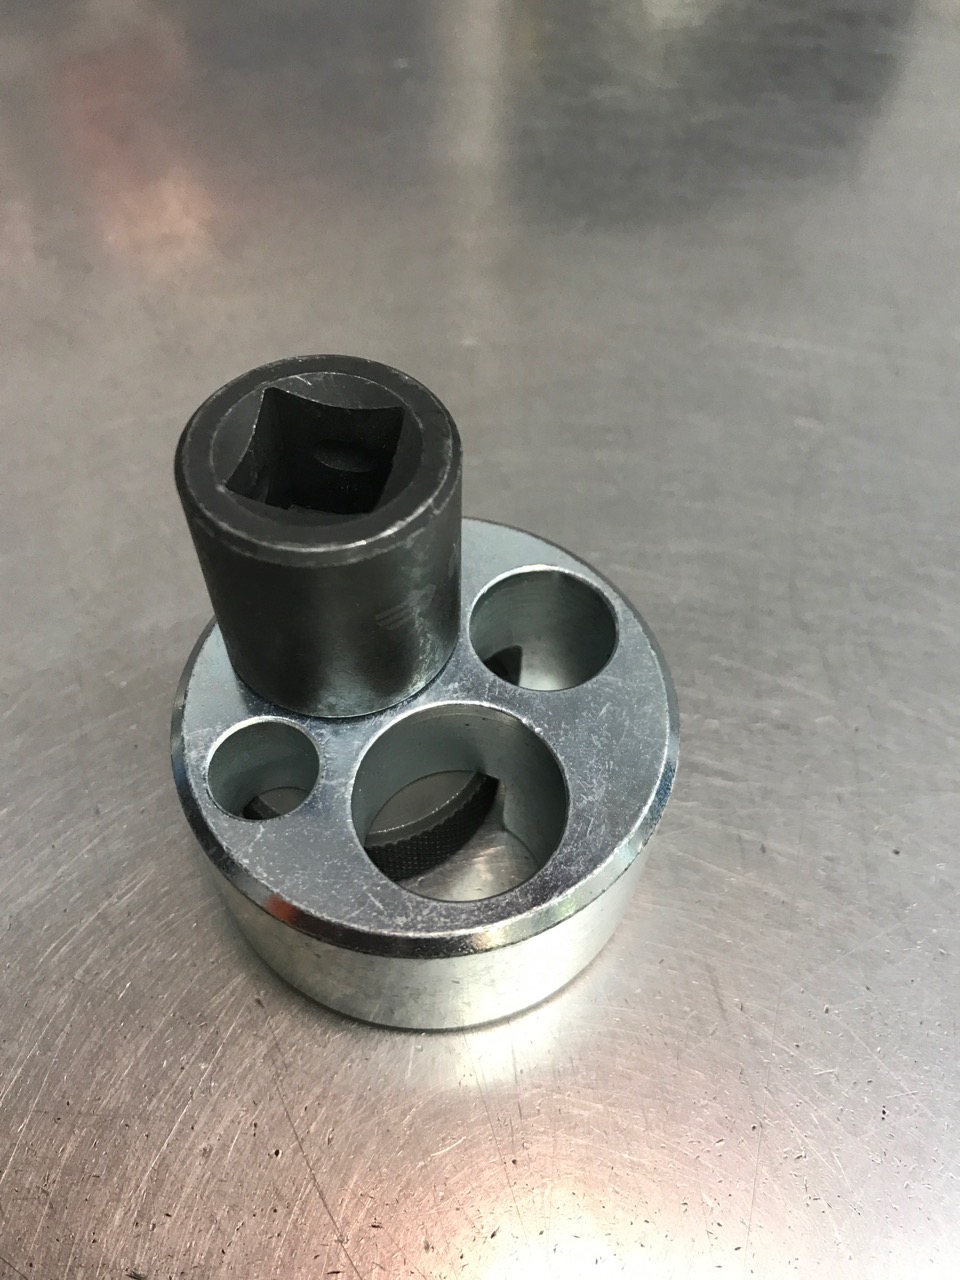
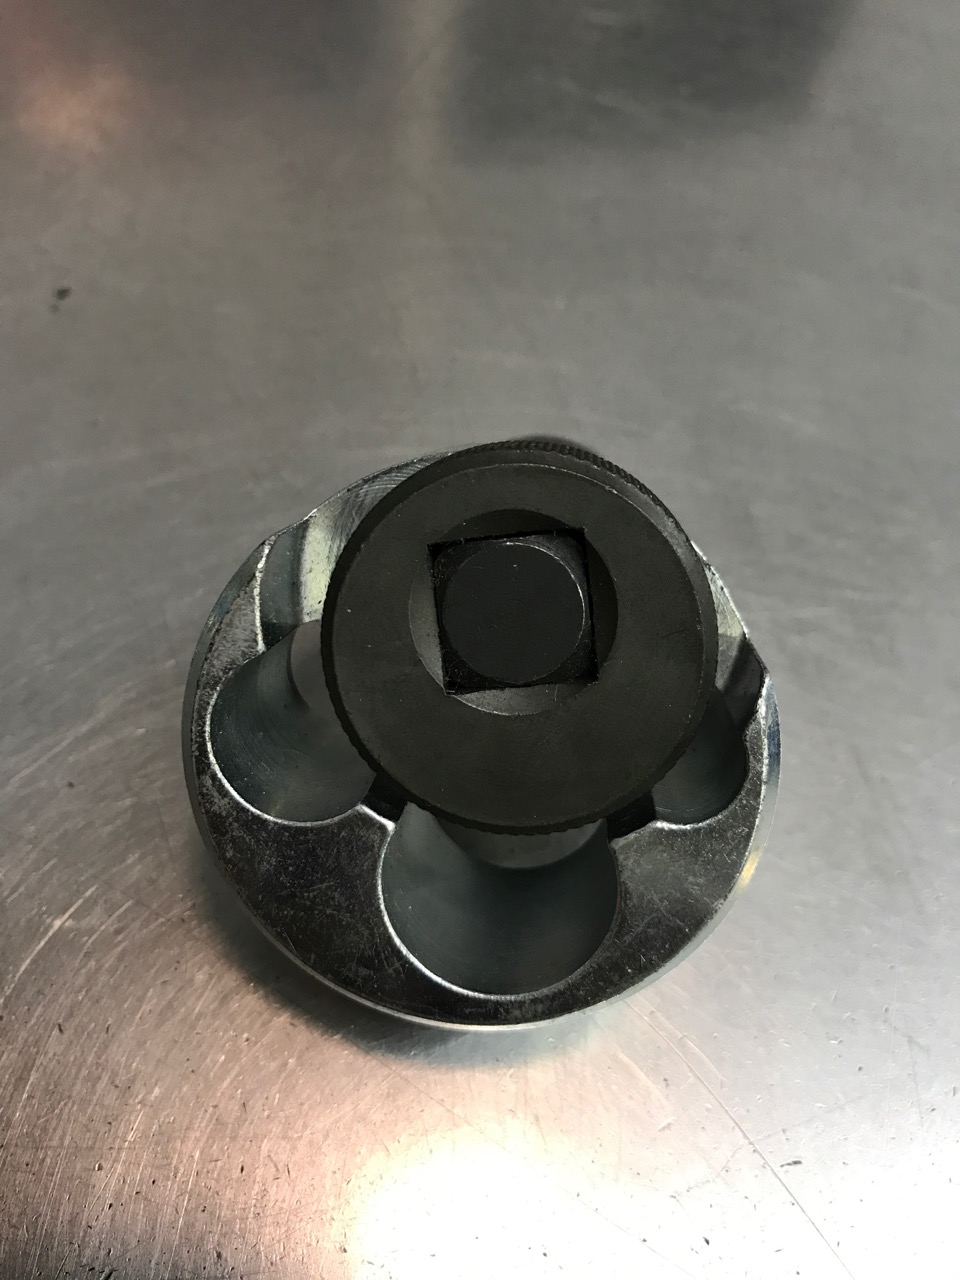
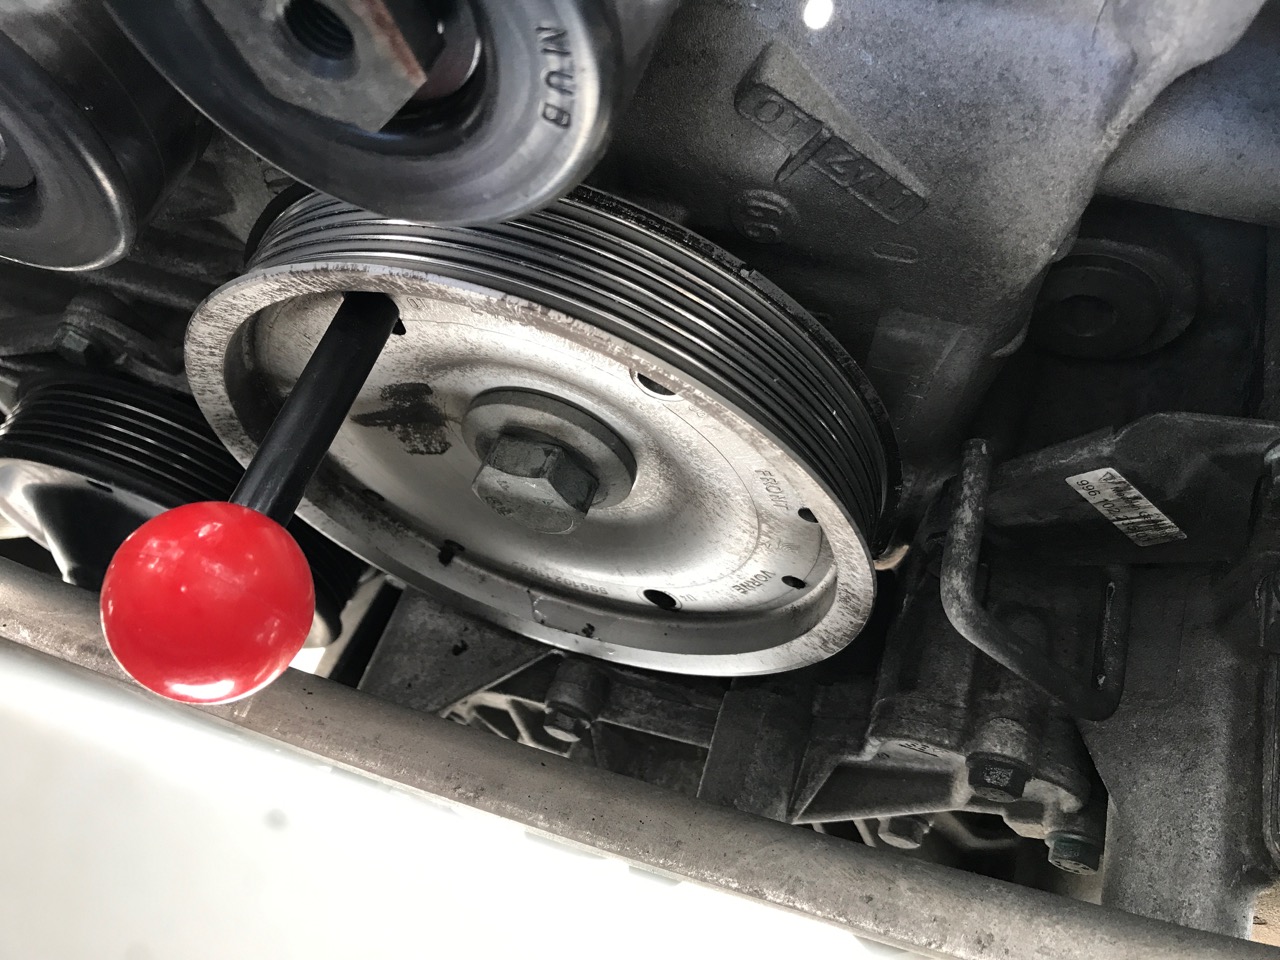
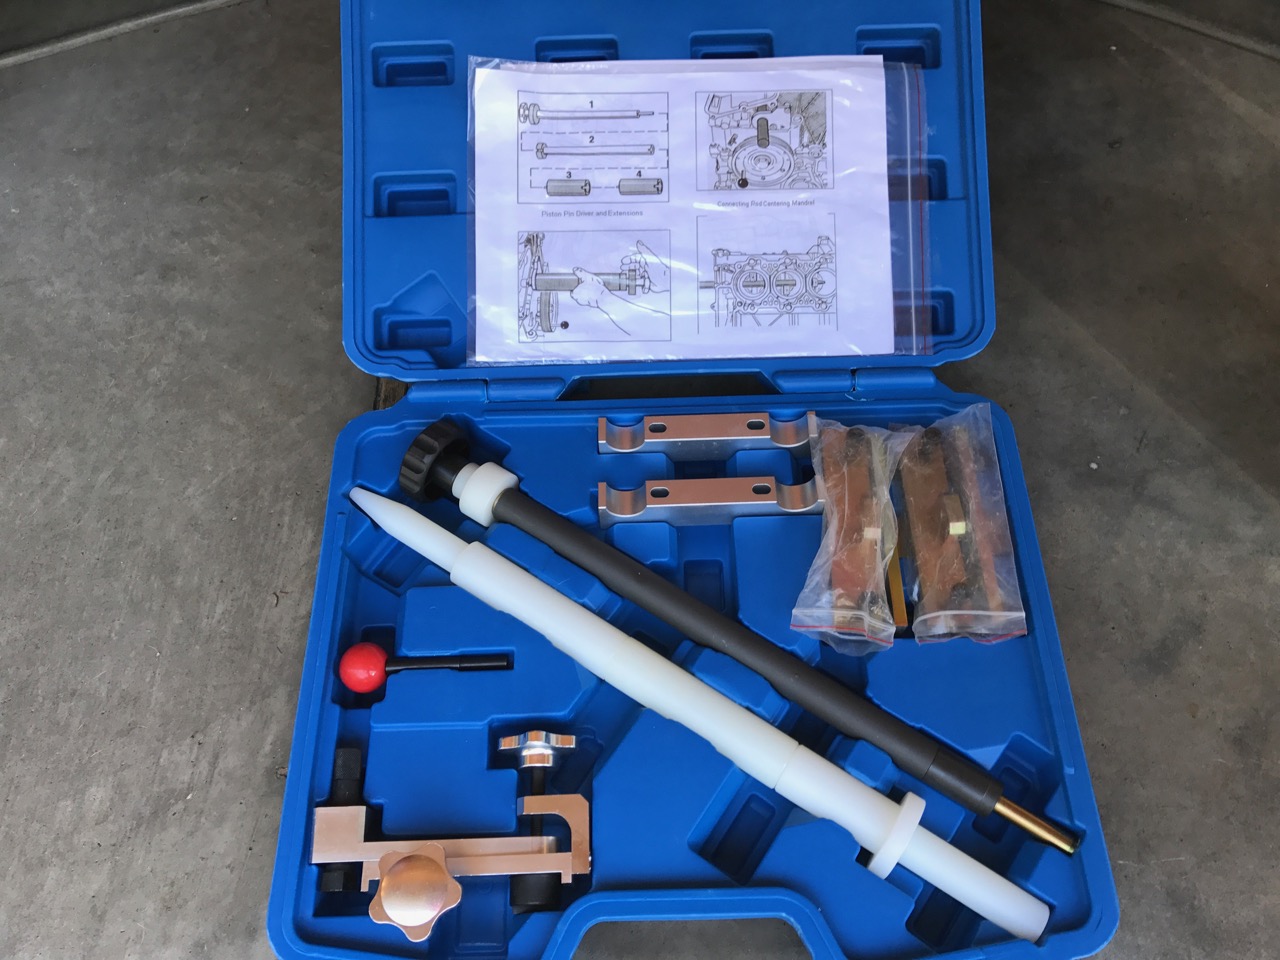
Progress update. Not much, Air pressure to clean all dust and dirt, cam hold down tool in place. All bolts loosened.. I'm wondering if this tool would work to remove those twisted off exhaust manifold bolts??? Oh, and look with I finally arrived today...
-
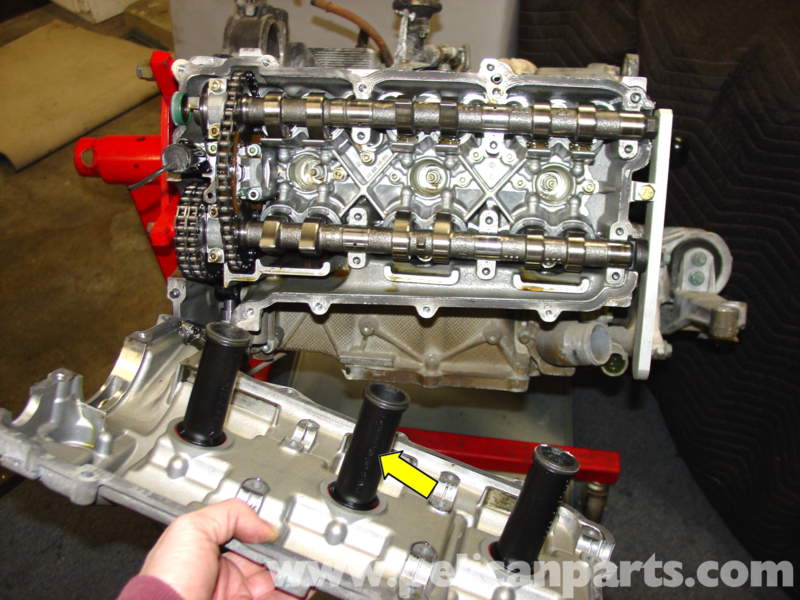
Thanks, Yes, I've been reading all articles referenced over and over. Some have a bit of conflicting messages but i think it's because some refer to bank 1 while others refer to bank 2. So now I have a few questions... 1) Is it necessary to remove the tensioner and the spark plug tubes before cracking the cover? this article says to remove both but pelican doesn't say anything about either. 2) Do I need to secure the cam at the front of the engine using my cam lock tool (see tool reference photo above)? Again, pelican instructions don't say anything about it and in there illustration it looks like both cams are secured by the head (near the front of the engine, between the chains). I've included pelicans picture.
-
I was just about to remove the pump. Thanks. I mark its position. I completely distorted the first cam cap, trying to take care to remove small chunks as I didn't know what was behind it. No worries, I removed all 3 without dropping anything inside. I'm trying to keep everything clean, inside and out.
-
Another question. Once i crack the cover. How do I perp the surface for resealing? Does the old sealant come off easy (like a gasket) or is it going to be a nightmare preparing to put back together?
-
Like almost anything new, my first time I proceed with caution and maybe get stumped by the most simple things. In this case the cam plugs threw me as i could not see well and was not sure how deep they where or how exactly they came out (plus I'd actually never seen one before and don't have replacements yet). The first one seemed to take for ever to get out. I began to think it was maybe glued in... Once I got the first one out the others where easy. I then understood how the cam holding tool engages into the ends of the cams and secured by a bolt into the head. I've removed the 3 cam caps then rotated the engine to TDC with the cam key on the bank i'm working on facing out (away from the block), removed the engine ground wire and attached the cam holding tool at the back of the engine. I'm about to remove the oil pump. Maybe then it will become clearer how to secure the cams in position on the front of the engine. Do I use the cam lock tool or somehow use the other cam holding tool? I understand I'll need to install the cam support tools once the cover is off. I'm just trying to get the cam secured at the ends before I crack the cover. PS I'm still working on finding Kroil locally.
-
Oh geez, my luck. Ok, then I'll open her up tomorrow. I'm hoping this goes pretty quick and without problems. One last question, can I reuse the came end plugs? Thanks !!!
-
Ok thanks. I think I understand. I plan to crack it open Sunday. I just finished cleaning everything up a second time to make sure I keep everything clean and tidy I'm not sure how i'm going to see the intake cam position. With the engine still in the car it's looks almost impossible to see (maybe I can use my phone camera). I'll take plenty of pictures and am sure I'll have questions. Maybe I should have asked earlier but should I consider replacing the cam tensioner pads while I'm in there? Looking back at my original videos, would worn pads be the reason one back is at or almost at the max 7 degree spec? If the pads will bring this back into spec, maybe I should wait till I have replacement pads in hand? or is the something I can adjust out?
-
I don't mind paying the price. I just didn't see it at my local automotive stores I frequent. After a little searching I found a place that sells it but they are closed on the weekend. I have one other place to try later today (fingers crossed). Thanks for the tip on the pint of oil, I'll be looking for it when I finally crack the cover. My biggest issue is time. Since I can't get right to it, I decided i'm going to change motor mounts and replace the serpentine belt along with a few other maintenance items. Sorry the progress has been slow. life keep getting in my way... So maybe I'm paranoid but I have this vision of removing the cam cover screws and everything falls out of place and I'm left holding a cam in my oily hand. That shouldn't happen, right? Ok, Oil drained, Ignition coils removed, a little dirt clean up and I think i'm ready to crack the cover.
-
Thanks Ahsai, I was very concerned about the twisting but they both finally came off. I was able to lower the engine a little over an inch, enough to get the muffler bracket off. Now I should be able to make some real progress. I ordered the stud remover as I could not find anything like it locally. I also looked for Kroil penetrating oil but could not find it localy so a few more sprays of the oil I have and maybe a few more toys with vice grips (being carful to leave as much plot sticking out the head as possible)... Moving on, how low do I need to drain the engine oil before cracking the cam cover? also, I know I need to get the engine locked at TDC but what do I need to do for the cam before removing the cam cover?
-
Ok, I'll remove both sides. I'll need every inch I can get to reach those upper bolts. I'll first try to find a stud remover like the one you referenced locally. If not, back to amazon... Thanks...
-
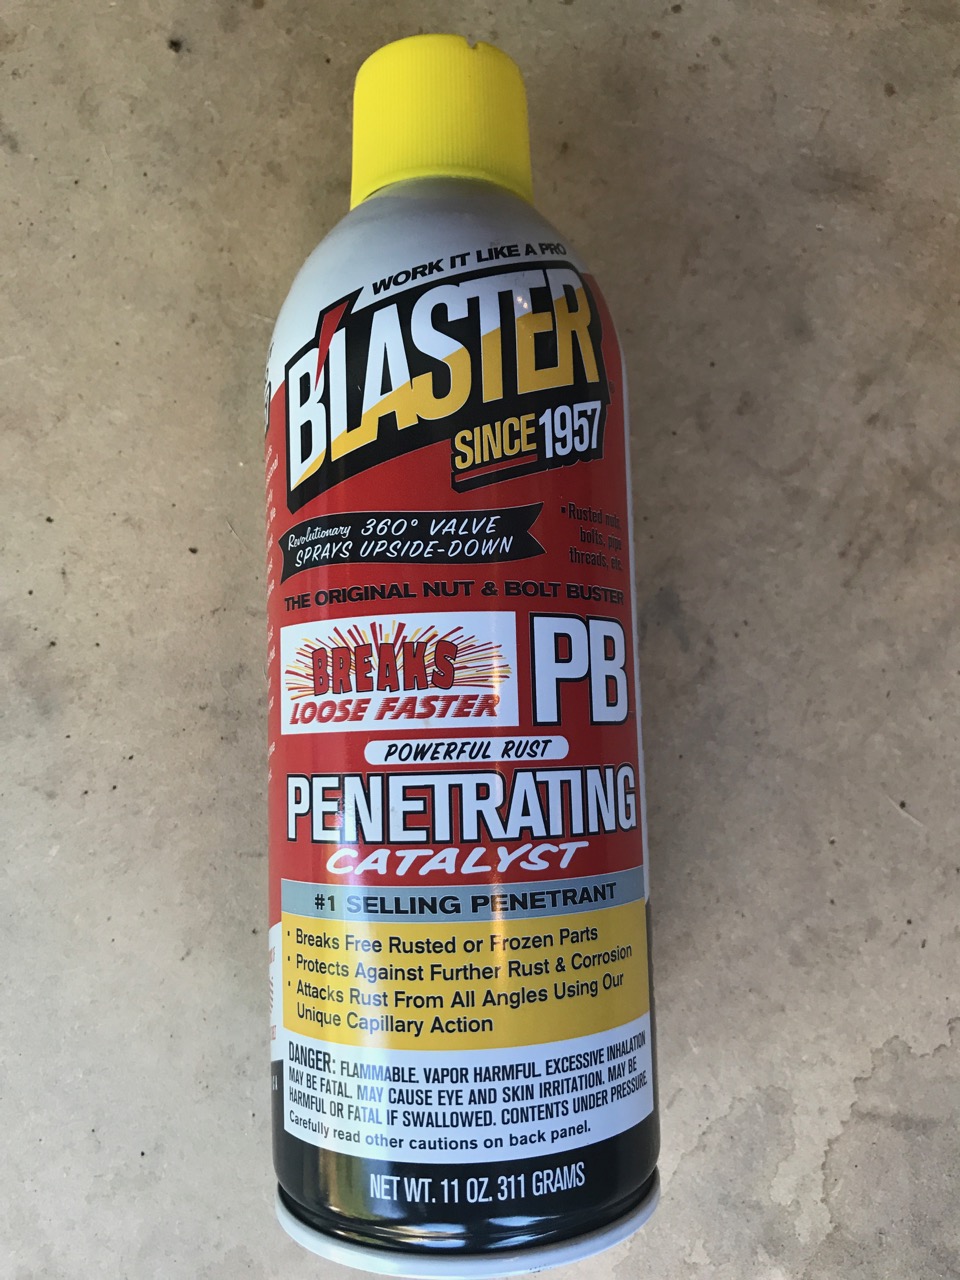
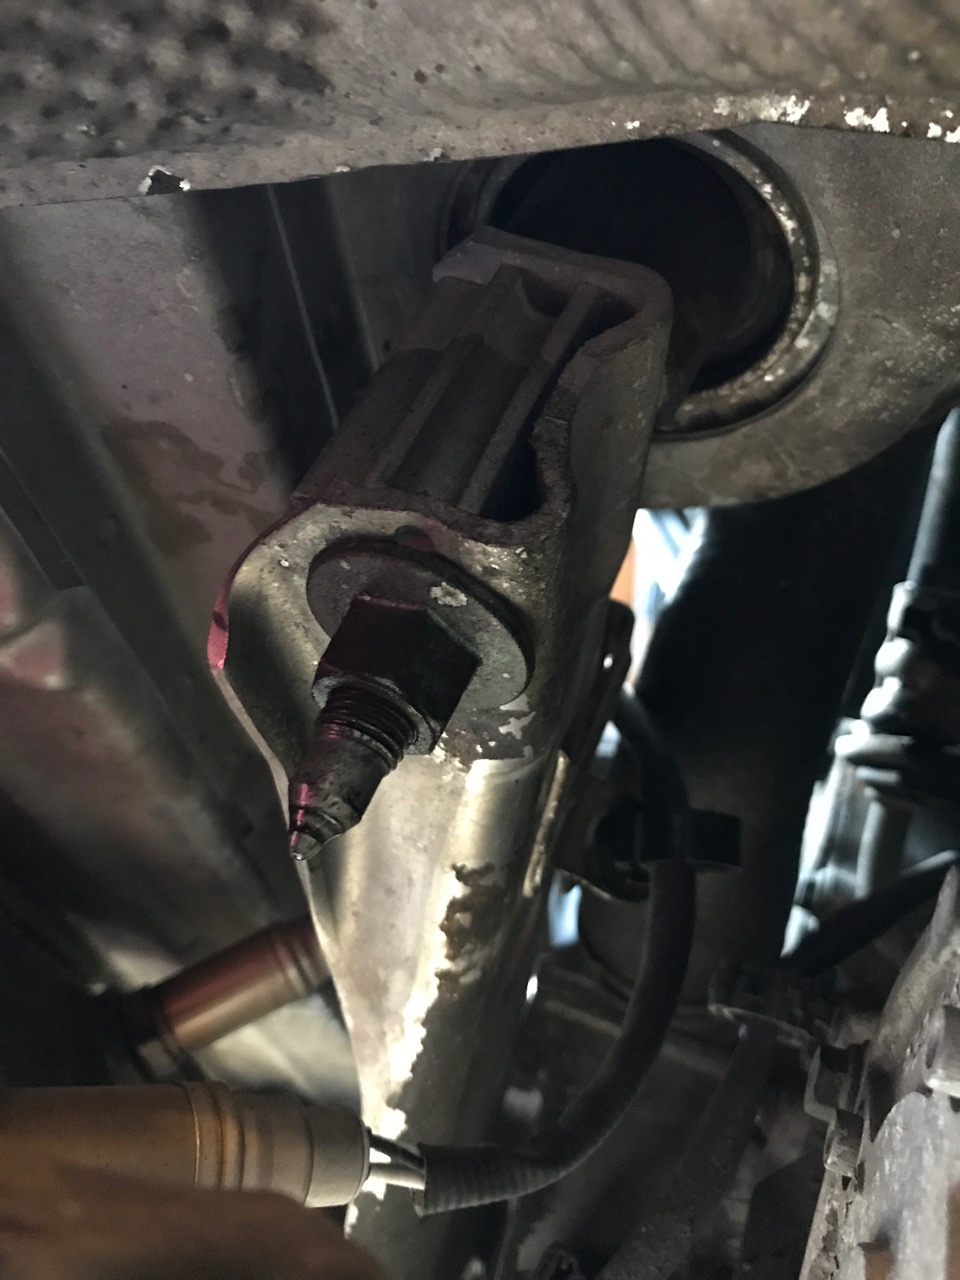
Thanks again, I went to the local dealer this morning. New bolts and gaskets are now all in hand. I have the motor supported well and will keep a watchful eye for all cables and hoses. I just need to get a deep 18mm 6point socket to remove the motor mount nut and hopefully I can make better progress. Should I remove both sides or just the side I'm working on? Also, the engine mount rail seems to twist a lot when trying to remove the motor mount nut. Should I be concerned or is that normal? (sprayed again with "Blast" and wire brushed to clean rust as much as possible). I'll get some Kroll While i'm out... Would heat help get the remainder of those exhaust manifold bolds out? Should I try an easy out first or continue with vice grips? Worst case is to weld a nut onto the remaining stud (have to rent a welder I guess)... Any advice and direction is very much appreciated.
-
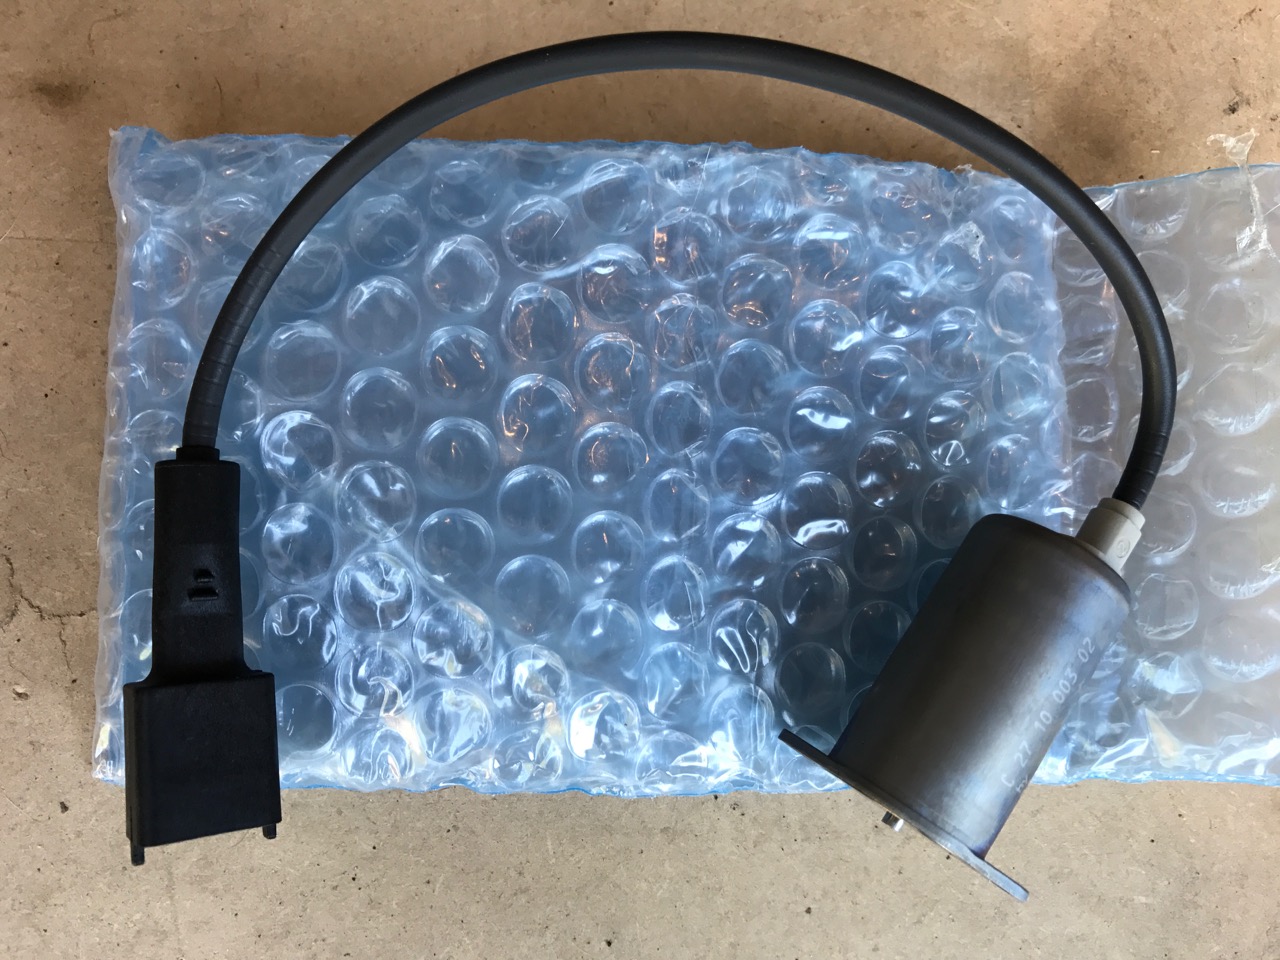
Thanks! I'm a little worried about the twisted off bold heads. I sprayed them heavily with "Blaster" (penetrating oil recommended by the local parts supplier) then vice grips but no luck. I'll give it a few more treatments and wait till tomorrow to give it another try. I checked out the new solenoid. It measured good at 13.7 ohms. Connected it to a 12volt supply in it's a very strong about 0.2" outward movement when energized. It does not retract on its own but can we push back in very easily. i'm having a real problem getting to the top muffler bracket bolts off. I was hoping lowering the engine would help but the nut to separate the motor mount from the engine mount rail is pretty rusted and course I don't have a deep 18mm socket. Another trip to the hardware store for that and hopefully I'll get the nut off without damage to the motor mount. Hopefully the lowering will make the difference needed and speed up my progress.
-
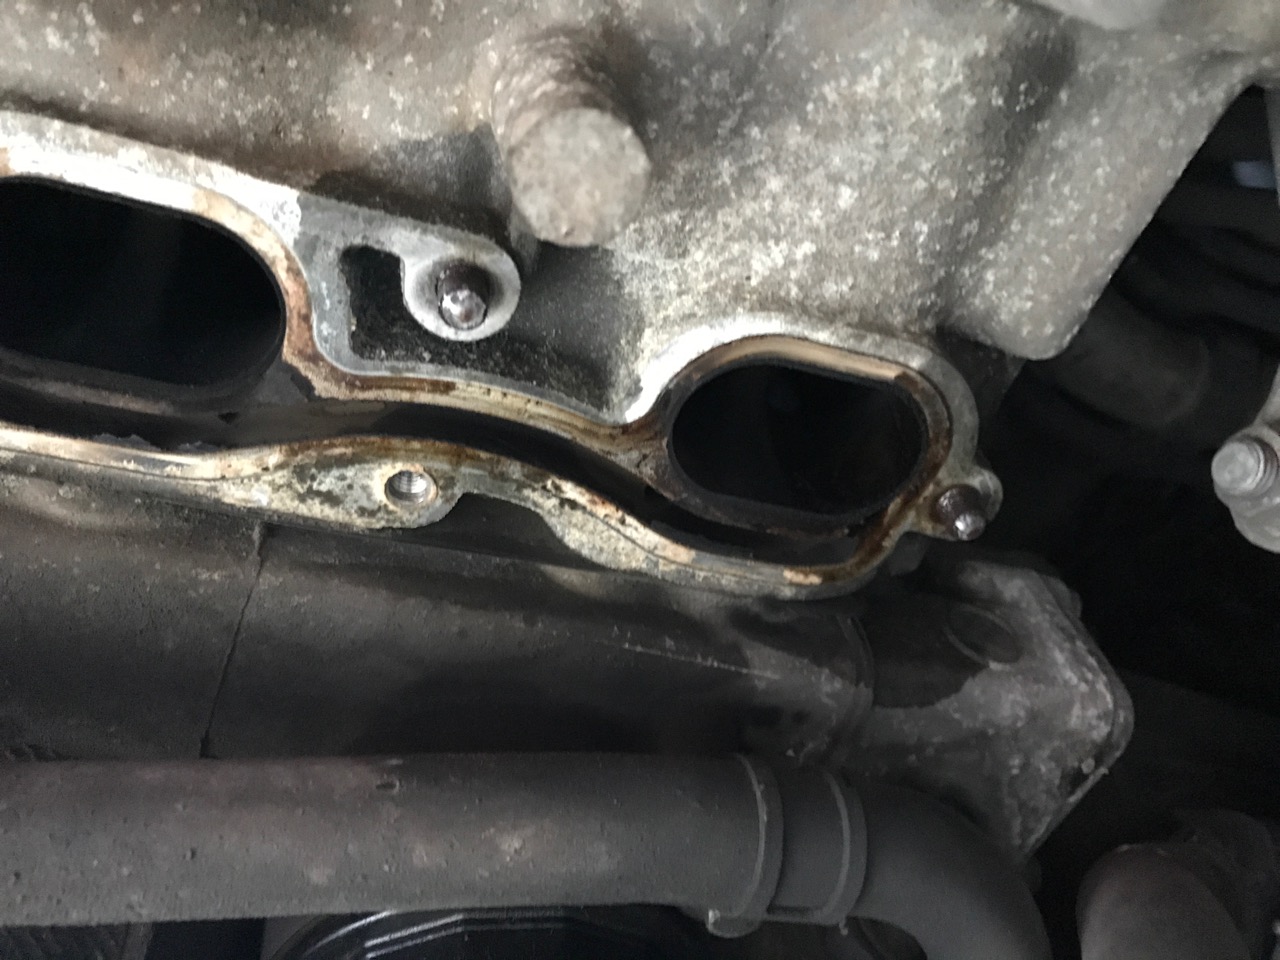
Thanks, I will check the solenoid for the right impedance and also connect it to a 12v supply to make sure it works smoothly. Now for some rookie questions: While removing the exhaust manifold i snapped the head off 2 bolts. What's the best way to remove them now? Plyers? I know I should replace all 6 exhaust manifold bolts, Do I need to replace the gasket? What about the muffler bracket bolts? Replace them also? What about the gasket and 3 bolts where the header connects the exhaust system? Replace all? How do I get to the top bolts that hold the muffler bracket to the engine head? Loosen the motor mount? When lowering, how far can the engine come down without stressing other components? Can I lower the engine by loosening the 13mm nut on the bottom of the motor mount?
-
Update The tools finally showed up today. Now that I think i have everything I need, I'm looking forward to making some real progress in the next few days.
-
Just a quick update. The good news is the main part arrived today. The bad news is, the rest of the parts are still in route so i'm on hold for a few more days.