Welcome to RennTech.org Community, Guest
There are many great features available to you once you register at RennTech.org
You are free to view posts here, but you must log in to reply to existing posts, or to start your own new topic. Like most online communities, there are costs involved to maintain a site like this - so we encourage our members to subscribe or donate. All subscriptions and donations go to the costs operating and maintaining this site. We prefer that guests take part in our community and we offer a lot in return to those willing to join our corner of the Porsche world. This site is 99 percent member supported (less than 1 percent comes from advertising) - so please consider an annual subscription or donation to keep this site running.
Here are some of the features available - once you subscribe RennTech.org
- View Classified Ads
- DIY Tutorials
- Porsche TSB Listings (limited)
- VIN Decoder
- Special Offers
- Paint Codes
- Registry
- Videos System
- View Reviews
- and get rid of this welcome message
It takes just a few minutes to register, and it's quality Porsche information at a low cost.
Contributing Members also get these additional benefits:
(you become a Contributing Member by subscribing or donating money to the operation of this site)
- No ads - advertisements are removed
- Access the Contributors Only Forum
- Contributing Members Only Downloads
- Send attachments with PMs
- All image/file storage limits are substantially increased for all Contributing Members
- Option Codes Lookup
- VIN Option Lookups (limited)


mnickson
-
Posts
1 -
Joined
-
Last visited
mnickson's Achievements
Member (1/1)
0
Reputation
-
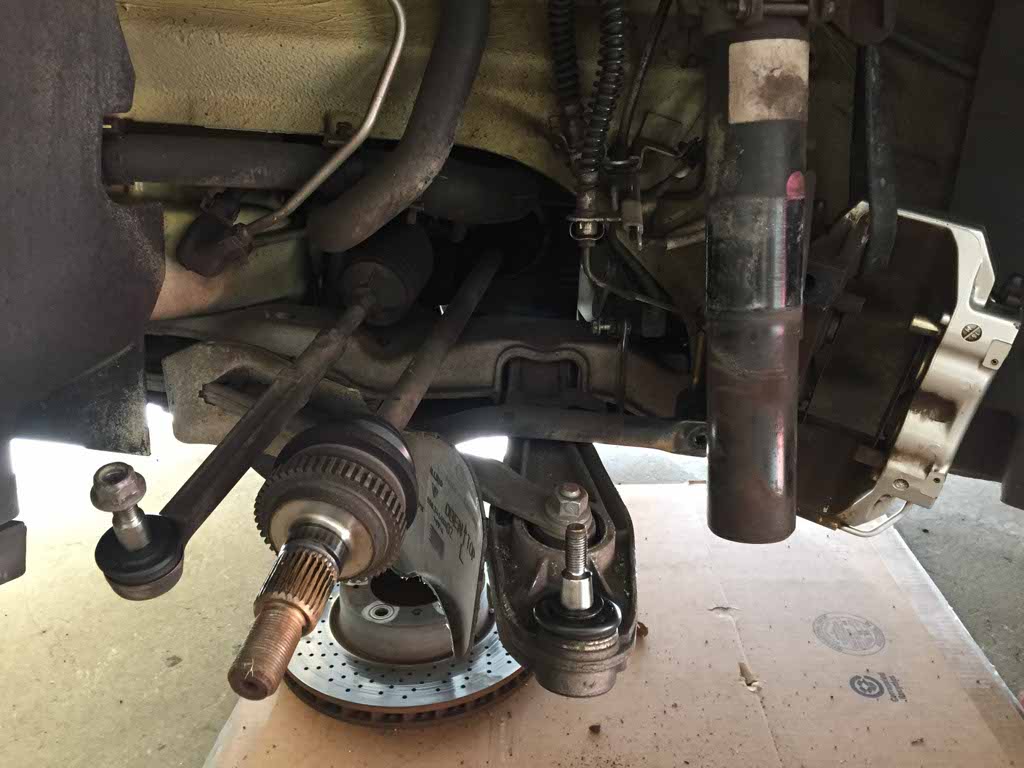
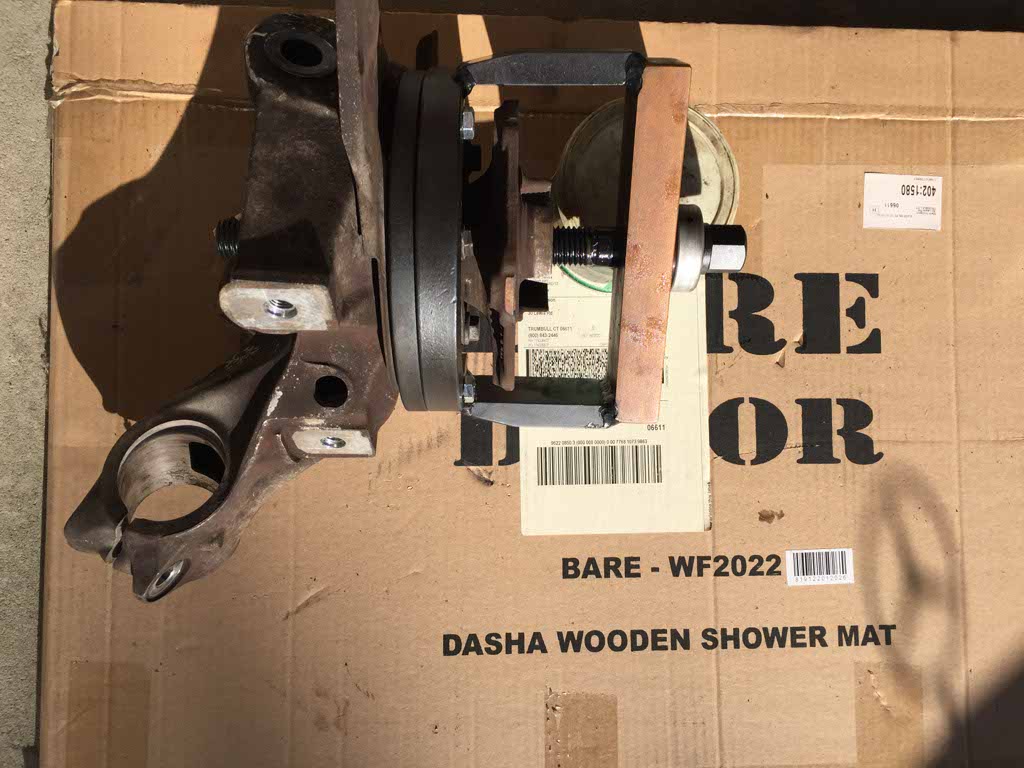
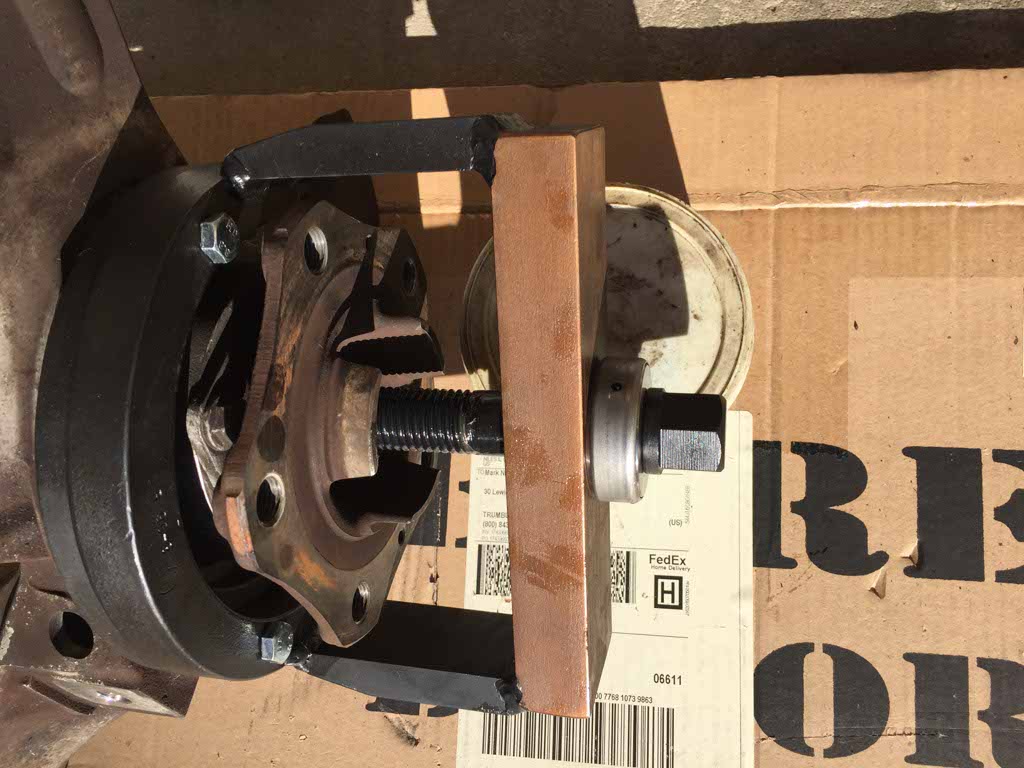
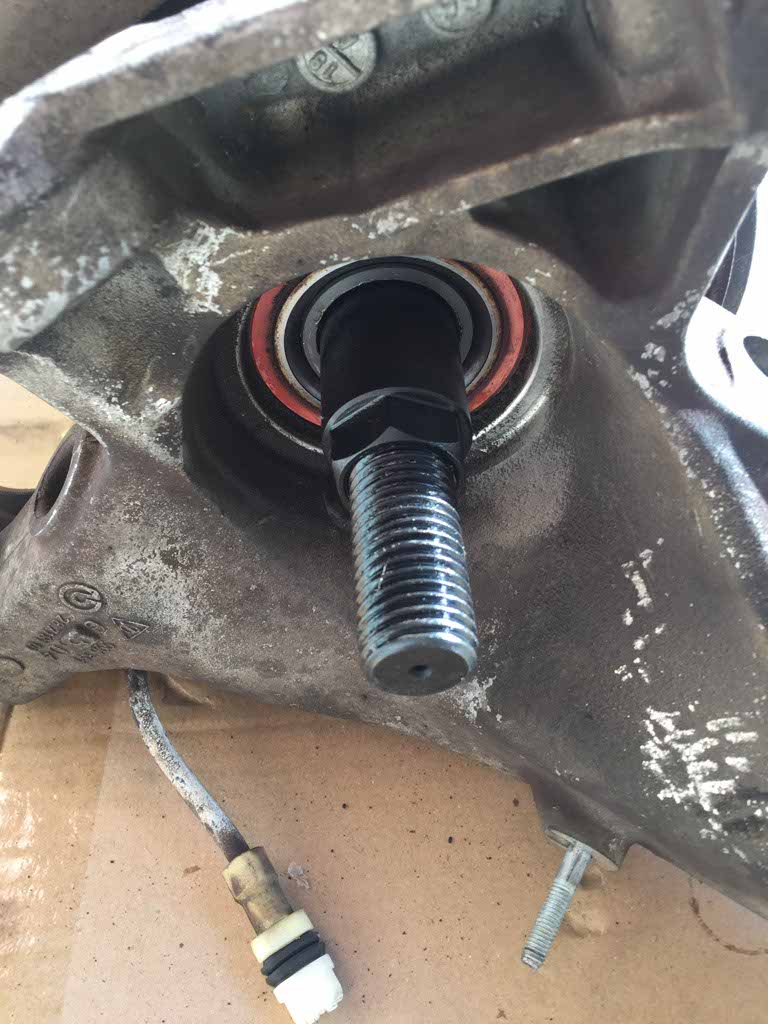
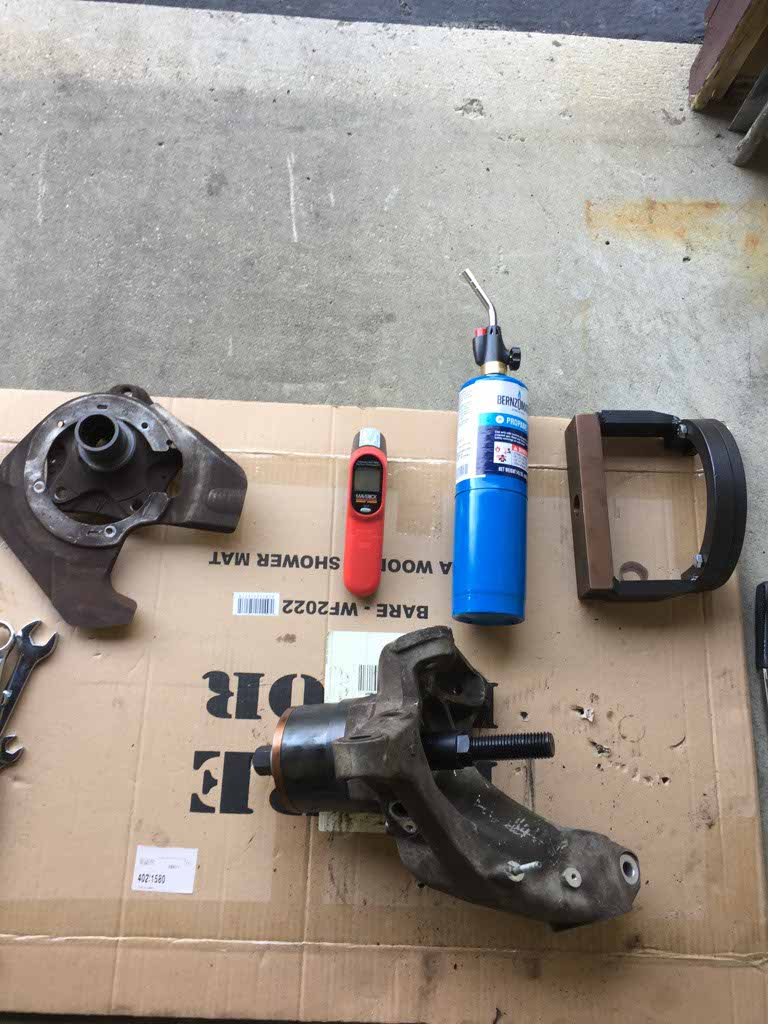
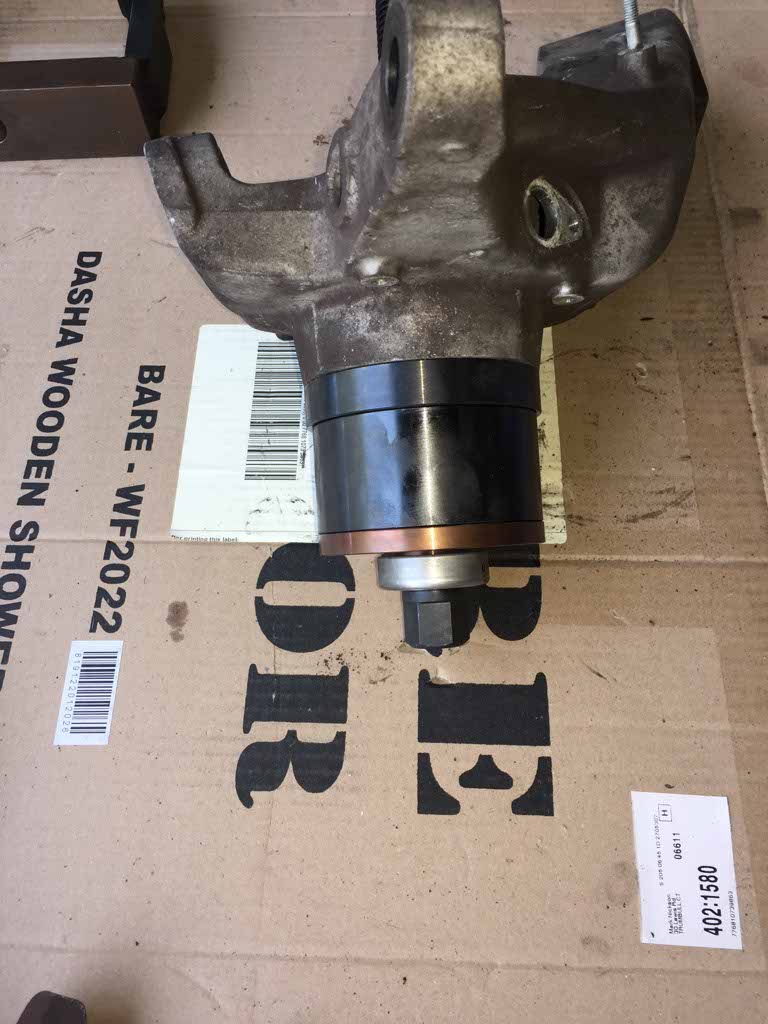
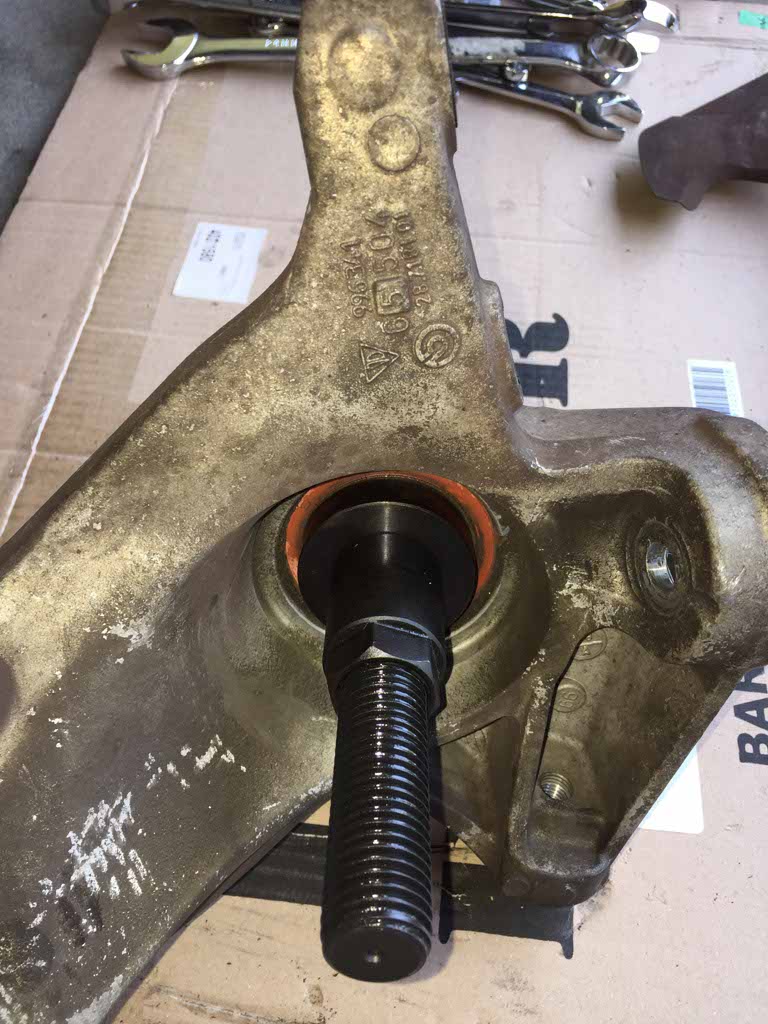
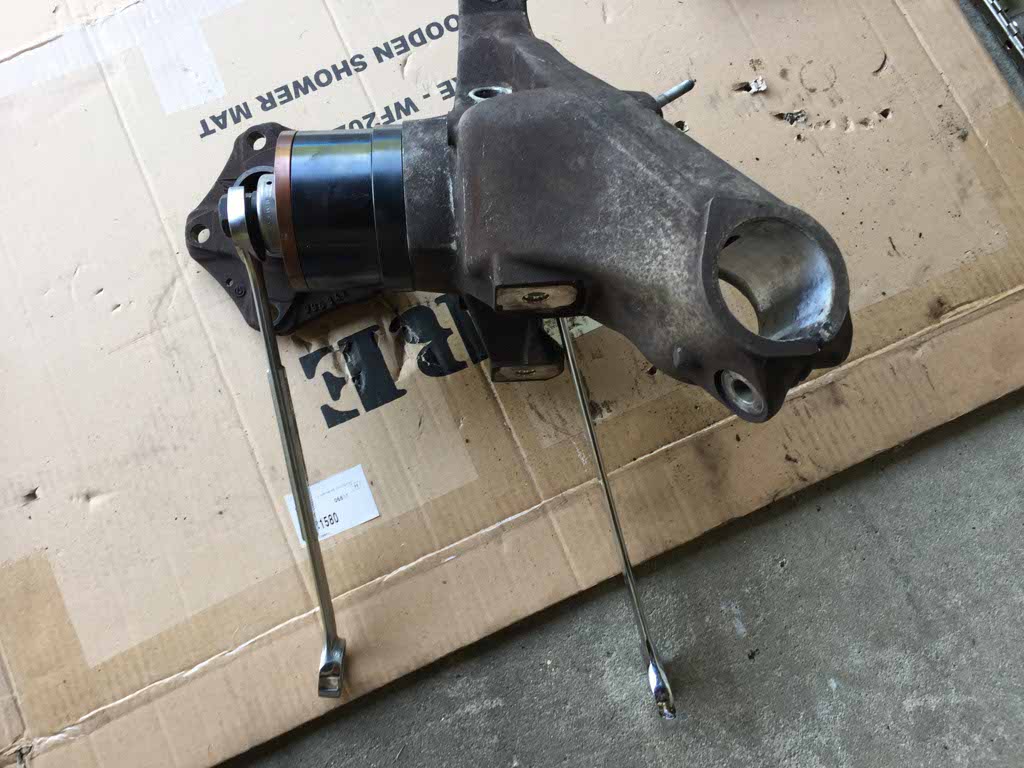
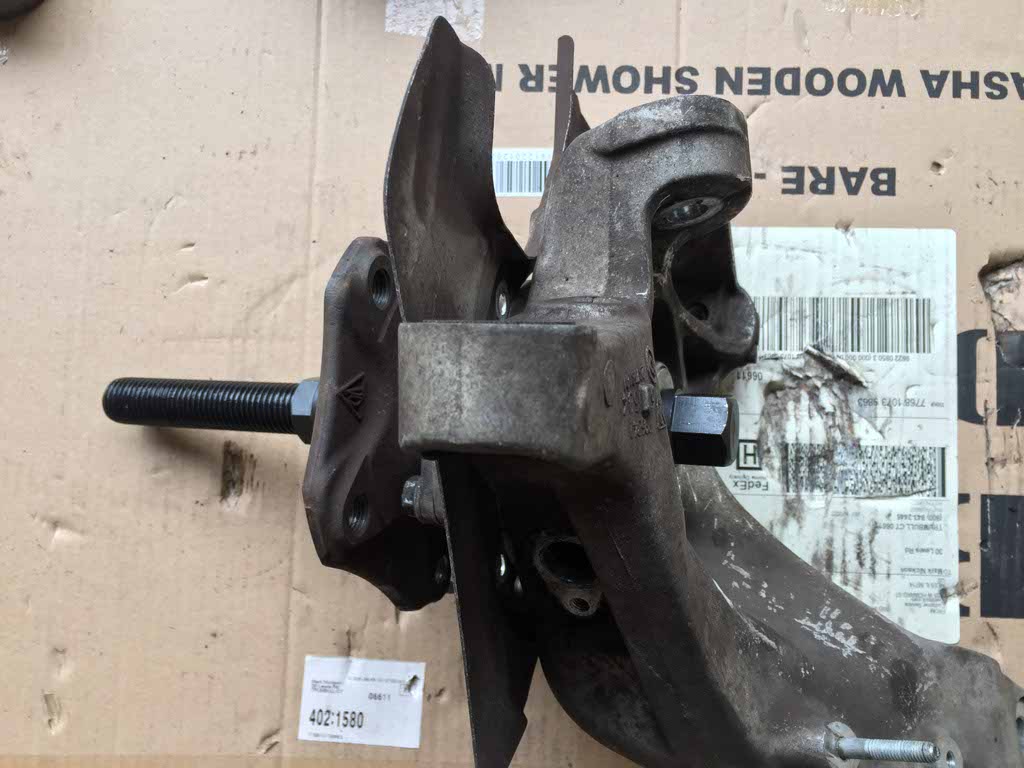
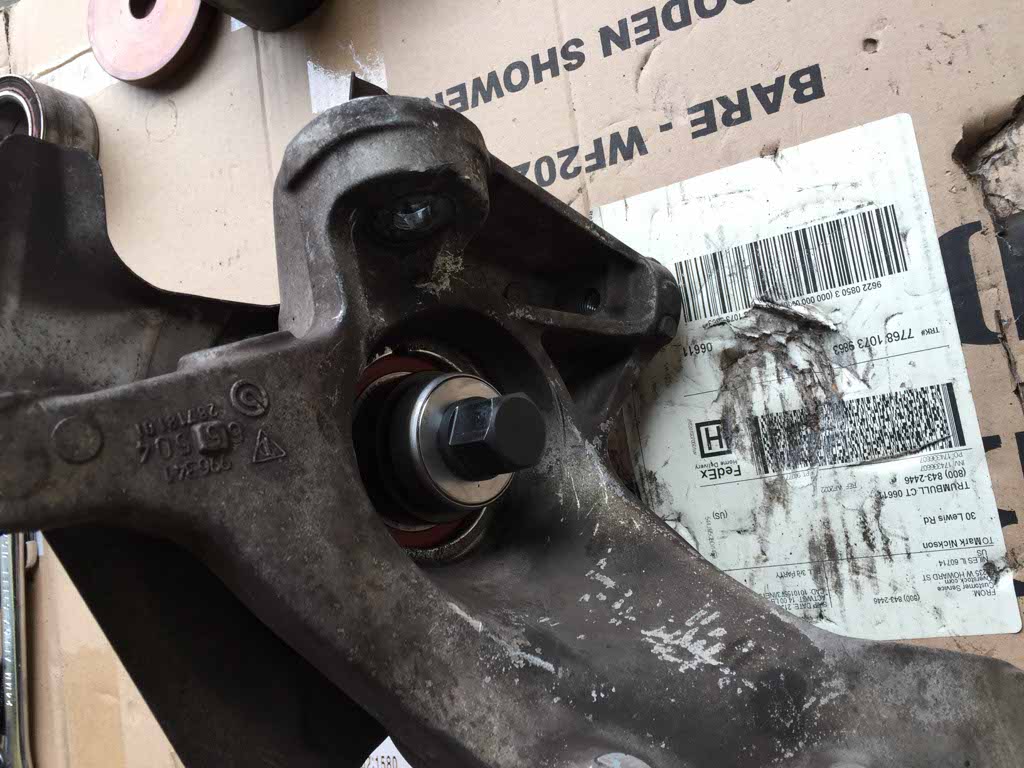
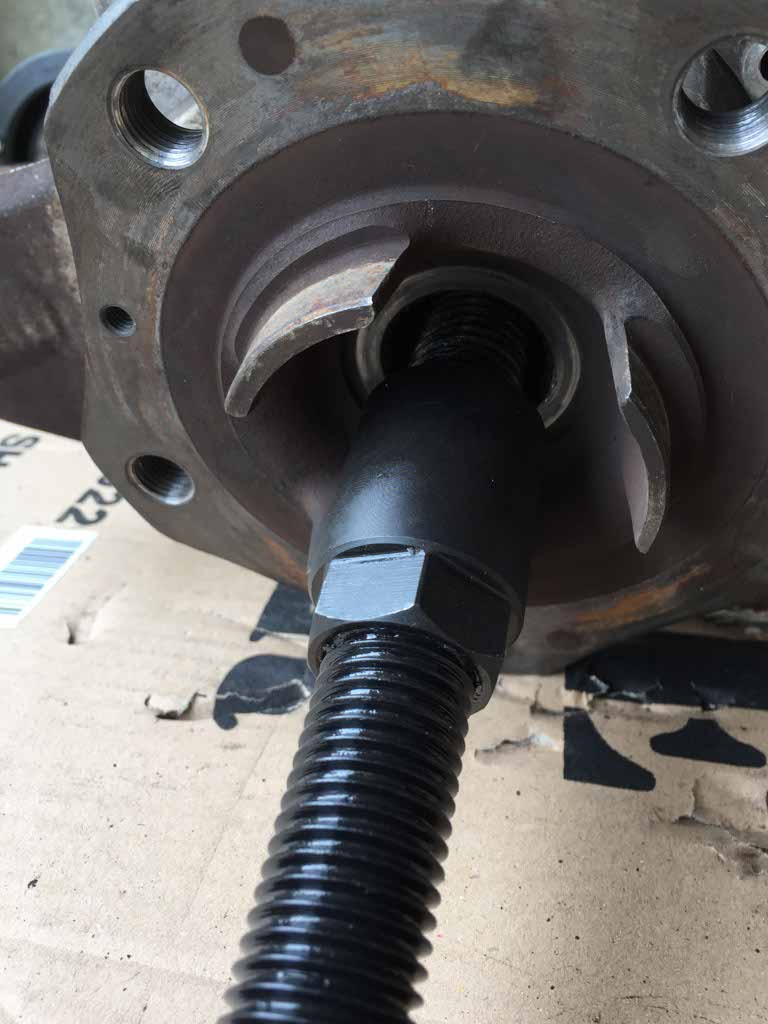
This article describes with photos how to replace a wheel bearing using the SIR Tools B90-P2 tool. There are no other "step by step" articles on any forums, so this article complements the others you find on the Internet to show how exactly to do it with this particular tool. Step 1. Remove the wheel carrier from the car. This photo shows where this article starts, it is specific to removing the bearing, not removing the wheel carrier. Step 2. Remove the wheel hub from the carrier, these three photos show how to put the tool in place. Basically, you draw the wheel hub out of the inner bearing race, it comes out easily. Step 3. Remove the bearing from the wheel carrier. Heat the aluminum wheel carrier to 100 degrees Celsius, do it evenly, it takes about 3 minutes, measure the temperature with an infrared thermometer. Note, there are other articles on the Internet which use the wrong standard for temperature (they incorrectly say Fahrenheit, it should be Celsius as per the Porsche Workshop Manual). Your basically drawing the bearing out, into the large cylinder. You can use the wheel hub as a support and conveniently turn the bolts with your 24mm and 27mm spanners. Step 4. Insert the new bearing into the wheel carrier. Prior to doing this, clean the bore of the wheel carrier with polishing cloth (your just cleaning it, not removing any aluminum). Put the new bearing in your kitchen freezer overnight prior to inserting it. This is an alternate approach to Porsche Workshop Manual which has you heat up the wheel carrier to 100 degrees Celsius. The freezer method is easier on your hands since you don't have to touch hot metal (if you do use the heating method instead of the cooling method, wear work gloves as usual). The tools in this step apply force on the outer part of the bearing and the aluminum casting. The photo shows the bearing half way in. Step 5. Insert the wheel hub into the bearing. Remember to put the splash shield in place prior to actually installing the wheel hub into the bearing. Notice how the tools thrust bearing which is silver in the second photo below is used with the smaller circular die. Basically you draw the hub into the bearing with force being applied between the inner race of the bearing and the cast iron wheel hub. Step 6. Re-install the newly restored wheel carrier into the car (this is not covered by this article since there are many others on the internet). Step 7. Enjoy your car - Mark Nickson, Member of SAE, PCA, and MBCA for over 30 years.