Welcome to RennTech.org Community, Guest
There are many great features available to you once you register at RennTech.org
You are free to view posts here, but you must log in to reply to existing posts, or to start your own new topic. Like most online communities, there are costs involved to maintain a site like this - so we encourage our members to donate. All donations go to the costs operating and maintaining this site. We prefer that guests take part in our community and we offer a lot in return to those willing to join our corner of the Porsche world. This site is 99 percent member supported (less than 1 percent comes from advertising) - so please consider an annual donation to keep this site running.
Here are some of the features available - once you register at RennTech.org
- View Classified Ads
- DIY Tutorials
- Porsche TSB Listings (limited)
- VIN Decoder
- Special Offers
-
OBD II P-Codes - Paint Codes
- Registry
- Videos System
- View Reviews
- and get rid of this welcome message
It takes just a few minutes to register, and it's FREE
Contributing Members also get these additional benefits:
(you become a Contributing Member by donating money to the operation of this site)
- No ads - advertisements are removed
- Access the Contributors Only Forum
- Contributing Members Only Downloads
- Send attachments with PMs
- All image/file storage limits are substantially increased for all Contributing Members
- Option Codes Lookup
- VIN Option Lookups (limited)


jchapura
-
Posts
89 -
Joined
-
Last visited
Content Type
Profiles
Events
Forums
External Paint Colors
Downloads
Tutorials
Links Directory
Collections
Store
Posts posted by jchapura
-
-
When you say "swapped" coil/plug - do you mean for another position? If so, it will be interesting to see if the code follows it. Then you'll know.
How old is the gasoline in it? Even couple-month-old gas can be "flat". And cause misfires. Generally though, not at a single position (unless of course it was on the "edge").
I think there's consensus to change the plugs around 40k miles or 4 years, whichever comes first. It's my understanding the 4 years is motivated by trying to avoid damage to the aluminum head because the plug threads adhere themselves to the head threads.
If you're a DIY-er, changing the plugs is probably about a 6 of 10 difficulty. Don't need a lot of fancy tools. I've done mine. Your hands will be sore the next day. Two or three of the positions are especially onerous. Maybe a 2-4 hour job. I didn't even remove the mufflers. My car was up on QuickJacks. You'll save a bunch of that $1400. Especially if you already have the new style coils.
-
Do you think a lab could distinguish between the chain guide ramp material and Techroned-off "carbon deposit" material?
If it were Techroned-off carbon deposits, would you be more concerned with allowing the carbon to build by not Techron-ing versus getting the slug of carbon every oil change?
FWIW, I use a Top Tier gasoline at least 80% of the time...
-
I had my oil tested and nothing remarkable seen there. Coincidentally, a fellow Rennlister had an issue similar to mine but on a BMW. The current working theory is that it was carbon that had been broken loose because of the fuel system cleaners we'd both used prior to the oil change.
 Found fine black powder in oil filter medium - Rennlist - Porsche Discussion Forums
RENNLIST.COM
Found fine black powder in oil filter medium - Rennlist - Porsche Discussion Forums
RENNLIST.COM
997 Forum - Found fine black powder in oil filter medium - Changed my oil today. 2005 C2S with about 80000 miles. Been using DT40 for a few years. About 3300 miles (1.5 years; car was laid up about a year) on this oil change. Opened the oil filter case to inspect the oil filter medium. Saw a lot of fine... -
Thanks Loren. The grommet is holding the sensor ok in its natural position. I check it quite often since my fan being on really gets my attention.
I was thinking of 1) reversing the sensor position or 2) insulating the sensor tip. All in the hope of delaying the fan start to its design value.
Is it possible another temp sender (oil, coolant?) is broken that is part of the purge fan control logic?
-
2005 C2S about 80000 miles
What are the possible causes for the engine compartment purge fan to come on early? The old sensor exhibited the same thing. The new sensor is about a month old.
I was checking the cam deviations with my Durametric and I noticed the fan come on only after about 5-10 minutes after the engine had started up (from a true cold start). The ambient temperature was about 55 degF. The Durametric showed the engine compartment temperature about 41-44 degC (much cooler than I thought was supposed to kick on the fan).
-
Thanks John.
After warm-up:
Camshaft deviation, bank 1 -0.9844
Camshaft deviation, bank 2 -0.4219
Rock steady, no jumping around at idle nor 2700 RPM.What do you think?
-
If it is, is it more troubling if it seemingly cropped up over the span of a single oil change interval? Am I on a "deadline" now?
Are the chain ramp replacements considered a DIY job without removing the engine? Special tools needed? Other considerations?
-
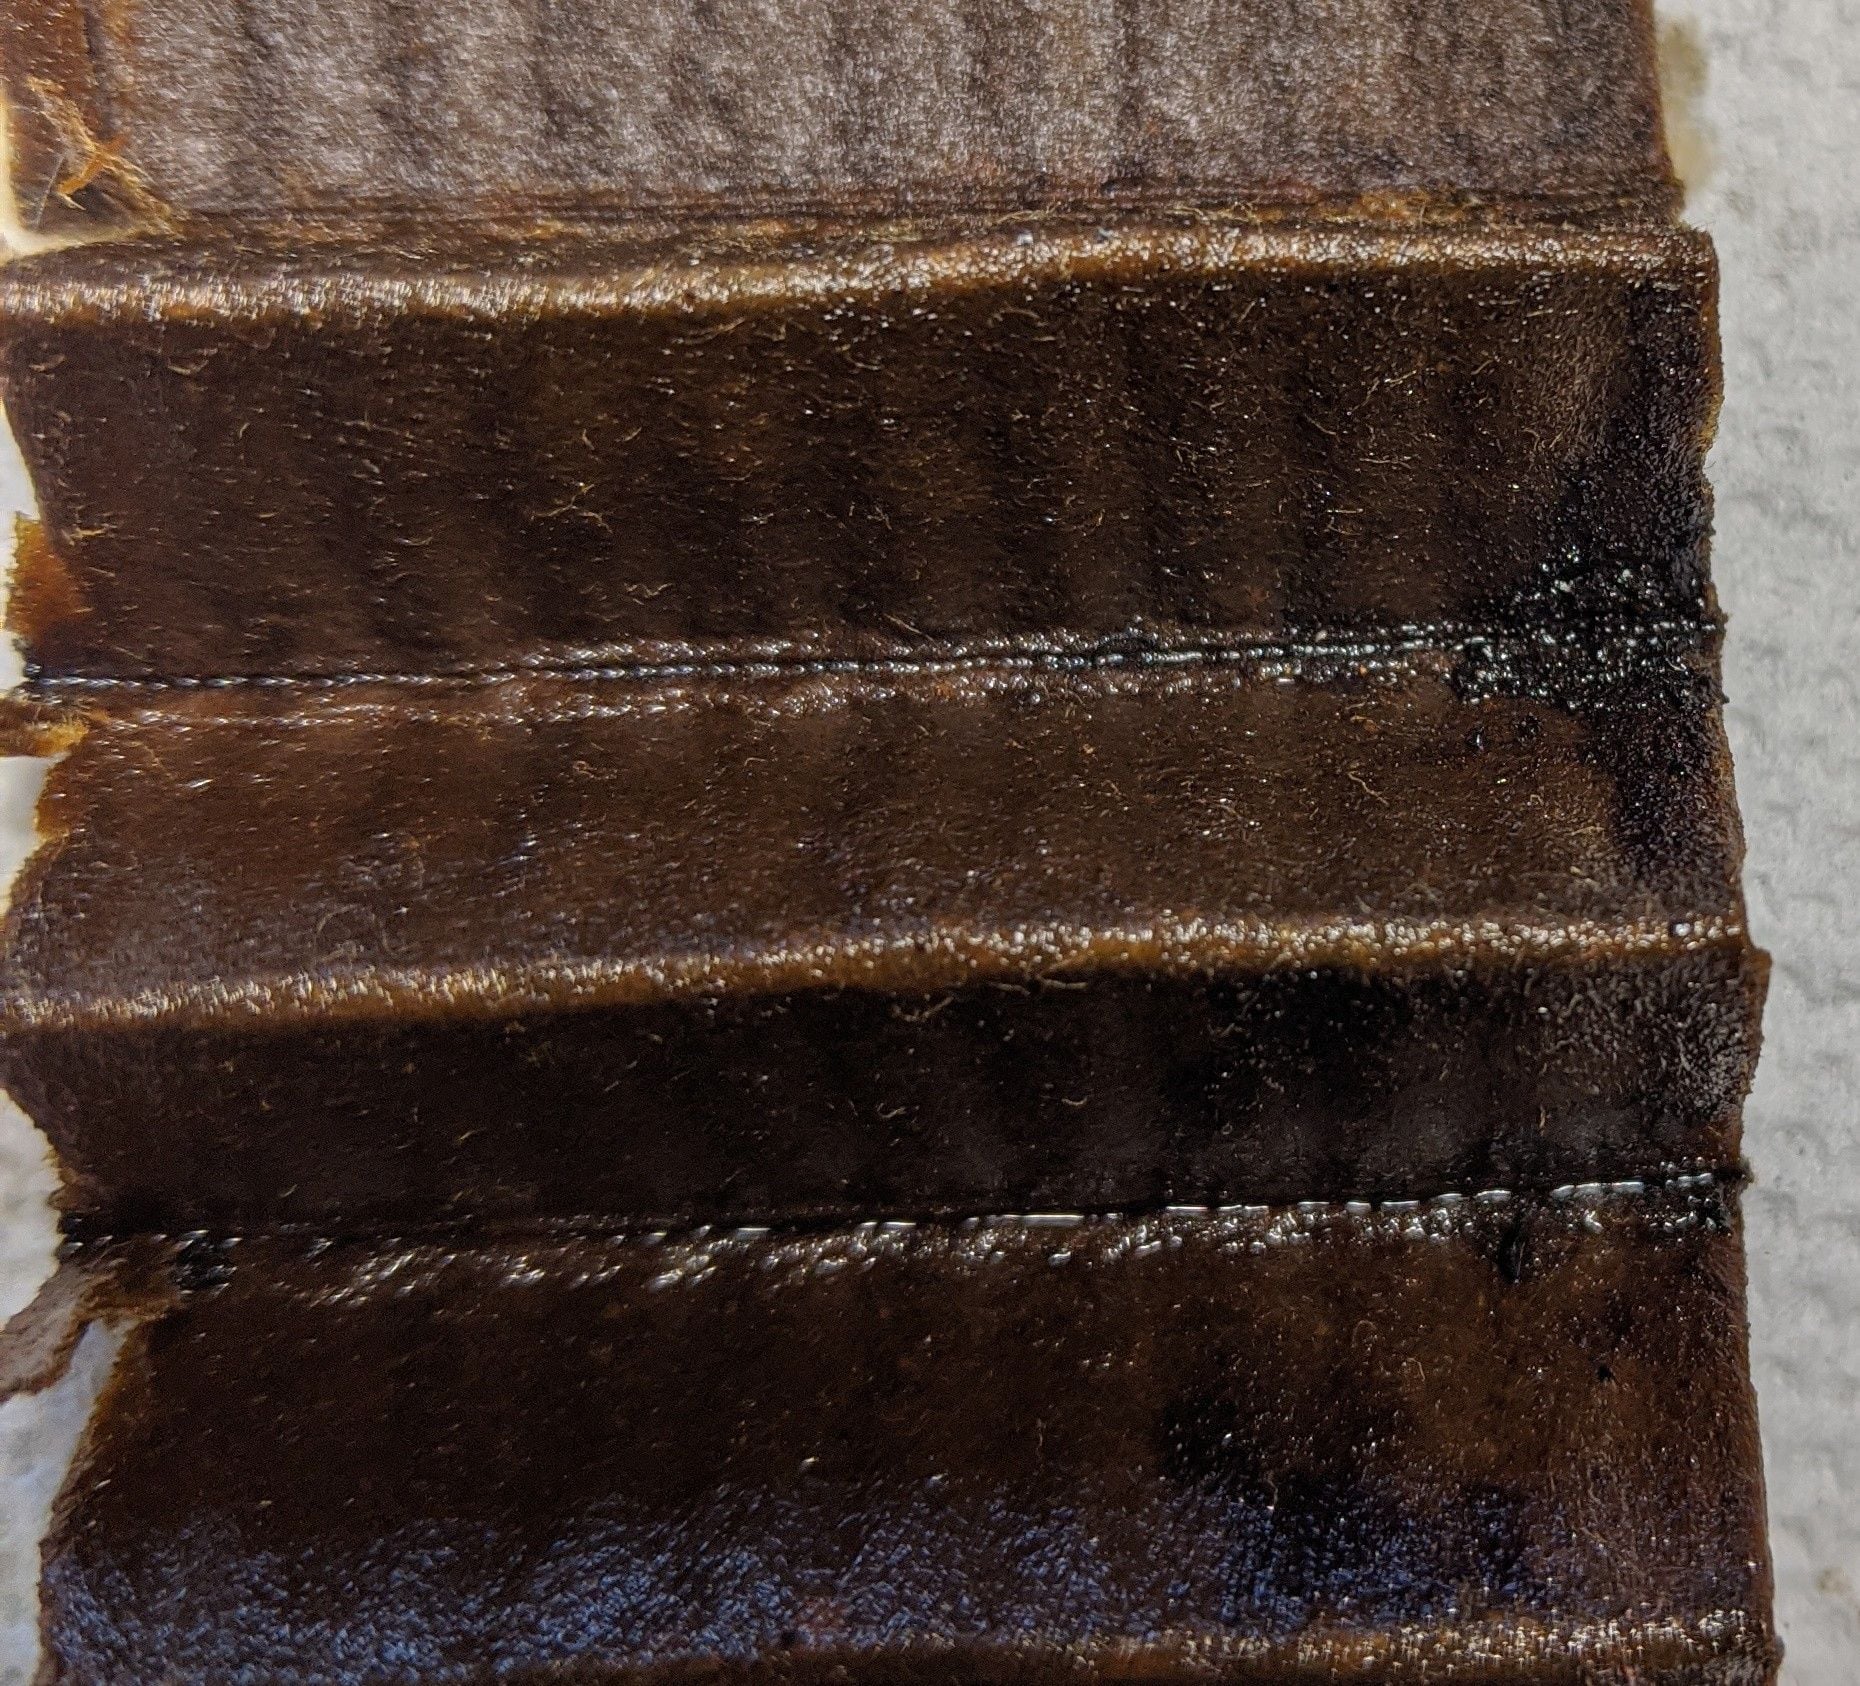
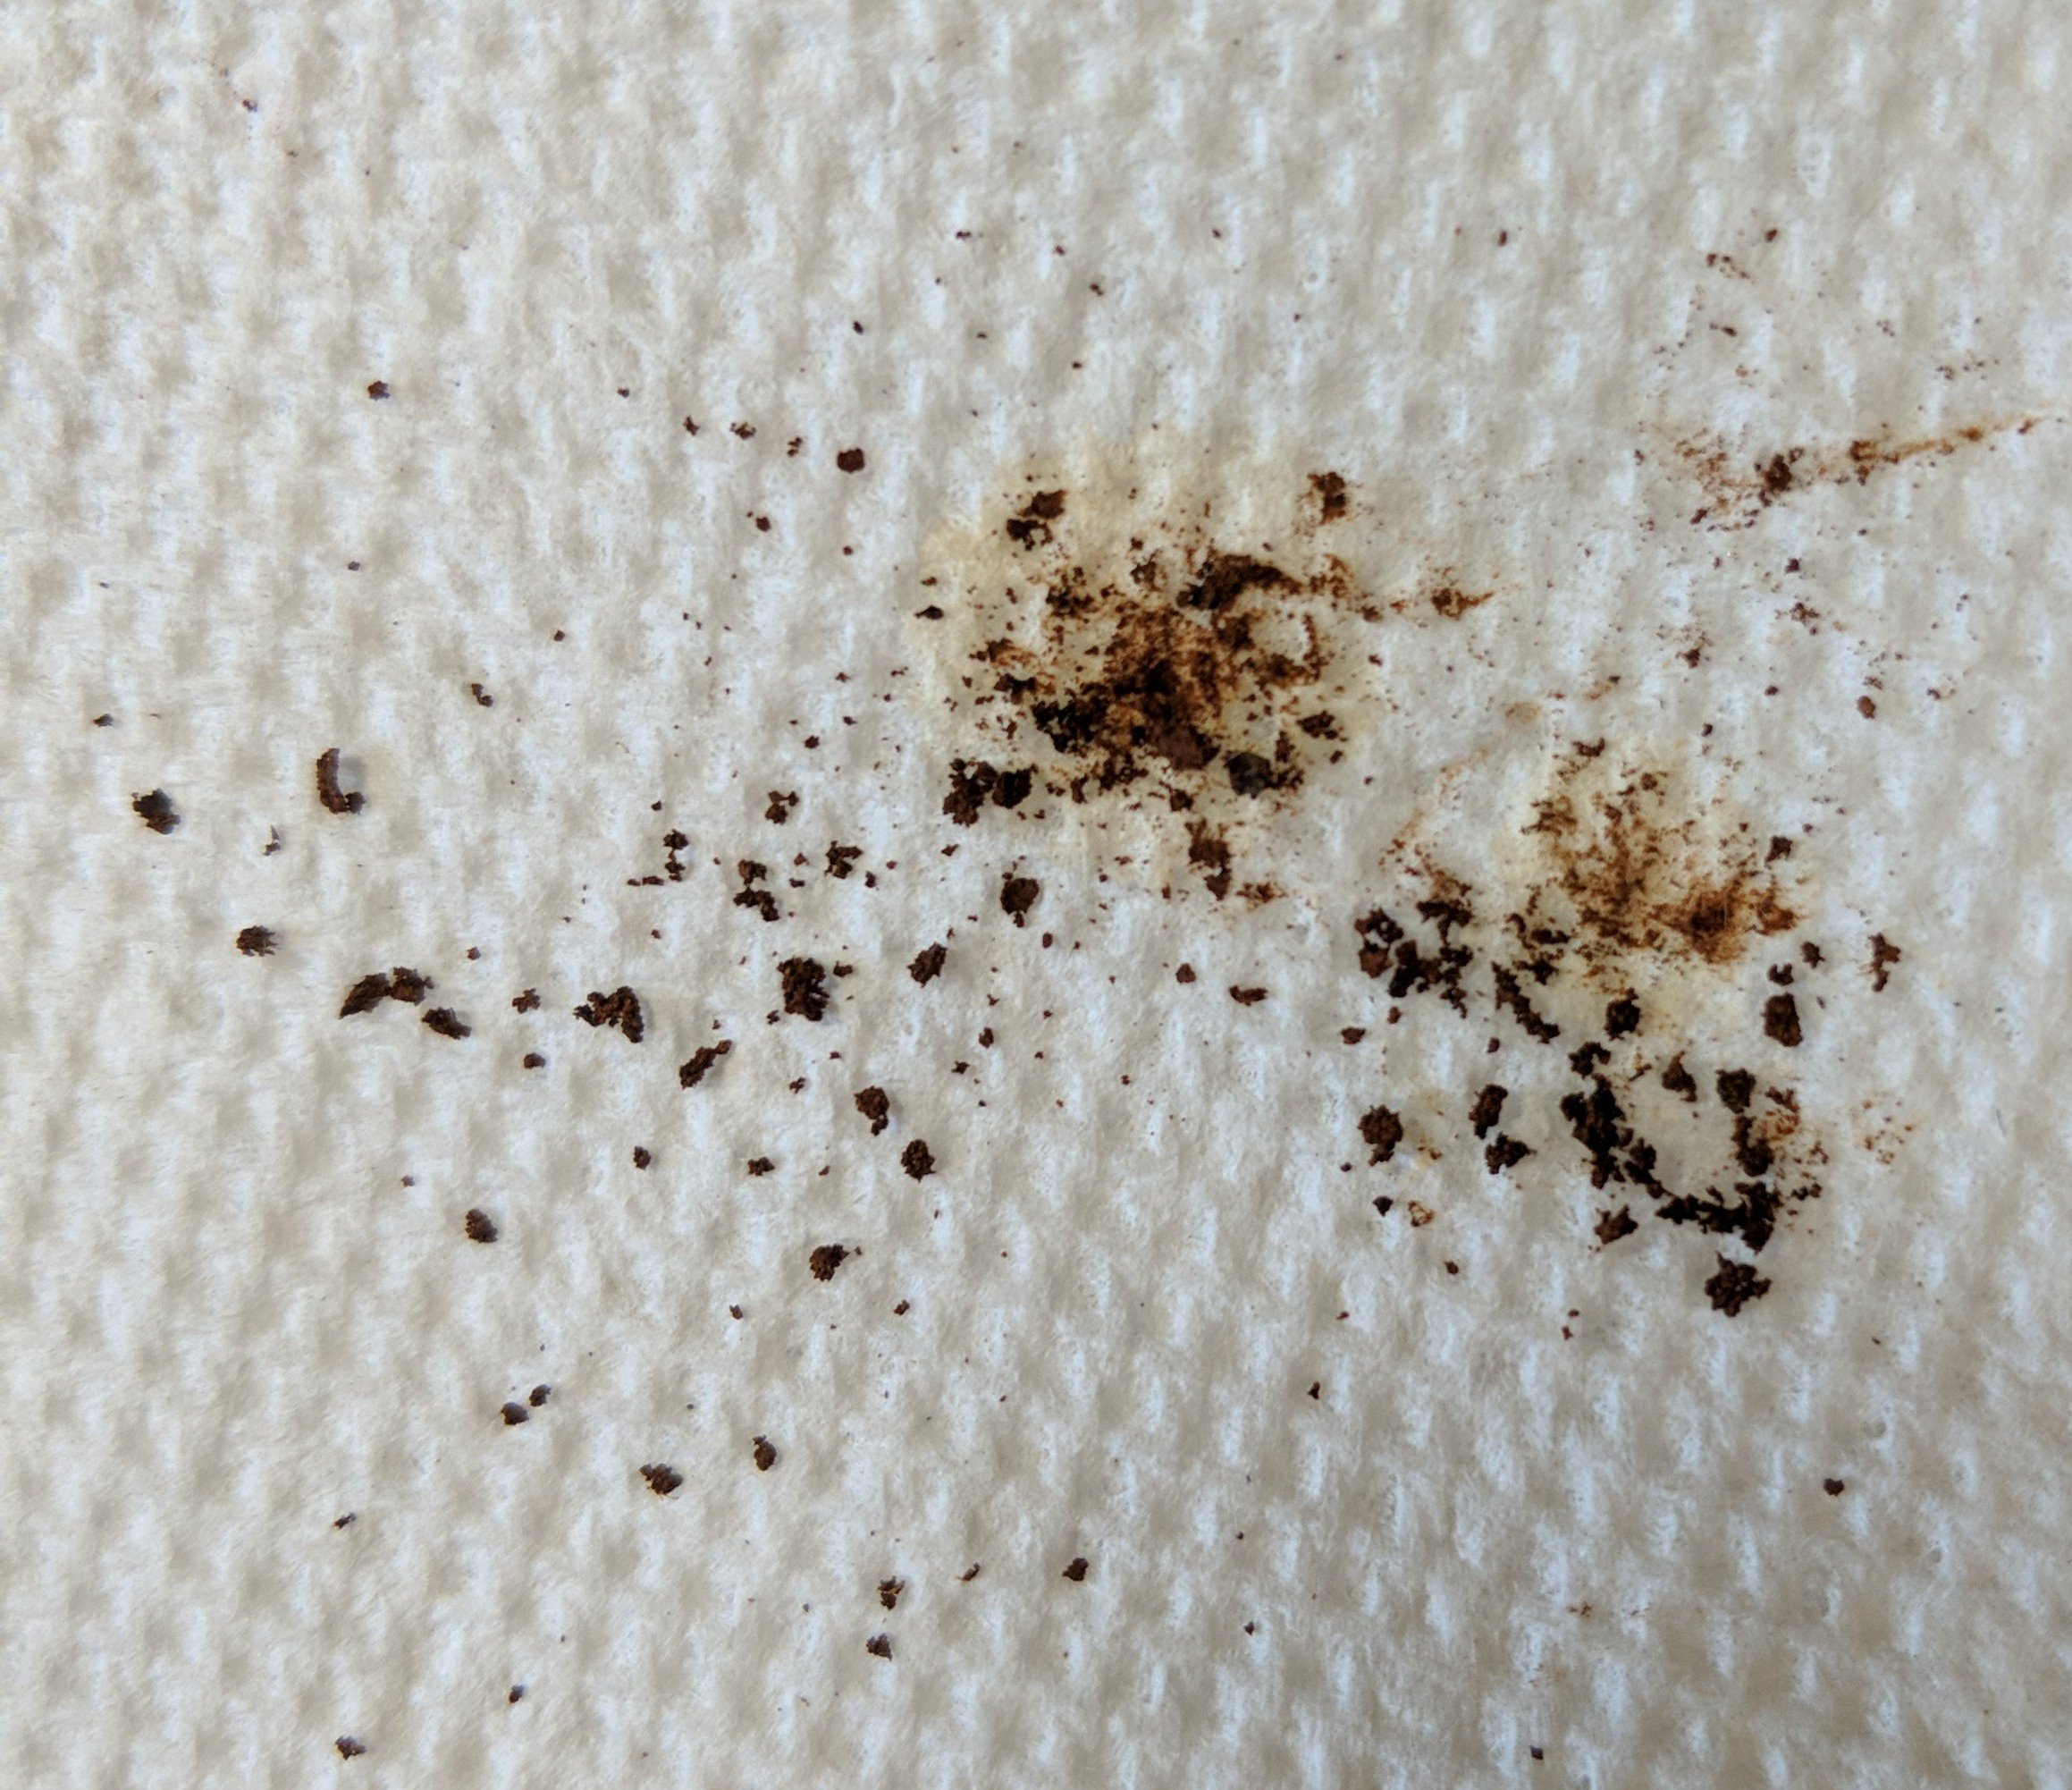
I used a wash bottle with lacquer thinner and washed about 1/2 the medium's debris into a clean glass container. Decanted it once. Washed it again. Decanted it. Let the solvent evaporate a little bit and scooped a couple of screwdriver tip's worth onto a clean paper towel. It was still a little wet as you can see by the staining on the paper towel. Picture is attached. The clumps are easily pulverized. The color is brown-reddish-brown.
PS: I think I'll get the Durametric out and measure the cam (angle) deviations...
-
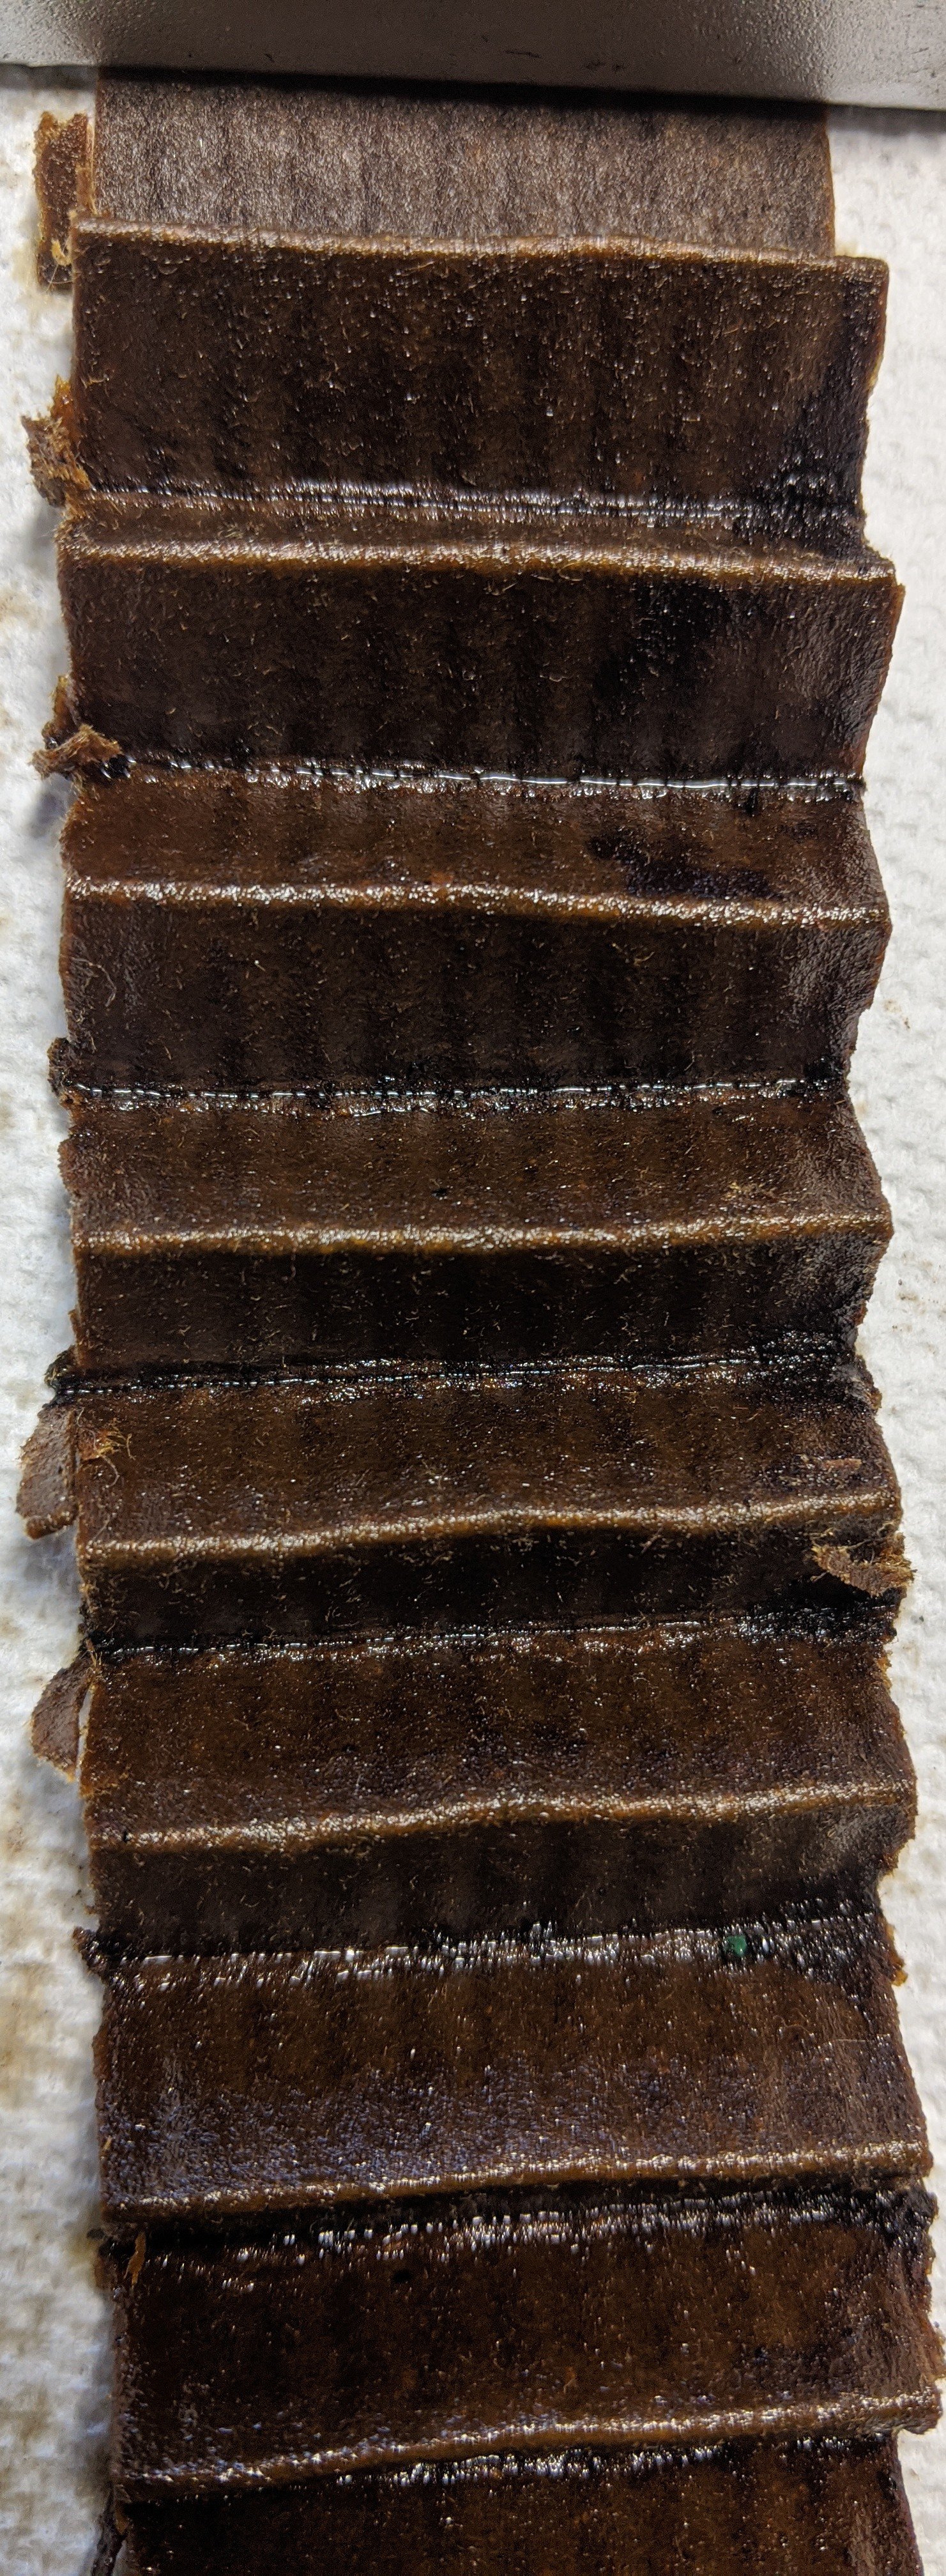
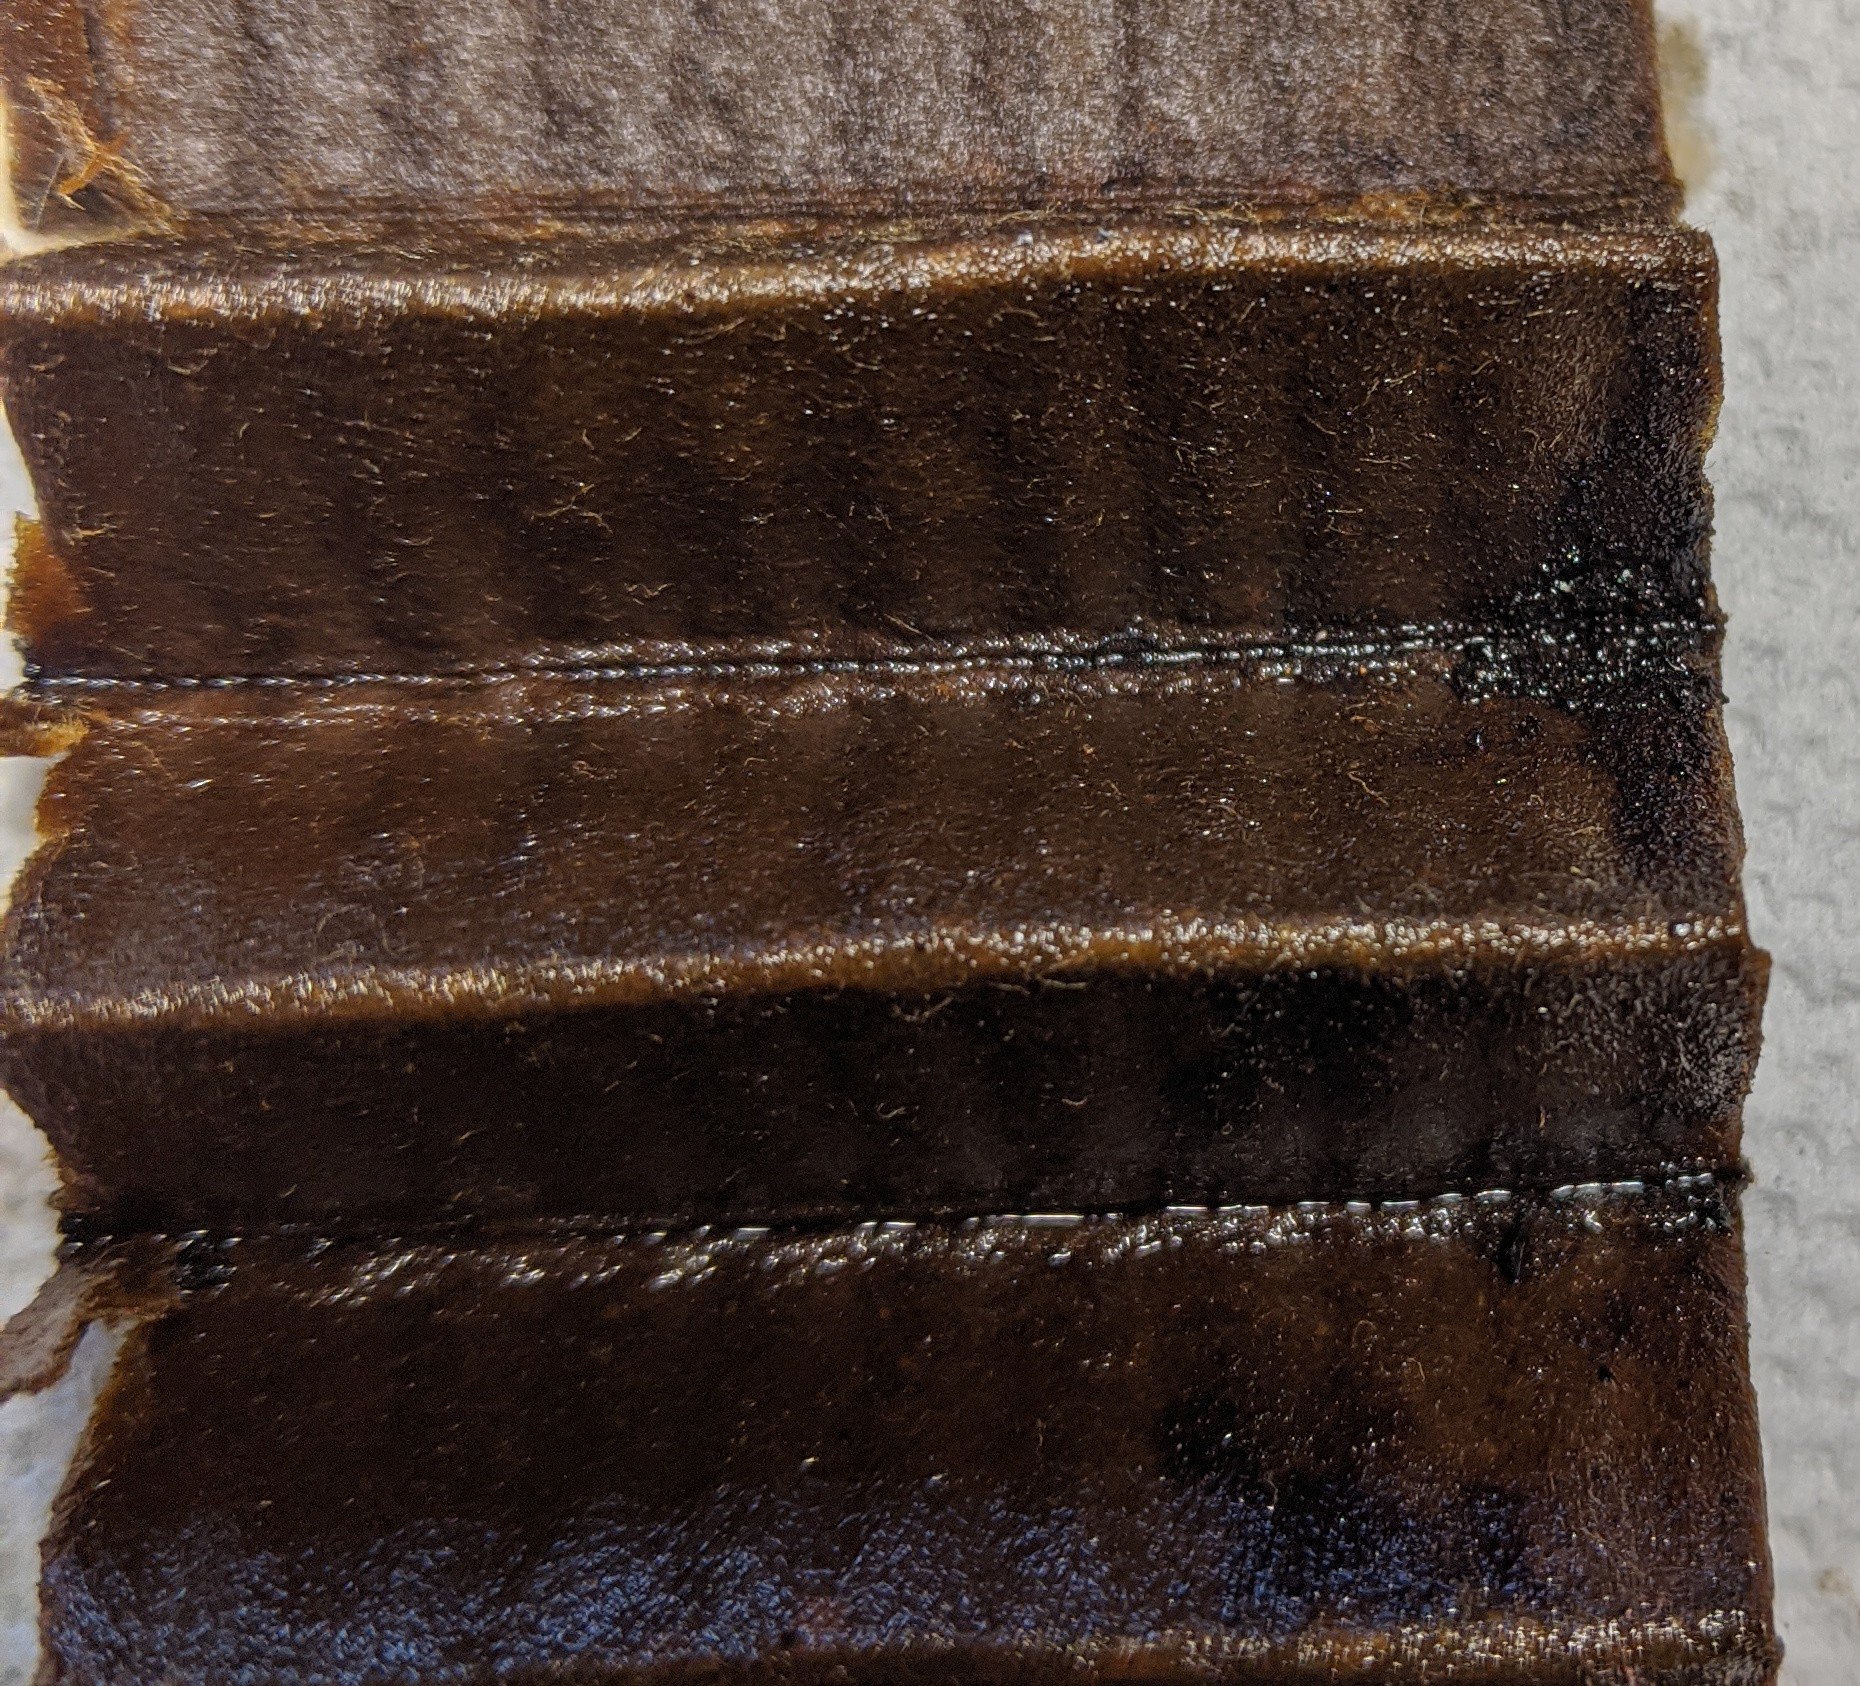
Changed my oil today. 2005 C2S with about 80000 miles. Been using DT40 for a few years. About 3300 miles (1.5 years; car was laid up about a year) on this oil change. Opened the oil filter case to inspect the oil filter medium. Saw a lot of fine black (oil soaked, of course) powder in the creases of the filter medium. Non-ferrous (wouldn't stick to magnet, other than due to oil acting as "adhesive"). More than I've seen in the past. I've attached two pics here.
What do you think? Source? Cause for alarm? Needs immediate diagnosis/correction? -
Yes. I've replaced mine twice in the four years I've owned mine. Same symptoms as you. Easy R&R.
-
Excessive crankcase vacuum is definitely a symptom of the AOS having failed. A couple of years ago, I made a homebrew manometer and captured the "inches of water" value. After the AOS failed, but I hadn't yet fully confirmed it was the AOS, I hooked up the manometer, and lickety-split, every inch of that water got sucked into the crankcase. I should have guessed that would happen but I stood there dumbfounded for a second then shut 'er down. Drained the oil. Replaced the AOS. Warmed up the car. Drained the oil again. A $120 for the extra oil change. Ugh.
-
I'm not sure this will help...
When I had the original side markers, I never had an issue with sporadic "check" messages.
For a couple years I've had LED replacements and about once a quarter I get a check message (on the right side) after hitting a rough patch of road. It has always resolved itself (I never had to fiddle with the fixture).
-
I'm surprised that the failed AOS caused the low pressure warning. I hadn't read that low oil pressure was a consequence and I've had a failure while driving and I had normal oil pressure for the balance of the short journey home.
-
I think the oil "spread" is too wide for the photos to help us. I think you need to clean off the area (even with a degreaser like brake cleaner aerosol) and then begin your vigil to watch for the first signs of the smallest amounts of dripping or seepage, etc.
-
They are not electrically controlled shocks. No wire. With the Ohlins, one can buy a black box that simulates the PASM part of the shock rather than having it coded out. It's just to fake-out the computer.
-
Howdy Koenbro,
I have a 2005 C2S. I noticed some drive-ability problems when there was ponding on the road (and maybe some dry weather "bouncy-ness"). I took it to a well known independent and he put it up in the air. Tire wear wasn't bad because I took most of the camber out about a year earlier but he said it probably had excessive toe-in and that should be eliminated and the camber put back. (You'll never get the same wear life out of the rears compared to the fronts). But...the most important thing was the rear shocks - he said he could lift the wheel assembly a few inches and if the setup was new/not worn, he should not be able to (by hand). I swear I had tried the four corner "bounce" test and the body settled in what I thought was a normal amount of rebounds. I guess the hand bounce test just doesn't cut it. So, I thought about Bilsteins to retain the PASM. I'm going with Ohlins R&Ts (Mostly because there was an availability problem with almost all Bilsteins for my car). I'll "code out" the PASM. I'm in the middle of the retrofit.
Shocks do wear out. Some say they're either good or bad. And they are only bad when they are leaking. Good or bad (binary) - has just not been my experience with any car I've owned (and my C2S's were not leaking). Even Ohlins recommends a rebuild after 20-30k miles on the top notch shocks. These things wear out. Especially things sliding past one another. Some say 50k miles is at the upper end of the useful life for a shock.
I think you could probably adjust/stiffen your existing PASM shocks with the DSC Sport Controller module. That's another option to consider.
John
-
Do what JFP says and...
I think that if the oil pressure gauge is showing any non-zero value when the engine is not spinning and electrical system energized, it makes the oil pressure sender suspect. It should read zero. The sender is easy to change and not too expensive; it's on the passenger side of the engine, on the top side above the head, and about half way back; it looks like a typical oil pressure sender. Pretty sure you'll want to do it when the engine is cold.
-
If you are referring to the black area near/below the shoulder - it is a marking from during my disassembly process.
-
I don't think there should be bolts in there. I happen to still have mine open for putting in coilovers. The aluminum plate is what the Bose subwoofer shelf sits on and there doesn't seem to be any bolts/studs coming from it (that would mate with the holes). As for the broken clip - I don't have that on my 2005 C2S as can be seen in my pic. It's been a few months since I took mine apart so I may need some help from you when I put it back together. ?
-
 1
1
-
-
Very weird. Never heard a story like this. What changed since it was last driven; what allowed them to not break the last time it was driven? Some sort of accelerated fatigue...
-
Do these seem like reasonable steps to change-out the tensioners? All comments welcome.
Tools:
-Tensioner torque 59 ft-lb
-32 mm socket
-fairly large 6 mm(?) hex key (for bank 2)Reference info:
-while facing the rear of the car; looking towards the front
-cylinders 1,2,3 - drivers side, left side; this is bank 1
-cylinders 4,5,6 - passengers side, right side; this is bank 2Parts:
-primary/ims chain tensioner - one ring marking; 996-105-180-58-M100; installs on crankcase near oil filter area; rear of engine
-cylinder bank 1-3 - two rings marking; 996-105-186-02-M100; left lower area on cylinder head; points straight down
-cylinder bank 4-6 - no marking; 996-105-188-02-M100; right upper area on cylinder head
-crush washers usually come with the tensioners
-camshaft plugs - 4x - 996-104-215-54Steps:
-index the engine to TDC
-remove the bank 1 camshaft plugs (looking into engine bay; to the left and look down)
-inspect the camshaft slots to ensure they are straight up and down, if not rotate the engine 360 deg; inspect the camshaft slots to ensure they are straight up and down
-lock the crank/pulley with a 5/16 inch or 8 mm pin
-lock the camshaft for bank 1, rear of engine, left side
-pump up the primary/ims and bank 1 tensioners in oil prior to insertion
-replace the IMS tensioner (has one ring) (flywheel end of engine; right side of engine; a few inches up from bottom of engine)
-replace the bank 1 tensioner (two marking rings) (left side/bottom of engine)
-remove the camshaft lock
-install the new camshaft plugs-remove the TDC pin
-rotate the engine 360 deg
-lock it with a 5/16 inch or 8 mm pin
-lock the camshaft for bank 2, front of engine, right side
-move the AC compressor out of the way
-pump up the bank 2 tensioner in oil prior to insertion
-replace the bank 2 tensioner
-install the AC compressor
-remove the camshaft lock
-install the new camshaft plugs
-remove the TDC pin
-
With regard to my 2005 C2S (three chain, right?), can I lock the pulley at TDC, and then use a single 9686 tool to lock the camshafts on one side but swap-out all three tensioners, one-by-one (without moving the 9686 tool)? If a single 9686 tool position can work for all three tensioners, which side should it be placed on - drivers or passengers?
-
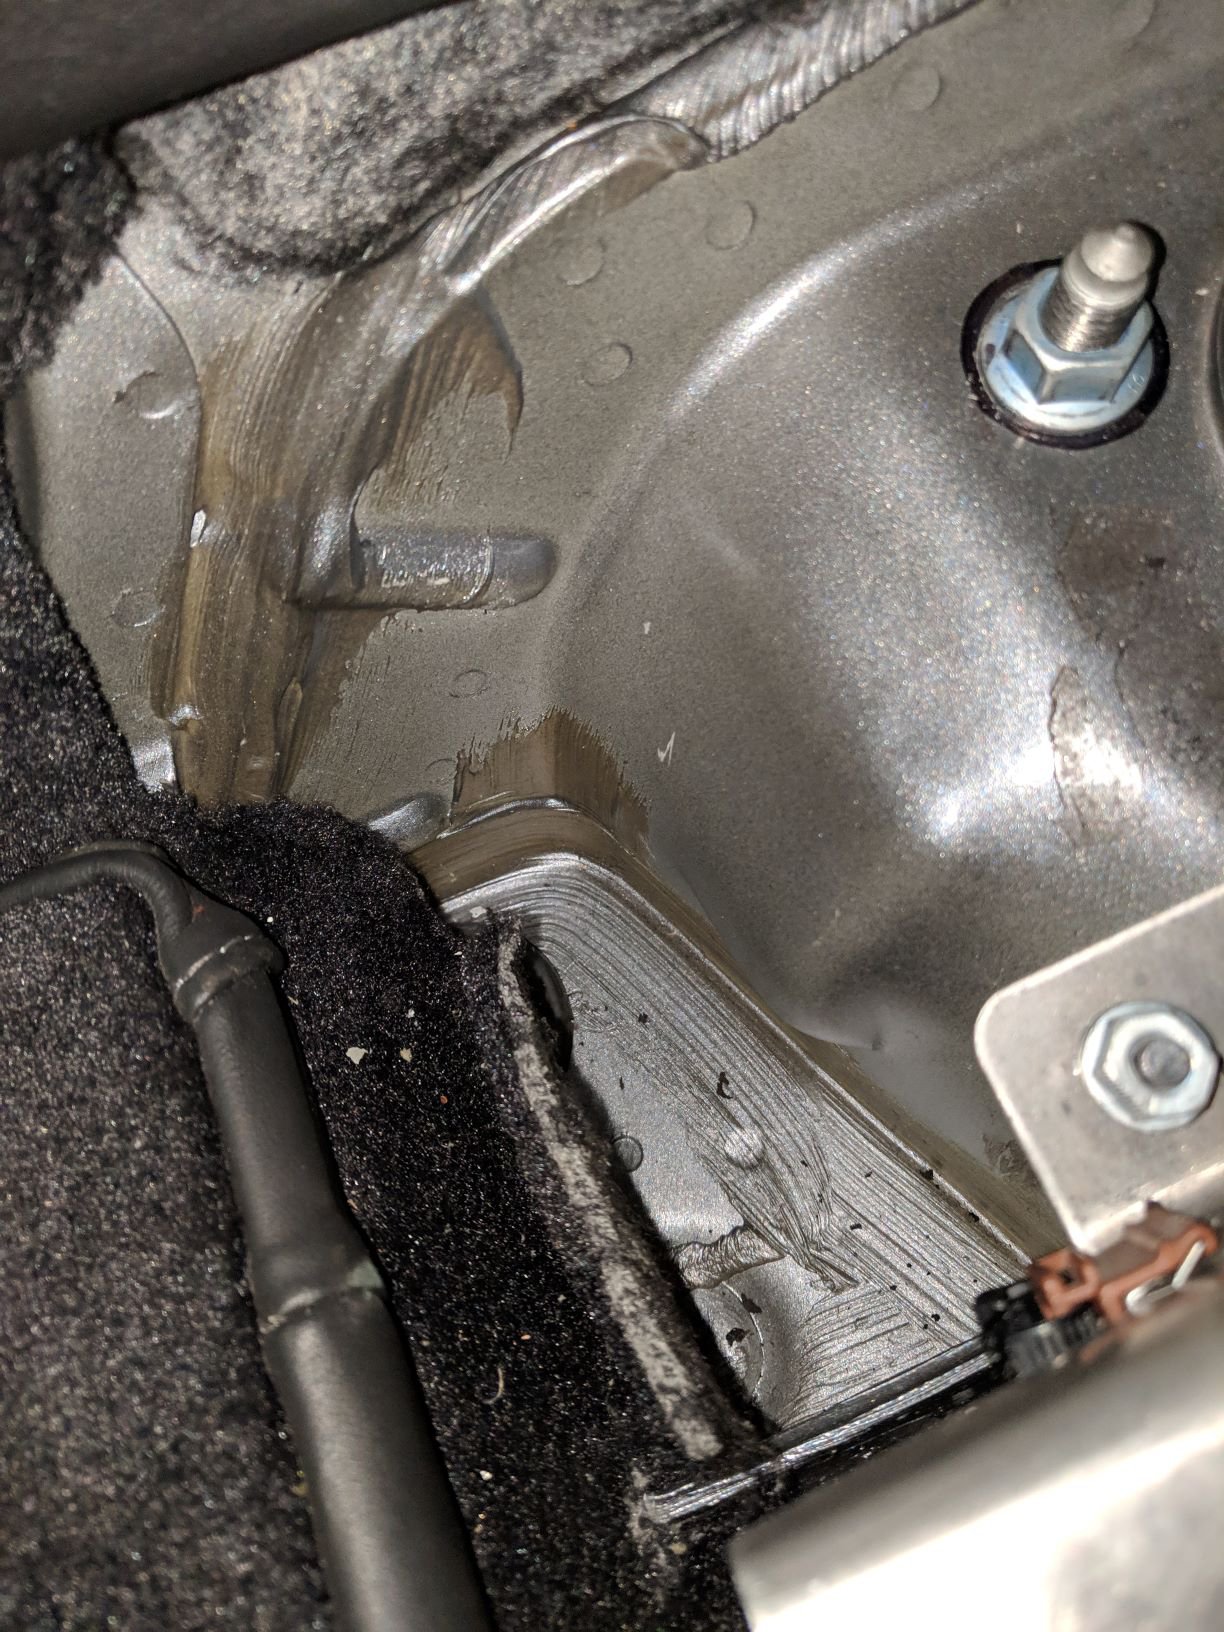
So, I got up under car to start taking measurements for the camshaft lock (similar to 9686) and noticed how little room there was at the front and rear of the engine to place the tool. In the rear (drivers side), the underside of the engine mount area seems to be in conflict. In the front of the engine, part of the frame crosses through the work area.
Can the standard lock tool be put into place (front and rear) while the engine is in the car?
-
I too haven't read that there's specific mileage threshold (although I've read that they do "age" - read - leak down and/or lose tension). I did read from Raby that there should be no noise from the chains, for example, upon cold start (even transient). I'm hearing a 1-2 second period of chain rattle at cold start so I'm going to preemptively change the two easy ones first and see what rattling is left over. I've read it's usually the IMS chain tensioner which is one of the easy ones. I'll do it at my next oil change even though not a lot of oil leaves the case. You do have to have one special tool (actually two of the same) - to lock the camshafts in position when you're locked at TDC with a 5/16 inch drill bit. I plan on making (the lock tool is rather simple) them from some aluminum flat bar since the cheapest I could find for one (as part of a kit) was $60.

Found fine black powder in oil filter medium
in 997-1 Series (Carrera, Carrera 4, Carrera 2S, Carrera 4S)
Posted
What do you think the sludge is composed of?