Welcome to RennTech.org Community, Guest
There are many great features available to you once you register at RennTech.org
You are free to view posts here, but you must log in to reply to existing posts, or to start your own new topic. Like most online communities, there are costs involved to maintain a site like this - so we encourage our members to subscribe or donate. All subscriptions and donations go to the costs operating and maintaining this site. We prefer that guests take part in our community and we offer a lot in return to those willing to join our corner of the Porsche world. This site is 99 percent member supported (less than 1 percent comes from advertising) - so please consider an annual subscription or donation to keep this site running.
Here are some of the features available - once you subscribe RennTech.org
- View Classified Ads
- DIY Tutorials
- Porsche TSB Listings (limited)
- VIN Decoder
- Special Offers
- Paint Codes
- Registry
- Videos System
- View Reviews
- and get rid of this welcome message
It takes just a few minutes to register, and it's quality Porsche information at a low cost.
Contributing Members also get these additional benefits:
(you become a Contributing Member by subscribing or donating money to the operation of this site)
- No ads - advertisements are removed
- Access the Contributors Only Forum
- Contributing Members Only Downloads
- Send attachments with PMs
- All image/file storage limits are substantially increased for all Contributing Members
- Option Codes Lookup
- VIN Option Lookups (limited)


mjsupp09
-
Posts
8 -
Joined
-
Last visited
Content Type
Profiles
Events
Forums
Exterior Paint Colors
Downloads
Tutorials
Links Directory
Collections
Classifieds
Store
Everything posted by mjsupp09
-
Rearview mirror removal
mjsupp09 replied to bob/ft.worth's topic in 996 Series (Carrera, Carrera 4, Carrera 4S, Targa)
Recently ran into this issue as my mirror fell off. (Thankfully it didn't break.) For those to whom this happens, the method above will not quite work. If your mirror falls off (with the base attached), clean the residual glue off and identify the metal circular base, which extends about a .25 to .125 from the base. For tools, I used a crescent (vice) wrench like the one above pictured. I also used channel locks, a microfiber towel, and (importantly) gloves. Last thing you want is the tool to shear off and bang your hand up. Attach the crescent wrench to the metal base. Wrap the microfiber towel around the mirror base housing and get the channel locks affixed. Twist the metal base COUNTERCLOCKWISE 90*. This will unlock the metal base from the mirror base housing. Acquire some glue (I used the 3M high bond adhesive), clean the working surfaces and reattach. Done. -
I'm presuming your car is beeping once? Do you have an aftermarket stereo? In the meantime, until you get it figured out you can lock the vehicle and immediately unlock it. In 45 seconds it will auto lock and the alarm won't go off on you.
-
An M96 Drive Log
mjsupp09 replied to mjsupp09's topic in 996 Series (Carrera, Carrera 4, Carrera 4S, Targa)
Interesting. I was unaware the IMS Solution was susceptible to failure. My other thought had been to install the Solution. There was ferrous metal in the filter, though not all of it was. Attached is a pic I have after combing through the filter. So at this point, the decision is save for a new engine (and run the one I have until failure); or rebuilt the existing? Anyone know what the going figures are for this?
-
Hello Wycked, I strongly recommend finding someone that has, or purchasing for yourself, some sort of diagnostic equipment. It would be interesting to see if there is any stored fault memory.
-
Good evening all, I was able to get out and run the car yesterday with the durametric plugged in. I know most lean to replacing the IMS, but at a cost of 3-4k and addressing only a single mode of failure (though quite possibly the most famous), I wonder if it wouldn't be better to start setting aside funds for a F6 or RND "new" engine. I have read monitoring camshaft deviation values and their rapid fluctuation at different RPM is one documented way to assess the viability of the IMSB/IMS. I've hooked the car up three times. Bank 1 likes to hang out at -6/-6.5 (and is out of spec). Bank 2 likes to hang out around -2.8. I would welcome any feedback on the logs I captured this weekend. I don't think I should be overly concerned, as there was no acute fluctuation across different RPMs and the change was in one direction. Thank you! Additional details: MY00 cabriolet; No prior IMSB replacement; Probably 15-30 small metal flakes (.3-1mm) in the oil filter. 2019_07_07_10_54_54-formatted (2).xls
-
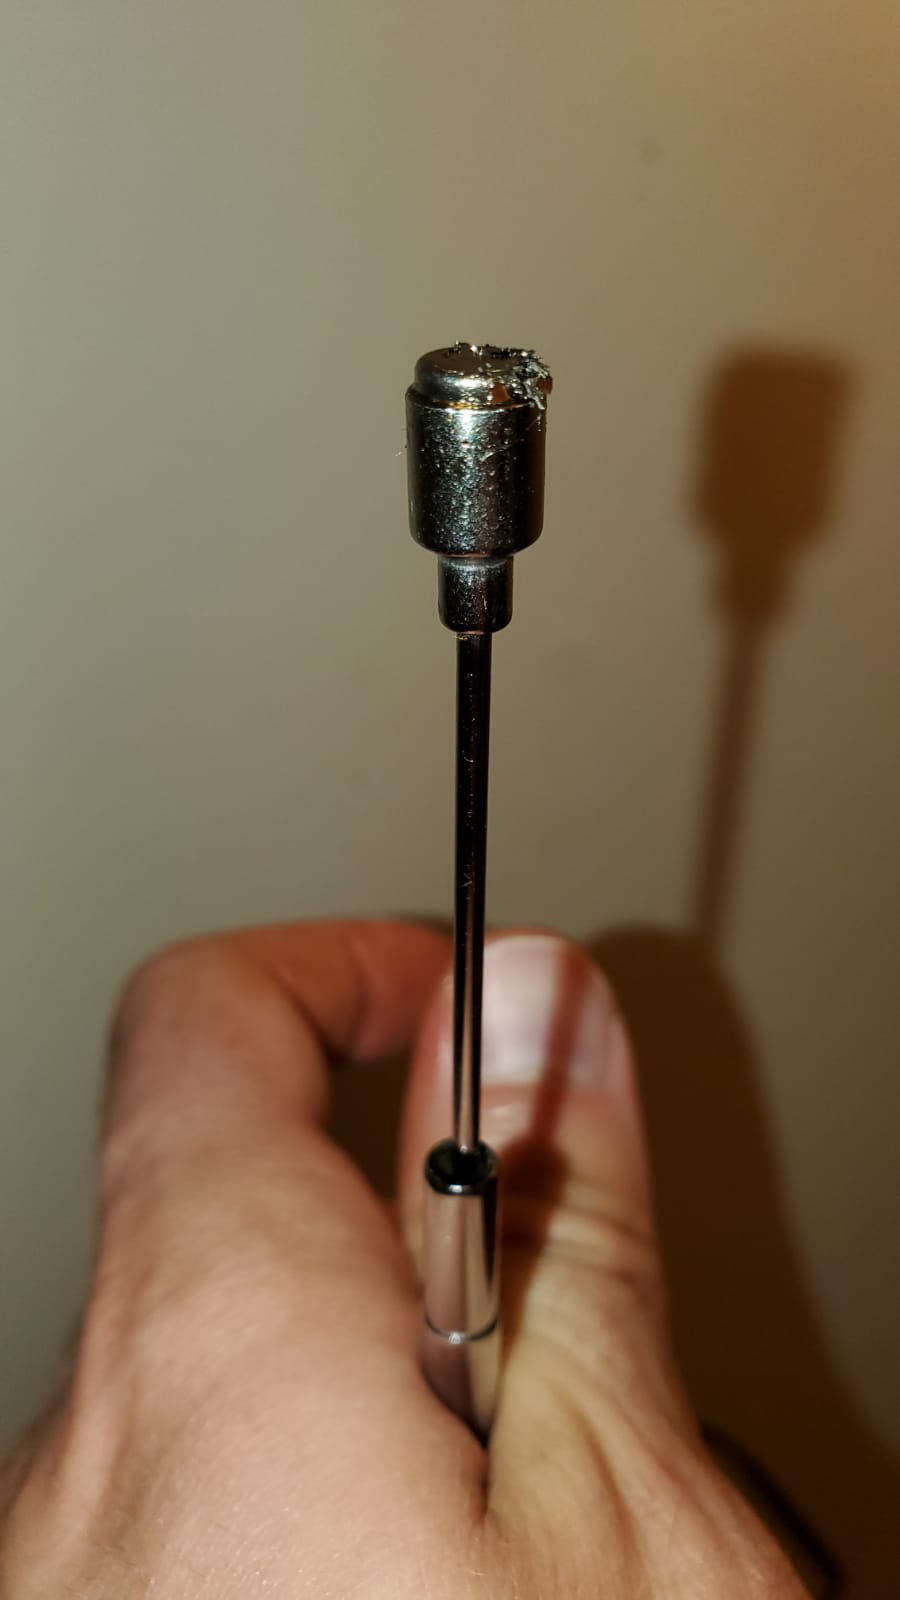
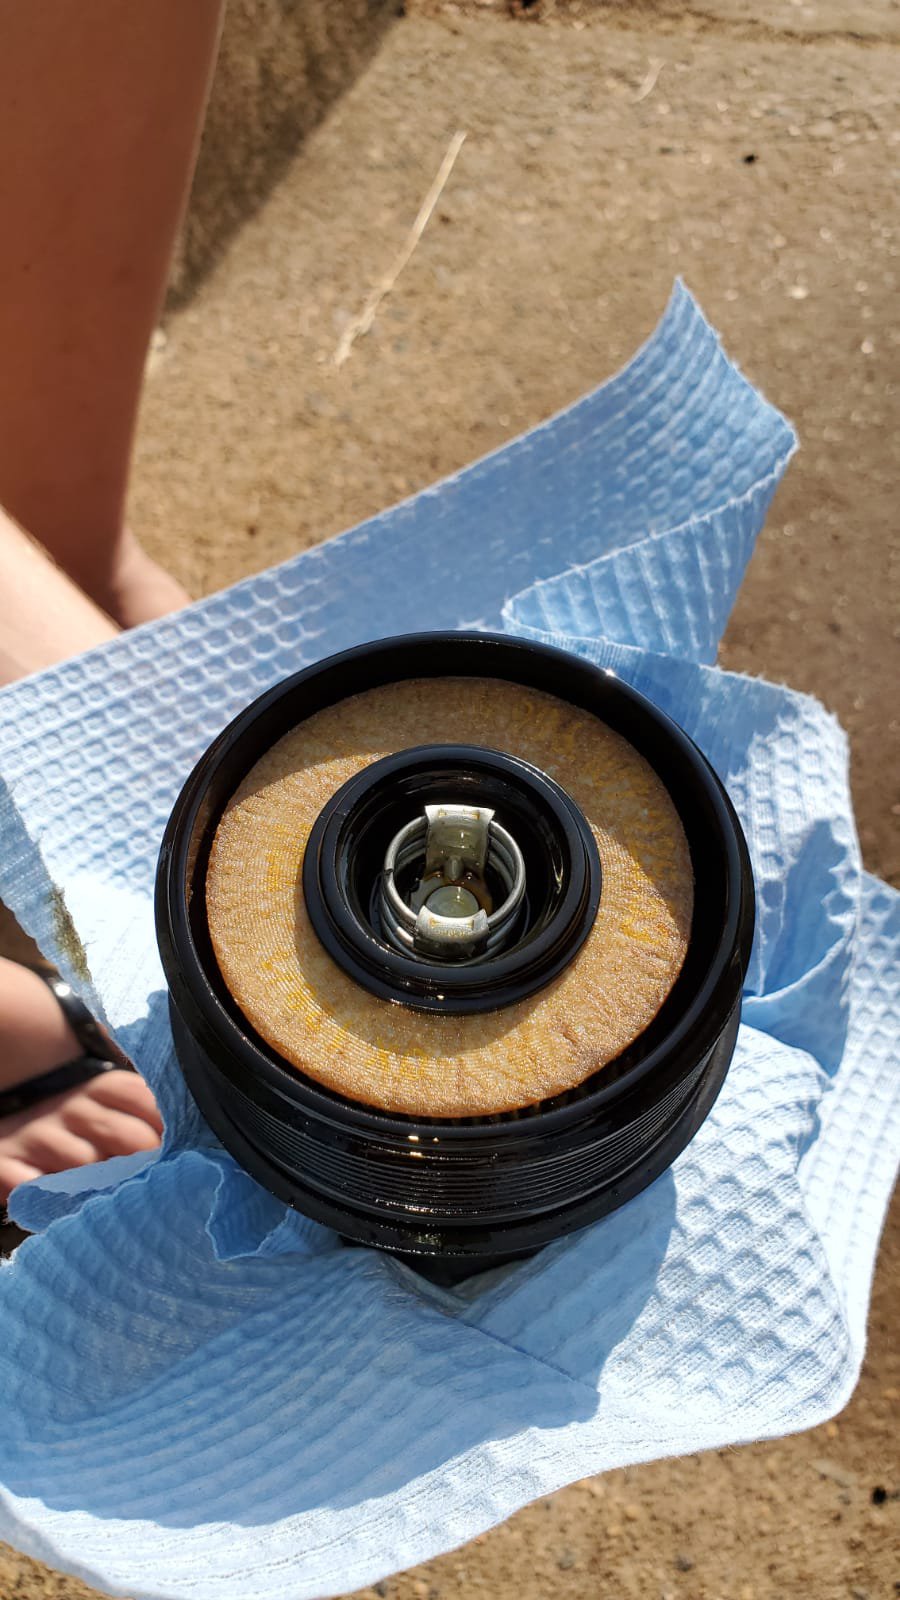
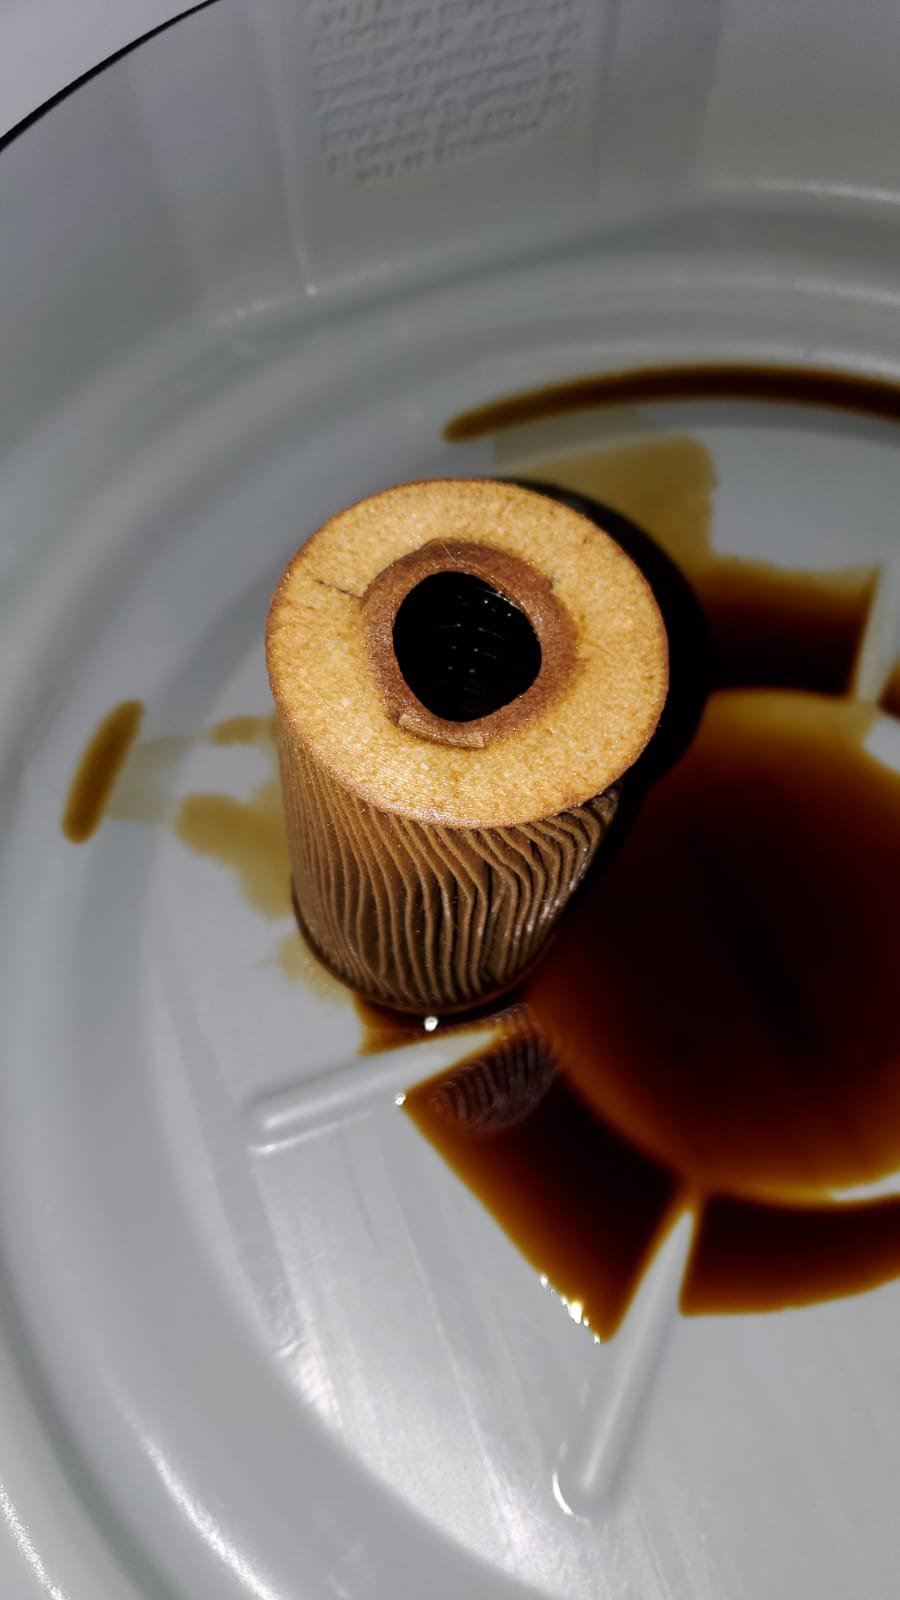
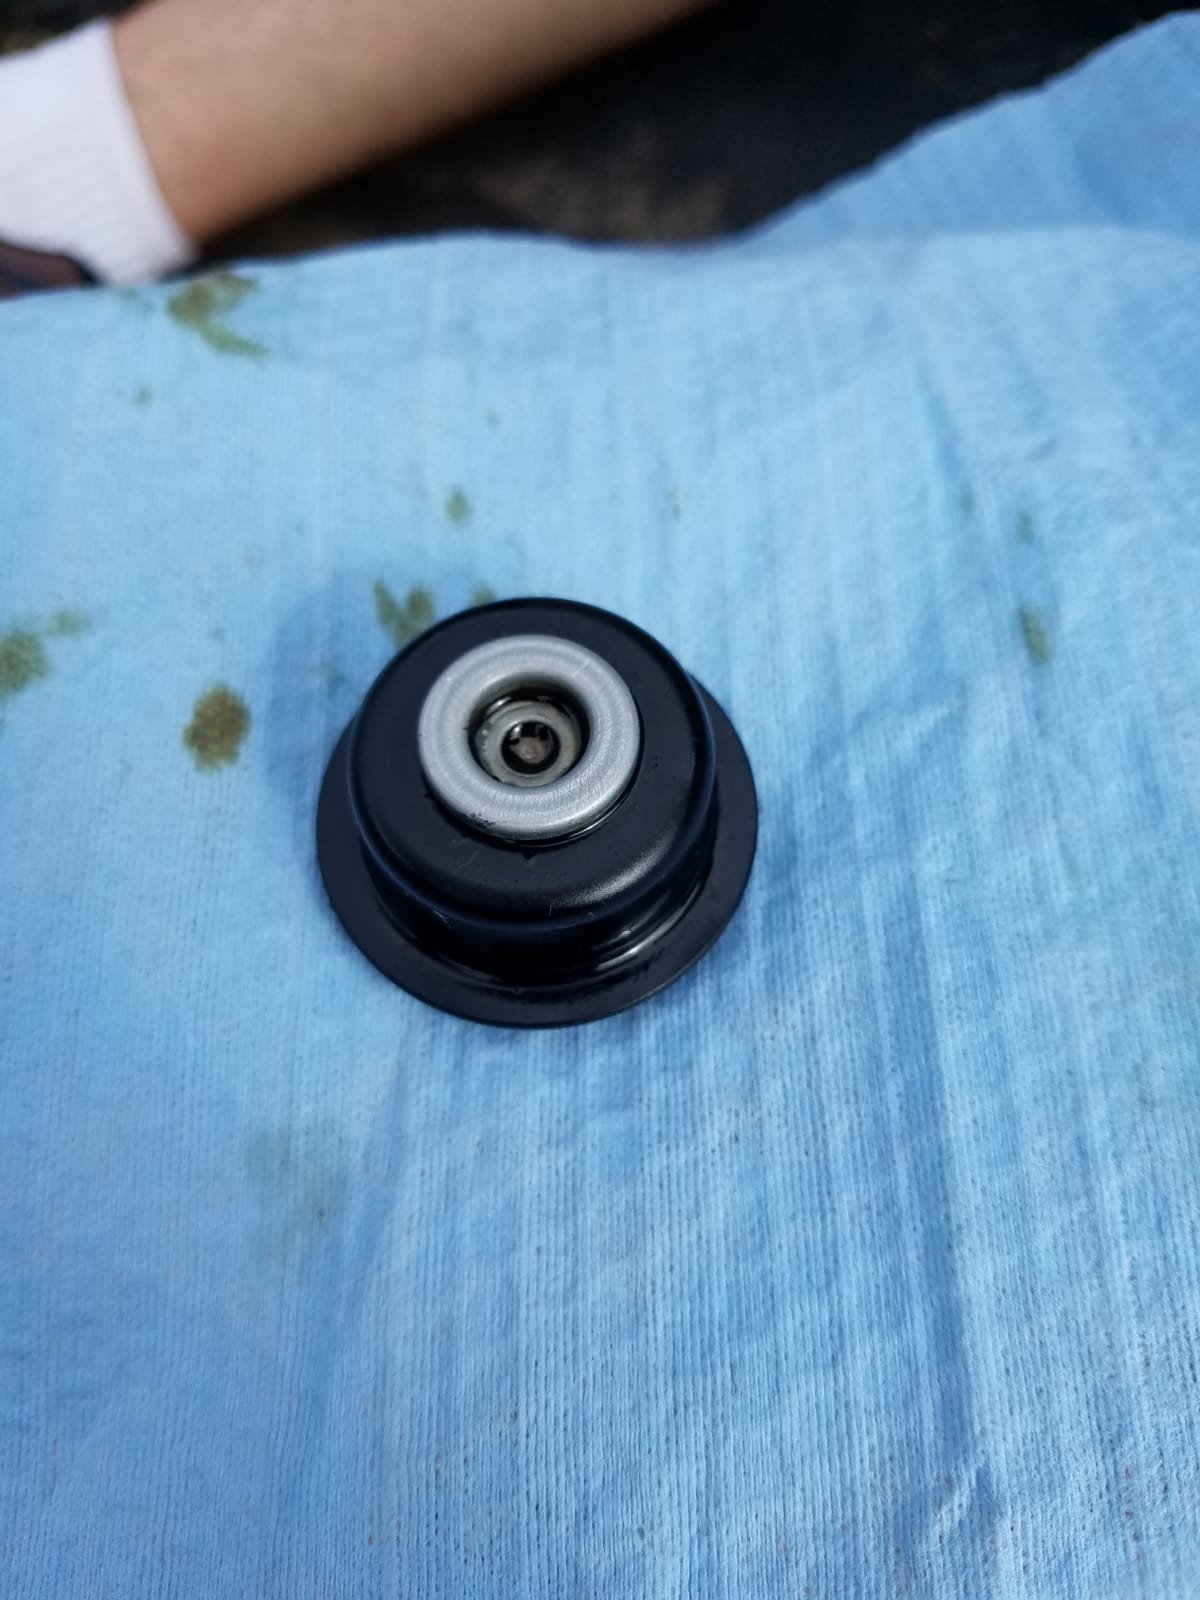
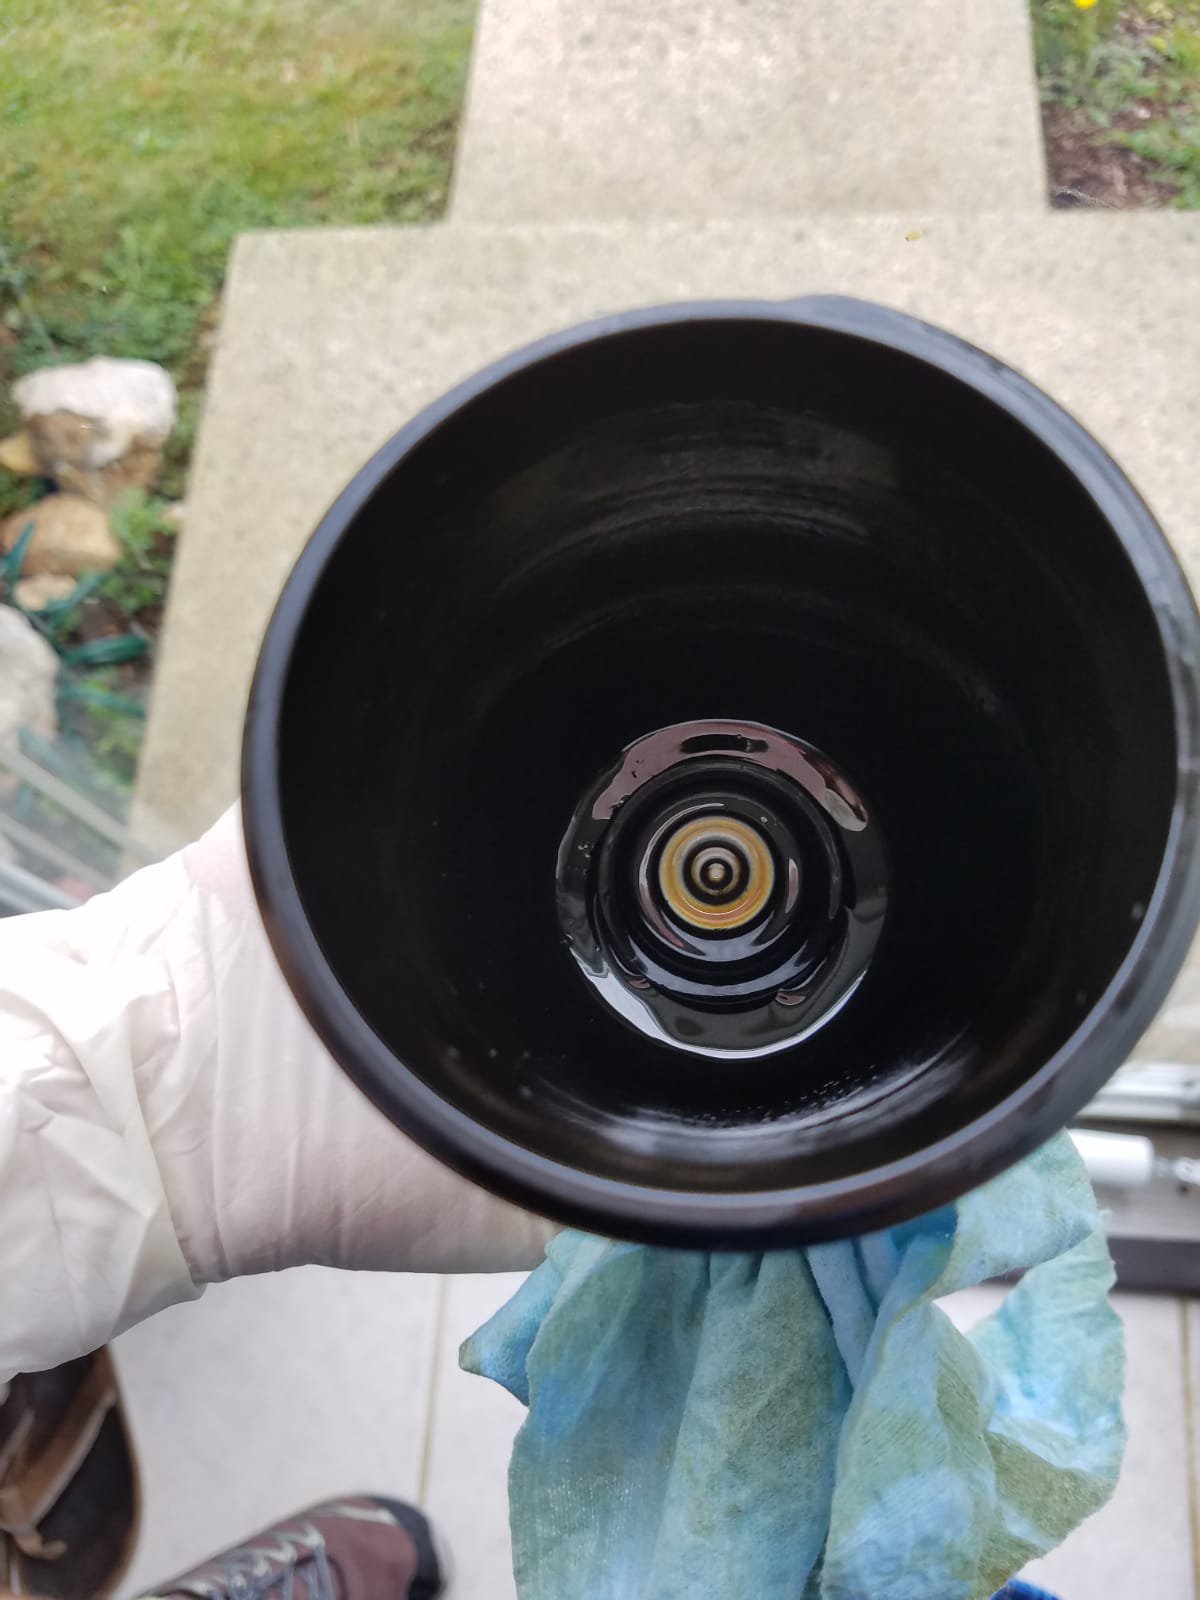
Much appreciated gentlemen for the input. Just to close the loop. The oil bypass valve came out with the old filter and not the canister. I got the direction wrong when I put it back in (picture 1), which is why the oil filter/canister threaded half-way by hand without issue, and required a wrench to turn the rest. Pulled the new filter out last night to reverse the direction and noticed the filter tear (picture 2). So, for that last half-way of threading I was destroying the filter. If anyone is doing a first-time oil change and you happen to have the bypass valve separate from the canister (picture 3), make sure you either seat it in the bottom of the canister (picture 4), or (what I had to do), press it into the bottom of the filter, press the filter on to the car, and finally finish by threading the canister on. After I finished this process, I restarted the car this morning and after about 2 seconds of running with no pressure/oil pressure warning light on, the pressure bounced immediately up to 4+ bar and the warning light went out.
-
Thank you JFP for your quick reply! I am certain there was an operator error. I pulled the oil canister and am certainly left with a torn oil filter (need to replace tomorrow). My problem was presuming the oil bypass valve was topside vice bottom of the canister. I'll make sure with my new oil filter the oil bypass valve is seated at the bottom of the oil canister and report back. In all of the oil change threads (and even Bentley's manual) there is no mention of the oil bypass valve in the process. This will be a good reference point to all those that encounter the same problem. Or better yet, to get it right the first time. ETA: Looking back through posts, it looks like you recommend the Wix/NAPA Gold 57211 filter. Is this the correct one? Oil Filter - NAPA Gold PART #: FIL 7211 PRODUCT LINE: NAPA Gold Filters
-
Hello all, Today I changed the oil on my new-to-me 996. Additionally, I decided to change the air filter and drive belt. After filling the car back up with 8.5-9q of oil, I checked the electronic level (the dipstick read over full) and it read two or three bars under full line. I plugged up the durametric and was getting ready to drive off to let the oil disperse, check my camshaft deviation values, and top it off with oil tonight. Before I was able to leave, I noticed after about a minute (and a half) of running that the oil pressure light was on and the oil pressure guage read sub-1 bar. I freaked out and immediately shut the car off. I checked to see if the oil filter, which looked good and scoured the forums -- didn't see a similar problem. I decided it must have been a fluke, so I tried to re-start the vehicle. Start up showed the gauge still at sub-1 bar and the oil pressure light on. This start sounded much rougher. Thinking back through the oil change, I wondered what I could have possibly done to leave my car with no oil pressure. The only weird thing I can thing of is the oil filter hand-spun on about half the way and hung up, so I had to finish the rest of the 10 or so revolutions with a wrench. I started to thing that maybe I couldn't build oil pressure because I cross-threaded the oil filter, or messed up something on the oil filter. It's the only odd variable. I went ahead and drained the oil and re-checked the oil filter, which when broken, spun off by hand perfectly. The oil filter looked good to go, with the oil bypass mechanism well-seated in the oil filter. I'm going to let the oil sit for awhile and see if there are any insights on these awesome forums. Thanks in advance!