Welcome to RennTech.org Community, Guest
There are many great features available to you once you register at RennTech.org
You are free to view posts here, but you must log in to reply to existing posts, or to start your own new topic. Like most online communities, there are costs involved to maintain a site like this - so we encourage our members to donate. All donations go to the costs operating and maintaining this site. We prefer that guests take part in our community and we offer a lot in return to those willing to join our corner of the Porsche world. This site is 99 percent member supported (less than 1 percent comes from advertising) - so please consider an annual donation to keep this site running.
Here are some of the features available - once you register at RennTech.org
- View Classified Ads
- DIY Tutorials
- Porsche TSB Listings (limited)
- VIN Decoder
- Special Offers
-
OBD II P-Codes - Paint Codes
- Registry
- Videos System
- View Reviews
- and get rid of this welcome message
It takes just a few minutes to register, and it's FREE
Contributing Members also get these additional benefits:
(you become a Contributing Member by donating money to the operation of this site)
- No ads - advertisements are removed
- Access the Contributors Only Forum
- Contributing Members Only Downloads
- Send attachments with PMs
- All image/file storage limits are substantially increased for all Contributing Members
- Option Codes Lookup
- VIN Option Lookups (limited)


Mitch Leland
-
Posts
10 -
Joined
-
Last visited
About Mitch Leland

Mitch Leland's Achievements
Member (1/1)
0
Reputation
-

BIG STINKY...
Mitch Leland replied to Mitch Leland's topic in 996 Series (Carrera, Carrera 4, Carrera 4S, Targa)
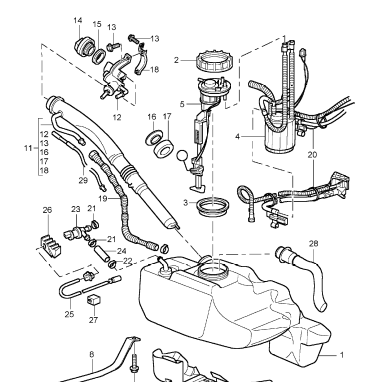
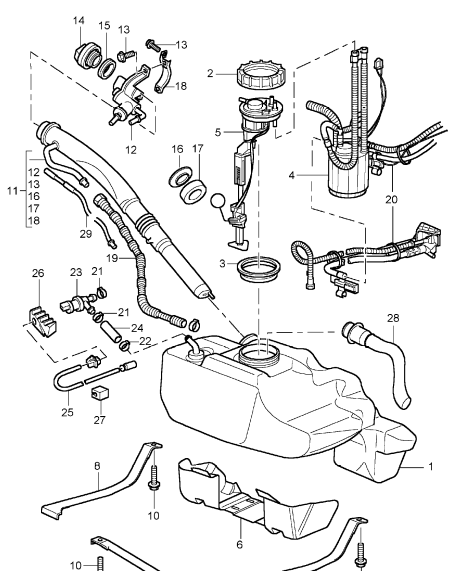
Loren, thanks for your input, however the white plastic 90 at the top of the pic is the battery vent line. The fitting inside the circle is my concern... It's a barb fitting and PET shows item 21 is a hose clamp. That would mean I'm missing a hose. The PET diagram doesn't show a hose coming off or going to that electrical valve, but shows a hose clamp. Someone out there must have some experience with this... a pic of what yours looks like if anyone has taken a pic of the top of the gas tank... Today when I went into the garage the stink was down to a faint smell, but you just can't plug up a hose which might have some other consequences.. -
2003 996 C4S I'm still chasing the big stink... Does anyone know what the plastic 1/8" barb fitting is for? Should there be a hose connected to it? If you're lookin gm at the PET my gas tank is a saddle bag configuration which is different different than the standard body. PET shows a hose clamp next to the barb valve, I'd sure be grateful if anyone could tell me if I'm missing a hose and clamp. OH, I inserted a plug just to see if the gas fumes would go away, they didn't... However that's with just 1 day on the clock.

-
GAS TANK WILL NOT FILL...
Mitch Leland replied to Mitch Leland's topic in 996 Series (Carrera, Carrera 4, Carrera 4S, Targa)
I now think the breach is either in the vent hose item 19 or the connections in the fill pipe, item 11. I looked at dropping the tank in Bentley's, but they only have draining and replacing the pump. I will do a search here. Is the fill pipe one continuous pipe or are there connections as denoted by the accordion rings? Thanks for any help...
-
GAS TANK WILL NOT FILL...
Mitch Leland replied to Mitch Leland's topic in 996 Series (Carrera, Carrera 4, Carrera 4S, Targa)
I'd appreciate anyone's ideas other than checking with a match. I've already thought of that, but for other reasons... LOL -
GAS TANK WILL NOT FILL...
Mitch Leland replied to Mitch Leland's topic in 996 Series (Carrera, Carrera 4, Carrera 4S, Targa)
The original problem was leaking gas fumes... I looked at all the plumbing on top of the gas tank and decided the fumes must come from one of the valves. I replaced the both of the 2 vent solenoid valves (996 605 213 01). No Sooner that I got the gas valves installed I couldn't fill ANY gas in the tank. I replaced the vent Bleeder valve (996 201 143 01) and Adapter cable (996 612 511 00). The adapter cable was $20 some dollars so at this point the "while I was there there" kick in. Finally I can fill the gas tank.... Not sure whether it was the bleeder valve or adapter cable, my guess it was the Bleeder valve. But the stink is still with me... Grrrr -
GAS TANK WILL NOT FILL...
Mitch Leland replied to Mitch Leland's topic in 996 Series (Carrera, Carrera 4, Carrera 4S, Targa)
Jon, I have searched away. There doesn't seem to be any one answer, some say you need to hear a click when the filler neck lid is depressed, others mention a fuse, etc. I haven't read if there's any way to test the bleeder valve rather than spend another $200. Even Wayne's book says it's a likely suspect, but nothing about testing before buying. So when I made this request I was looking for some validation on replacing the bleeder valve. Oh. I have already taken the car apart to look at the top of the gas tank, all seemed to be in order... -
The gas tank will not take any gas, I've replaced the 2 solenoids under the head lights, right side. I think the only thing left is the bleeder valve under the gas fill lid. Would all think replacing the bleeder valve will restore my issues with the gas tank. Wayne's Book, "101 projects" suggest replacing the valve will take care of the problem... What say you.. Thanks.
-
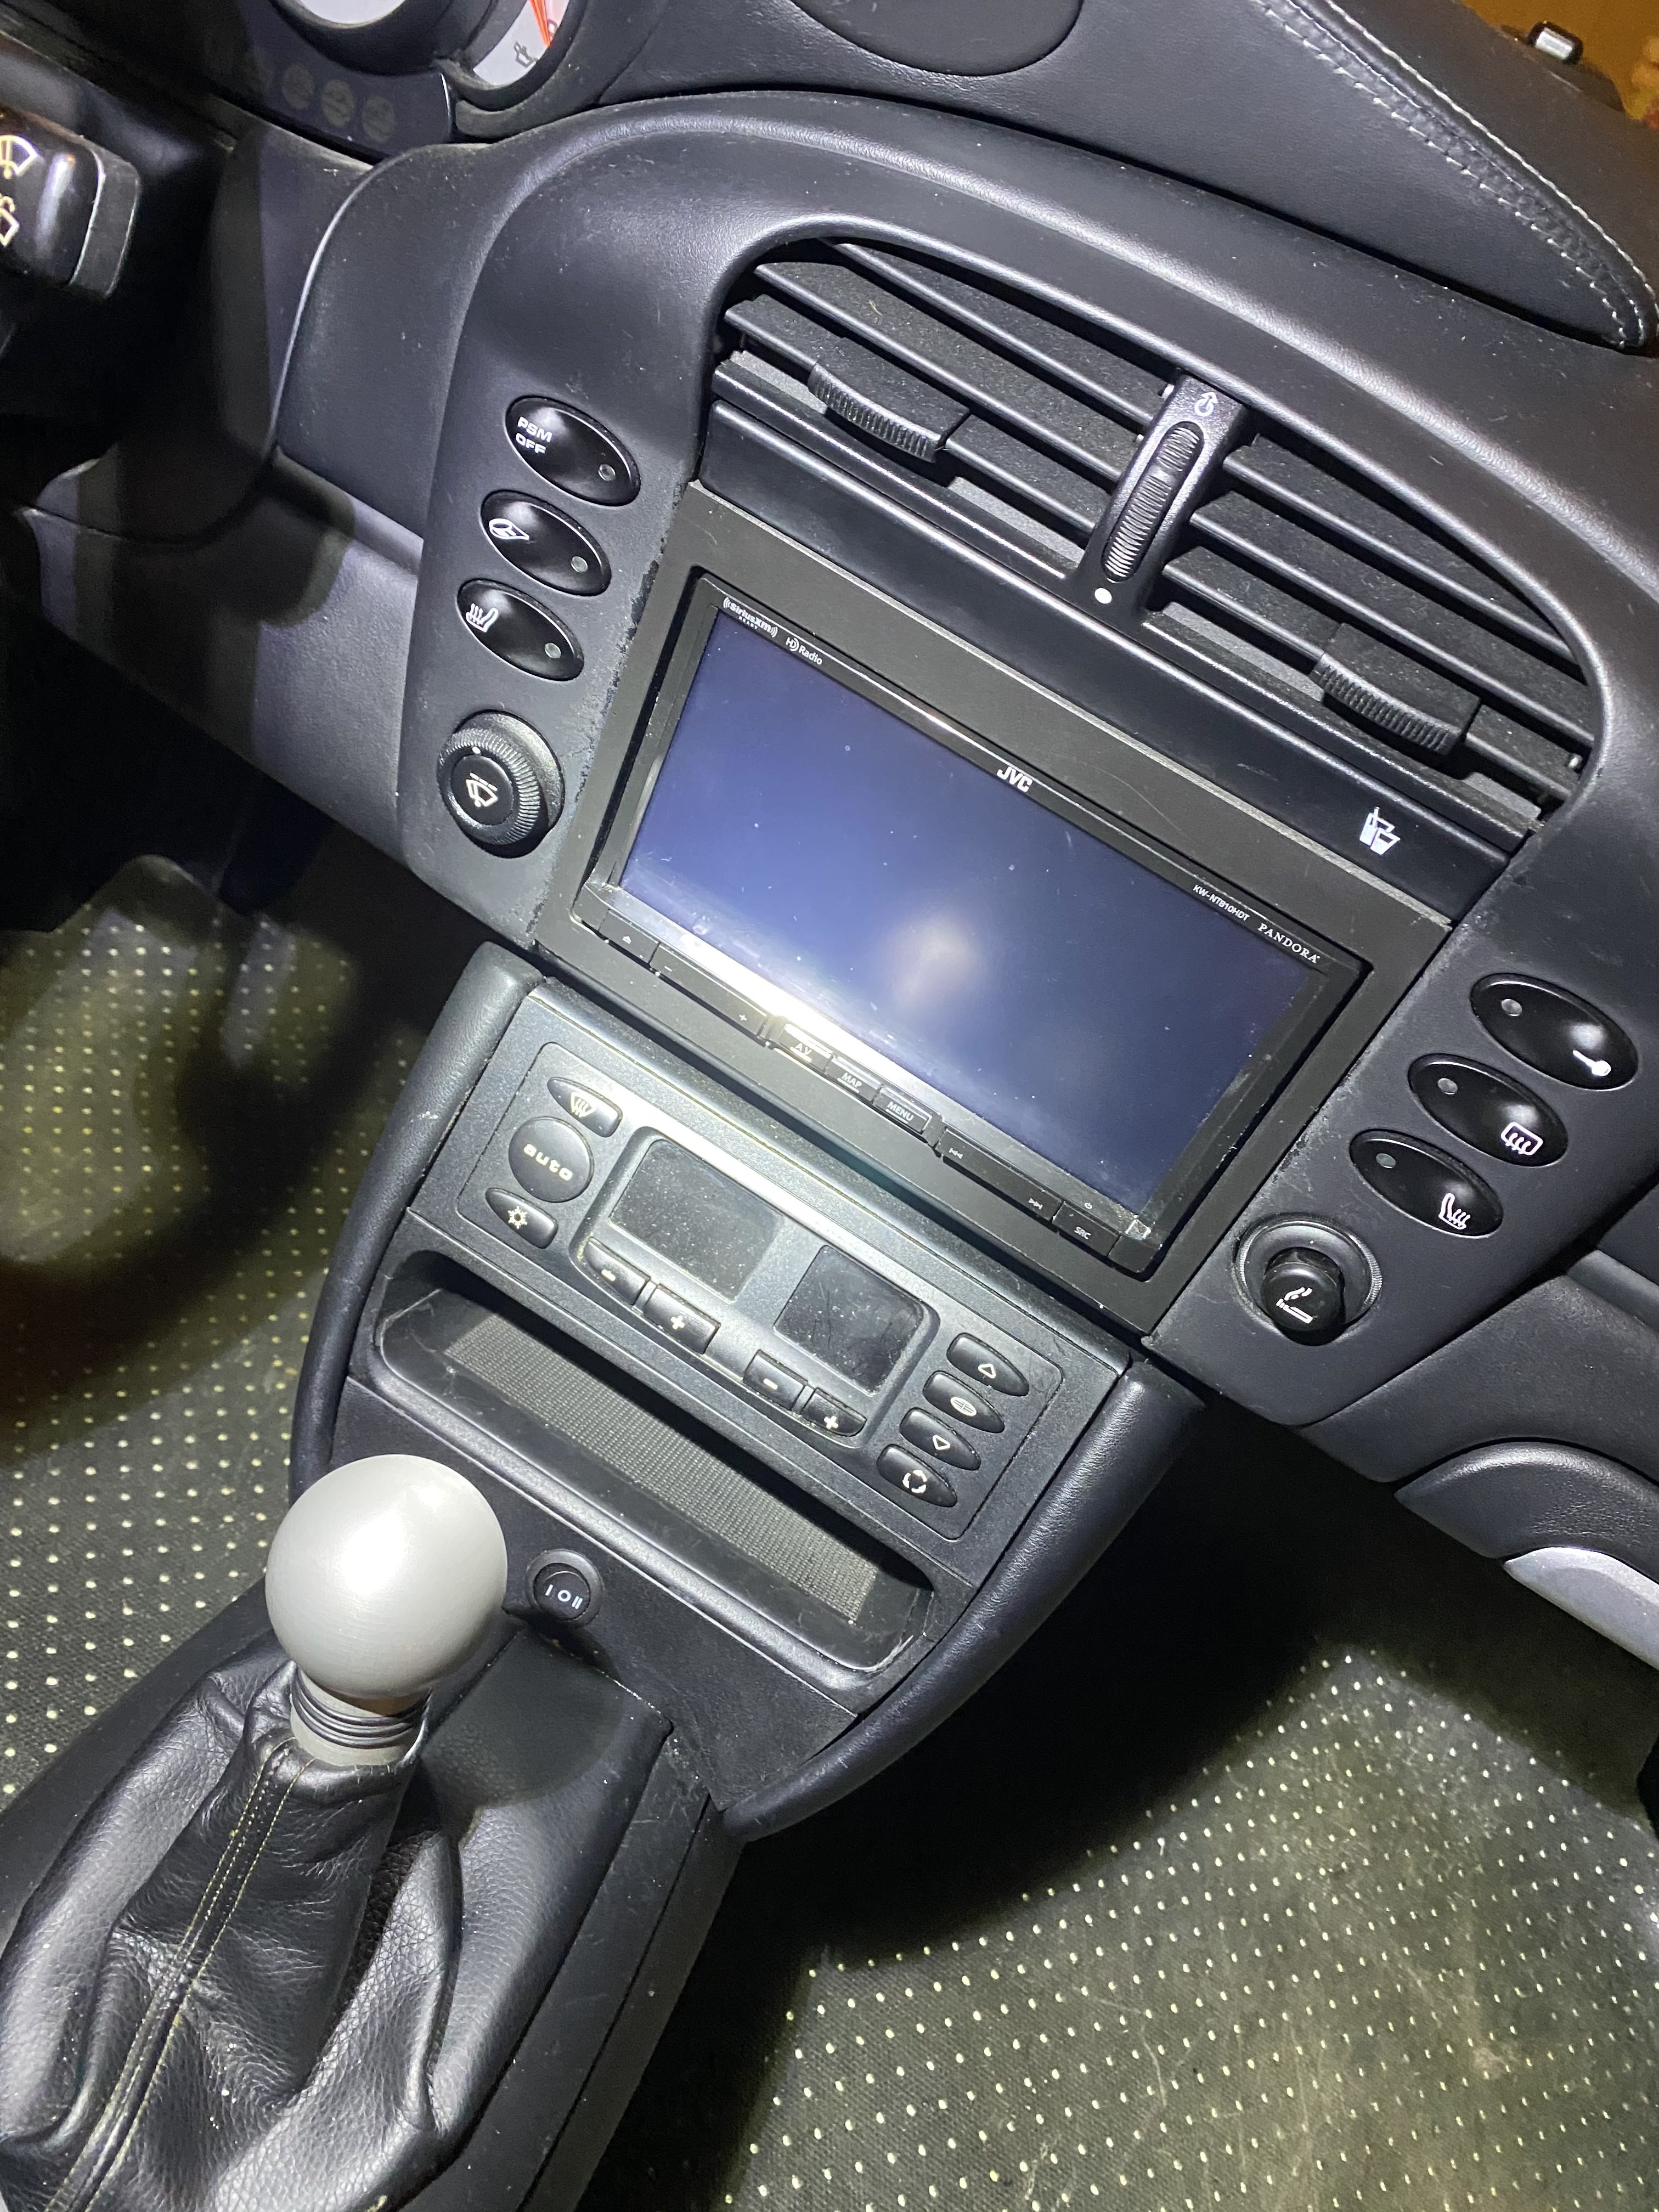
Well done... Could you post some pictures and description of what you did... The system worked before so it was just for 'fun' and fill those empty holes on the dash... I had the same feelings and moved the seat warmer switches up on the horse shoe and filled some empty holes. Could you run the fans a short while after shutting down to help with the heat soak. I share your need for fun... here's my center dash that I've re-worked to suit my needs..
-
Mitch Leland changed their profile photo
-
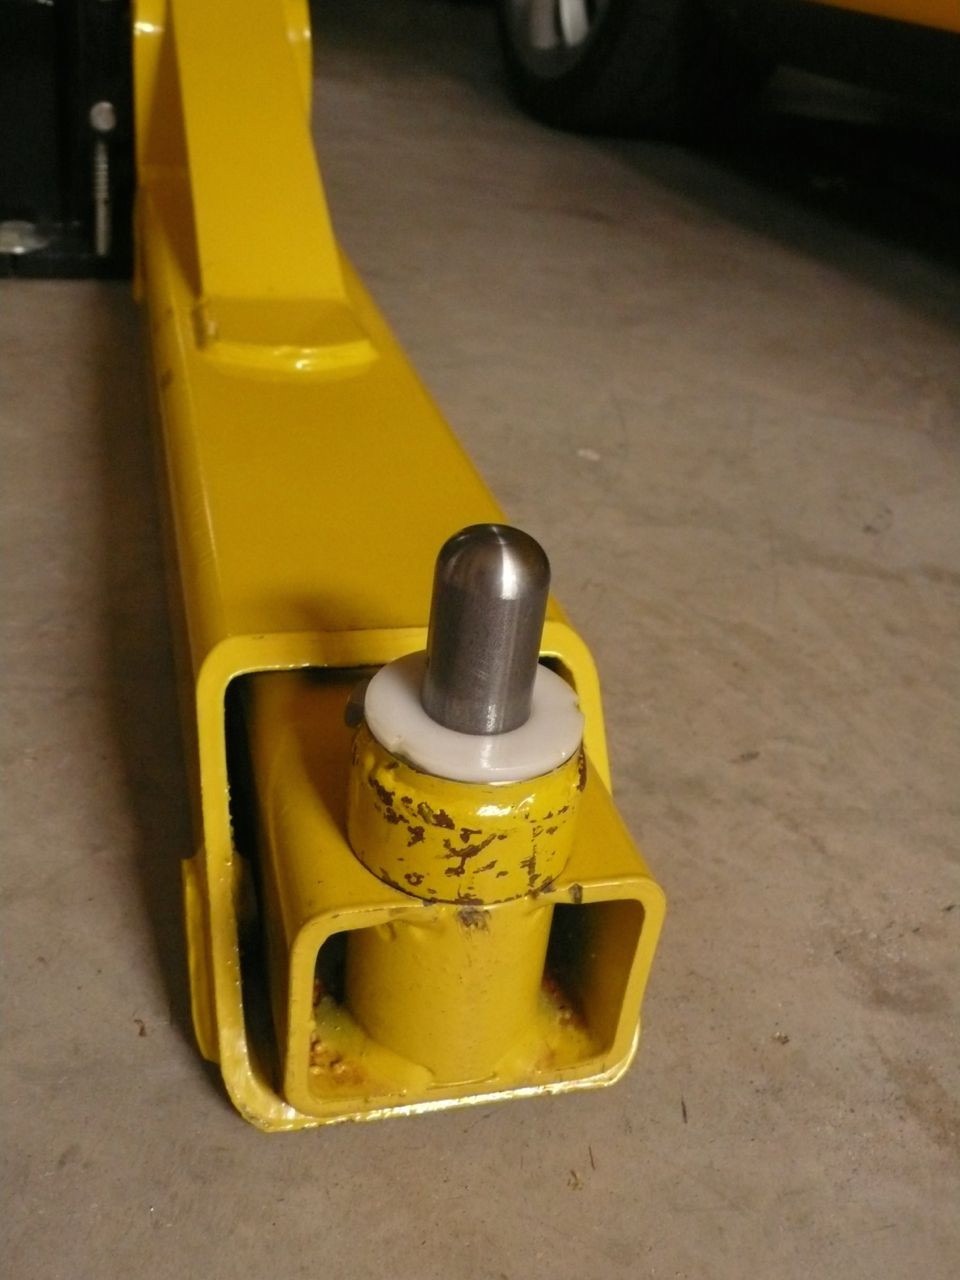
Bill, One more thing, I did this so many years ago I can't remember what we did. I believe we took one of the stock lifting devices and machine these spring loaded pins. The best thing is you know the car is engaged with the lifting arms.
-
Bill, What I do is disconnect the side that is higher/ahead of the other. Then bump the up button to approximate the short fall of low post. Then reconnect the hydraulic hose and see what you've got. I got tired of having the pump cart always in the way as well as the hoses. I had a much longer hose made up and now the pump stand is against the wall as far as the short hose would allow. Now the longer hose can be configured several ways, but for the most part it's now out of the way. The hose was expensive, but has made a big difference in being able to move around the front of the car. I called MaxJax to see if this was feasible, but they would not tell me for liability reasons. For the first time it took awhile to fill the hose, then I had to adjust the lift, but not a big deal.