Welcome to RennTech.org Community, Guest
There are many great features available to you once you register at RennTech.org
You are free to view posts here, but you must log in to reply to existing posts, or to start your own new topic. Like most online communities, there are costs involved to maintain a site like this - so we encourage our members to subscribe or donate. All subscriptions and donations go to the costs operating and maintaining this site. We prefer that guests take part in our community and we offer a lot in return to those willing to join our corner of the Porsche world. This site is 99 percent member supported (less than 1 percent comes from advertising) - so please consider an annual subscription or donation to keep this site running.
Here are some of the features available - once you subscribe RennTech.org
- View Classified Ads
- DIY Tutorials
- Porsche TSB Listings (limited)
- VIN Decoder
- Special Offers
- Paint Codes
- Registry
- Videos System
- View Reviews
- and get rid of this welcome message
It takes just a few minutes to register, and it's quality Porsche information at a low cost.
Contributing Members also get these additional benefits:
(you become a Contributing Member by subscribing or donating money to the operation of this site)
- No ads - advertisements are removed
- Access the Contributors Only Forum
- Contributing Members Only Downloads
- Send attachments with PMs
- All image/file storage limits are substantially increased for all Contributing Members
- Option Codes Lookup
- VIN Option Lookups (limited)


hankster66
-
Posts
32 -
Joined
-
Last visited
About hankster66

hankster66's Achievements
Member (1/1)
2
Reputation
-
I put everything back together as you suggested to do manometer test, but I went ahead and replaced the rubber sleeves on the intake where there was an obvious leak to save myself the trouble of pulling it apart all over; the insides were pretty shot. Manometer reading floated around 4.2 INWC. Interestingly this the same reading I got on the old AOS before I replaced it. Did the test after 45 45-minute spirited drive and had no codes pulled before/after. Will drive it a few times this week to see what happens. Out of curiosity, could a vacuum leak bring oil into the air intake, or could there be another cause? Alex222 referenced that a little bit of oil in intake is normal. I've driven it almost 3k since tearing down the engine. Thanks Alex. Had not considered O2 sensor inthe exhaust. I had overhauled my exhaust when I tore down the engine with all new seals and bolts, so that's likely not an issue, but I had not replaced sensors. I will wait to see if I get the error code again.
-
Thanks JFP. You are reminding me that before I did all the engine work, I set up a manometer test. On the old AOS it ran -4.2 inches of water. I nonetheless replaced it with Porsche part as a precaution due to age. I did consider getting an extreme aos, but thought this was sensible along with all the other stuff I was doing. Would you suggest I put it back together and do the manometer test? Would it make a difference if I did it before/after replacing any of the “leaky parts”? What are your thoughts about the fuel tank vent issue?
-
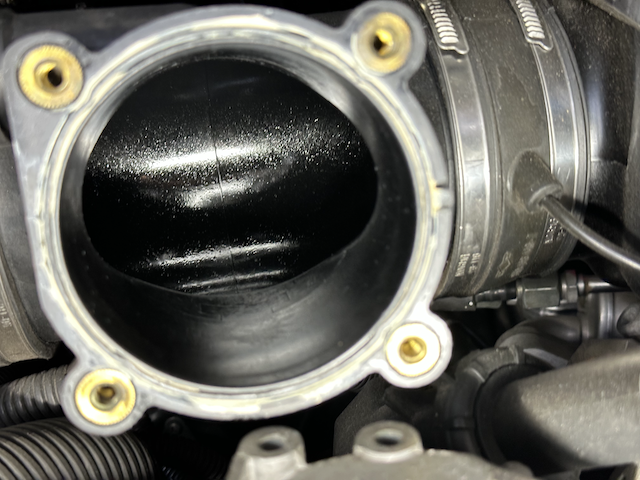
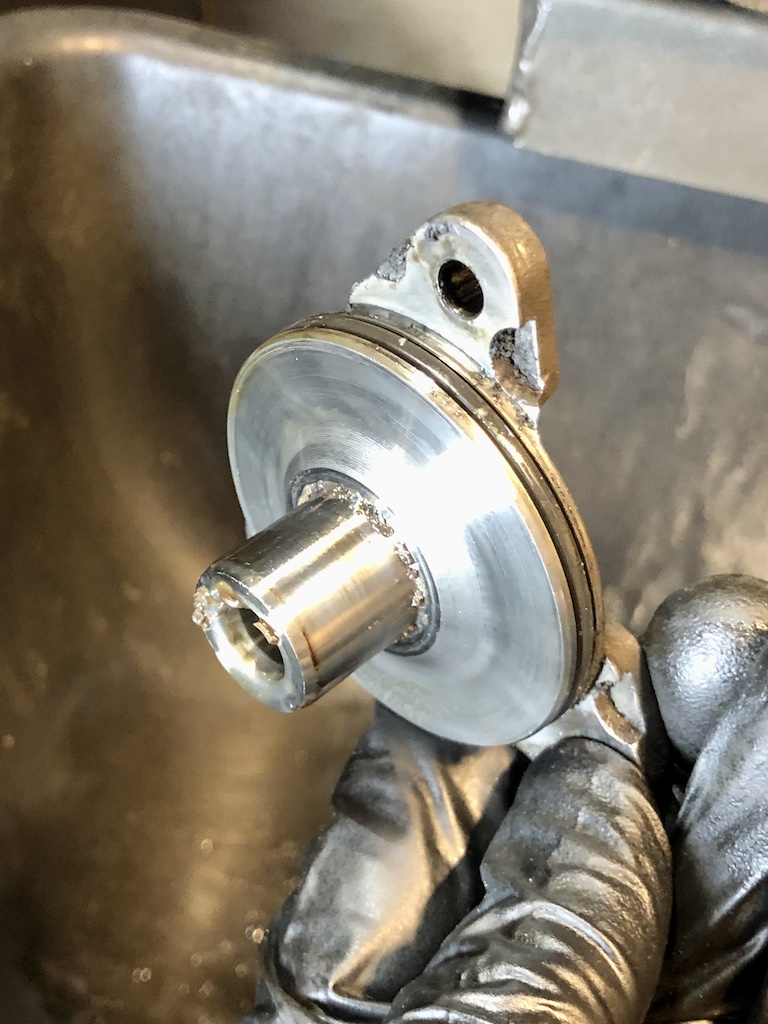
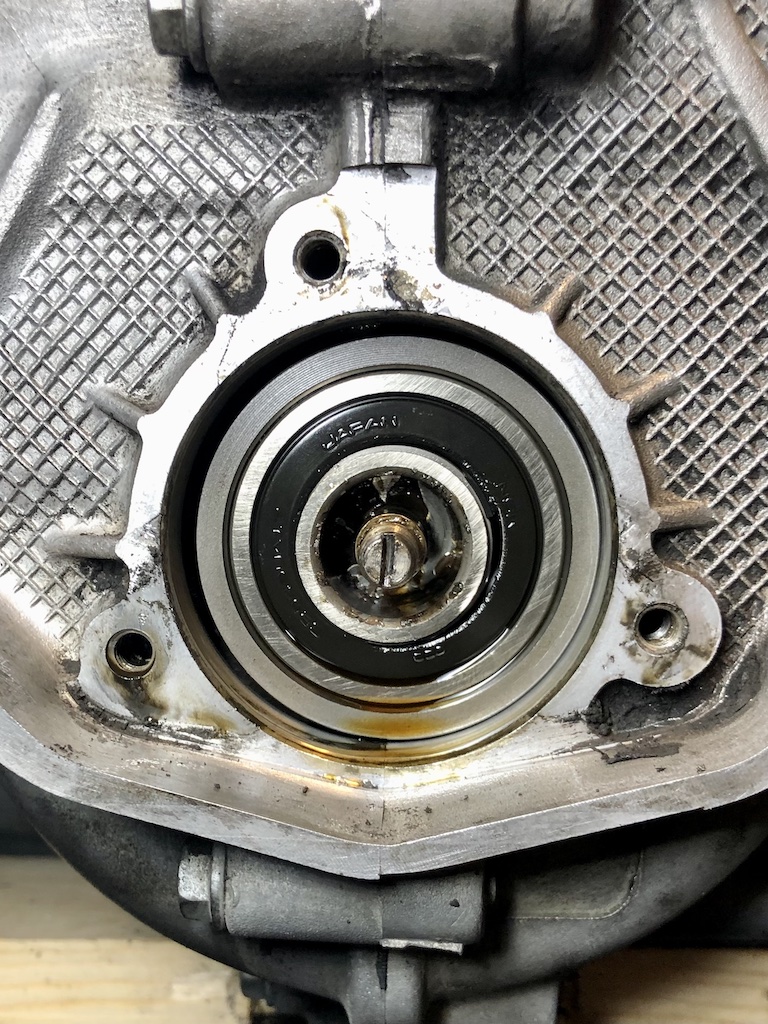
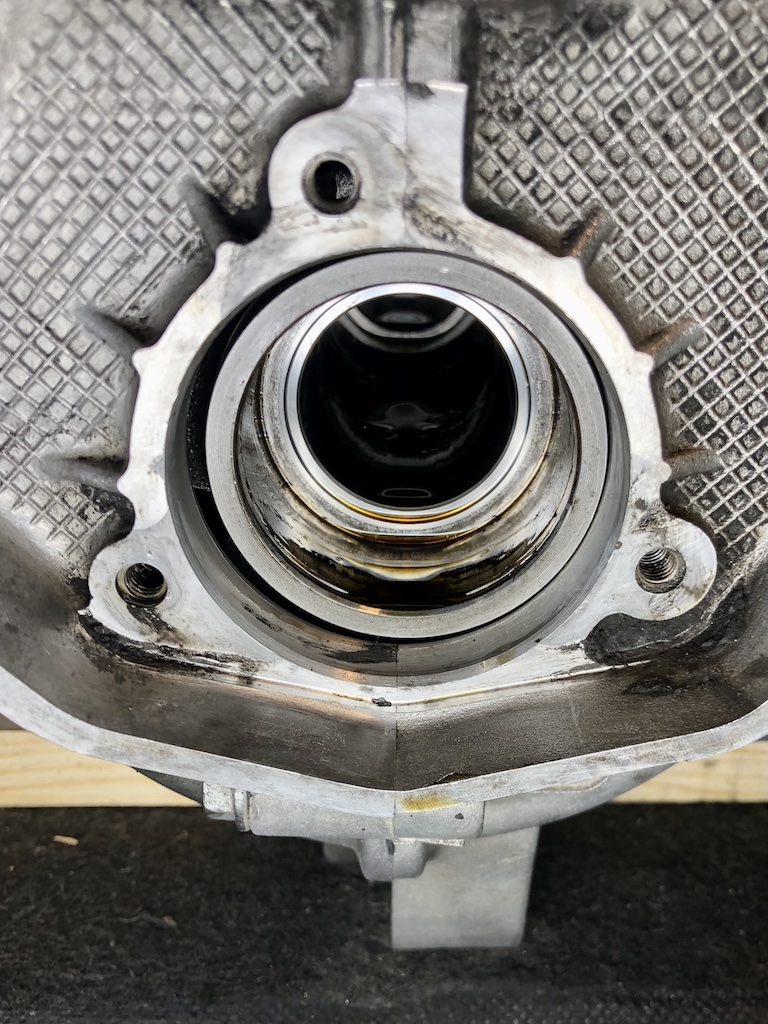
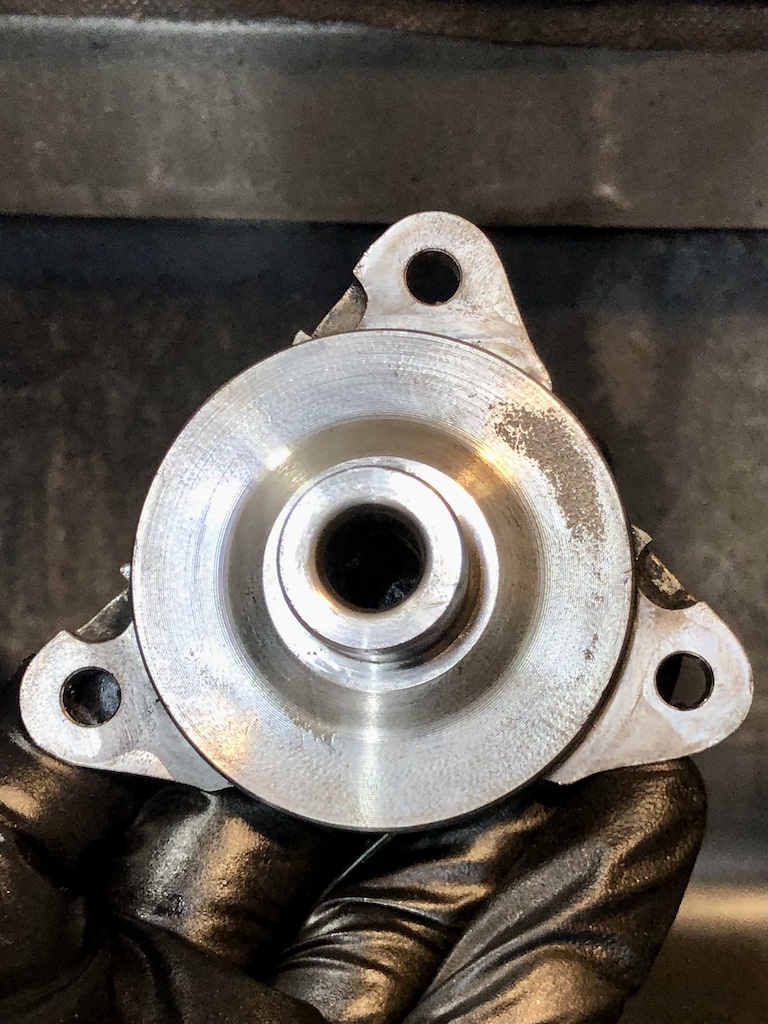
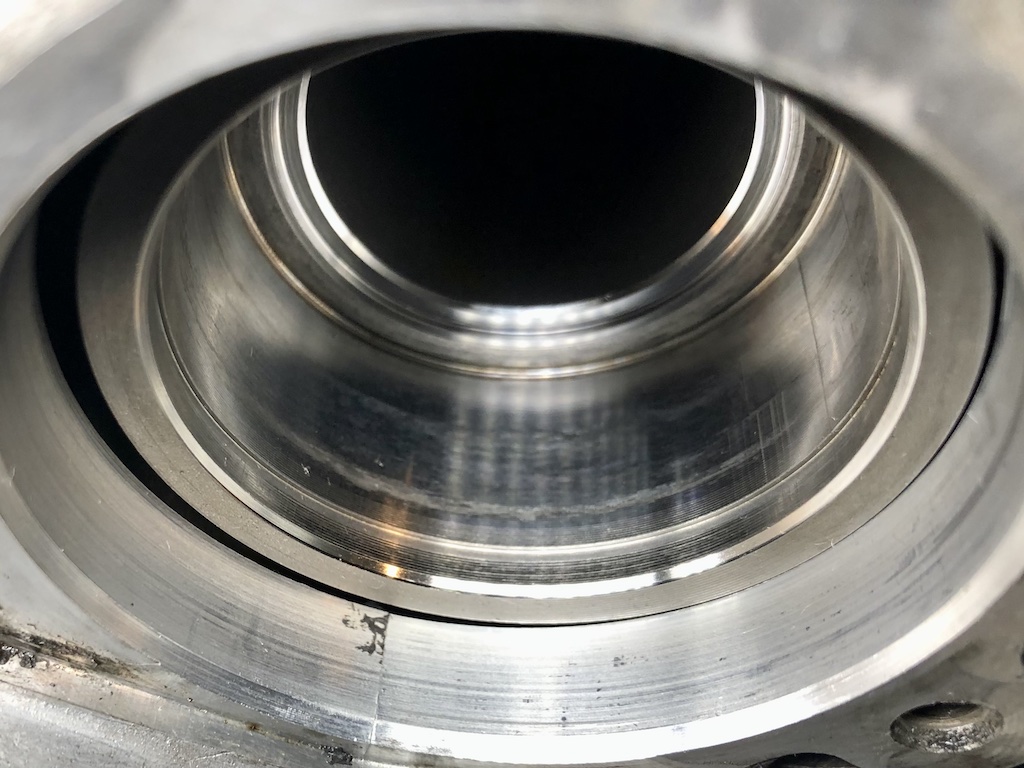
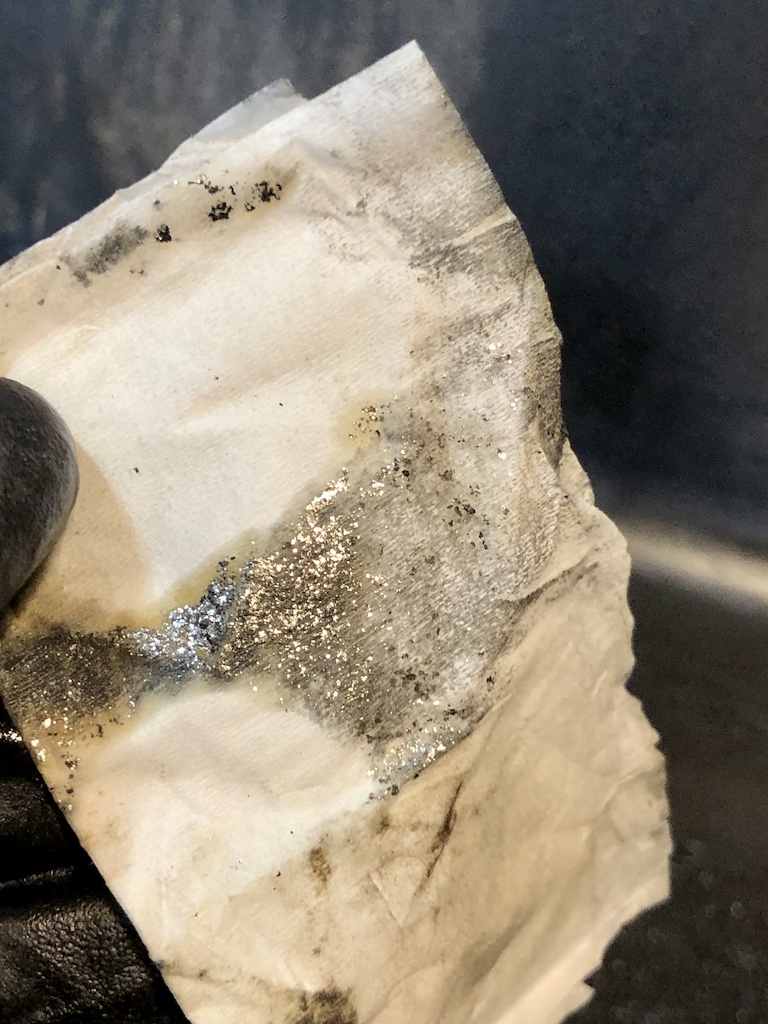
The Car: 2000 996 6spd Cabriolet 97k Prior Work: 2 years, 2k miles ago... Top End refresh, AOS, IMS/RMS, spark tubes, coils, timing, pump, etc. Recent Issue: After overhauling suspension (probably coincidence) fault codes: P0442 (fuel tank ventilation) and P1130 (Oxygen sensing) Driving/Engine Experience: Was testing new suspension, driving great on day 1. On day 2, check engine light came on. Was running fine, although I smelled a faint smell of oil. Summary of My Diagnosis... - Durametric showed two fault codes, nothing else. Cleared codes to see what would happen. Engine immediately idled rough. - At first everything was leading to fuel/vacuum leak. Gas cap, which is the principal culprit, was fine. Proceeded to smoke test air intake, oil filler, gas filler, etc. - Air Intake/Throttle: Disconnected air box and connected smoke to throttle body. There was a bunch of smoke all over the place, It was hard to tell from where, but one place that was obvious was the intake manifold adapter (circled in the pic below). I then sealed the throttle body and pushed smoke through the booster valve. Smoke seem to come from center distributor tube, so decided to remove throttle body and front distributor section. In doing so found oil in throttle (not there before test), and then saw shiny film inside intake manifold (see pic below)... wiped with rag and confirmed (similar to when I tore down the engine for prior work). After removing and sealing openings, identified smoke coming from center of middle distributor tube (pic below). - Oil Filler: Sealed the booster valve and smoked filler tube for any leaks there. No leaks from filler tube. But after a while saw smoke come from the previously identified areas, but not as strong. Also now could see smoke coming from the manifold side of the intake manifold adapter where previously could only see from hose side. Again, not as strong as when pushing smoke through valve or intake. - Gas Filler: So having saved what initially seemed obvious last (as suggested in another thread), smoked gas filler tube to rule out fuel tank bleeder valve. Not sure if bleeder valve failure can be tested with smoke, but no smoke came from bleeder valve or anywhere else, but did come out of opening across from cap (pic below). Questions... - Oil Sources: I worried when I saw the oil that i have a problem with the new AOS. Could the vacuum leaks noted cause oil to come into the intake? The other item I read that could create issues for AOS and oil in intake is the lower vent pipe connector on bank 2 passenger side. I didn't see any smoke on that side. - Gas Filler: Not sure what to make here as it relates to the fault codes. - Is there anything else I need to check or look for to solve for oil in intake or fuel tank fault?

-
Hi JFP, Project Update... good news, bad news. First, I just want to thank you for all your advice along the way. I did end up sending the heads to Len Hoffman; unfortunately, not until after doing some DIY trial and error that could have been saved if I just sent it to him to begin with... but better late than never. Good news: Got the car up and running. Felt great completing the project, and getting the car on the road with nothing "blowing up"! Bad news: durametric telling me a slightly different story about my results. Throwing o2 sensor fault codes ahead of cat P0150 (bank 2) and P0130 (bank 1). More concerning is my timing being off: Bank 1 -4.97, while Bank 2 is 0.00. I had taken the car for a few short drives to ensure fluid levels, oil pressure, etc. I put the durametric on it after a 30-minute drive at idle. On background, I changed all the IMSB/RMS, tensioners, chain guides, cam-to-cam chains, lifters, springs. Before the work my deviations were Bank 1 (-10.44) and bank 2 (-5.64). Don't know if it's coincidence or means something that the difference between the two banks is roughly the same before/after, and bank 1 continues to be the only/bigger problem. I find it interesting that I could even get bank 2 to perfect 0.00. Some have suggested that the long chain may be at issue, but since I'm in spec to just leave it alone (for now). Bank 1 seems to be on the outer end of the spec, so I wonder how long it will be before it's out of spec again. Curious if you have any thoughts or suggestions.
-
Working on a 996.1 C2 head refresh... replacing springs, lifters, etc. and doing the valve job. I can't seem to find a micrometer that fits the spring base, regardless of the height range. Tried the ProForm 66902 and 66903 valve micrometers, which appear to be licensed under other vendor names, but base are too wide. I know I can do the measurement with a standard micrometer, but wanted to do it with something that has less variability. Anyone ever do this or have an idea?
-
I hear you... I borrowed his video from a friend and it has great detail on assembly, but does not go into the build specs... I'll check it over again in case I missed it. Thanks.
-
Hi JFP, is there anywhere I can find valve specs to check guide wear, install height, etc. ?
-
Thanks for looking it over. I had pulled the sump early on as part of the LN checklist, including borescoping, etc. Found some particulate in filter (normal levels) but the sump was clean, except for some plastic from chain guides and a quarter-sized non ferrous piece of metal that everyone confirmed was a leftover from the manufacturing process. That's what drove me to go into the lifters to eliminate possible issues there. Like here, I had sent pics to LN to verify everything was ok before proceeding. As I tore down the engine, I did not find any particulates elsewhere in the engine... nothing in the heads, cylinder walls, on the chains, and never saw anything in the oil draining in the collection pan under the engine as I rotated it on the stand to do work. Everyone was speculating that I had the dual row, which is not always the case in these 2000s from what I've learned. Fortunately it was the more robust one that kept this engine going this long (90k). I guess I was lucky to have the clutch go out so soon after purchasing the car as it forced me to do this work probably much earlier than I would have otherwise.
-
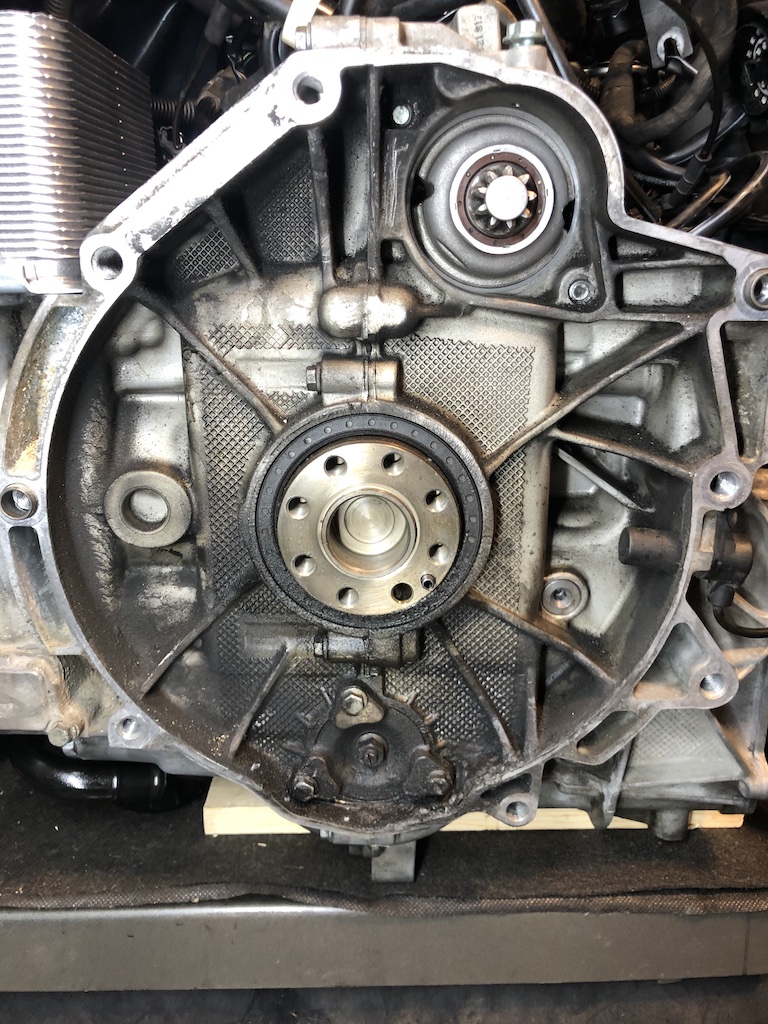
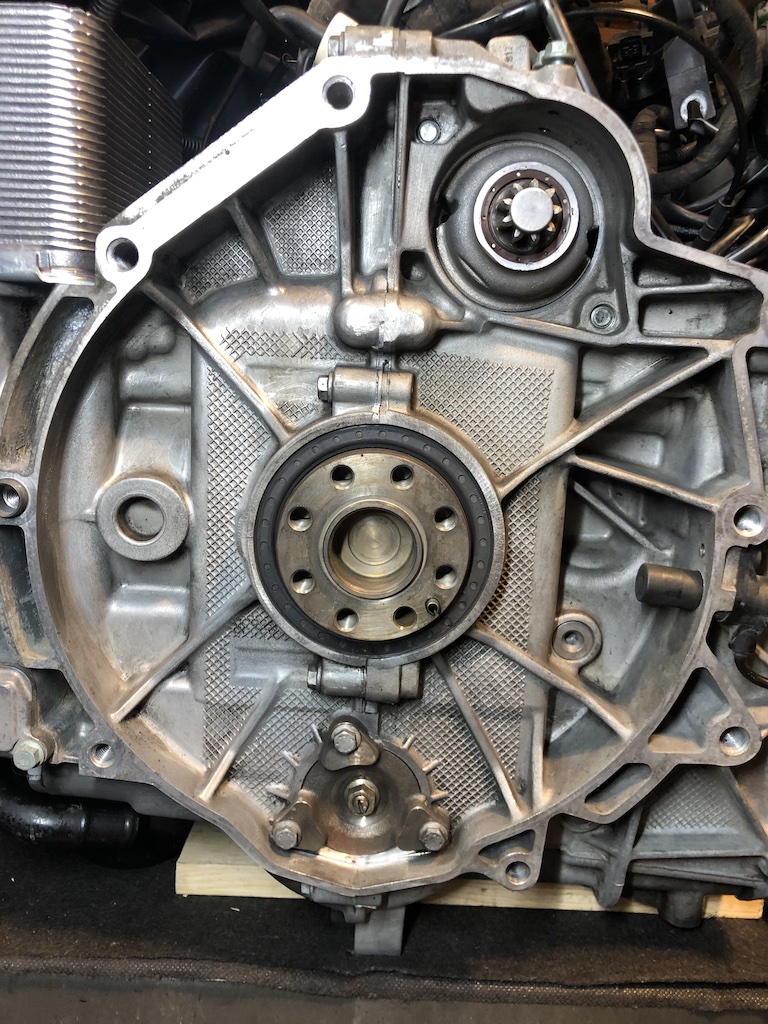
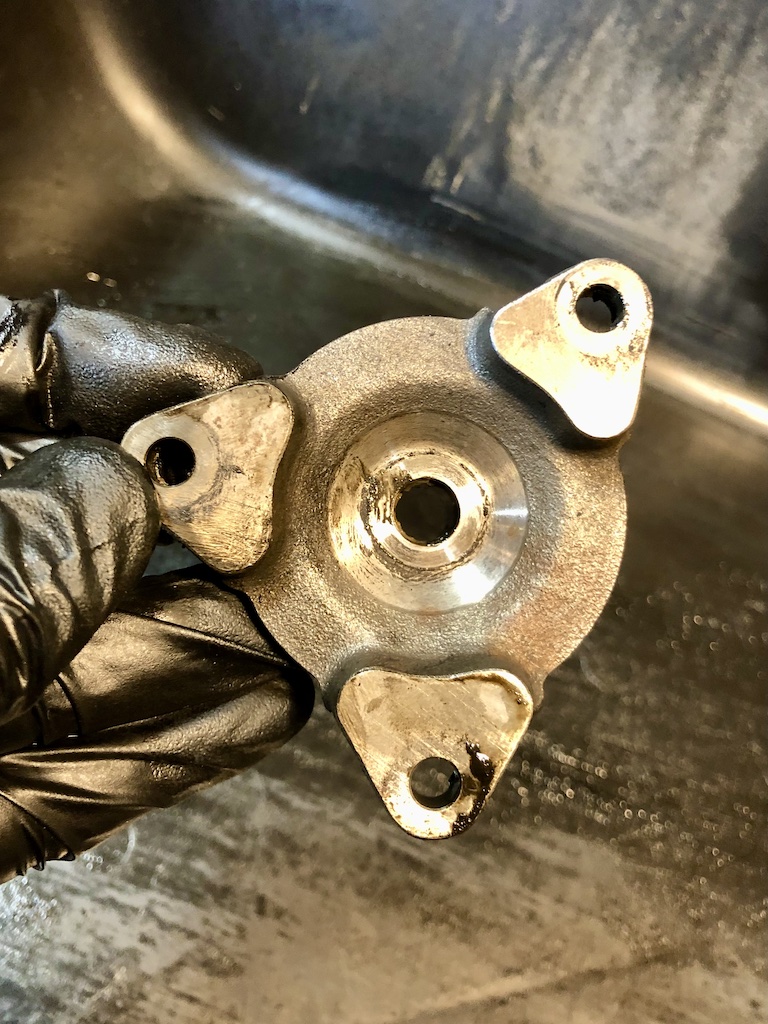
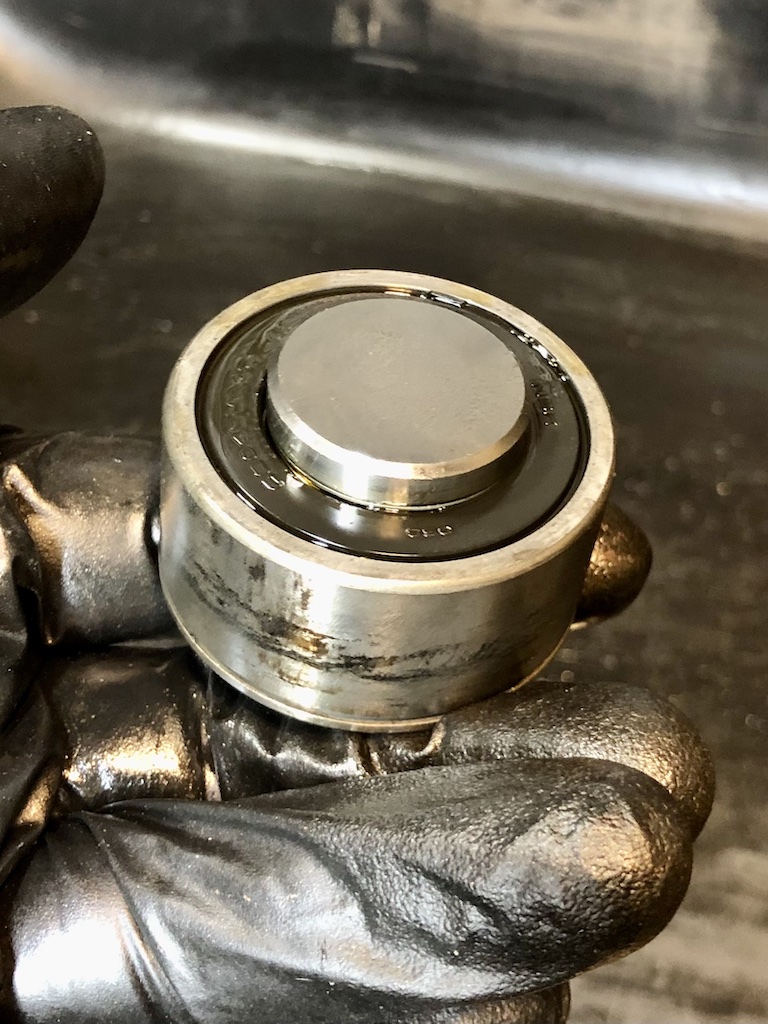
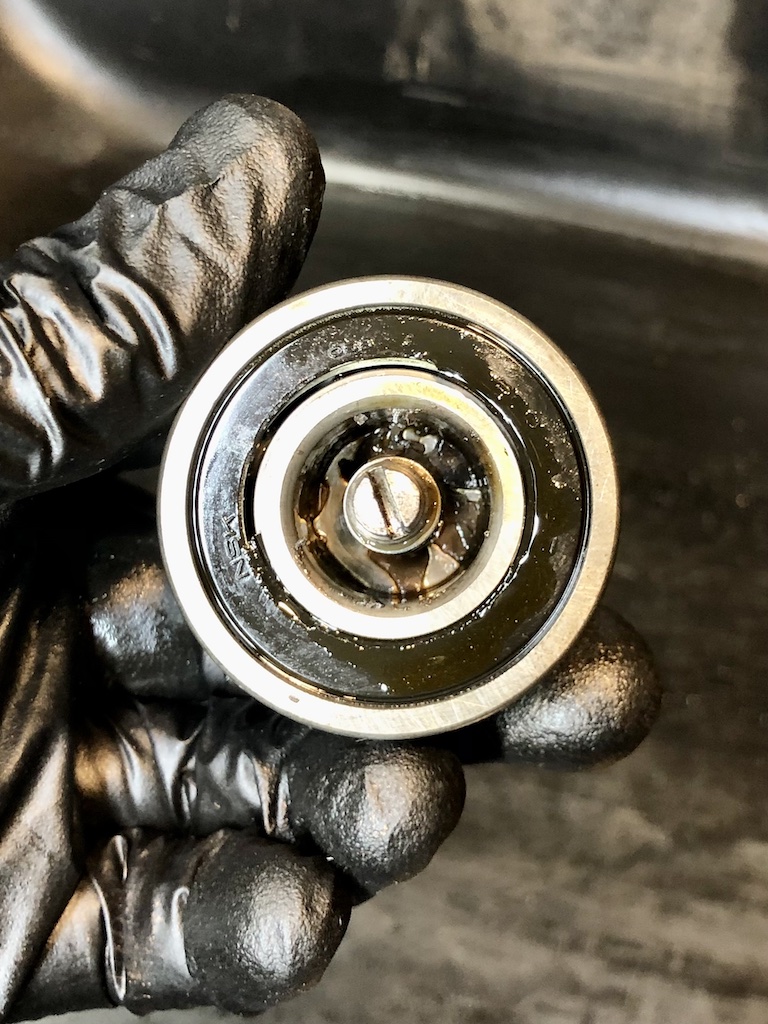
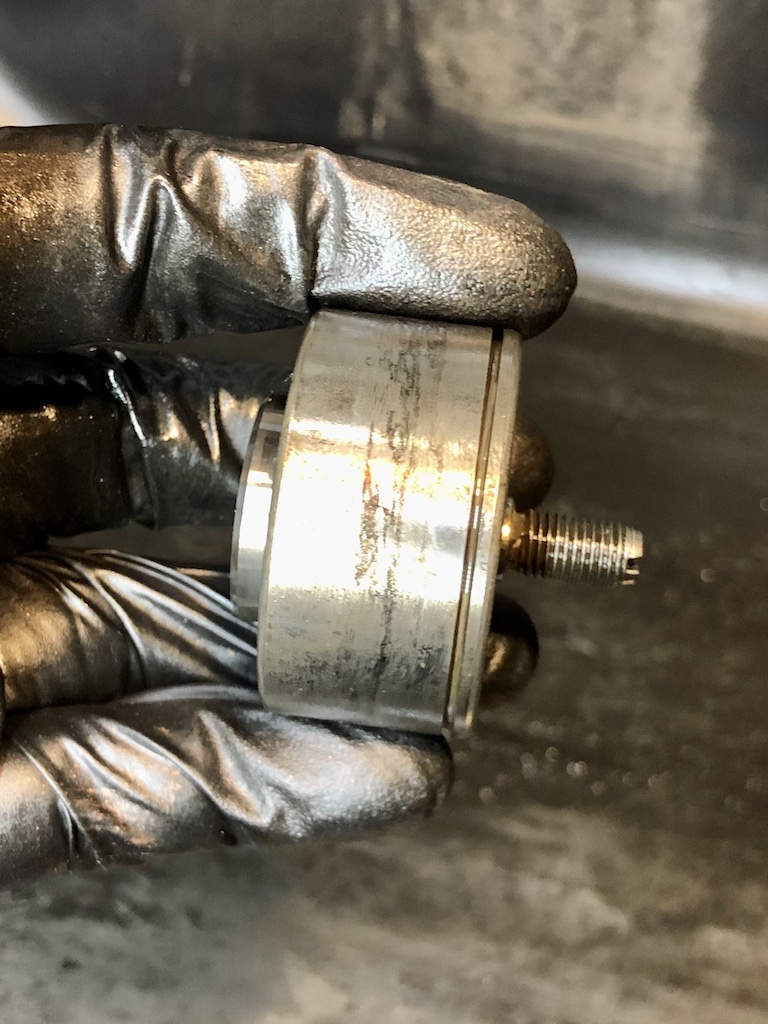
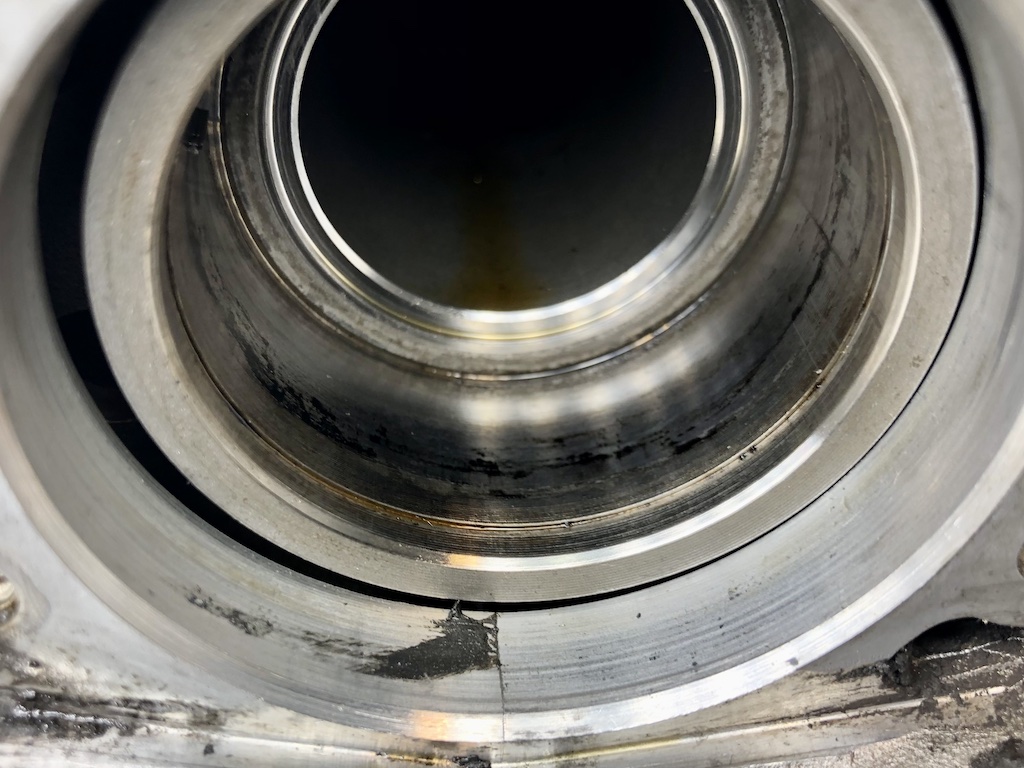
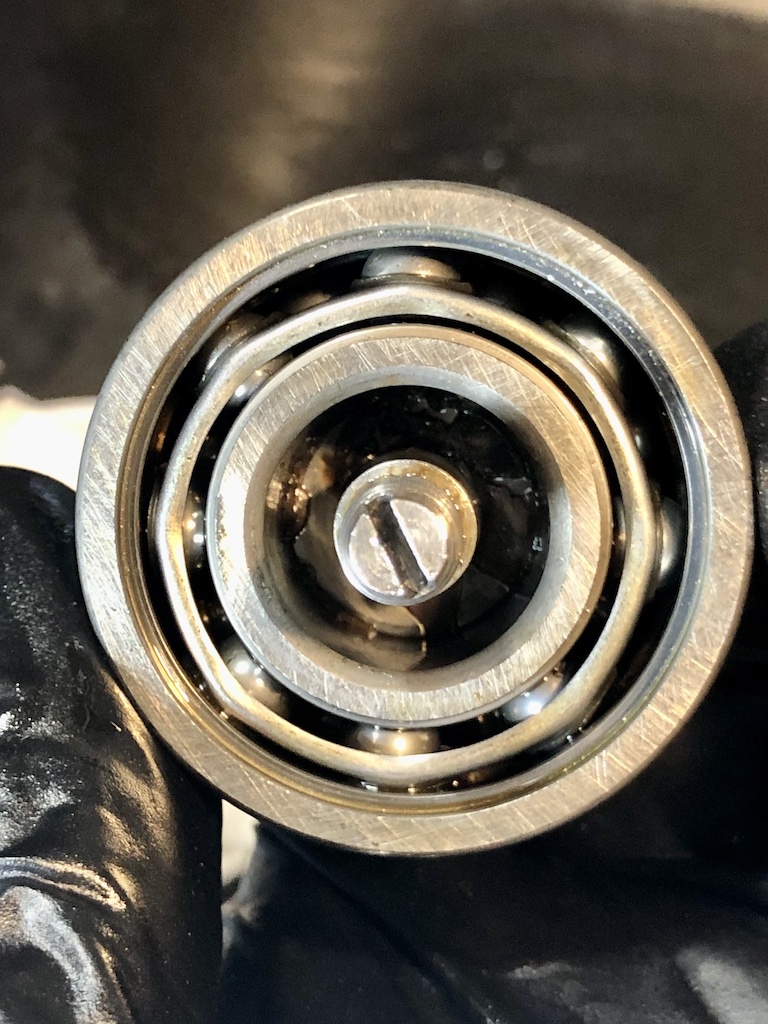
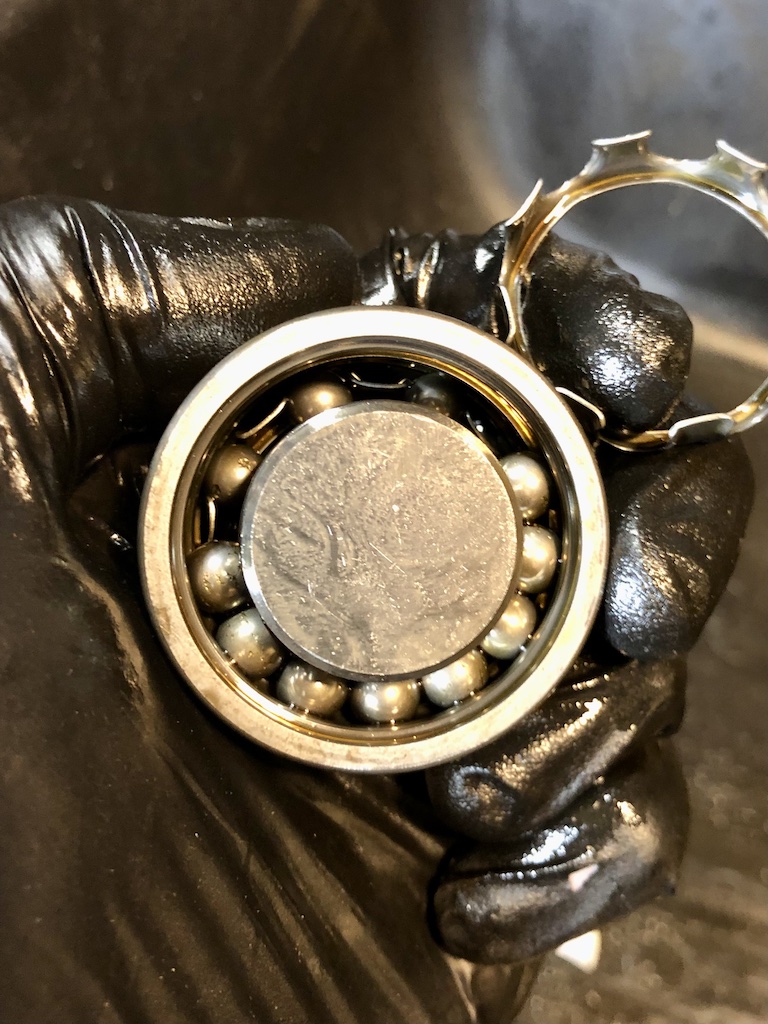
Pulled out IMSB, pics below. Everything looks like the bearing did not fail. Bearing spins, but not freely or necessarily as smoothly as it probably should. Some movement fore and aft, less so laterally. All bearings seems to be in tact, but some of the balls have loss of material, which likely explains the particulate I found inside the shaft. Curious what you think about the pitting on the inside of the flange and the black scuff marks on the out race of the bearing and inside of shaft end. It seemed to clean up nicely. Is the particulate I found normal or an indication of the bearing due for replacement?
-
Thanks JFP on recommendation. Having an exchange with Len and obvious after a few exchanges why you are recommending him. I was wondering before I keep going, if ok to do the IMS work now, my reasoning being if I discover issues with IMS, I may have to rethink what I'm doing with this engine. LN instructions call for locking cams presumably because most scenarios assume heads are in place. Do you see any issue with pulling and replacing IMS bearing with heads off if engine has been locked at TDC and chains are secured against the guides... or do I need to wait to have heads back on w/ cams, etc.
-
I attempted to spot check variation, and there appears to be some, but very difficult to confirm with springs in. Essentially, after thinking it through, I agree with you that I have to remove the heads. Even with the cams out, I'm getting air out of the exhaust, so have to resolve that. In addition to my question above regarding timing, questions below about head job... - Would you recommend I take the head to machine shop for resurfacing? - Is there anything I should do with the head before taking it to the shop? - Unless I find any obvious defects with guides, stems and springs, plan to reuse? Is there anything here that you would replace regardless? - I was thinking of lapping valves myself and checking that they properly seat and measuring for installed height, etc. Seems straightforward, but your thoughts? - Saw one of your old articles commenting on replacing head bolts. I see mixed comments and references to later 3.4 (mine is a 2000 C2) not needing to replace head bolts, especially as they don't seem to be a failure issue. I will likely be in this engine again (hopefully not to soon) to refresh the heads/rings and just wondering what I can get away with for now.
-
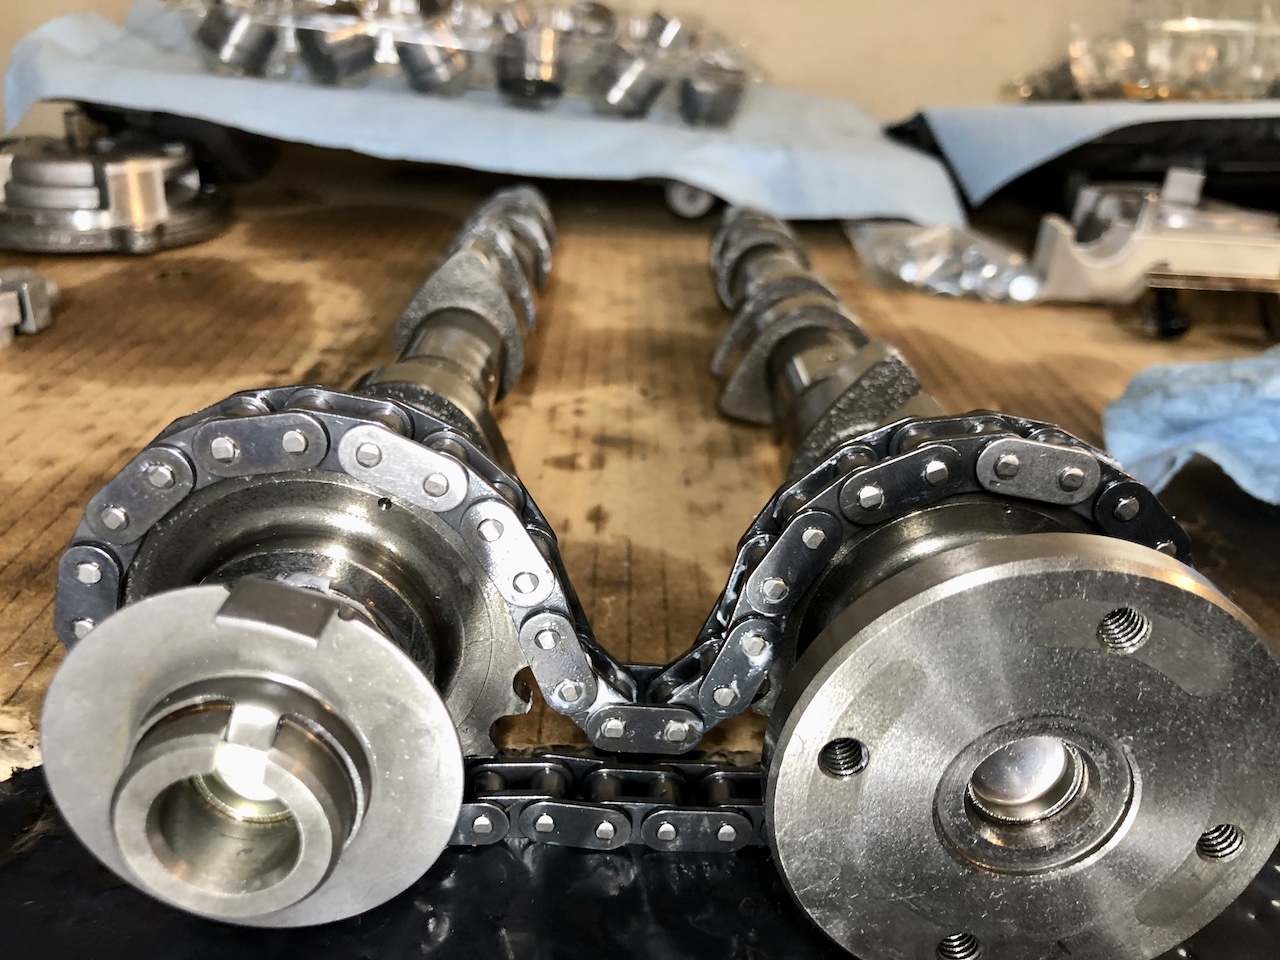
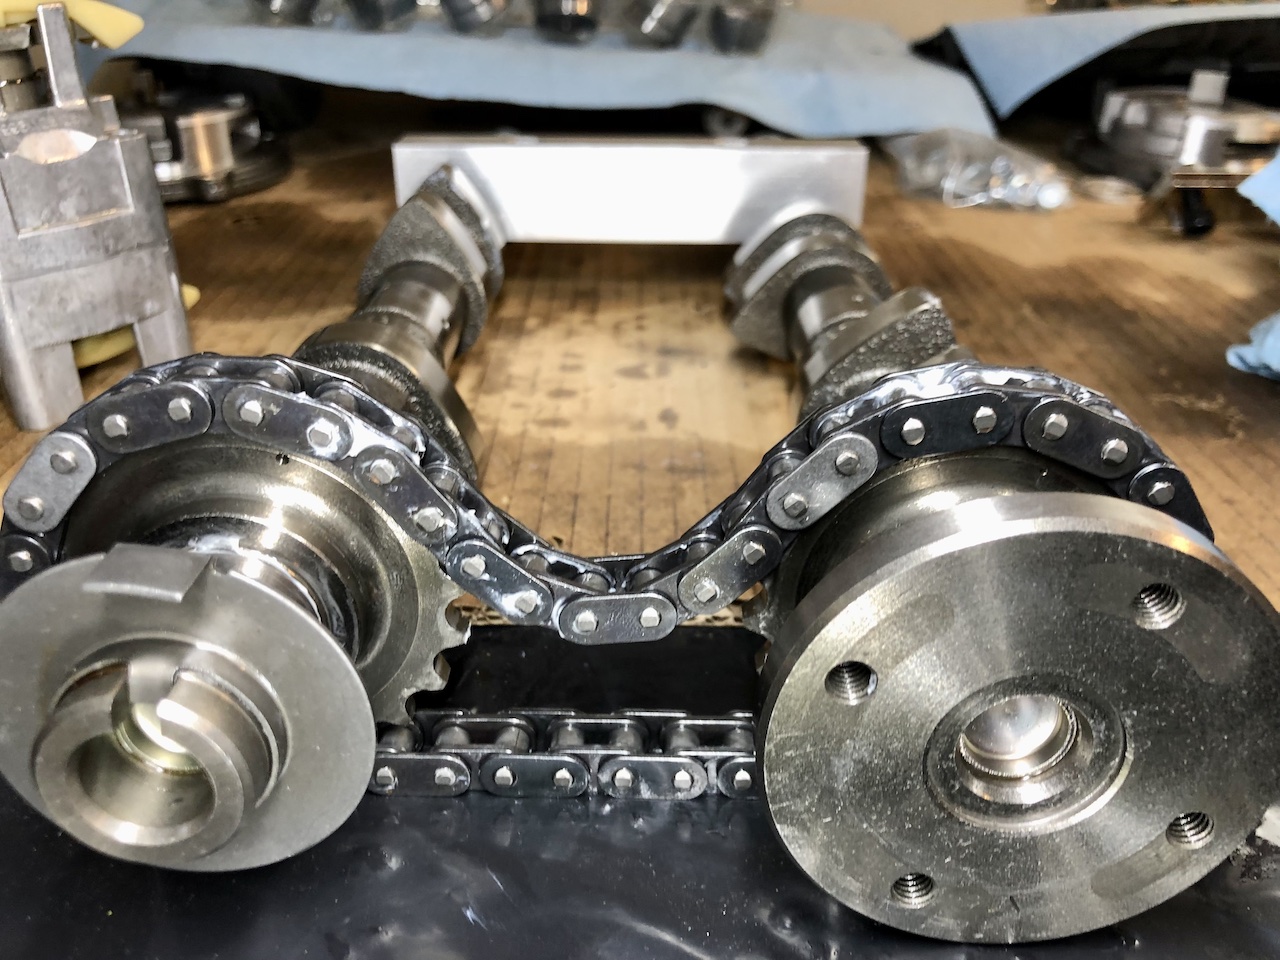
When installing... - confirmed correct cam allocation - lined up link to cam marks - assembled vario cam / cams, and checked link and mark aligned before/after install - put cam tools in place - torqued down variocam and caps - set long chain to sprocket to exhaust cam - released variocam compression tool - installed tensioner (pumped with oil) - torqued down sprocket bolts - confirmed timing marks - rotated engine 360 at TDC - confirmed cam timing with timing tool (but can't recall if I checked links / marks) Below are pictures of cams with chain in time and then after I rotate two times until cam notch is facing up (out). Again, outside of engine, confirmed cam allocation and even double checked that the new chains were exactly same as original, and that there were six links between marking links. Is it that the cams have to rotate x times before they return to the original alignment?
-
So I disassembled both banks to measure valve install height and I noticed that on both banks I was out of time (chain link to cam mark) on both banks. I assumed that they always lined up as the cams rotated back to TDC. When I took both cams out and removed the variocam to orient the chains to the cams again, I rotated by hand to see what happened and they don't line up after multiple rotations... had not read that anywhere. On the outside, both sets of cams remained in time (cam tool slotted in perfectly). Can you confirm what the behavior should be on the chains?
-
Thanks for taking a look. So I guess my next move is checking installed height. - I saw that the way to do this is with spring removed, but wouldn't measuring them in be similar or is the issue measuring from the space covered by the spring? - As I understand I'm looking for deviations from cylinder to cylinder, but is there also standard spec or range for installed height in these engines? - If by chance I see no deviations, I may still have to go in to resolve, but is there anything else I could have done in the assembly that might explain this?
-
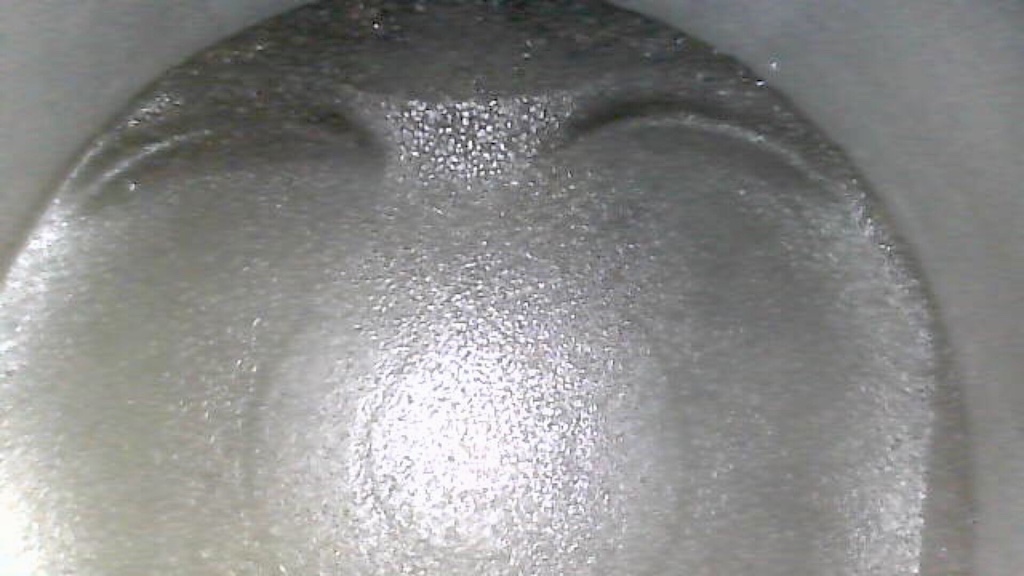
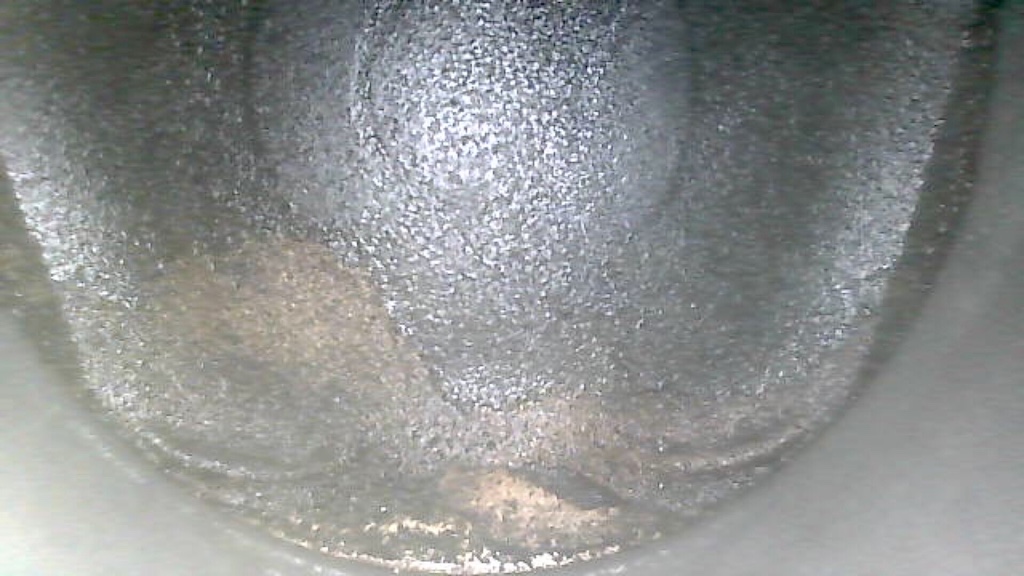
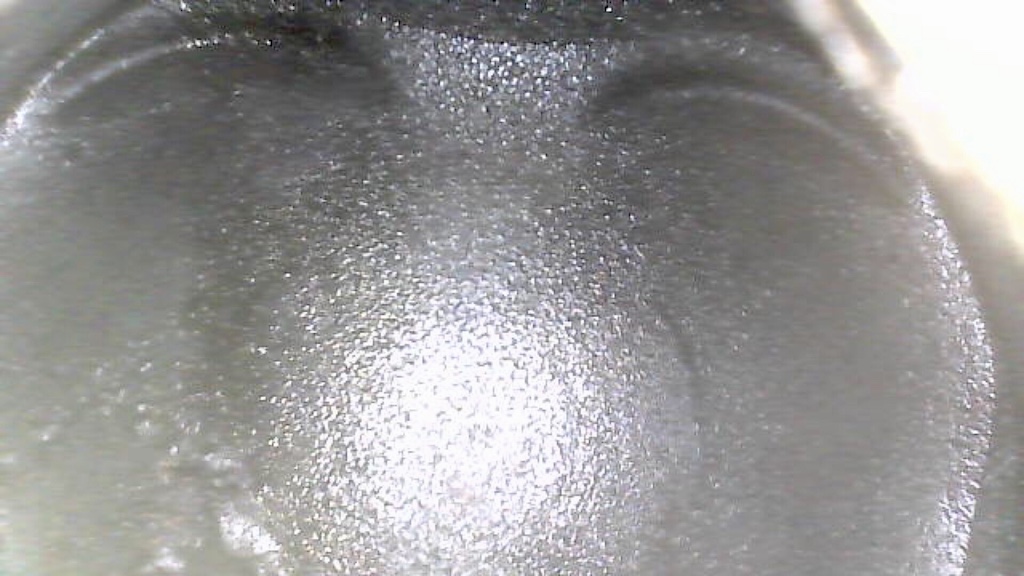
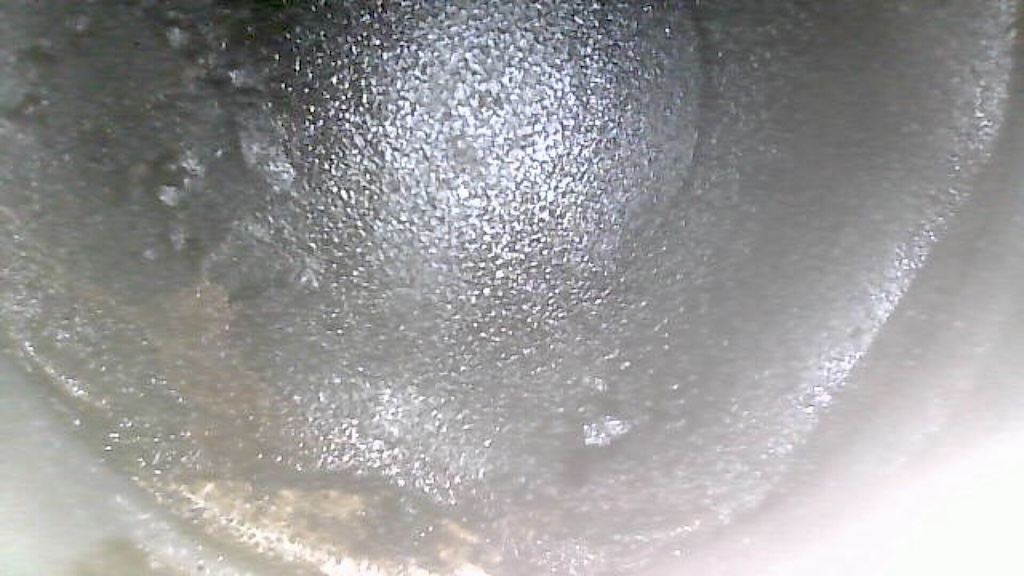
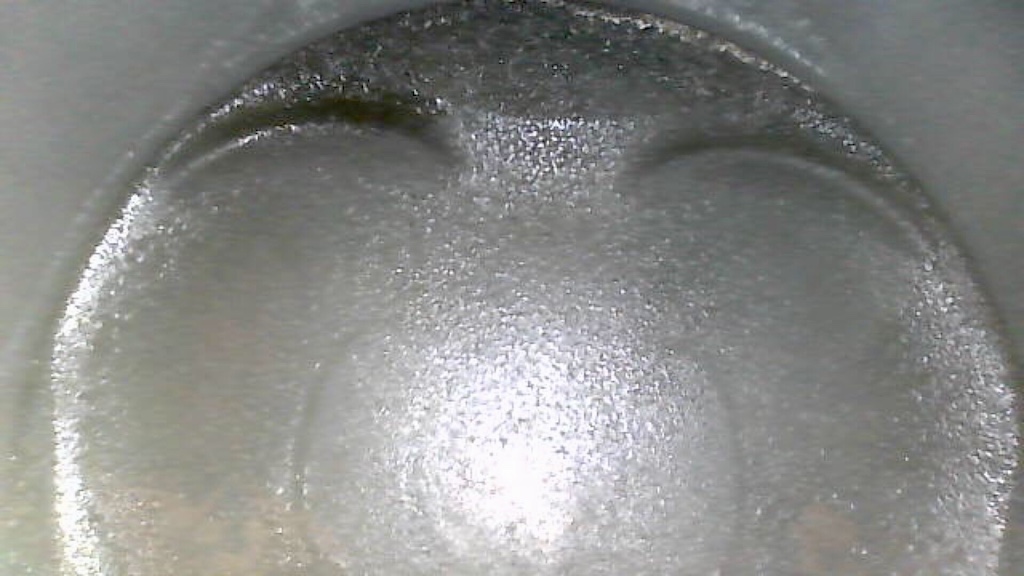
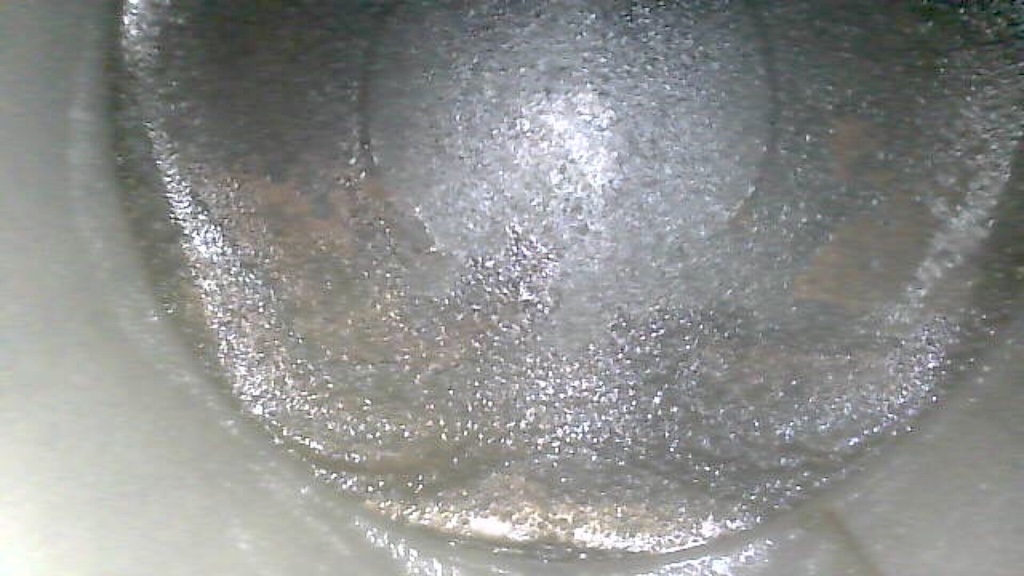
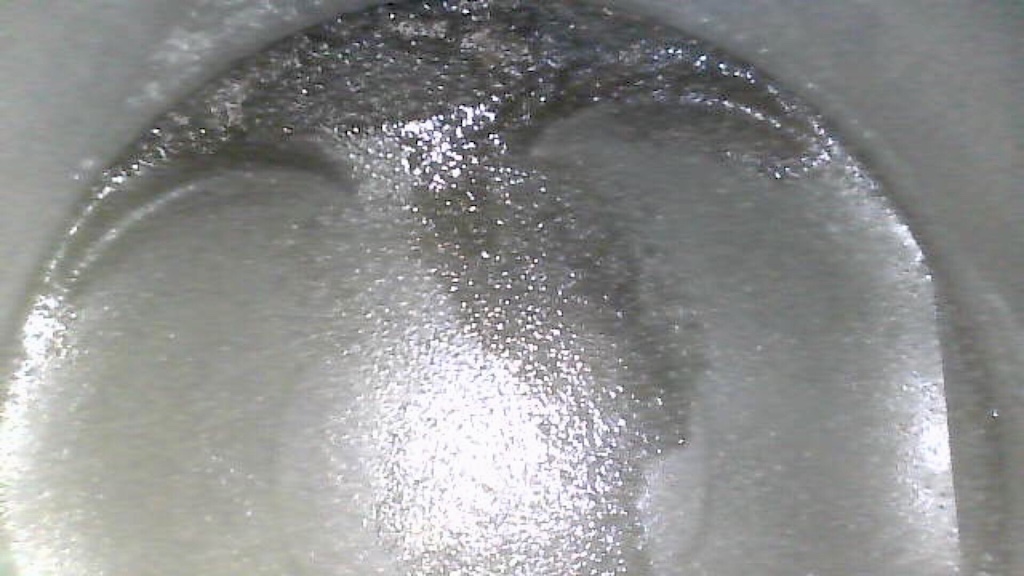
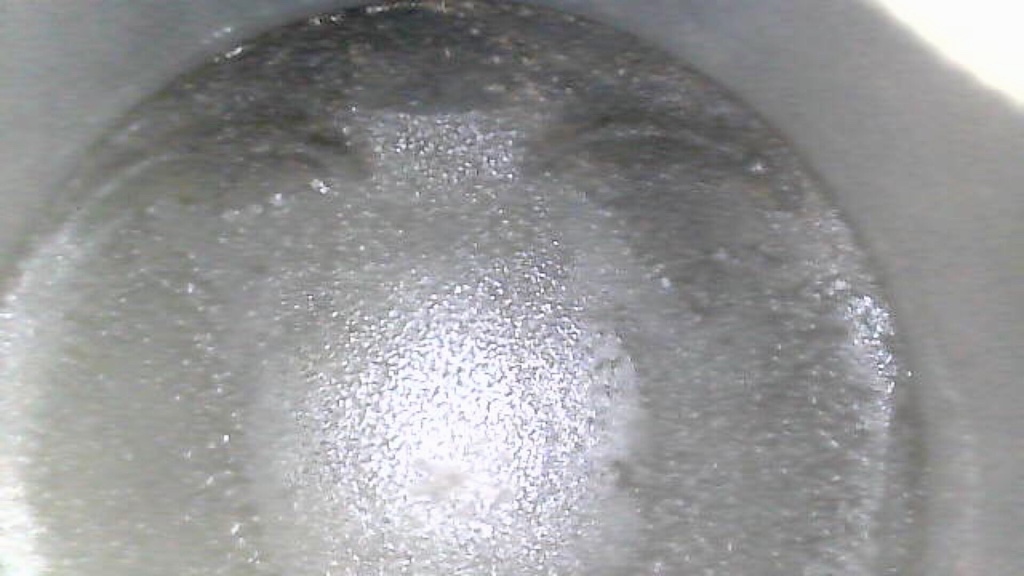
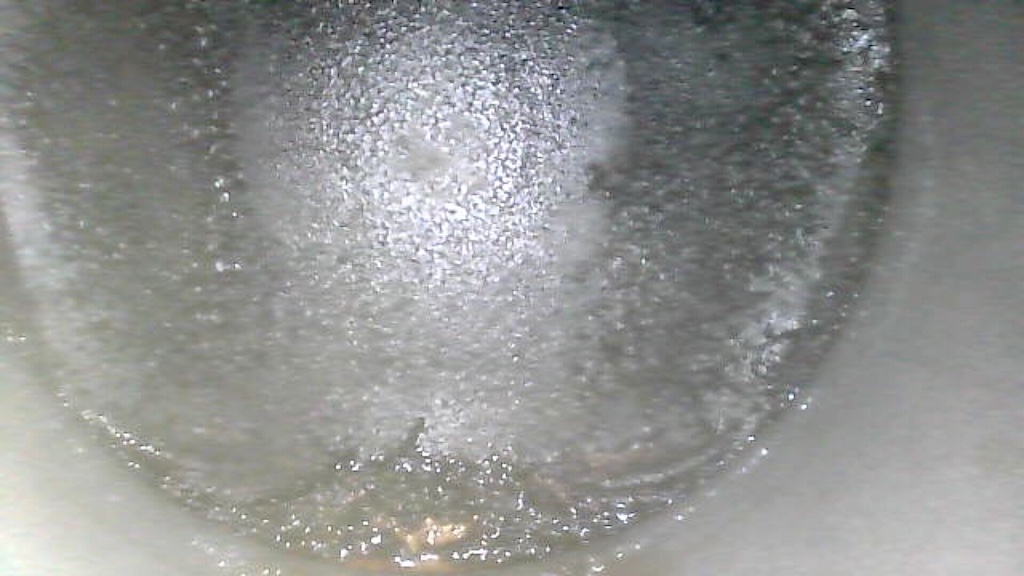
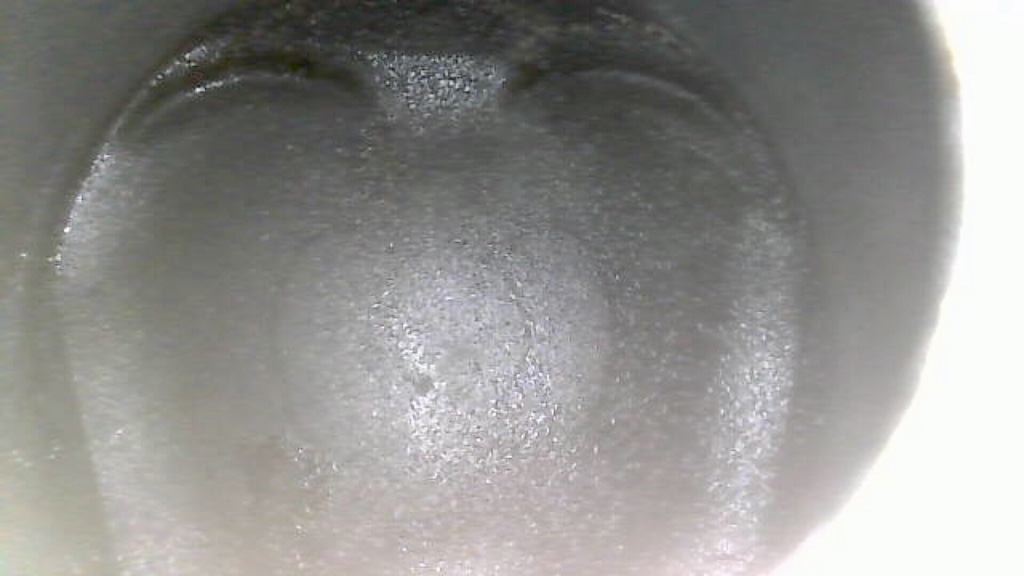
Thanks JFP. To confirm if there was piston impact, below are pictures, two for each cylinder in order from 1-6.