Welcome to RennTech.org Community, Guest
There are many great features available to you once you register at RennTech.org
You are free to view posts here, but you must log in to reply to existing posts, or to start your own new topic. Like most online communities, there are costs involved to maintain a site like this - so we encourage our members to subscribe or donate. All subscriptions and donations go to the costs operating and maintaining this site. We prefer that guests take part in our community and we offer a lot in return to those willing to join our corner of the Porsche world. This site is 99 percent member supported (less than 1 percent comes from advertising) - so please consider an annual subscription or donation to keep this site running.
Here are some of the features available - once you subscribe RennTech.org
- View Classified Ads
- DIY Tutorials
- Porsche TSB Listings (limited)
- VIN Decoder
- Special Offers
- Paint Codes
- Registry
- Videos System
- View Reviews
- and get rid of this welcome message
It takes just a few minutes to register, and it's quality Porsche information at a low cost.
Contributing Members also get these additional benefits:
(you become a Contributing Member by subscribing or donating money to the operation of this site)
- No ads - advertisements are removed
- Access the Contributors Only Forum
- Contributing Members Only Downloads
- Send attachments with PMs
- All image/file storage limits are substantially increased for all Contributing Members
- Option Codes Lookup
- VIN Option Lookups (limited)


Bristol
-
Posts
106 -
Joined
-
Last visited
Content Type
Profiles
Events
Forums
External Paint Colors
Downloads
Tutorials
Links Directory
Collections
Classifieds
Store
Everything posted by Bristol
-
Very interesting Loren, thanks for responding. That's something I might have to look into for a future mod. I'd have to research it some more though. I'm pretty sure I read somewhere that a guy with a Boxster was successfully using the ROW tune with two, rather than four, cats. But that may indeed have been in a less restrictive emissions state than California, of which I believe there are 49 states less restrictive than California! :rolleyes:
-
I would like to make it, depending on the date of course. Unfortunately I don't really have any projects for my Boxster right now though. I'd like to come and help out/observe any way.... Loren, just kinda curious - can you change the DME software with your PST2 to go from a US model to the ROW version? I'm guessing you wouldn't have the specific maps for that. My understanding is that the ROW Boxsters only run with one O2 sensor, so with a ROW map I could run that way too. Again, just curious if it's even possible with your PST2 as I'm kicking around this idea with some potential future mods. Kirk
-
Psst.... (whispering) actually it's a great deal right now. You see they're running more than just their introductory pricing. There's also a 10% discount you can get and FREE material upgrade and FREE color etching. Here's what they just posted over on 986forum where they have the special discount code: "Have a great weekend you guys, and remember we are doing the introductory rate for one month only with free material selection upgrade and free multi color etching. + an extra 10% off for being a forum member. refer to our product release posting for discount code....."
-
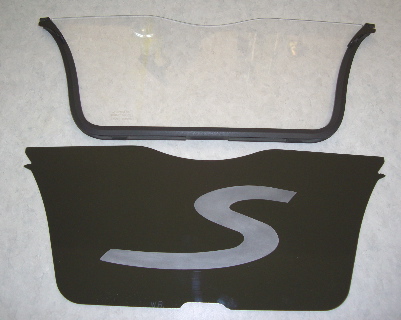
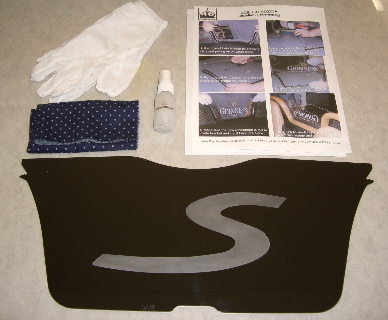
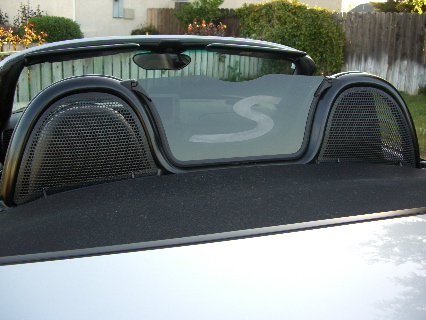
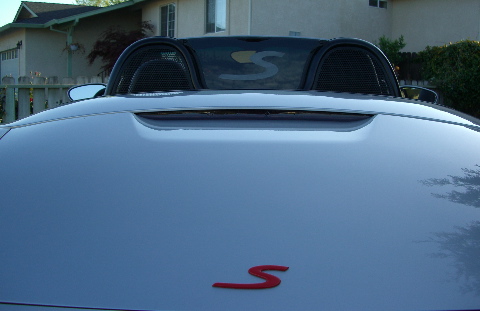
I did a search and saw this hasn't been discussed here, so I thought I should bring it up. There's a company in Texas that is now making replacements for the Porsche windscreen on the 97-04 Boxster. Here's their website: www.windrestrictor.com They can make the windscreens in several different colors with custom designs etched into them and the designs can be colored too. I just received mine today and it is really EXCELLENT. Very good quality and easy to install. You just snap the surrounding edge off the Porsche windscreen and snap it onto the Windrestrictor. My car is debadged - no hood crest, no wheel crests, and no "Boxster" on the rear trunk. I just have a red "S" on the trunk (obviously my Boxster is an S model). So for the Windrestrictor I had a silver "S" etched onto a tinted screen. They were able to match the font perfectly from a few photos I sent them. I think they can do just about any artwork. There are tons of examples in the gallery on their web page. Attached are a few photos of my Windrestrictor and it installed on my car.

-
It's on a white sticker on the underside of your front hood. The sticker should list your car's factory option codes as well as the paint code. Let me know what you find as I'm curious. On my Arctic Silver '00 Boxster S the paint code under the hood is "L92U". Kirk
-
Front bumper Air dam Grills.. Any suggestions?
Bristol replied to efedor's topic in 986 Series (Boxster, Boxster S)
Yup, I replaced the grills in my bumper with mesh screen for like $13 from Home Depot. I took the bumper off and mounted them from behind using zip ties and a few strategically placed holes that you can't see from the outside... No temp issues for me, but I live in Northern California. It only gets up to 114 F here in the summer. :) -
Interesting... thanks for including photos. Do you already have the driver selected that will fit into this enclosure? I'm curious as to what you'll be using. Just a couple suggestions. Take them for what they are... How do you plan to mount the enclosure in place? You may want to consider molding in some mounting tabs with the fiberglass work that you're doing. Personally I would get some 1" wide by 1/8" thick aluminum bar material from any hardware store. You can bend it easily in a vise. I'd drill mounting holes in the aluminum and make two aluminum tabs that extend out of the top and under the edge of the carpet and then two tabs to extend out of the bottom of the enclosure. These then could be molded right into the enclosure while you're making it or in this case epoxy glued on the back since the enclosure is mostly done now. Some mounting tabs would give you a way to bolt this thing down. With the driver installed it's going to be fairly heavy and I don't see that you have any provision for holding it in place. Second suggestion - how are you going to actually mount the driver? Unless you really build up the fiberglass on the mounting ring area I doubt the fiberglass is going to hold the driver. With the weight and vibration it will crack with time. Using some reinforcing at the mounting location would be good. I personally would have put an MDF ring above the foam piece you used and fiberglassed over the whole thing. That way the driver could mount through the fiberglass to the MDF and your mounting screws would have something to dig into. Now that you're mostly done though I would recommend using some mat or several layers of cloth to really build up the mounting ring area to make it strong enough, or consider still laminating a layer of MDF or some other material in there for mounting. Good luck! I think you've still got some challenges ahead of you, but the base so far looks good. It's going to look pretty wild in your car, but nice fiberglass work like this is the standard for high end car audio these days...
-
Naw man, you can get a "control box" for the add-on litronics that will shift the light up when the high beams are turned on, but that's not what he's referring to. He's talking about the system that comes when the litronics are factory installed and raise or lower the lights based on hard braking and acceleration. I've never heard of anyone adding that outside of the factory just because it's too much of a PITA with little benefit. In your case you've just got the lights alone that you added after the fact, right? For those you'd just want to adjust the height of the light when it's shinning against a garage door and get the level even and to the height of your liking. Didn't you buy your litronics (left and right) from two different sources? If you did, then you'd definitely want to adjust them to the same level as they might be set differently. Other than that... I think you're pretty much good. To be honest I lowered my car with Gemballas too and never even thought about adjusting the headlights. :rolleyes: I doubt they're off that much. Kirk
-
cold hard shifter, never felt this before?
Bristol replied to rsfeller's topic in 986 Series (Boxster, Boxster S)
Yeah, this does sound extreme. What kind of transmission oil are you running and when did you last change it? I did not have Mobil 1 gear oil available in my area when I changed mine. So I put in Castrol full synthetic oil instead. It's not a good replacement! The Castrol makes changing gears much more difficult when it's cold. So I'll also have a problem like yours with difficulty shifting when cold, but again not as extreme as your case. It does go back to normal in my car once warmed up. I'll be switching back to Mobil 1 once I round some up and get around to it. Another thing besides the transmission oil that might be the problem is just if there's some kind of mechanical binding. Maybe some little critter trying to stay warm has caused some problem. Just my 2 cents... -
Wow, what the "flock" happened to your airplane. Looks like it got really flocked up. Er... sorry for the fowl language. The windshield survived though. Maybe we just need to make the Boxster windshields out of the same material.
-
Tail Light Upgrade- Hard To Decide!
Bristol replied to juniinc's topic in 986 Series (Boxster, Boxster S)
I don't want too seem too anal, but I thought I'd comment on the black tail lights again... I had looked into this before and checked the California code on tail light regulations. They require that your tail light have a red reflective portion that can be seen at night by another car's headlights from 300 feet away. The tail lights on the left that Tool Pants showed a picture of would not pass code, but the tail lights on the right would be okay. Covering the amber is no problem as long as it still shines through amber when you signal. I would check your local state regulations. Again, I would worry less about harassment by the police and more about liability in an accident though. If rear-ended, this may shift some fault from the person who hit you to you. Even though the lights still shine through red, the light level is lower than standard. If this is found to have contributed to the accident, well then you're screwed. As for the Nightshades spray... I could not find that stuff anywhere around where I lived or on the Internet. I wanted to paint over the amber on my headlights like Juniinc did. I ended up bying some model shop smoked tint spray for plastic models. This was relatively easy to find at a local hobby shop. I still haven't painted my lights yet though, just been working on other things. However, others have reported good results with this stuff - similar or the same as Nightshades. -
Tail Light Upgrade- Hard To Decide!
Bristol replied to juniinc's topic in 986 Series (Boxster, Boxster S)
Yeah, I keep kicking around the idea of changing my tail lights too. That's probably my next mod. I like the LED ones you put as first, but it depends a bit on the color of your car. What color is your car? Personally I like those same LED lights but with the clear/chrome look. Looks awesome on a silver Boxster. But you can't seem to get that light in the US right now. The last option would look good if you hard a guards red car. Otherwise I'd still stick with the first choice. As for your second choice... it really looks cool and would look amazing on a black car. Where did you find that? I assume it's a home-made paint job. Still I wouldn't touch those lights with a 10 foot pole. They'd be completely illegal in California and probably Washington too. They'd just be an invitation for getting pulled over and harassed. Plus they wouldn't be too safe. I bet they'd increase the chance of you getting rear-ended and if you did, the person who hit you might be able to weasel out of trouble because of the illegal tail lights. Just some food for thought, ultimately you choose the risk you're willing to accept. -
Hey man, I see you're in San Jose. Did you know that mounting anything on the windshield in California is illegal? It's not exactly going to get you pulled over, but may be an add-on to another ticket. Still I'm mounting mine this way until I can find a better solution. You may want to find another option. I've seen people mount them to a little stand between the seats and just in front of the roll bar.
-
New Work On Kirk's Car
Bristol replied to Bristol's topic in Work on Cars (Sacramento/Elk Grove/Rocklin/Roseville Area)
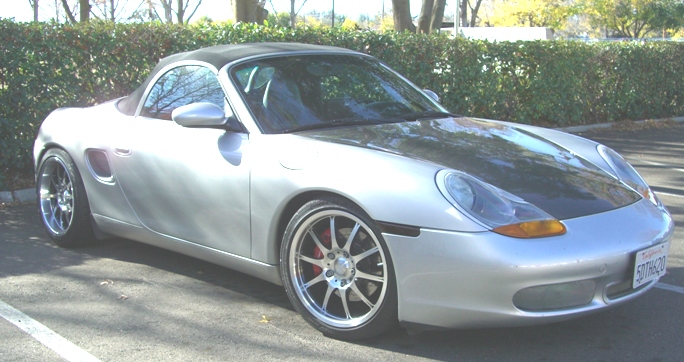
Pics of the car - baby's got new shoes...
-
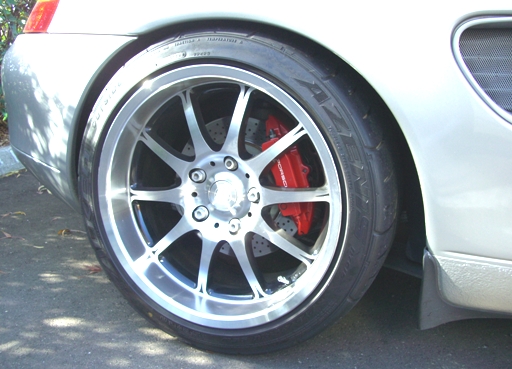
So where'd you get those bolts from??? I just installed some similar BSA wheels (but the machined/polished version) and I need some chrome bolts now. :P On my 2000 S I didn't have any fit issues in the front with the caliper. It's odd that you did. I do have a rub in the back though since my car is lowered. Kirk
-
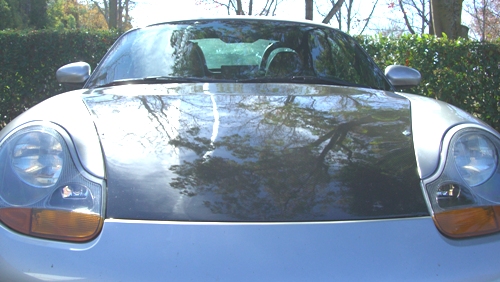
Well I finally got some work done on my car (2000 Boxster S) and thought I'd share... especially since I haven't actually got much done at our work on car days. :rolleyes: I bought some dzus 1/4 turn fasteners to help hold down my carbon fiber hood. The fit wasn't great and it was bulging in the middle. After some work with fabricating the brackets, drilling, etc, etc, I finally got that project done and it looks really great. The fit of the hood is 95% perfect now and it looks a little more racey with the racing panel fasteners. I'm even tempted to add more. :P I got my new lower stress bars installed and they are 4X easier to install than the old home-made bars I had on the car. Adjustable heim joints are what made the install so much easier. I'm testing them now to see how they hold up. I just got new wheels for the car last night. 18" BSA's with Falken RS615 tires. The wheels look awesome on the car with it lowered on Gemballa springs. It's a bit more mean looking and I love the 2.5" polished lip in the back. Now I just need some chrome wheel bolts... Grip from the tires is great. As I had discussed with Loren though the rear is pushing it a bit for width (18X10 wheels with 275 tires) so I rub under extreme circumstances. I'm looking for someone local who can roll my rear fenders professionally, using a tool like Loren said Shark Works in SF has. Finally, I got some new aluminum pedals that look great. Those are going to go on the car tonight. I bought a 90 degree adaptor for my drill to make the install easier. So if any of you get pedals and want help installing them, I've got the best tool for the job. So, sorry, but it looks like I'm not saving anything for the next work on cars day! :P My next project is a fiberglass Gemballa GT bumper I just picked up cheap due to some damage. I'm going to patch up the cracks and have an exhaust made for it (exhaust comes out of the middle of the bumper, up high, like a Carrera GT). But that's not really a work on cars day type of project and will take me weeks and weeks to complete - a good winter project. I'll follow up with some photos shortly. Kirk
-
got my alignment after springs install....
Bristol replied to djomlas's topic in 986 Series (Boxster, Boxster S)
I got mine on eBay from Marietta Tire in Marietta, Georgia. Sniped the auction and got them cheap - brand new. :D I'd just keep my eyes open and see what pops up. I wouldn't call it a "simple" swap. You'll need some spring compressors and a 7 mm allen wrench (not very common size). The best directions for the front are here on Renntech in the 996 section. The rears are the real pain in the arse. Kirk -
got my alignment after springs install....
Bristol replied to djomlas's topic in 986 Series (Boxster, Boxster S)
Djomlas, the car is looking great. My opinion on the alignment - well the front doesn't look too bad. I dropped my 2000 S with Gemballa springs and I'm running about 1.0 negative camber in the front. My car was about 2.4 negative camber in the back, but I wasn't happy with that. I took it back to the shop and they worked on it some more and finally got it to 2.0 negative in the rear. I think it's tricky on lowered Boxsters to get the camber right without compromising toe. If you're not happy with the alignment, then you may want to consider taking it to a professional Porsche shop or race shop... BTW, stupid me - I went through some hassle (but no cost) getting the car aligned a second time to get more of that negative rear camber out. Then tonight UPS delivered some new 18" wheels for me to replace my stock 17s. Wouldn't you know it... I've got a rub problem in the rear on the fender! Now I wish I had a little bit of extra negative camber back there! :P So with your larger wheels, maybe you should simply count your blessings that you don't have a rub problem and leave the alignment as it is. As for me, do you think I can take my car back to the shop for another alignment? After the grief I gave them I just don't think I can do that. I'm going to look into getting the rear fenders rolled. <_< Kirk -
Revised windstop clips
Bristol replied to Tool Pants's topic in DIY Articles - Boxster (986) - Common Fixes and Repairs
Thanks again Jeff!!! My closest Porsche dealer is about two hours away from me but only 15 minutes from Loren's house. So when I was down there for the Work On Cars Day this last weekend I picked up the windstop clip for $3.50. Install literally was a SNAP. :rolleyes: Here I thought this was a big deal when it broke, but ended up costing me less than a movie rental and took maybe 2 minutes tops to install! :renntech: -
I haven't heard of an intercooler being installed on a supercharged car, but it has been done on the turbo cars. I think the Gemballa "biturbo" puts the intercooler in the trunk. Gary's turbo Boxster in the United States has the intercooler installed under the transmission. Photos and details of Gary's setup are here: http://www.6speedonline.com/forums/showthr...661#post1431661
-
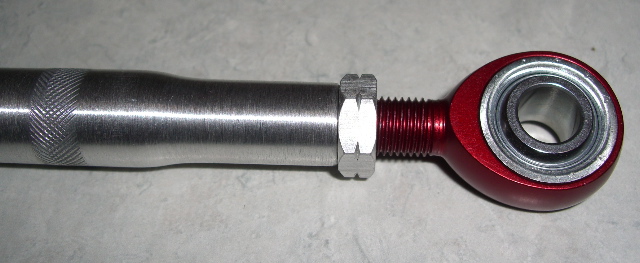
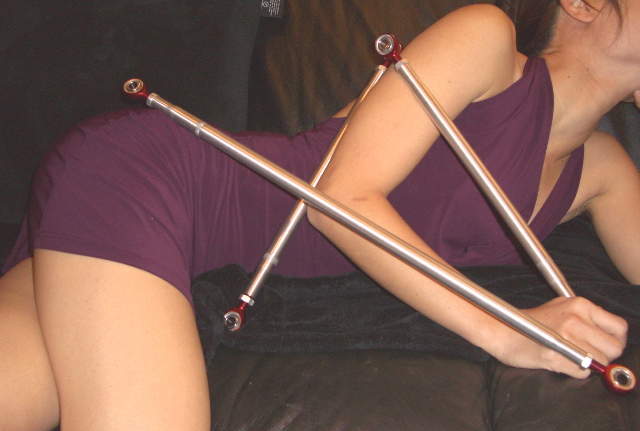
A closer look at the heim joints (also called a rod end).
-
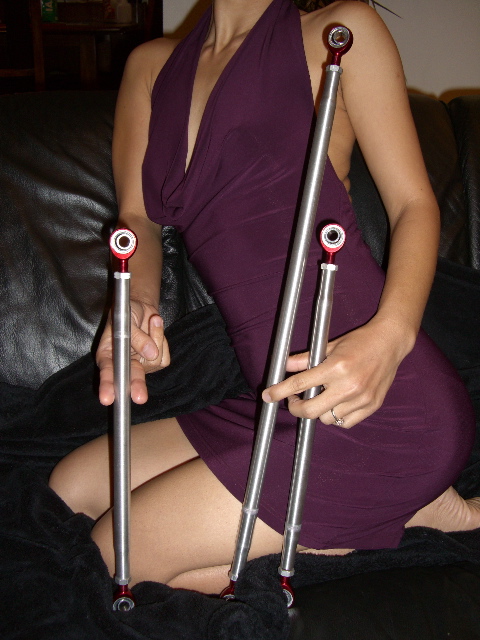
The three bars, as they are laid out under the car.
-
Them are some good looking... uh... bars.
-
Here are some quick pics of my new and improved lower stress bars (all three). The large main bar ties the left and right sides of the car together. The two smaller bars then tie the left and right sides to the support in the middle/rear of the car, thus triangulating the three bars together and giving extra stiffness. Basically I've been running with a homemade setup like this for a couple months and really appreciate the improvement. Now I've taken it a step further by upgrading to light weight and stronger racing components. I'm going to take these parts to work tomorrow and weigh them before I install them. But they're really very light weight. The rod ends or heim joints are three piece (not the cheap two piece) units made out of hard anodized aluminum. Each heim joint is rated to hold over 4,000 lbs! The bars and locking nuts are all aluminum too. Man this is a slick setup. I can't wait to get them on the car! Oh, and by popular demand, my assistant is back to show off her goods... er... I mean the goods. Kirk
-
Hopefully I'll have up some photos of my assistant later this week. I ordered some fancy racing heim joints that USPS tried to deliver on Saturday, but I was away at a Work on Cars Day in Sacramento. I should have the package today, so tonight I'll make a new, super duper lower stress bar with adjustable heim joints rated for over 4,000 lbs each. Unfortunately my assistant has to work tonight, so I may have to take photos without her. :angry: I'm doing all three stress bars in the back with this new setup. I also bought some parts to see if I can use these heim joints with special spacers to make sway bar drop links (one of mine has a bad seal). Stay tuned more to come later this week...