Welcome to RennTech.org Community, Guest
There are many great features available to you once you register at RennTech.org
You are free to view posts here, but you must log in to reply to existing posts, or to start your own new topic. Like most online communities, there are costs involved to maintain a site like this - so we encourage our members to donate. All donations go to the costs operating and maintaining this site. We prefer that guests take part in our community and we offer a lot in return to those willing to join our corner of the Porsche world. This site is 99 percent member supported (less than 1 percent comes from advertising) - so please consider an annual donation to keep this site running.
Here are some of the features available - once you register at RennTech.org
- View Classified Ads
- DIY Tutorials
- Porsche TSB Listings (limited)
- VIN Decoder
- Special Offers
-
OBD II P-Codes - Paint Codes
- Registry
- Videos System
- View Reviews
- and get rid of this welcome message
It takes just a few minutes to register, and it's FREE
Contributing Members also get these additional benefits:
(you become a Contributing Member by donating money to the operation of this site)
- No ads - advertisements are removed
- Access the Contributors Only Forum
- Contributing Members Only Downloads
- Send attachments with PMs
- All image/file storage limits are substantially increased for all Contributing Members
- Option Codes Lookup
- VIN Option Lookups (limited)


seafeye
-
Posts
333 -
Joined
-
Last visited
-
Days Won
1
Content Type
Profiles
Events
Forums
External Paint Colors
Downloads
Tutorials
Links Directory
Collections
Store
Posts posted by seafeye
-
-
Sticky Radio Turning knobs
It's a single-din factory unit. I was wiping it with a wet towel and the two turning knobs on the face panel got sticky afterwards. Don't know why. Maybe it's old.
Can they be replaced? If so how?
Thanks
Easy fix.
Go to the local dealership and order new ones. I bought them for $8ea. Kind of a rip off but what can you do.
They just pull straight off. And yes over time they do start to get gummy and gross. You will be happy to
get some new ones.
-
Thanks for the write up,
I noticed that your bolt in the upper control arm was in backwards or upsidedown to what they have in the parts diagram.
Don't worry i did that too. It won't go in the other way. Just wondering if the factory made a mistake or when they built these cars
they put them in this way.
Bolt 10 and 11 nut.

-
The drivers side of the car only took 2.5 hrs. One person. Could of had it down to 2 but i buggered up some threads on the ball joint getting it apart. I wasn't carefull enough, and the tool carved up the first two threads. I didn't have a rethread kit so i just used a small file and worked it a bit. All is well it was just at the top and the bolt goes past it.
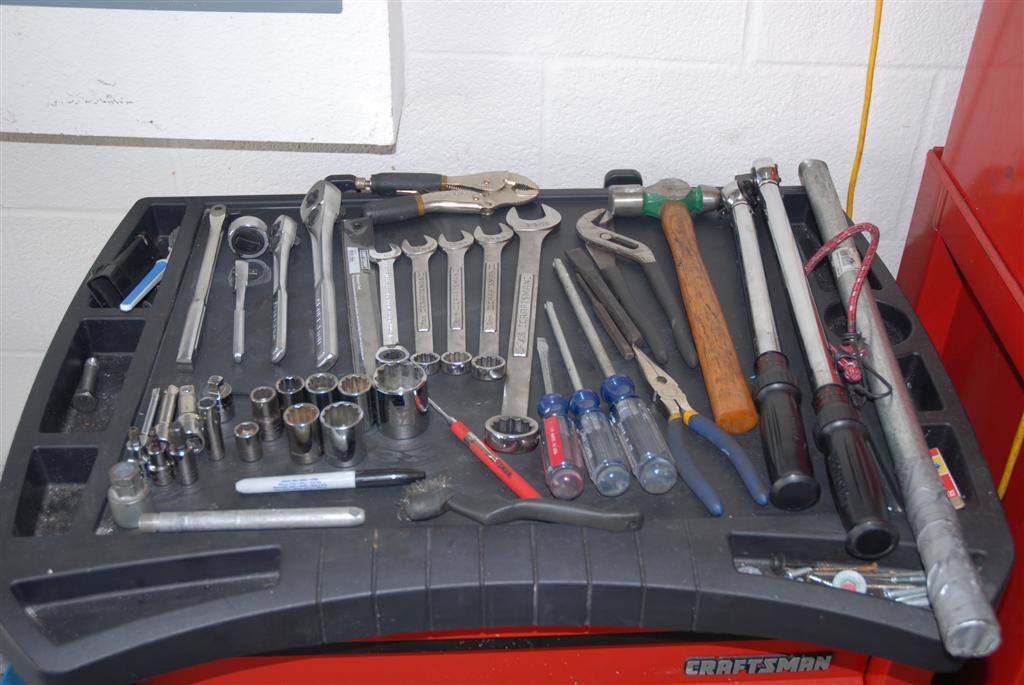
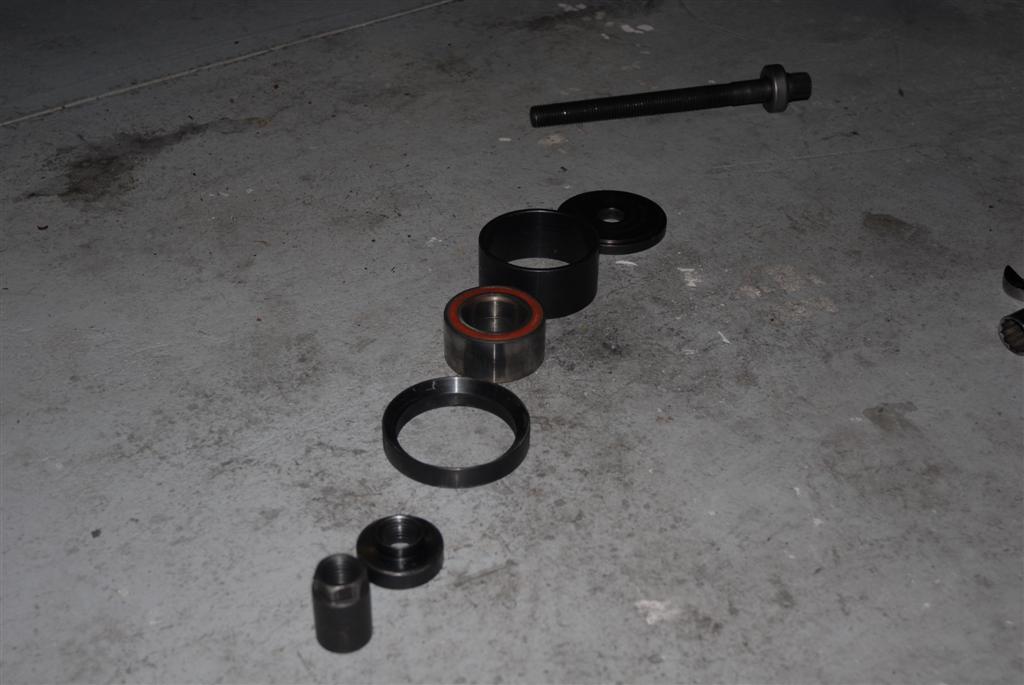
I figured the last post here should be all the tools required to do the rear wheel bearings.
It may seem like a lot but i'm sure with a little ingenuity you can reduce it.
All the tools required for your boxster or 911 should be metric. But you will need some standard ones for the SIR TOOL bearing remover and ball joint breaker. If you are doing the front you will need these tools plus the spring compressor for the strut.
1/4" Ratchet
1/2" Ratchet
3/4" Ratchet
3/4" Thumb Ratchet (Really not needed at all)
1/2" Breaker Bar
Short 1/4" extension
Short 1/2" extension
Short 3/4" extension
Reducer from 3/4" to 1/2" (Used on my larger torque wrench for the caliper bolts)
T40 Torx Socket 1/2" Drive
5mm allen socket 1/2" Drive
10mm allen socket 1/2" Drive
10mm socket 1/4" Drive
13mm Socket 1/2" Drive
13mm Socket 3/4" Drive
17mm Socket 3/4 Drive
18mm Socket 3/4 Drive
19mm Socket 3/4 Drive
32mm Socket 3/4 Drive
1/2" Socket 3/4 Drive
5/8" Socket 3/4 Drive
3/4" Socket 3/4 Drive
15/16" Socket 3/4 Drive
1/2" Torque wrench
3/4" Torque wrench
4 foot bar
Hammer
Small punch for taking the pin that holds the brake pads.
Chisel that was used to help take off the bearing race on hub.
Vice grip
Needle nose plyers
Bungi cord
Sharpie Marker
Magnet to catch those bolts that fall out of your arms reach.
Wire brush
Medium phillops screwdriver
Large Phillops screwdriver
Flat head screwdriver
Of course your two tools from your factory tool kit..
Wheel liner upper
and
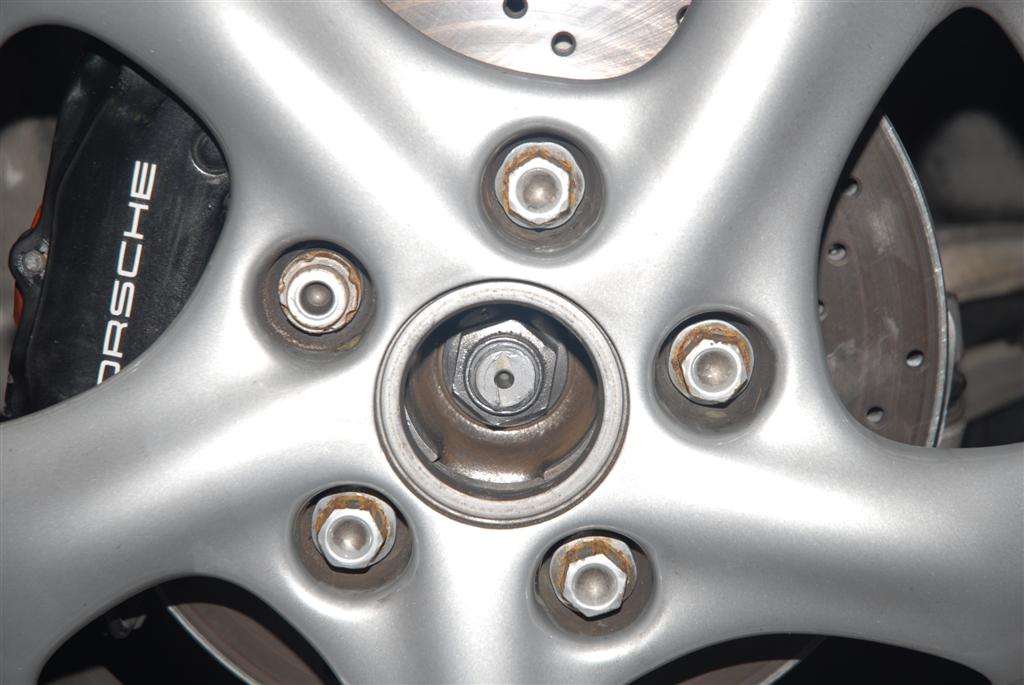
the wheel lock key.
Misc...
Grease
Brake cleaner
Hand Cleaner
Anit seize
and most important get yourself some good gloves. Your hands will appreciate the comfort.
-
Lastly or finally....
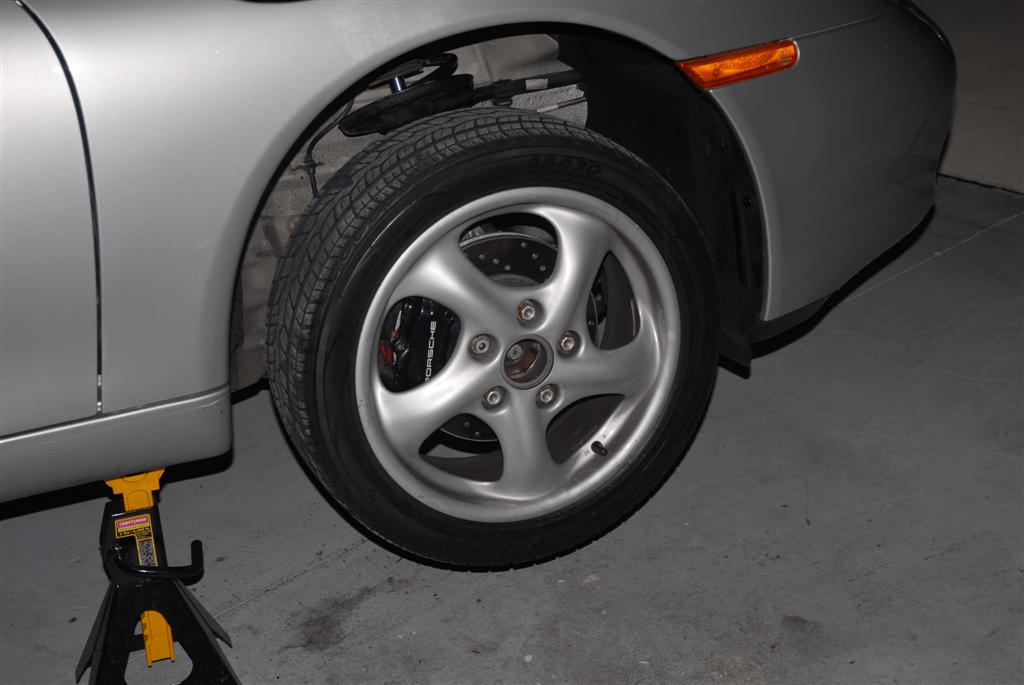
Replace the wheel, use your tool in the factory supplied kit.
Lower the car, torque the wheel bolts to 96 foot pounds.
And tighen the wheel hub bolt to 360 foot pounds. WHAT you don't have a torque wrench that goes that high? I don't either.
And i am not going to spend $250 to buy one either. So what i did was tightened the bolt as tight as i could with my 4 foot bar and then on my road test i stopped by the sears auto center and got them to do all 4 for me. I just gave the guy $10 to do it.
Enjoy your savings....I wonder what you will buy with the money you saved? I already spent mine on what else...tools!
-
In the above post you also saw that the number 8 was reattached. Forgot to mention that.
After you have attached all the bolts, ball joint, number 8, you can tighten them up and torque to whatever settings your manual states. I understand that the boxster S has different settings so check to see what yours are. VERY IMPORTANT.
With the escentric bolt on the lower control arm you need to turn the bolt to the position that you marked earlier. Then once you have the spot, tighten the bolt. You kinda have to balance the two in order for the washer to stay in the position you want. Just take your time.
When all the bolts have been torqued you can put a jack on the bottom of the wheel carrier and jack up the car till the bolts for the sway bar line up. 17mm and 15mm here.
Finally its coming to an end...
Find your rotor you took off earlier, clean off the screws, plenty of antiseize and reinstall.
Same with the brake caliper bolts, those 2 10mm bolts that hold on the wires. Make sure the wires are routed properly around the sway bar. Replace the brake pads, pin, spring etc...
-
You probably quessed that next is the replacement of the wheel hub and axel. Couple of tricks here too.
Use the SIR TOOL to press in the hub. Easy enough.
Then loosely put the axel in the hole. I say loosely because you have to place the lower control arm back in its place. And it is a lot easier if all parts aren't tight.
So put the axel as far into the hole as you can.
Move the lower control arm into place. Put some WD 40 or soap or something to help the control arm back in. Mine actually wasn't all that tough. I think i got lucky. Just wiggle the whole assembly and it should fit nicely.
I put a large phillops screwdriver in the hole to line up for the escentric bolt. You can attach the axel bolt at this time. Doesn't need to be tight.
Take the screwdriver out and wiggle the whole unit again to get the bolt in. Next the washer (Can only go on one way) then the bolt.
Now take the ball joint you disconnected earlier and reattach it. Sould be straight forward.
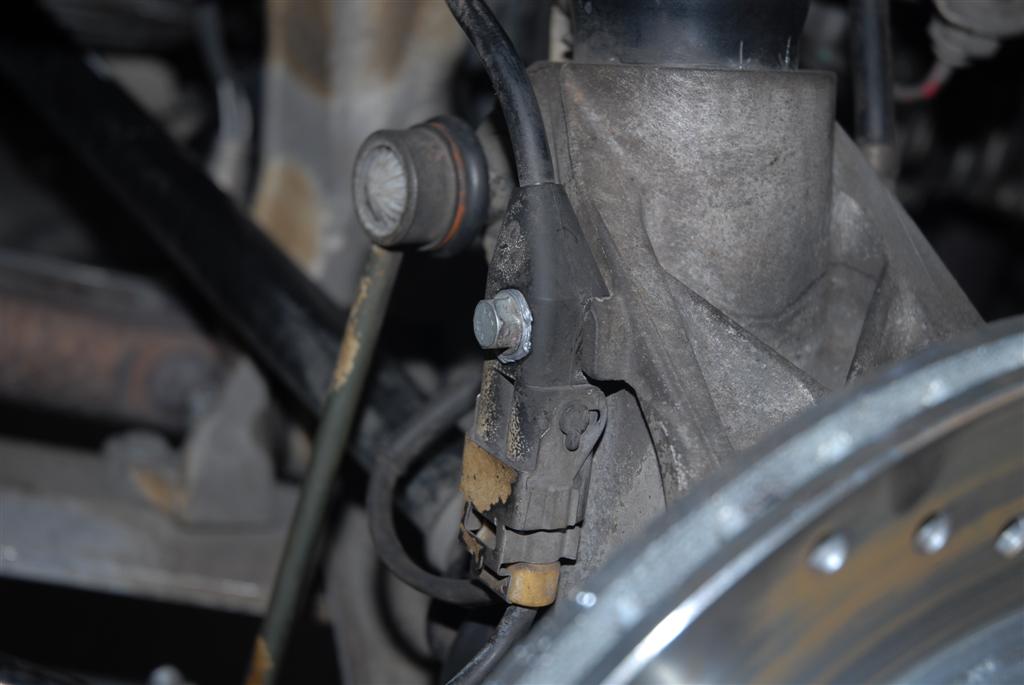
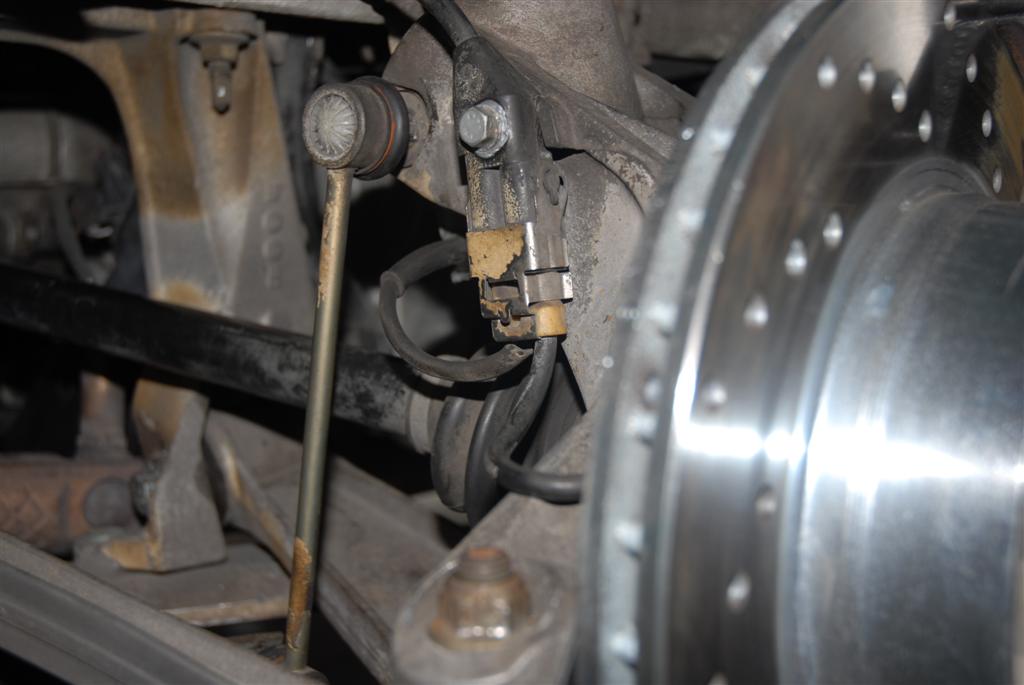
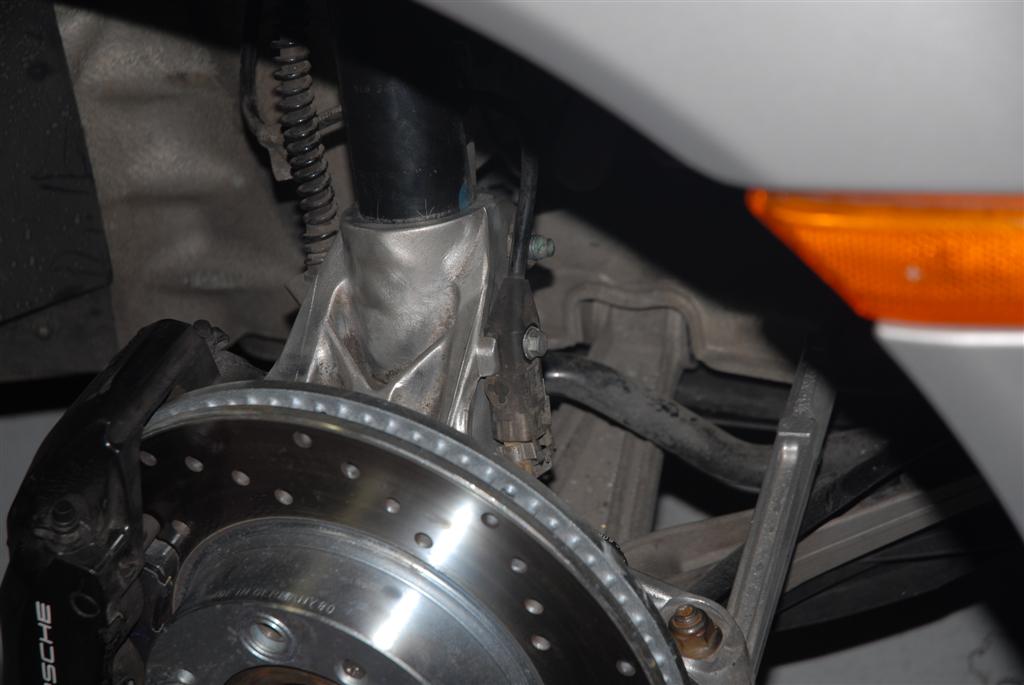
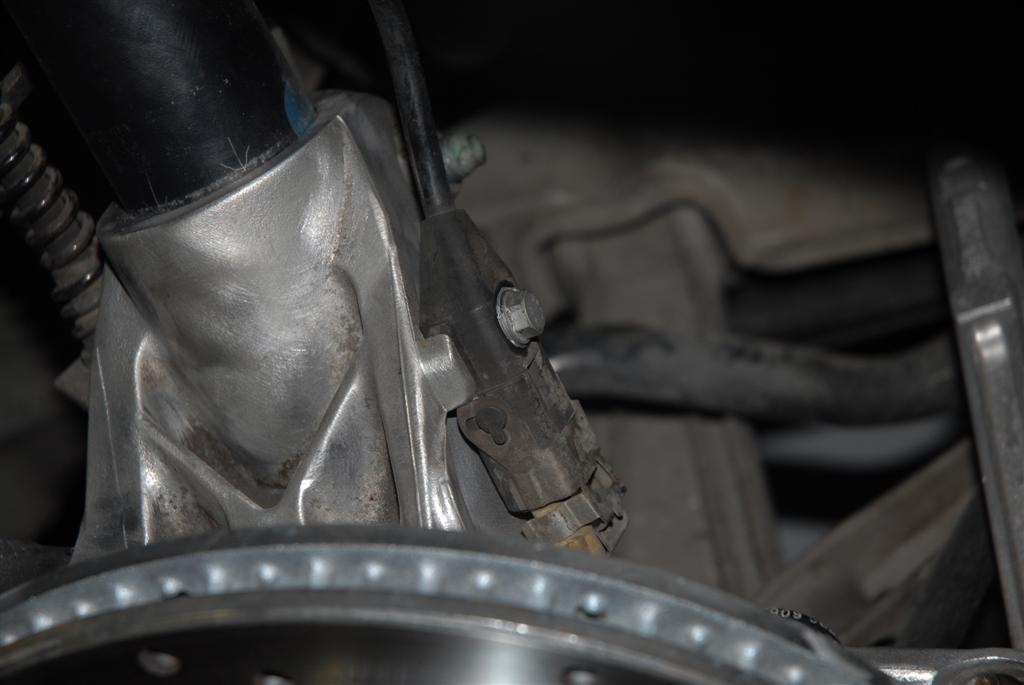
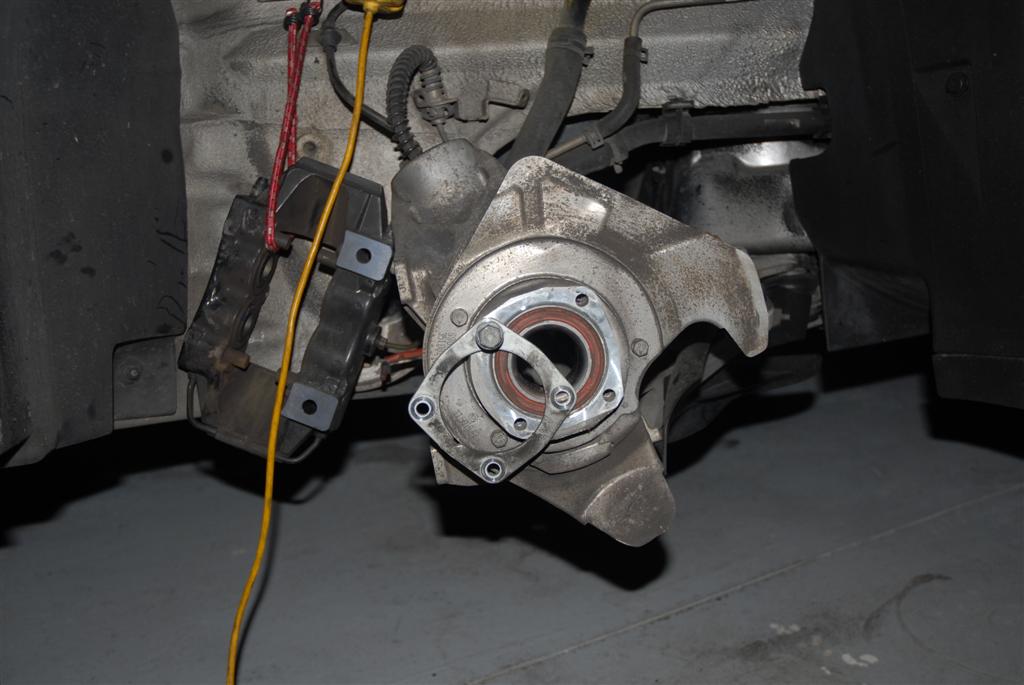
Here is also a picture of the parking brake line i broke. It was rusted, but i am sure with my yanking and pulling i must have pushed it over the edge. Nevertheless the brake still works. I live in florida and we don't get much rust. I wonder what the northerners cars look like? Sounds like the next project.
-
This going to the tool store kinda reminds me of how i convince my wife i need a new tool. Her grandfather was a tool guy. Real men have tools. And he was a real man. My wife really looked up to this man and has great respect for him. Now i am not one for taking advantage of an opportunity but...
I ask my wife questions about this great man, and more about his tools. "Did he have an aircompressor?" Yes, then it was OK for me to get one. One day we went to sears and looking around i noticed some vises. Showed her one that i wanted to buy. She said that her grandfather had a much bigger one and i should too. Gotta love this girl! I guess what i am trying to say is that buy as many tools as you can. You may be helping your future Grand Son in Law.
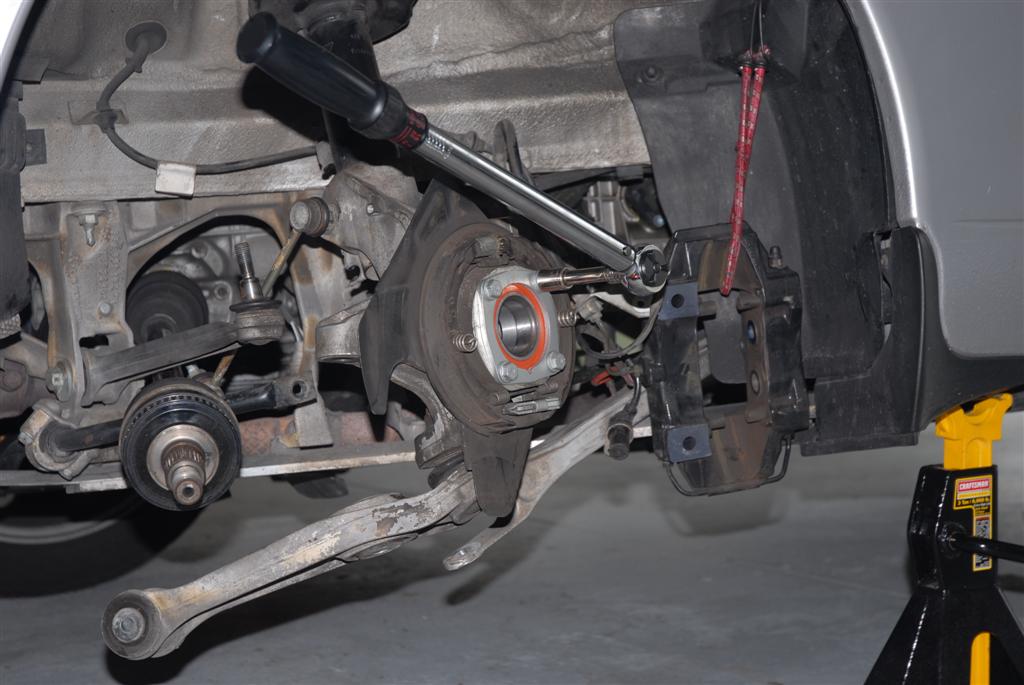
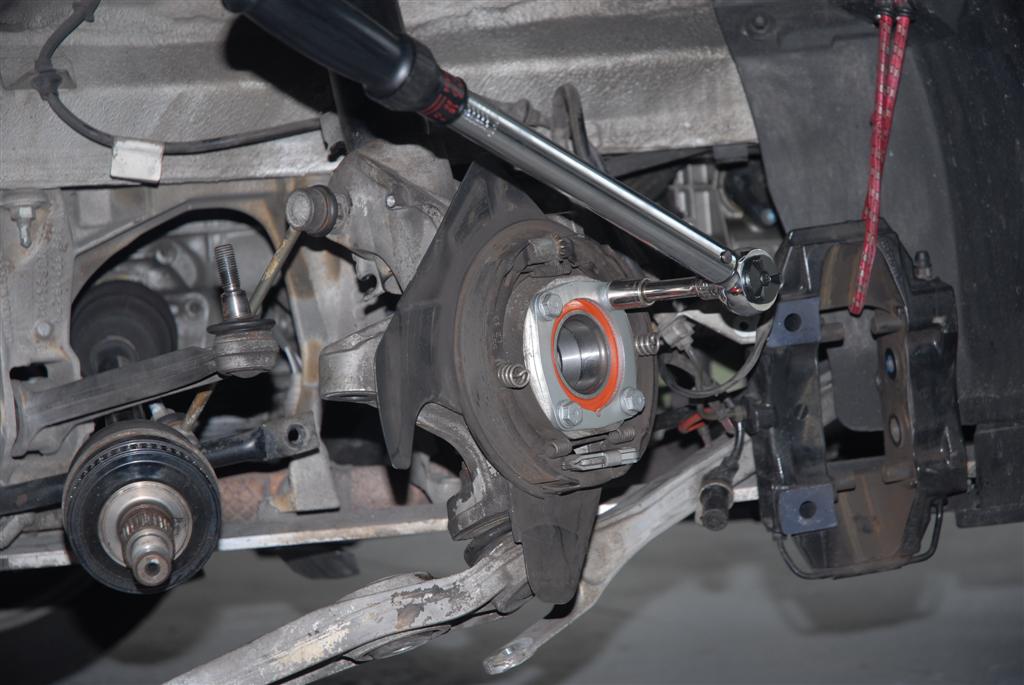
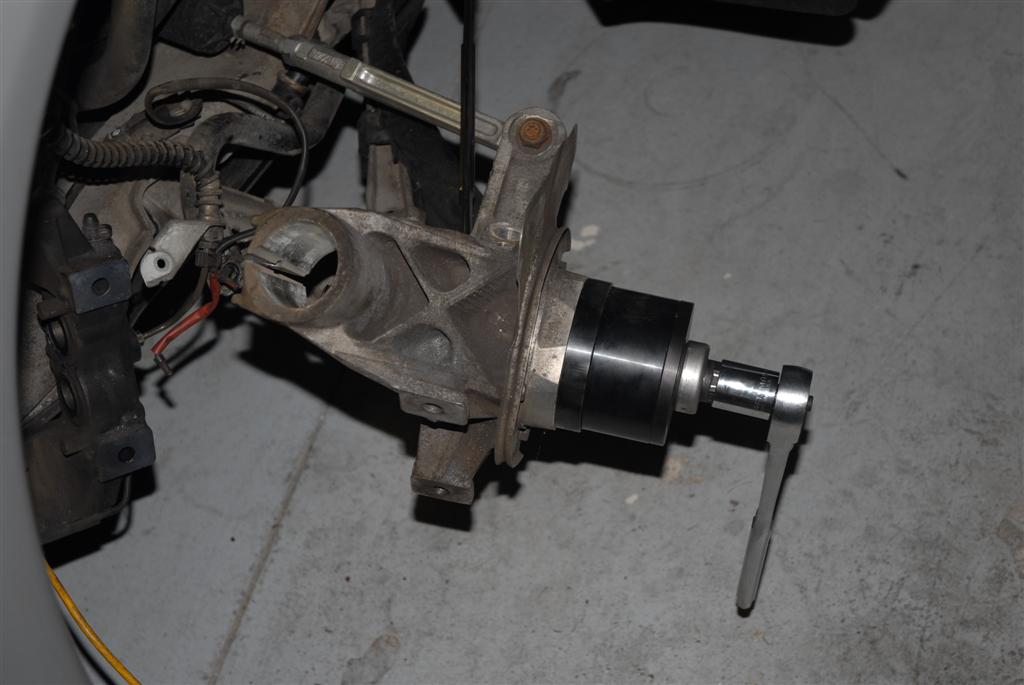
Here i am using the Sir Tools puller to remove whats left of the bearing. Two people would be nice. But with some effort you can get it done with one.
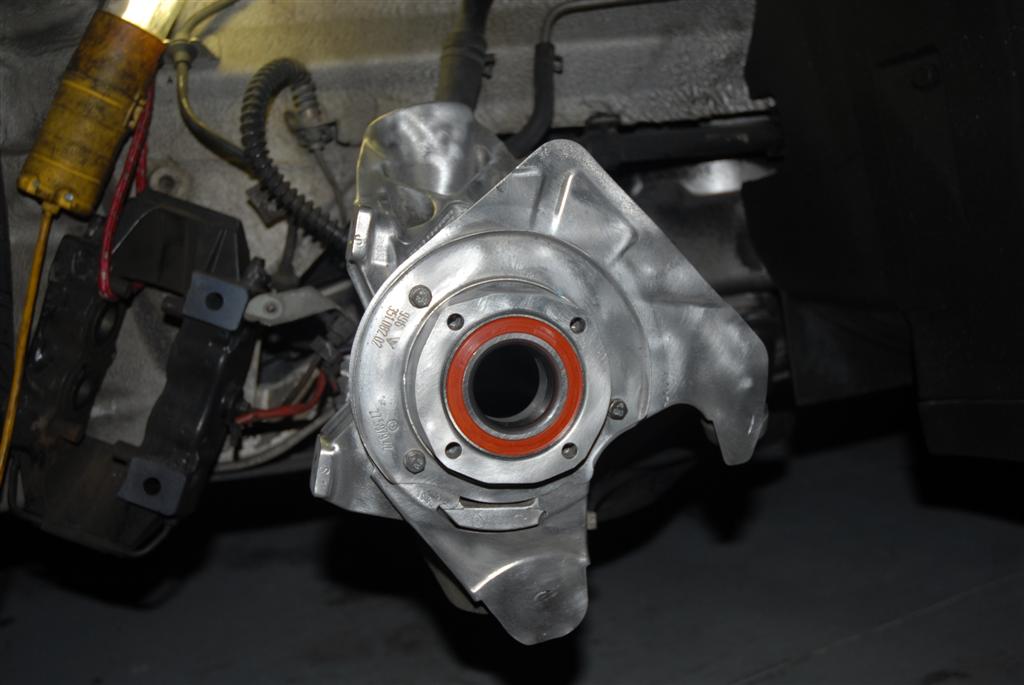
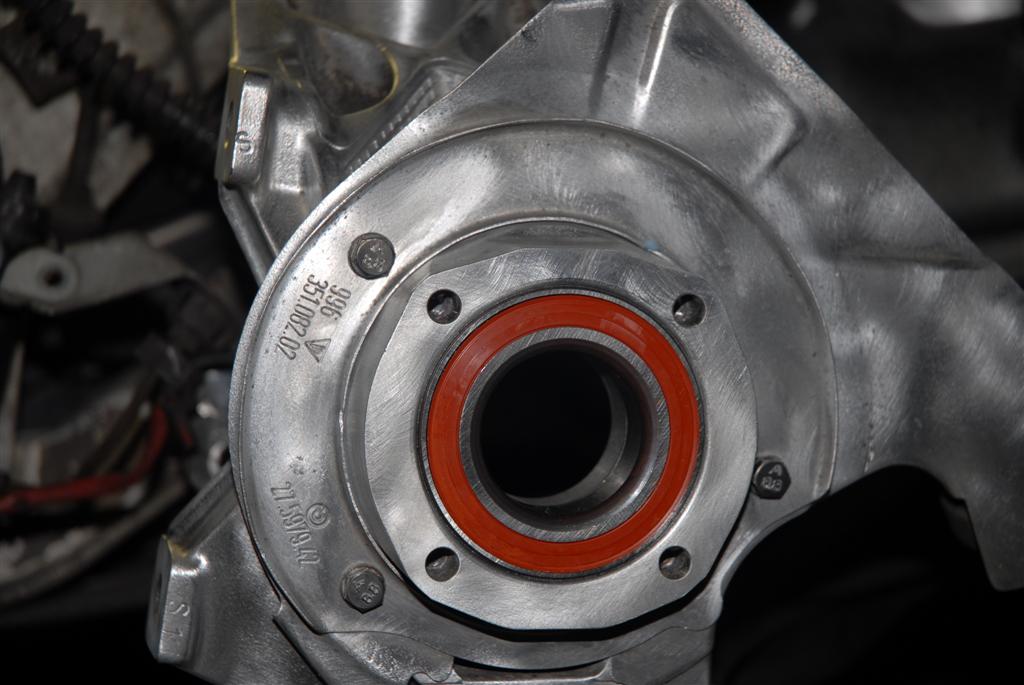
After you get it out, use some brake cleaner, but not much, can't be good for the planet earth, and clean out the carrier. You may have noticed that when i did the front i polished and cleaned the wheel carrier. I wasn't in the cleaning mood this time.
Reinstall the wheel bearing reversing the tool, should slide in, if it doesn't then it might not be lined up properly. I did keep the wheel bearings in the freezer for a while to help "Shrink" them. Might of helped i have no idea. Whats for dinner...Omaha steaks or wheel bearings?
After install of wheel bearing, attach the dust cover and bolts, use some anti seize on the bolts and torque.
-
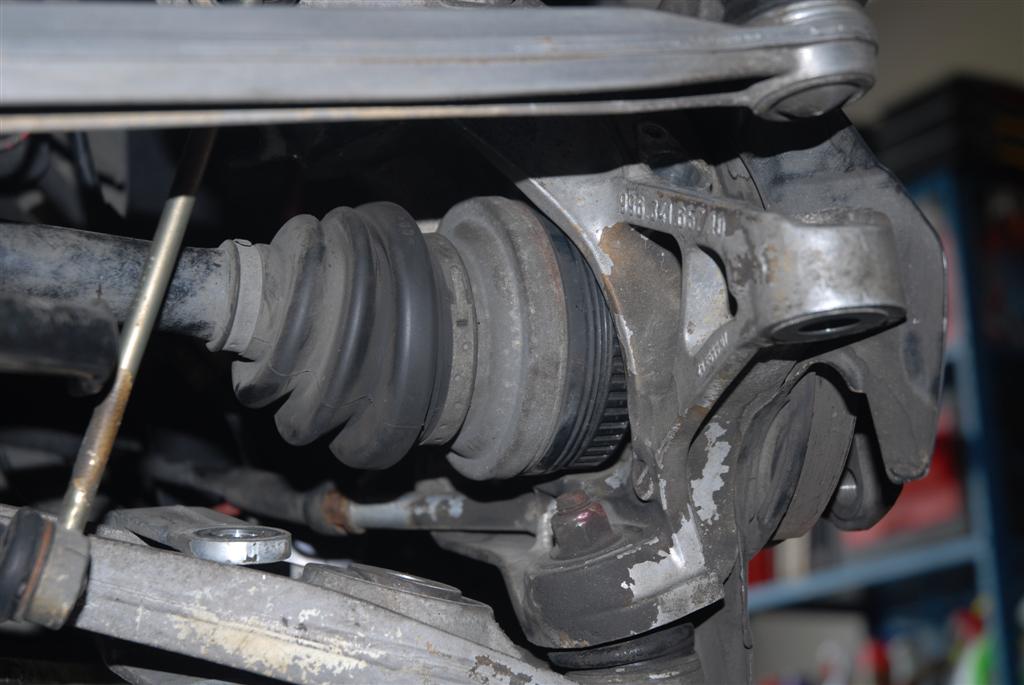
I thought i had some pictures of me pulling out the axel but i don't sorry. I am sure that you get the idea. Couple of wacks and the whole wheel carrier is able to move freely.
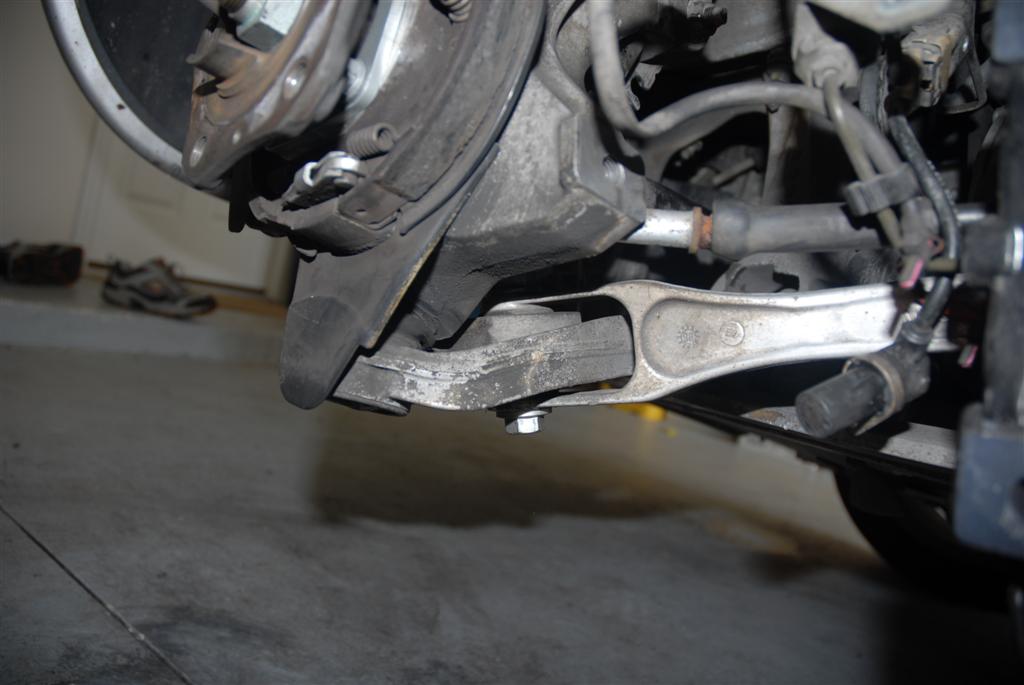
You may notice is some pictures to follow that i took off the Control arm...(Track Arm) to some. Number 8. You don't have to. I did because i was too afraid to use some force on the axel. Don't hit it so hard that you bust your transmission but enought to free it. Also if you want to remove the Number 8, you will need a 21mm wrench. I didn't have one that big so it gave me a good excuse to go to sears and buy the Large Wrench Set for $59.00 (On sale). Did i mention my wife is away this week? heh heh
If you look at the parts diagram you will see that the number 8 can't interfere with the lower control arm coming out of its home.
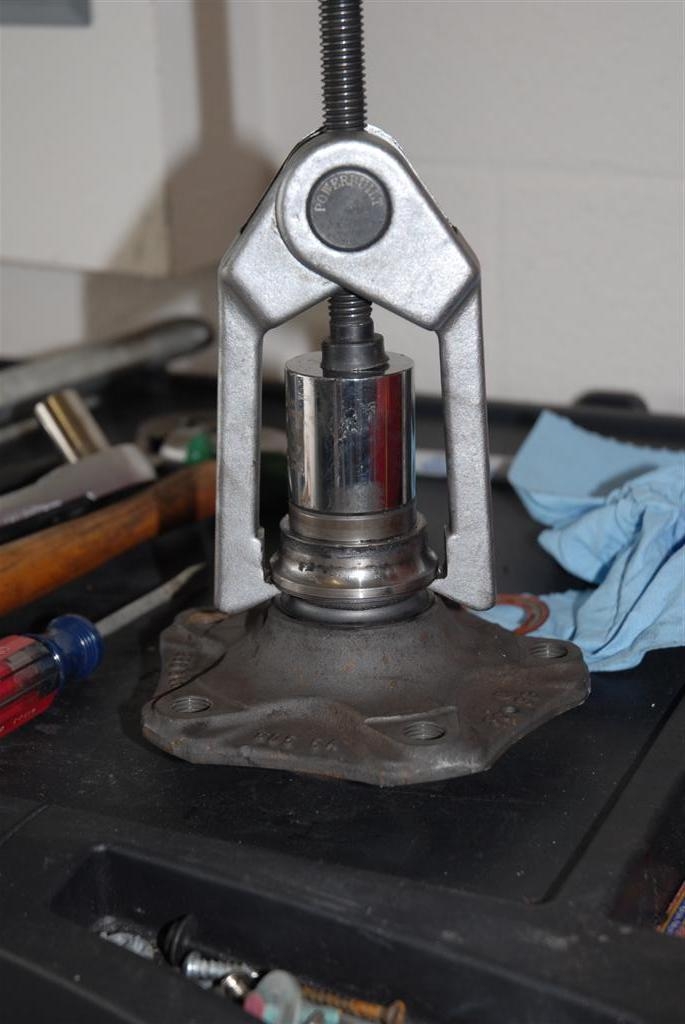
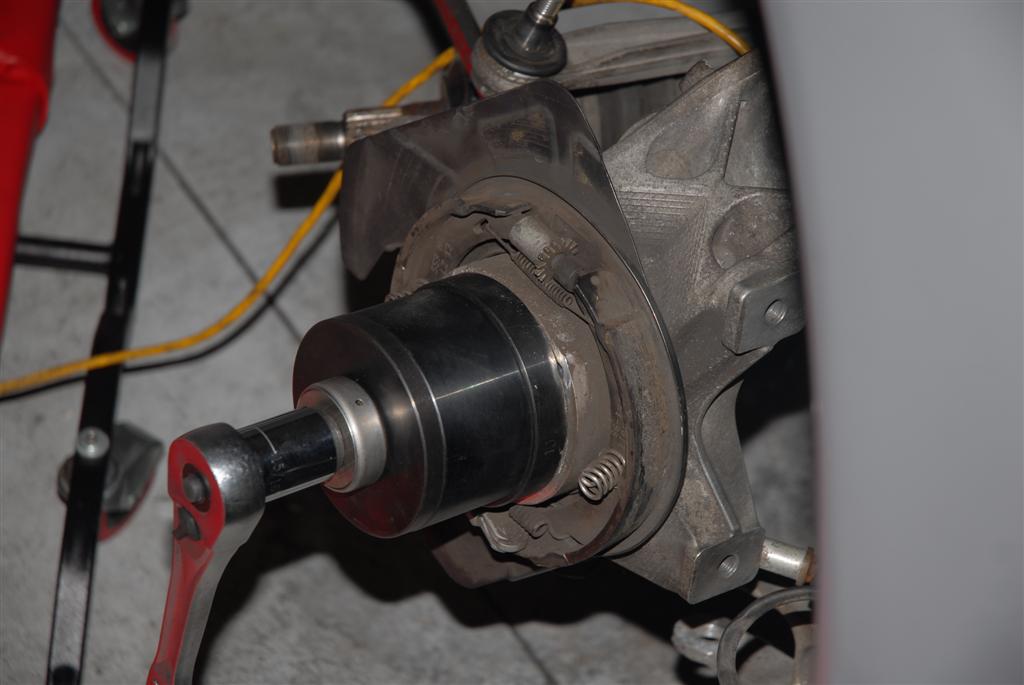
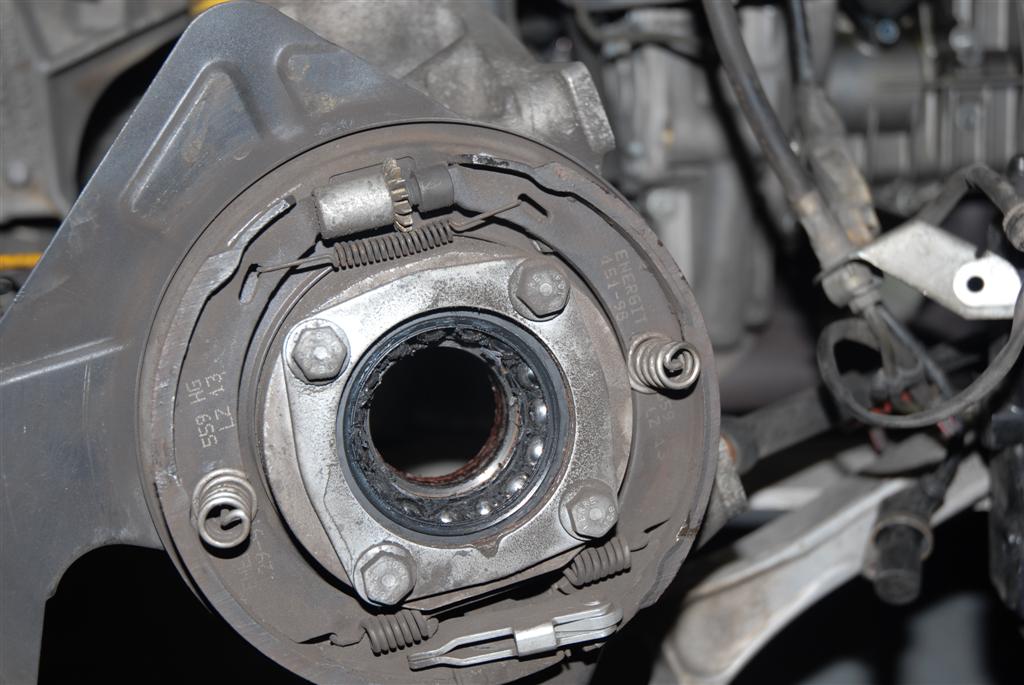
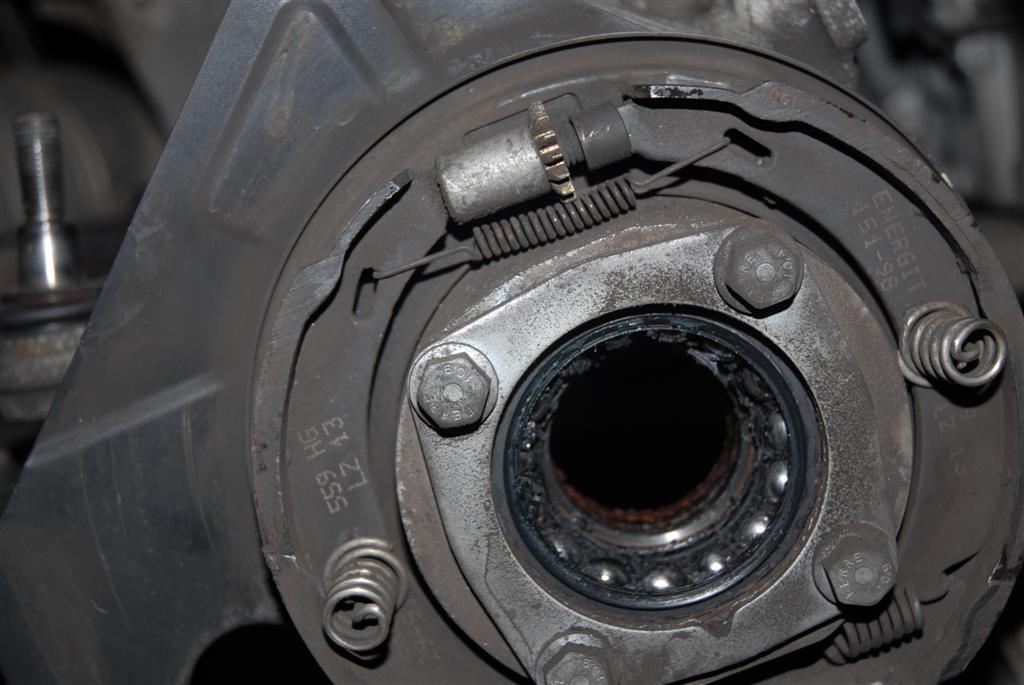
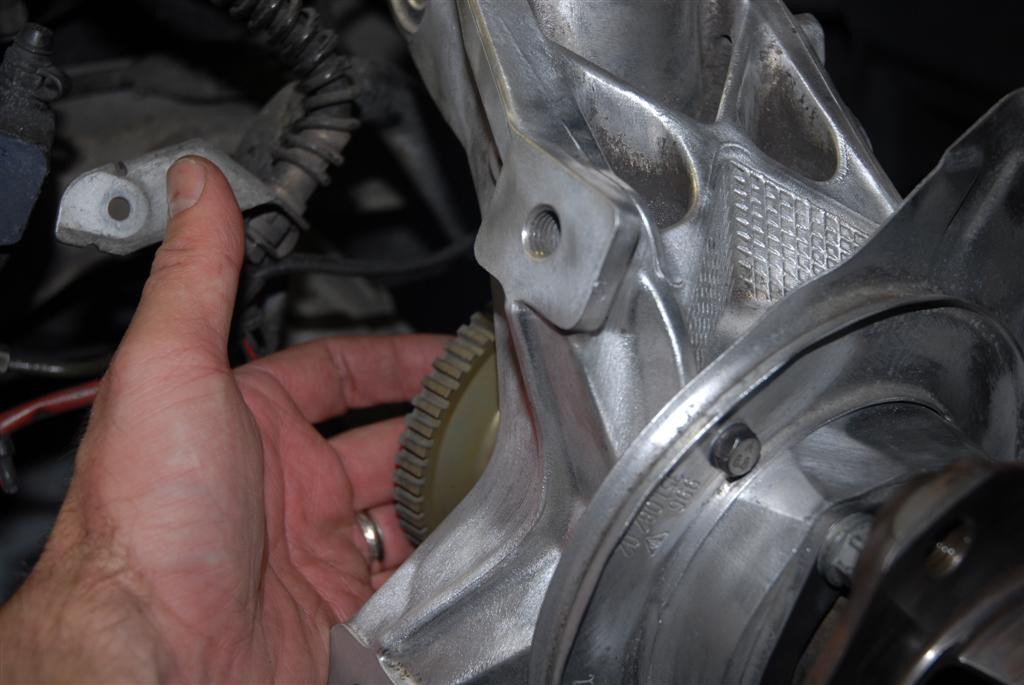
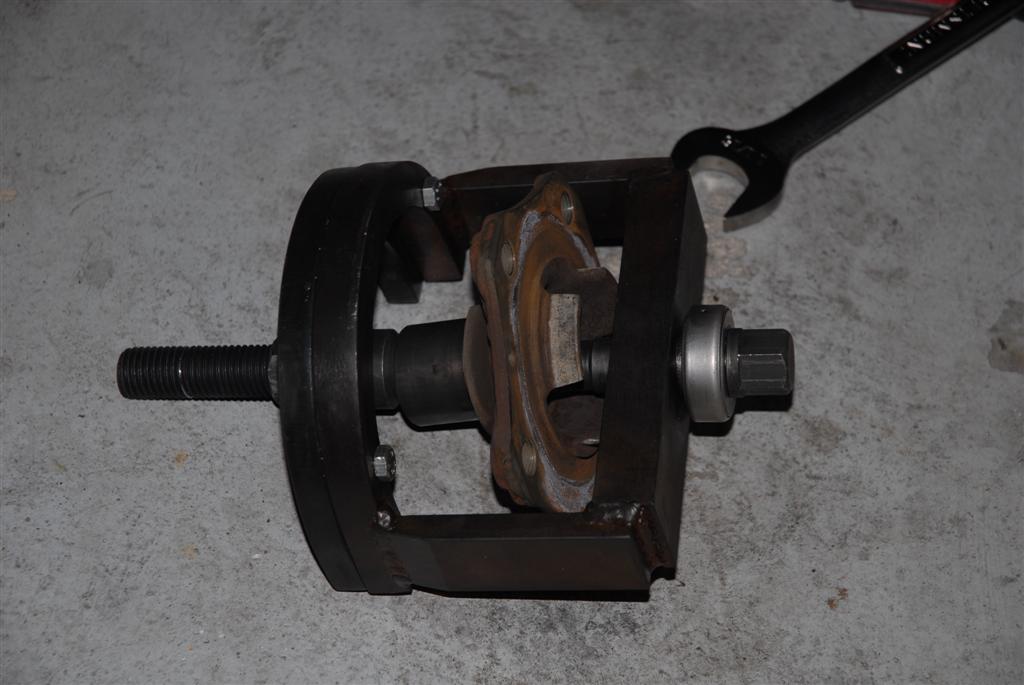
With the axel out of the wheel carrier you can now turn to your SIR TOOLS kit. In the instructions it says that you can rest the horseshoe portion on the parking brake shoes. Hmmm, doesn't seem like a good idea till you think about all the extra work required to remove the brake shoes. Well if the instructions say it's OK...
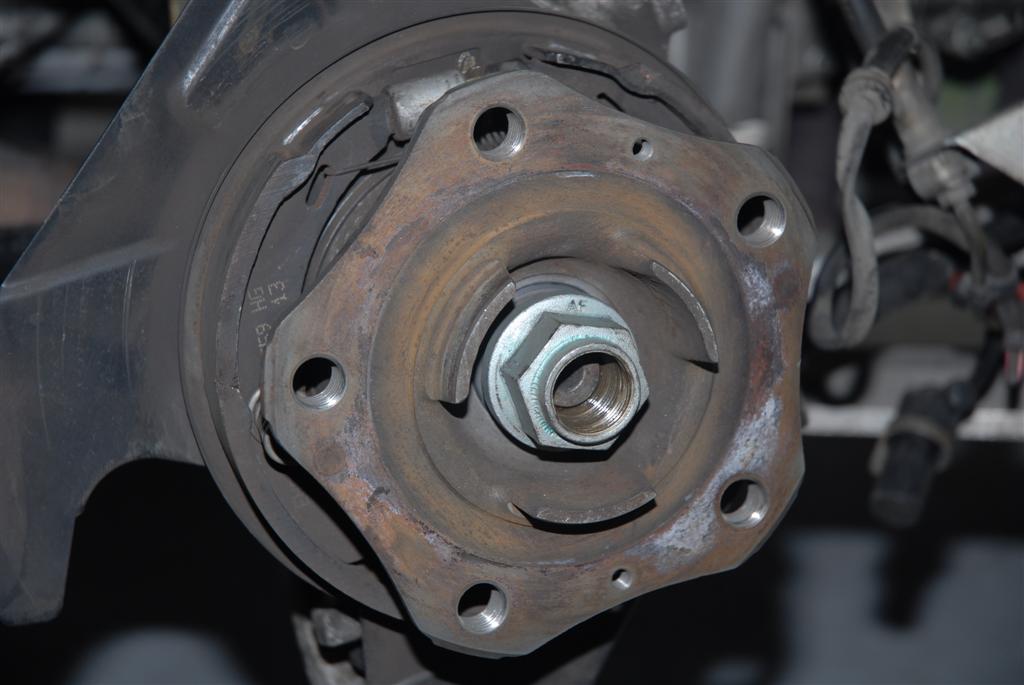
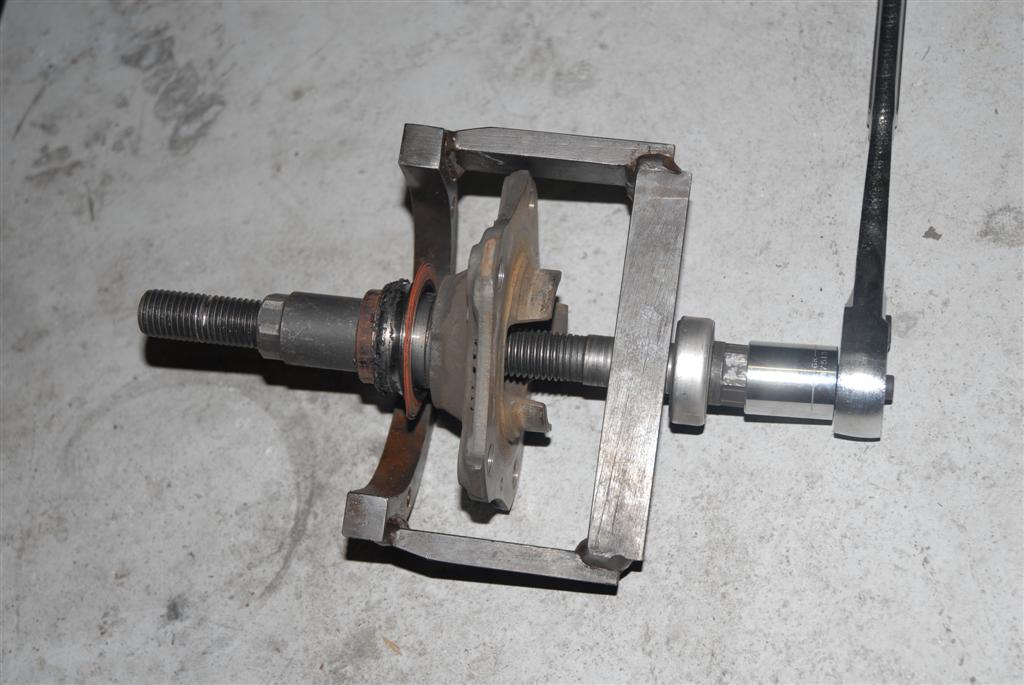
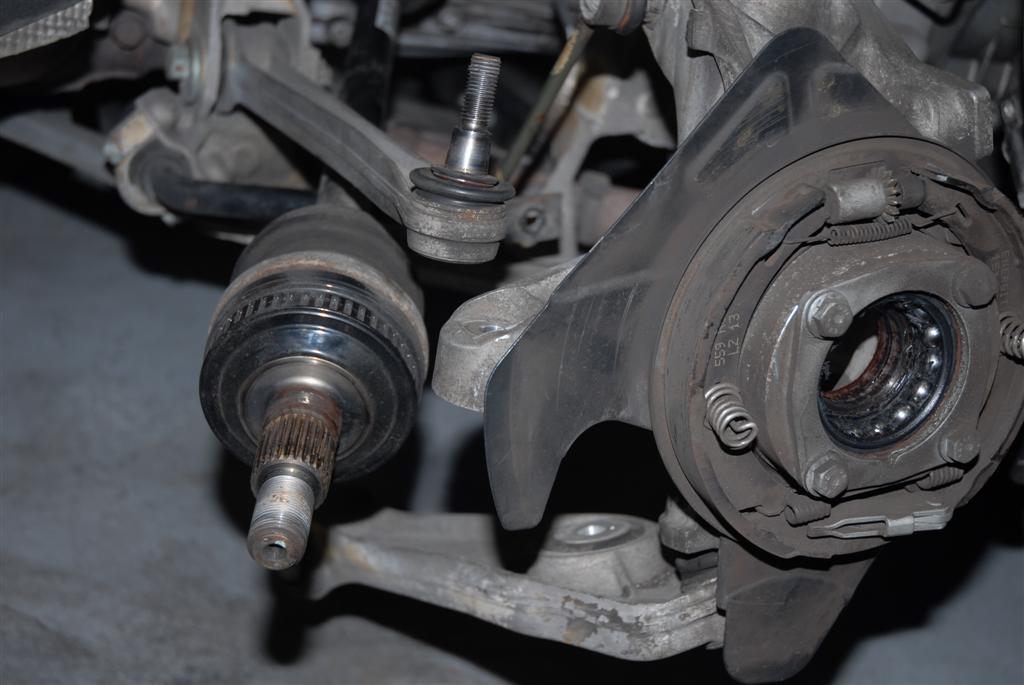
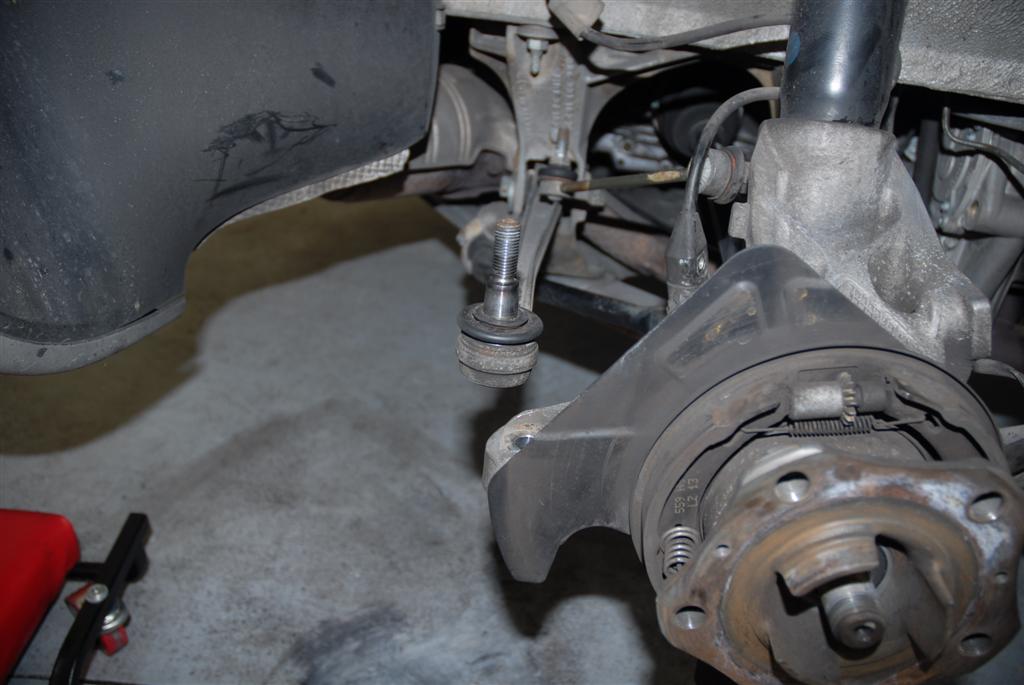
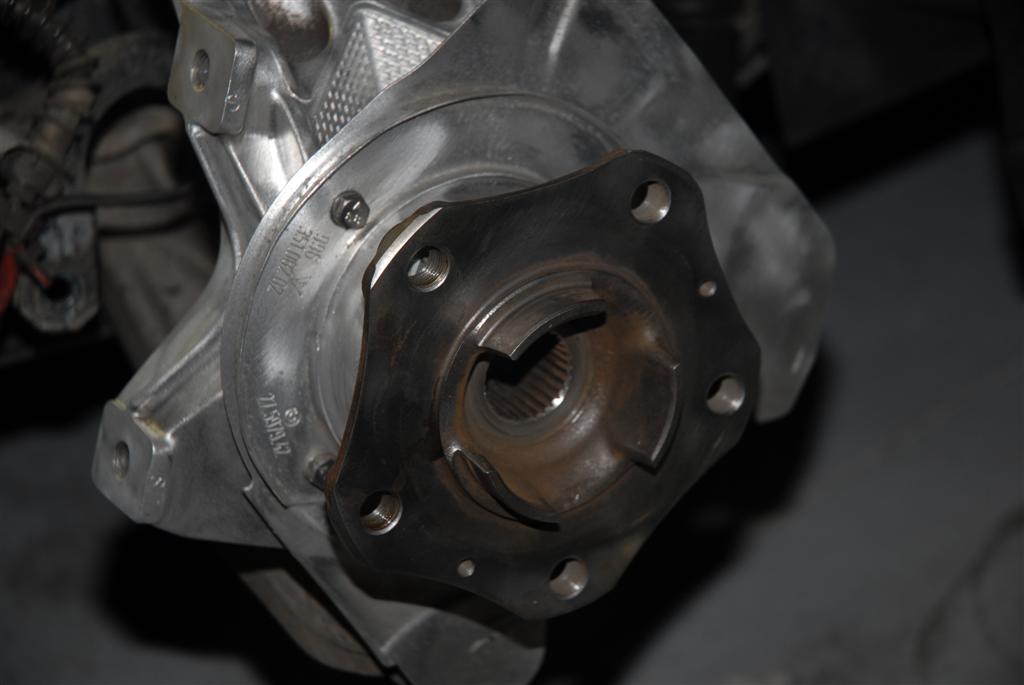
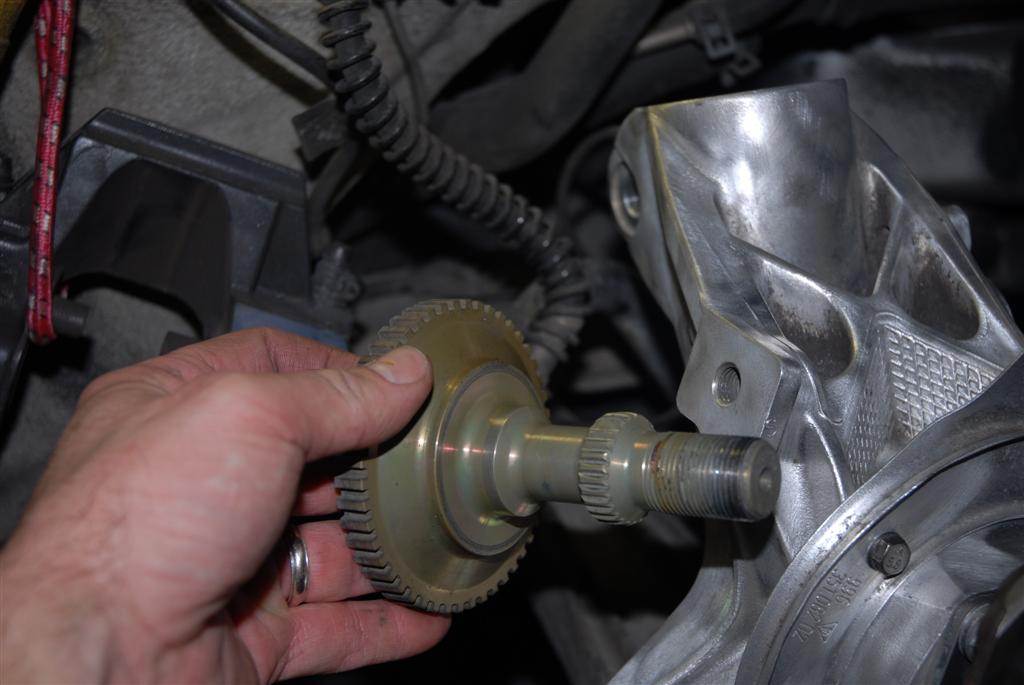
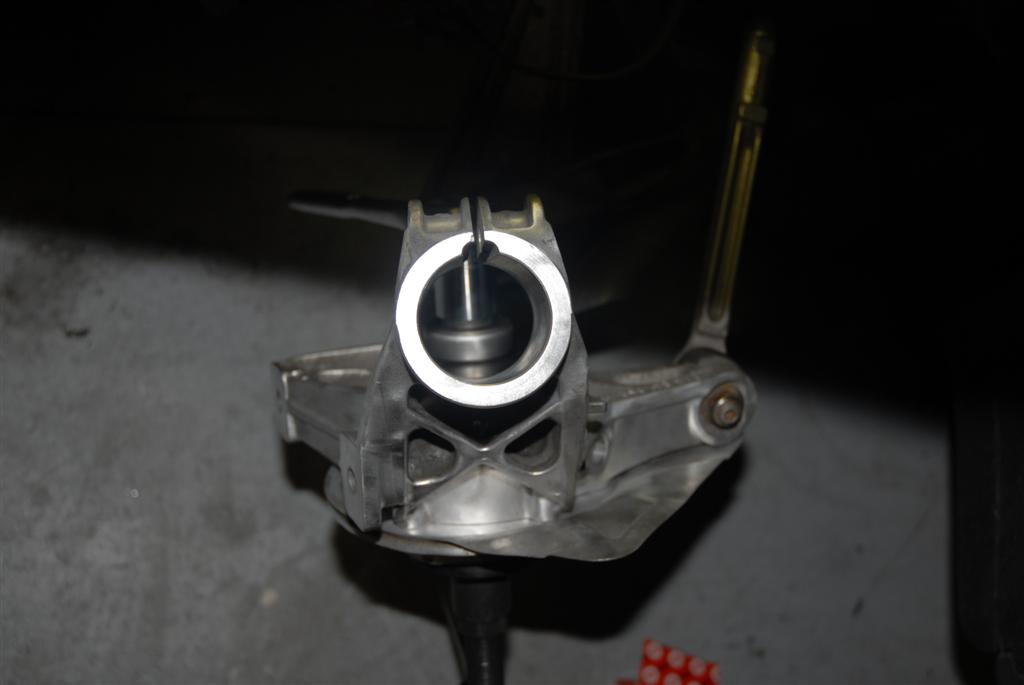
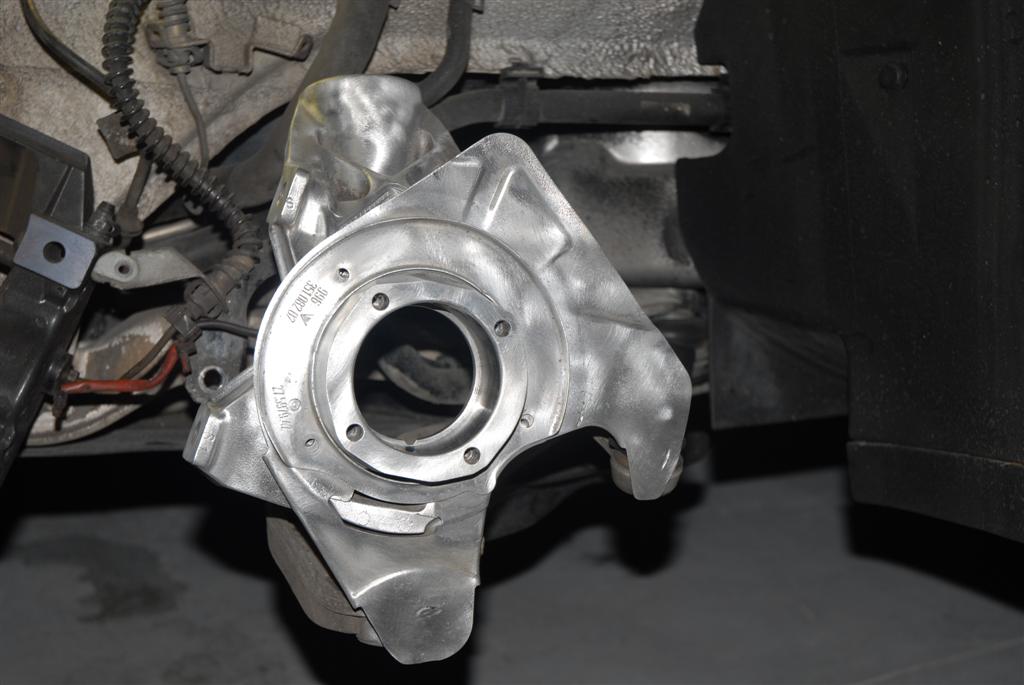
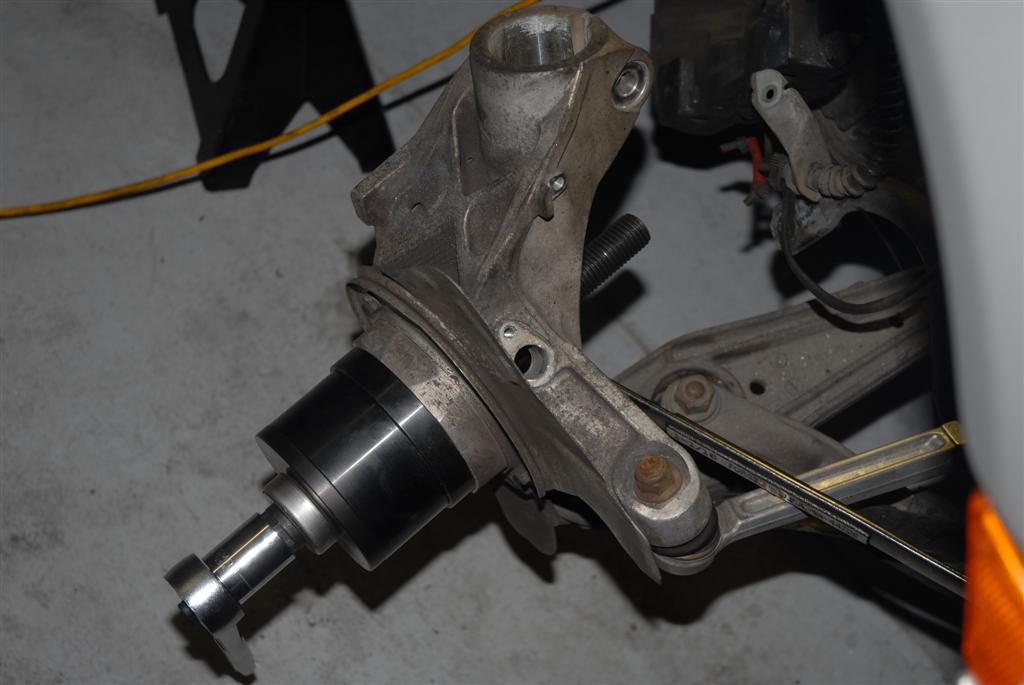
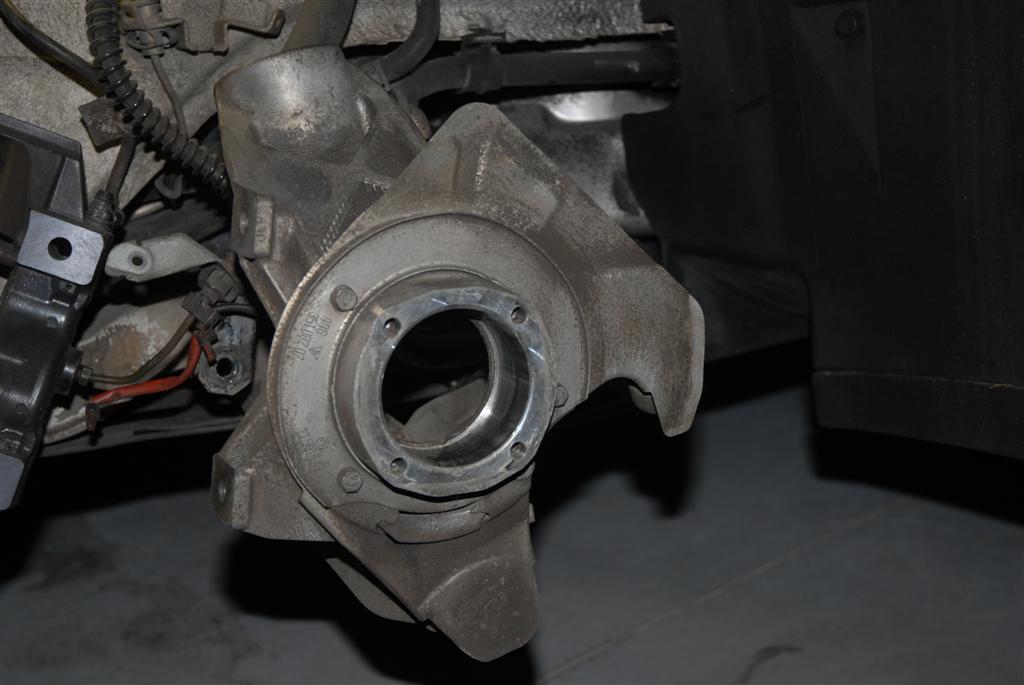
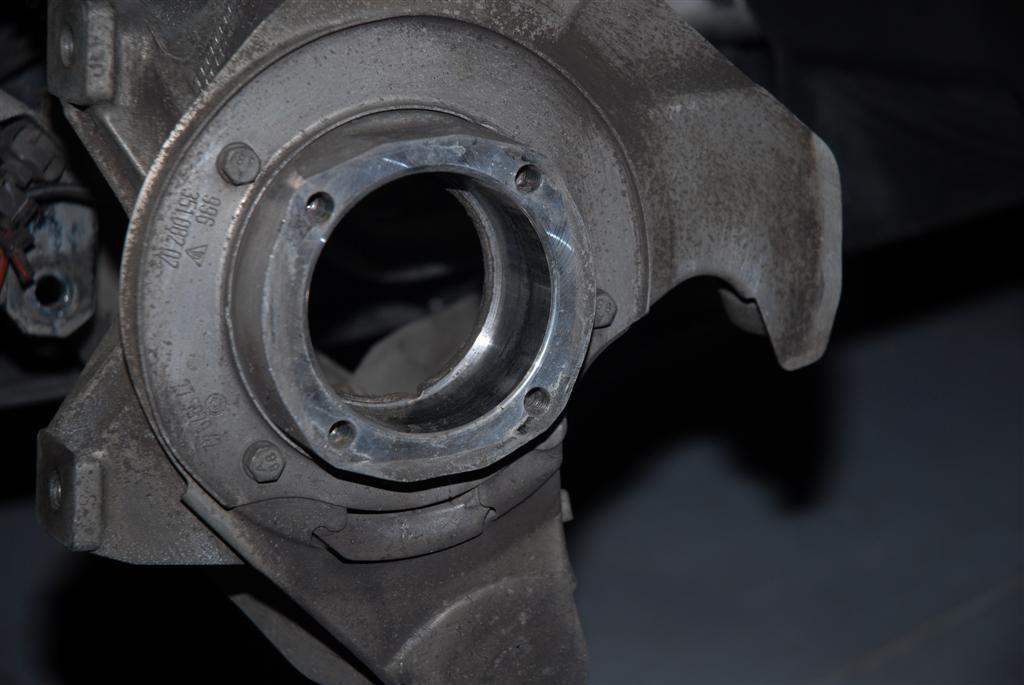
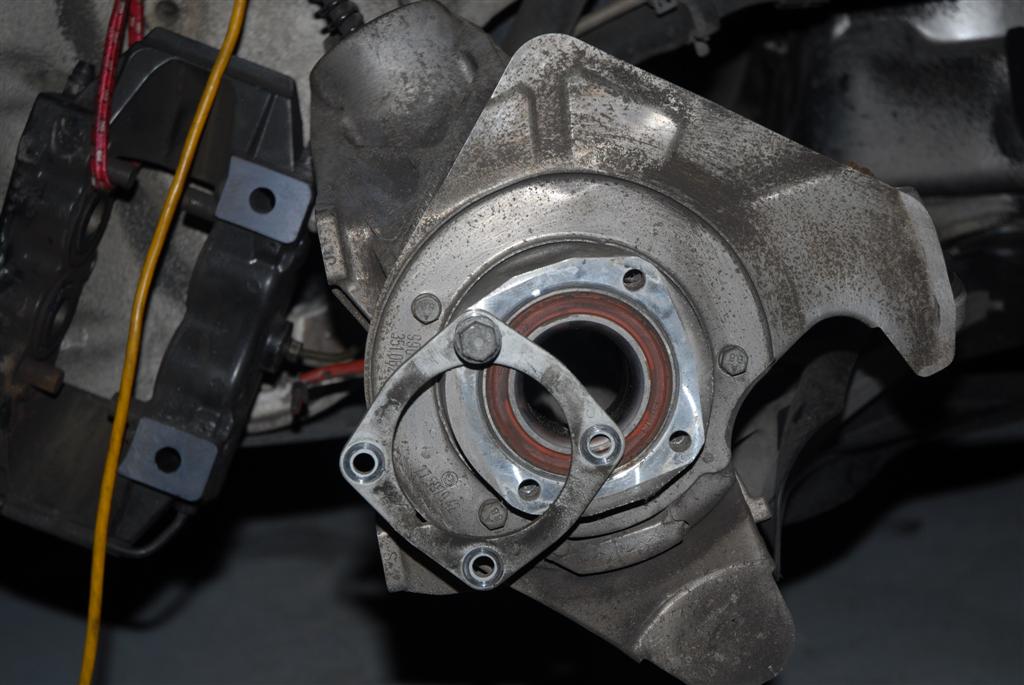
First picture is the hub right after it came off the car still wrapped in the removal tool. Look closely and you can see the bearing race.
Bearing looks kinda dry huh? No scoring but so dry i can hear the noise.
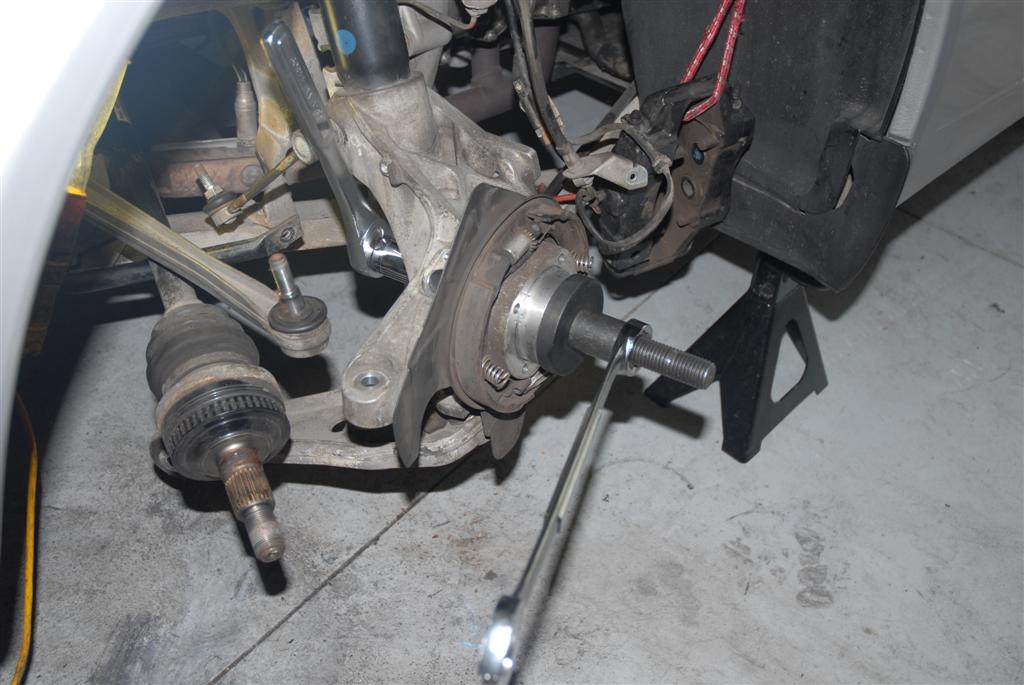
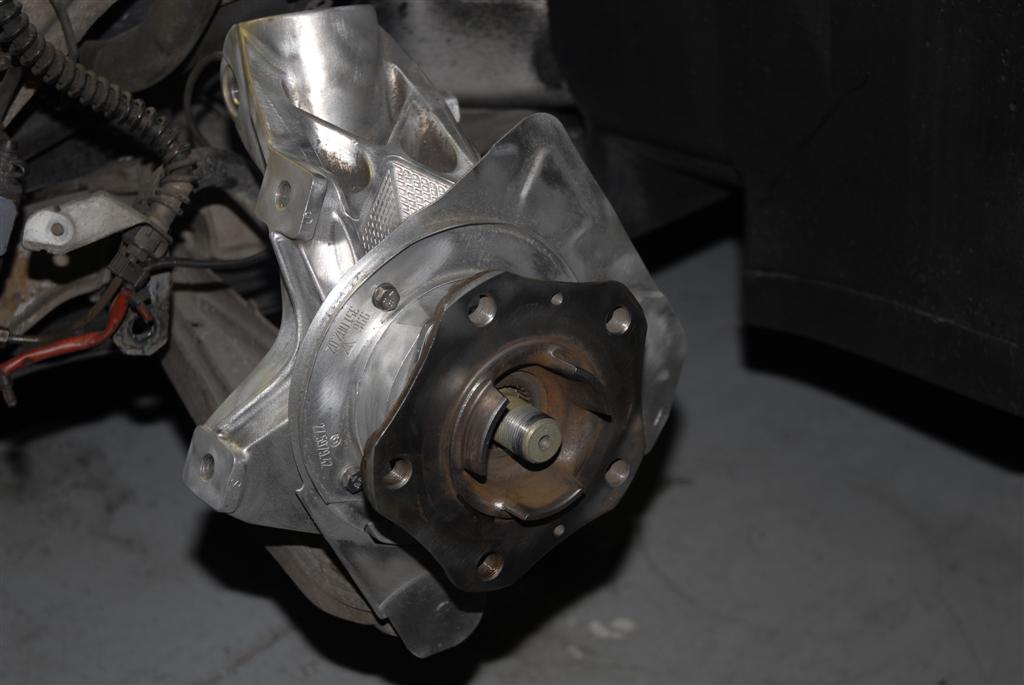
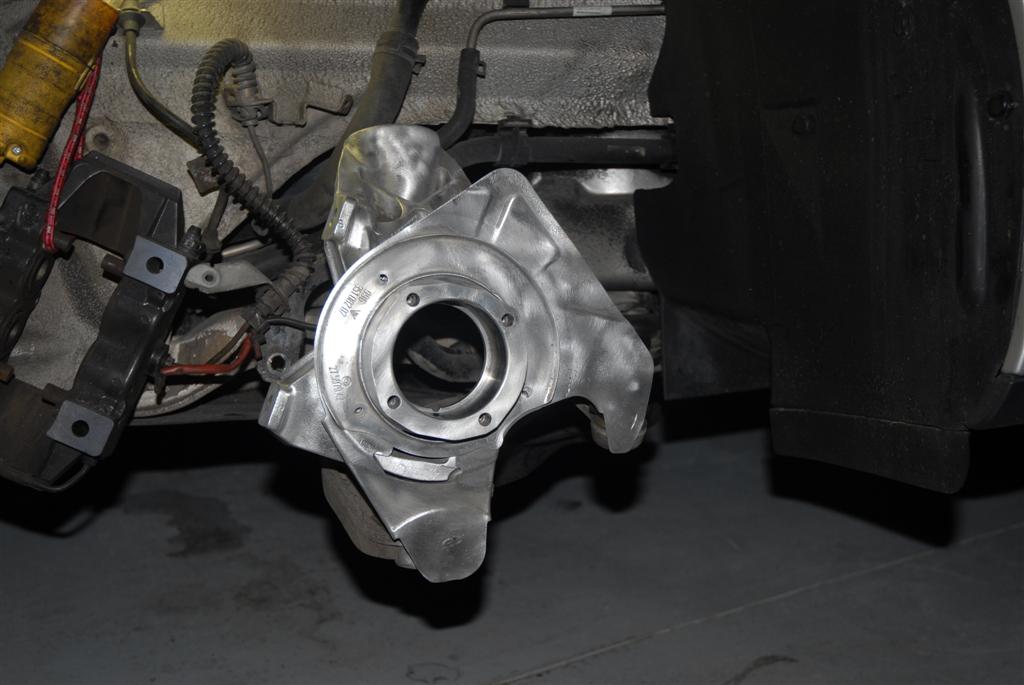
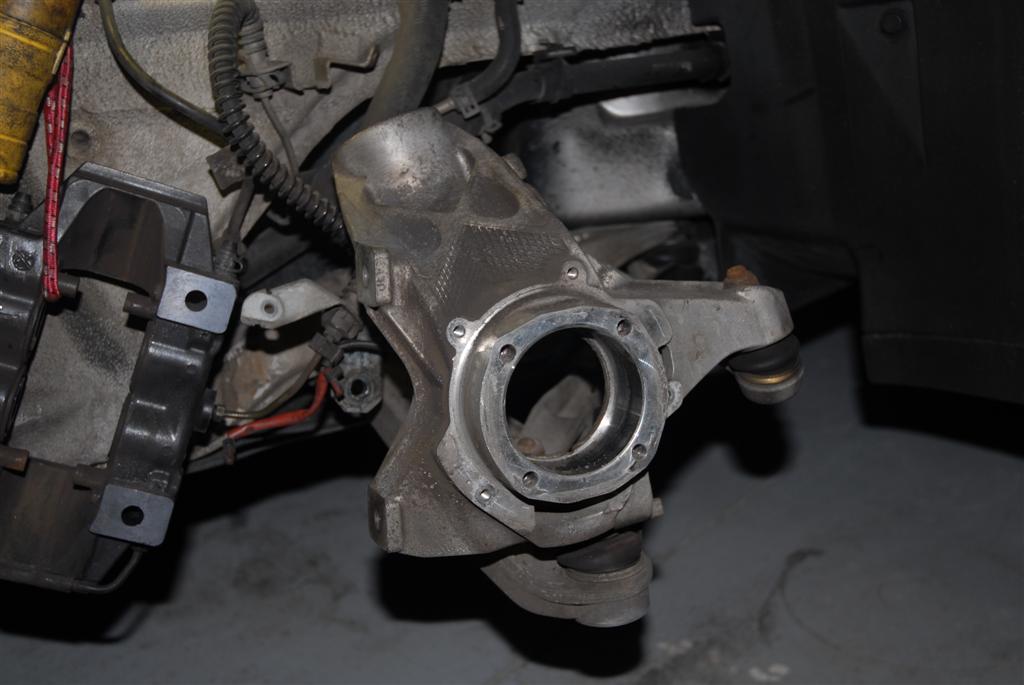
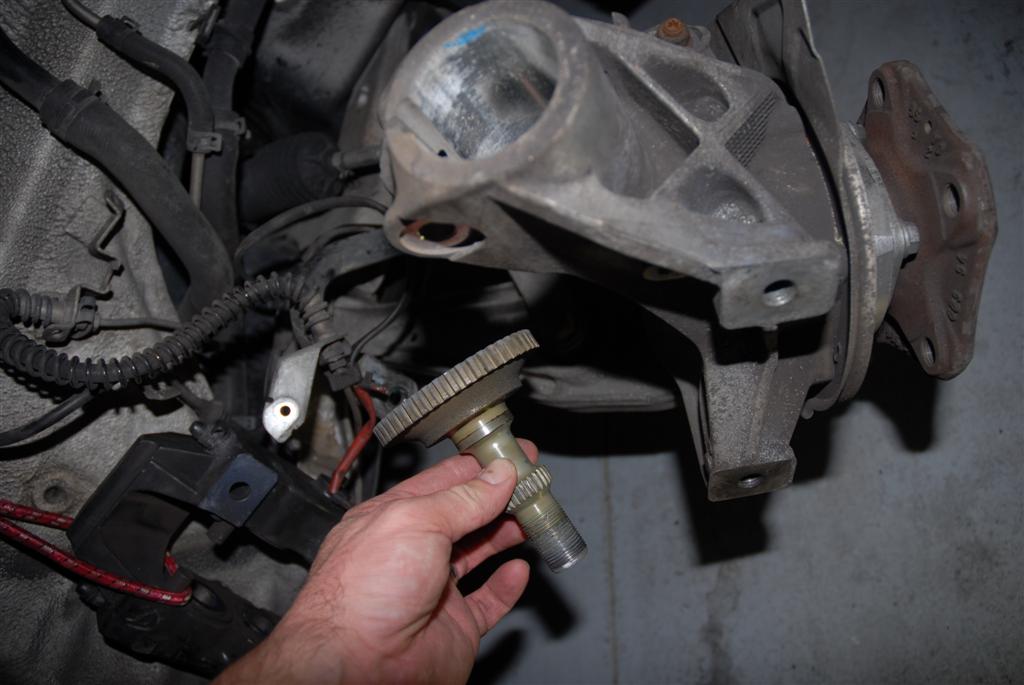
Next picture is the axel out beside the wheel hub. You can also see some area's of where the tool rested against the brake shoes.
-
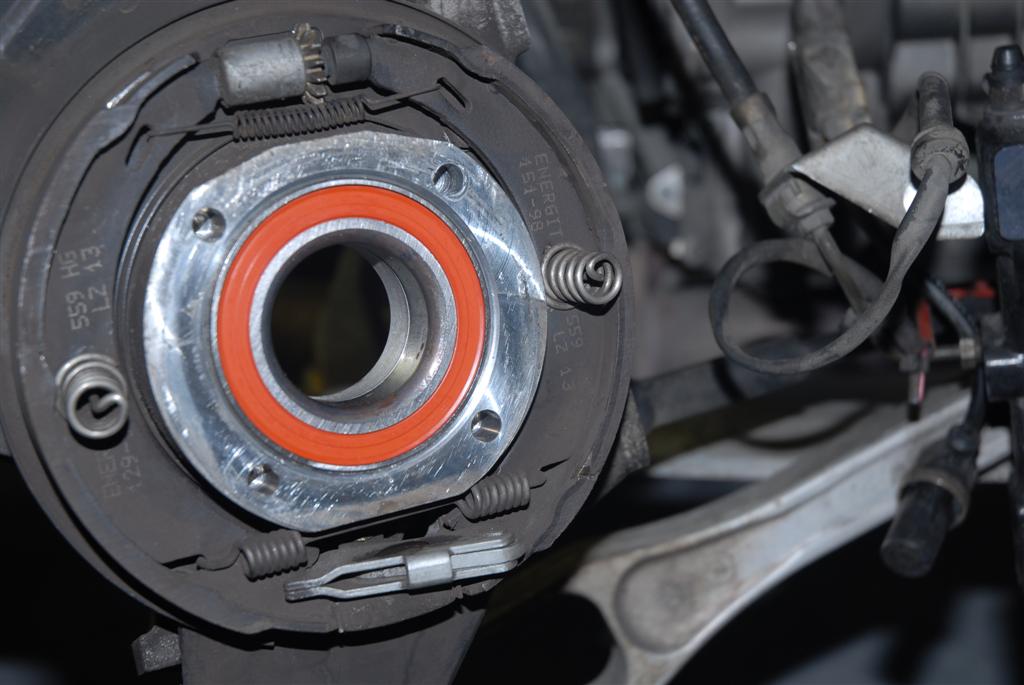
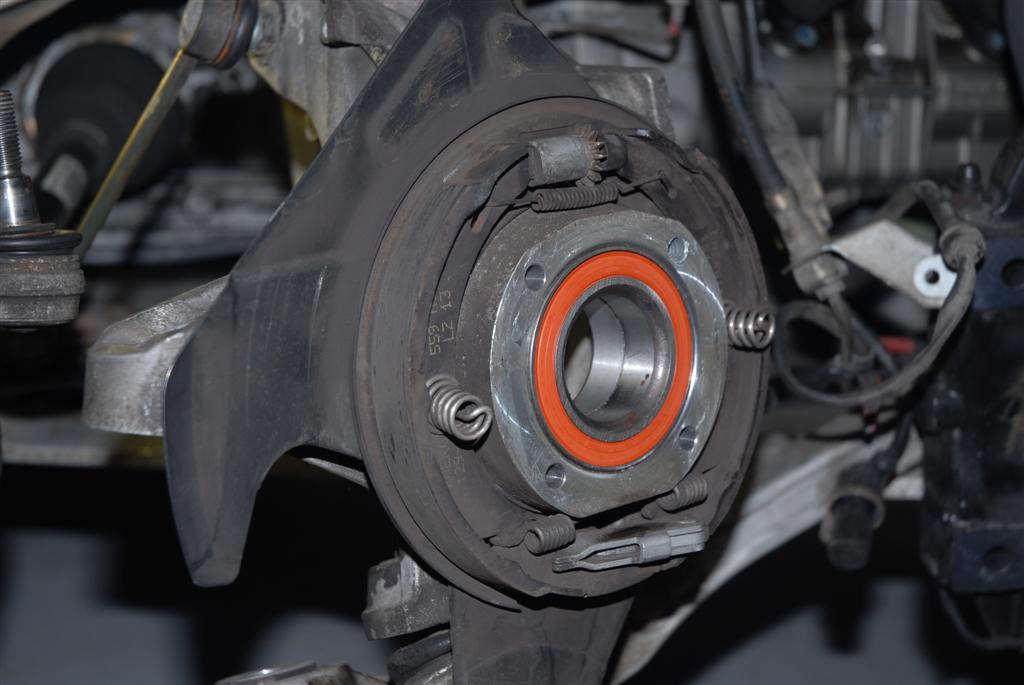
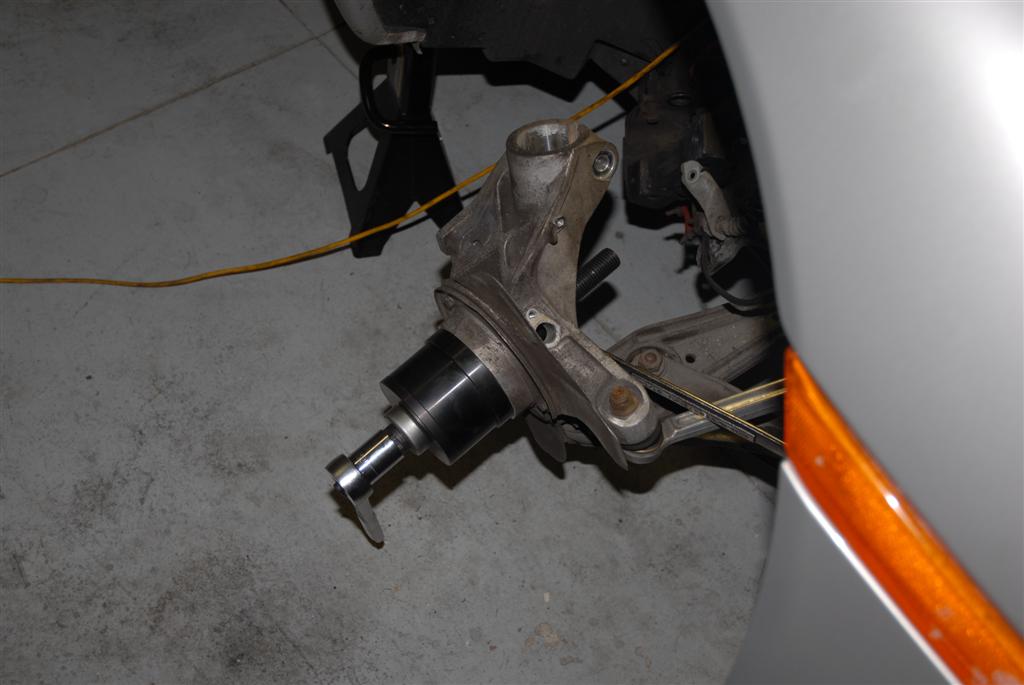
More pics of the process
-
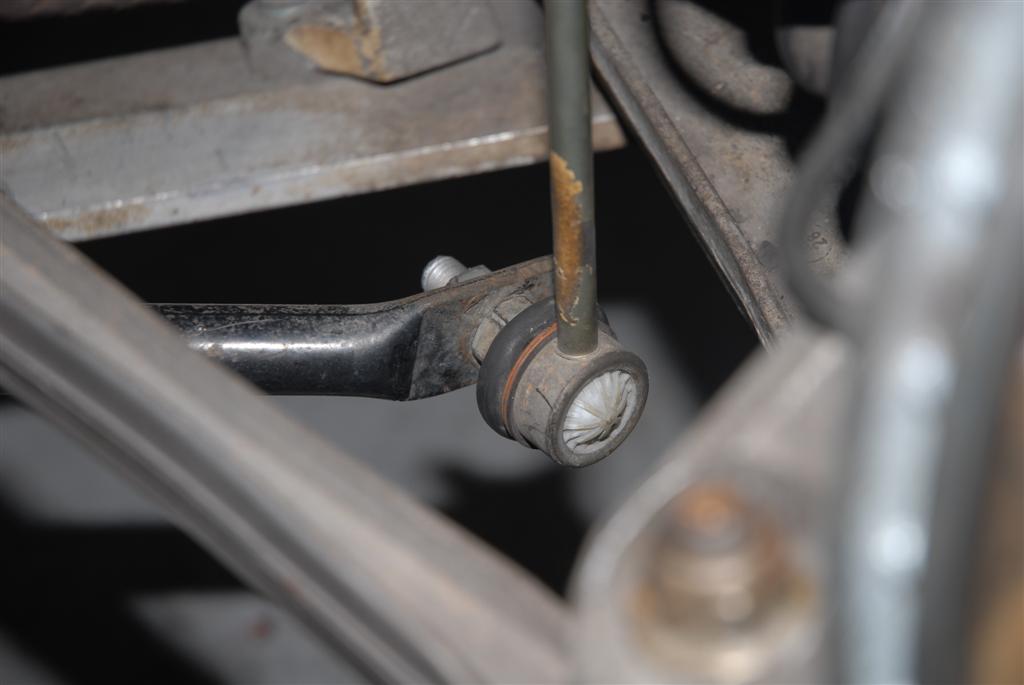
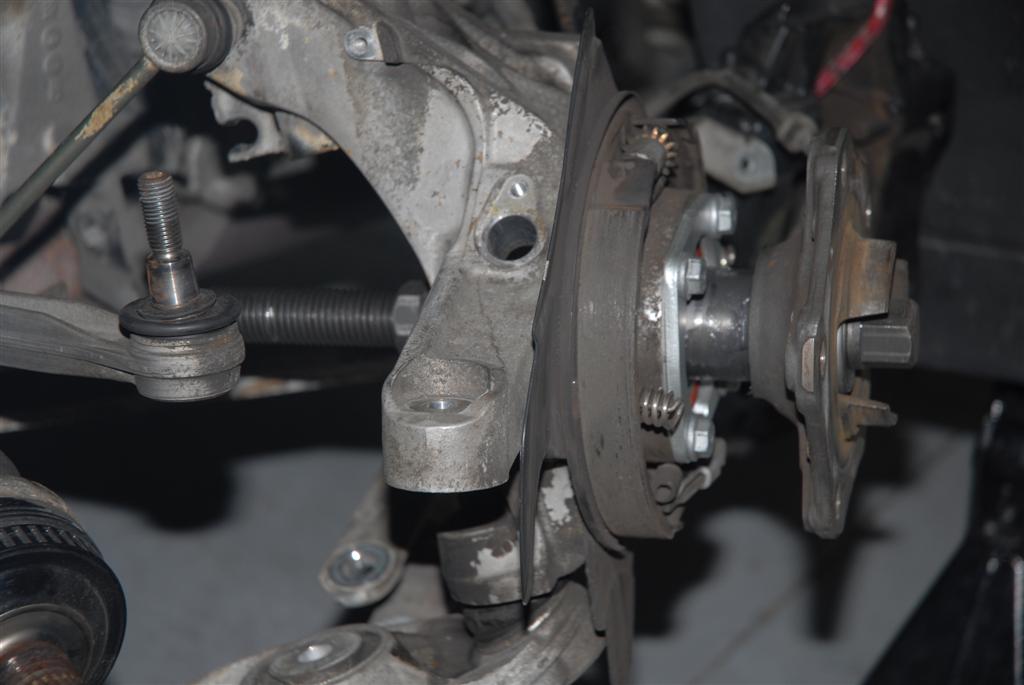
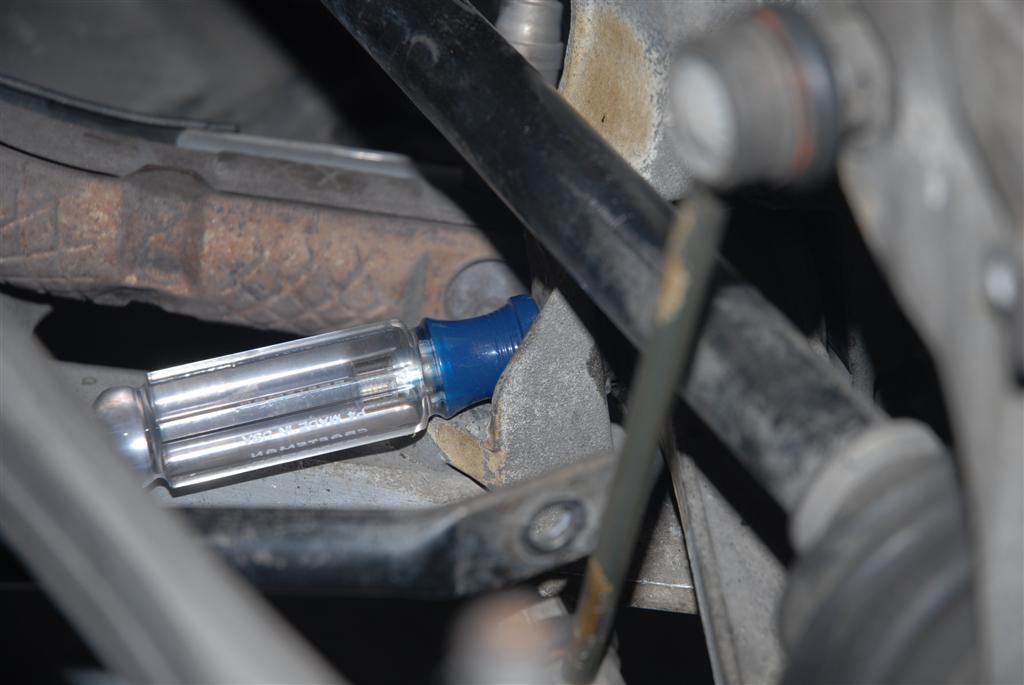
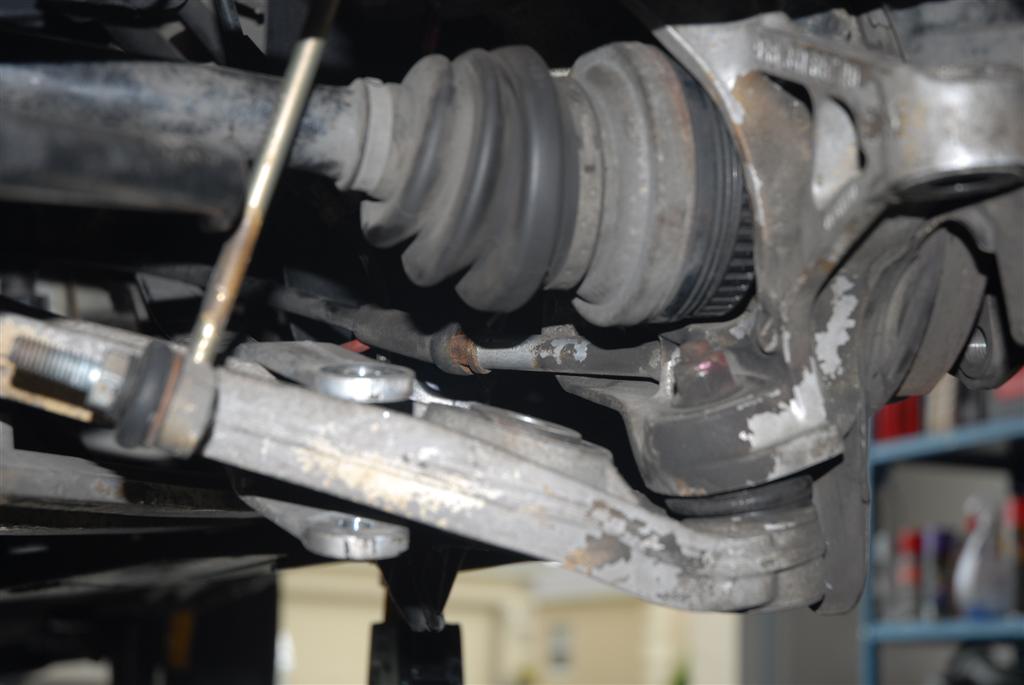
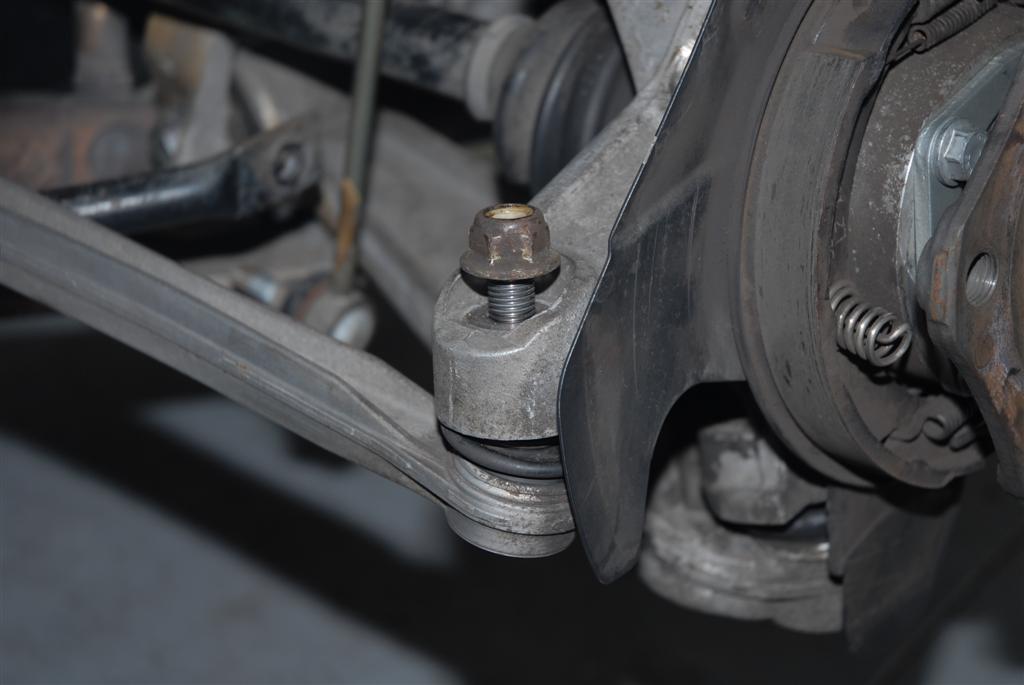
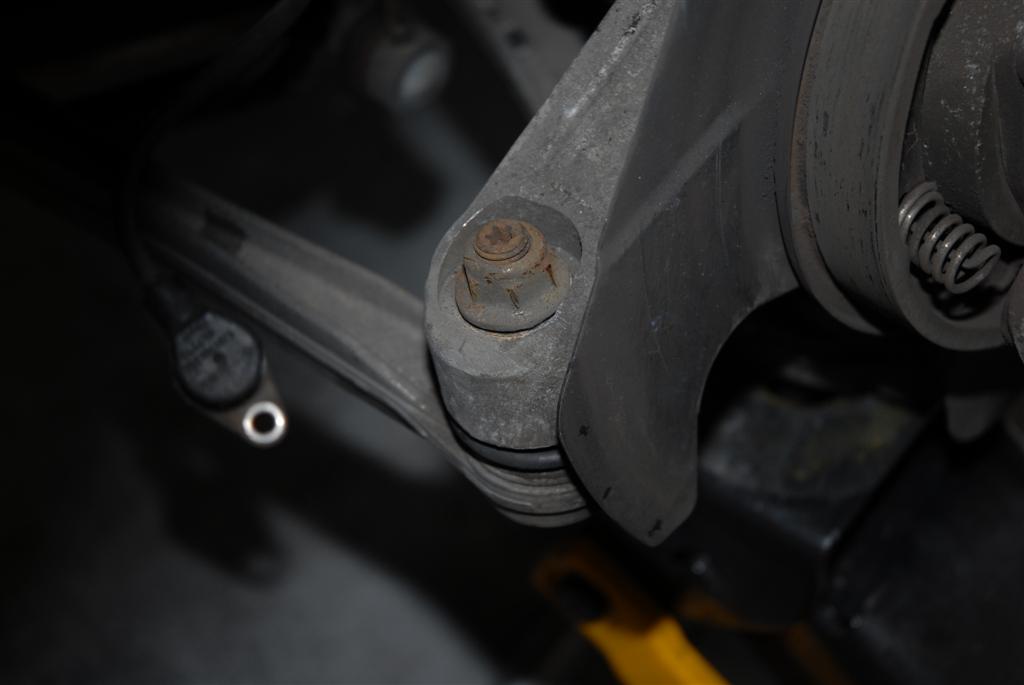
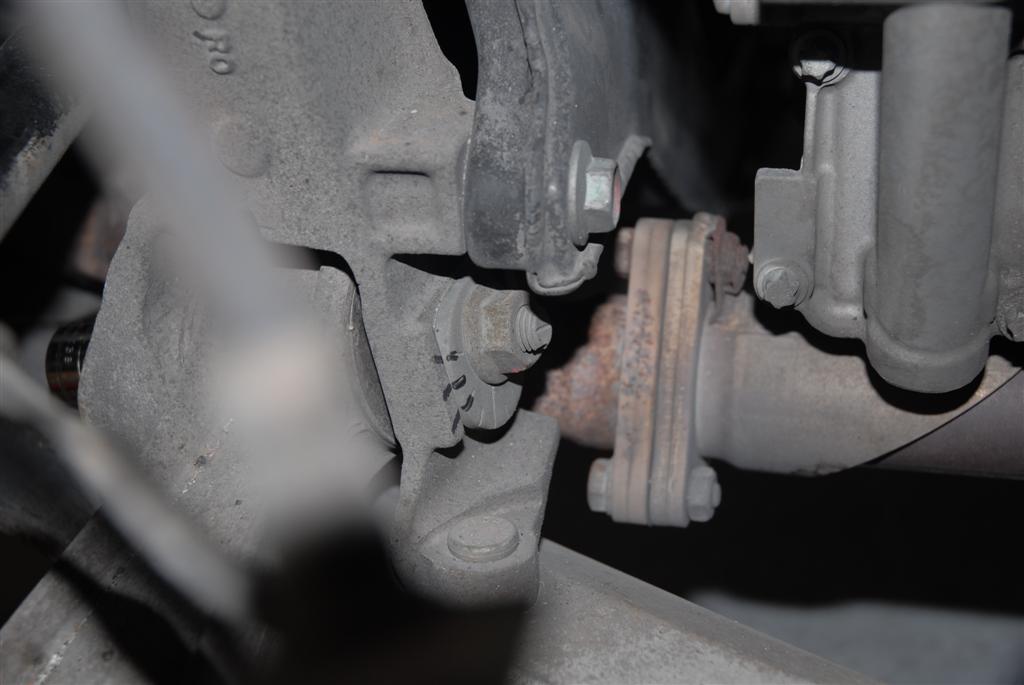
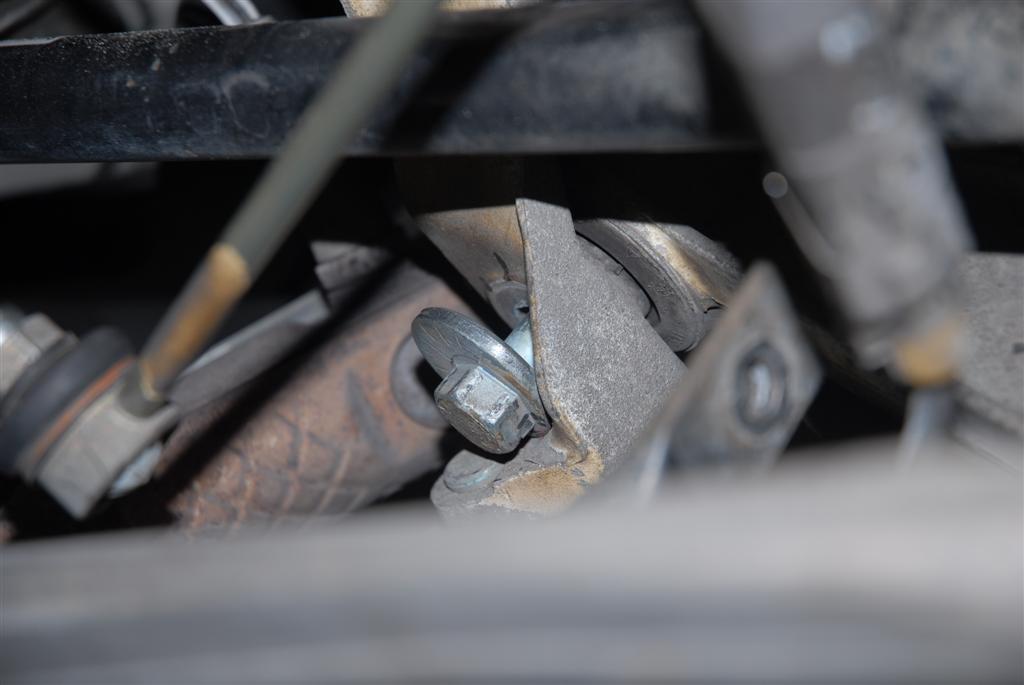
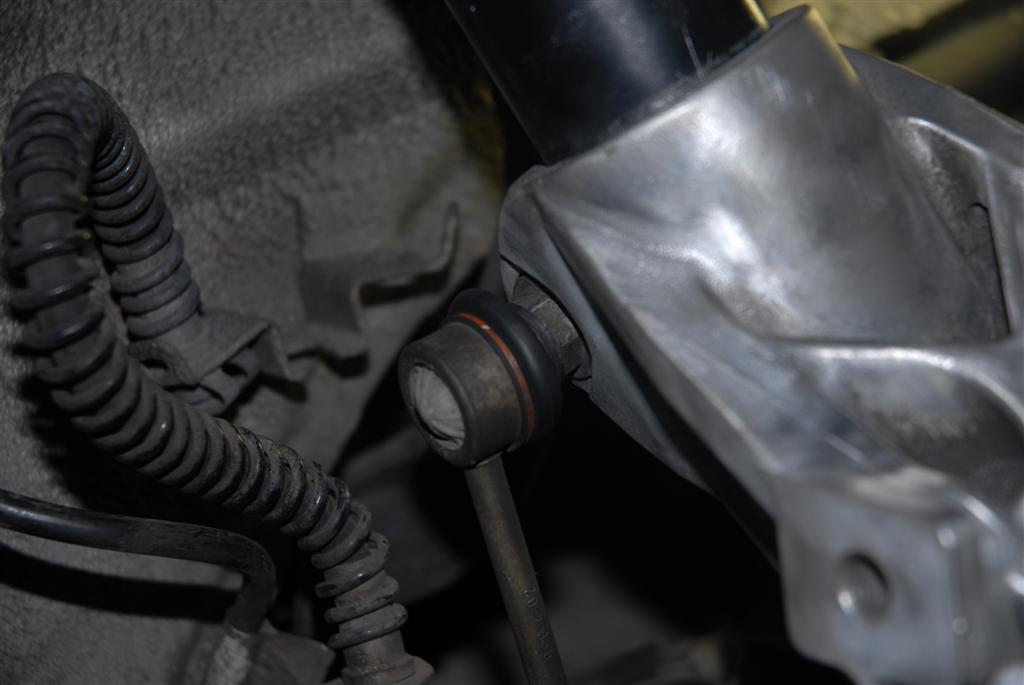
So now we are going to take apart the ball joint on the track arm.
Use a 17mm wrench (I think) and a torx socket on a ratchet to take the bolt off. You must hold the torx steady while you undo the bolt.
Search around this board and you will see lots of links for Ball Joint Seperator.
There are a couple of tools available just be carefull not the damage the rubber portion, or anything for that matter.
Press the tool and voila the ball joint comes apart. Very little effort should be needed here.
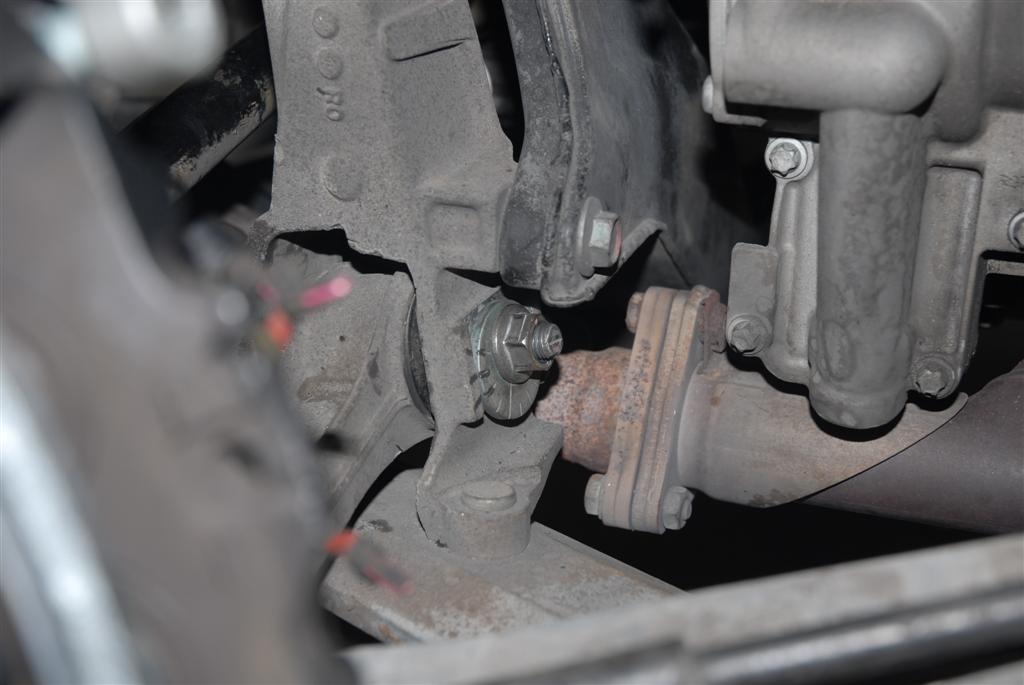
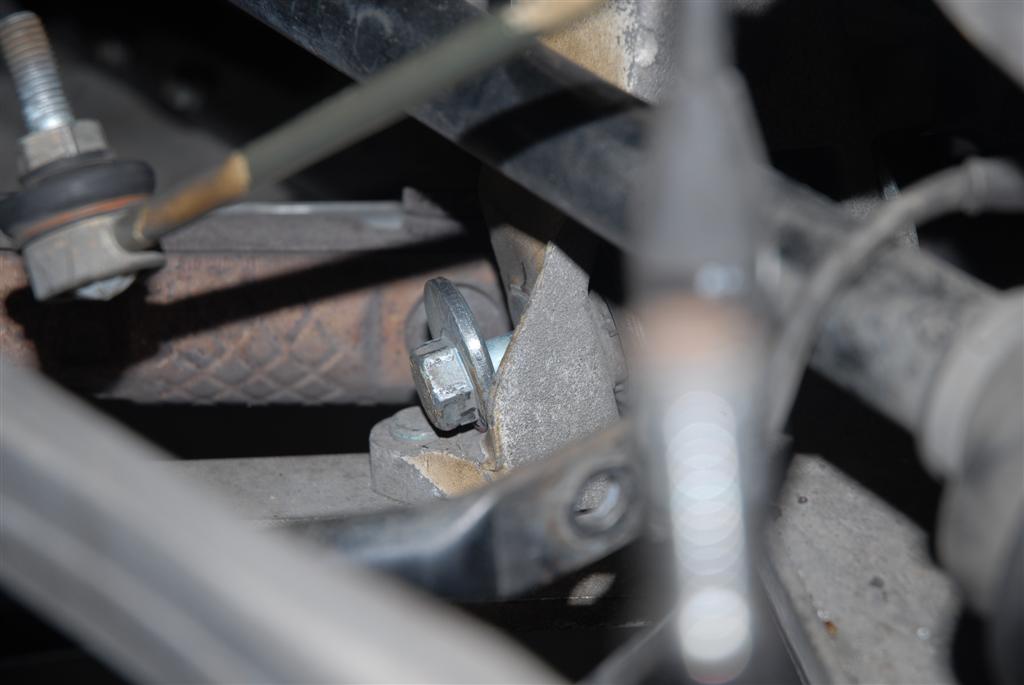
Good time to undo the sway bar as well. Just the bottom is all that is needed. 15mm and 17mm.
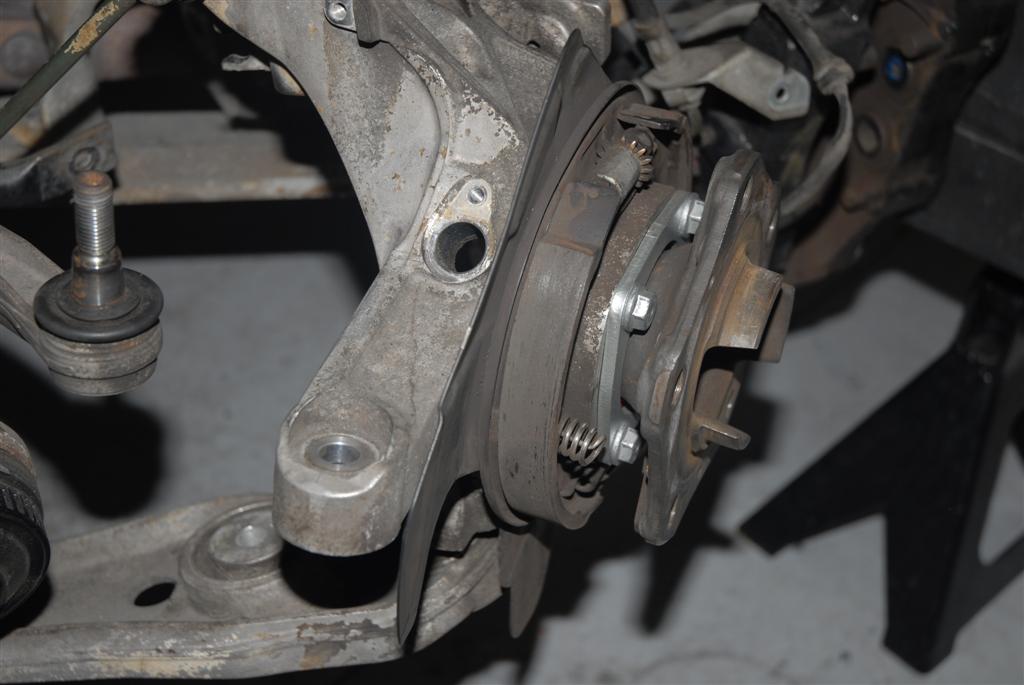
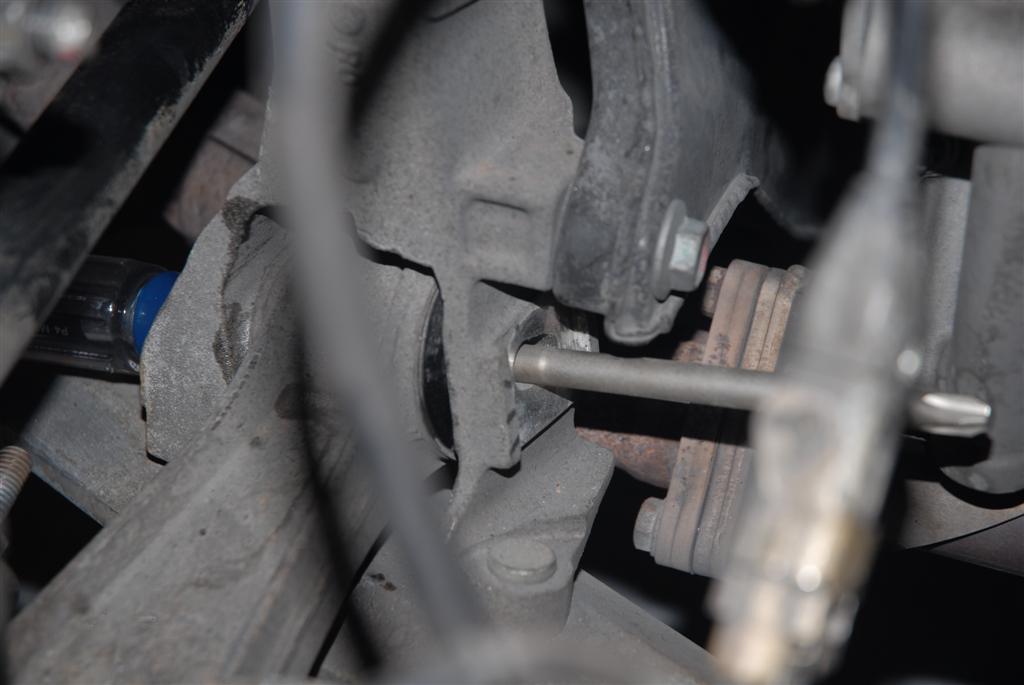
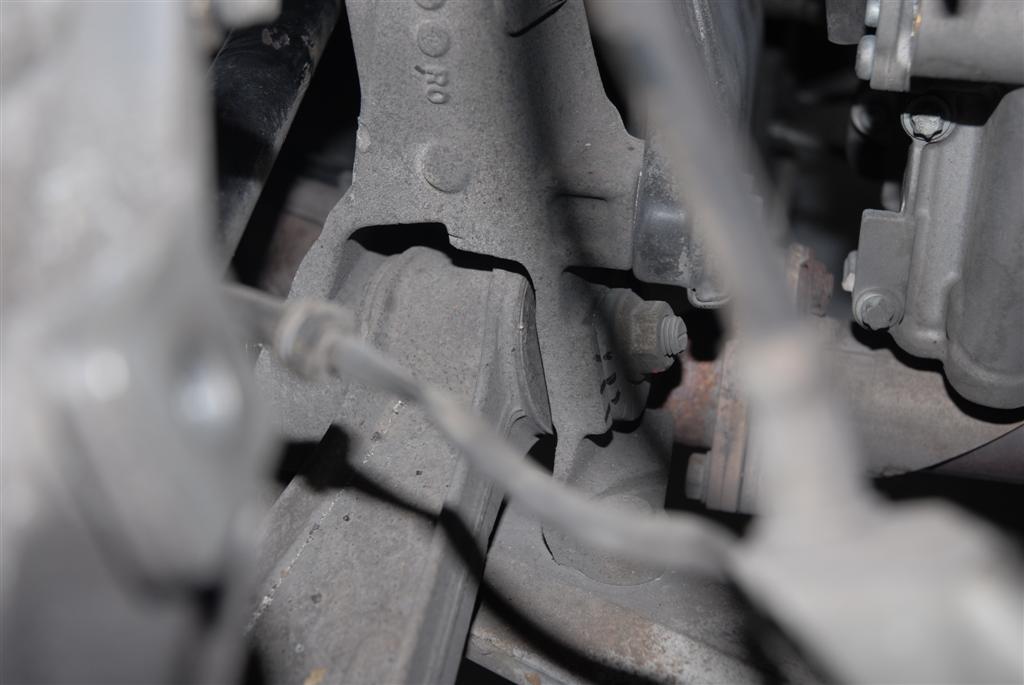
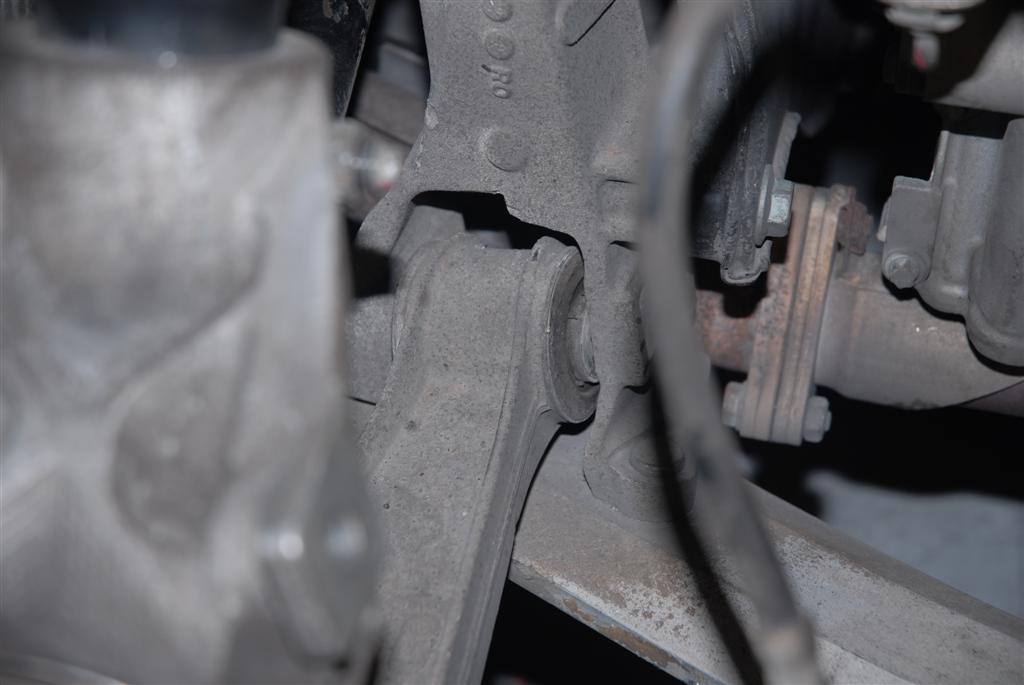
Once that is broken you can go ahead and mark the escentric bolt on the lower control arm. Hopefully we can get all this back together without having to go to the local alignment shop. So mark it and start to undo the bolt.
If i remember correctly, 19mm one side and 18mm on the other.
This is where my language turned for the worse. yet again.
The bolt can be a bugger to get out. Try with a pry bar under the control arm and try to take pressure off the bolt. Best bet is to have a buddy to push on the wheel carrier to release the pressure and take the bolt out.
Now for the trick i wished i had earlier.
The axel has been in the car for some time. Maybe you have no idea if it has ever been out since the birth of your car. Nevertheless it is going to be a _____ to get out. But this worked for me and i hope it will for you.
I was pulling and pulling on the wheel carrier hoping to get the axel to slide out of its home. But it just wouldn't.
I eventually resorted to my trusty hammer.
A couple of medium taps. As i get more frustrated the hits become harder. Be carefull.
It just popped out. Just like that. Simple. The rest is downhill. (Or so i thought).
-
 1
1
-
-
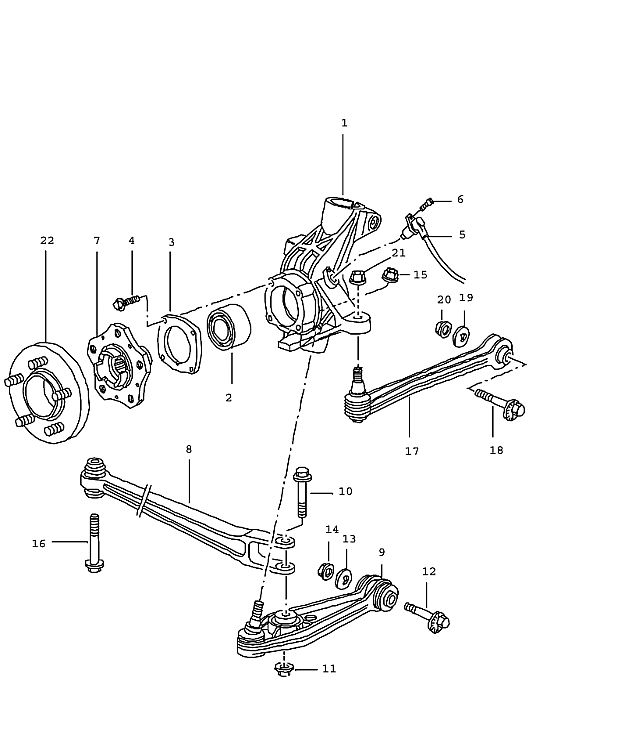
Just so everyone is clear on what parts are named what i will list what i call them.
They might be different than what you think they are but remember i am Canadian. We drink Beer. Sometimes too much.
1. Wheel Carrier
2. Wheel Bearing
3. Dust Cover
7. Wheel Hub
8. Control Arm
9. Lower Control Arm
12. Escentric Bolt
17. Track Rod
Now i know that you all have been calling the Control Arm the track arm but i have just taken this from a parts diagram.
http://dcauto.gotdns.com/catalog/index.php...amp;illo=501-00
-
Sorry for the long break....here is the rest...
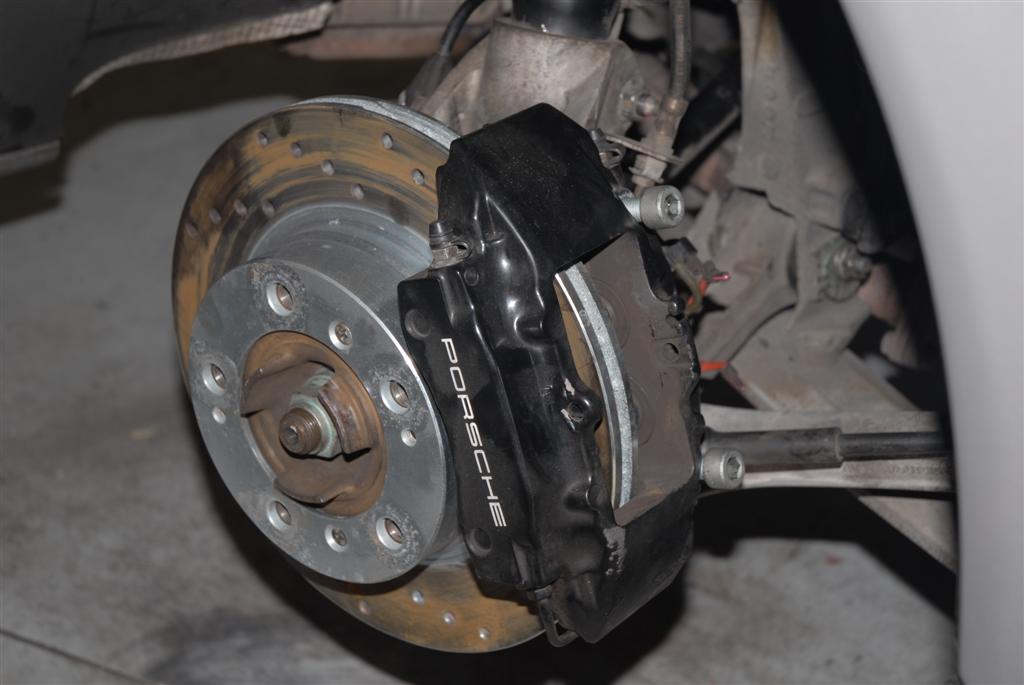
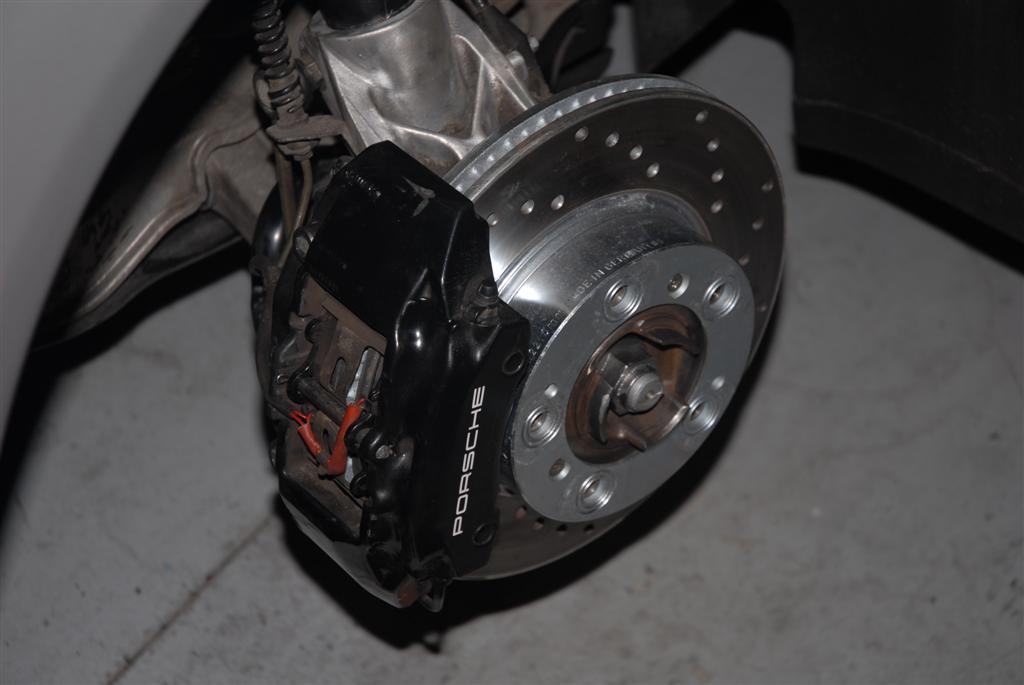
Next we are off to remove the brakes.
Really simple. With just a few tools.
I like to remove the 2 phillops screws on the brake rotor first, while the brake pads are holding the rotor from spinning. They could be tight so use the proper screwdriver and use a lot of pressure while turning.
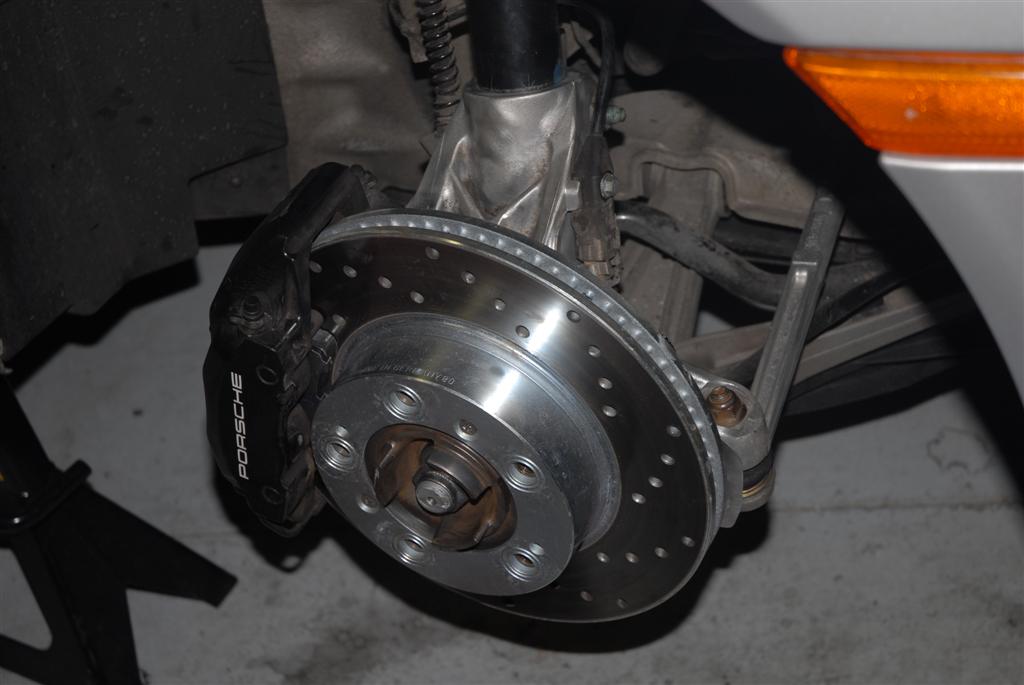
Next disconnect the brake wear sensors and the securing clip or cotter pin. Using needle nose plyers.
Use your punch and tap out the pin that holds the spring (Doesn't look like a spring but it does hold energy)
There are two 10mm bolts that need to be removed. One is holding the brake line to the carrier the other hold the ABS Sensor and the brake wear sensor. Undo both these and don't lose the bolts.
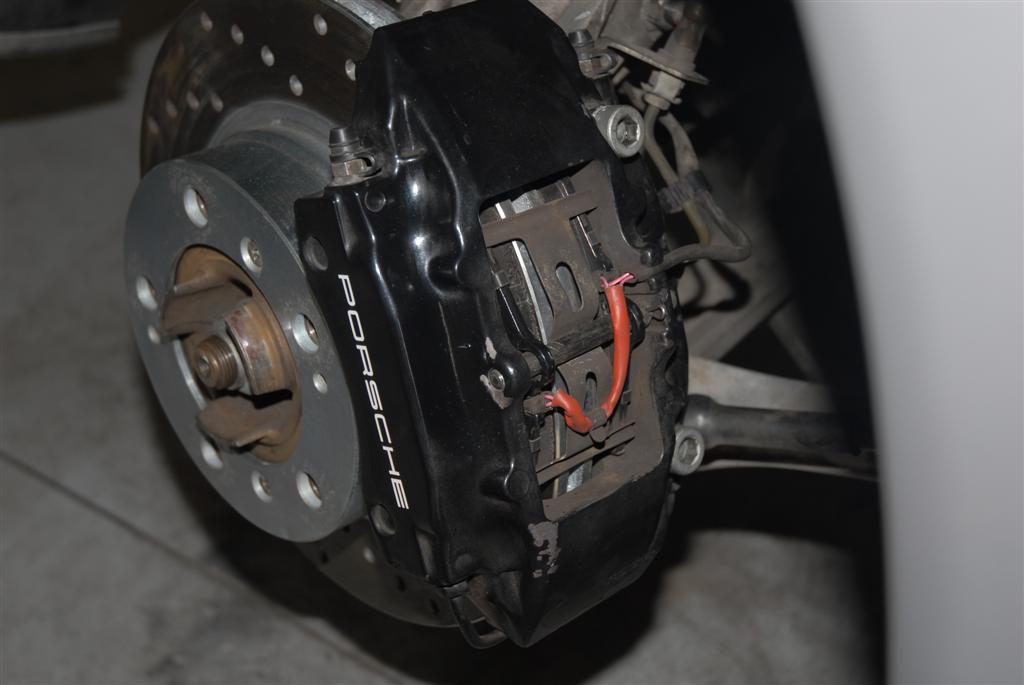
With a cloth wraped around some channel lock plyers, squeeze the pads towards the outside to compress the brake pistons. Now undo the brake caliper bolts that secure the caliper to the wheel carrier. Get your bungi cord or tie wrap or why and secure the caliper out of the way.
Release the parking break if you have not yet done so.
Pull the rotor off and set all the brake parts in one area.
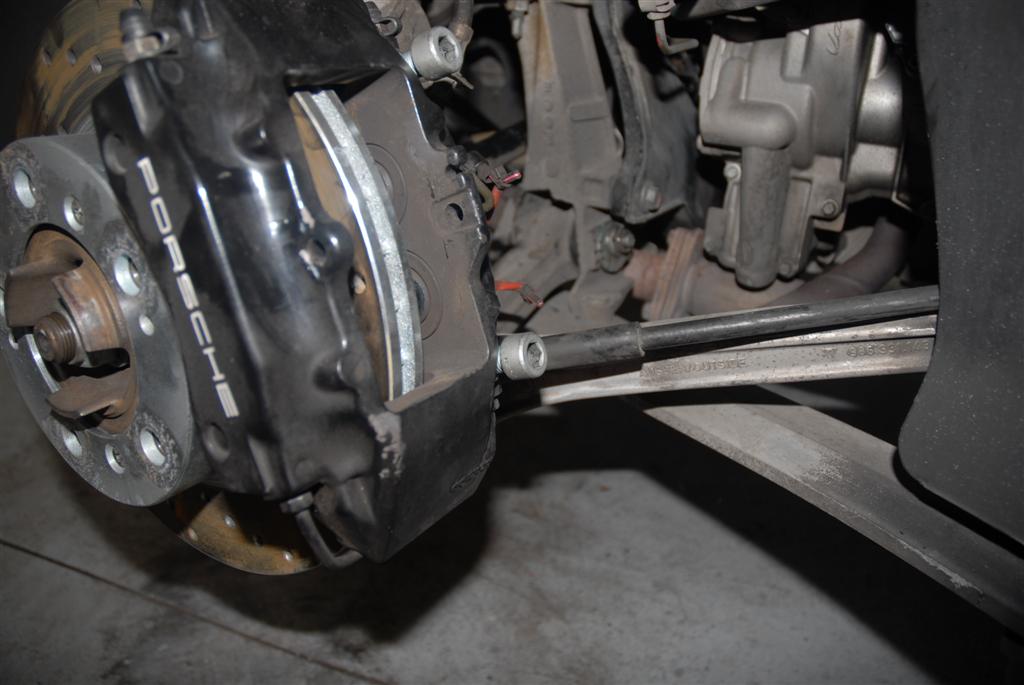
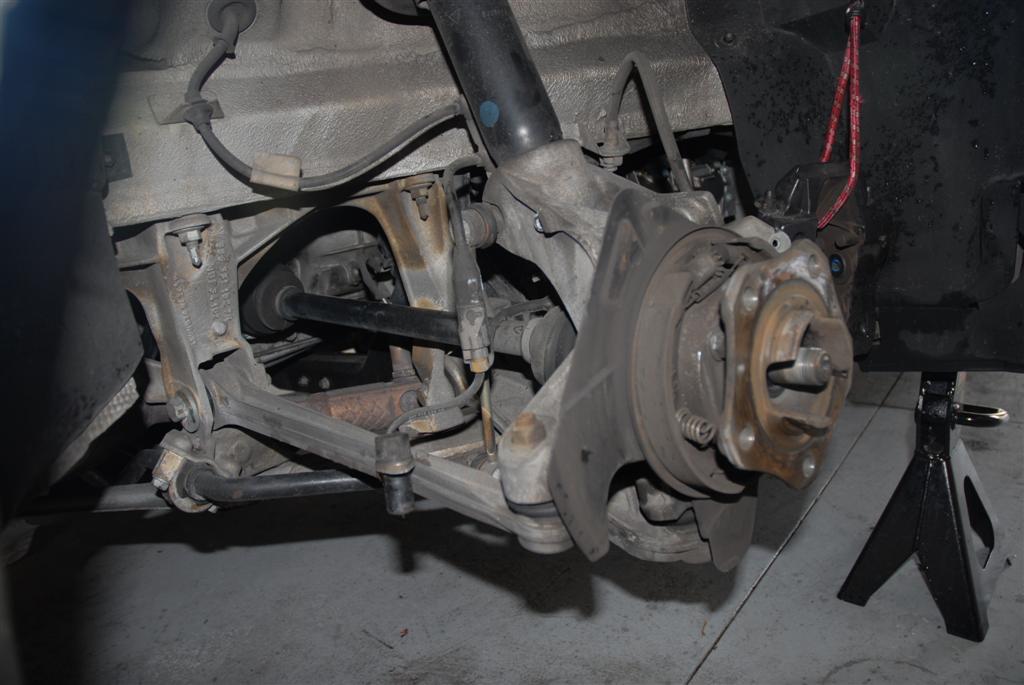
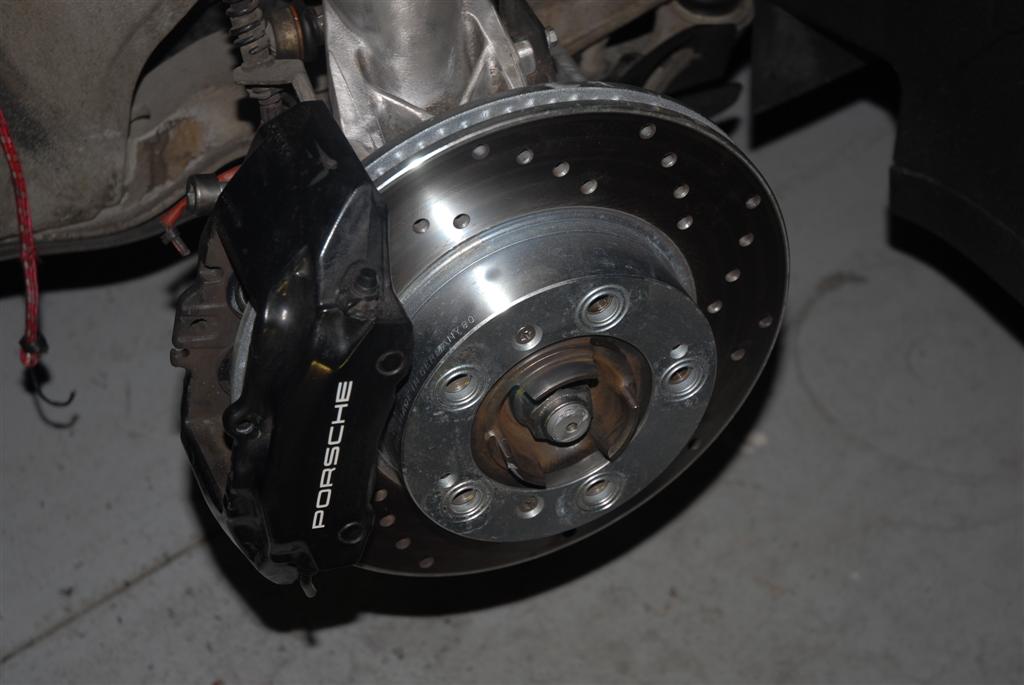
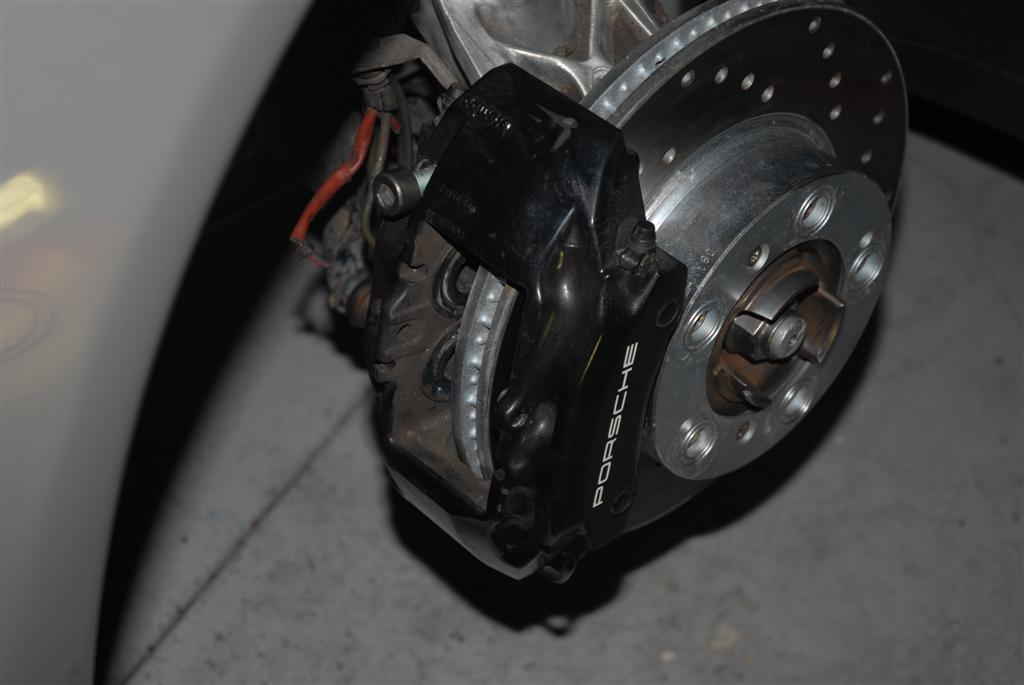
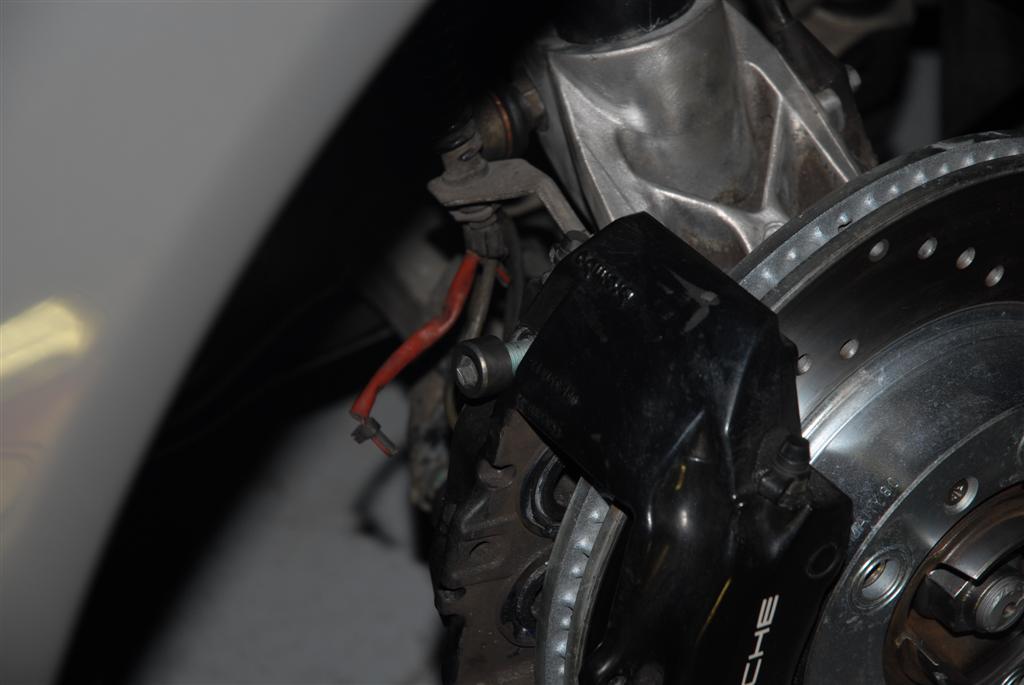
First picture is of the caliper out of the way.
Second in the top right is the brake line bracket disconnected from carrier.
Third is ABS sensor hanging around.
-
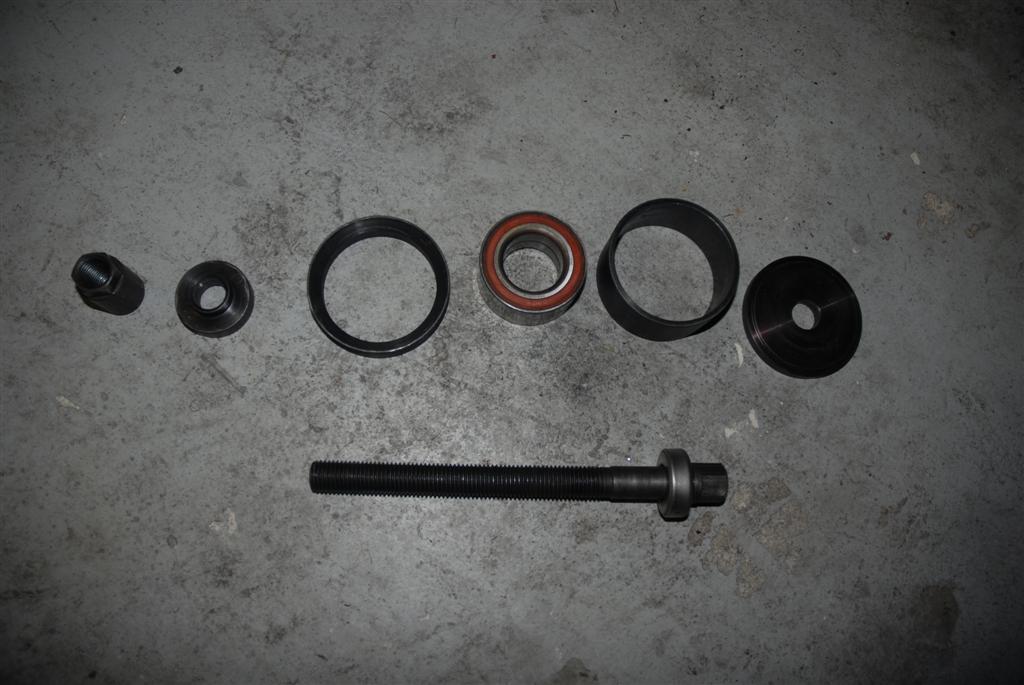
Rear Wheel Bearing 102
This is a continuation from the front wheel bearing change. That was good practice for the rear of your car. Although i thought the rear was more difficult than the front but after i was done and found a couple of tricks that i will share, it might actually be easier. Having the right tools always make things go smoother. The B90-P2 tool i bought at http://www.samstagsales.com/Porsche.htm#axle Took only 3 days to get it. I was away at work for 4 days so the timing was perfect. Great service
-
Author
-
Category
-
Submitted10/29/2007 11:40 AM
-
-
This question is for Loren or who else might be able to help.
Working on the rear of the car now and wondering about getting the axel out of the wheel carrier.
I understand that it is possible to change the wheel bearing without disconnecting the axel off the transaxel. By taking out the bolt on the lower control arm and swinging the carrier out of the way. First dissconnecting the sway bar and track rod. I suppose some confusion might come of people calling the parts different things. Anyway is this the way that it should be done? Or is there a better way?
My parts diagram lists the names as the following....
1) Wheel Carrier
2) Bearing
8) 8 Control Arm
9) Lower Control Arm
17) Track Rod
-
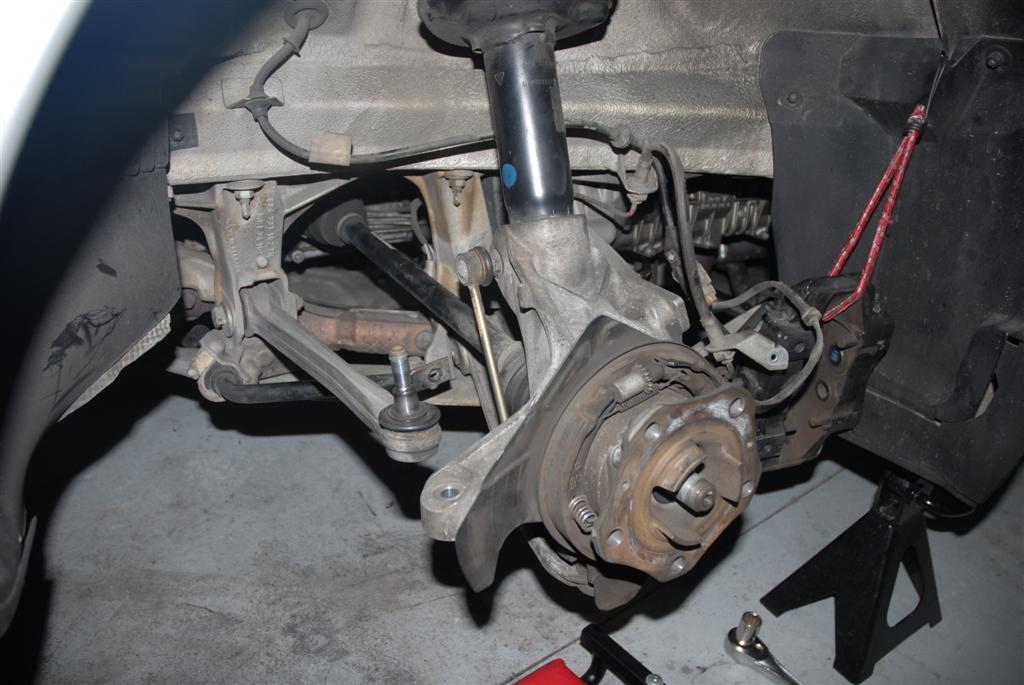
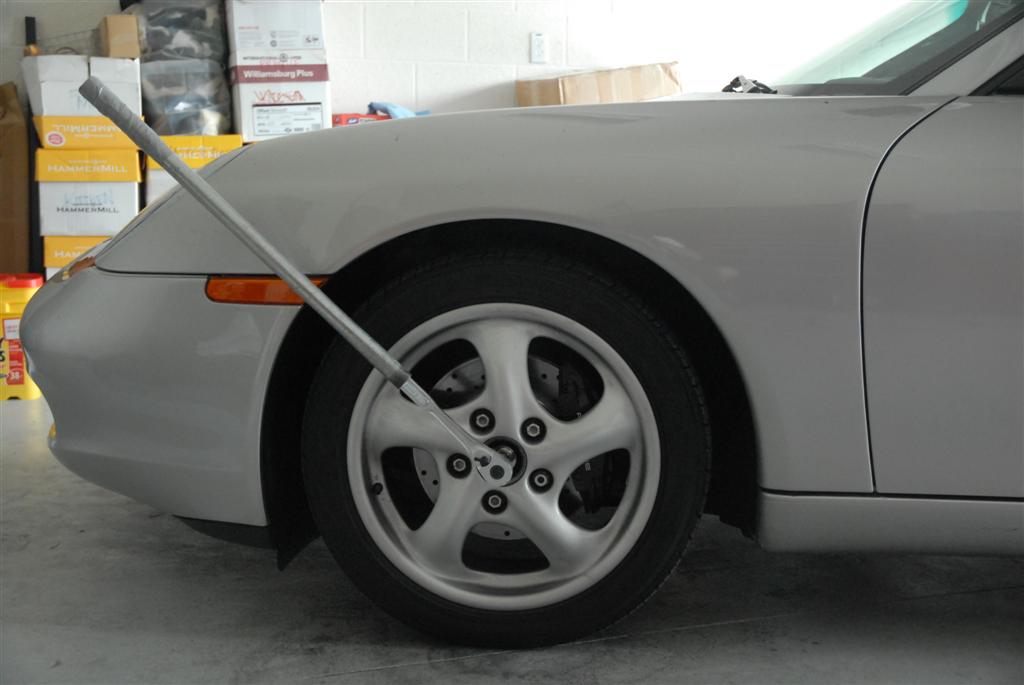
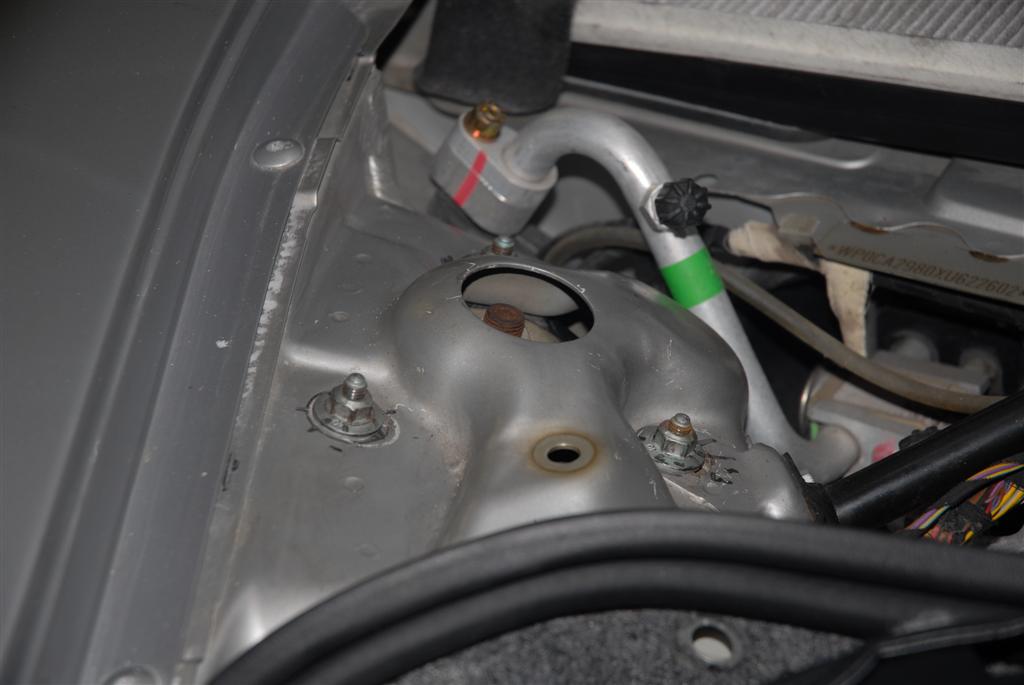
Found some misc photo's that might be of importance.
First is the bar that i made from some home depot pipe. Not the best thing for the ratchet. They really weren't made for this kind of abuse, but what the hell it's guarenteed forever right?
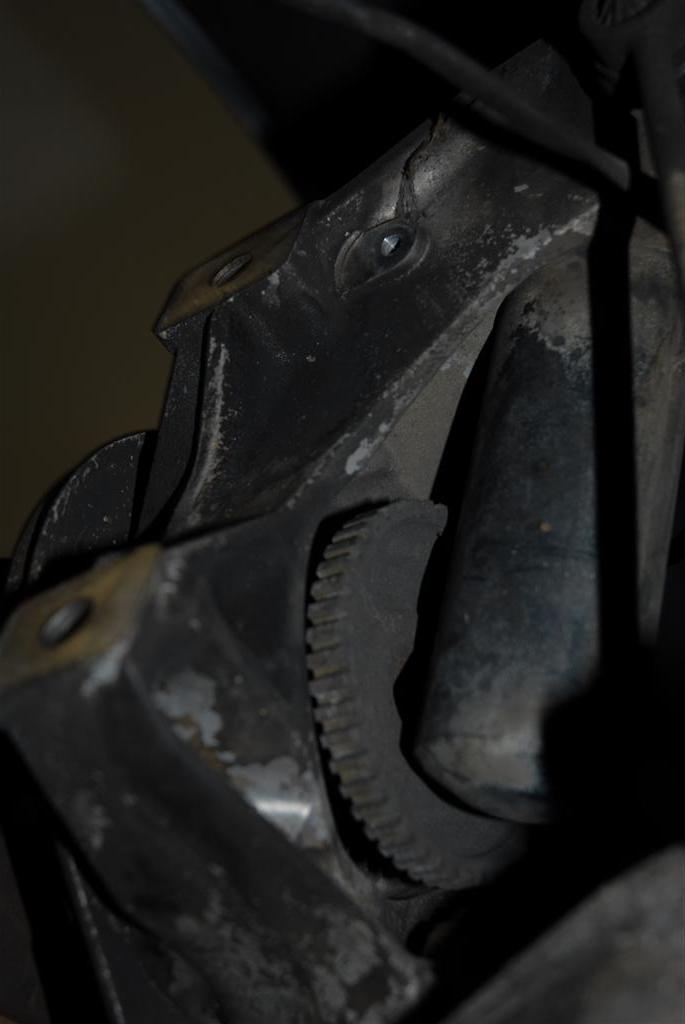
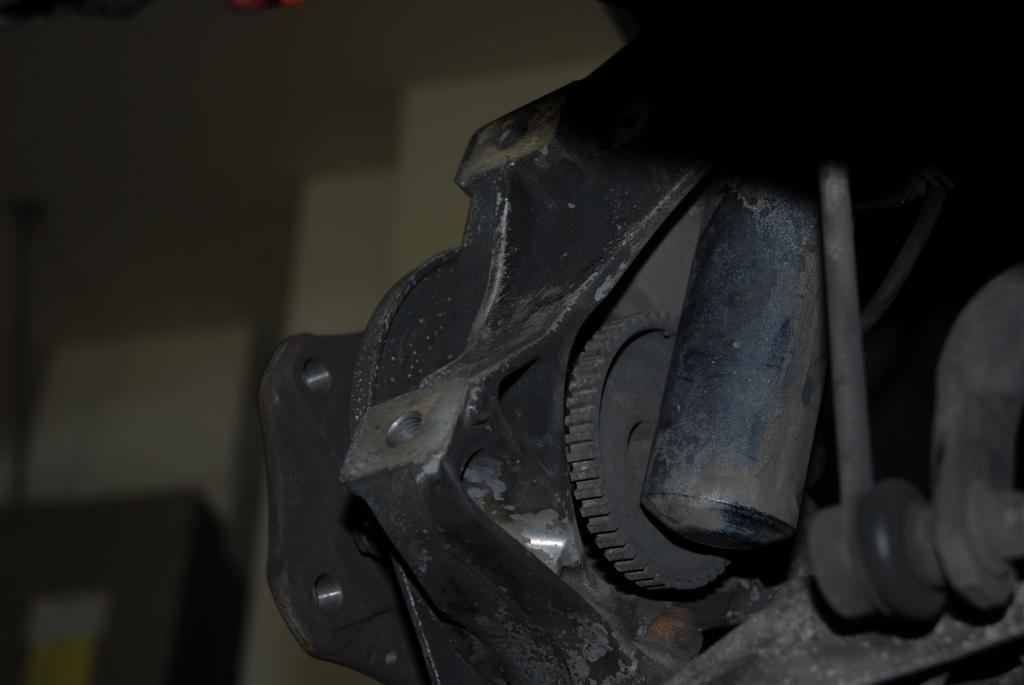
The other pics are the reason why you have to take out the strut on a stock car to get the wheel bearings out. You can't get the axel past the bottom of the strut. grrrr
-
Thank you for the great pictures. I am changing front shocks real soon and appreciate your info.
I thought that the tie rod and ball joints had to be removed to get the shock out?
How hard was it to compress the shock for removal? Two person job with spring compressor?
Thanks again!
JDBOXSTER
Hey
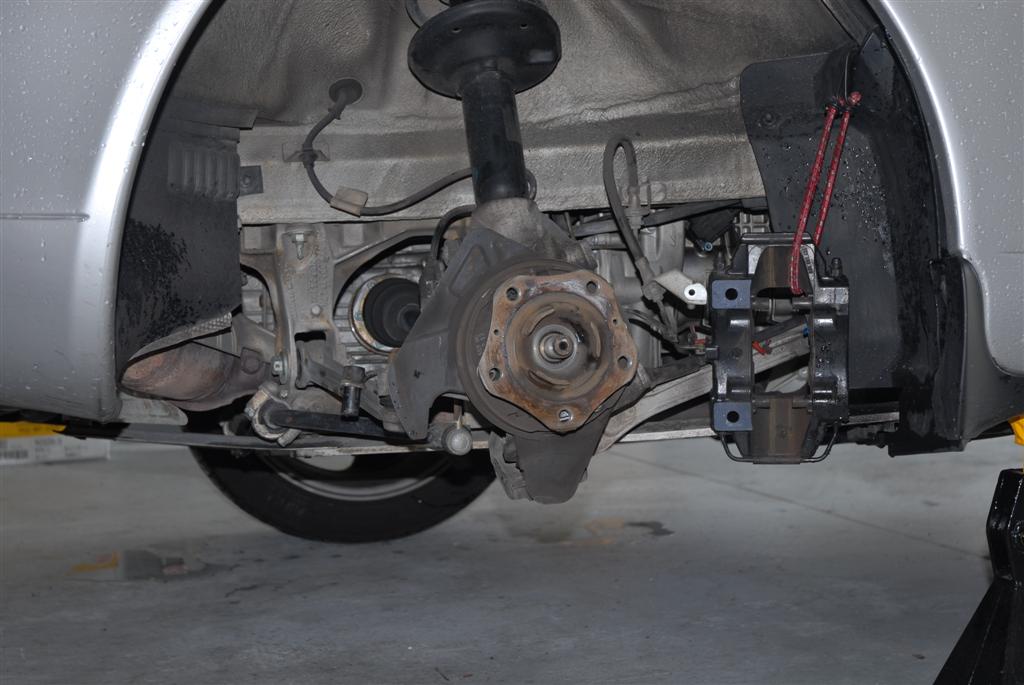
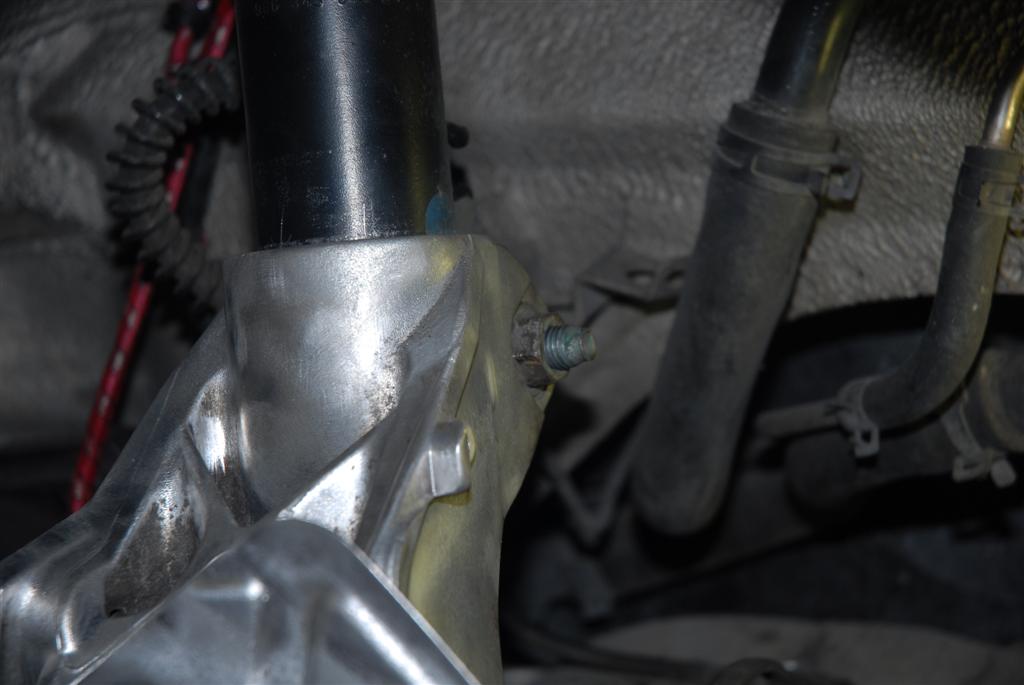
No you don't need to remove the tie rods. Really all you have to do is jack up the car,
place the jack under the wheel carrier,
compress the spring with the jack,
put the spring compressor on the strut,
remove the top bolts,
lower the carrier
slide the strut out of the carrier.
Of course there are some wires on the back that have to be disconnected. But that should be all.
Just be careful of the spring being compressed. Lots of stored energy there!
-
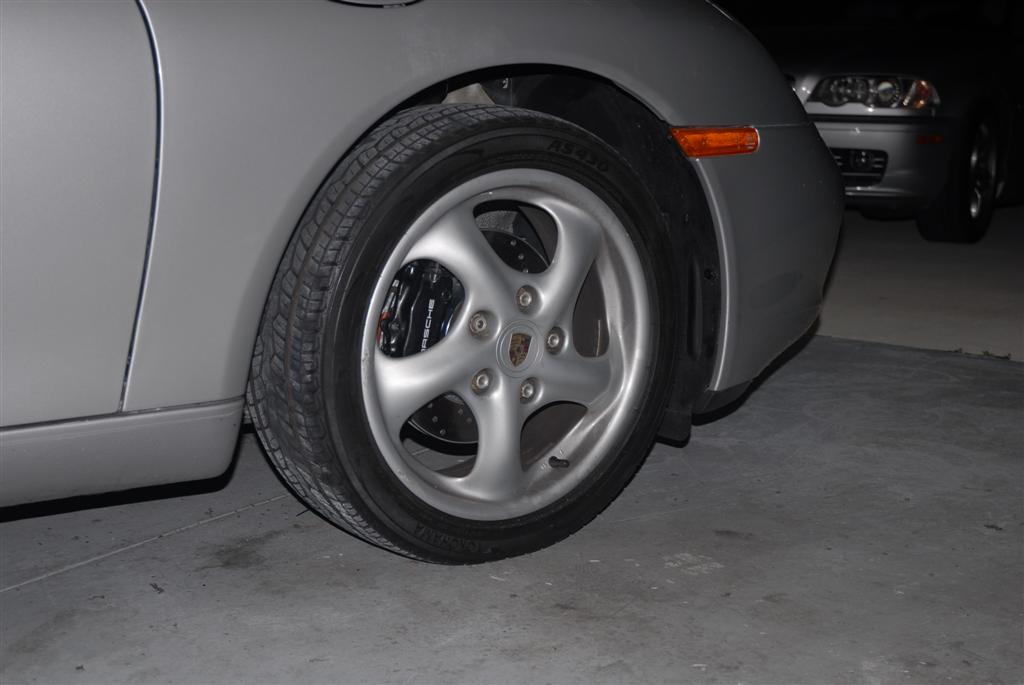
Lastly, replace the wheel, lower the car and torque the center nut to 360 foot pounds. UGH!
Replace the center cap and have dinner with the wife.
I may or may not have missed some steps here, again don't drink beer, have another person around to help out and think like a german. They never use muscle just brains. Everything should be a resonable effort. If it isn't rethink what you are doing.
Good luck and if i can do it....
-
Whew almost there.
Now the brake rotor gets put back on. Don't forget the anti-seize on all the nuts, bolts...
Caliper back on. You are supposed to use new bolts when doing this...
Pads. Center axel bolt just as tight as you can for now.
I couldn't take a picture of it but put the wire for the brake sensor in between the sway bar.
Before you take it apart take a mental note or a picture of where it is routed.
Don't forget the ABS Sensor and brake bracket. Lots of Anti Seize here as well.
-
Hope this has been helpful so far.
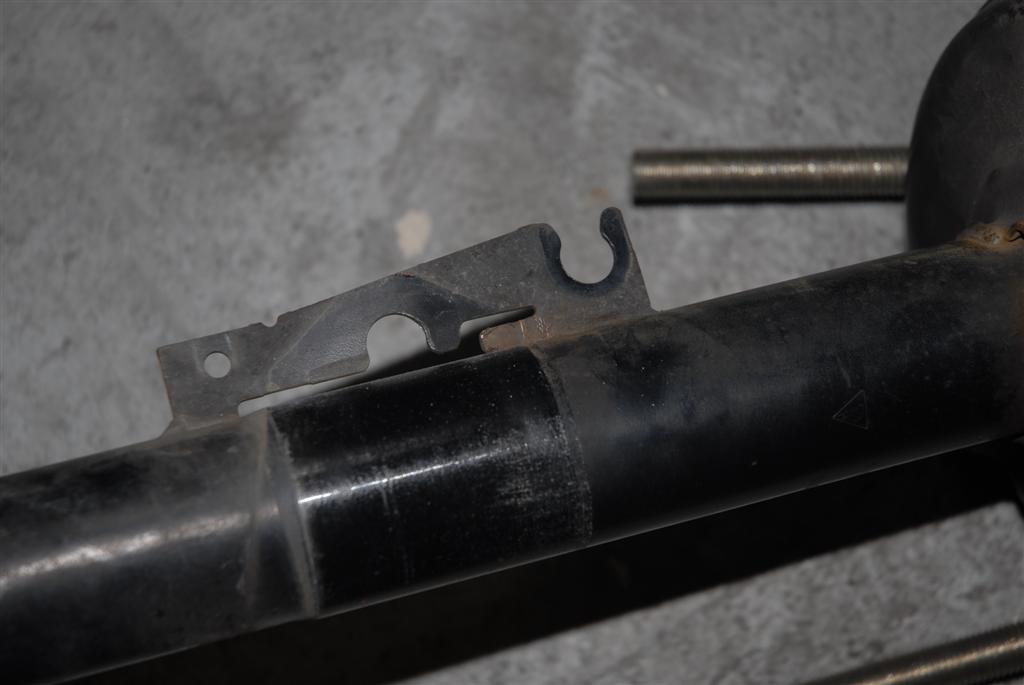
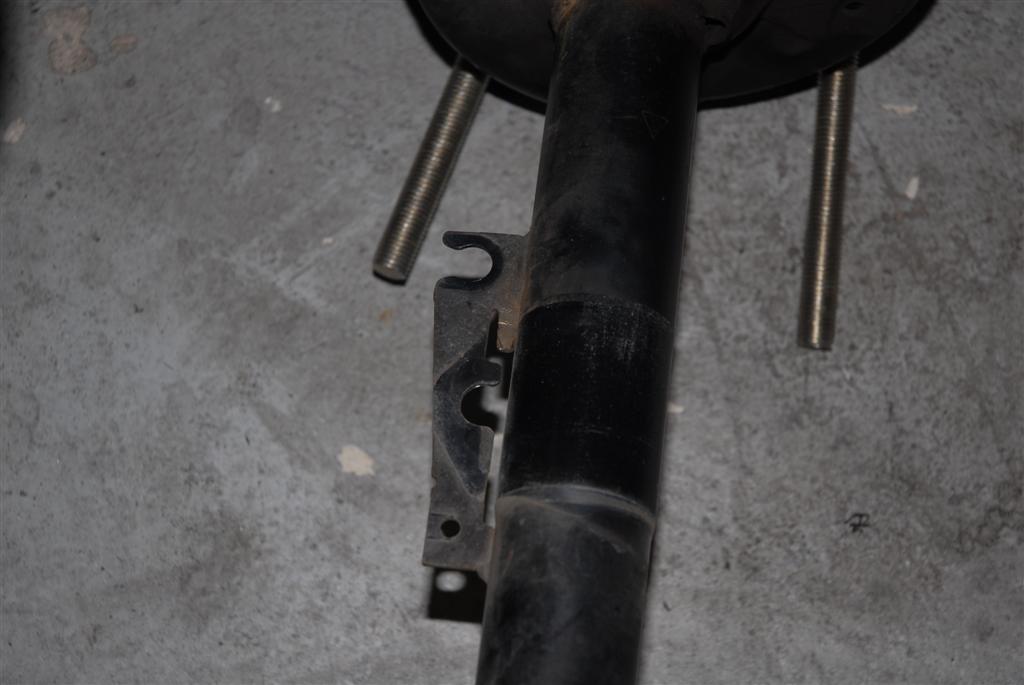
In the first two pictures here you can see that tab i was talking about earlier. I just took some plyers to straighten it out flat.
This will help me install the strut.
Slide the strut back into the carrier. It only goes in one way. And push the strut into the three holes in the body. This is where i hope someone can add to my project. This is the order in which i did it. Most likely wrong because my language turned for the worse.
I pushed the strut in the top and tightened the bolts. Don't forget to torque them.
Take the Jack and lift up the carrier, slide the sway bar bolt into the hole and lower the carrier to where you first marked the strut placement.
Tighten the bolt and bend back the tab on the strut. Release all pressure on the strut and take off the spring compressor.
Now you can jack up the carrier to the height needed to reinstall the bottom bold of the sway bar.
-
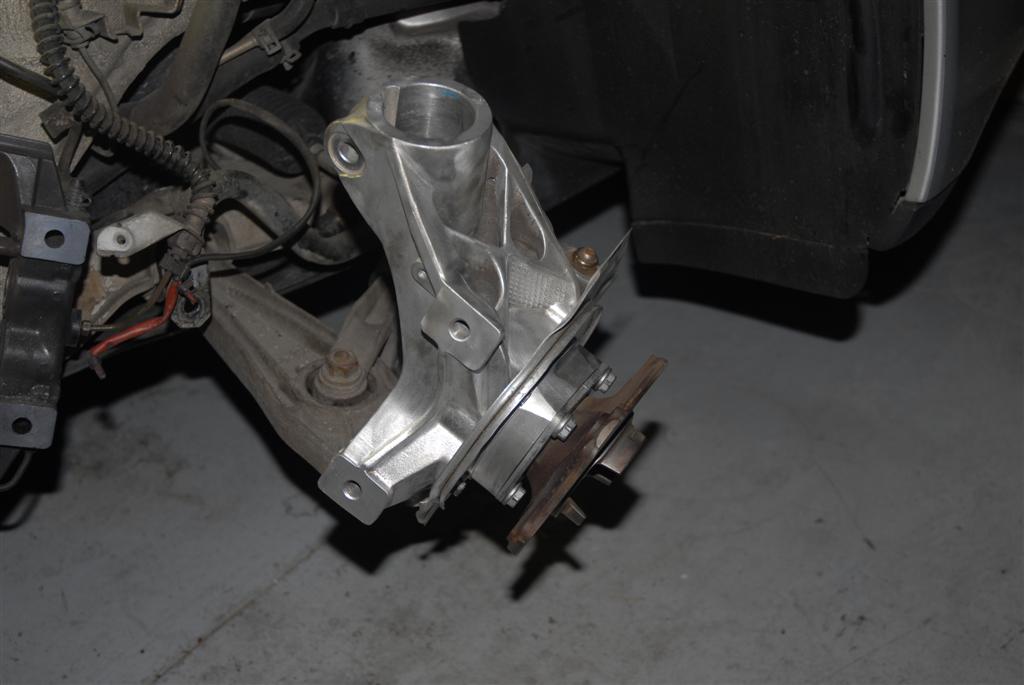
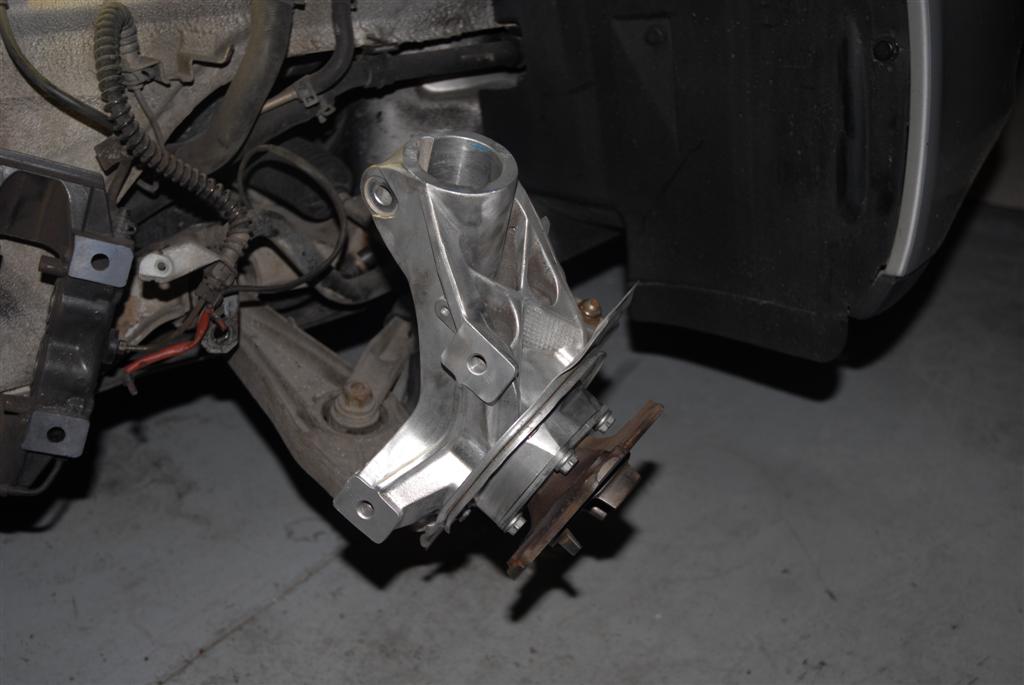
Alright the end is near....End of this project that is...
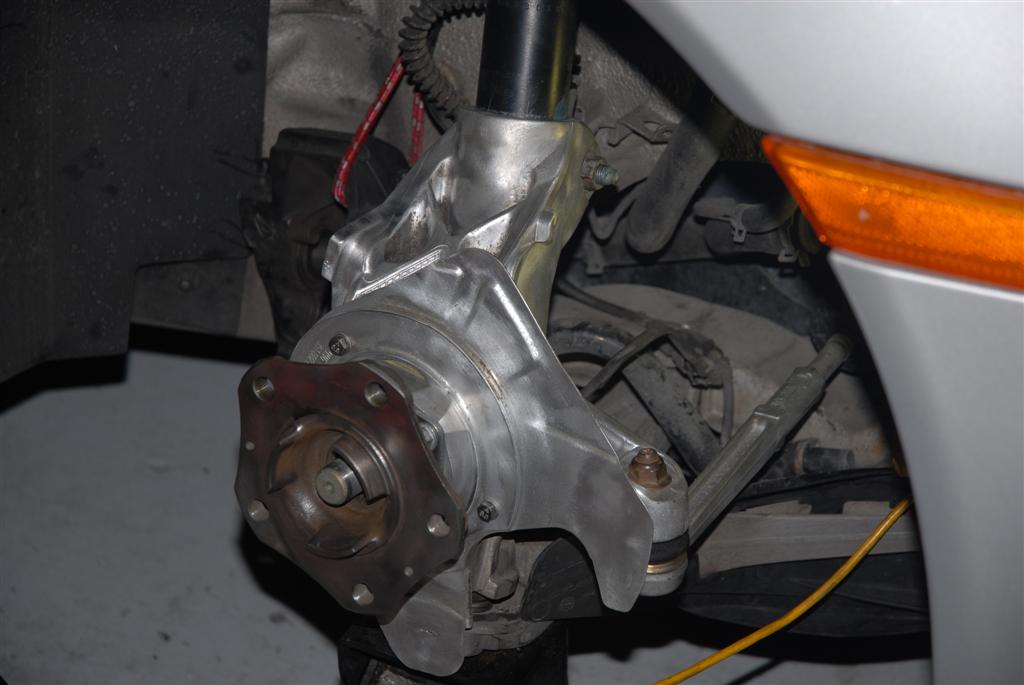
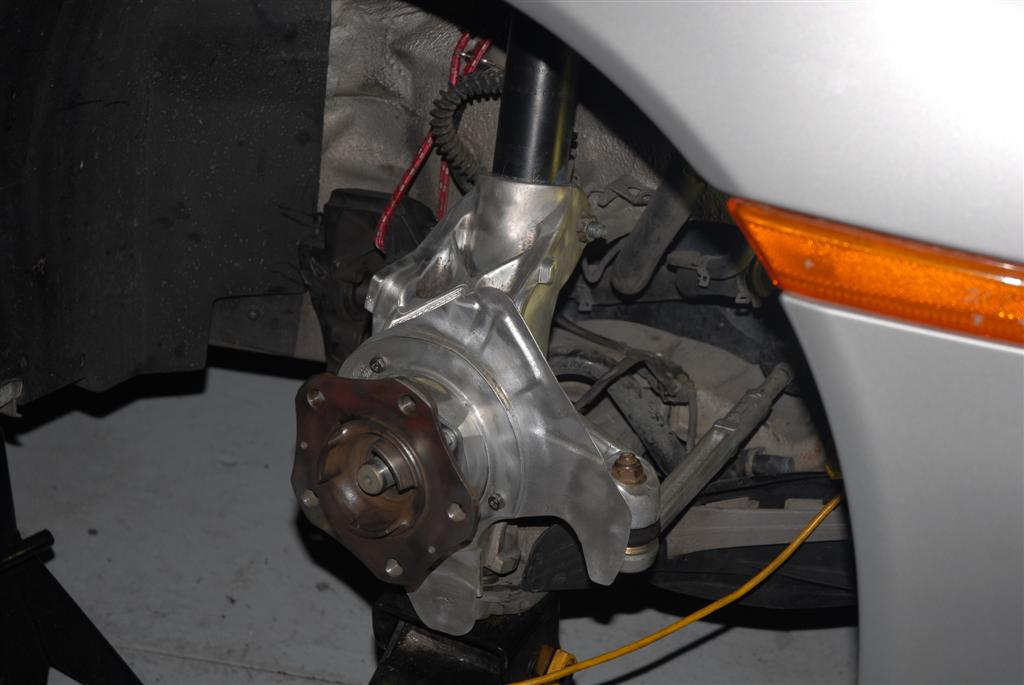
Next is the installation of the hub. I cleaned it off a bit but it was getting late and the neighbours complain about noise. So the power tool usage was kept to a minimum.
SIR Tool again for this part. Sorry didn't take pictures of the tool in use but just follow the directions and you will do great.
Don't forget to replace the spindle in the back of the hub. Just slides right in.
-
Now it's time to do what we intended to do in the first place...Replace the wheel bearing.
The SIR Tool says to use the adapter sleve in the back of the hub. Either piece 9,10,11.
It wouldn't work with that piece so i didn't use it. It would just get stuck in the back.
So put the tool together and press the bearing home. Like i have said before two people would help here. It just gets tough to really wrench on the tool when the carrier is flopping around.
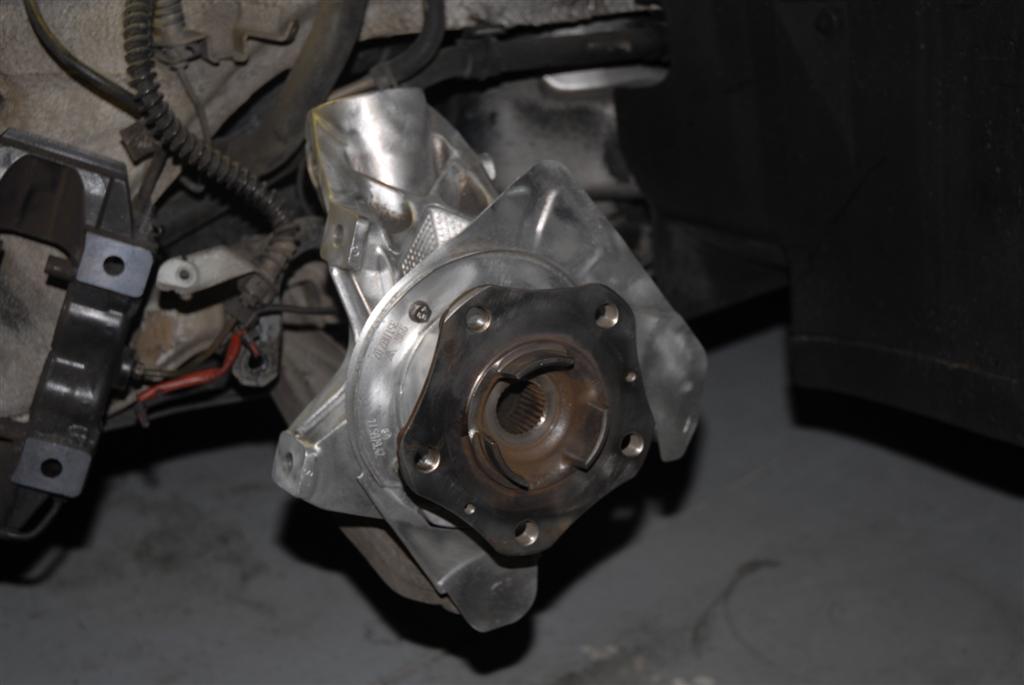
After the bearing is seated, reattach the dust cover and the four bolts. Don't worry about the dust cover going back wrong. The holes will only line up one way.
-
Cleaning of the wheel carrier....
Brake shield taken off and cleaned as well.
Tools needed....
Wire brush
Elbow grease
Degreaser
Beer
Anti Seize
-
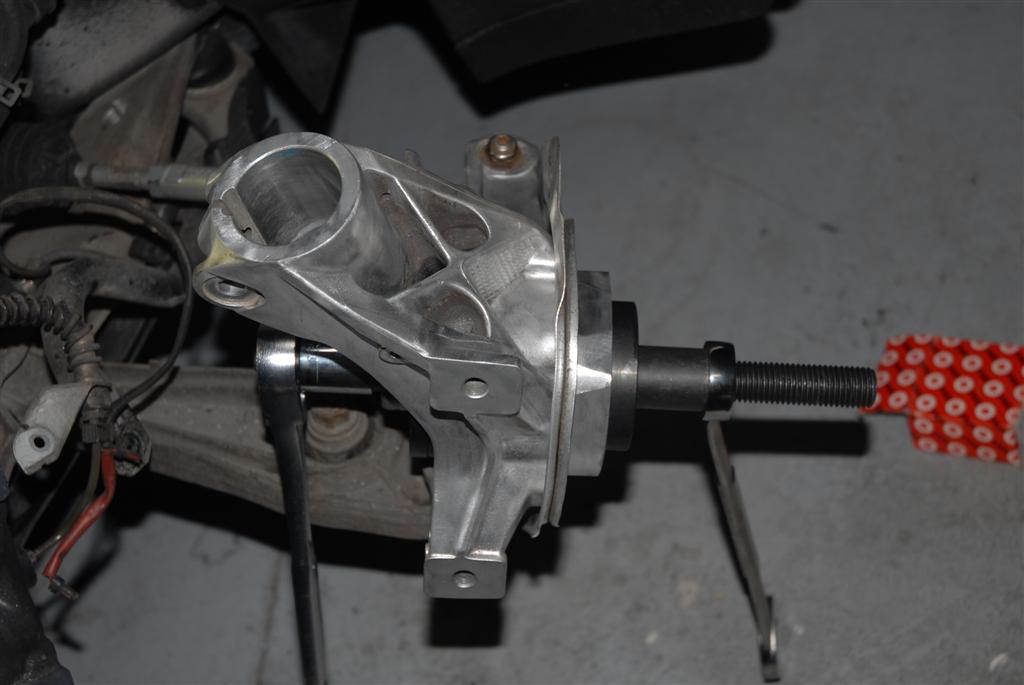
Next is a series of pictures of the SIR Tools removing the wheel bearing.
Did i mention that two people would have made this easier?
The wheel carrier moves around a lot. It is very difficult to get it to stay in one place.
Use the tool to extract the bearing. I was lucky because this one came out without one swear word. No blood. And most importantly no spilt beer.
Do not drink beer or consume alcohol while working on cars. Bad idea. ------
-
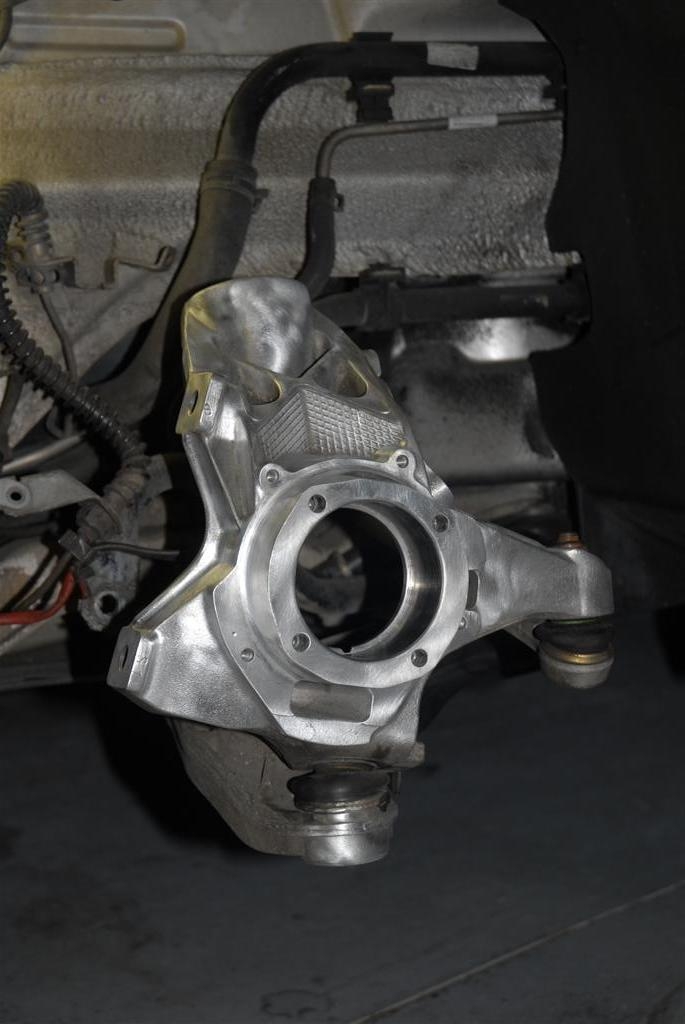
Now you can take out the spindle from the carrier. The only reason we remove the strut is so you can take this out. If you have aftermarket struts this might not be nessasary.
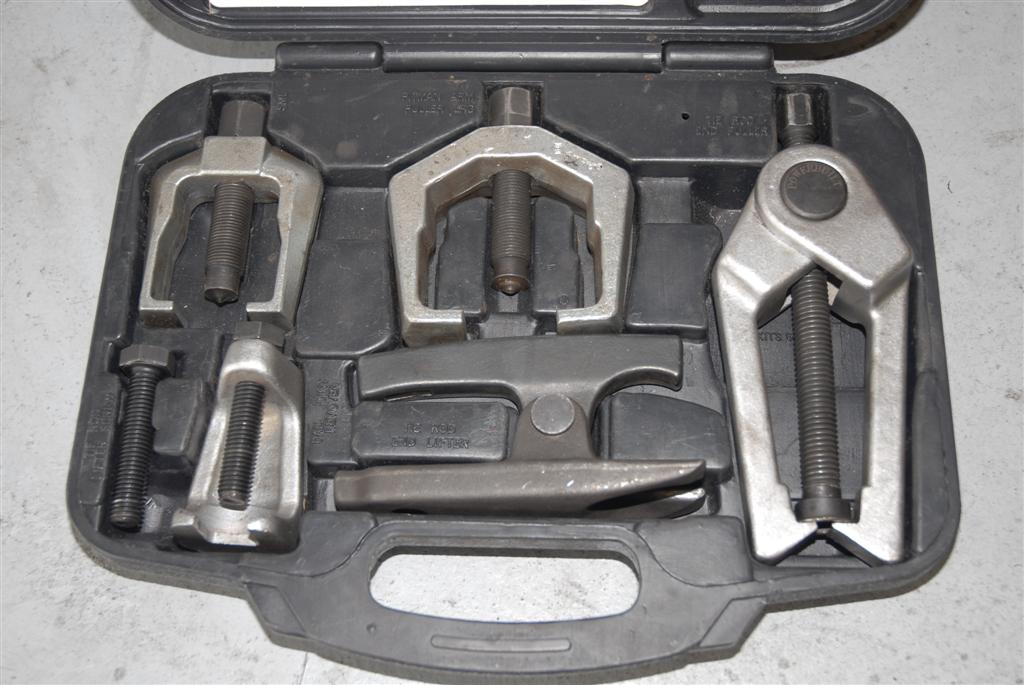
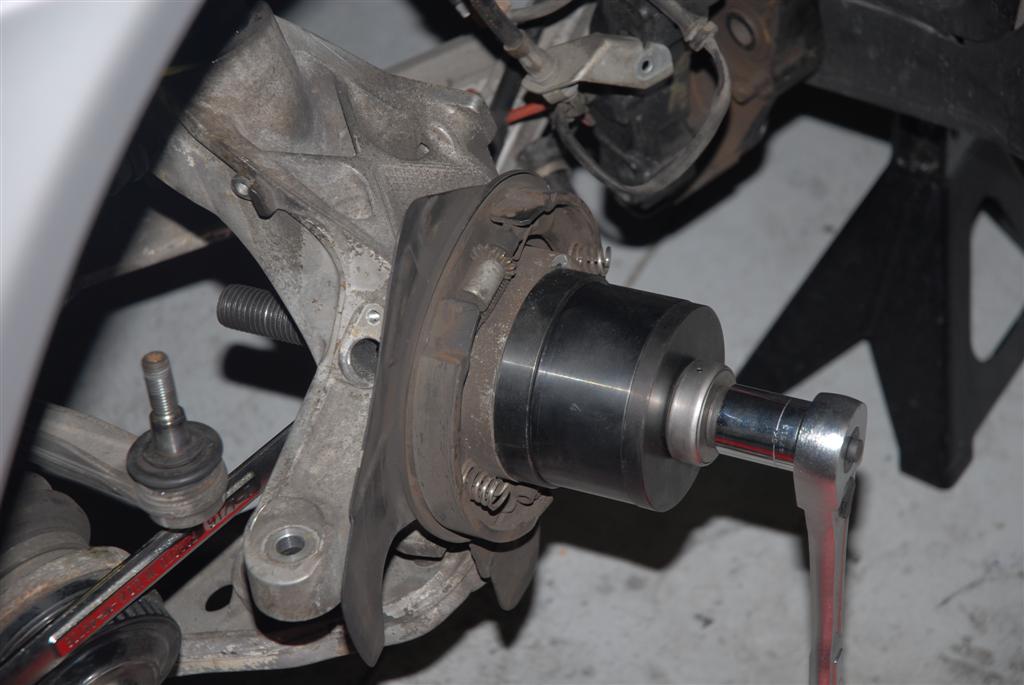
Now for the fun part.
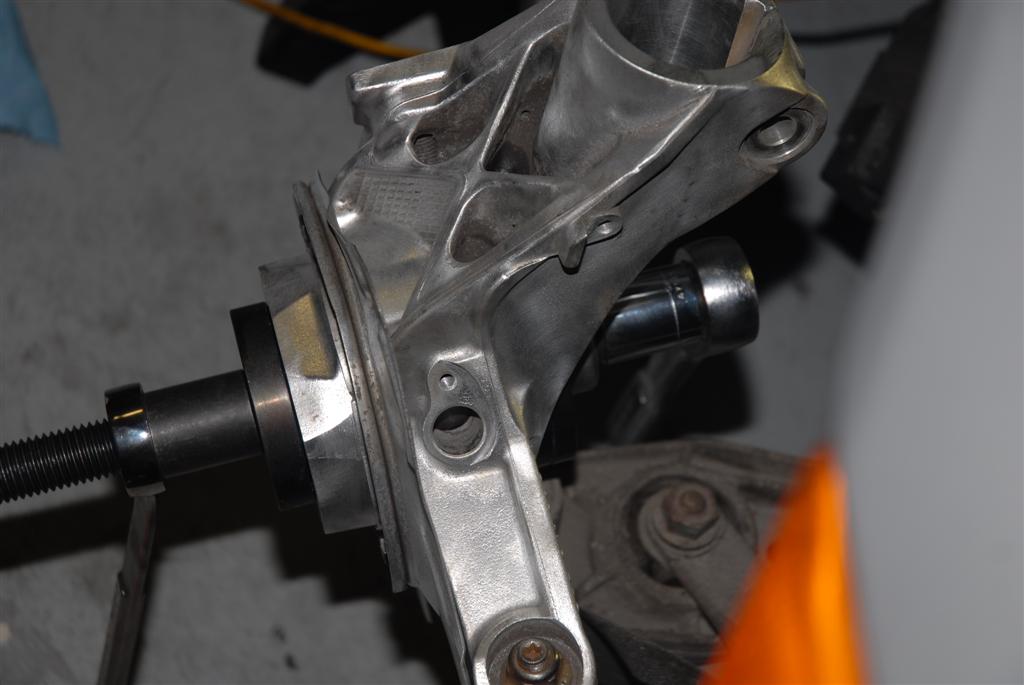
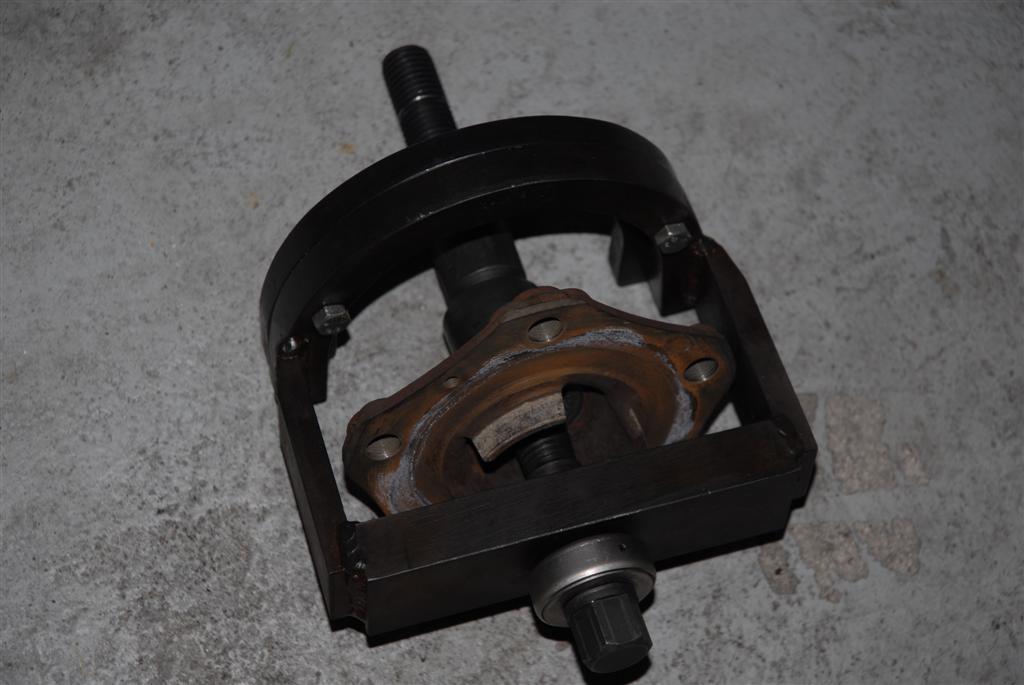
Wooo look at the new tool....
The directions for the tool are great. Just look at the pictures and put the tool in the order they say.
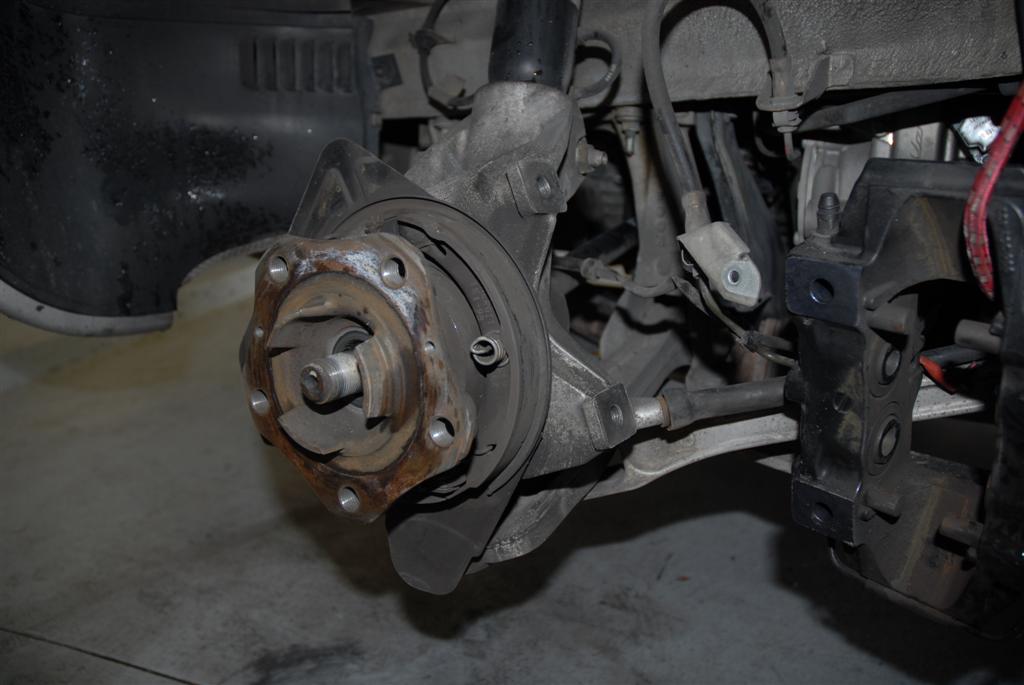
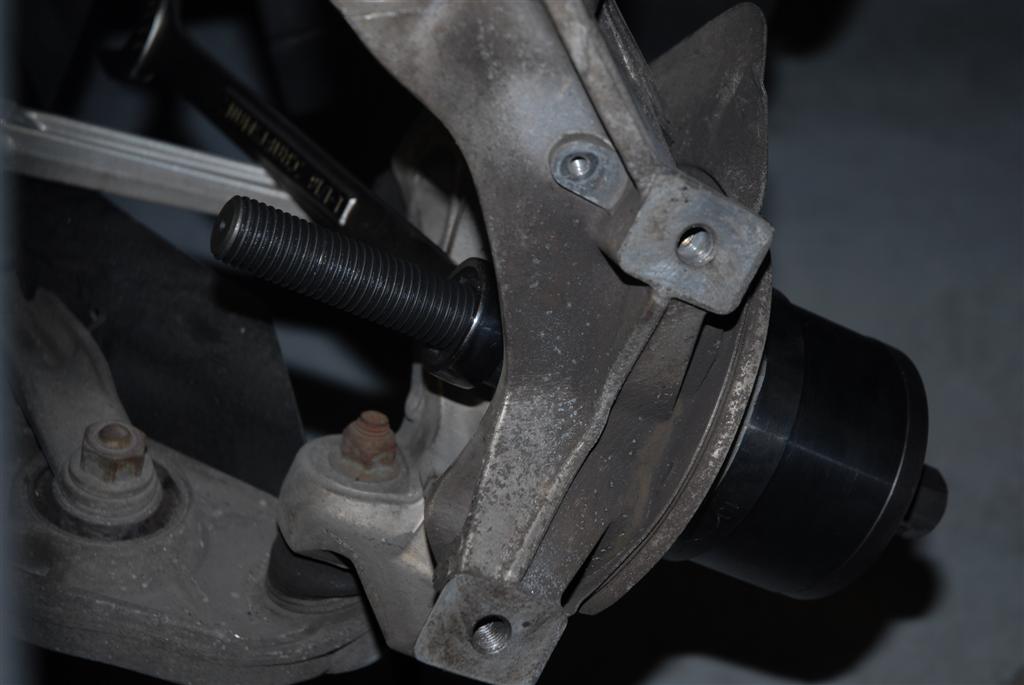
At first i couldn't understand that the horseshoe part of the tool rests on the the brake dust cover but it actually sits on the 3 nuts holding the cover on. So you will not destroy the shield using this tool.
Assemble the tool around to pull off the hub.
I was lucky because the hub came out no problem at all. It didn't even break the bearing like i expected it to.
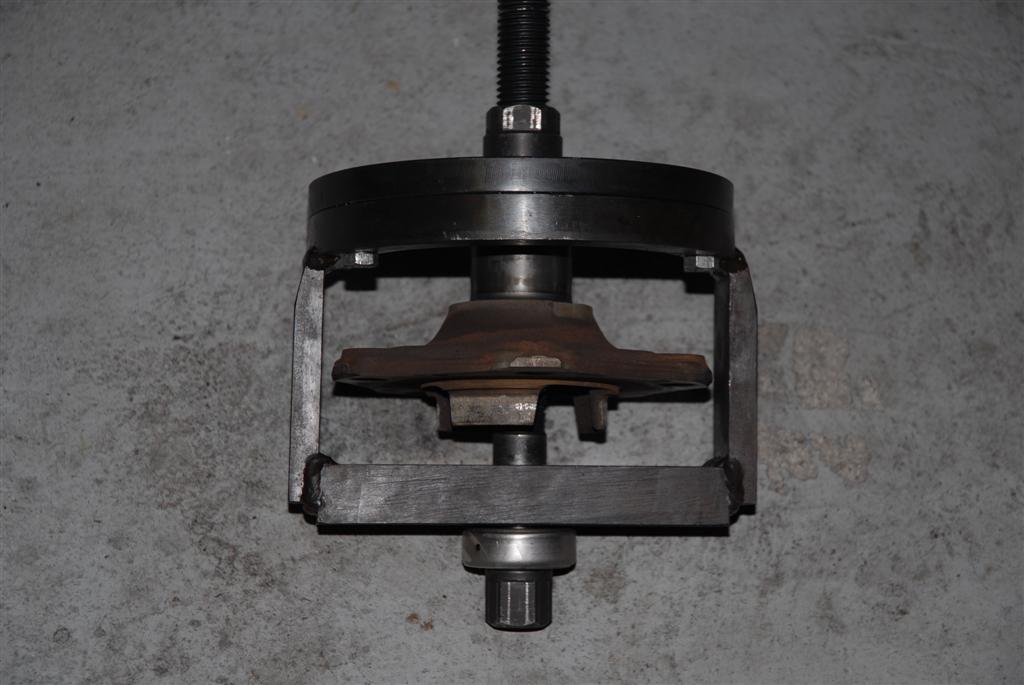
This is where two people are gold. It can be a real workout to do this single person.
Ratchet the two ends and voilla the hub slides out of the bearing.
Remove the 4 13mm bolts on the dust cover.
Now all you are left with is the bearing in the hub. Rearrange the tool and press out the bearing.
What beer are we on now?


engine vibration
in 986 Series (Boxster, Boxster S)
Posted
I have quite a vibration as well.
Replaced tires, brakes, wheel bearings and had a 4 wheel alignment. Still no difference at all. And i have the extra muffler support.
If i drive say 85mph, put the car into neutral i still have the vibration. So what do i try next?