Welcome to RennTech.org Community, Guest
There are many great features available to you once you register at RennTech.org
You are free to view posts here, but you must log in to reply to existing posts, or to start your own new topic. Like most online communities, there are costs involved to maintain a site like this - so we encourage our members to subscribe or donate. All subscriptions and donations go to the costs operating and maintaining this site. We prefer that guests take part in our community and we offer a lot in return to those willing to join our corner of the Porsche world. This site is 99 percent member supported (less than 1 percent comes from advertising) - so please consider an annual subscription or donation to keep this site running.
Here are some of the features available - once you subscribe RennTech.org
- View Classified Ads
- DIY Tutorials
- Porsche TSB Listings (limited)
- VIN Decoder
- Special Offers
- Paint Codes
- Registry
- Videos System
- View Reviews
- and get rid of this welcome message
It takes just a few minutes to register, and it's quality Porsche information at a low cost.
Contributing Members also get these additional benefits:
(you become a Contributing Member by subscribing or donating money to the operation of this site)
- No ads - advertisements are removed
- Access the Contributors Only Forum
- Contributing Members Only Downloads
- Send attachments with PMs
- All image/file storage limits are substantially increased for all Contributing Members
- Option Codes Lookup
- VIN Option Lookups (limited)


juniinc
-
Posts
1,155 -
Joined
-
Last visited
-
Days Won
1
Content Type
Profiles
Events
Forums
External Paint Colors
Downloads
Tutorials
Links Directory
Collections
Classifieds
Store
Everything posted by juniinc
-
Door "comfort open" question
juniinc replied to jbboxsters's topic in 986 Series (Boxster, Boxster S)
this thing? -
DIY guide for removing interior plastic pieces?
juniinc replied to panameras's topic in 986 Series (Boxster, Boxster S)
There is a black clip above your lamp holder(green) for the ring.You will need to pop it out.
-
Nice photo! Tool Pants .
-
OK Maurice, I bet it is your seat buckle receptacle. According to my experience & research the most frequent cause is a fault in the relay in the seat belt. 986 has a relay that detects and records whether the seat belt was being worn if the airbag deploys. You would most likely have to replace your seat belt buckle receptacle(986 FAQ). Also I've seen some cases related to faulty reading, all it needed was computer to be reseted. Same thing that happened to my 350 Z last week. Shawn: Thanks for the info. Will definitely check the wires for cuts/chafes as this most recent variety of airbag light only reared its ugly head about 3 months ago. Regards, Maurice. Anybody know how many ground wires exist between the air bag in the steering wheel and the car chassis and between the steering wheel and the car chassis? Locations? Regards, Maurice.
-
LOL I might do that. Thanks Maurice Juniinc: Great job, with good photos! If you could compile a avery detailed DIY with additional photos and list of materials, it could be revolutionary. Regards, Maurice.
-
Emiata sells their stuff for around $100. I've seen their vinyl,wasn't really impressed with it. Yes taking the top off would be easier to sew it in but putting your top back on is the hard part. I've seen some guys took more than a week to trying to figure it out. Even though I've done my fair share of converting tops I just had some bad experience with it.
-
Hey....... yes I did it myself. You can purchase the material at any automotive upholstery supply store or from me. It is a good weekend project but you will need some hands with it. Here are some tips I recommend. Before you start to detach your old thread, make sure you mark your center point on the top & bottom. Then you want to make a exactly matching template by transferring your old window ,make sure you mark your existing factory stitch marking too.That way your new window will fit tight.
-
Thanks Shawn. we have a pre-cut(28"x58") vinyl strictly designed for this purpose. a guy also told me that it is used on military gas mask. Stitches look better than ever,my old existing thread color was Grey but now its completed w/ black. it is almost invisible. (
-
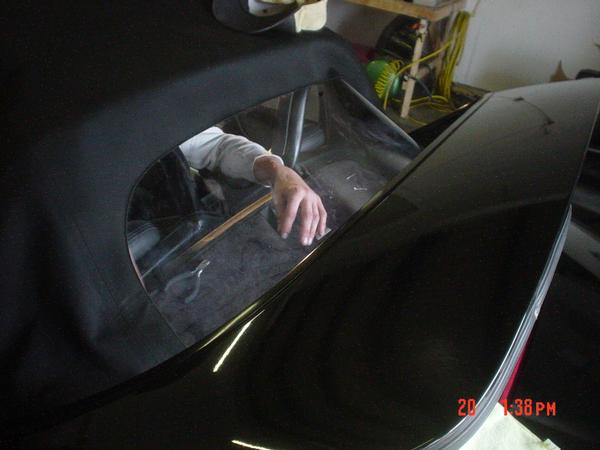
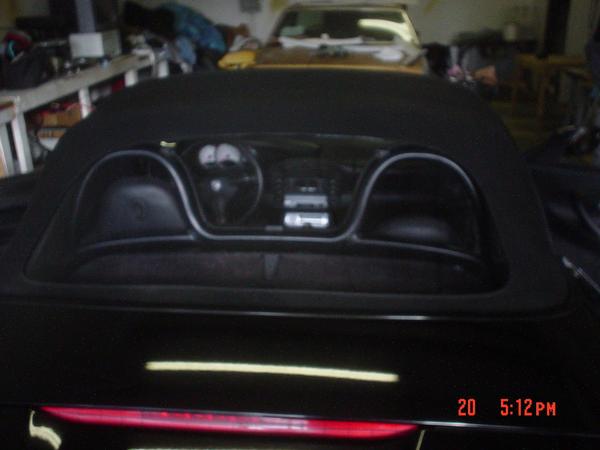
Hello everyone. This is Juniinc. It seems to me many of us are having a issue w/ damaged rear window. I would like to contribute some of my recent work. This week's project was tackling my torn out ,yellow stained rear window . So I finally brought her to my shop . First I almost ordered a kit but after a few phone calls were made I realize that I can actually get the better stuff from locally. So I decided to make my own window kit. and it is much more flexible, thicker than the factory one. Estimated installation time is about 6-8 hours with the top on. If you haven't done this process with the top being on before, I recommend you to do it with the top off! Keep in mind it is really tight behind the roll bar, especially when you try to stitch the bottom. With the top off you should be able to accomplish the job in a few hours Hood with old broken window Perfect Canvas with old window roof latch wasn't even closed,tight! Shows the tightness of the stitching she is finally done
-
If you havn't done it yet this might help you. I just jack up my left side of the car then if you want to level the car just lower your jack. Much more quicker & easier.
-
Now, this makes me happy! Thanks for that shop proven dyno Jim. This is the most cost effective way to gain your HP I have seen lately. it is better than a poor man's true air flow kit or EVO cold air intake. WOW
-
HID Retrofit lights in Stock Halogen housings.
juniinc replied to 986Jim's topic in 986 Series (Boxster, Boxster S)
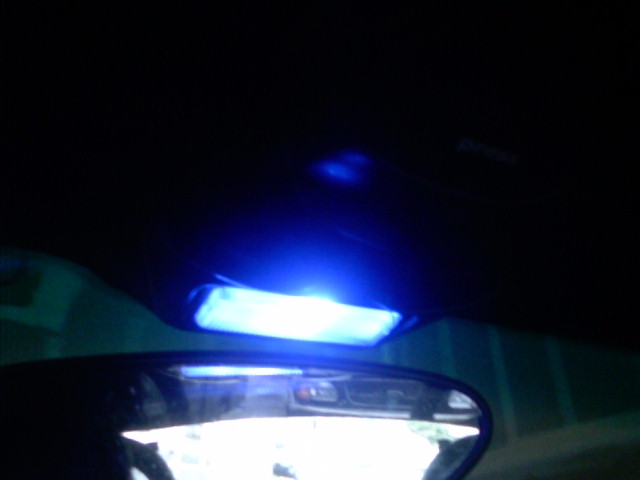
Clear side marker w/ xenon bulb Dome was replaced w/ blue LED
-
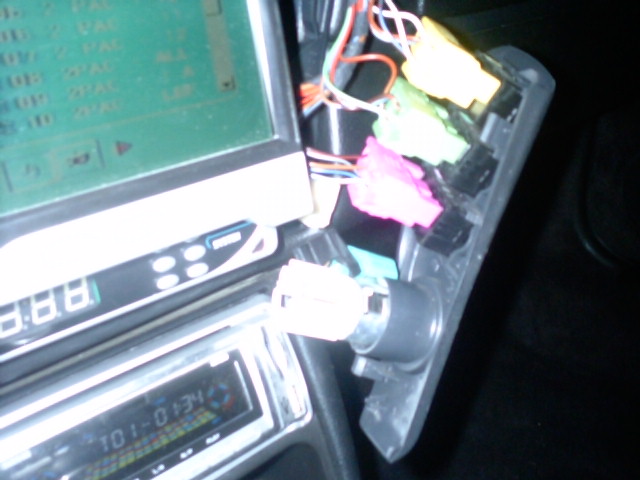
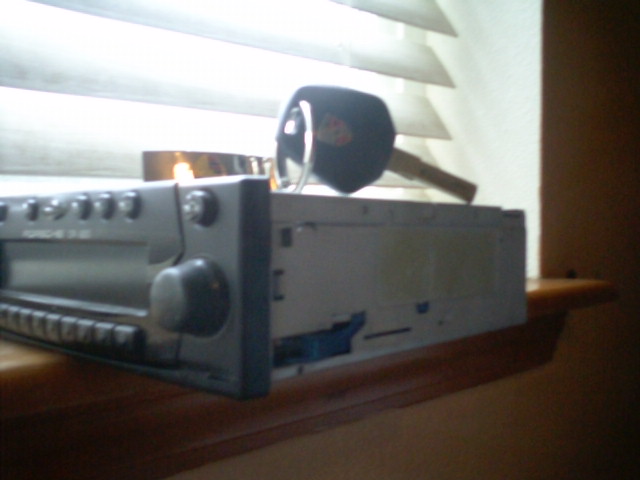
Removing The Becker Head Unit
juniinc replied to gandrade1's topic in 986 Series (Boxster, Boxster S)
Hey Gustavo, I've removed many of em. I just use a long knife blade,skinny enough to fit the side slot. All you have to is trigger that blue tab on both side
-
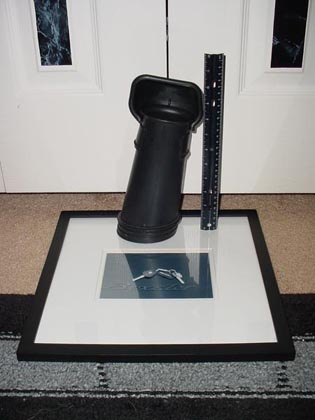
Thanks! Maurice. It is all 1 piece. Juniinc: Excellent DIY! Your second and third photo show the litlle "dish" below and at the front of the snorkle... The fourth photo is not as clear. What happens to the "dish"? Regards, Maurice.
-
Desnorkle Your 986 1.) Un-screw the one phillips head screw at top center of side air intake... 2.) The molded air duct and the intake grill are still attached by three delicate plastic tabs at the three points... The best way to remove this is gently insert your fingers through the grills into the intake at the points circled in red and gently try to free the tabs... All three points come forward towards you, but if one is stuck or gets caught it will break... 3.) Inside the drivers side air duct you will f Author juniinc Category Boxster (986) - Mods Submitted 10/05/2007 09:33 PM
-
1.) Un-screw the one phillips head screw at top center of side air intake... 2.) The molded air duct and the intake grill are still attached by three delicate plastic tabs at the three points... The best way to remove this is gently insert your fingers through the grills into the intake at the points circled in red and gently try to free the tabs... All three points come forward towards you, but if one is stuck or gets caught it will break... 3.) Inside the drivers side air duct you will find a snorkle... The snorkle is added to most US cars for noise restrictions. Now this piece is attached by no screws or tabs, but it most likely will give you some troubles removing... The best way is to remove this, just grab a hold of the long snorkle (not the small dish on the end)... Now wiggle it from left to right and vice versa while pulling out towards you. This works, but might take a little effort. 4.) This is what the intake is going to look like after the snorkel is removed... Just carefully insert the three tabs back into their points... Make sure that all three are tightly in by pushing the airduct cover (not the grill)... Insert your 1 screw into top center of cover and you are done.
-
Blue LED
-
-
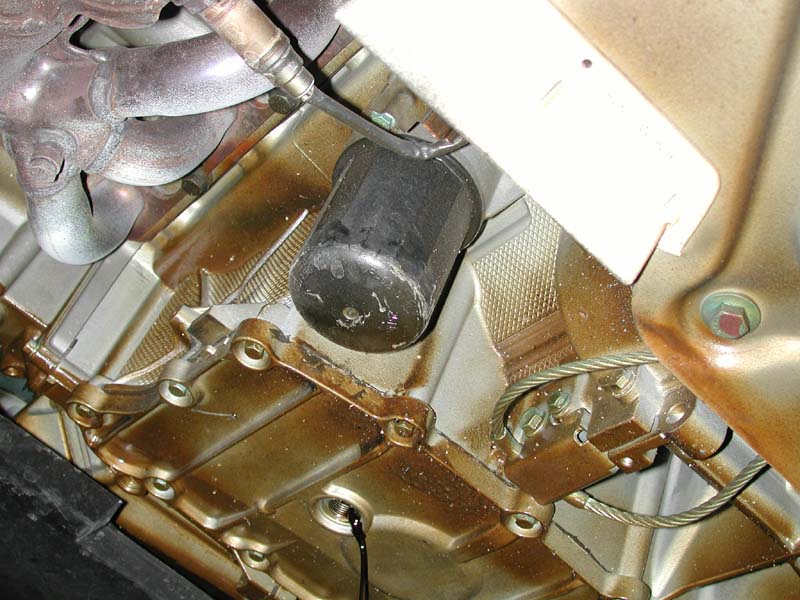
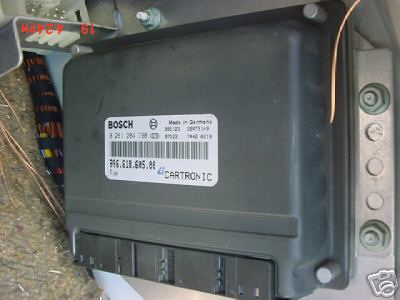
I think it's your ECU DME unit. In this case I will call a few places and find out if its possible to get a second hand unit of the same kind...2.5 and tip whilst I await the result form the garage.
-
Please help! I think I killed my Amplifier!
juniinc replied to glitch's topic in 986 Series (Boxster, Boxster S)
The speaker wires that goes to the dash speaker are distributed from your amplifier located in the front -
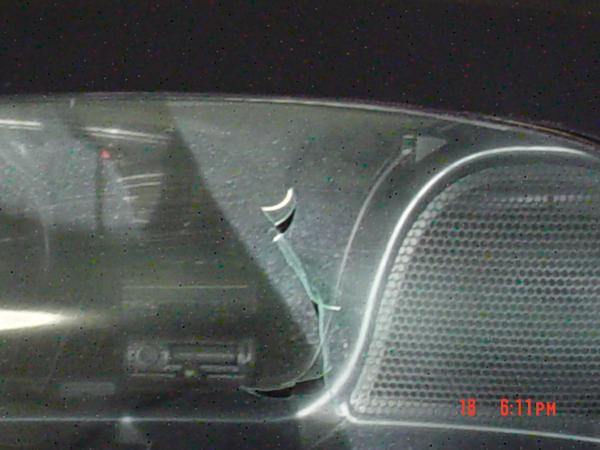
Glass window top replacement
juniinc replied to Tool Pants's topic in 986 Series (Boxster, Boxster S)
I agree. -
Do you want more HP? Check these out guys,your super charger will cost you around $7,700.00 if you know how to put it on... LOL of course "desnorkling" would be my first option. ImagineAuto__Porsche_Boxster_Stage_1.htm ImagineAuto__Porsche_Boxster_Stage_2.htm ImagineAuto__Porsche_Boxster_Supercharger.htm
-
Driver Door Glass Strange Behavior.........
juniinc replied to tah's topic in 986 Series (Boxster, Boxster S)
There are 2 micro switches in your driver's side door for your inner & outter handle. attatched to your door handle(back side) Porsche_Boxster___Removing_Door_Panels.htm -
Driver Door Glass Strange Behavior.........
juniinc replied to tah's topic in 986 Series (Boxster, Boxster S)
There are 2 micro switches in your driver's side door for your inner & outter handle. attatched to your door handle(back side) -
yes